Leaderboard

Popular Content
Showing content with the highest reputation on 06/29/19 in all areas
-
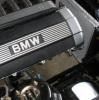
4 pointsWell about time for another update. First is conceeding that i need some more time to get the E30 back on the road, and with the missus coming back from Florida and needing her car back, this post will go on a quick E38 tangent before coming back to the E30. i decided to go for the 740iL i posted above. I probably would have looked about for another car, but my friends 540i manual that i mentioned above (and in pics below) is starting to get rattly timing chains. he is a bit tighter than me, so instead of fixing what he has its more cost effieicent for him to throw a good motor at it, so thats probably what will happen to this 7 in a few months. By and large, it actually has been looked after well, with a very large stack of reciepts, and underneath there is no rust as it has been rust proofed regularly. only mod this car will get is at least people will know its a crusty old 7 now. and another Petrol station pic, the novelty still hasnt worn off quite how cheap petrol is here, despite Ontarian's thinking its expencive now. only thing i actually had to do to the 740iL to make it good was i needed to replace the rubber bushing that held the throttle cable to the brace bracket, as the one on it had turned into plastic from heat and 24 years, and was holding the throttle at about 2k rpm. and also reset the traction control and SRS system from a low voltage fault from the past. Right. Back to the E30. Went to install the subframe back in, and the damn thing wouldnt line up. as it turned out, because of the rusty brace brackets mentioned in previous post, the old subframe bush had cracked and left some of it behind. Sort of hard to explain unless you are familiar with the E30, but the top aluminum piece in the photos was basically cracked off and left behind inside the chassis. I knocked the bolt out, it is splined, and enters into the body from under the rear seat on all E30s (except cabby IIRC). i then drilled it out with an appropriate sized drill bit, 25mm from memory. bit of a hassle, but eventually got sorted, and installed the subframe into place, connecting up drive shaft, brake lines, sway bar, exhaust etc, and for now, leave the blown right shock in place, and have not dealt with the rusty spring seat either. will come back to those things. the week prior, a friend from New Zealand came over for a week, before going to the US and then coming back for last week. And in thier case was a few of gods owns finest, for me to enjoy. Cool so finally getting somewhere with this car right !! Wrong. Go back to that previous shot showing the brake caliper, and see if you notice anything different about it. In all the time working around it, i didnt even notice. yup the bleed screw. wtf. someone has replaced it with an actual bolt at some point, and not just any bolt, but gone through the hassle of boring out and tapping a new hole with a larger thread. you can imagine the frustration when i went to bleed up the brakes. Ill be honest. i did actually try and make do with what i had, but just wasnt going to happen. So of course, need to get a new caliper. Silver lining was i managed to find a guy that was clearing out his moms place, managed to pick up a pair of calipers, and also spotted a pair of used Bilstein shocks in the garage. the lot, mine for $80 so cant complain at that. i didnt take any pic of bleeding process as i had a few mates around to help me, but here is a pic of the rear subframe finally all in properly. Ill need to come back to sorting that spring seat, and also still to extract the rusty bolts from those brackets so i can install them with new bolts, but yeah. Finally can drop the rear, and jack the front back up, and get to that steering linkage. managed to pull that out, and yeah nah its not for me. one orientation is completely siezed up. the other orientation has the play i noticed. so only one of 4 caps is actually doing what its supposed to. I couldnt see any retainer circlips on the inside or outside, so not totally sure how it works. almost looks like they are inserted and then the aluminimum itself is scored to hold them in, as a one use solution. unfortuantely, the part is NLA from BMW, and try as i might, i cannot find anywhere in Europe or New Zealand, i have hunted high and low. it is specific to right hand drive facelift non power steering, so a needle in a hay stack. yes i did consider installing power steering, and really, i probably should. but anyhow, i dropped it off to be rebuilt today. Only other thing to add is my neighbour has cool friends: just cant get a break with this damn car. and summer is going to be mostly over by the time its sorted. WAYYYY more work than i ever guessed, and if i had known, would never had brought it. But it was brought with my usual "she'll be right" attitude, and ive got it now, so might as well keep going!
-
3 points
-
2 pointsHi, new to the group and have just purchased a classic 1967 1802 so hoping for help advice and any other insights to this cool little car. pretty keen to get some Alpina or minilite wheels on her...ideally Alpina I've also got a 1975 R75/6 but thats a whole other thing.... so I guess I love the classics. its currently inNelson but should be up here in Akld next month after having a stint at Cartel Works http://cartel.works/
-
2 pointsUnfortunately, the only thing appropriate, an illuminated C&B, is not available.
-
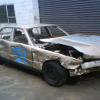
2 pointsLets all chip in a few bucks and buy it, so we can burn it with fire.
-
2 pointsRight, well a few evenings spent on the car, and then today being Saturday just a wee bit more. Front jacked up in the air, to remove the lower steering linkage. Didnt take any pics of this sorry. Has a lot of play in one of the two universals so it is out so i can rebuild it. got it half out and realised it is a wierd universal i havent seen before, and i havent had expereince rebuilding one before. When you do an M52 swap, or indeed any motorswap, its necessary part of the conversion on a Right hand drive car. typically you would also convert to an E36 or E46 steering rack too. What i usually do is remove and drop it all off an Howatt Engineering in Naenae to do, so i havent had experience doing it. still deciding if i tackle it or find a shop to do it. Remove the right front wheel as it has a puncture in it. Jack up the rear, move the left rear wheel to the right front. Temp bolt on right front to the left rear. Lower Jack. Get front off Jack stands and onto the two good tyres, jack up the back, and remove both rear wheels. the right rear, and the left rear (which was the right front) both have punctures / slow leaks, so those into the 500 to get sorted out. Start on removing the Subframe. Right off the bat, i knew this was going to offer up some surprises. subframe removal on an E30 is usually a piece of piss. 1,5 hour job max. I was advised by a local "buddy" (canadian for m9) to start on the rustiest stuff first so you know how your day is going to go, and also buy a flame torch, it will be your new best friend, so i brought a propane torch, (quite right in hind sight, awesome tool. no pics of it but you will probably see it in the back ground of the below picks) right then, crack off the subframe main bolts then. the 22s came off easy, to get to the 8mm allan bolts for the support i needed to half remove the side skirt. and bam, just like that, 5 minutes in, first problem. on the left hand side, one bolt completely snapped off (prior), on the right hand side, both had gone, so bracket offering no support at all. Okay, no problem, i can order that. removed the brackets so i had them on hand for ordering (there are two types so good to make sure you get the right ones, and then just put a few threads onto the 22 and gently loosened the subframe so i knew it would come away. cool. Move on to the exhaust which comes off easily, then remove heat shielding and then the drive shaft bolts. i wasnt really thinking, this stuff should be easy since the car has had an engine conversion, so not 30 years old, none the less, needed to be done. next step, remove the lower shock bolts. easy enough, but found the right rear shock is totally blown. i have never seen a shock with zero resistance before until now so thats up for replacement. and then disconnect sway bar, and then remove the spring. Here is the the bad news... spring on the left comes out just like normal. one on the right falls out, with the upper locating pin still in the spring. wtf. look a bit more carefully and what do we have here. picks taking after probing about with a screw driver. whats worse is there is f**king gorilla foam in there so someone knew it was there and did a bodgy... not happy, but such is life. fortunately the body seems to be alright, but the lower piece is no longer avalable from BMW. i did actually think about using the head from a jack as a replacement, as it would be a perfect shape..... Move on to loosening the diff mount. at first i was like wtf somone has put an imperial bolt in... never mind, some of the bolt head crumbled away, turns out it was a 19 all along... also loosened the brake lines and ABS sensors (yes it has ABS, the E30 was the second BMW to have ABS after the E28 5 series), and was happy the assembly was ready to come out. In the shower cleaning up i realised i forgot the hand brake cable so will do that when i get back to it. Right off topic for a bit, but what i been up to none the less. (goes back to E30 soon!!) next day, decided i better work on the Cinquecento since i did say i would do it while missus is away. It hasnt locked since she got it , that was a door card off and a tiny black clip that wasnt seated right, and back on and good to go. and onto replacing the rear brake pads. "babe my car is making a bit of a grinding noise in the back recently" take it to work and barely got out of the street before i knew the brake pads had all they had to give taken and then some..... have you ever seen brakes so smol?? realised the 500 was the same bolt pattern and center bore very close as the E30 so why not chuck them on for a nosey...... Local constabulary dropped by for a yarn. they either drive Ford Expeditions (think Escalade or Suburban size), or they ride Harleys. and they are called the OPP here. every time i hear that i cant help but think of the irony since OPP also means Other peoples property in the rap song from like the 90s, which of course gets in my head every time. Strawberry then got a detail down at work. in the back ground is the CN tower, and the yellow building is the pub i sometimes go to after work. and yes going off topic so will come back to what you came here for lol. We are up to today now. Subframe removed. Crusty old bushings. nasty, Now normally you would press these out properly. I do have the proper BMW in my garage, but thats 14,000km away and cost about $450 or so to buy. since i expect this to be the only time i do this job, i decided to do it the Hori way. its pretty well documented that this way works, and i had everything i needed already to try it so thought why not. FIRE I would imagine this would work for many of you guys so i will detail the process. 1/ Turn on Rock Music 2/ Grab a can of low rent beer, or something someone else has left in your fridge. 3/ Soak bushes in WD40. 4/ Make sure your partner is not home, and if pre planned, buy her some new oven trays because you will be using two of hers. 5/ aim gas torch at bushes. how long it takes them to start going depends on your flame. mine took a good 2 or 3 minutes of heat before they would stay alight on thier own. keep the loose stuff clear by flicking it out onto the tray. remember, the objective isnt to burn every last bit of rubber, just to remove the bush. When they start popping and crackling, they are hot enough to keep going on thier own. Once they are lit, have some of the beer. Man has created Fire. after your second one is lit, go back to the first, you will find the center part has melted enough you can clear out and knock out the center with a screw driver or some such. bear in mind that the flame will increase at this point as a lot more rubber is exposed to oxygen. the center piece that falls out onto your tray you can put out using some of your rubbish beer. Eventually the outer race or whatever its called for a bushing cannot withhold gravity and will fall out by itself, giving you a nice empty housing (well after you clean up the last little bits) On to the control arm bushings. basically the same process although they are only an inner and rubber with no outer on an E30. they will start spewing themselves out, three of mine spat the center out by themselves, one needed a bit of persuasion. next step is let them cool. its probably lunch time by now anyway. then press in your new bushings. on an E30, the subframe bushings do not go in all the way to the collar. they are only supposed to go as far as the top of the housing is level with the top of the rubber part of the bush. in hind sight the photo i took isnt the best, but if you look at 4 o clock in the photo you will see its level. 2 oclock is still down as its got an indicator on it. this means there will be a 10 mm or so gap at the bottom. you will find that they wont want to go any further as they flare. Originally, this was designed so it could be leveled in situ, but even BMW removed that from the service advisory, the part was never updated. as a side note, if you were to do poly bushings, they do not have this gap, so you MUST fit E36 compact lower braces (the rusty brackets i mentioned above) which are stepped rather than flat. trailing arms arent complicated at all, if you have a brain. One of the great things about Canada is that the weather and the seasons are very decisive. if it snows, it snows. if its sunny, its 30 degrees (as it was this morning). and if it suddenly gets cold and there is a clap of thunder, you have about 20 minutes to pack your sh*t up and get inside before god turns on the hose. so quickly threw the subframe back together with the new bushes, packed up and got my ass inside. I was intending to take photos of the assembly together, and also one showing the trailing arm bushes . VERY IMPORTANT to just do one or two threads on the trailing arms to the subframe so they are very obviously loose. this is because they must only be tightened when the suspension is loaded. This applys to all BMWs, and most probably all cars in general. this also applys to contral arm bushings in many models. I will try to remember to take pictures tomorrow. and then a pic of me when i saw myself in the mirror. LOL i guess it was all that black smoke!!!! 'til next time
-
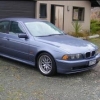
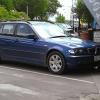
1 pointWell as most of you know i moved up to Ontario, Canada in Feburary this year. While I instantly found the public transport system very good (many people here hate it... i guess you always want what you cant have), of course i would never be able to live without a car. Before i got here, i had already decided or so i thought that i would get something american with a V8 in the front, it would be my last oppertunity do so, Canada and the USA being the last oasis for the V8 engine, with fuel still at $1.30 CAD (not much in it compared to NZD). I had organised a Ford F150 in Blue, V8 of course, 2016 ex lease that i was going to pickup when i got here. What i didnt realise is that, without a credit history in Canada, i was unable to be approved for the lease, basically because they had no idea who i was. No credit history also caused a few other complications for me too but wont go into all that. Suffice to say, no F150, and indeed no leasing at all. given that i only plan to be here for about 18 months or so, there is little point buying a car, or so i thought. anyway, once arriving, one of my first objectives was to find some friends! i joined a few E30 and BMW pages up here, and within a day or two was invited around to a guys warehouse full of E30s. I told my lady before i went round there that i already knew how today would end. And there it was, a hard top for my E30 cabby back at home. they are onobtanium in NZ, in more than a decade around the traps, i know of only one. made a deal with the guy and had myself a hard top to ship home. Then i saw another wee beastie collecting dust in a corner. Oh that old thing, its an E30 Touring, very rare over here. Indeed. They were never sold anywhere in North America, and command exceptionally high prices over here. Might have got the story wrong but it goes something like , it was brought sight unseen in Poland in advertised good condition, and since the guy had Polish Ancestry it was brought, flew over picked it up, and road tripped it back to Toronto, Canada (crossing the Atlantic between the UK and Halifax). While yes very reliable (havent been able to fault it yet), its never been someones baby so scruffy here and there and needed some significant mechanical work. and the owner, once completing the trip lost interest. Suffice to say i was interested, put it up on the hoist to see what i was buying and did a deal. sure, a wee bit more than you'd pay in NZ for one in the same nick, but there is probably more in New Zealand than there are in the entire Continent here. And so became the saga of registering it in Ontario. While they are very lax on saftey here, being no annual inspection and no border compliance etc like we have in NZ, it is difficult in otherways. Insurance is compulsory here, and as i am a 'new' driver by there standards, rates are high. you also need to take it for a saftey inspection (the only time it will ever get checked), although because i already knew of what was needed, it just got a dodgy safety, which is very common here. no body bothers to actually get the car inspected, have heard that from heaps of people! eventaully all sorted and start driving it. got its first bath up at the family home a week or so later, so i could see what i had actually brought under the 2 years of dust etc. youll notice in those pics the rust in the tailgate, as is always the case on Tourings. what happens is the seal at the lower edge of the glass shrinks being 30 years old now, and water gets in and trapped. Also the front valance a bit bent up as well. interior pic shows various bits of trim missing, fortunately all of the touring specific stuff is present! and the engine bay. yes its ugly needs a serious clean, but yes that is an E36 M42 swap, which gets the car moving very well. Coilover plug conversion using M52 coils. There is a lot of things in here that is pretty hows your father, it pains me to say though that it is actually reliable as anything, starts first crank every time. I will talk more about the engine in a later post when i get to addressing it And that last picture is my first tools here, brought for me for my birthday! Next up, found a job, and while not in the industry i want to be in, it was a real stroke of luck. It is a body shop, part of a chain of 150 or so stores, the biggest in Canada, and owned by an American company which is the biggest auto body chain in the world. what better place to land a job when you have a 30 year old BMW that needs some love! Another wash. yes i did that a bit. money was very tight before i got a job, as i didnt intend to be buying a car! but good to actually be able to detail it in a proper place with all the resources i needed. Put my ETHRTY plate in the back window which came over from NZ with me in my case. was intended to go up on the wall here, as i said, never expected to actually buy an E30 here! and of course a BMWCCNZ sticker added to the rear window! as it turned out, purely by luck, one of the other body guys is actually a BMW guy two, and owns an E30 himself, and also the E39 540i 6 speed you can see in the background there. very cool to be at a workplace and meet someone like that! He actually liked the black kidneys on my car, which i didnt like. i asked him if his were chrome, he said they were, so at one point, he brought in the silver ones from his car and i swapped them over, so all the photos from here on have silver grills. that was the first mod i did, and more of an anti-mod ha. Went to a classic car show, swap meet and second hand collectables show (all in one) absolutely enormous event (as is anything here). spent the day and still didnt see everything, but i did manage to pick up these to add to my collection at home. All 4 are North American spec so diving boards etc but interesting all the same. The guy also had E28 E32 E34 and E36 ones as well, i tried to bargin for the lot but he was a tight old prick and i think he was one of those 'f off we are full' types and didnt like my accent. oh well, whatever. Mid April by now, Finally managed to find a house. unfortunately doesnt have a garage which is a bit of a pain, but Toronto rent is much like any other major city. if you want space and carparks you are out of the city already, and you want a garage to, thats just not in the budget as it turned out. Time to get cracking on the car ! First order made, door handles for three of the four doors. never understood why they break over seas and yet never seen that at home before. it was explained to me here its so common because of the cold, the locks frequently freeze, and so the 30 year old plastic breaks trying to release the frozen metal. of course, we rarely get sub zero temp at home so thats why! drivers door hinge bushings, to get rid of the aweful squeek and slop in the hinge meaning often had to close the door twice or three times. not a job i had done before, but BMW sell a rebuild kit, very straight forward to complete rear brake pads. the hand brake is also totalled as well but will sort that at a later date. various interior bits and pieces pod filter for the engine so it actually has a filter.... those dodgy Poles. you'll notice the dent in the right rear door as well. after that photo and while the door card was off i sucessfully heated with the missus hair dryer and pushed it out with plam of my hand from the inside, so very happy about that. also the tool collection as you can see has started to grow.... Took the following photo of what i came back to after i shop at Walmart. lucky no contact to my car, but how the hell do you walk away after parking like that and think boy i really nailed that park. Have look at the X3 to the left, the Volvo in the back ground, and whatever the crossover behing the Pontiac is. also the Pickup and the white car right at the very back. not one of them are parked properly. This is every single day in every car park here. and they are always scratching thier heads why thier insurance is so expencive up here. I thought the standard of driving was shocking in NZ, but its excellent compared to up here. ohhh i do enjoy when the courier comes Mostly that is parts for a 2002ti that i have been doing some work on for a guy i met online up here, though there are bits in there for re hosing my fuel tank as it was leaking abover 3/4 full. It would appear i didnt take any after photos, if i remember right my iPhone died because id been listening to spotify all afternoon, so just imagie the above pics again with all new hoses, pump o rings etc, and also sanded what i could see of the tank and rust covertered it in hopes it wouldnt need a new tank itself. Luckily, i have filled it maybe 3 times since this and its been fine! doesnt leak at all! th biggest leak was coming from an undersized o ring around the pump cradle. also fitted a tech1 wheel i managed to pickup. needs a refurb, but at least it doesnt twist around the rim like the orginal one did. skip forward to Mid May, Right thats enough of nuts and bolts. by now i have been working at the body shop for about 6 weeks and so i asked if i could take some time to paint up some bits and pieces for the car on a Saturday or whatever and pay for the materials. dont be silly they said, call it part of your training! not having to pay for materials and whats more doing it on company time was great! they said they would rather i screw up my own stuff than a customers car anyway. Real priveledge actaully because its a side of the auto industry i know nothing about, and it is totally different to all the other branches. anyways, first up was the front valence. sourced a 6 cylinder and/or A/C type one with the dual slats. i prefer the look, makes the car look a little higher specced than it is. Paid a pretty sum for it. non-rusty parts are exceptionally rare find here in Canada. First step, mix up some paint. Found Diamante Schwarz Metallic on the computer and mixed it up from the base colours. interesting to see what it looks like when un mixed! Didnt take a before pick of the Valance, but basically i sanded it back, and applied rocker gaurd which is a Canadian made product a lot of cars here have applied to them below the lower trim line. not uncommon to see the texture, even on newer cars. basically it is a heavy rubberised coating that semi hardens. think of roughly half way between Plastidip and toughdeck spray on liners for utes. While that was drying, i was trained how to take my valance off LOL yeah right as though i dont know but hey! next step is the sealer. unlike all the other steps, it is highly toxic so must be done in full protective gear. this was the only step that was done for me, just for hygene reasons what with only one face mask. next is three layers of colour (just because i made too much paint, usualy 2 would be fine) ... and then a few coats of clear and bake in the oven for about 20 mins or so. ... and then all installed, with all new hard ware, also clips and iS lip i picked up, and also mounted in the brackets and loom etc for fog lights, not that i have found any yet, but its all there ready to go when i do. just a pic of the 2002Ti i have been doing work on as well lately, just finished it up Thursday last week. Caught up with my buddy with the 540i again (he moved on end of April). his mate came along with that yellow Dodge Dakota R/T Super Bee. pretty rare apparently, it is the size of a early 90s 2wd Hilux etc, but with a 5.9L (360) Magnum V8 in it. about 250hp despite such a massive displacement, BMW was getting more than that out of a 4L at the same time ha. still. not my thing but pretty neat little wagon. Popped by another guy i met onlines place for a yarn. has an E30 and Golf Mk1 in the shed, and also the E21 in the back ground. This 740i possibly the new daily??, not sure yet, all the same thought i would post it up. this is typical of a 90s BMW up here (makes my E30 look great). yep rust just something you have to deal with on a car thats spent 20 years in the snow, and then the other 6 months of the year in the beating down sun (much hotter here than NZ in summer). compare to an E38 in NZ which i have never seen a single one with a spec of rust on it. this isnt even particularly high kms, only 160km or so. Canada weather is very hostile to cars! Which brings us up to today! Local ariport saved my carpark for me, when i dropped the missus off this morning. Then what do you do when you get to work at 4.30am , work on your E30 of course! 3.5 hours to sort out my tailgate in the piece and quiet. You know the process now from the above run through, just this time with a few body filler steps to full in the rust holes. yes technically metal should be welded back in, but my reasoning is that this gate is so rusty already its not worth spending time saving, just make the most of what you can and hope it lasts for a while. so i will just let the pictures do the talking. and finally, since as i said above i dropped the missus off at the airport this morning, i have her car till Friday week, yep a very manly machine lol but she likes it and that means i can drive what i like. its actually quite pleasent to drive, just very very under powered, definatley a city car. Anyway, since i have it, it means i will be getting stuck into replacing some stuff under the car in the coming few weeks since it wont be on daily duty. so jacked the car up when i got home, and decided actually, after getting up so early this morning i am too tired to get under it today. So i came inside to spend two hours posting on bimmersport instead lol. Thanks for reading, and sorry i cant be bothered to go back through an reread/spell check. its just gone 11pm on Tuesday night so im tired, just powered through typing that last 20 mins ha. BTW sorry i havent been as active on here recently either, i am always reading!!
-
1 pointI have a second hand one in the garage, just to make sure I never need one!
-
1 pointFirst thing to learn is never trust the advert. The dealer or person listing usually knows jack all about the car they are selling claiming msport this mspec that. Better to check yourself with carjam and vin decoder
-
1 pointwell suppose just rip it all out and re hook up original stereo back in it place . probably have to resolder some wires etc
-
1 pointThanks for all the input, have learned to look for headlight washers to indicate xenon headlamps, the seat warmers are easy enough to spot if the interior pics are good enough. The VIN finders can be helpful as well to list specs but not sure how accurate they are. Getting better at discarding the overpriced underspecced offerings and narrowing the field down.
-
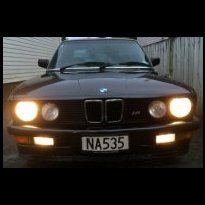
1 point@M3AN was gonna put another post up about spotting yet another E3 on a trailer behind a Landcruiser..... and how it was the same Landcruiser lol. But thought I'd just show you a couple of pics for now, picked the good one up tonight. Pics taken on my phone in the dark, so will post better ones in the daylight when I can. Oh and before anyone says anything, that tie-down over the front is just to hold the bonnet shut, don't freak and think I towed the car with just that on it ???
-
1 pointYeah i know it needs lowering. Ive got ACS springs and Sachs sports sitting waiting but little motivation to do so and i like having ground clearance and suspension travel.
-
1 pointspotted these new suzuki s-cross suv's around and couldnt help but think of the new x
-
1 pointOk, just cause you asked so nicely, and I happened to be out at the farm yesterday, so I managed to grab a couple of pics of the parts car for you
-
1 pointHi all, Long term owner of a 1982 635 CSI, new to bimmersport. Looking to undertake a refresh of my baby and will probably seek advice on all sorts of silly and not so silly questions. Thanks to all who put this great site together and do all the hard work - much appreciated! Greg
-
0 pointsM5 ABS units are $4500 and there's no second hand ones
-
0 pointsECU options ... Brand new ABS control unit - ~$3K! 2nd hand ~$350 Repair to complete ABS unit - ~$1600 Repair to just ECU - TBA So unsurprisingly we're going for a 2nd hand unit and likely ECU-only repair if that fails down the track. Wasn't sure about putting a MBI on this vehicle but maybe I should.... !