Leaderboard


Popular Content
Showing content with the highest reputation on 09/02/20 in all areas
-
6 pointsId be interested to see crash data with tire info - some of my mates freak when they are passengers with me not because I speed but because I take a 65 corner at 90 or 100 if I know it. I didnt really understand the issue for years as I had always bought pilot sport or similar max performance tires (PS4S in the c63 now), then I drove a mates shitter 1996 civic to diagnose a noise and got loose on the first roundabout I came across, land sail or some such hilarious brand tires. 14x165 and $60 bucks each apparently.They weren't tires those were ice skates and apparently they sell in droves. The stopping distance from premium and even mid range tires to ultra budget are huge, one comparison I saw was 62m for PS4S , 70-80 for mid range tires and 103m for some popular cheapshit tire. Two things I never skimp on - tires and toilet paper, im sure theres a skid joke in there somewhere.
-
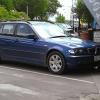
4 pointsPoor mans euro plates ?
-
3 points
-
3 pointsSurely we should have a guy walking in front of all cars waving a red flag and the car driver honking the horn instead of dropping the open road speed limit to 90kph.
-
3 pointsWe had a German farm girl helping out on farm last year, she was pleased to spend a lot of time dealing with the trailer as towing a trailer requires a seperate licence back in Germany. It would appear there is a lot of room for improving the standards of driver education in NZ. Sorry for the kids who are finding it hard already, but you are dealing with something that can kill when you inevitably f**k it up. More lowest common denominator policy from police, disappointed but not really surprised.
-
2 points
-
2 pointsThis. I've never been big on radar detectors but the first time I get a ticket for <5km/h I'm going to get one.
-
2 pointsThis just emphasis's the need for a Radar Detector, not so I can do 130kph but so I dont get an unnecessary ticket for doing 106kph when traffic is flowing smoothly or I am on a clear road in perfect driving conditions. Mine has save me form this fate on so many occasions now it has paid for itself many times over.
-
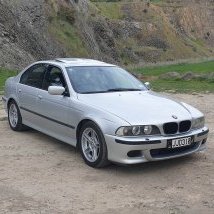
1 pointAfter what I paid for it: $12,700 I haven't had it for long (just before lockdown) but I'm thinking of selling the 130i. It only gets runs at the weekend as I walk to work and I'm thinking I might get more use out of an offroader. Man Maths may still prevail and allow me to have 2 cars but its just not a sensible option at the moment. Anyway: ~107,000km Lovely condition - few imperfections (stone chips, slight scrape on the bumper, very mild kerbing on alloys) BMWP Exhaust - Brilliant noise, a little louder on cold start-up but then is quiet until you really get on the throttle (original exhaust can come with the car but has been chopped so a little fabrication would be required) BMWP Air Intake - Looks the part. Was on the car when purchased (as with exhaust) so no idea how it really changed the performance/noise. Recent tyres - Hankook Ventus Primes Clean WOF from Feb 2020 Rego out in Oct but I'll be adding 6 months when I get round to it
-
1 pointWanting $6000 Bimmersport thread Black Top LCI model - 220k Kms. Fresh Wof and Rego. Has been my daily and the most reliable BMW I've owned. I have 3 130is so need to reduce the fleet as I only drive the manual one now. Has extensive service history from previous owners. Major items in last 40k kms include: Transmission Service, Rocker Cover/Oil Cooler/Inlet Manifold Gaskets, Belt, Tensioner, Crank and Idler pulleys plus Starter Motor. In my ownership I've put in a new battery, Vanos solenoids, replaced coolant temp sensor, spark plugs + coil, fan blower motor and had a professional cut and polish done. Drives well and looks good. There are normal stone chips on the bumper/bonnet for its age but otherwise externally is really nice. Tyres have good tread too. Inside is also nice, except the floor mats have stains that wont come out(have cleaned them several times). Has a Parrot bluetooth system installed, good for music, and legal tints. Also had the flap in the rear muffler opened full-time, gives a bit more noise as flap normally opens fully under more throttle, can be returned to normal by plugging the vacuum line back in. Otherwise totally stock. Currently the rear wiper doesn't work. Was that way when I bought it and hasn't bothered me. A few recent pics:
-
1 pointGeneral consensus is the the N62 is a pile of junk and best avoided, always leaky and full of plenty of issues they just shouldn't have. Unless you can get a mechanical warranty on the engine not worth bothering with. M62 certainly has a better track record, but complex, older now and need the timing chain guides done, vanos work and other fiddly stuff. While apart valley coolant block plate seal should be done along with other 20 year maintenace items. Switching to a non water cooled alternator is probably a good idea too. Personally I'd use an older M60B40 and refresh that, a well proven reliable vanos free motor, double chain timing and idler gear for the chain rather than cost cutting U shaped guide that wears out as used on the M62. Still a few things to do given they are 25-30 years old. Or just use an LS GM engine and sleep at night knowing it will run forever without a problem :p
-
1 pointStill a hell of alot better than dealer plate surrounds
-
1 pointI paid $149 on sale two years ago (with a cooler bag and some accessories). This is a tasty deal, buy a few to keep your fleet on trickle/maintain.
-
1 pointHello folks. Ive been thinking of joining the forum for some time now, and have finally got around to doing it. I have three E30's, all different build specs, all non standard. The plan is to race them, and have some fun when they are finished. It would be great to get to know other like minded people, and compare notes and ideas.
-
1 pointI feel for you seeing this, the person will almost certainly say 'but you can still get out' and if you cant get a parking warden theres bugger all you can do. Our solution below. I remember our student flat in wellington used to have this issue at both sides of the driveway. Rather than causing any damage to the cars we got two guys on each arch and just dragged the offending end out into the middle of the road. Only had to do it a few times at the start of each year. No idea what happened to the cars but they were never there when we got back from uni or ever again.
-
1 pointI know. Very slow to respond too which makes it hard to get any information. He said he has "strong interest" but as we all know, interest doesn't mean alot. Surely if you had someone willing to put down a deposit, that shows they'll actually buy the car? I see there's a tired looking E38 in Welly.. Maybe that can fill my project bug. Or Brent's E36 touring if it gets cheaper ?
-
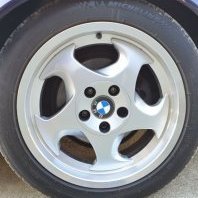
1 pointQuite rare wheels, not because they’re overly desireable or anything but just hardly see them on the secondhand market. In saying that theyre quite a nice simple wheel that fit the e9x and also the e8x 1 series perfectly. glw your search ill also keep an eye out
-
1 pointHappy early Father’s Day to me. New low profile 3000kg jack.
-
1 pointOr dickheads on cellphones in traffic ? Speeding is literally just the lowest hanging fruit. So easy to police.
-
1 pointThis looks like a really good buy! GLWS
-
1 pointSomeone was advertising a Jammer in the for sale section.
-
1 pointIt started life as an 323i engine e30 road car then caged by original 'race car conversion' owner. It blew it's engine in it's second local meeting. This 'disalusioned' owner sold it as a roller to a prospective race driver, who intended putting an m50 engine in but found the process and cost too daunting. I took it on, as I had an m44 to put in and could use it as an interim race-car while completing an 's42' '02 build. Never considered it for use in 'the series.' IMO and by my reckoning is too expensive for my resources , I can do more local events and for about 1/2 the budget for a series car. With Delorto's, road pads and tyres managed a low 1.27 Manfield PB, with an RS (Real Slow) driver. With your talent Dan, and with your tweaking, I believe sub 1.24 Manfeild laps could/would/should be attainable? Can take on board though what you say.
-
1 pointuse bmw ETK
-
1 pointIts an older model 60L unit from repco, filled with a mix of parts washer solvent from supercheap. It does the job, but tbh I dont use it as much as i should, I prefer to use brake cleaner for smaller jobs on the bench. The pump on the parts washer is too powerful and the jet of fluid ends up spraying everywhere when it hits the item youre trying to clean. Would be nice if i could adjust it down but there is no adjustment. A lot of people also recommend diesel or kero in parts washers, but I went for a biodegradable, non-flammable solution which may not work as well, but better than a big liquid bomb under my house.
-
1 pointAnother thing that has bothered me since I got the Mini, was the horrible wind noise from the passengers window at speed. It needed fixing. At about 100kph, or lower if there was a decent crosswind, the passengers side door glass would emit a rather annoying sound. Obviously on a 700km or so trip home on the open road this started to get rather tiresome, but thankfully it wasn't there all the time, and you could drive around it to a degree by raising or lowering speed. The window was operating correctly, including the auto drop on the door opening, but still, there was a noise. A decent inspection, and comparison of the window to the drivers side one that didn't make a noise showed that the front of the door glass was sitting a couple of cm lower than it should be. Instead of seating up in the seal above the glass, it sat a good distance below it. That'd be a good place to start. Adjustment of the window glass sounds like a real pain, but in reality its a lot easier than expected. From what I had read, I thought that removing the door card to do the adjustment was the easiest way, but after failing to remove the door arm pad and access one of the door card screws (I swear someone has glued the pad to the door, it doesn't budge no matter how much I press the clip to release it) I tried another way. The official BMW way is to remove the waist moulding on the outside of the door and use a special tool to rotate the adjusters. Now, I don't have the tool (looks kinda like a C tool for adjusting platform adjustable suspension), but had heard you could use a screwdriver. Sure enough, I removed the trim with the window up and was greeted by the sight of the two adjuster wheels, right up in easy access. The adjuster is a large nut that secures the glass to the regulator, as seen in this photo Using a narrow flat blade and a hammer I tapped the adjuster around. Lefty loosey, righty tighty. With both adjusters slightly looser, but not loose enough that the glass moves around freely, I gave the front of the glass a yank upwards. This pulled the glass up slightly, whilst leaving the rear more or less where it was. After a few trials and tests, moving the glass up and down until it was just right, I used my hammer and screwdriver to tighten the adjuster wheels again. I got the glass so it sits firmly into the seal front to back, and still operates correctly. There is now no gap around the glass. There is a proper adjustment spec for this, which I think is measured with the glass at "open drop" but the door held closed against the latch, and should be 5mm from the lip of the window seal to the top edge of the glass. There are more details on other sites about this, but I chose to go with sight and feel instead, as it's an old car now and everything is getting a little more worn out that when it was new. You can see from the dirt mark that was previously behind the seal how far up the front of the glass has come The rear is about the same as it was You could previously see the top of the glass here, now it sits in the seal I gave the glass a thorough clean inside and out, and under the trim, and reassembled. A quick drive down the open road was promising, with no wind noise, but it was an intermittent issue so will need to do more testing, but I'm fairly sure that is what the issue was.
-
1 pointFinally, It looks like I might be coming to the end of fixing the previous owners neglect and bodges. When I first got the car and drove it home it shook like crazy under any acceleration. This turned out to mostly be the coil, leads and plugs that had done their dash. Once they were replaced the shaking got a lot better, except under a couple of conditions. The worst was when I'd pull out, foot flat, to pass another car around a bend. The whole car would vibrate, but this time there was no loss of power and the engine was pulling hard. It was something else, and I had my suspicions. One of the items on the PPI was the "RH Inner CV boot coming off". The previous owner took this as the need to replace the clamp on the boot, which he did before I collected the car. I noticed when I had the front subframe off that it was covered in grease, and the clamp the previous owner had fitted to the boot wasn't a CV boot clamp (a narrow thin metal strap) but instead a standard hose clamp. I guess it was working as the boot was still there, but everything in the vicinity was greasy. I decided to remove the hose clamp and fit a proper clamp, but thought I should check inside the CV joint and see how much grease was in it first. I slid the boot back, and nothing. A small smear of grease on the tripod, but otherwise it was running dry. The cup also appeared to show signs of discolouration from heat. Bollocks. Holding the inner CV cup in one hand, and twisting the axle or outer CV resulted in a defined click and visible movement in the inner CV. Double Bollocks. CVs do not like to run dry. It's the second quickest way to kill them. The first would be to replace the grease with grinding paste. Since I didn't have a spare joint or axle at hand I packed the joint with grease and refit the boot with a proper clamp, just in the hopes it might be a bit better and keep going. It wasn't better, but at least it didn't get worse. Since new inner CV joints aren't available a new RH axle was ordered from RockAuto. The axle arrived the other day and it was time to crack on and replace it. Car went up on Quickjacks, wheel was taken off and then the axle nut threw up the first battle. These are tight, and the staking on the nut needs to be straightened out to help spin it off. After some bashing and rattling, it gave way and we were on a roll. With the nut off I could already tell the splines were free in the hub, not rusted and seized like some. Winning. To get the outer CV out of the hub you will need to swing the hub outwards. To do this the lower ball joint and tie rod end need to be disconnected. This was easy to do since the ball joint was new, and the tie rod end recently disconnected. The PS fan and lower torque mount need to be removed to access the bolts that hold the hanger bearing in place Now the hanger bearing bolts can be attacked. Two are easy to get at (one partly loosened already in photo) with a ratcheting spanner, but the other (LH side of photo) is tucked up behind the axle with limited room. A ratcheting spanner is a must here, and it will eventually come out far enough to remove with your fingertips Next swing the hub outwards and slide the outer CV out of the hub and let it hang freely. Now it's just a case of pulling the shaft out of the gearbox. I gave the hanger bearing a couple of taps with a hammer and the axle slid right on out. No oil came out of the gearbox, but apparently, if the car isn't level it can leak once the shaft is removed. Wiggle the shaft out, spinning the hanger bearing to clear everything it tries to get stuck on Easy. Since the replacement shaft I got is aftermarket and not genuine, the hanger bearing housing will need to be transferred over. To the workbench we go. This housing is held in place with a large internal circlip Awesome, I thought, I can finally use the sweet circlip pliers I bought ages ago. They're rubbish. Too short and too floppy due to their design. Don't bother with interchangeable ones, just get a proper pair of single purpose pliers. Like these, which I had to run out and buy for this job And they worked a treat Before removing the housing I also needed to transfer over the little dust shield, so to stop that being damaged by the housing I used a hammer to carefully tap it off The hammer was once again employed to bash the housing off. It's a bit of a light press fit on the bearing, but will come off with some hitting in various places around the perimeter. Now it was time to build up the new shaft. Mmmmm, shiny. Refit the circlip first. Trust me, its a lot easier than doing it once you have hammered the housing onto the bearing. Then the housing goes on, as does the dust shield. Ensure the circlip is correctly seated in the groove. Its pretty decent quality considering it costs so little. The boots are all soft rubber, the splines are nicely cut, and the CV joints are all nice and tight. There is zero play when twisting the shift, unlike the old one. Refitting is simply a case of carefully slipping it back into place, making sure that the hanger bearing housing is rotated the correct way before slipping the shaft into the box. Ram it home, bolt the bearing into place, slip the outer CV into the hub, and reassemble everything else. The hub nut is about 180nm, so I got my favourite helper down into the garage to sit in the car and stomp on the brakes whilst I swung off the torque wrench. Stake the nut, and that part is done. Before fully reassembling I took the chance to fit a SuperPro insert into the lower torque mount. The mount was new, but it still felt a bit soft to me and there was some thumping when coming on and off the gas, or changing gears. SPF2426K These are just inserts that fill the voids in the standard mount. Easy to fit, just slip them into the mount and refit. The results of the work are all pretty immediate. The axle has completely removed the shuddering when accelerating, it is like a new car. I can push it as hard as I want around corners and nothing. The mount insert is also fairly obvious. The car feels a lot more direct and connected not. The gearshift is tighter, and the thumping has near enough gone. There is some vibration in the cabin at low RPM, but I think that was there beforehand. Well worth it for a simple upgrade. You could probably use it on an old, slightly torn, mount too. I'm very happy to finally be at the end of fixing the issues that the car should not have even had. Now I can enjoy the car without worrying it will shake its self to bits.
-
1 pointBest way to fight these sort of issues is for people to dispute the infringement and go to court, courts will get overwhelmed quick if enough people do it then they likely be forced to backtrack.
-
1 pointWhat I don't understand is that we already have legislation to manage this type of thing however the penalties and weak and not very well enforced. Same goes for liquor laws, we've got the rules, just no one bothers to enforce them
-
1 pointBit of progress this week! Rear end painted up Car off to panelbeaters tomorrow, was very rusty along boot seal lip so new panel will sort it all Done the dentent shift pin rebuild in the weekend, what a fun job that is..... Have an online order on its way with front and rear seals etc for the motor to swap in and hopefully get the sump and gearbox on in next few weeks
-
1 pointPretty sure all e39 M5 worldwide do not have break ducks (sorry I just had to do that...)
-
1 pointThanks for the input all. I'm told you can fit three in one container which reduces shipping costs by quite a bit. That's made the decision easy and all three will be on their way shortly. Hope to meet some more BMW owners in summer ?
-
1 pointThe leather has also had a bit of attention with the Colourcare system, looking a lot better now, also replaced the back seat base with a spare recently acquired...
-
1 pointWaterpumps will start throwing codes when they are on their way out so not usually a surprise moment. Lifters just need 3 mins at 3000rpm to bleed. Valvetronic motors and the seal need doing at some stage (cheap and easy) Rocket cover gaskets weep Coil packs will die (cheap and easy) But yeah get the 3ltr if you have the option. Purely because the 2.5 saves you nothing bar maybe some cash up front. I also feel you need to be pedantic with servicing. But that should be a BMW ownership thing anway.
-
1 pointHey guys, so here's the story... have a 1980 635csi auto. Want to convert to manual. Have a getrag 260/6 box. This weekend I'm going to check out a couple of e12 525 manual scrap cars. My e24 is based on the e12 chassis so... What's worth pulling off the e12 car that could be useful for the conversion or for future spare parts or to on sell to others... I'm thinking pedal box, driveshafts, diff, suspension, maybe even the m30b25 engine. Are things like the headlights and doorhandles the same? any internal bits? dash cluster etc? who has knowledge on these old treasures!
-
1 pointlove your write ups, so much detail
-
1 pointIn an effort to stamp out the issues this car has, it was time to tackle the most serious issue; The front control arm bushes. It was noted in the PPI from the seller that the front control arm bushes were "split". What it didn't mention was that they are completely buggered. This would become a WOF issue in the near future, and wouldn't be helping the handing, so I had to fix it. Its a well known issue with the R5x Mini, and fairly easy to test by kicking the front of the front wheel and seeing how far back it bounces. Kicking my wheel revealed a ton of play. The internet widely regards the Powerflex PFF5-101 as the solution to all issues with the control arm bushes. Not only is it an upgraded poly bush, but it'll last for ages and is much easier to press into the housing than the OEM metal sleeve bush. The Powerflex bush is a three-piece design and doesn't need to be located in a certain location like the OEM ones. The original plan was to replace the bushes without removing the front subframe. This turned out to be the wrong idea as I just couldn't get the control arm to break off the taper of the inner ball joint, and as it turns out, all the ball joints were all stuffed and needed replacing too. You cannot remove the inner balljoint without lowering the subframe to some degree (and even if you could break the 100NM bolts free with limited space, you would have issues torquing them up again), so it's easier just to drop the subframe completely. It's not much more work to drop the whole subframe. My Quickjacks were perfect for this job, fitting the Mini jacking points and giving me a decent working height. You wouldn't want it any lower than this, or there may be clearance issues when pulling the subframe out from under the car. Obviously the first step once in the air is to get rid of the front wheels. It's amazing what these little 15" wheels and runflats weigh, they're probably the heaviest wheels I've had, and I've had those horrible things on the M328i and MX5. With the front wheels off it's time to start popping the ball joints. The tie rod end, swaybar link, and outer ball joints all need to be disconnected. I used the old loosen the nut and hit with a hammer method to remove these, but since I now have a splitter kit I will be using that from now on The inner joint I just could not pop. No amount of hammering would split the taper This is the point I just decided to drop the whole subframe. Thankfully the engine isn't mounted on the subframe, so its a matter of dropping the subframe with the steering rack attached and that's really it. There is a bunch of stuff that needs to be disconnected but otherwise it's all straight forward. One very helpful resource for this job is the Mod MINI Youtube channel. There is a specific video for doing this job, which I followed along as I went. To remove the subframe you need to remove the front bumper. Sounds weird, but the front crash tubes are attached to the subframe. And the crash beam needs to be removed next This is more or less the Service Mode for the front end. If you needed to do the radiator or supercharger, this is the minimum work you would need to do. With the beam off, unbolt the crash tubes, remove them, and start to unbolt the subframe. Don't forget to disconnect the ABS sensors from the subframe uprights, and the power steering pump. Check your O2 sensor wiring isn't clipped the to the PS hoses under the reservoir. Support the subframe on a jack with some wood to spread the load, and lower it down. That's it out. Now there is ample access to the arms, bushes and joints. This is the bastard. Unbolting these two bolts, and the two on the swaybar mount will allow you to remove the arm complete with bush and ball joint. Do note that if you have Xenon lights as I do, the sensor attached to the ball joint in the photos below is the auto levelling sensor. You MUST fit the correct sided ball joint to the arm (it has a locating hole drilled in it), and remember to fit this sensor during reassembly, as you'll be dropping the subframe again if you don't. There is also a small 10mm holding the sensor arm to the control arm, which will need to be removed. The bushes are well buggered. Both have little to no resistance to the arm being moved around, and you can see through the rubber in one. I'm not sure "split" is the word I would use if I were doing the PPI. With the arms removed and on the bench I could try popping the taper of the inner ball joint. First I tried a normal splitter. It just wasn't big enough, even with some modification with a grinder. The inner joint is quite limited in its access, and needs both a long reach splitter and one that opens wide. This resulted in me spending some more money and buying a kit of splitters, which had slightly larger splitter like the above, but that just kept popping off. The real deal was this big boy press with adjustable arms. It clamped perfectly onto the arm and with some rattle gun hammering, the splitter fell off. I thought it had slipped off, but it actually fell off when the taper popped on the joint. Finally! Removing them confirmed to me that I made the right decision; The inner joints were stuffed. Very floppy with almost no resistance. In contrast, the new ones are very stiff. In went the new ball joints torqued to 80NM. Next was to tackle the bushes. The obvious thing here is that you need to press the bushes off the arms first. If they were bad enough you might be able to just pull the outer part of the bush off leaving the inner on the arm, but mine needed to be levered off in one piece. This was done with my biggest prybar, levering between the bush and the flat on the arm. These are a metal sleeve bush pressed into a housing. This is what I was dealing with, big splits in the rubber all around and very little resistance to movement. Apparently these are fluid filled originally, but I couldn't see any fluid left in them. They were the original bushes To remove them, either use a big workshop press, or a reciprocating saw and metal blade. I chose the latter. There are two layers. The first is the inner rubber section, which also has its own metal sleeve in it. Using your saw, cut through this until you can use a chisel to force it out of the outer metal sleeve. Once that's out, carefully cut a slot into the outer metal sleeve. You don't want to cut into the housing. With the slot cut into the sleeve, it was easy to use a chisel to push the sleeve out Now it was time to press in the new bushes. I used a length of m12 rod, some washers and a pair of 15mm galv flanges as a makeshift press. This worked perfectly. A deadblow hammer was employed to push the bush in just that little bit more to make the lip pop out the other side Using lot of the supplied grease, grease the bush and fit the purple insert. Fit the washer to the arm, and then slip the arm into the bush. Done. A pair of reconditioned arms. Before I could reassemble I decided to replace the outer ball joints, and swaybar bushes. The swaybar bushes weren't too bad, a little smooth but minimal play and no cracking. They were the original bushes. I tried to get some poly bushes for this, but couldn't get any locally, and didn't have the time to order from overseas. The 24mm MCS standard bar seems to be odd, as few places listed that size, instead only having the smaller Non-S bushes listed. Torquing up the inner ball joint and swaybar bolts was a battle. The ball joint bolts were 100NM, which is quite a bit, but the swaybar/control arm bush mount bolts need 165NM. I had to get the help of my lovely Wife to stabilise the subframe whilst I swung off the torque wrench. I think that is the highest my torque wrench has been. The last thing to do was the outer ball joints. These are a pain because they press into the bottom of the knuckle, and are exposed at the top, allowing them to rust into the housing. There is also limited access. I managed to get the old ones out by using a punch and hitting the exposed parts of the flange. You can see the two shiny areas where I was hitting. You can see the rust that was binding it in place. I have heard of people replacing knuckles because their joints just would not come out One of the old joints was very loose and the other was actually OK. Best to replace in pairs though. I greased the surfaces of the new joints thoroughly and used the bolts to slowly draw it into the knuckle. Hopefully this one won't seize in there. Now that the subframe was complete, it was time to refit Remember to reconnect the power steering wiring and feed the PS res back up through the gap. Don't forget to torque everything up. Refer to your workshop manual for torque settings as there are a few. The gist is that the big bolts are 100NM, the small bolts/joints are 56NM. The previous owner identified that the power steering fan wasn't working, so included a replacement with the car. Since you have to remove this to remove the subframe, it was a good time to replace it. Four screws hold the fan in place. The old one was very gritty to spin. A quick dip through the parts washer to get all the old dirt and grease/oil off the bracket, and on went the replacement fan. Another reason the fan wasn't working was the low speed on the radiator fan also wasn't working, and the two are linked. A quick check at the radiator fan plug showed an open circuit on the radiator fan resistor, indicating the resistor had failed. Another common issue, and something the previous owner was preparing for as the car also came with an external replacement resistor. This external resistor mod is a common way to fix this issue without having to remove the radiator fan shroud, which requires a lot more work. It also allows the resistor to use the car body as a heatsink, and keeps it out of the path of weather, which is generally what kills the old resistors. A quick snip of the wire, some soldering, and the resistor was wired and mounted to an existing unused threaded hole. There is plenty more information out there on this mod, but a good thread is this one. The low speed fan now operates correctly when the AC is running, but I still haven't seen the PS fan operating. I'll need to keep an eye on that. I did replace a blown 5A fuse for the fan, so need to check if that blew again. A couple of other small things I did before taking the car for a test run, was the replace the cabin filter. The old one was manky as hell. Packed with dirt and leaves. I also fit the replacement vinyl red S logos that were missing from the car. Just looked weird with no colour on the rear and sides. I purchased them from this Etsy store. They have a whole range of different colours available. And finally, I replaced the park light bulbs with LED. I noticed when I had the front off the car that there are resistors tied into the park light wiring. I guess this is why the park lights were always super dim with the bulbs. I can only presume this was done in Japan and the LEDs were removed for compliance during import. The resistors will be there to trick the car into thinking the bulb is OK, otherwise it will usually trip a blown bulb warning with LEDs. After all that, the results were almost immediate. There is far less play in the steering, its nice and tight now and the car kinda rotates on its own axis when turning. This is a feature I remember from my old R50, but this car hasn't felt like that until now, it always felt unsure and vague. The thumping coming on and off accelerating is greatly lessened, and changing gears feels more direct. There must've been some sort of clunking or noise previously as there is that feeling of "huh, suddenly the car is quieter" even though I don't recall any noise when driving; much like when I did the rear arms in the Saab. It's a lot more fun to drive. Much more surefooted and confident. It's what a Mini should drive like. I can highly recommend refreshing the front end if it hasn't been done before. Even with only 127,000km on this car, it was all very worn out. I'm starting to feel less disappointment and regret with this car. It's just a shame its costing time and money to put it right just so I can enjoy it.


.thumb.jpg.04807d42ad69838062fa7df5f4a7a884.jpg)

