

kiwiland
-
Content Count
67 -
Joined
-
Last visited
Posts posted by kiwiland
-
-
Anyone got any experience or comments on running Maxxis MA-P3 tyres on an E39
-
Anyone advise me on best source and likely cost of a set of rear door sills for a 2001 530, would probably need some replacement clips as well
-
Could be a vent pipe from the battery
-
Have had an intermittent case of both lights coming on and speedo not working. Next start-up returned to normal (phew!!). What are the options and rough costs involved in fixing this? Car is 530i with 65k on the clock?
-
12.1L/100k on short runs, 8.0L/100k on motorway at 100-110 speed, have had the car for 9 years and consumption has been constant over that time
-
Luckily I had my antibullshit filter energised
-
Have a small oil leak in my 2001 e39 530 together with a burnt oil smell in the cabin when stopping from a run. Been told::-
(a) It is almost certainly the rocker cover gasket and
(
 it is a difficult job to replace.
Any info as to what I am likely to be charged for the job?
Have had the car for past 8 years and mileage is now 60,000
Appreciate any comments
-
Interested to hear who you use for an oil service on your E39Before you spend you time DIY'ing why not just send it to a reputable mechanic? For me to have my car serviced which is oil, oil filter and air filter is about $350 which includes an inspection of sorts and all the stupid stuff like topping up fluids and lubing door catches etc.
No offence but as to why anyone would have an older BMW serviced at the dealer is beyond me. It's not like there is a bunch of proprietary software or tools that are needed. That goes for my E39 too.
-
I believe its mounted behind the rear seat. You need to remove the boot liner to access it. Also the tv module if fitted will be in the same area
-
Recently had the same problem with my E39. Initially AMI was talking "after market" but I hung out for original and got it. Checked the replacement for the BMW logo and correct part No before it went near the car
-
Drive a 2001 E39 530i with automatic air conditioning.
Yesterday went to start the car and nothing, only a faint glimmer on an internal light.
Checked the battery and found 8.2 volts - battery stuffed!
Got it replaced and found the dud battery was stamped for Sept. 2001. Congratulated myself on getting 10 years life out of the original battery. Then happened to pass through the garage in dead of night and heard the aircon blower fan "cycling" 3 seconds on then 5 secs off. Car was in sleep mode and no way could I stop it. Seems to have stopped this morning but who knows when it will start up again.
My question is:-If I set the fan speed (with the +/- button) right down to the minimum point when the display lights on the aircon panel go out will this isolate the fan from starting up by itself while I sort out a solution?
Estimate of costs to supply and fit a replacement FSR?
Advice gratefully accepted
-
Final washup on this saga:
1. Insurance Co agrees to supply BMW OEM windscreen but job has to be done by S & S because of "several hundred dollars difference between their price and JCs". ( JC supplied the screen to S & S)
2. Screen installed by S & S who came to house to do the job, their man certainly knew what he was doing, was pleasant to deal with, and quickly carried out the work.
3. Tested rain sensor and all working OK
When looking at the amount of specialist equipment carried in the S & S service vehicle and the expressed knowledge it is difficult to see how anybody else could do a better job.
Thanks to all for their advice and comments
-
Thanks for all the good advice.
Update on the saga:-
Insurance claim lodged and claim No obtained. Insurance directed me to S & S who initially wanted to supply and fit an "after market screen" which would have rain sensing but not be a genuine BMW item. Told them I was not happy with this and they are now pricing to the insurance Co to do the job with a genuine replacement. Am also getting Jerry Clayton to quote insurer to do the whole job with genuine part (available on 1 day delivery from BMW-NZ)
Insurance Co talking about possibility of "extra cost" to do the job with genuine part.
Can see some full and frank discussions with them in the near future!!
Watch this space.
-
Driving down motorway today and some clown shoots past and sends a stone into windscreen and pits the glass. 10 minutes later the pit has developed into a 300mm long crack. Car is a 2001 E39 with rain sensor and tinted top strip of glass, is original BMW screen.
Have full glass insurance (I think) but have heard horror stories about replacement glasses and some replacement Companies. Am on the North Shore and would welcome some advice, can I insist on BMW replacement glass and who to do it
-
If the Satnav computer is mounted in the top centre of the boot under the centre brake light then its a jap import and will not work in NZ
-
I want to add a reversing camera to my E39. I already have MK4 Nav and 16:9 BM retro fitted.
I see there are a couple of options on TradeMe - both are members here I think. Which is best or is there a better options from the UK or Europe that someone can direct me to?
Cheers
Matt
Grant at Hotwire has an excellent unit which has minimal disturbance to the car, ie no holes to drill
-
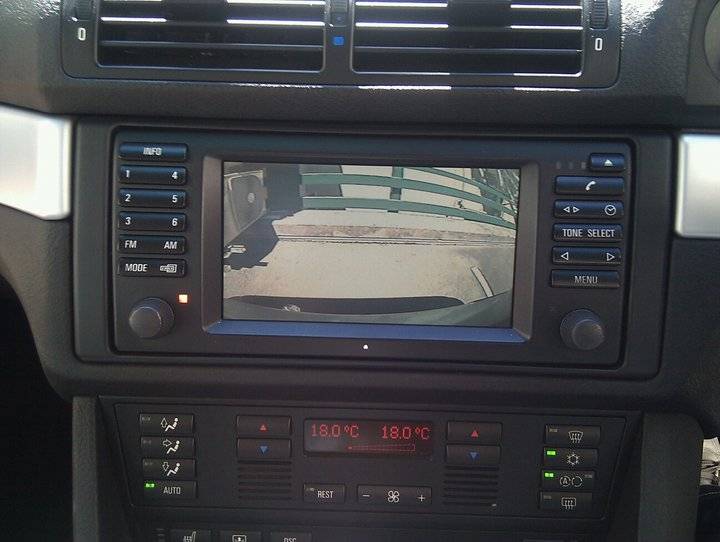
Thanks Grant for the first class installation of the reverse camera on my 530I yesterday. The unit works perfectly and friends are impressed with the quality of the picture.
-
That "little senser looking thing " on the windscreen vent is probably part of your aircon system and its purpose is to adjust cooling when the car is in hot sunshine
-
Is that not to control the ""alarm" that gives a beep one minute before the hour to let you turn your radio on to get the latest news etc
-
My installation job on the camera is doomed!! had just opened up the excellent photos etc and got to the stage of stripping out the boot lid when my computer acquired a nasty virus which effectively locked me out.Hi Kiwiland,
Here you go as promised:
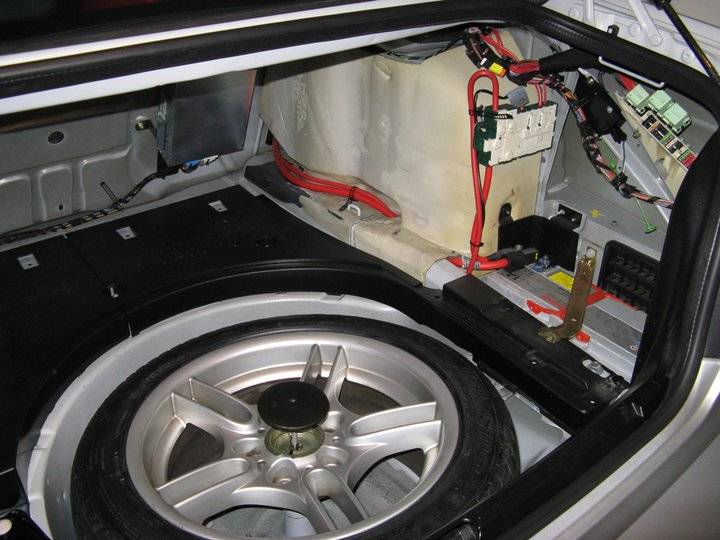
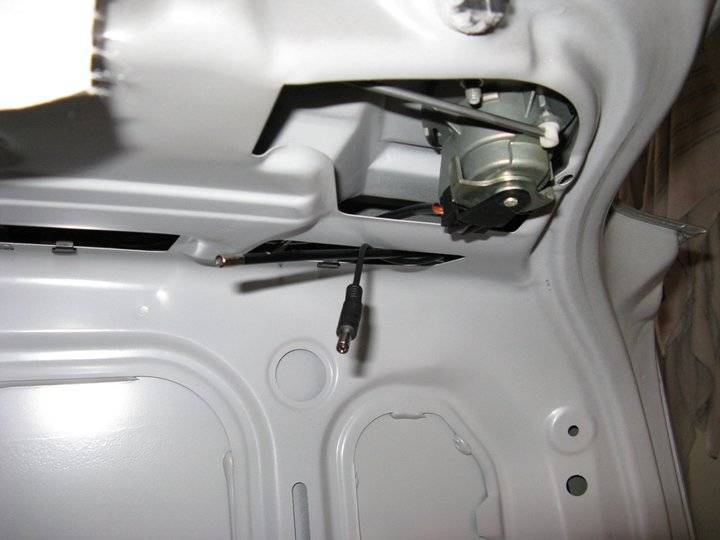
Firstly, remove all the trim as per the reply I just did to hybrid. This link also contains pics of a similar nature to what I did. You'll need to remove the boot lid trim, boot floor, boot back trim (covering audio and video modules), and the trim which covers the battery compartment.
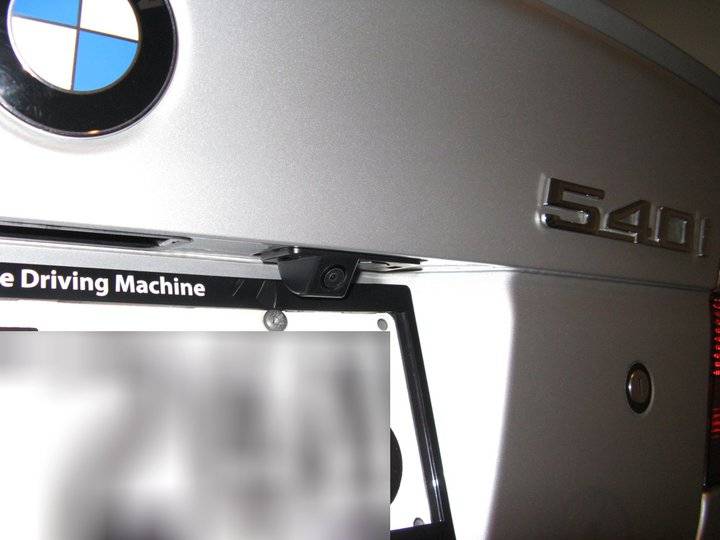
Next, follow Grant's instructions and fit the camera into the driver's side aperture (assuming that is side he instructed you to install it into). If you have a number plate surround, remove the number plate surround (or number plate altogether as I did) first. The gasket needs to be stuck to the camera first and then thread the wires through the same hole that the existing number plate wires are coming through (I pulled the number plate wires/plug out first). Once the camera wires are through, click the camera into the aperture. Again, Grant probably already told you this, but if not, he told me a trick to getting the camera to sit tightly and that was to bend the tabs of the aperture up slightly by using a screwdriver. This works a treat.
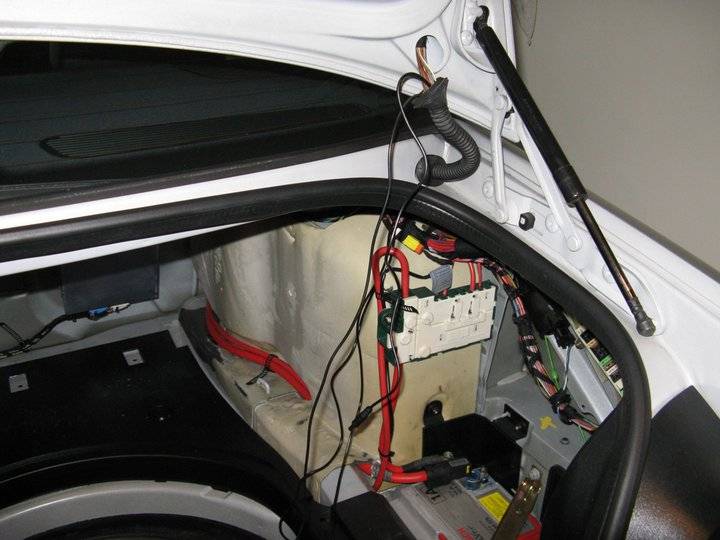
As for feeding the cables through the conduit, I managed to do this with relative ease. I went to the bike shop and got a metre of outer brake cable casing (cost about $5). It is very stiff with still enough flex to bend where necessary. They also put a metal end on it (which keeps the end smooth, I didn't want to accidentally poke through the conduit). I pushed it through using silicone (and a bit of Vaseline on the end of the brake cable) by itself first from the top down. Once it was in, I taped the wires (one at a time) to the top end by taping over the terminals and then again about 1cm up further (to prevent the terminals from being tugged). Then I slowly pulled the brake cable all the way through from the bottom which brought the cable through all the way. Repeat the process for the second cable. It was actually pretty easy! The trick is to not only to remove the conduit from the boot lid and boot but also the big bit right underneath.
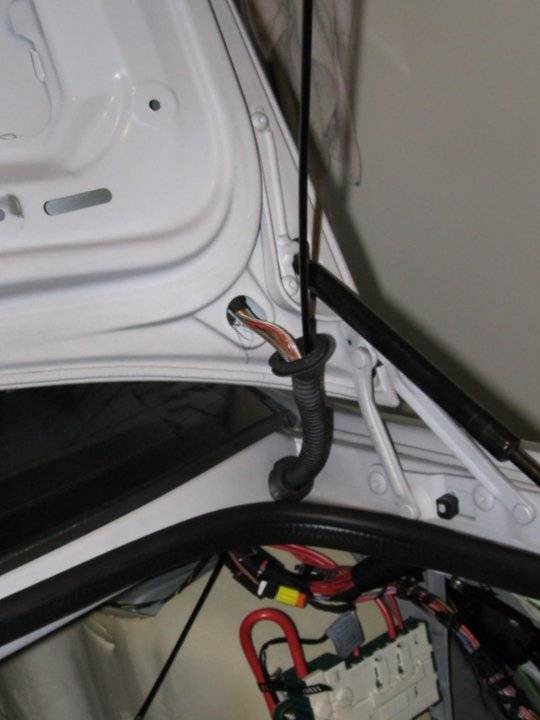
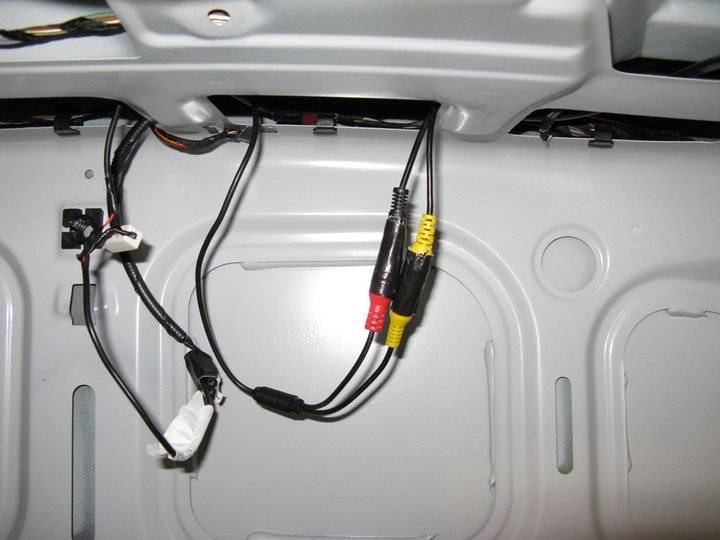
Pic of both wires now through
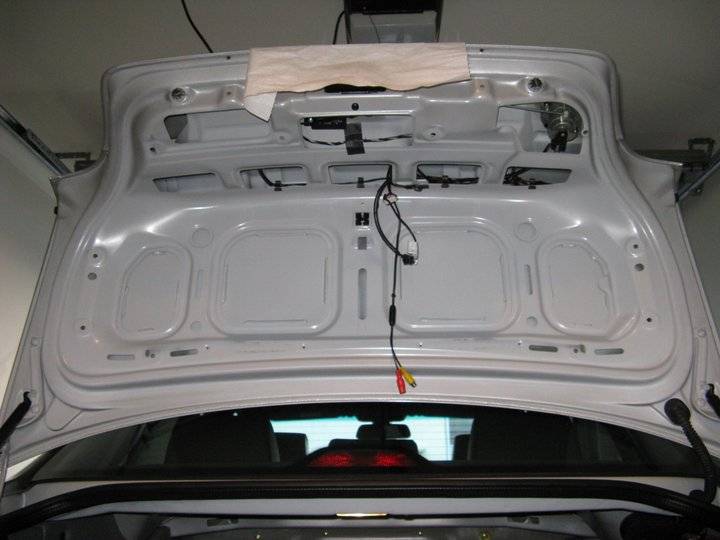
I then used the same brake cable to feed the wires (with the RCA plugs) that needed to go through the boot lid frame up to the male & female RCA camera connections. I taped the RCA plugs (did one at a time) and fed the wire up the inside of the bot lid. Another trick here was to use my pinky finger in the hole (bottom right of the pic below) to guide it up otherwise it kept on going too far over to the right and I couldn't get it at the top.
With both wires through, connected them to the camera and secured them with tape.
Next is to follow the instructions Grant supplied re the blue and white plugs on the Video Module. To remove the plugs from the module, you need to push the black locking tab over to the right but before you do, you need to push upwards on the centre of the plug at the same time (so to unlock the black locking tab). I used my girlfriends travel mirror to help see what I was doing!
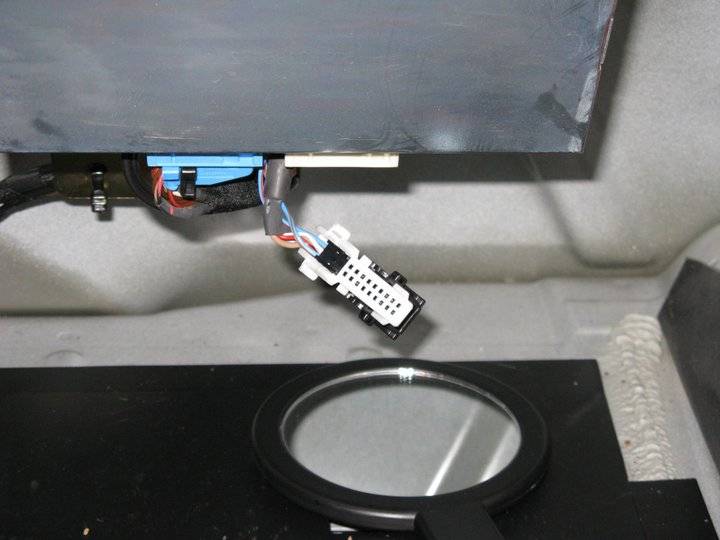
Once the plug is out, you need to slide the black insert out of the surround (basically, the blue and white part of the plug is just a surround used to connect the black insert which has all the pins in it). I used a very small jewellers flathead screwdriver to lift up on the locking part of plug and then on the opposite side (and at the same time), pushed the inside black insert out using another jewellers screwdriver by pushing through the small hole. I found this bit quite tricky. Unfortunately, I don't have any clear pics of what I did here, but I think once you remove the plug from the Video Module, you will understand what I am saying.
Follow grants instructions for inserting the correct wires into the appropriate slots. As he mentioned, you can clearly see the numbering on the black insert once it is out.
FYI I found this step the hardest bit. Getting the thinner video wires into the black insert was quite hard. Because of how thin the wires are, I couldn't get the terminals to click into place in the insert. However, I used a very small jewellers flathead screwdriver to gently push them in from the side. I also used needlenose pliers to ease the blue wire terminal into place (in pin 17 of the blue plug insert) from where the solid part of the wire was just out of the insert. I suggest being very patient with this bit, especially given the awkwardness of where the Video Module and plugs actually are.
Here's a pic once the wires were inserted and plugs back into the module.
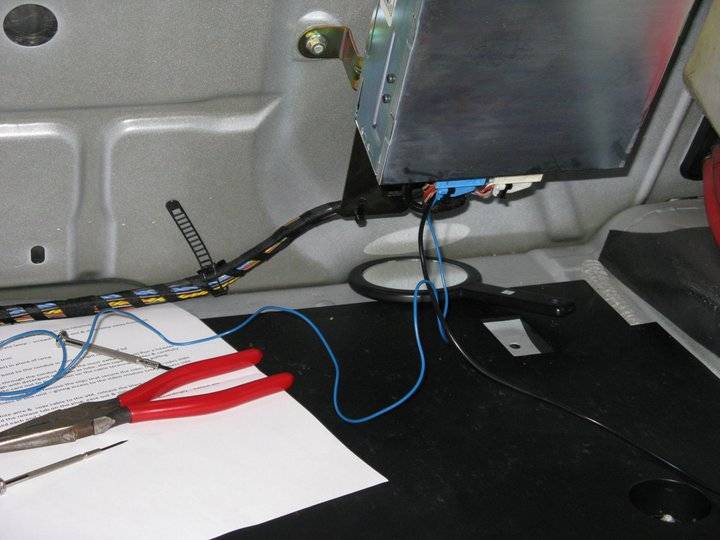
Once I was done, I tidied up the wiring and then took it to an auto electrician (whom I had booked that day). They tapped the camera into the number plate wiring (got them to leave the original number plate plug as well) and also the relay into the loom (I gave them the info from Grant on what wires to tap into of course). They also had a holder which fitted over the relay and secured this as well. They charged $88 for this. I have nothing to compare it to, so can only assume this is an ok amount to pay. Was very happy with their work though. This part is certainly not something I would have done myself even if I DID own a soldering iron. That loom scares the living bejeesus out of me just looking at it haha.
Once I had my car back, I just put all the trim back on and it was complete. Best bit is that from looking that the back of the car, the camera is almost camouflaged by the black number plate surround.
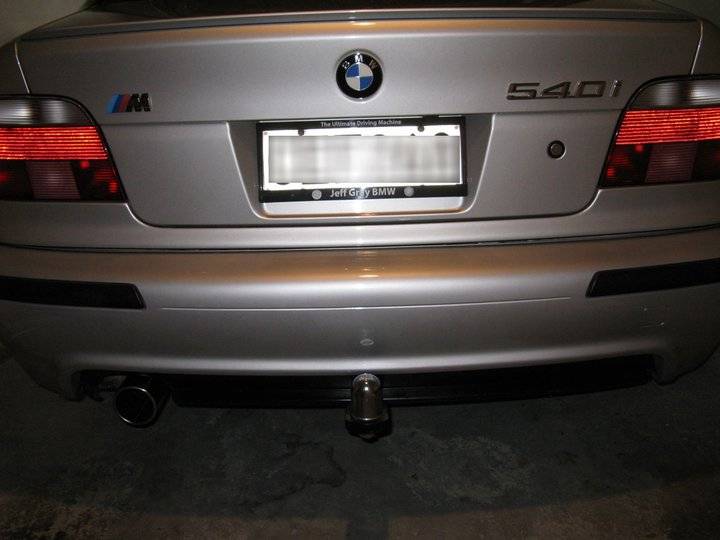
Only when you look from the side can you really notice it.
Total time I spent: 1 hour 50 mins to take all the trim off and install the camera + 10-15 mins to put all the trim back in.
I am exceptionally happy with the result. It is a much better alternative to reversing sensors.
Big ups go to Grant too. I asked a TON of questions as I didn't want to stuff anything up so I'm surprised he didn't get sick of all my emails

Hope this helps make it a little easier. Seriously, as daunting as I thought it seemed before starting, it actually wasn't that bad to do. I only remember swearing a couple of times and got a bit of cramp from being right in the boot haha

Get onto it
Cheers,
J
Taken me till today to get the PC up and running again (thank goodness for the System Restore function) so hopefully will get back to it soon
-
Look forward to seeing your info, have one of Grants units sitting in a box waiting to be installed and your info would help greatly
-
In the news today a prime example of how this country is going to the dogs. Appears 2 prisoners escaped from custody while being "escorted" from the cells to the courtroom by security staff. Now the public is being warned that they are dangerous and should not be approached. Time we adopted the USA method of shackles on wrists and ankles together with chain when "dangerous" types appear in court. Or would this conflict with their precious rights
-
Re the medical kit is it the one that clips into a bracket on the bottom of the front passengers seat?
-
Interesting comment from Clinton re fitting Jap imports with hour meters. I have a 2001 E39 I privately imported from Japan in dec 2005. Nicely specd was complete with most keys etc but not with full documentation. So I am going on for 5 years local experience with minimal troubles (touch wood)
When I landed it I had BM Workshop run a full DIS diagnosis and on recently looking at the printout again I see that for many of the fault records the DIS lists how many (operating?) hours since the fault occurs,at least I think thats what it means. Seems to me that somewhere in the DME there is a record of total operating hours. Having this hours figure and the total mileage some simple maths would give a good picture of the cars history in Japan. Any comments from the knowledgeable ones?
Maxxis
in Wheels & Tyres
Posted · Report reply
Nothing like a set of considered well thought out replies.