

CSET
-
Content Count
928 -
Joined
-
Last visited
-
Days Won
25
Posts posted by CSET
-
-
Badass! Great find!!
-
-
Keen to see how long the tyre lettering lasts. The issue I had with the $11 UNI Paint pens from Supercheap was yellowing after 3 months or so. Whether it was caused by age or cleaning/tyre protection (or a combo of the two) I don't know.
Vinyl lettering could be an option next if your method doesn't last - there's a few applying it now.
-
This is the brush I used. Not a sales pitch, any soft-bristled brush should work just as well. I've actually bought a 'specialist' alcantara brush from Ebay today to try - watch this space..!
https://unitedcarcare.co.nz/shop/brand/valet-pro/boars-hair-dash-brush/
Interior cleaner - once again any mild interior cleaner should do the trick - just don't use much & make sure it's not too strong or you risk damaging the alcantara. If in doubt, dilute.
https://unitedcarcare.co.nz/shop/brand/valet-pro/classic-interior-cleaner-500ml/
Microfibres. I do 2-packs of these for $10 in-store.
https://unitedcarcare.co.nz/shop/brand/united-car-care/high-quality-300gsm-seamless/
EDIT: try not to use those thick white terry cloths. I got impatient and tried one - it seems they're a bit harsh (started taking the dye out of the seat/turning black!!). Gotta be so bloody gentle.
-
 3
3
-
-
Looks good, can you describe your process? I'm about to tackle a similar situation.
Cheers.
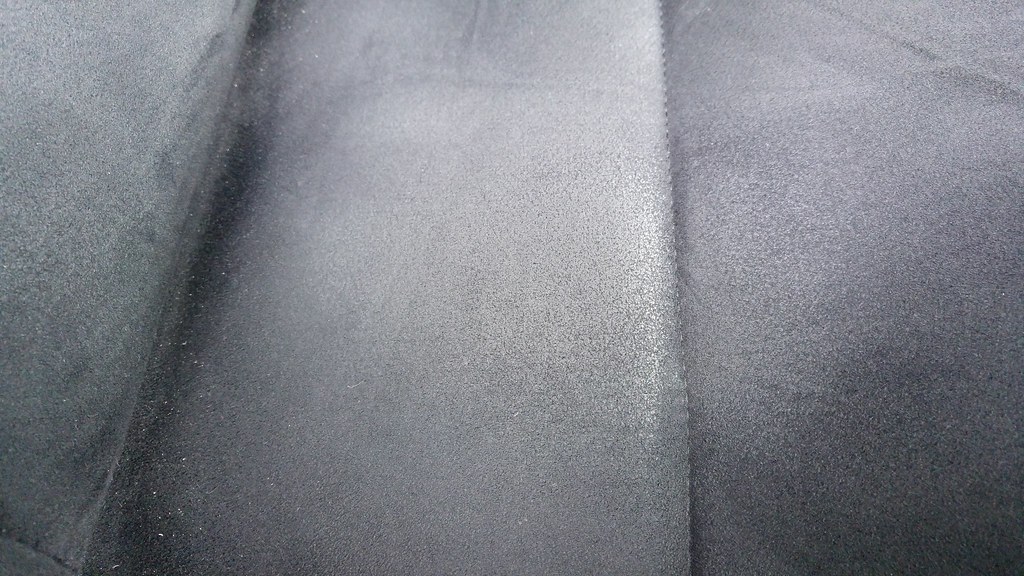
Sure mate, it's not hard but I found it takes a lot of time and patience to get right - it took me just under 5hrs to do this seat, and it was mainly focused on the patches shown. The danger with alcantara is scrubbing too hard and removing the pile (making it worse) - so you need to be extra gentle agitating the seat.
I found it most effective to work in small sections, about 6in x 6in square. I used a soft-bristled boar's hair brush, two clean 300gsm microfibres & a very small amount of all purpose interior cleaner (I stock all of these in my shop if you're after any).
Spray APC onto brush bristles (a couple of sprays, don't want the alcantara to get too damp), work evenly into the alcantara for a minute with the brush, gently wipe off residue, repeat. It took me 15-20 goes on each section to get the result pictured. I'm not sure this is the best way (as It's painstakingly slow) but it was the most effective method for me as I couldn't afford to risk damaging the seat!
-
3
-
-
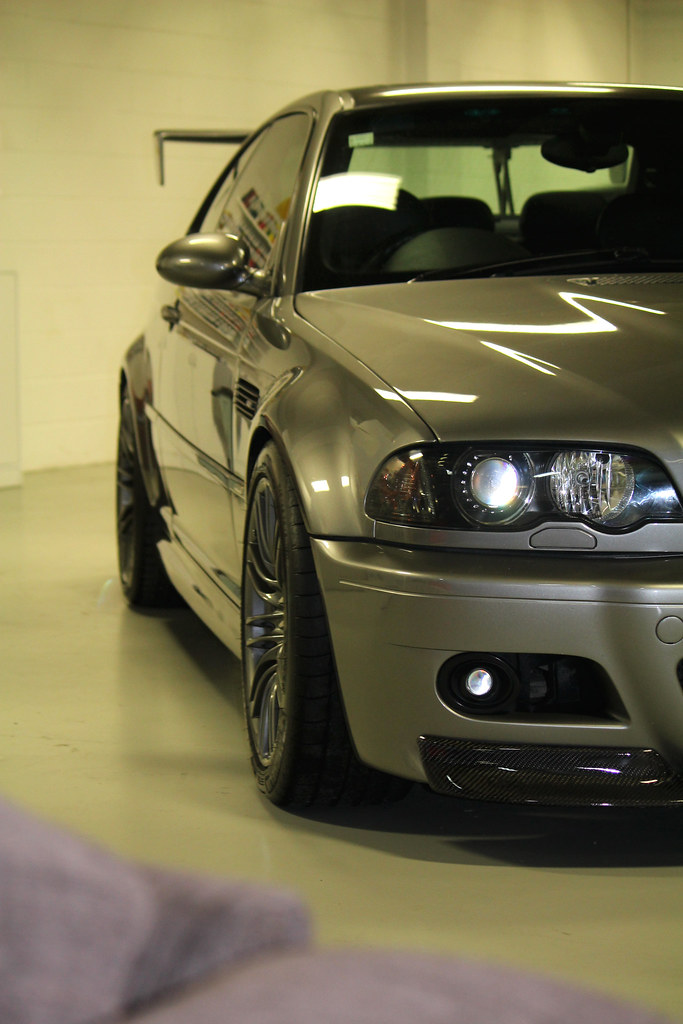
The driver's seat was getting a bit shiny on the wear-areas (side bolster & centre seat). I spent a few hours detailing it the other day
Before (the alcantara is matted in places & shiny in others, looking worn):
 20160516_115454_HDR by Christian Taylor, on Flickr
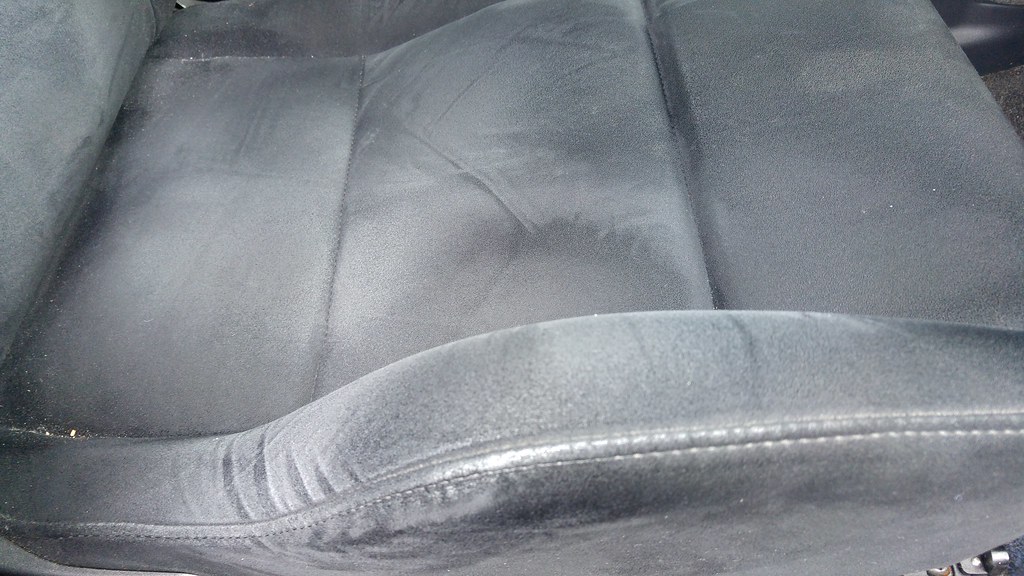 20160516_115442_HDR by Christian Taylor, on Flickr
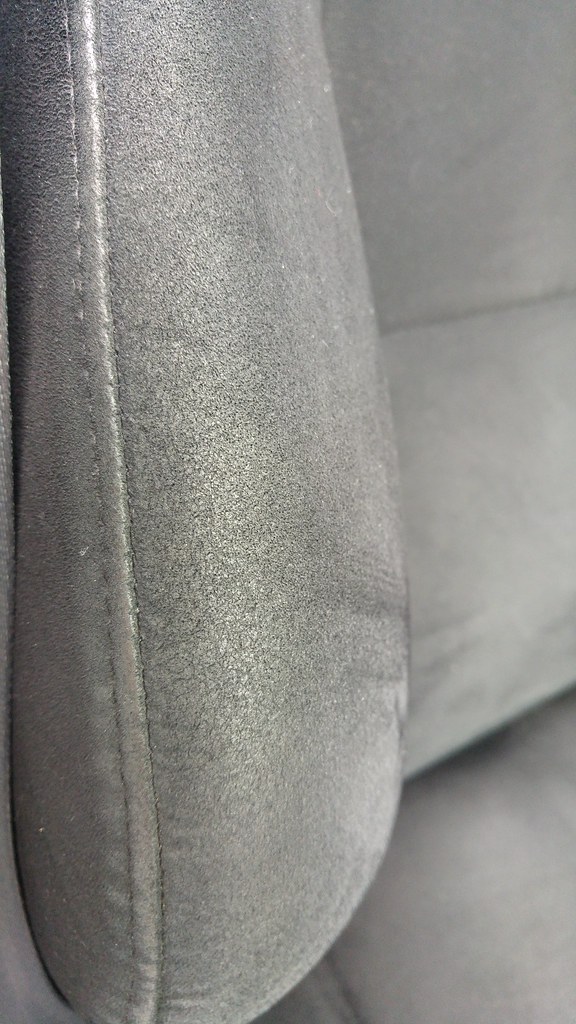 20160516_115448_HDR by Christian Taylor, on Flickr
After (different camera, but no more shinyness or matting):
 IMG_5032 by Christian Taylor, on Flickr
 IMG_5049 by Christian Taylor, on Flickr
 IMG_5054 by Christian Taylor, on Flickr
 IMG_5040 by Christian Taylor, on Flickr
And matching alcantara shoes, courtesy of my wife. These'll be staying in this car once I put the seats in..!
 AlcantaraOverload by Christian Taylor, on Flickr
-
2
-
-
it just so happens i do have a spare set of seat and believe the sensors are all in tact hmmm, i'd love a set of these one day...must add to list.
Hey mate after some digging around it seems these seats were an option for the Evo 8 MR. Here's some that were up for sale a little while ago: http://www.trademe.co.nz/motors/car-parts-accessories/mitsubishi/interior/auction-1078406135.htm
You'll probably have more luck buying them in oz, I found a few listings over there, including this one where he said they're from an S2000. Worth looking into, but I can't find any pics of s2k's with these seats: http://www.gumtree.com.au/s-ad/liverpool/other-parts-accessories/genuine-recaro-evo-8-mr/1113343030
-
1
-
-
Not sure on exact model mate. I've had these seats in another car for a year or so, and love the balance of comfort vs support. Way more comfy than my old fixed back racing seats, and much more supportive than OEM M3 ones. Plus they look <3 in full alcantara.
They don't bolt in directly, you need aftermarket floor mounts, as well as spare seat & airbag occupancy sensors from BMW (unless you're happy to hack up your OEM seats). The added bonus of aftermarket mounts is you can interchange a variety of bucket vs reclining seats with ease.
-
1
-
-
Mmm carbon roof, recaros.
When will the fun end!!
Maybe put a different engine under the hood? jk
The fun never ends! S54 is more than enough power for me - the car has a lot more potential than the driver in this case. Which I like - I'm still learning how to drive it properly.
-
1
-
-
That wing though...
If you don't like the wing you definitely won't like what's coming next haha
 Recaros1 by Christian Taylor, on Flickr
-
4
-
-
I was lucky to have the chance to compare the fake carbon roof against some real ones over the past few days. Not bad!
 Fest4 by Christian Taylor, on Flickr
-
3
-
-
That wrap material looks quite good, most don't. What's "5d carbon"? Just a brand thing or does it mean something?
I did a bit of research and it seems that carbon wrap comes in different 'grades'. Not sure if this is an official thing across brands or just a guideline tho.

Also a shot from the front
 Roof2 by Christian Taylor, on Flickr
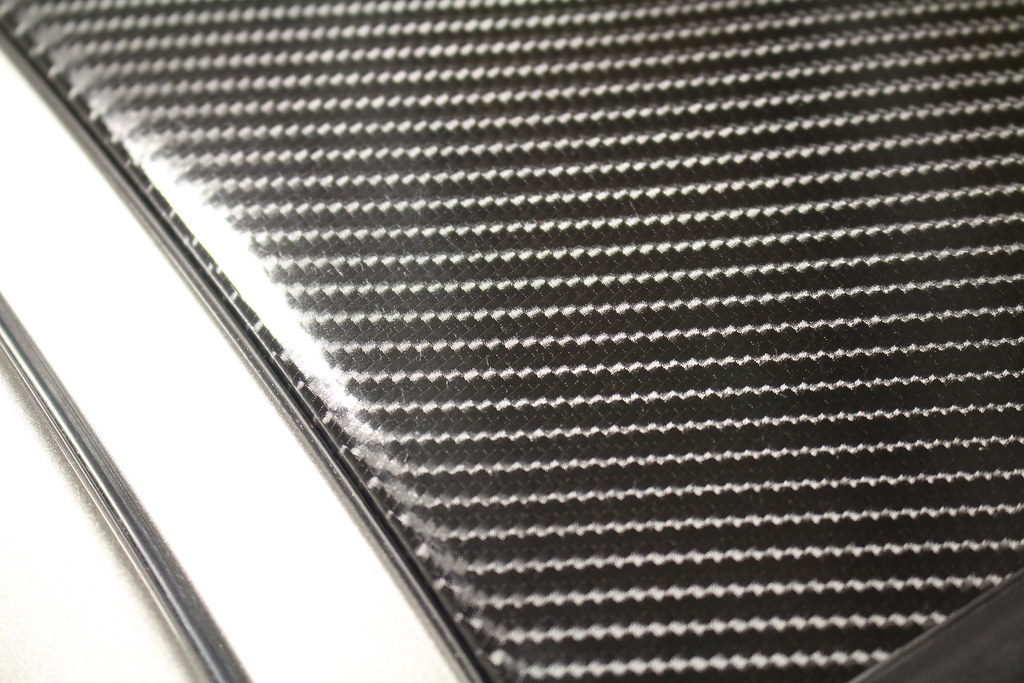
Edit - I had a layer of 3M protection film applied to the front splitter after the last Rally to help protect it against gravel rash. It was pretty bad haha
 13086877_1054817571231770_5435005651463935159_o by Christian Taylor, on Flickr
-
5
-
-
I went for a proper drive on the new wheels last weekend, and having a little more sidewall on smaller wheels seemed to give the car a more stable feeling on the road. It didn't seem so bouncy or jittery over bumps, and was still quite planted at 99kph - not sure how much of this was a placebo with shiny new wheels tho tbh.
I'm still chipping away at the odd thing here & there on this car. The boys at AutoStance kindly applied a 5d carbon film to the roof panel. Whilst I'm a huge fan of real carbon fiber and all the other carbon parts on this car are genuine, I can't afford a new roof panel. Besides, I'm not a good enough driver to justify the weight saving of a real carbon roof, so this is purely for aesthetics.
This wrap is awesome, and adds nicely to the look imo. If you're after carbon wrap definitely check them out - Matt or Heino at autostance.co.nz or just pm me and I'll send details.
 Roof3 by Christian Taylor, on Flickr
 Roof1 by Christian Taylor, on Flickr
Close up
 Fake by Christian Taylor, on Flickr
-
1
-
-
Nice looks great, awesome photos too!
-
Oh was this your new car you brought to OCD last week? I thought it must have been a loan car for some reason!
Keen to see results from a tune, 210kw and 600nm is impressive from factory. So is the plan to have this as a daily driver?
-
Expensive tyres? Look forward to seeing what you chose!
-
I like the look of the new wheels gives a very cool circuit look, feel the rear tyres could be a little bigger in profile and a 10mm spacer to properly fill out the rear gaurd.
I agree mate, fronts are ok but 5mm more profile in the rear plus maybe 10mm spacer would sit nicely. I want to make sure they won't rub as-it, I've had some pretty bad rubbing issues with other wheels on this car in the past (but to be fair they were 10.5in wide!)
I was seriously considering these wheels on a recent TM auction. I'm a fan.
Is this a modified ride height?
Me too was so lucky they turned up at the right time! Yep running H&R race springs - from memory about 35-40mm drop, so not massively different to stock.
Edit: another pic that shows the colour better, they're quite dark
 IMG_0856 by Christian Taylor, on Flickr
Compared to the CSL's on the front (slightly different angle, but you get the idea):
 IMG_2983 by Christian Taylor, on Flickr
 -
Hmmm, I don't think they work on an E46.
Other ones are much more fitting for the cars shape / vintage.
I disagree - I think they really suit the car's shape (that said, I'm also a big fan of mixing vintage of wheels and chassis). The world would be a boring place if we were all the same!
-
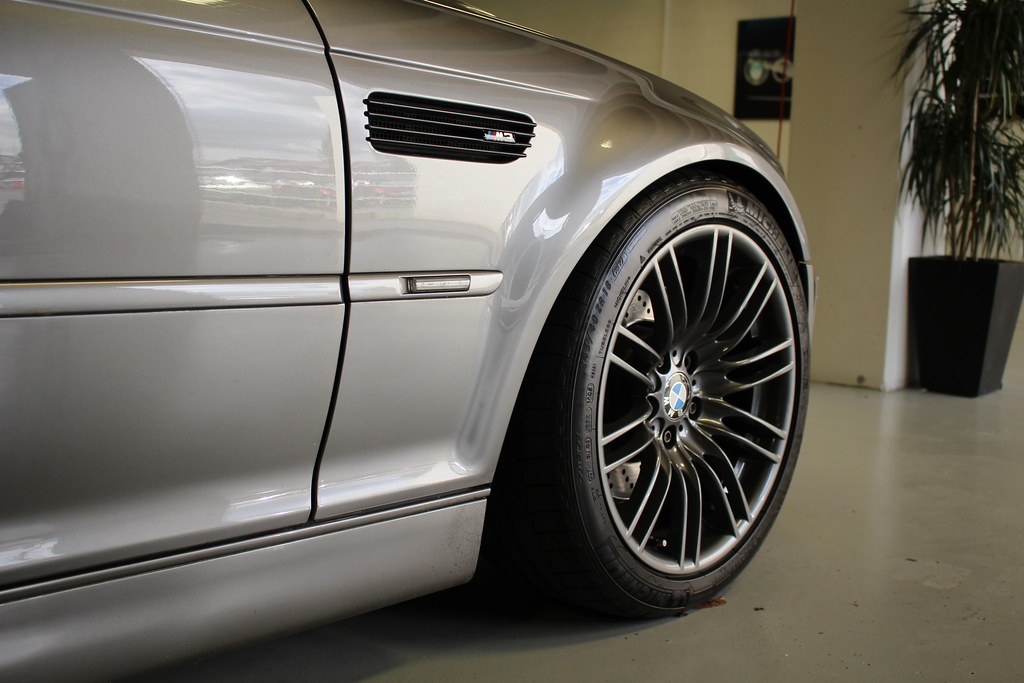
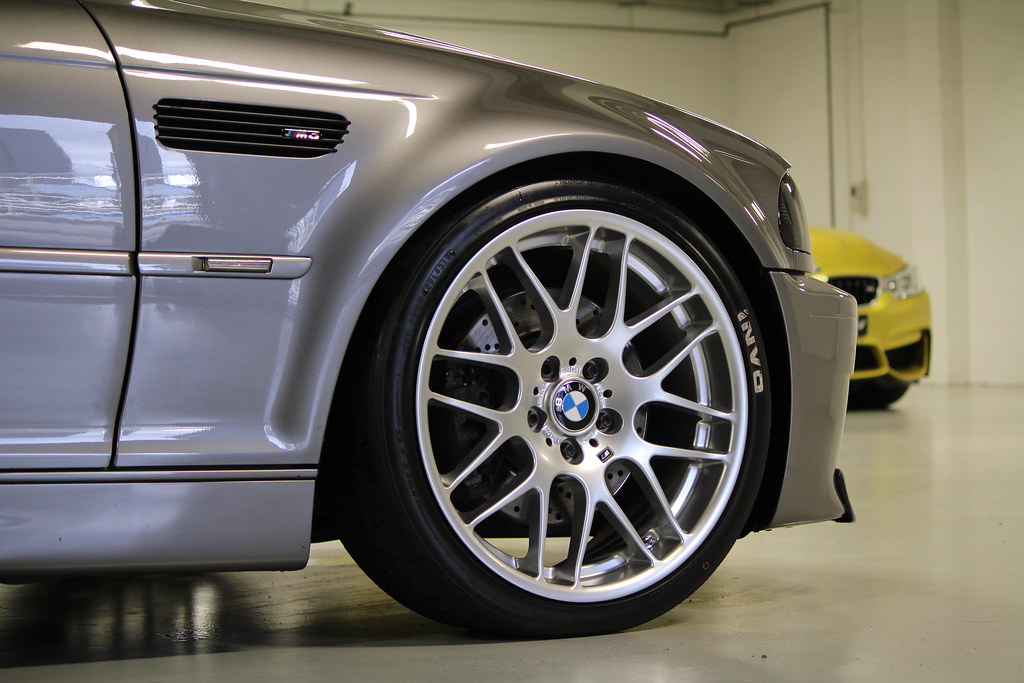
Picked up some more wheels today - Style 219M's. I finally get the chance to detail & coat the CSL Style 163's with C.Quartz!
 NewWheels5 by Christian Taylor, on Flickr
 NewWheels1 by Christian Taylor, on Flickr
 NewWheels2 by Christian Taylor, on Flickr
 NewWheels3 by Christian Taylor, on Flickr
 NewWheels4 by Christian Taylor, on Flickr
-
3
-
-
Congrats man!!! Keen to see pics!
-
Looks awesome height is perfect !! Nice car man
-
Wing painted & mounted in time for the rally next weekend. Still need to put new M3 badges on, polish & CQuartz. Went with half-painted leaving the bare carbon underneath.
 1 by Christian Taylor, on Flickr
 5 by Christian Taylor, on Flickr
-
3
-
-
CSET should buy it to put his wheels on it and make it all complete!!
No thanks, I don't like autos
...
Wait for it...
-
6
-
-
Thanks for your kind words Simon, it was our pleasure to work on your vehicle.
M TOY M3
in Showroom
Posted · Report reply
Recaro seats are in! Huge thanks to atlantiskiwi for his help. The seat rails took a fair amount of 'massaging' with a dremel to fit. NZKW straight bolt on ...
Need to bolt up properly but we're 90% of the way there.