
Karter16
-
Content Count
392 -
Joined
-
Last visited
-
Days Won
38
Everything posted by Karter16
-
Well pretty pleased with this for a first prototype. The insert fits perfectly and the two pieces fit together perfectly. I'm stoked that I got the internal geometries right for the insert as they were the hardest bit. I will do some measurements of the prints to make sure they are perfectly dimensionally accurate, and provided they are I need to adjust the seat between the top of the body and the cap by about 0.5mm in diameter and height. The printed cap fits on the OE body, but the OE cap is ever so slightly too large to fit the printed body. I want to make sure I'm as close to the original as possible with this so will make that adjustment. Key thing though is I can now go ahead and design the pockets for the grip pads and include the first iteration of that in the next prototype as well.
-
I got the chance today (making the most of winter before the weather improves and I get started on house projects again) to get started on a project I've been wanting to do for a long time. The goal here is a 1:1 replica of the SMG shifter knob. Why? It occurred to me some time ago that modern manufacturing techniques present an opportunity to create a twist on the stock SMG shifter to make something a little bit unique. The plan is to have the knob 3D printed in titanium and then finish it to a polished surface which will hopefully be a cool twist on the chrome of the original item. The 4 leather pads I'm planning to do as leather-covered TPU with an ABS or similar backing (drawing heavy inspiration here from how heinzboehmer recovered the pads on his SMG). Why titanium? It is of course a PITA to finish, and it might not end up working out, but I've decided to give it a try for two reasons. Mostly because it's a cool thing to try, secondly - thermal conductivity. One of the nice things about the OE shifter being plastic is that the shifter doesn't feel ridiculously cold to touch on a winter morning. This is because plastic has poor thermal conductivity. Titanium of course has much higher thermal conductivity than plastic, but also it's an awful lot less than stainless steel or aluminium, so will help to reduce this effect. The model above as you see doesn't have the pockets cut for the leather pads, reason being I want to do a test print to make sure that I've got the internal geometries right first in case I need to change anything that affects the pockets for the pads. I'm intending to reuse the OE clear acrylic centre insert which mates the shifter with the shaft, so I need to make sure it's a spot-on fit. Anyway - first draft is being printed and will do some test fitting when I get the parts. In the meantime here are a few screen caps of the two parts:
-
When deciding on the Gauge.S one of the ancillary decisions I needed to make was how/where to mount it. When he installed his Bryson designed an enclosure to go in the ash tray which is very nice, and I decided I would go with the same approach as it allows for the Gauge.S to be hidden away when not using the screen. It's also an easy swap back to the ash tray at any point. The centre console is specific to LHD/RHD, in that the cigarette lighter is on the driver's side. This meant that the enclosure Bryson designed needed to be mirrored for my RHD to keep the screen centered. Bryson kindly shared the CAD file with me and I was able to quickly make up a mirrored version for RHD. I also removed the features that I don't need (internal mount for the GPS unit and mount/faceplate holes for USB-C charging). The end result looked like this: As you can see it was printed on a textured bed which gives it a lovely effect. Now this all seemed too easy to me, so I decided to make it more difficult by doing a painted finish to more closely match the rest of the centre console components. As always with painting it's all in the preparation: This was then followed by several coats of matte black, before being sanded back to a completely smooth finish and then top coated with several more coats of matte black. I'm super happy with how it's turned out: In person it looks perfect to me, I can't find a single imperfection in the paint that I'd fix if I could. I'll wait for this to properly harden and then do some photos showing it in place. Just got to wait for the rest of the bits to arrive now!
-
Time for a few little updates: First the wheels/tires - having had some more time driving on them, and in particular on some dry roads I can't believe how much quieter the Potenza Sports are than the RE050As. I know that one of the complaints about the Sport is that it's noiser than the PS4S, but honestly it's still a huge improvement over what I had before, so still feels like a win to me. I'm super super, happy with the 18x9/18x9.5 combo, and the lightweight 18in rims have given me everything I was hoping for in terms of ride + driving feel. I try very hard to make sure that each change I make to the car aligns to my goal of "improving the driving experience", and this change has absolutely nailed that brief. As an aside, at the time that I installed the RACP brace I also replaced the rear cover on the diff with a new one with new bushes. I'm super happy to report that the combination of these two things has completely addressed what remained of the diff slop/M-Clunk/whatever you want to call it. I'm stoked about this as wasn't sure whether the diff was getting a bit worn out, but I'm super happy with how this has resolved, particularly as my brain has reprogrammed my driving style to not work to minimize situations where it happens (same thing happened when I got the tune dialed in for rev matching, it takes a while for your brain to realize the car is going to behave predictably and that you don't have to avoid certain scenarios any more. I've also ordered a Gauge.S for CAN/D-bus logging. Thanks to Bry5on and heinzboehmer I've adapted Bryson's ash tray insert for the Gauge.S to suit an RHD car. I've also ordered the connectors for the Gauge.S board headers, etc. Still to do is to confirm the exact connector used on the steering angle sensor and order a pair to make an extension for the Gauge.S. The plan with the Gauge.S is to put everything I can into a couple of custom CAN messages from the DME so that the Gauge.S can log these at high data rate. I've written a custom program ROM which allows me to specify the memory addresses of the variables I want to push on the CAN bus in the partial/tune binary. The advantage of this approach is it means that reconfiguring the messages is a simple tune flash rather than a change to the program binary. I can't actually test this until I get the Gauge.S setup, but it's otherwise sitting there good to go. Also while disassembling the CAN functions I uncovered that ARBIDs 0x700 and 0x701 (which are disabled in the 0401 tune) can be enabled to send knock manager data. This is going to be super useful for tuning and big thanks to Bryson for confirming the behavior with logging. I've got a bunch of half-finished projects on the go at the moment that I need to finish before I start anything new (which I'm itching to do): - Finish the boot/trunk interior work with the RACP brace in place. (I managed to get myself stuck for a while on the best option for the false floor, but think I've got a reasonable option) - Finish the SMG expansion reservoir bracket (No blocker here, I just have one that works well enough and need the motivation to sit down and do the final design) - Print and install Bryson's Euro M3 bumper to CSL snorkel duct (this one is currently blocked as Dad is having some 3D printer issues with ABS that he is working through) - Finish documenting all of the CAN messages on the main CAN bus for the 0401 binary (I mostly have what I need, but want to produce comprehensive documentation on this for the benefit of the community) Think that's all for now...
-
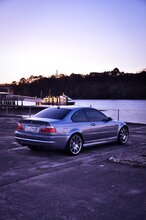
Yesterday I got the tires fitted to the ARC-8's and today I put them on the car and went for a test drive. It will surprise no one that this setup is a huge improvement over 19s with old RE050A's. The first few minutes of driving were weird, it felt like I'd lost a bunch of road sensation and it took a few minutes to realize it was just harshness and unhelpful noise that was missing. All the useful feel of the car and the road through the seat and wheel was still there, it was just a quieter smoother ride with much less of the unnecessary hum, buzz, fizz, whatever you want to call it. As soon as I realised I could still read the road as before I settled in and started comparing the difference. I can't talk to how the Potenza Sports compare to the PS4Ss, but compared to old RE050A's they are very significantly quieter, I first noticed this by noticing that the CSL intake sounded louder! 18inch wheels are clearly what this car was designed for and are better than 19s in every way when it comes to ride quality and feel. I'm very happy I opted for the firmer sidewall of the Potenza's over the, softer than PS4S, PS5's. The accuracy and immediacy of handling is still there, significantly improved upon with new sticky tires. I need to give a big shout out to Bry5on for his advice to put 9in wheels up front with the ET42 offset. I'd always been worried about putting anything too wide up front, afraid of ending up with heavy, dull steering, but with pretty much the correct offset and lighter wheels and tires all the precision and immediacy is still there, and when you get on to windy open road the feel of the car with a larger tread patch up front and closer to square setup overall is just superb. On the topic of weight. The combination of lighter wheels and lighter tires means I'm almost 4kg lighter per corner, which (including weight of the rotors) is close to a 14% reduction in rotating mass, and I can really notice the difference. I'm always skeptical of my butt-dyno because I'm always concerned it is excessively influenced by the "wallet factor". But in this case there is no doubt. Acceleration and braking both noticeably benefit, not to mention how much better the car ride and holds to the road with less unsprung mass. In summary, as you would expect, this is a fantastic upgrade in every way. I do want to thank everyone who took their time to give me advice and suggestions on this project. It wasn't one I was planning to do right now, and as a result I had not performed my usual excessive amount of research and preparation well in advance. I'm very grateful to everyone who shared their knowledge and experience to help me arrive at the ideal outcome. Thank you! Like heinzboehmer I've very much missed driving the car while it's been laid up, so like him when I got it back on the road a short test drive turned into a longer one. Only I ended up at a slightly less globally-famous landmark. The Mt Rex sand processing facility in Helensville 😂 Also, it's winter here, it was raining, and the sun was in the wrong place.
-
PS5’s came to $1775.94. The fronts (245/40R18) were cheaper than the Potenza Sports, but the rears (255/40R18) were significantly more for whatever reason.
-
I ordered tires this evening. After much research I decided to go with the Bridgestone Potenza Sport. I had been planning to take the well-trod route of Michelin PS4S's, however they're not available in New Zealand (and importing tires was just going to be too expensive to make sense) in any of the sizes remotely close to what I need (I confirmed this with Michelin NZ directly), this was a surprise especially given I'd checked on their NZ website that those sizes were available here 👎 This meant I then needed to figure out alternative options. In Michelins that meant PSS's or PS5's (no Cup options available in NZ in the sizes I need). The PSS's are too old, and the PS5's while by all accounts very good had me a bit concerned about the softer tire wall than the PS4S. The RE050A's that I'm running currently, are fairly stiff in the sidewall department and while objectively terrible compared to modern options I am used to the stiffer sidewall. By moving to 18's I'm already introducing more compliance for a better ride and road stickability (that's the technical term 🙃), and I was a little concerned about also moving to an even softer sidewall as well. I then looked wider, and after a bunch of research, looking at what is available in NZ, settled on the Potenza Sport. The Potenza Race would be an even better option I think, but they're not available in 18in options. The RE71-RS's while the stickiness would have been giggle-worthy, don't give the same degree of feedback and would be impractical in wet conditions, so the Sport it is. TireReviews.com have a good review of it and on dry handling it's very close to the PS4S, slightly better in the wet, and ranks worse on comfort (due to the firmer sidewall), slightly worse on noise and worse on wear. The wear doesn't bother me as I won't do enough km's anyway, the firmer sidewall I'm okay with and the noise will still be a lot better than the RE050A's anyway. This is all splitting hairs of course, but might as well get the best option I can. Big shout out to @Palazzo for suggesting Costco. Bridgestone NZ direct have the best price out of the rest due to a special deal currently which comes to only $2376.32 NZD for all 4 tires fitted. Costco, for exactly the same thing, is $1379.94, plus in addition you get a $360 store credit as well. Given we regularly shop at Costco for essentials this means the end cost for the tires comes to $1020. Which is quite astonishing to me. That's significantly less than I paid for new performance tires for my 318i in 2007!
-
Couple of updates: 1: The wheels arrived today 🎉 Mandatory photo, although we all already know what ARC8's look like 🙃 2: The male MAF sensor connectors arrived. I don't actually have need of these for myself, but I finally came across them and thought I'd order some to confirm they're a match and if so share the details with everyone as saves having to pay Turner money for their relocation harnesses. These things appear to be the exact same item Turner are using and they come with the pins and seals. I ordered 5 of these for the princely sum of $9.58USD total including shipping. per-unit price is $1.24USD. You can purchase your own (you can order singles) here: https://www.hdconnectorstore.com/productdetail/32496.html
-
TunerPro have a bunch of xdf's (definition files for tunes) for the Motronics as well as binary reads of the tunes - might be worth poking in to: https://www.tunerpro.net/downloadBinDefs.htm#BMW
-
Yeah absolutely. I was going to reply to your thread when I got a chance. The key thing is to figure out what processor your ECU runs - I think you're Motronic 1.0 right which is some derivative of the Intel 8051 I believe. Ghidra has def files for the 8051 I believe so you might be in luck. The second thing which is really needed is some sort of definition file which describes the locations in memory of parameters, etc. so you've got something to start with. From there it's a case of loading in Ghidra, trying to find code blocks, data blocks, etc. In terms of other tools it's pretty much just been Excel, TextEdit, and the like. Do you have a read of the program ROM from your ECU?
-
Well it's been an exciting weekend. On Thursday I got stuck into the additional CAN message project. As a recap the idea here is to add an additional function into the 0401 program binary to send an additional CAN message. I've given the new message the ARBID of 0x7D0 which makes it lower priority than all other CAN messages. The format of the message is: There's basically 4 parts to achieving this: 1: Create a new function that replicates the existing function to send CAN messages from the DME. It needs to be recreated as we need space for the extra instructions to call an additional CAN message. 2: Modify the 10ms task to point to our new function instead of the original. 3: Load our new CAN message definition into the CAN config table in the program ROM. 4: Create a new function to assemble the new CAN message and push the frame to the CAN buffer. The fun part is that this needs to be done by modifying the machine code in the binary, no easy way to write assembly or C here! I got the above done on Thursday, spent code-checking it and then flashed it to my car on Saturday morning. As soon as I turned the ignition on I could tell something was wrong as the DSC light was flashing. All modules relying on outbound CAN were throwing errors. A review of what I'd done revealed a dumb mistake. I was trying to use slot 17 of a 15 slot buffer 🤦♂️. Anyway it was an easy fix and v1.1 ran without issue, and I connected to the MK60 with INPA and could view live CAN data, so I knew the standard CAN messages were working fine. I'm not actually set up for CAN logging so at this point I shipped the binary off to Bryson for further testing. I was very excited to get this back from him showing the new message being logged: Bryson then setup his logger with the appropriate conversion factors and has been able to log AQ_REL, Lambda Integrator, etc. at 100Hz instead of the 5Hz or so that you get over DS2. He's posted a link to the log which you can find in his post here I'm super stoked that this has worked out. In addition to being very useful for tuning, it also proves that these sorts of modifications are possible and that the disassembly work is good enough to understand what's going on to the degree that it's possible to make working changes and additions to the program. Also - the new wheels are in the country and should hopefully arrive end of next week. Tomorrow's job is sorting out tires.
-
Well I placed the order with Apex last night. I've taken some good advice and gone with 18x9 up front (245/40) and 18x9.5 (255/40) at the back, which gets closer to square, while also getting me a good offset (ET42) at the front. Why not go fully square? Firstly, I don't drive the car enough km's for it to really matter from a tyre wear perspective - these new tyres will likely go the way of the old ones before I wear them out. Secondly it means I don't have to worry about spacers on the rear wheels like I would really need to if I went square to suit the fronts. In NZ wheel spacers automatically mean you need a low volume vehicle cert which, as previously covered, I am intending to avoid. I used willtheyfit.com to compare this setup with the various stock M3/CSL setups, and got a little concerned about how close the edge of the tyre tread will end up to the front spring perch on the Koni's. As has been identified by others the shape of the perch on the front right strut lends itself to running slightly closer to the tyre, and it's very close indeed. Although the new setup is a few mm shorter it's also closer to the strut and I was concerned it might be too close. When I compared the measurements against my car I couldn't see how it was going to work. Then when running the comparison for the 3rd time I realised I had made the amateur mistake of relying on a (top-google-ranked) post on another forum where that person had misquoted the offset on the 19in Style 67's. With the correct offset keyed in I was then satisfied that the new wheels should be an appropriate fit. The wheels are coming UPS expedited, so will likely be the usual case of arriving in New Zealand in a week or so and then spending the next week sitting in the distribution centre in Takanini. I'll get some quotes for tires this week so that they're ready to go when the wheels get here. Thanks everyone for your thoughts and advice on this, suddenly urgent, project!
-
Thanks for this - great review!
-
Thanks heaps for this - obviously my searching last night sucked! Given I've put less than 25,000km on the car in the last 10 years I'd say the 40,000km life won't be a problem lol. Great idea! hadn't thought of that - thank you!
-
What I really want is the PSS5 but they're not released in anything under 20 inches yet 😛 General consensus from what I've read is that the PS4S is the one to have, so plan to stick with that.
-
Well I found a circumferential crack in the inside wall of the front right today... The tires are old and I've been keeping an eye on them for this exact reason. I was hoping to get another 6-12 months out of them, but that's not going to happen and I need to get this sorted. My plan was (and probably still is) to shelve the 19in Style 67's and get some 18in ARC-8's (original I know, but quite simply can't come up with a better weight/quality/value/looks combination) and buy the new rubber for those rather than the 19s. I'm focused on driving experience and the 18s will be much better suited to Auckland roads than the 19s plus the weight savings will be very welcome. I'm thinking to go with 8.5" fronts and 9.5" rears with ETs to match to keep close to CSL spec. Apex suggest 235/40 for the fronts and 265/35 for the rears, but Michelin PS4S's don't come in a 235/40R18, so I'm wondering whether 225/45 and 255/40 would be a suitable option as that's very close to OE specs as it pertains to circumference.
-
Time for a quick update on a few things. I've been doing a bunch of playing around with the VE tuning process for a couple of reasons: Firstly when I was working through documenting how the CSL MAP Sensor is used in the DME it occurred to me that it was probably a good idea to take the MAP Sensor out of the loop of the RF calculation while performing the VE tuning process, as otherwise it would be compensating for underlying inaccuracies in the VE table and otherwise masking and making things more difficult. Secondly when going through the disassembly in detail I uncovered that the AQ_REL value that is logged from DS2 (in TestO) is not in fact the value that is used for the CSL AlphaN table. Rather a modified form of AQ_REL is used which inflates the AQ_REL value by a varying amount below 2400 RPM. Addressing the first piece is a case of changing a parameter in the partial binary to disable the MAP sensor, and I solved the second piece with a spreadsheet to convert TestO logs before putting them through the rest of the VE tuning process. This has been a great success. In the space of 3 tuning runs I've gone from something that (even after earlier VE tuning without addressing these two things) felt like an AlphaN tune (which it absolutely is with the MAP sensor turned off), to something so good, it feels like the MAP sensor is enabled, even though it isn't. (of course this won't extend to changing atmospheric conditions, etc. but gives you an idea of the improvement). Particularly low RPM rev matching is superb now with the AQ_REL values that are logged being accurately used to adjust the VE table. After just 3 runs everything is consolidating beautifully around a lambda of 1.0. (the couple of cells that show greater change are cells that I didn't manage to hit in previous runs). I've also been doing some investigation into adding an additional CANBUS message for the DME to send to allow for high data rate acquisition of key variables that currently aren't on CAN. This is a project that requires modifying the program ROM and as such will be a decent chunk of work to get done, but there are a few people keen for this and it seems like a fun winter challenge to figure out. I do want to spend some time working through the safety concept mechanisms to ensure that the safeguards in place in the DME would appropriately handle any edge case bugs or timing/performance issues that might be inadvertently introduced by such a change, but both the Master and Slave CPUs independently handle all key safety functionality, so given the changes will be only to the Master program ROM the risk should be manageable. I'm also satisfied now that the CF-Nylon version of the MAP sensor adapter is up to the job. I'll try mailing (rather than couriering) one to bmwfnatic as a test to see if the postal service accept it (it's right on the 10mm thickness limit). If that all goes okay then it will be practical to make these available to others at a reasonable price (no one will want to pay the $$$ for courier shipping from New Zealand). I'm pretty staunchly of the view that I don't want to make money out of this hobby and its community. I'd much rather contribute in ways that we can all openly benefit and learn from. But also I have a bag of these things sitting on my desk that won't get used otherwise and it seems a few people are keen. I'm thinking that I'll work out a price that covers the portion of the printing cost + postage + a few bucks to cover my time to package and send (and share that cost breakdown with everyone for transparency) and that way people who would find it easier to pay to get one of these can. Important to note that the CAD file for this is freely available here so if you have a printer / have a mate who has a printer / want to order your own from somewhere else you should totally go do that instead 🙂
-
Finally made it to this thread! As soon as I saw your car I knew today was the day! here’s the matching photo I took:
-
Pretty sure I've finally found a source for the male MAF sensor connector that allows for MOQ of 1 (and it's cheap to boot). This is what I'm talking about: I've ordered a couple to check and confirm, but if it is then this is the missing piece for people to be able to build their own harness extensions (and IAT relocation extensions I guess, not that I think they're good idea) without having to pay Turner mark-up. It also means anyone wanting to do what I did (keep the MAF connector and wire up for MAP sensor) doesn't have to buy a Turner extension just to then hack it up to add on the Bosch MAP sensor connector, etc. I'll wait til these arrive and I've confirmed and then put up a post with all the various part numbers needed to do this.
-
Whole family (including myself) are sick this weekend so took the opportunity to try out doing a VE table tuning run with the MAP sensor turned off. I've been wanting to do this for a while as theoretically it's another variable that can be removed from the process. With the MAP sensor taken out of the RF calculation path the car is essentially running in "Alpha-N Mode". My theory behind this is that depending on point in time conditions the MAP sensor is adjusting the final RF either up or down from what's calculated from the VE table. While this is desirable in day to day use, for the VE tuning process it's an unwelcome additional variable. Unfortunately I can't really think of an objective way to measure the impact of it to the VE tuning process, so it's really just a subjective assessment I guess. The difference with the MAP sensor disabled is immediately noticeable in the part-throttle conditions the MAP sensor targets. The car is less responsive and throttle input is jerkier and less consistent. I found a couple of RO/RPM conditions which I hadn't previously been able to flush out. I intend to do another tuning run tomorrow or Monday on a day when I can get further out and up the RPM range more to get a more complete test. It would need more people to try this out and get their subjective feedback as well as to whether disabling the MAP sensor positively influences the VE tuning process (I think it will mostly be about the speed at which one arrives at the end result), but I am pleased to have finally proven out that changing the configuration byte from 0x12 to 0x02 does behave as expected. Oh and also gave the nylon MAP sensor adapter a couple of good heat cycles and then took it off and inspected it - appears to be unaffected by the heat so far, so off to a good start.
-
The MAP sensor adapter printed in CF-reinforced Nylon arrived today. Minimum order value applied so I'm now the proud owner of 12 of these. I'll try to install in the next couple of days. HDT is significantly higher than the CF-PETG I used previously.
-
Well yesterday and today I tackled a job I've long been putting off. Yesterday I took the headlining out of the car, and dropped it (along with the sunroof cover, etc) plus the BM-134 fabric off to a professional headliner upholsterer. The dude was a legend and had it ready for me to pick up this morning (think he was grateful that I'd done the hard work of taking it out of the car!). He was very complementary of the BM-134 fabric - he said it's a quality fabric with quality foam and was lovely to work with. I'll tackle pretty much any job on the car, but this is one of those few things I'm very happy to leave to a professional - the work is flawless and it looks incredible. For those wondering about the fabric match - I took some photos of the re-wrapped headliner against one of the interior trim pieces which has the original BMW fabric on it (non-foam-backed): It's a very close match and certainly once it's in the car you can't tell at all - the slight difference really only shows up in photos. Likewise it matches well against the new A/B/C pillar trim I bought (which fortunately all match each other as well - as that was a problem for a while): While the headliner was out I took the opportunity to pull out the wiring a PO had put in for a radar scanner - I removed the T-Tap connectors, insulated the wires and wrapped in Tessa tape: In order to remove the sunroof cover to retrim it I also had to remove the sunroof glass - I took the opportunity while it was out to give the frame a good clean and re-lubricate with graphite lubricant: I reinstalled the headliner and then got on to installing the new pillar trim - shiny new B-pillar covers: Then the C-pillars, along with the foam insulated clips: And lastly the A-pillar trims and inserts with the airbag logo on them. Notably the A pillar inserts are a significantly different shade to everything else. (which is hilarious given this is all new OE parts). If it annoys me too much I might order replacements and hope for a better match. I'm very happy to have this done - it's not a particularly fun job but very satisfying to have everything refreshed and like new. You can see the huge difference in shade between the new a-pillar and the insert 🙄.
-
Well 2 days of driving an excavator, 4 months of weekends, 300m of rebar, 14 tonnes of concrete, 232 CMU blocks, and a lot of manual labour my retaining wall is complete - finished backfilling it today. Starting to get a bit wet here for the winter so great timing. Bit of a general update on the car. The latest version of the SMG reservoir bracket is in use, I've got some more tweaks to make to it so will do that and print the latest iteration. The MAP sensor adapter in CF-PETG shows some evidence of softening. It seems, under the clamping force of the bolts, it's not quite up to the ~100 degree C temperature that the rail hits. Plan is to get this printed in GF-Nylon which should be able to handle beyond 150 degree C temps. I'm doing some preliminary work on the reinstallation of the trunk interior with the RACP brace in place. Working through a few things to get to a lightweight, high-quality solution that meets my need to make it look as OE as possible. The version of the CSL tune I've been running the last while seems super stable. Even as it's got colder here it's remained super smooth. Seems I've got the warm-up maps pretty much spot on. I still want to do some more fine-tuning, and in particular am keen to try out running the fuel tuning process with the MAP sensor integrator turned off, but it's not top of the priority list given what I'm currently running is so good. Planning to get the headliner out and off to the pros to redo with the BM-134 fabric that I have stashed. I've also got brand new A/B/C pillars to go in once it's reinstalled. Intend to make more progress with the 0401 disassembly as well - especially as the days get shorter and the weather gets worse. Lots of little bits and pieces on the go. I've also been enjoying driving the car. The refreshed diff bushes have eliminated any remaining clunk in the drivetrain. Combined with the smoothness of the CSL tune it makes for lots of enjoyable downshifts with no need for the manual throttle modulating that I'd previously gotten used to to minimize the thunk. Secondly the RACP brace has, in addition to providing top-side support to the RACP, made an enormous difference to the torsional rigidity of the rear of the car. It's a very significant improvement and I'm getting itchy to give the front of the car similar treatment 😛
-
pretty sure this breaks moderation rule #18...
-
Today I also finished up the repainting of the v brace and rear sway bar brackets project. I top coated them a week and a half ago and they've been resting while the enamel fully cured. Today I reinstalled them along with new hardware to match.


