

Secniv
-
Content Count
201 -
Joined
-
Last visited
-
Days Won
7
Posts posted by Secniv
-
-
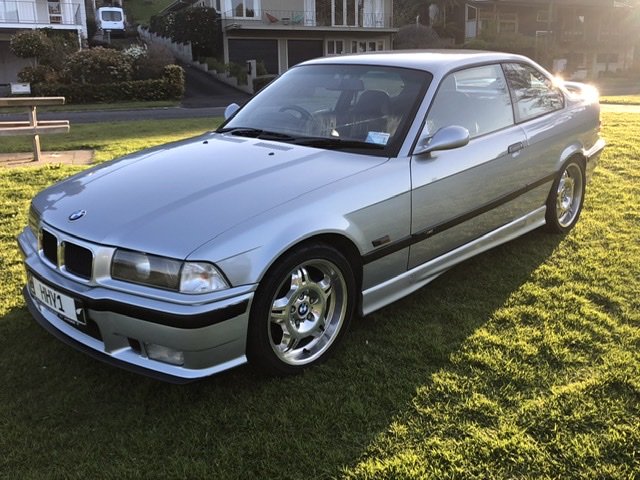
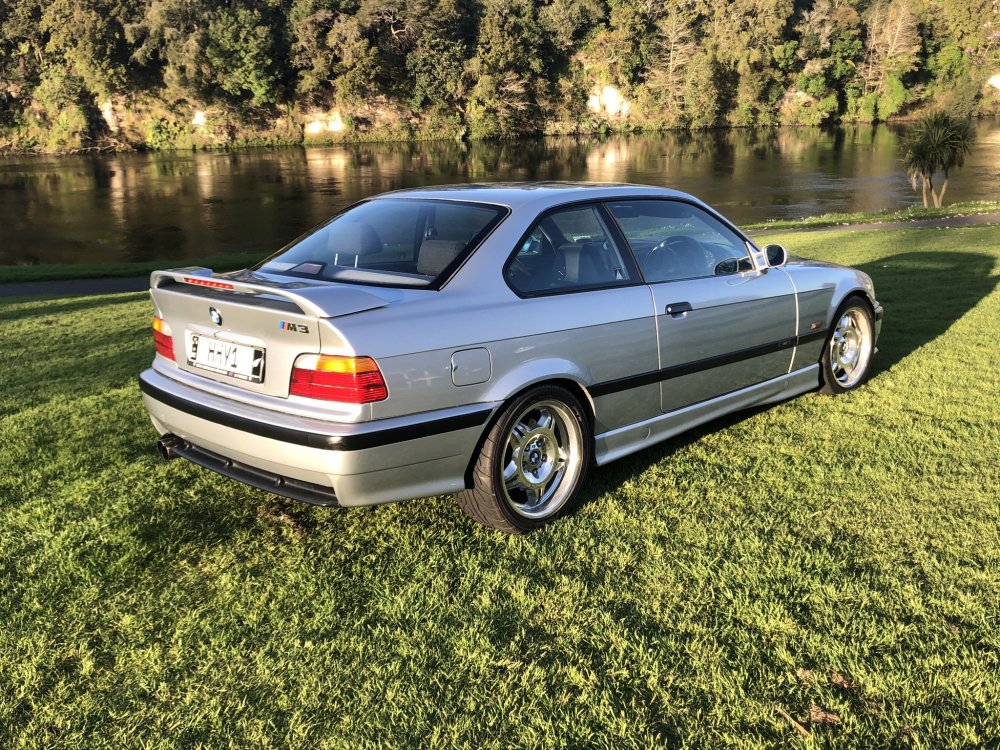
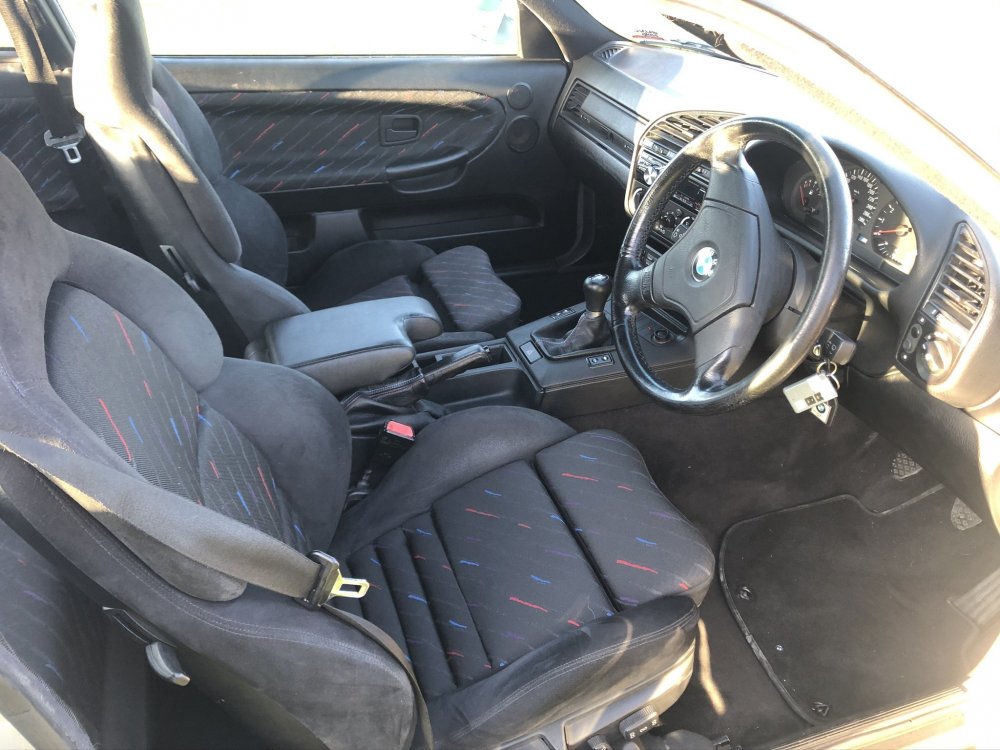
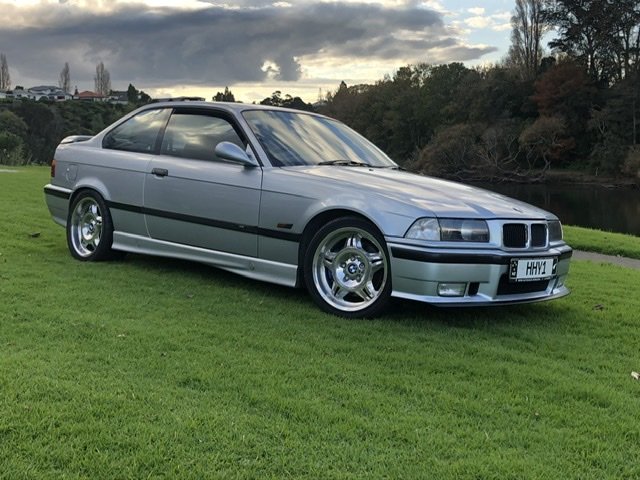
Some of you may have been following my progress on the E36 M3 here..It’s had a lot of attention over the past 2 years on top of good bones and attention by previous owners. However it needs to make way for my latest purchase a 911.
Mark from Classic Car Valuations will be providing me a valuation but I’m keen to get your thoughts.

-
 2
2
-
-
Gone?
-
3 hours ago, M3AN said:Long time, little love for the M3. But this arrived today after being ordered in April. I knew it was extended lead time but they originally said July, then August, then September. All's well that ends well.
This is just a tempter, more details to follow when I come to install... but feel free to guess. I've been wanting something like this for years.
KW Coil overs?
-
On 8/29/2020 at 7:46 PM, KwS said:Everything torqued to spec whilst under load?
Checked and re-torqued under load.. only to finally trace it to a loose exhaust bracket (next to the gearbox). Don’t recall loosening this myself so suspect the guys who welded the bungs in for the pre-cat O2 sensors ?
Car is driving very well and warm-up is a lot smoother with little/no hesitation.
-
1
-
-
So I did a bit of a blue a while back and it's been bugging me since.
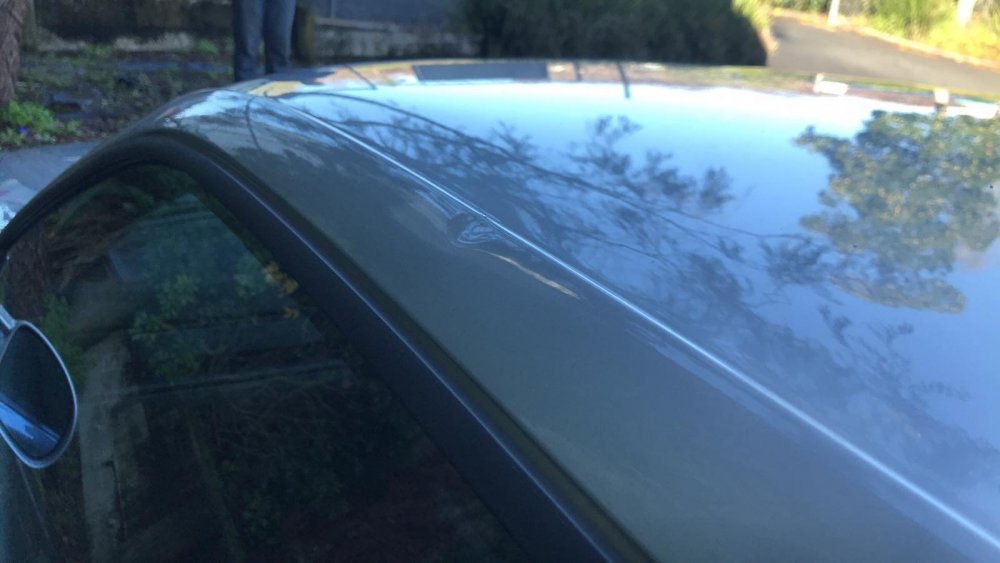
I drop a bar on the roof and it creased the roof edge. When I got the dent remover guy in to remove some other minor dents he wasn't able to pull it out as it was on a crease line. So I put a claim in with Classic Cover who approved it and I took it in to Prestige Repairs here in Hamilton.
There was a bit of other touching up needed with respraying wing mirrors and boot lid, plus stone chips on the bonnet and few other spots around the car. They ended up have to respray the whole roof and down the A and C pillars to blend it in and came up really well although I did have to take back for a little more buffing which they handled promptly. I'll post some photos when I get a chance and it's not raining.
-
2
-
-
On 8/29/2020 at 7:46 PM, KwS said:Everything torqued to spec whilst under load?
I thought I did but I'm going to go over them again to be sure. Thanks
-
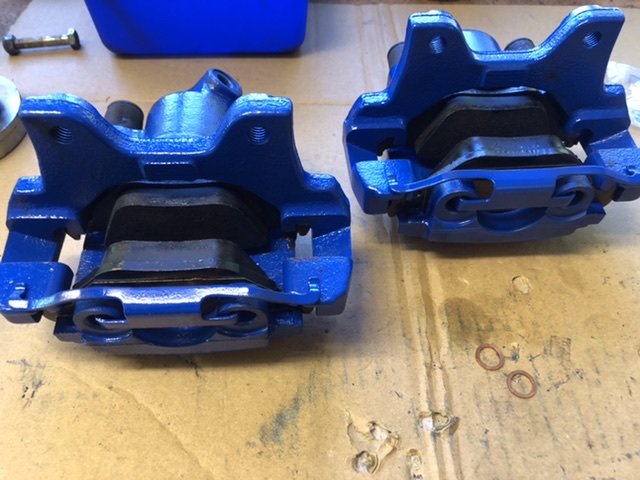
3 months gone by quick. Have done a few things to the M3:
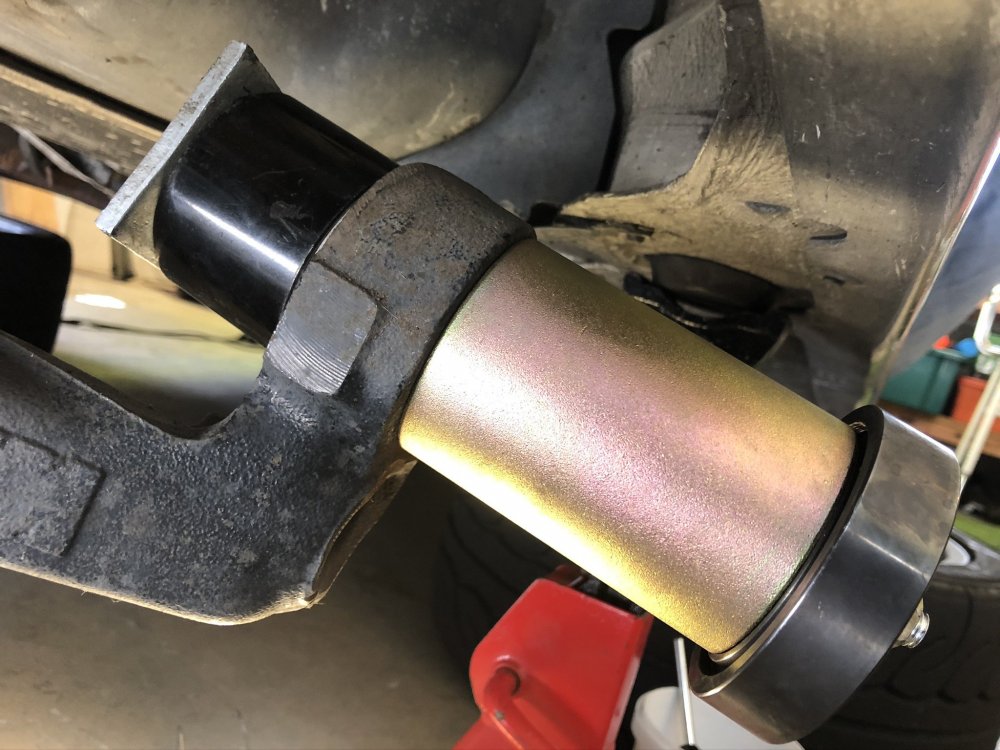
I replaced all the rear suspension bushes and control arms.


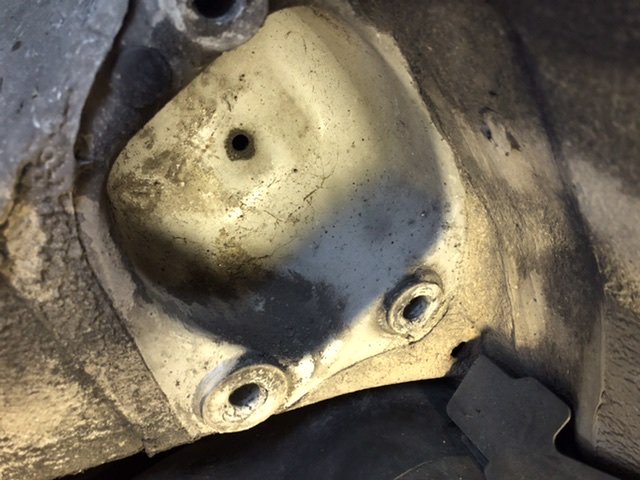
Now I’d be pretty pleased about this but there is now a knock from the rear end which I can’t trace (With pry bar and mallet). I didn’t replace the subframe mounts and I’m wondering if they have gone (look ok) with it sitting in the air for quite a while or using the jack on the subframe to lift the rear.
Any ideas I’m happy to explore. -
On 8/26/2020 at 9:21 PM, KwS said:Inside and out, thats is a stunning car. Wish i had that sort of money.
I couldn’t think of a better enthusiast to own it. I struggled selling it and still have regrets but my new mistress is helping me overcome my doubts?
-
1
-
-
On 8/26/2020 at 3:54 PM, balancerider said:This someone on here's old car? @Secniv?
Yes I traded it to chch. Someone will get a bargain.
-
21 hours ago, Mikan said:https://www.trademe.co.nz/2759884572
@Secniv this is your specialist subject matter right?
Well I’ve read and researched a lot about them while building my replica. Does that make me a specialist idk, enthusiastic yes.
It’s an interesting arrangement. Ex-factory B3’s used Alpina parts of course (spoilers, wheels, their mod engines, seat coverings etc). Sytner (UK) did conversions and I believe you could order any base vehicle and add the Alpina parts you and your budget wanted. So there is precedence.
However my benchmark would be in order to call it an Alpina B3 2.7 It would have the factory build plate and be on the factory registry. It appears to have non of these. An OE engine transplant and a few Alpina parts a B3 does not make imho.
Having said all that it looks like a lovely car despite the high mileage but $59k wow!
-
 1
1
-
-
3 hours ago, M3AN said:In some circumstances you're right. Don't get me wrong, the RS4 is my favourite of all time wagon, it's just not a great alternative to an e36 M3, if that's the experience you're looking for.
You own or buy an old M3 these days for it's character, handling, weight and feedback, not for its speed.
Bingo
-
With some sadness it’s gone ? to make way for a new chapter in my car passion/obsessed life.
-
1
-
-
21 minutes ago, Gaz said:It's missing the rear spoiler which just makes it look weird to me for some reason
Funny didn't notice that until you pointed it out.
-
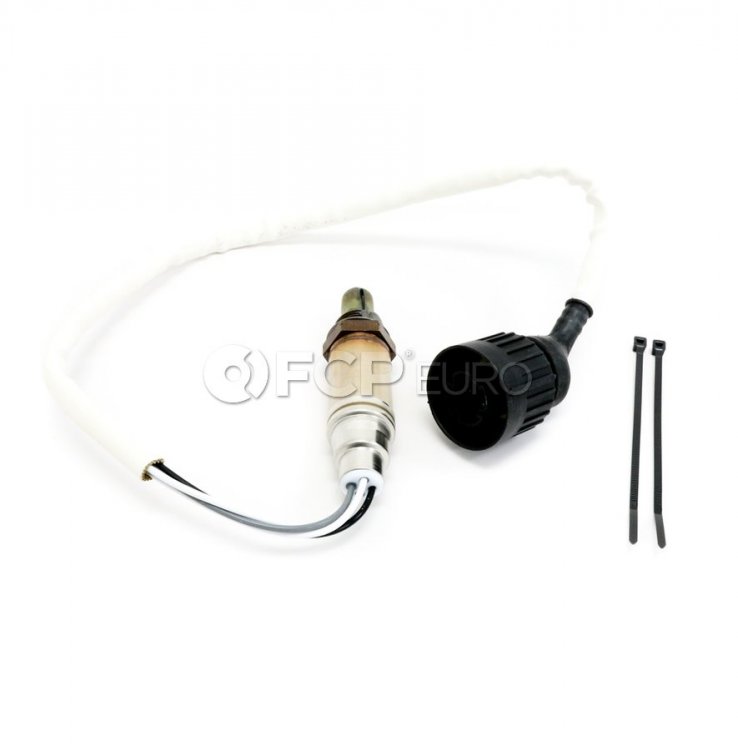
$100 incl. courier post
I incorrectly ordered this for the E36M3 fits other models to as per link.
https://www.fcpeuro.com/products/bmw-oxygen-sensor-bosch-13231
Will offer it here before I return it for refund. My mistake your gain.
-
13 hours ago, Breaker said:From what I heard from Gerry who owned one and sold it off shore, don’t expect it to be any cheaper then an E60 M5 but likely the problems are different and Alpina specific so pretty hard to get someone who knows what they are doing to work on it if they do come up.
High performance cars all have issues, dam beautiful and we considered one. Would love it in my garage
I did a lot of research prior to purchasing and drove 6 or more E60 M5s before going with the B5. I struggled with smg box.. great when flooring it but not so great when not imho.
The servicing and issues with the V10 are well documented. Any issues with H1 are those that are related to those normally associated with N62, Valve Stem Seals, Alternator Bracket/Gasket Oil Leak (Replaced), Coolant Transfer Pipe Leak (replaced), Valve Cover & Valve Cover Gasket Oil Leaks (replaced). Alpina specific issues are cracked coolant expansion tank (replaced) and the bearing/seal wear or failure in the supercharger. When dismantling I checked the oil collection and appeared to be in spec at approx 5-10ml.
Its true I’ve had to help school local BMW dealer and double check part numbers before they order but that’s probably me ?. Still help saves delays or expense.
Would love it to go to someone who’ll enjoy and take care of it and happy to negotiate. Only selling as I cringe every time I have to put our recently acquired dog in the back seat. A touring version of these would be ideal.
-
2
-
-
If any bimmersporter is after a modern classic super saloon that’s rare and different.
https://www.trademe.co.nz/motors/used-cars/bmw/auction-2683404221.htm
-
3
-
-
I belong (amongst others) to a drivers group called ARTDI (a reason to drive it) and we had our first drive Sunday morning since before lockdown. With another bimmersporter from Hamilton #audiguy in a Z4M we drove through to Rotorua to meet up.
A varied collection of 35 cars turned up (groups of 10 and SD procedures observed ?).
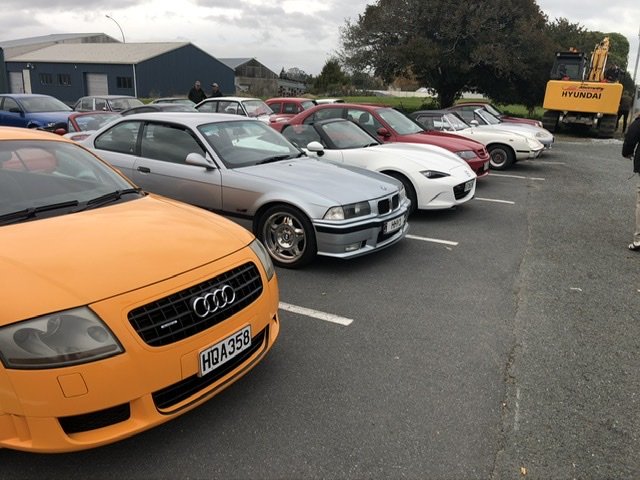
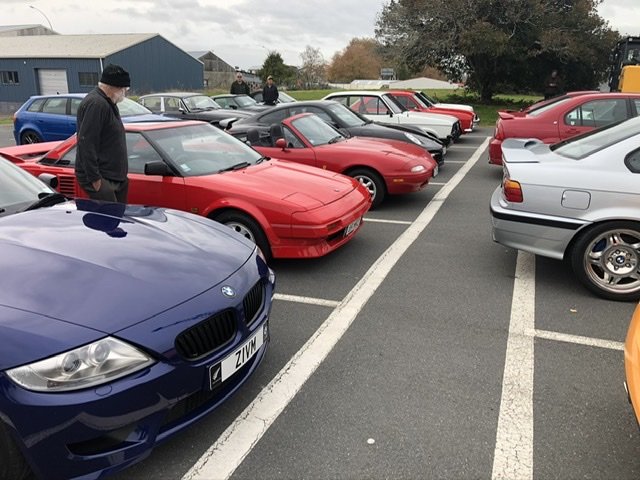
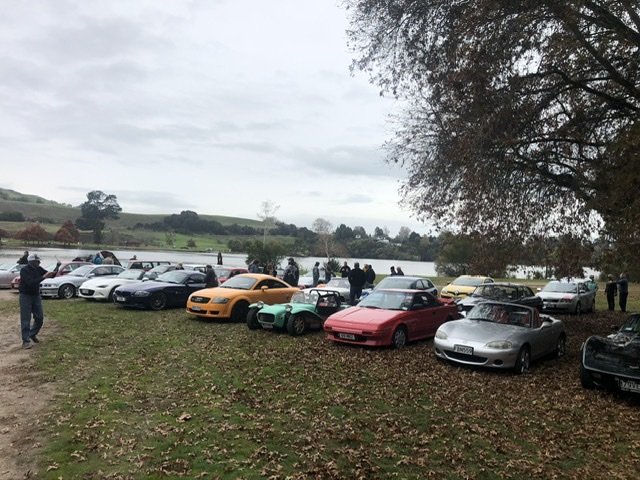
The organiser Earle driving the orange Audi TT Quattro 3.2V6 (I owned a silver one a few years back) and is lead car for the Targa rally. He choose the course for the day using many of the roads used by Targa.
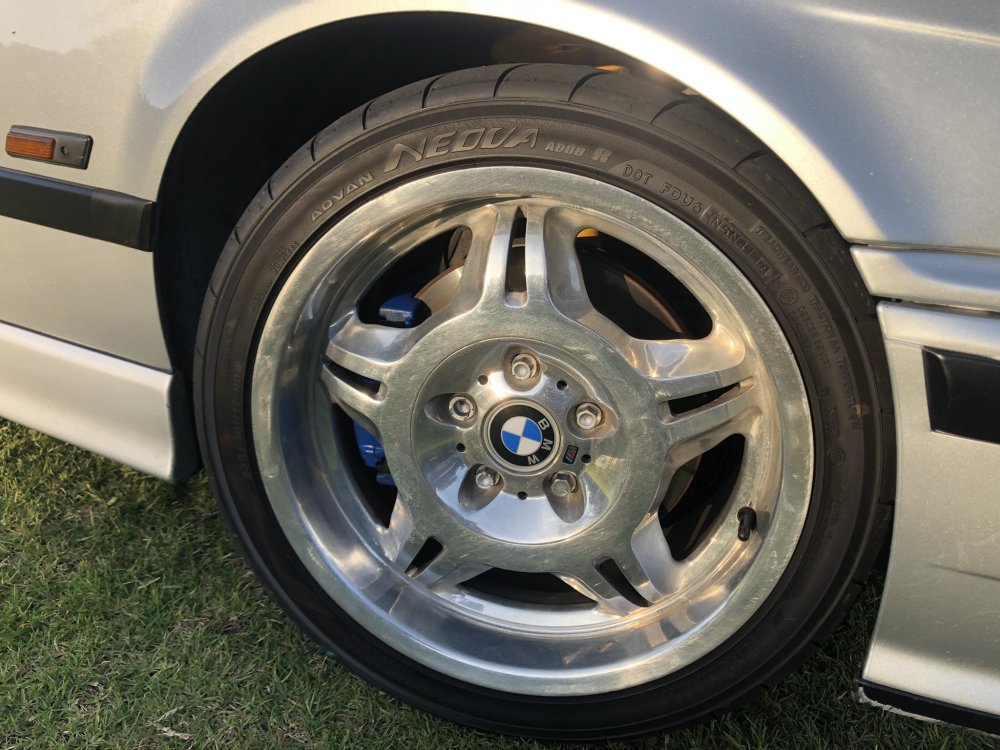
Well what a blast ‘following’ the TT and the Z4M. Best of all the M3 performed flawlessly on some testing roads and even though it needs a rear wheel alignment after changing the RTABs. Have some replacement wishbones and bushes to do then will get a proper alignment done.
-
4
-
-
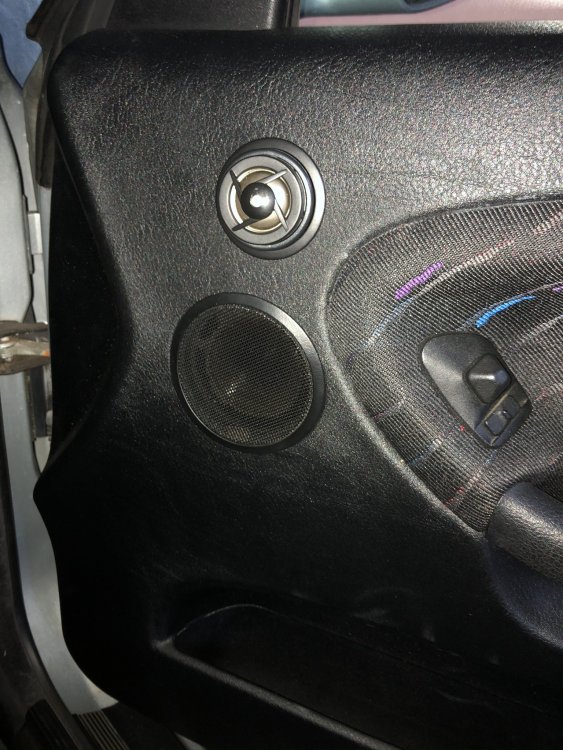
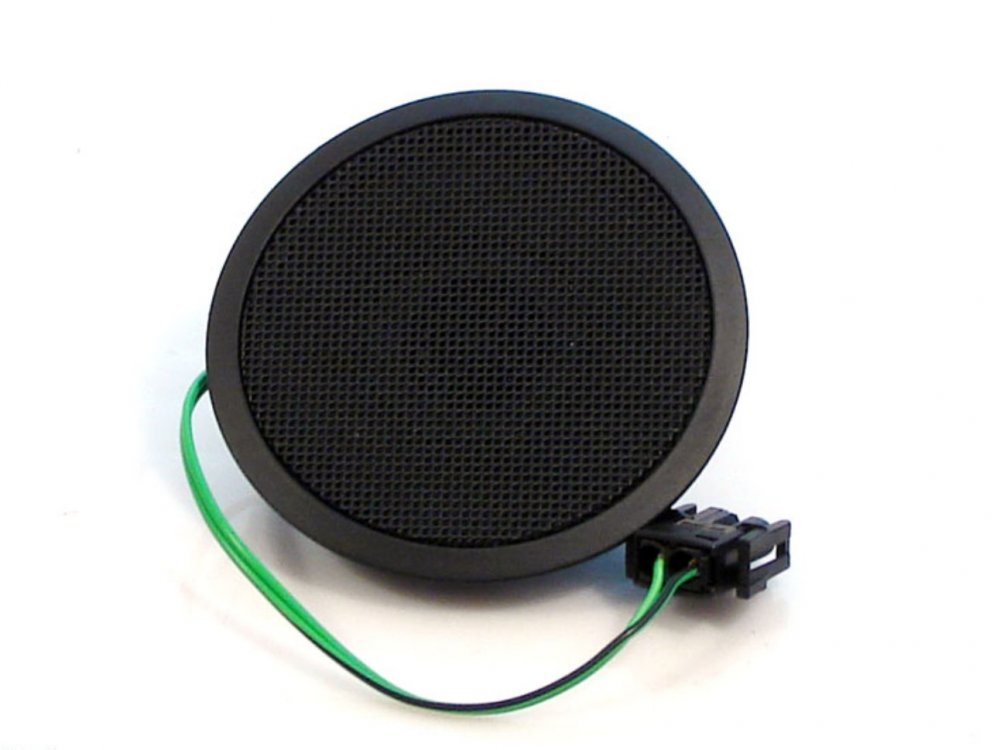
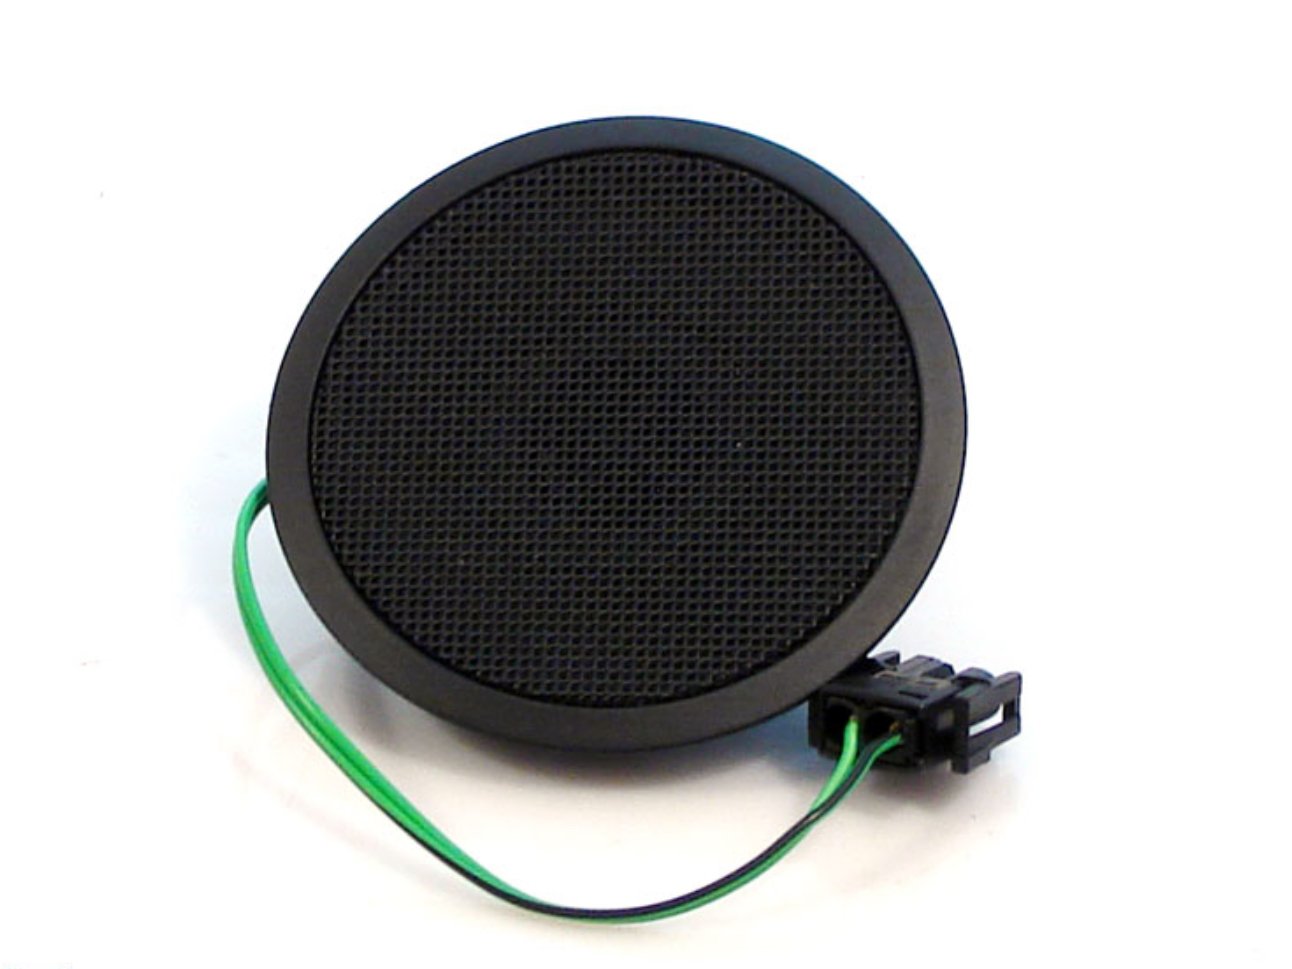
WTB OE front door tweeters. That’s the smaller top one came on up spec’d models.
-

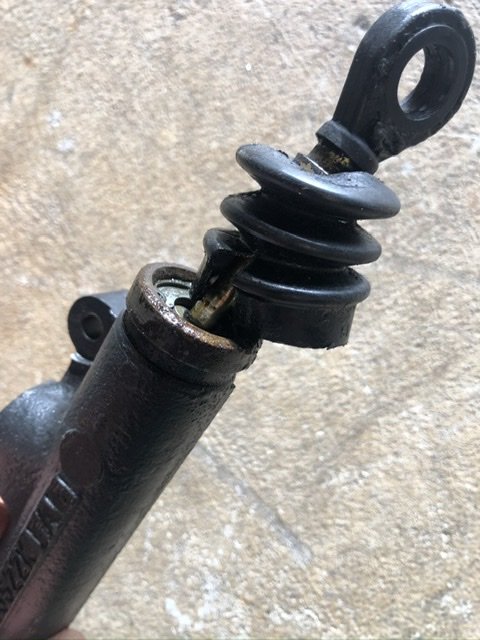
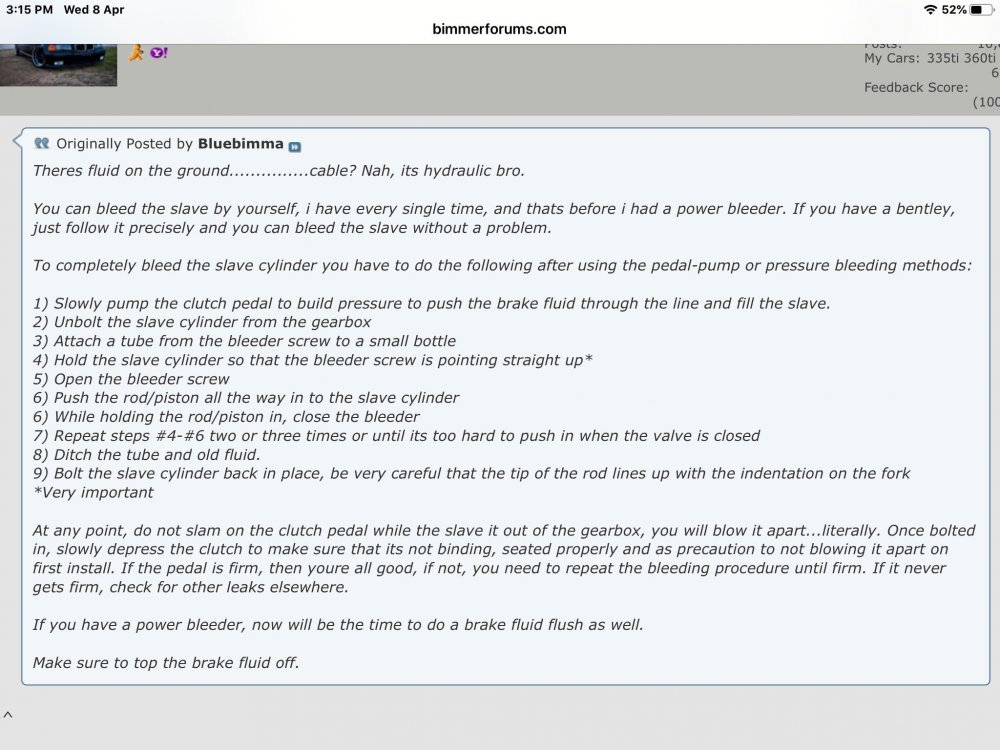
Back on the road post-lockdown.As per last post I was having a challenge bleeding the clutch. Tried pumping clutch method (till my son and wife got fed up), reverse bleed, vacuum bleed and power bleed (thanks Nick from Weitz Ind. for the loan) but just couldn’t get all the air out and good pressure.
So I ordered a replacement slave (waited a week from FCP), installed and still no improvement! So ordered new flexible hose into the slave, master cylinder from FCP (another week) and inlet hose and connector locally (Level2).
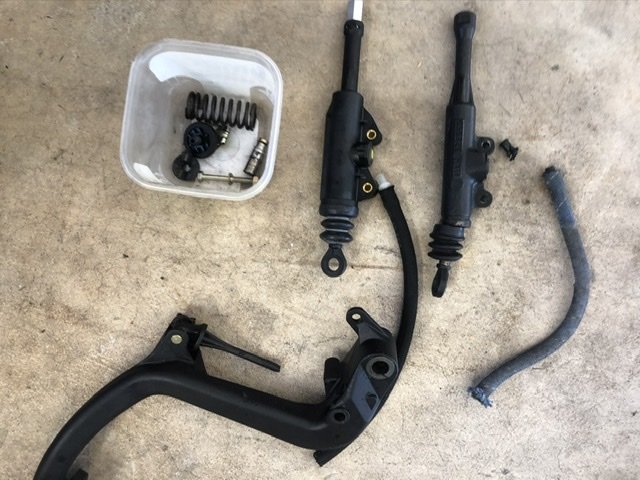
Once I got the master out it was obviously toast with gaiter torn and weeping.
Followed an excellent diy on how to replace the master and clean/re-lube the pedal assembly
It is a real fiddly job in an awkward place. Having the drivers seat out imo made it a lot easier.
Used the power bleeder, so easy to use just put a bottle of Castrol Dot4 in container, Connect to reservoir, pump up to 20psi, connect hose and catch-can to slave, open nipple, wait until fluid comes through and no air. Done.
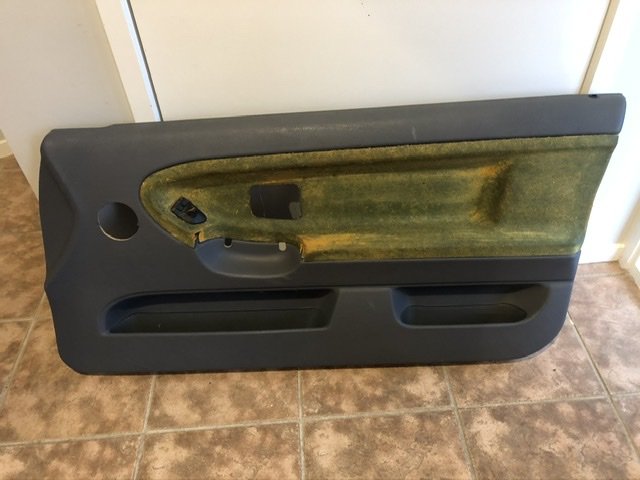
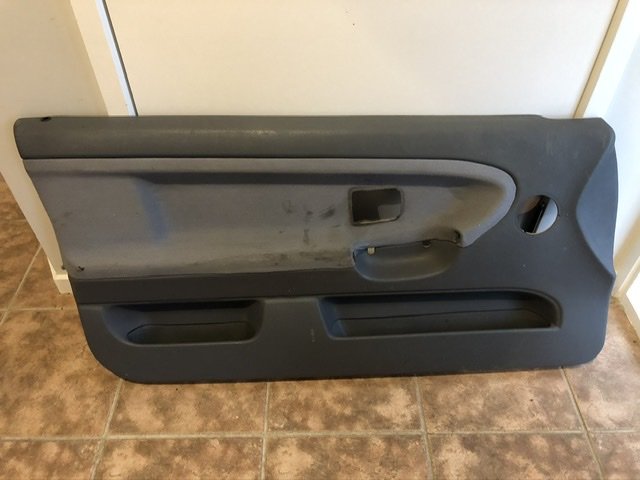
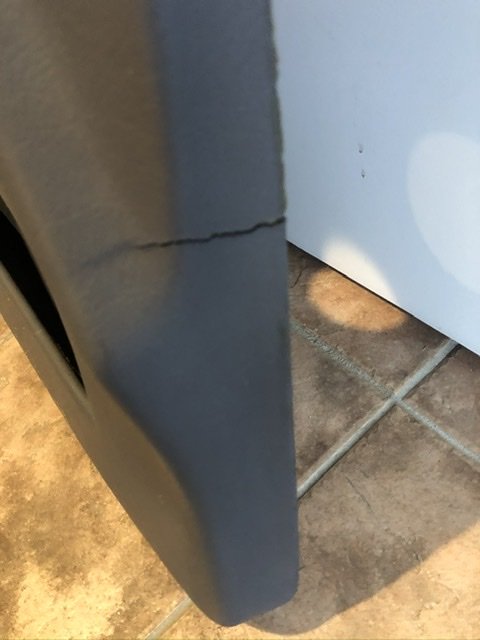
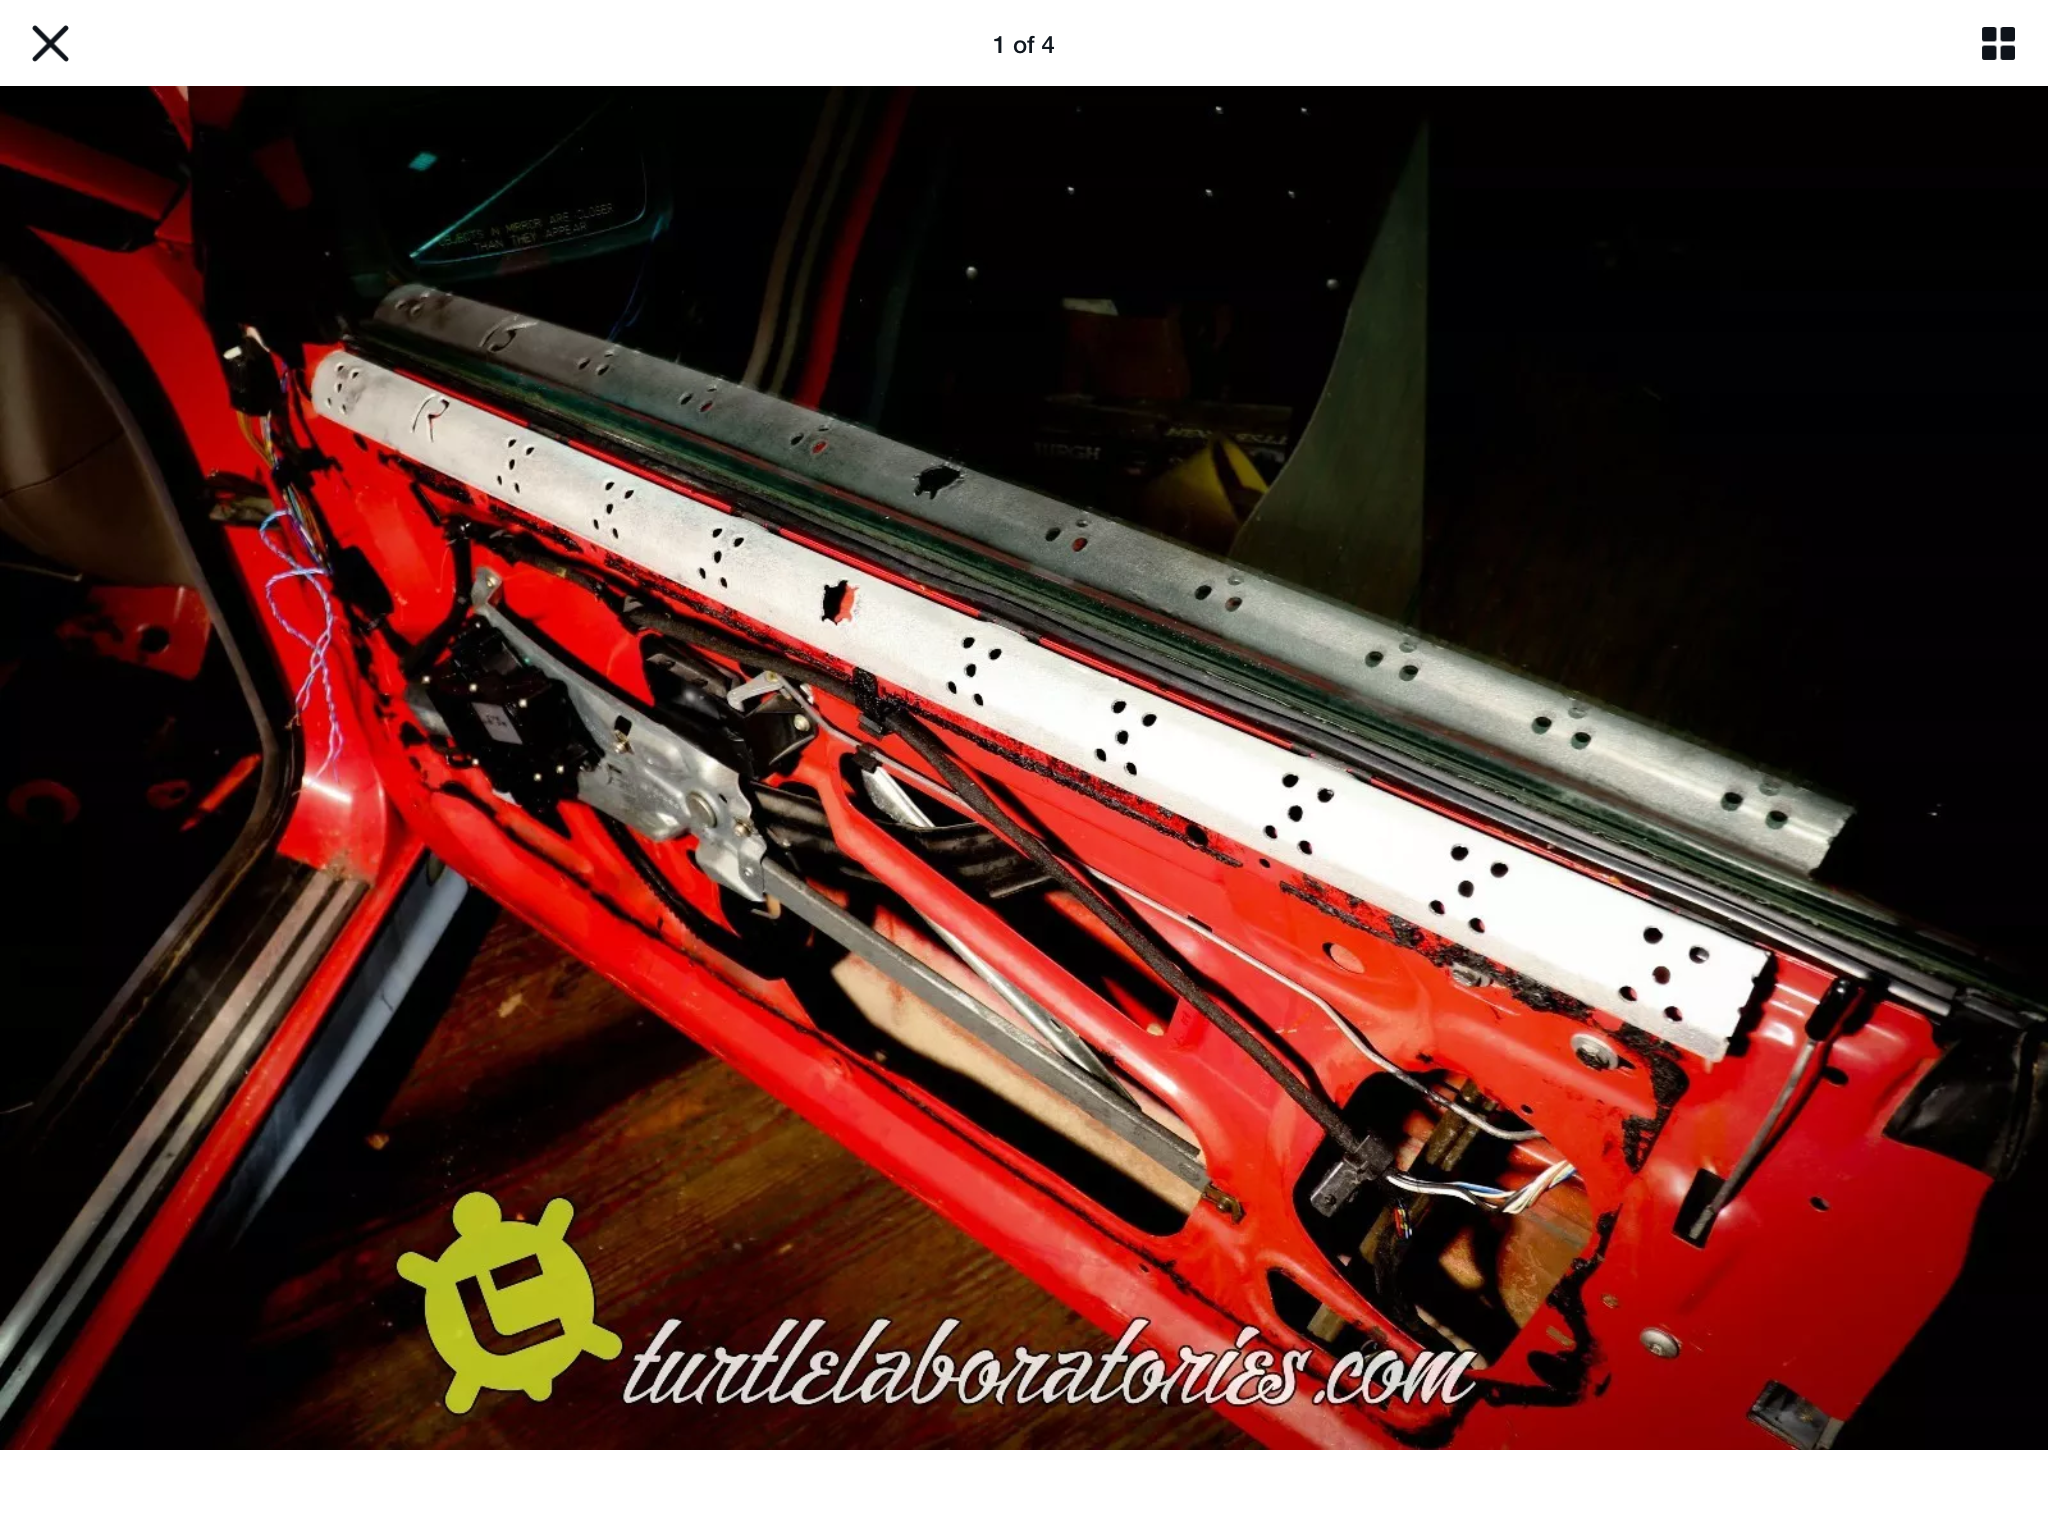
While waiting for parts I had collected some replacement door cards from Pick-a-part. They were from a 98’ coupe in grey, had a crack but otherwise great condition with no separation and pockets sound. Plastic top rails were broken but I had sourced some alloy replacements ex-Turtle Labs.

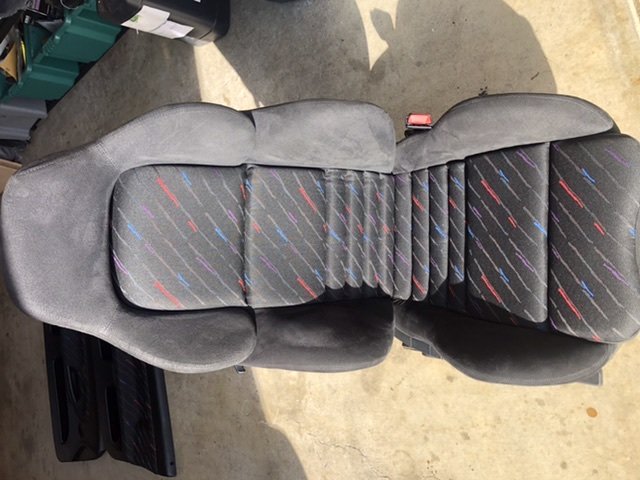
Cleaned, repaired and painted the cards. Once we got to Level3 I was able to drop off to Master Trim here in Hamilton. I also dropped in the drivers seat which was well worn, separating and shabby. I sourced the material out of Arizona when I was in SoCal last year.
While I had the seat out I removed the passenger seat as well and gave the carpets and seats a good clean.Master Trim had them back to me inside a week and what an improvement.
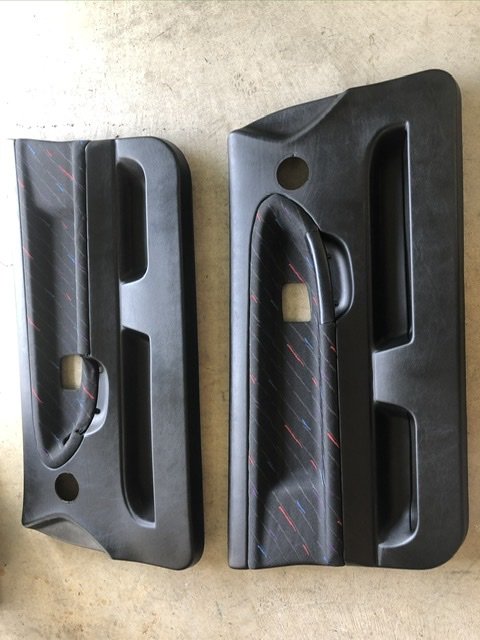
Turtle’s recommendation is to place the top rail in its door clips apply the adhesive to the rail and I used Ados High Performance Adhesive Sealant which is flexible, handles heat and similar that used for mounting windscreens. Based on my research should do the job.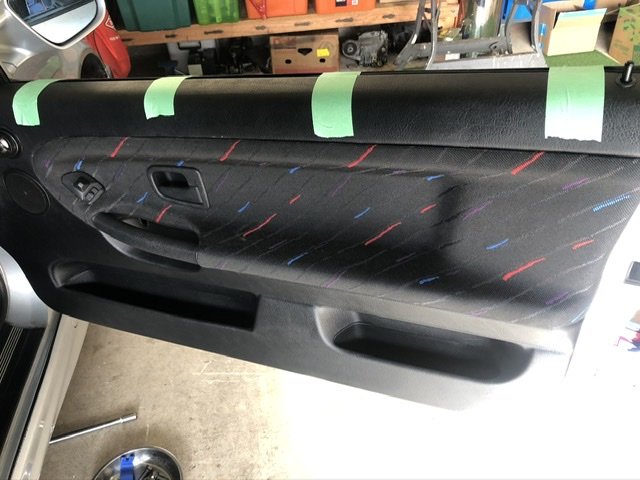
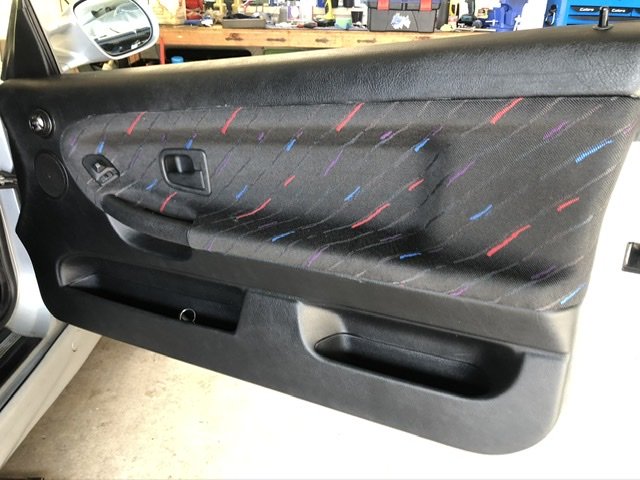
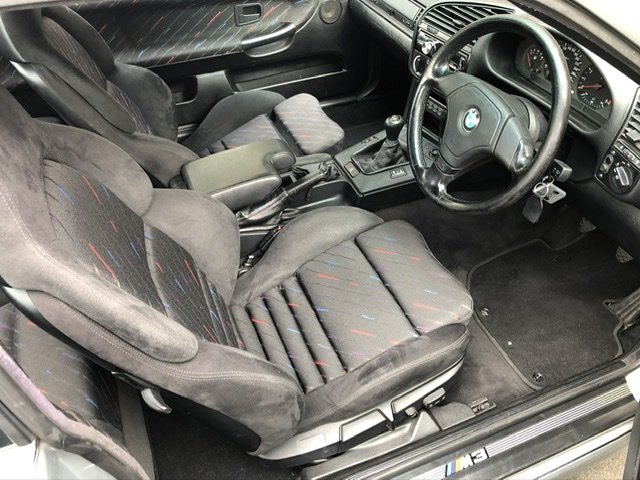
Interior looks great now and even has that new car smell. Makes such a difference.-
8
-
-
Any improvement in your idle issue after removing the SAP?
Out of interest is it still running the pre-cat 02 sensors?
GLWS will be interesting to see where the market is at..
-
1
-
-
It can be the smallest things that can hold you up, which wouldn’t normally be a problem but for a lockdown. More on this later..
I was able to source rear brake pads through NZAD as they are an essential item and we’re delivered within days of ordering.
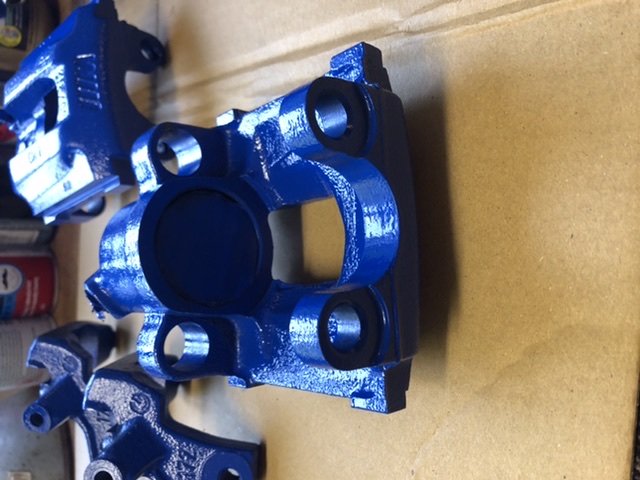
So painted and rebuilt rears as per fronts.
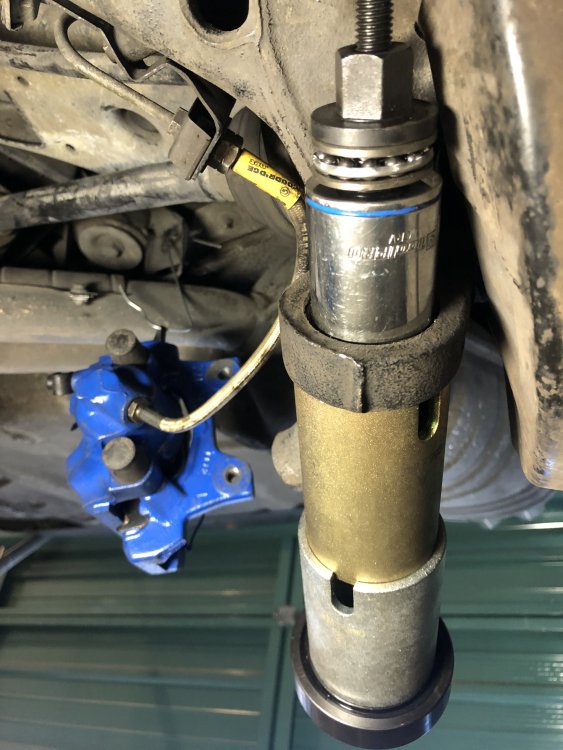
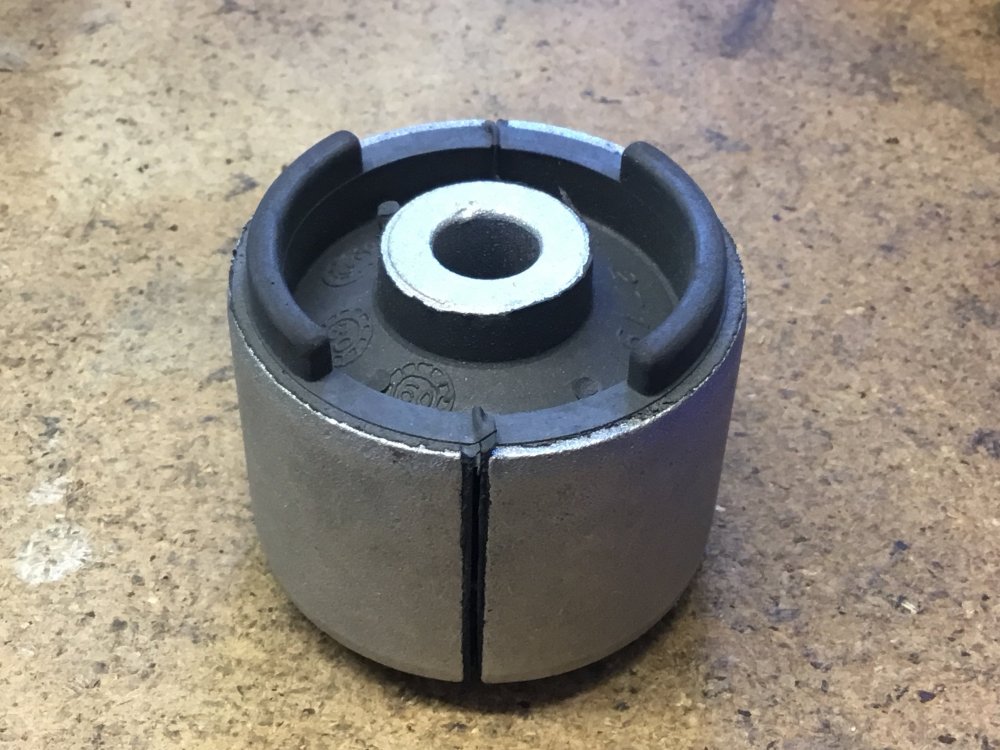
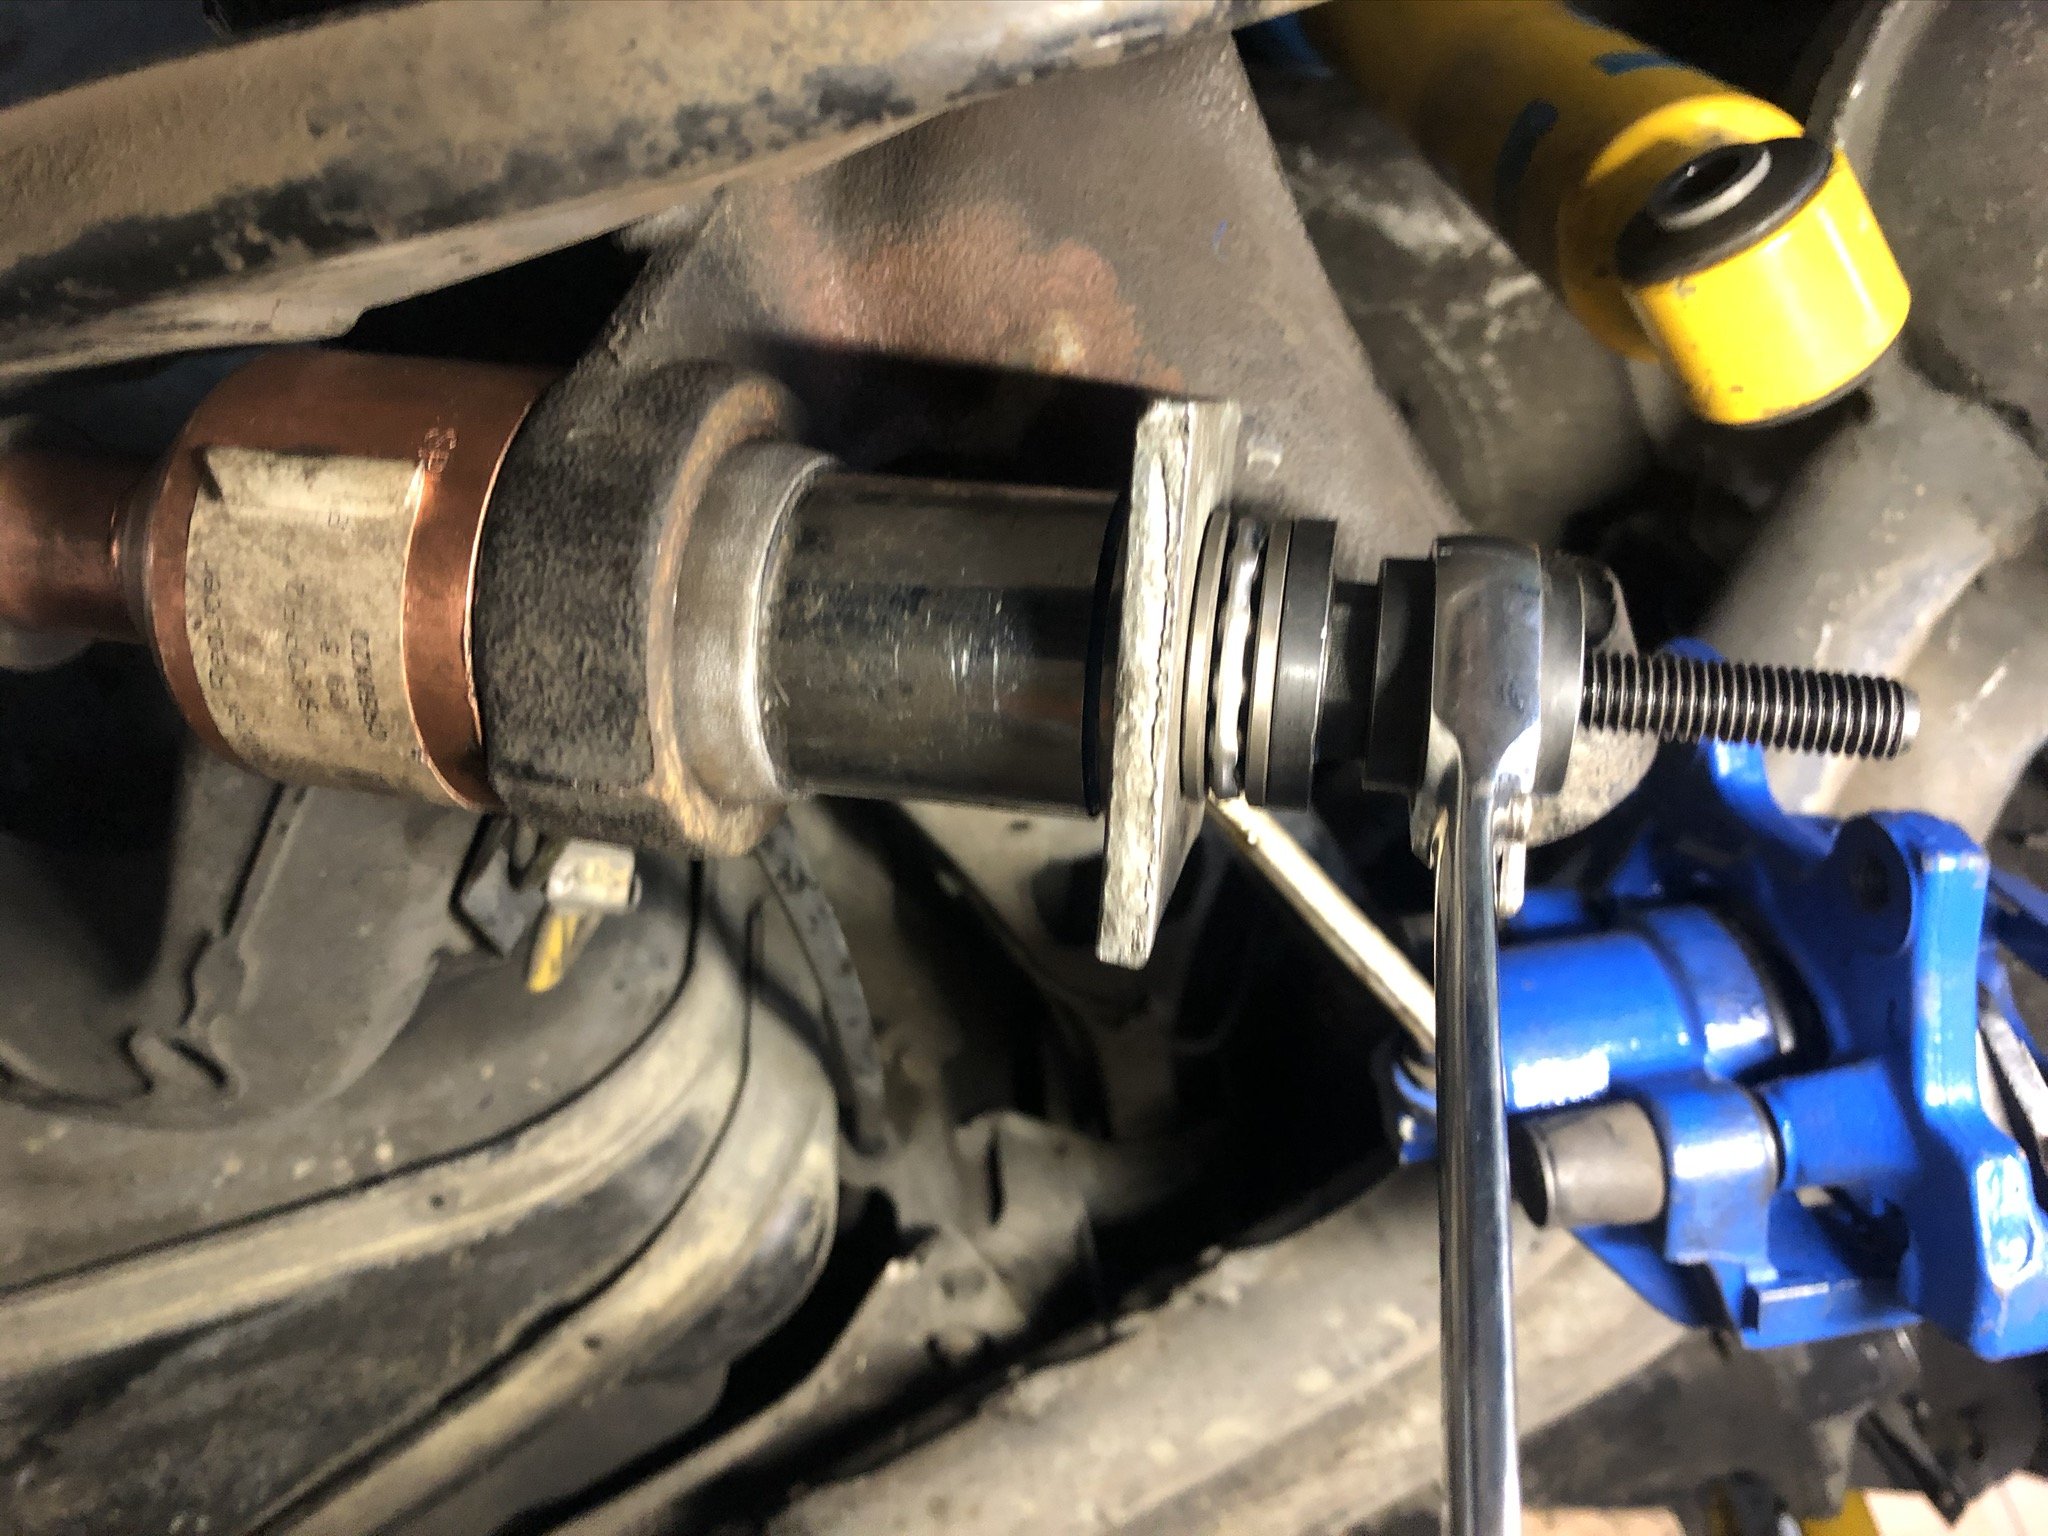
Next I moved on to the rtabs. After a few false starts and then with some local support (who will remain nameless but Covid19 protocols observed) I managed to create a tool to remove and install the bushes.
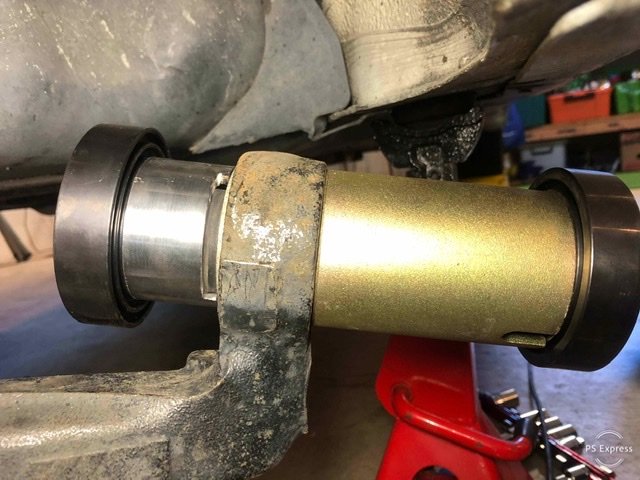
Theres a lot of online guides on the process so won’t go into details.
The pockets looked really good and no corrosion.
I installed some poly limiters ex FCPEuro.
Replaced fluid and bleed brakes with new Dot4 and then did clutch as well.
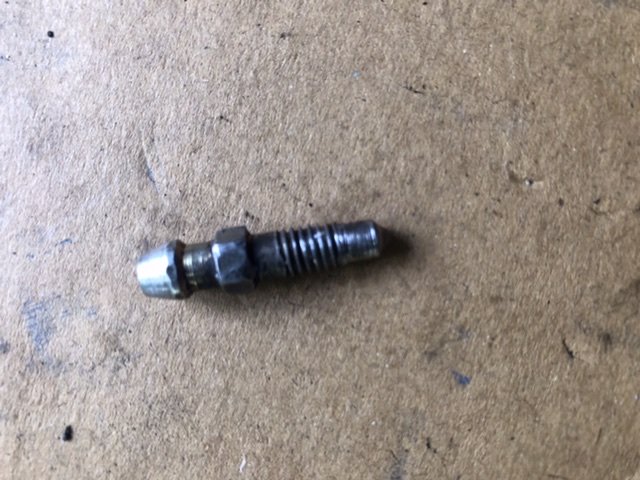
So for some reason the clutch slave wouldn’t bleed. Removed screw looked all ok so removed slave. After faffing about and getting it on the bench figured the outlet was blocked. So flushed it with new fluid. Replaced bleed screw and cross threaded it.. *&#$! So after a day of trying tap and die, then using thread tape no luck. And of course I had given my old E30 callipers away and while Supercheap had them listed and would have delivered as an essential item they oos ?
Replacement ordered but here I’m stuck for now. Guess I’ll have to do those household chores..
-
2
-
-
On 1/26/2020 at 4:38 PM, Blackie said:So, still fighting this.
New clutch master and slave - both quality parts.
Can't get a pedal that feels like it is doing anything mechanical. Have tried pedal bleeding, inverted slave bleeding and reverse bleeding.
Starting to wonder if the 318 clutch I fitted somehow requires more leverage than the clutch slave can supply?
So frustrating.
Did you figure this out?
Ive followed this process and looks like I’ve got all the air out but pedal doesn’t spring back.
-
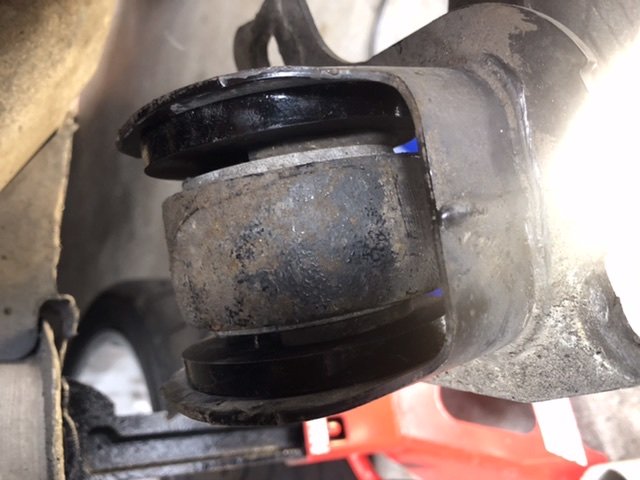
Oh so close.. the black tube was just 1mm too wide to get through the arm. Started to move the bush easily until it fouled. Options now are to drill & cut the rubber section of the bush before hammering out or wait until after lockdown.
-
On 4/4/2020 at 11:02 AM, allan said:The copper grease will only delay the thread failing. It needs to be a square thread like used in a vice or clamp and even then greased. Are you able to mod the 2 1/4 piece to make it a cross. This would give more contact points and avoid damaging the Bush by not pressing in square.
Have enough threaded rod to be disposable if damaged.
A cross would crush rubber flanges.. hence the bmw tool or equivalent being square.


What’s it worth?
in General Discussion
Posted · Edited by Secniv · Report reply
Garage queen.. 245k.. having said that it has had the wheels off a lot!