

sweetm3
-
Content Count
604 -
Joined
-
Last visited
-
Days Won
4
Posts posted by sweetm3
-
-
Hi Rich
Hope this helps these quotes are from 2010 when I was looking round for a BBK
I went with Racingbrake US. Changed to 8" rims up front with 10mm spacers
had a couple of hickups but they sorted it out for me.
And once I had figured why the first set of pads were toast after one track day
they didnt get up to temp (these front rotors dont require any cooling)
I have had no problems. They great.
What ever you choose check the US for racing pad prices I found them a lot cheaper
PM me if you have any questions I may help with
Mark
Quote from Race Brakes NZ front only
AP Racing Front 330mm 4 pot kit (17†wheels) is $3830 plus gst = $4308.75
Up-rated Pads Cost $ 806.62
Slotted Rears Cost$ 253.12
Total $ 5368.49
XYZ NZ
330 x 32 floating rotor/6 piston brake kit with sprt/race pads
Cost $2490
Slotted rear rotors
Cost $339 pr
Performance pads $118
Total $ 2947
Floating is now not available. The fixed rotor kit is $2390
Massive Brakes 332 X 32 6 pot calipers front only
$1700 US
$ 300 US shipping
Total $ 2000 US = $ 3193.92 incl GST still have to add pads and rear rotors but would be cheaper than below as the rear rotors would only be slotted one piece
RacingBrake US
328 X 28 4 pot calipers front + full floating 2 piece rears +pads + shipping +gst = 4556.01
The other problem with Massive and RacingBrake as I require 20mm spacers to fit them under my 7 1/2" street rim but they work fine with my track rims and my 10mm spacers
-
$7700 to have the wife’s Hyundai Sanfe reconditioned.
That’s with me dropping out the motor & gear box and helping putting it back in.
I’m going to be checking her oil from now on.
The only positive is I now have some leverage when I want to spend
some money on my car for something “I want†not need. I have to say
she knows me too well as her first comment when hearing the costs was
“it’s not dollar for dollarâ€
 bugger
 -
Merry Christmas everyone
-
My standard 3.2 dyno's at 184.8 Kw, hope you dont mind me butting in BrettCorrect me if i'm wrong, but 200wkw doent sound like anything more than std ??
Or is it just that, a standard engine?
Mark
-
Micheal PM me your email address and I'll send a couple of photos to youHi E36 M3 owners, if it's not too much trouble when any of you have some free time could you take some pictures of your M3's Coolant expansion tank setup?
I just want to get an idea of how the brackets/mounts work for them as I need to install the same setup in my car.
I bought an M3 Euro tank and then got a set of brackets for it but they're wrong, turns out they are actually for a USA spec M3, so because of that they can only go where my brake booster is....

I could probably mock some mounts up out of alloy or thin steel, but factory pressed ones are just that much nicer.
So yeah, any close up, clear pictures would be extremely appreciated! Hopefully from there I can work out what parts I need....
-
hey all im in the market for a good fishing boat, something like a 14 foot sea nymph or the likes ive been told that i should try and find something with 60hp+ in yamaha but it doesnt seem there is much out there im new to the game so if there is any recommendations on whats best etc please feel free to help me out...
cheers kerry
Kerry just like car motors, outboard motors require regular servicing usually on hours done or once a year.
This can cost a couple hundred for a basic service, but at 500hr and then 700hrs you are looking a mayor costs. I haven’t hit those kind of hours yet but a mate has and it wasn’t cheap, basically a recondition.
Some things to think about,
Bigger is better, in a 14 footer unless you’re a diehard fishman you won’t go out any weather over 10-12 knots max
Lighter is better, less power required to get on the plane, cheaper to run, easier to launch
Alloy up to 6mtrs , can be launched by one person off a beach or ramp, can be parked on a beach for a picnic or if you get into trouble
Fibreglass, nicer finish, nicer ride (but I still wouldn’t go out in anything over 10-12 knots)
As for motors, check the service history, also spend some money on having an inspection done. Unlike a car if it breaks down you cannot just get out and walk home.
Hope this helps
Fair weather fishman
Aka sweetm3
-
Had some quality time with my bimmer at Hampton Downs
-
-
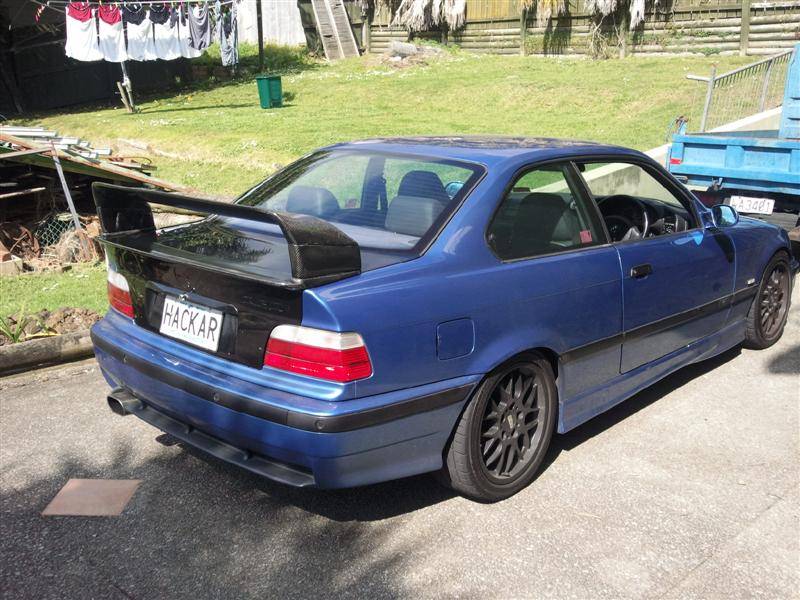
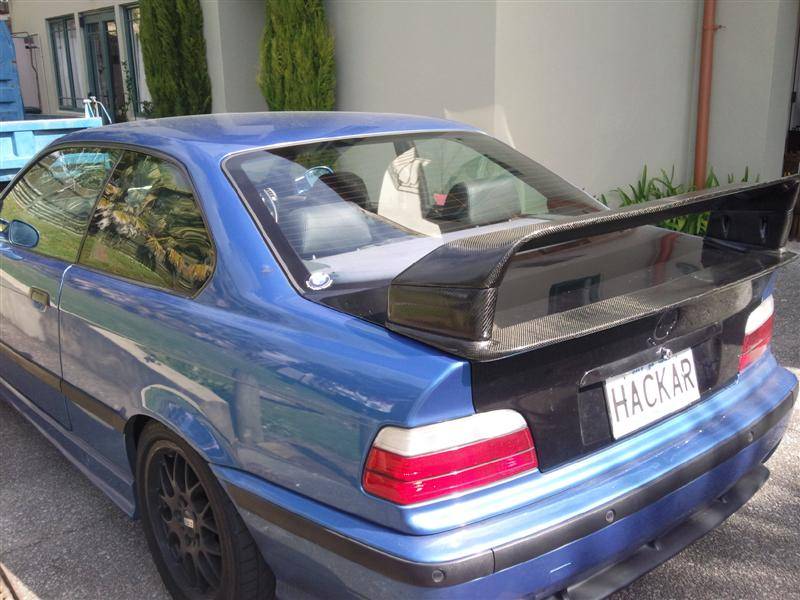
Hi Guys
finally attached spoiler to spare boot lid and fitted to car.
Looks good from a distance

-
Visa currency exchange fees a % I thinkBrilliant, thanks guys. Are there extra fees related to the use of different currencies, or is that more to do with whoever I have my Visa with?
GST on total cost; product, shipping if over $400NZ
Niether have ever stopped me from buying as it's still always cheaper
-
Agree totally with Allan
-
My thoughts exactlyAll sounds very tricky, re the boot lid, you can always cut the wiring harness that goes up the L/H boot strut and connect the wires to a male and female connector plug, nice and tidy.
-
Reason for project
I wanted to try out a high rear spoiler wing at the track to see if I could knock some more time off my laps.
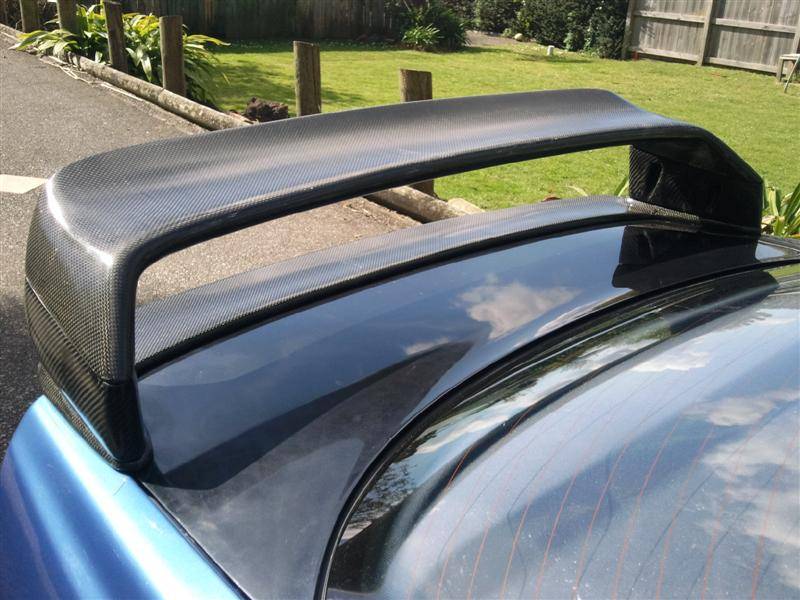
So I brought a 2 piece low GT CF spoiler and a boot lid off trademe a month or 2 ago. The project was to try and turn the spoiler into a high 4 piece spoiler.
I tried to make the risers myself starting out by forming the risers from foam not very successfully so I gave up and just cheated, brought a pair of risers from the states.
I then had to figured out, how to connect the pieces together. Done
Now this was my first attempt at CF and I have never done FG either, so it was pretty ambitious to say the least.
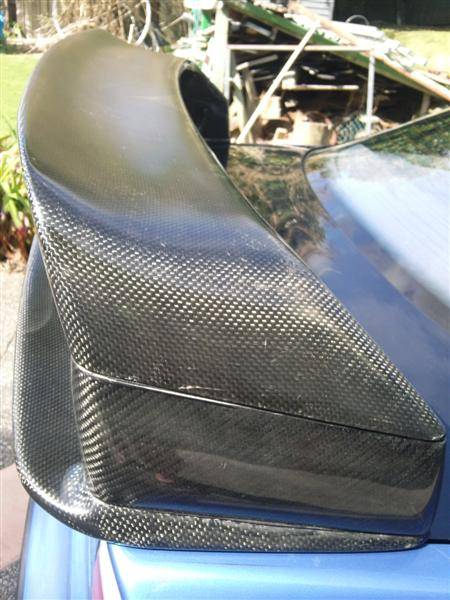
With multiple angles, curves, sides and a join, laying out was fun. But the real fun started when trying to wet out the fibre.
Here’s my process for what it’s worth
Cut CF to approx size
Mix 4:1 resin with a bit of black pigment added, for the first coat for depth
Wet out riser,
Lay down CF over riser, attempt to trim to make a nice join (never happened)
Wet out top of CF x 3 approx 15min between coats, pour and brush coats on, turning the piece multiple times to try and stop runs and drips (as a dried drip has an air bubble under it)
Hit the piece with a blow torch between coats to remove air bubbles (only mildly successfully)
Let dry over night and then sand with 180, 400, 800, 1000 and 1200 to smooth
Another top coat of resin to get the last ripples or low points out
Let dry
Sand 180, 400, 800, 1000 and 1200
Things I did wrong or didn’t work for me
When first wetting the form piece with black pigment resin don’t over wet or it seeps between the CF weave and you loss the pattern
Don’t have any joins
They say to dab the resin coats on with a paint brush, I tried and caught the weave
Heat gun didn’t work on the air bubbles it didn’t get hot enough I think
Put enough top coats down so you don’t sand down to the CF when trying to smooth out
Conclusion
If it’s your first time CFing and it’s a smallish, simple piece your doing, go for it.
If it’s a complicated piece and for show give it to a professional
Or if you’re like me and don’t mind that it’s not perfect because you hope you will be going so fast no one will see it or maybe the rest of the spoiler is not perfect either go for it.
I purchased Carbon Fibre and resin from NZ Fibreglass.
By the way the extra boot and spoiler will only be fitted when I go to the track
Project remaining items Clear coats and working out an easy way of disconnecting the wire loom in my boot.
-
Had a go at laying carbon fibre
 won’t be giving up my day job
 -
If you are in a BMW and driving it properly it shouldnt be a problem but if you are being tail gated on a single lane road, you must be out for a quiet sunday drive so pull over and let them bye.This all seems to be about double lanes, what about tail gaters on single lane roads?
-
The States are the same outside lane is for over taking, or moving into if someone has broken down or there is an on ramp.
In the part of Mexico where I stayed they only had 1 ½ lanes so you drove on the shoulder only pulling out into the lane proper when you’re overtaking
-
Your right bbs, polyurethane bushes.I'm sure sweetm3 means polyurethane not polymer.
From all my lurking it seems marine grease is mentioned a lot.
Early m3's use the same swaybar bushes as a 316. And later use the same as e34 518.
I'm not so sure about 3pedals comment
I got hold of a set of Eibach sway bars wanted to renew the bushes, couldnt buy them in NZ or Oz. Had to have my brother in the USA call Eibach get a part # order them and ship down.
Once I have the right grease I'll install sway bars, polyurethane bushes and new GC adjustable links.
3Pedals I will have to try Stocks or Autolign Sunday if not then on Monday was hoping for someplace this weekend.
Cheers
-
I’m wanting to put on my new poly sway bar bushes and have read that it’s recommended to use synthetic or silicone based grease.
I have tried Repco & Super Cheap with no luck, anyone with a product name and supplier
Cheers
-
Not engine parts but: Cross brace, Spacer Set for Rear Trailing Arm Bushings, basically renew any bushes that will tighten up the suspension.
Once your have your list together, I would check out Turner Motorsports, then email your list to Doug Mahar [dugmar@turnermotorsport.com] get a quote off him as I have found their shipping cost are the cheapest and fast as they use FedX (with no mark up), Pelican use UPS.
-
Absolutely stunning, I look forward to seeing it in action
-
I like Racing Rays instruction as well, I'll have to get him in the car next time I 'm at an event where he's availablegreat video
-
-
I just drive my car the speed limit and have no problems.
Having a track car and doing regular track days is so underated .. some of you guys should try it some time, you find no reason to hoon on the roads cause its no where near as fun as the track.
It costs less too .. speaking to someone whos had thousands in fines in the past and had ministry of justice turn up a few times on my door step.
+1
-
I found this link when doing a quick google on 3pedals postand in laymans terms???

E36 M3 Cylinder head coolant connection Question
in Maintenance
Posted · Report reply
Hi Guys looking to install a Water Temperature gauge.
Looking at the parts detail drawing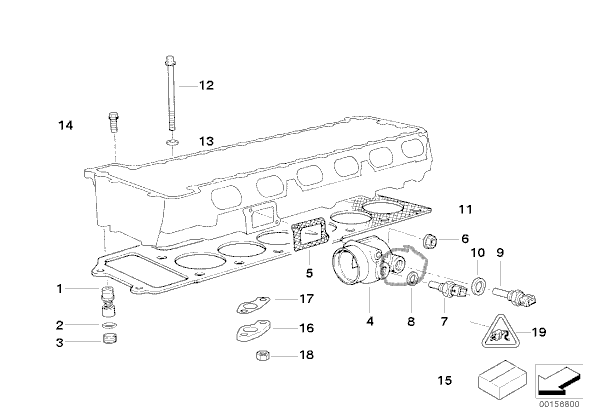
in the area circled I have a Hex nut next to a sensor.
if I remove the hex nut I'm thinking I could I fit my new sensor in that location.
Am I right
Cheers