
Vass
-
Content Count
836 -
Joined
-
Last visited
-
Days Won
74
Posts posted by Vass
-
-
Loving the content James is making since leaving Donut - quirky, weirdly informative, a tad cringe at times but always funny and entertaining. Find myself craving an X3M40i all of a sudden.
-
 3
3
-
-
32 minutes ago, Olaf said:how're you getting on with this? I know you've had Barbara to keep on developing, and your Tractor too...
The past few months have been real hectic, we've been too busy developing a new human for me to spend any real time in the garage so haven't made enough progress to warrant an update. Should finally have a bit of time this weekend though so will see if I manage to get anywhere with it.
Coincidentally, yesterday marked 1 year since we bought it but it's no closer to being back on the road. The co-owner mate had lost interest in it and being parked up in another mate's paddock on the opposite end of town I've just had too much going on to take on an hour long round trip every time I wanted to work on it. So about a month ago the mate loaded it onto a trailer and dropped it into my driveway so now I can slowly tinker away at it whenever I have a bit of time.
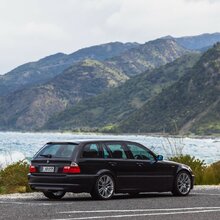
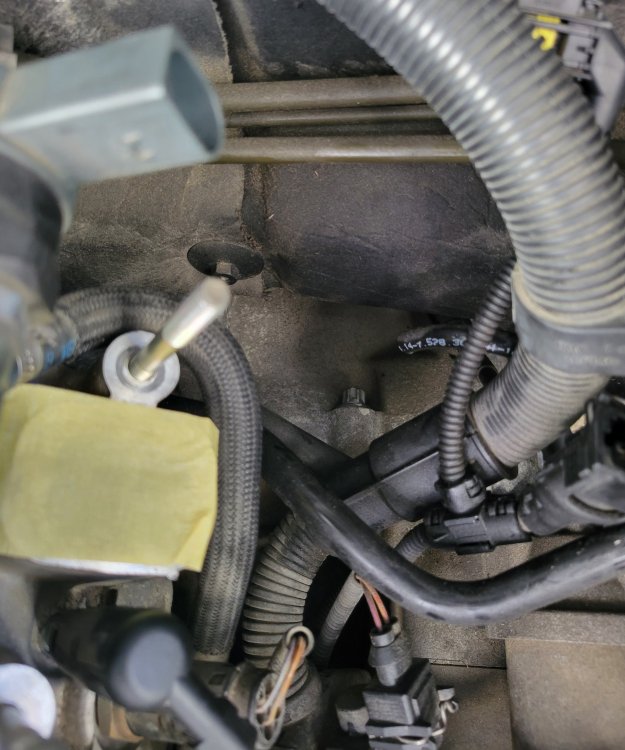
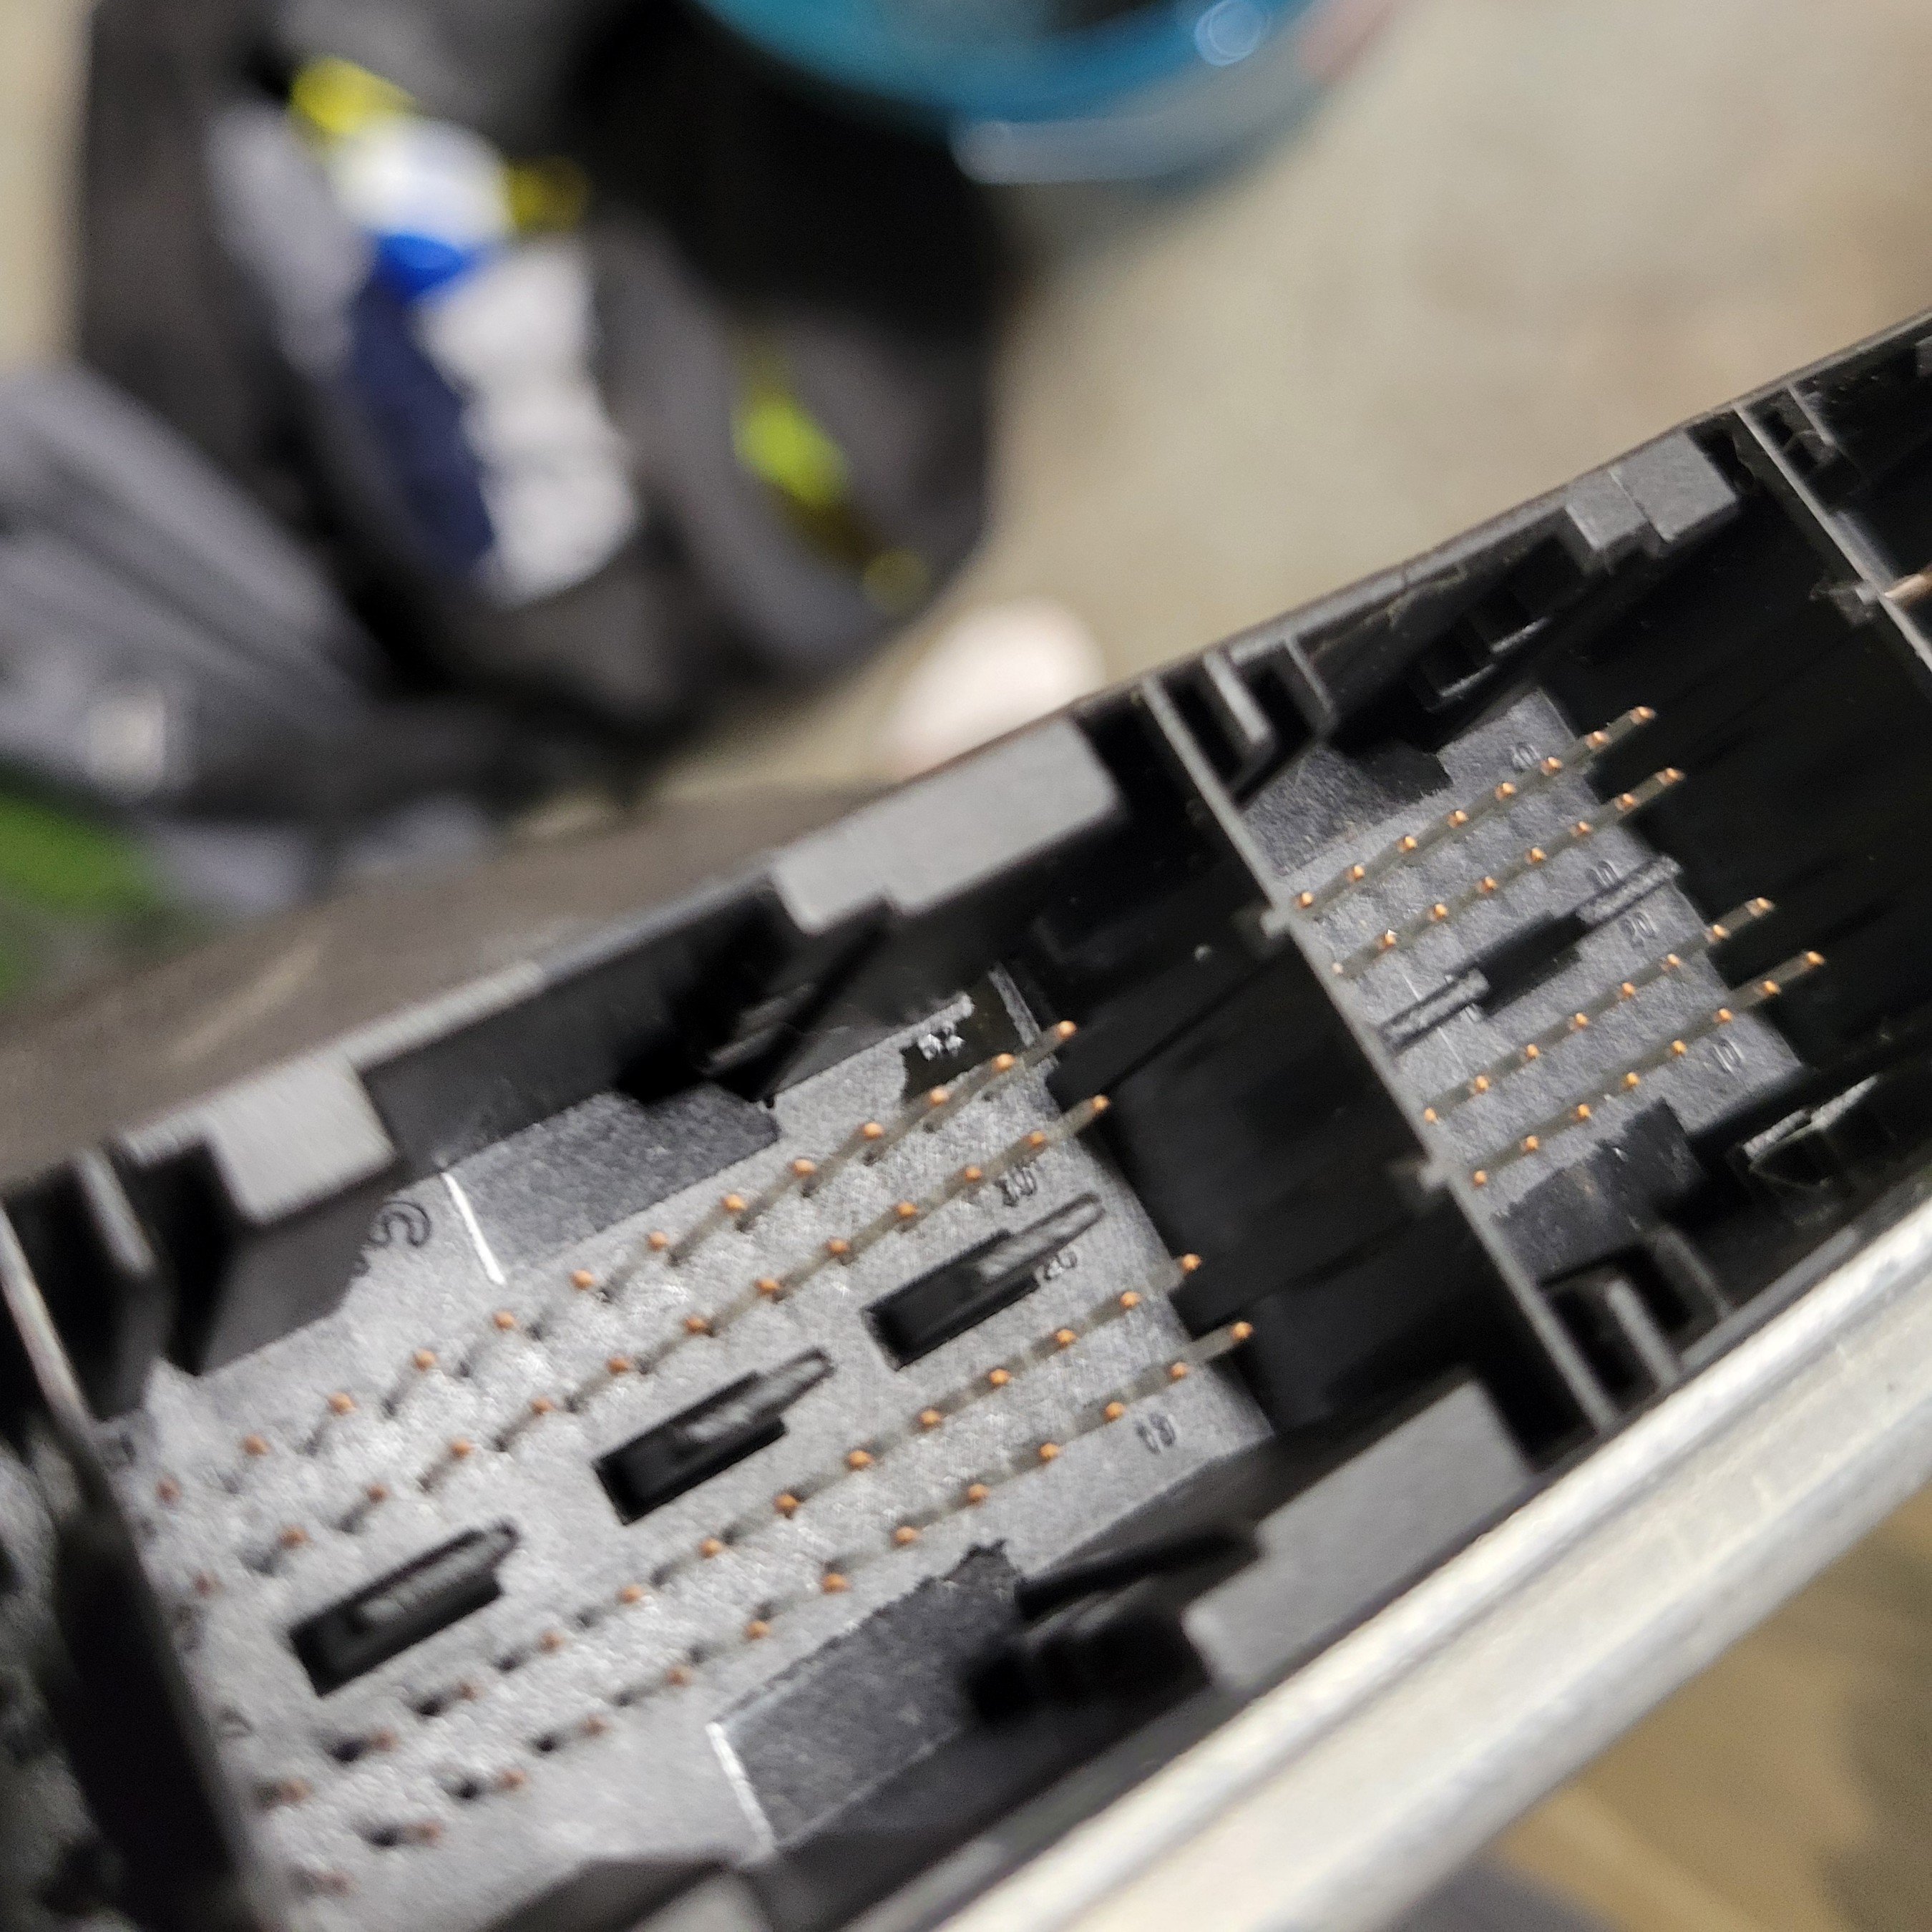
All I've done so far is disconnect the DME and inspect it. What I found was some oil on the main engine harness plug that had migrated along the wiring from one of the sensors/solenoids all the way to the DME, which is apparently a thing that happens... In our case it's just a tiny amount that I could see but the car hasn't run in a good 4 years now so it might have had more there and it's just dried out over time.
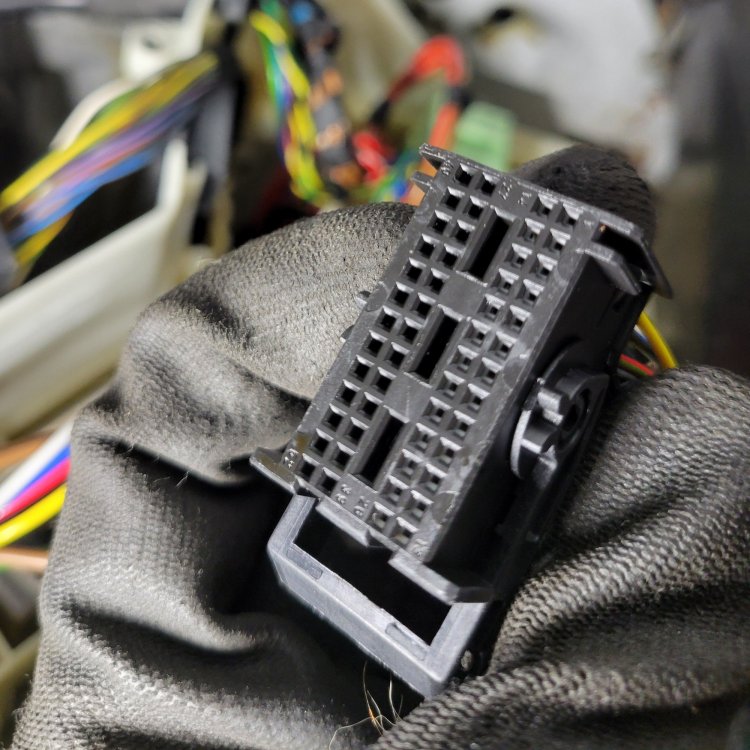
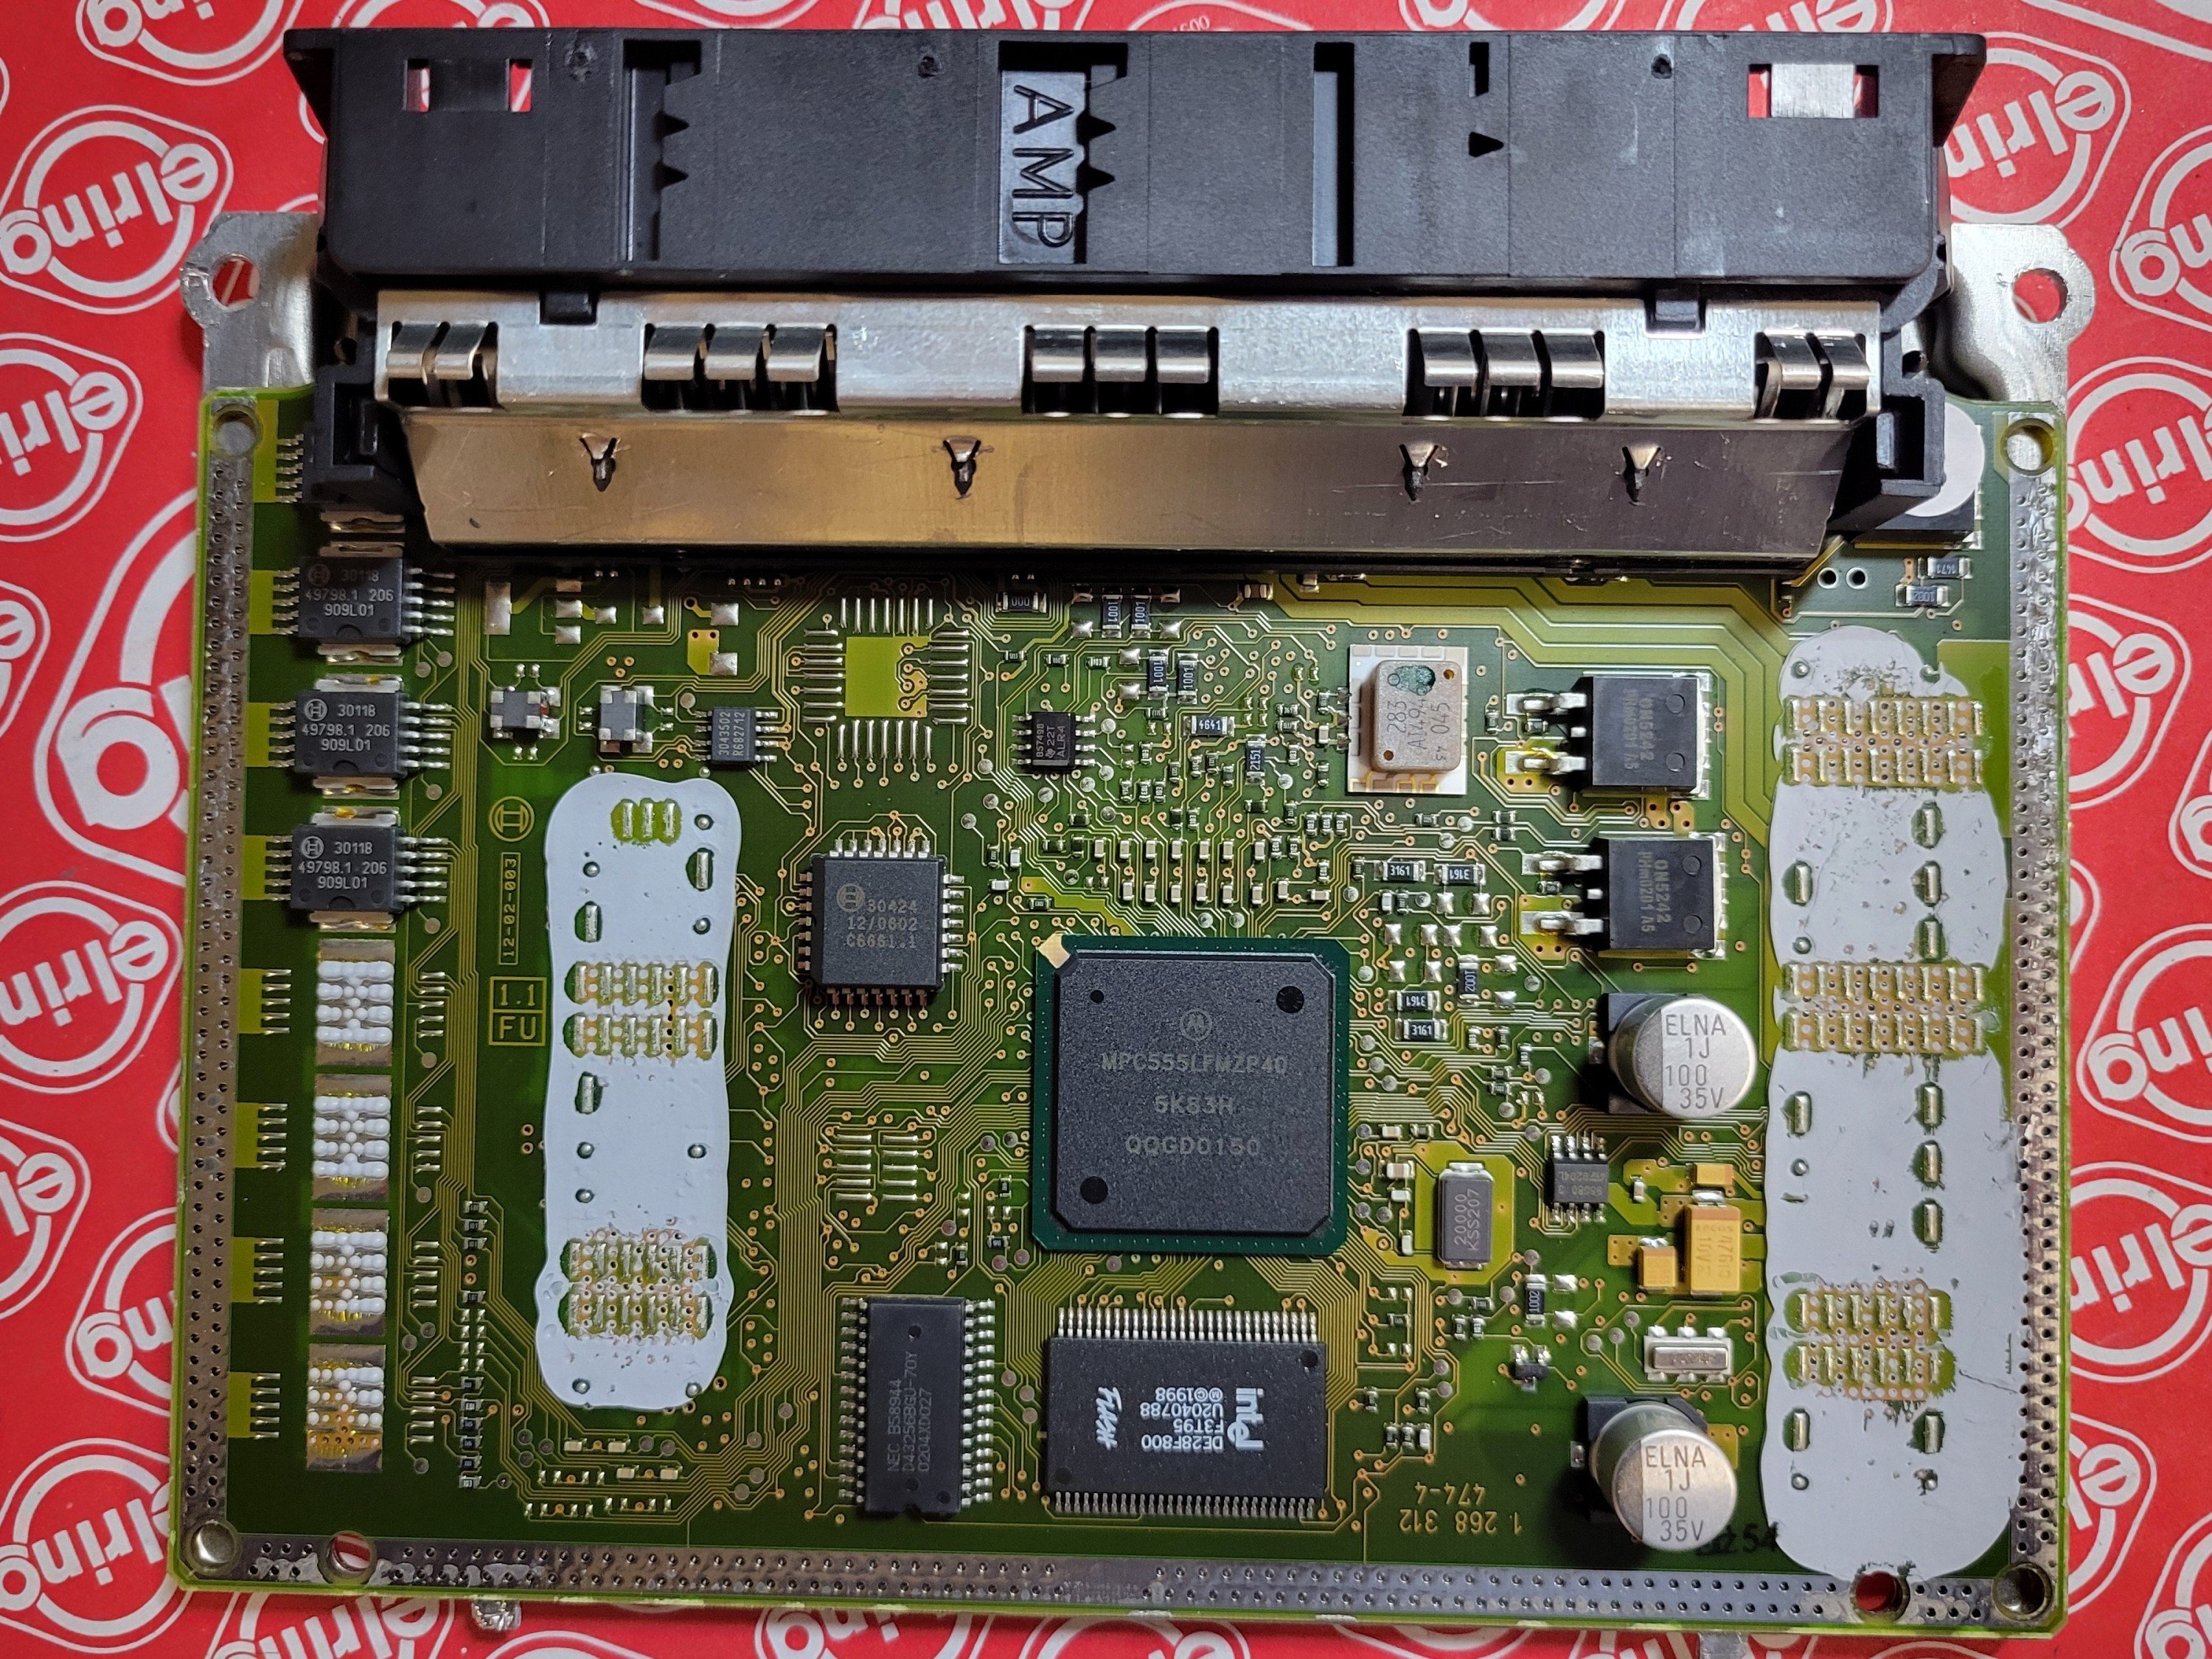
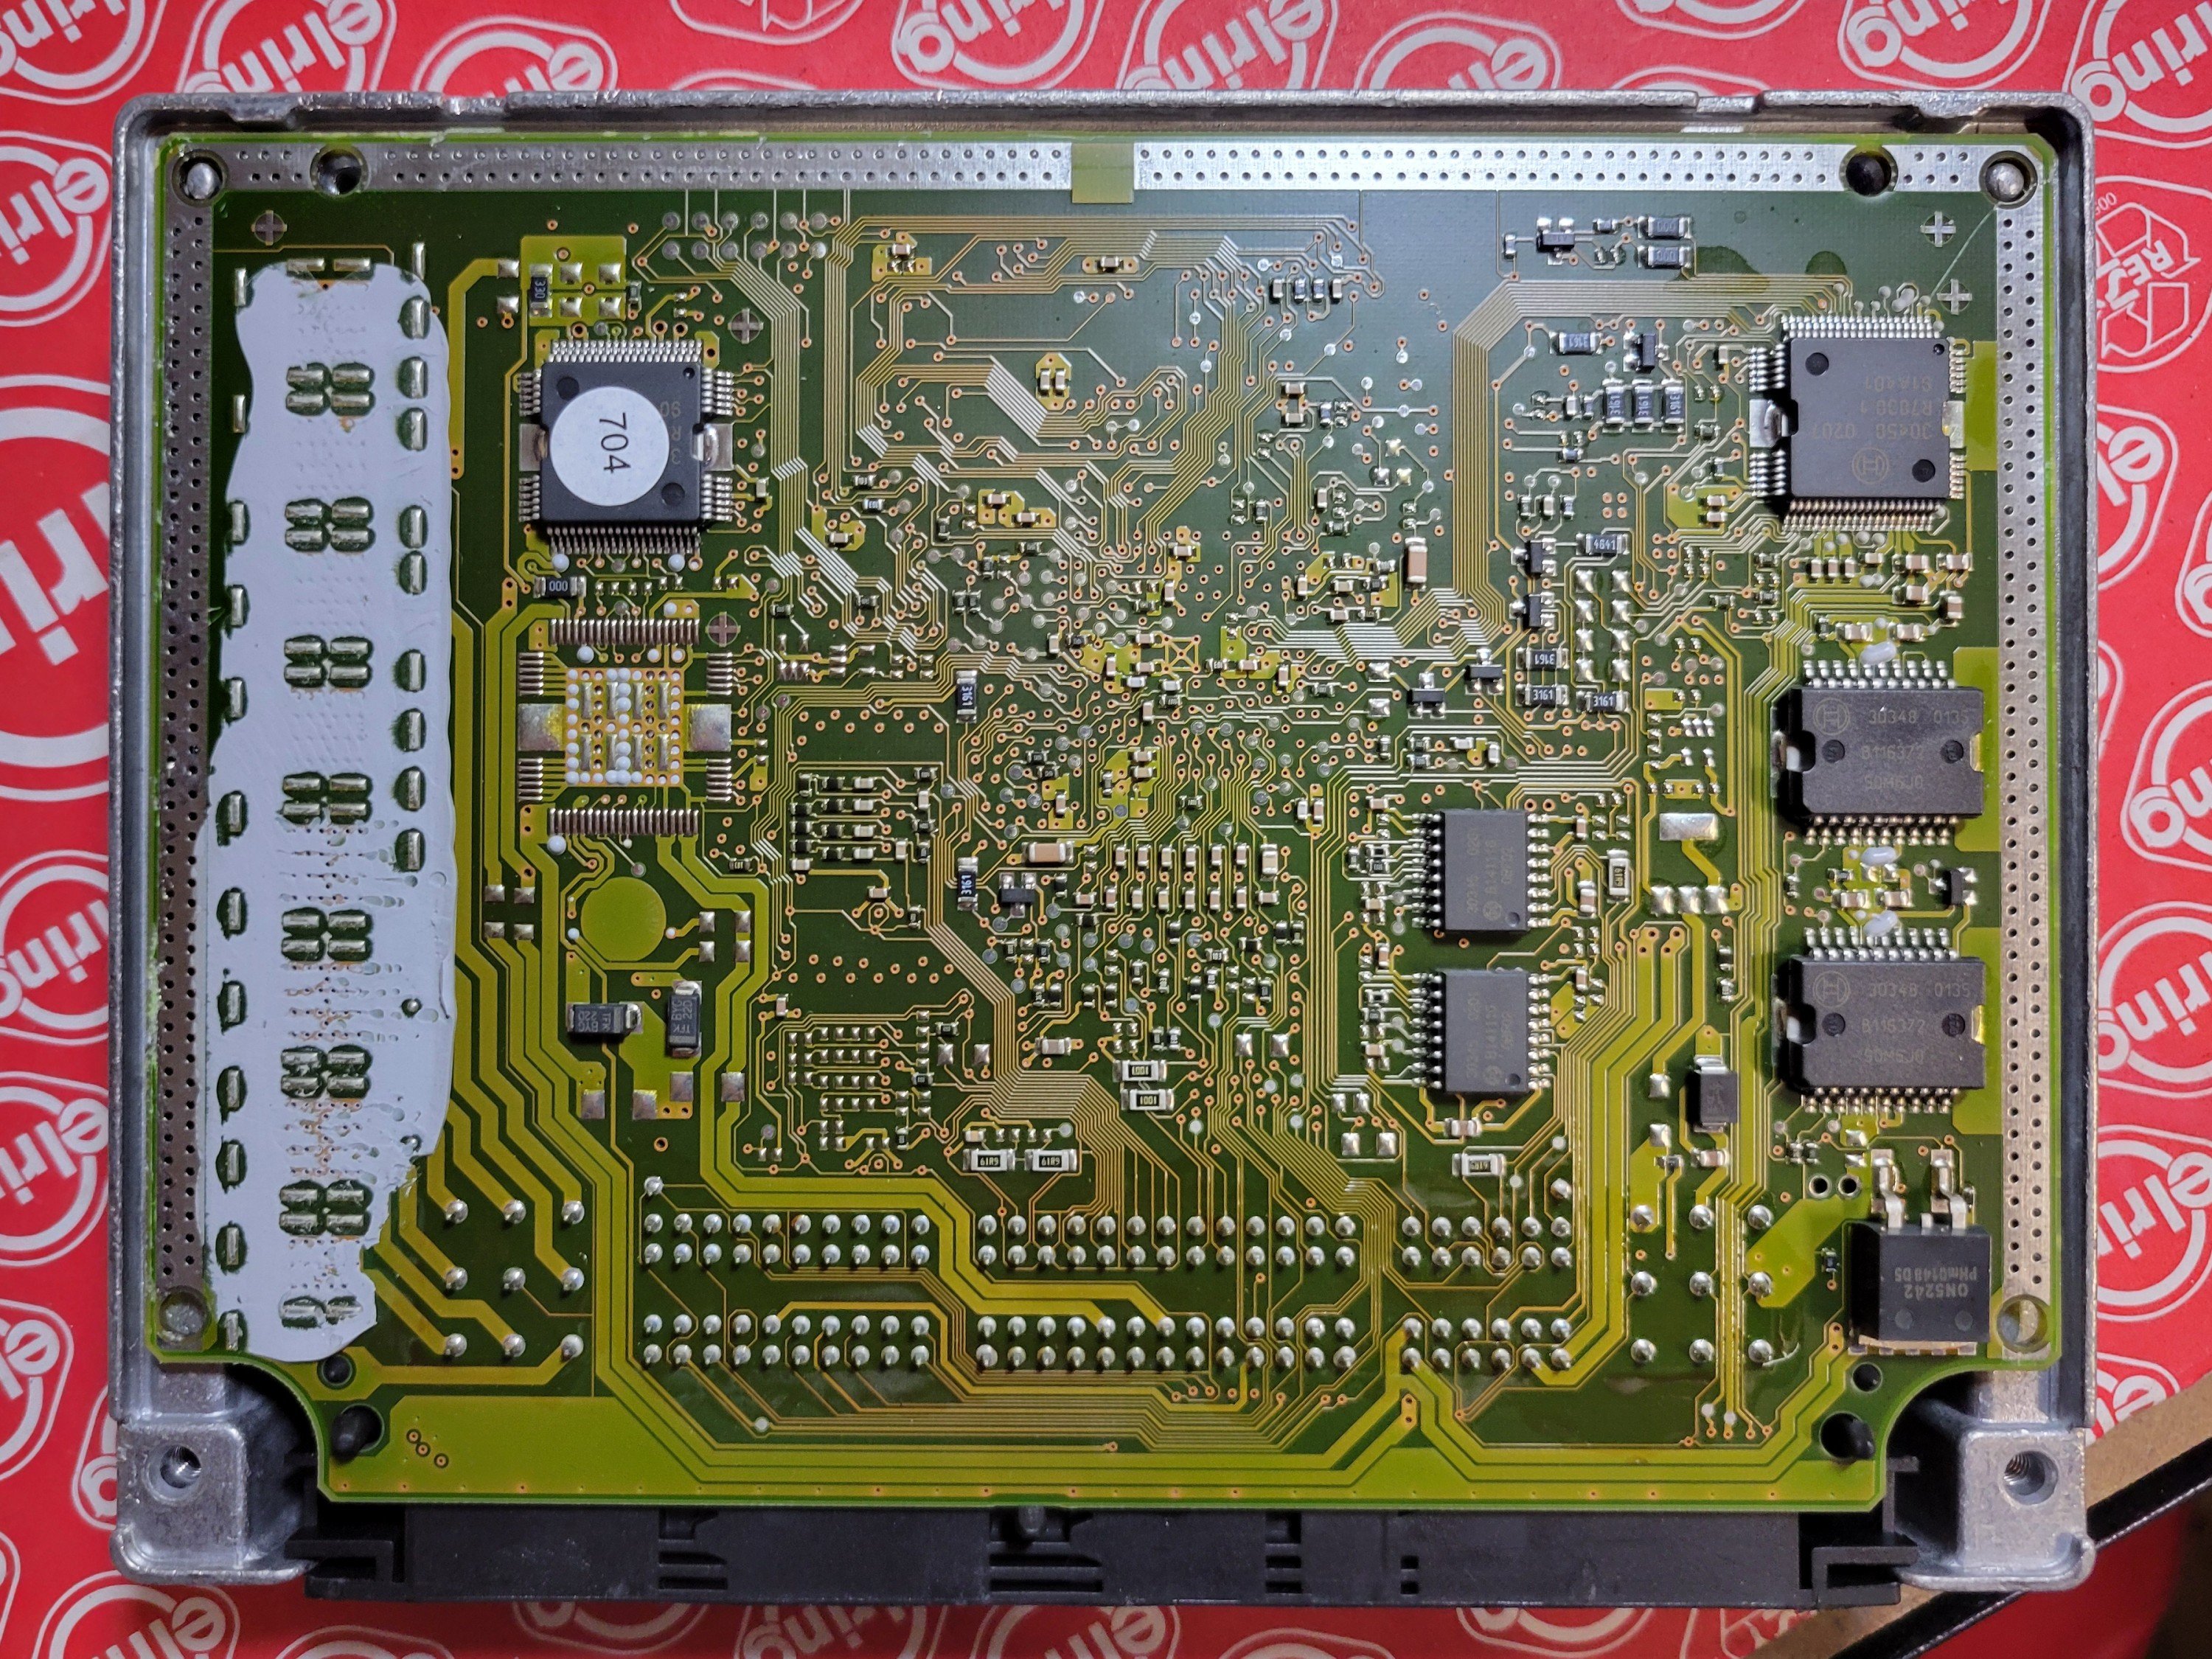
In any case, I sprayed both ends down with contact cleaner spray, then took the DME out of its casing to inspect for any other damage that might stand out but all looked fine to my unscrupulous eye.


That's about as far as I've gotten with it so far, am yet to reinstall the DME back into the car to see if that did anything. I want to again remove the intake manifold and give everything a going over before attempting another start, will then check/clean the ignition switch and try resync the DME to the EWS and eliminate that as a possible culprit.
This car would make a nice base for an M54 swap but with a barely 3-month old daughter keeping us on our toes and being down to one income I won't have the time nor the finances to turn it into a proper project any time soon. So my hopes are to get this thing running well enough that I can daily drive it for a few years, then see how I feel about it further down the line. If I don't manage to bring it back to life soon then I'll unfortunately be forced to put it out of its misery.
-
1
-
-
Must be 1 of 1.
-
 4
4
-
-
I mean to be fair, if you were to recreate what was done there (strip down to bare shell, rust treatment & full repaint, interior retrim, adjusties etc.) you'd probably end close to a similar figure, so I don't see it being as egregious as some out there that are asking $30k+ for cars that need another $10k+ spent on them. Looks to be a very tidy and well sorted car with some subtle mods. Doesn't mean it's worth what he's asking to someone out there but I don't see it as a blatant flip or a cash grab. For example, my E46 genuinely owes me close to that figure at this stage but I'd be lucky to recoup a third of that if I were to ever sell it...
-
1
-
-
Ohh I just noticed you got those door & fender inserts painted white at some point. I remember you mentioned wanting to do that at the beginning but don't think you went into specifics on it. Minor detail but would be keen to hear about the process. Those strips feel like a weird material to paint since the plastic looks a bit porous, they're also real flimsy so wondering how best to make the paint stick and retain a nice finish. What sort of prep did you undertake, sand them down somewhat or just clean up and spray? Did you paint them masked up on the car or removed them?
-
Some more tiny details that I've tinkered with recently.
Did a few tweaks to the stock DME tune, main one being the thermostat target temperatures. Originally pioneered by @Eagle and I just followed suit. On my android headunit the coolant temperature display is always just 2 clicks away so I've been monitoring the running temperatures quire regularly. I believe they've always been within the norm but were constantly on the higher side, hovering around 99-100°C city driving and 101-102°C motorway cruising. With the below changes they've now gone down a tad to 97-98°C city driving and 94-95°C on the motorway. Eagle reckons some brand thermostats just run a bit hotter than others, in his experience he hadn't seen any M54's consistently run above 97°C so 102°C did seem a tad excessive. This tweak seems to have brought the temperatures down into a more comfortable range. Next time I change the thermostat I might give another brand a go, currently running a Borg Warner unit.

Originally, both tables had identical values, as per the right side AC ON table above. The screenshot is halfway through the process with only the left side AC OFF table values modified, the AC ON values were then also modified to match.On the topic of exhausts, I stumbled upon a little titbit of information in Bryson's thread over on E46 Fanatics about the vibration dampeners on the stock exhaust system. Turns out automatic cars had two of them, both #4 & #12 on the schematic below, whereas manual cars only had #12. Mine being converted, I decided to unbolt the #4 dampener from the rear of the muffler. Can't say it made a discernible difference but it's now a tiny bit closer to a factory manual.
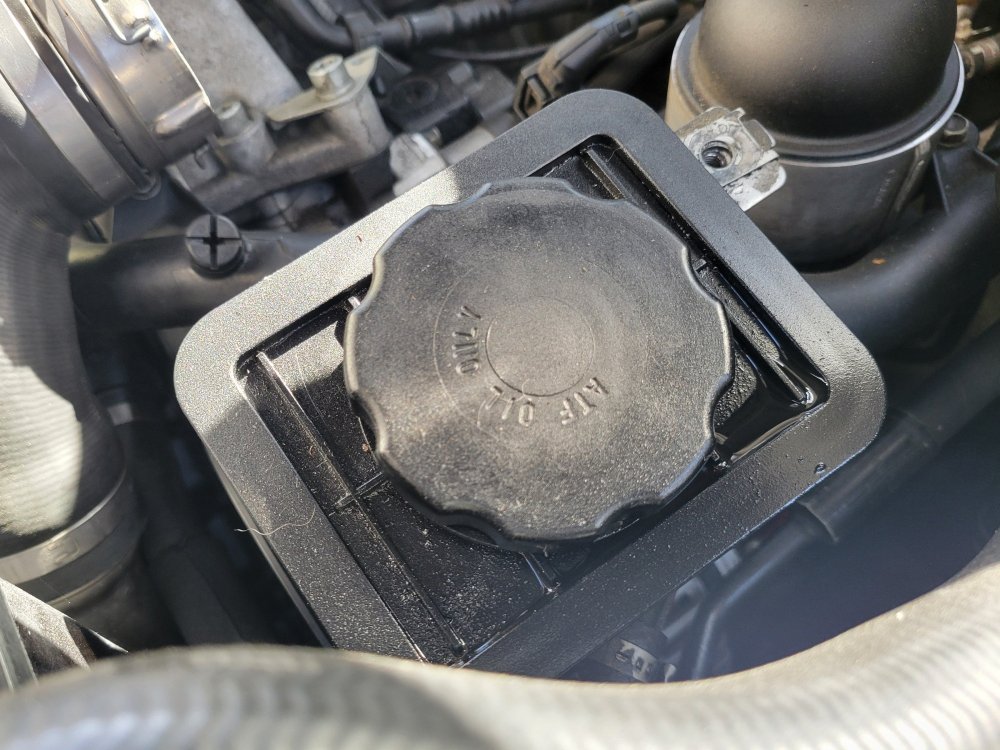
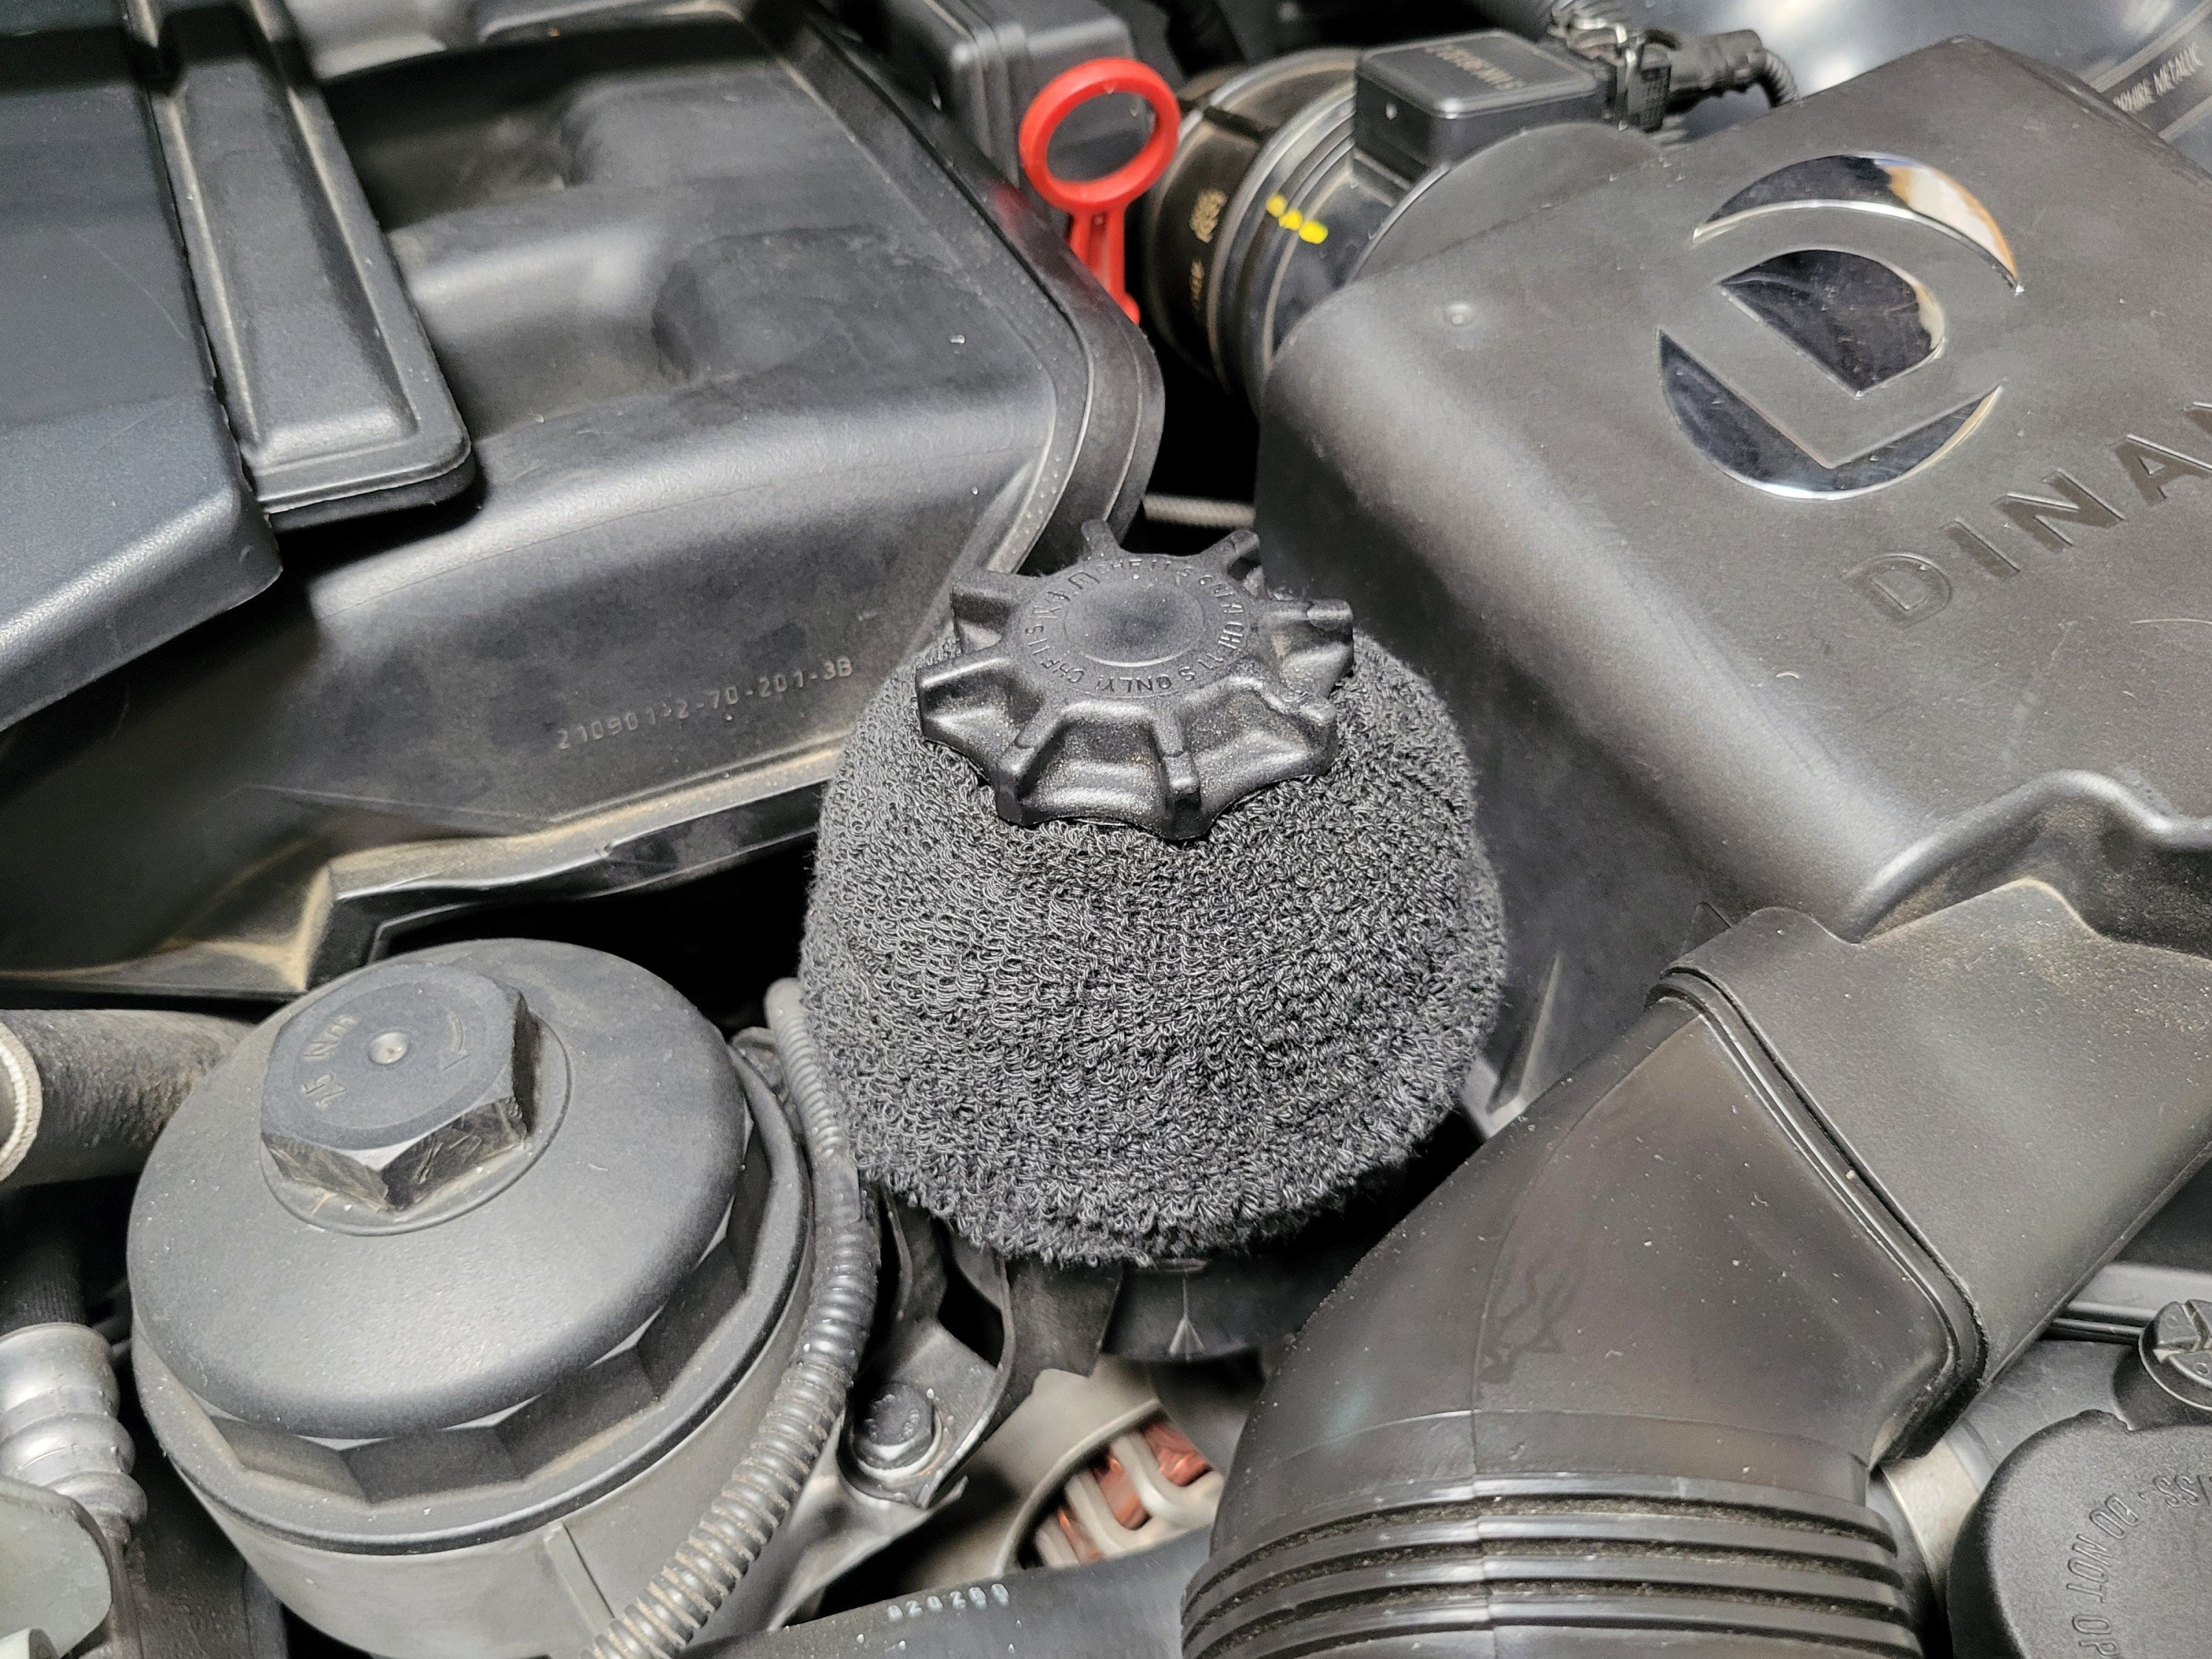
The power steering reservoirs on these are notorious for weeping and creating a mess. Mine is still fairly new and hasn't succumbed to this inevitability but as a little piece of security from a potentially messy situation I got myself a cheapo wrist sweatband and draped it over the reservoir. Fits well and looks quite inconspicuous being all black without any tacky logos. The idea was of course blatantly stolen from Garagistic but cost me a fraction of the price.

-
2
-
-
1 hour ago, Harper said:I've got no regrets after chopping the centre muffler resonator section out of the compact. Made the car maybe 10% louder and just sounds a bit throatier and more low speed burbles. I'm not sure how different the 325ti rear section is though, totally different shape and smaller than the 330 muffler so maybe that contributes.
Yeah good shout, that's probably what I'll end up doing next. Just scrolled back through your thread again, for some reason at first glance I thought you had the secondary cats cut out instead of that resonator. Good to know it is an improvement even with the cats still in place. Having gotten rid of the stock manifolds I'm hesitant to get rid of the secondary cats too, don't want it so smell like a bag of eggs left out in the sun...
-
On 11/23/2023 at 10:09 PM, Vass said:- Been having an intermittent issue of the driver's side HID headlight not wanting to turn on. Sometimes it'll just take an extra minute for it to light up, sometimes it'll need a smack, others it'll work perfectly fine. I suspect it'll be something to do with the ballast or a loose connection as if it was a bulb then it probably wouldn't turn on at all. Will need to go on a mission of swapping components over to opposite sides to figure out what the culprit is exactly. Could even be the ignition switch, apparently, who knows...
Decided to revisit this issue since the frequency of it happening seems to have increased of late.
I had previously installed new HID bulbs, which made no difference.
Next up was the ballast, which I managed to grab a spare of. Fun fact - the E46 shares the same part number with the first gen (BMW-era) Mini, of which there was plenty of at Pick-A-Part so I nabbed a newer 2006 production date one. Seemed to work at first but a few drives later the issue resurfaced.
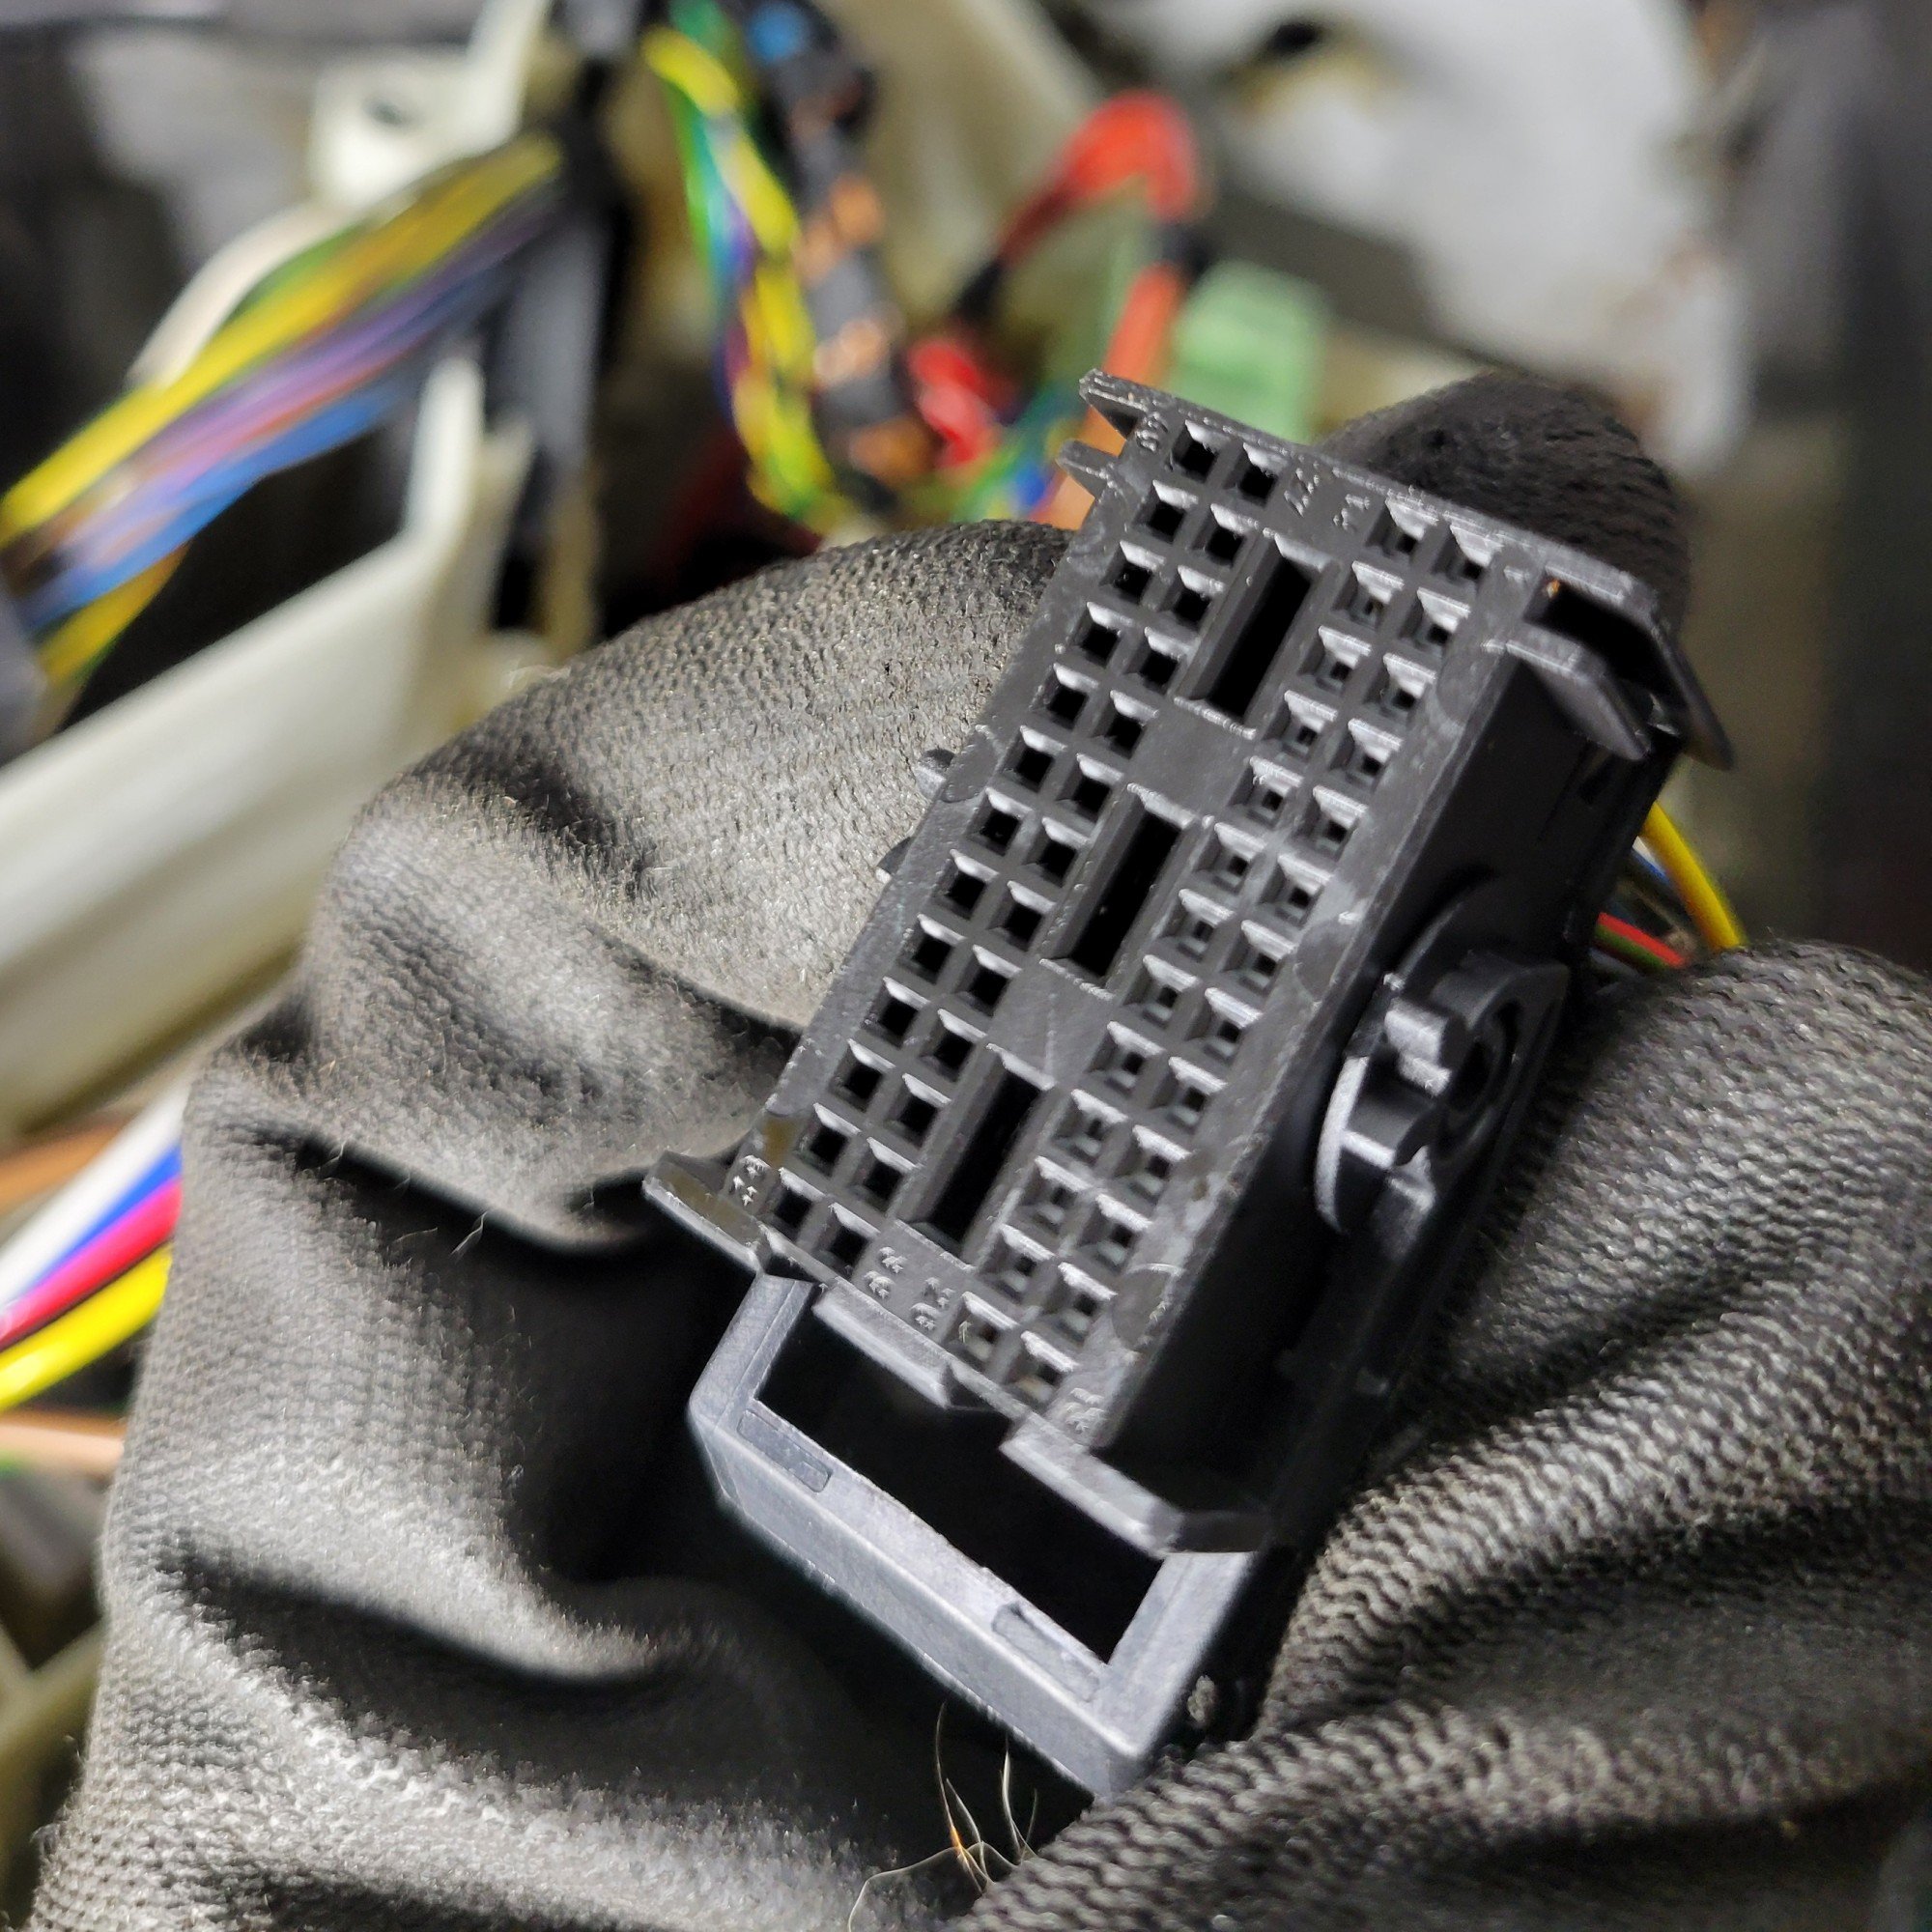
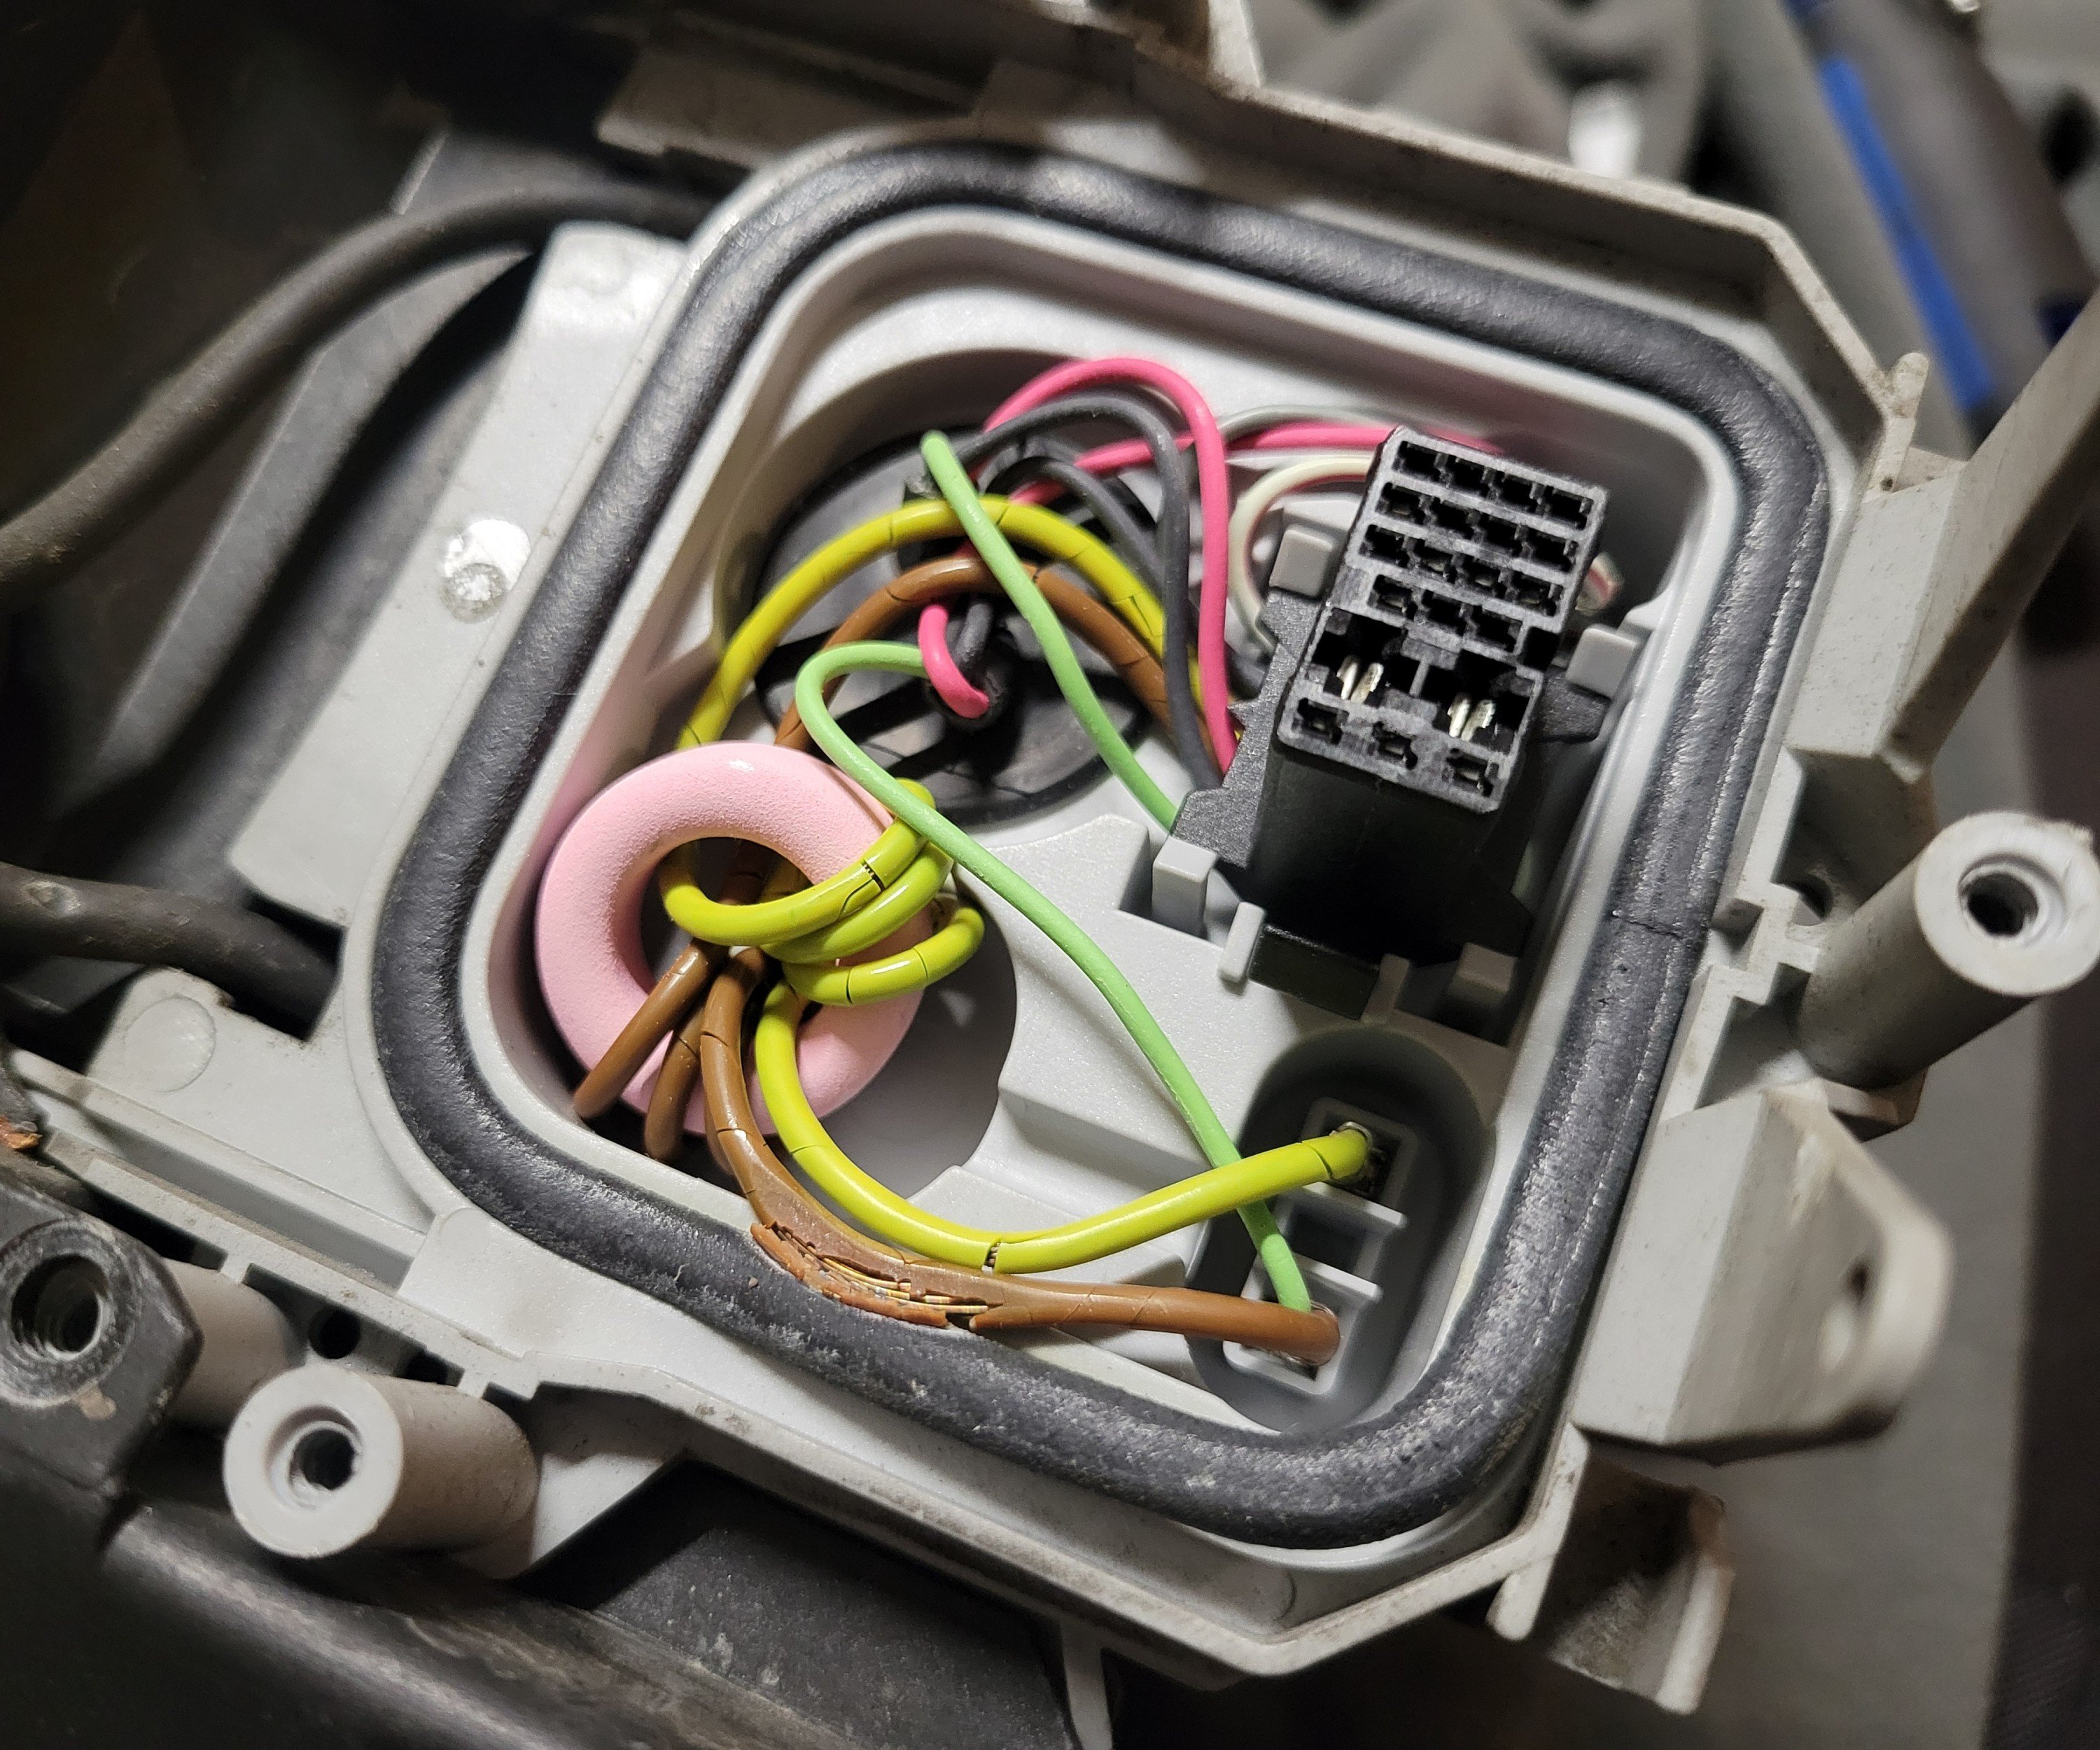
I then dug a bit deeper and took the lid off the housing where the ballast connects to only to discover this:
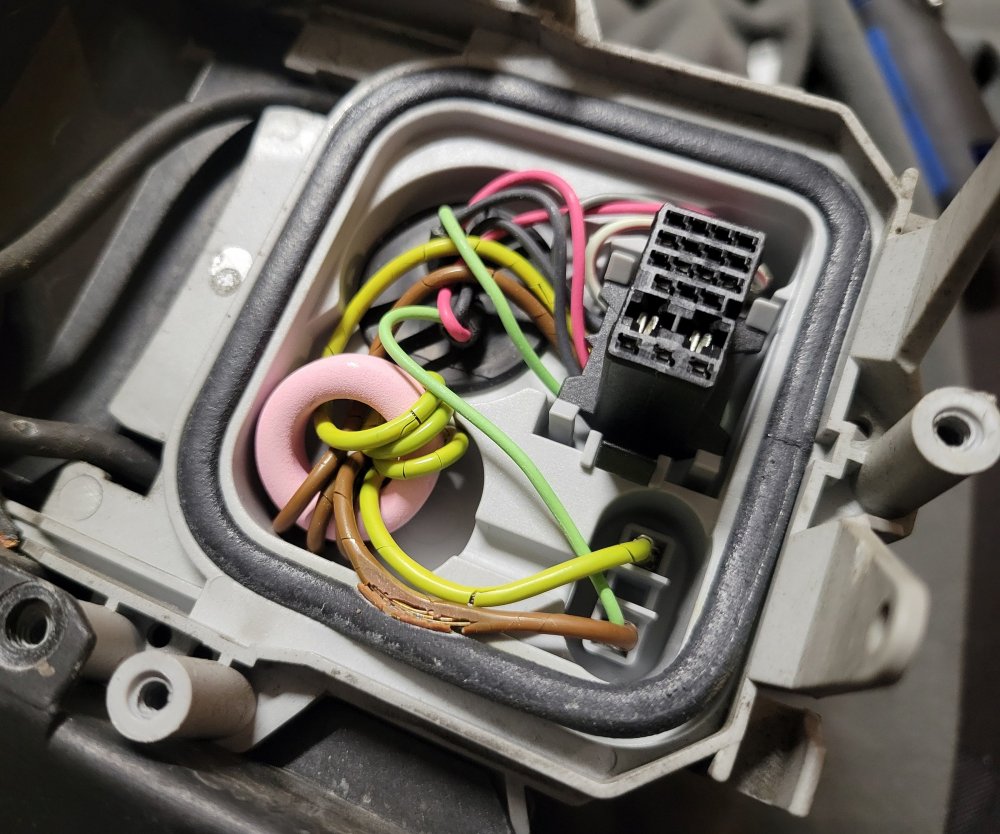
The insulation on the wiring had gone real brittle and was cracked throughout and one of the brown ground wires seemed to be crushed by the seal, leaving the metal completely exposed. Not even sure how to remedy this properly, rewiring seems like a mammoth task to get right looking at the way all the wires are intertwined. For the time being I just cleaned up the most obviously damaged part and wrapped it in electrical tape to at least somewhat isolate it.
At one point I also scored a spare xenon headlight from Pick-A-Part when one eventually turned up. Testing it out it fired up straight away without any issues so I'm hoping the internals on that are in better state than my current one. Unfortunately, the casing on it is pretty rough and has several clips and tabs broken off so it's not a straight swap in its current state. I will need to dissect the light and hopefully make one good one out of the two I have.
As of a few weeks ago, poor Barbara got kicked out of her cosy garage to make room for this ol' nugget that I'm still trying to resurrect. Ever since sitting outside I started noticing the problematic driver's side headlight also suffering from moisture buildup inside the housing and the issue of it failing to fire up has become noticeably more frequent, failing to light up at all on several occasions in the past week, no matter how many times I cycled the switch. I'll need to order a strip of butyl and reseal both headlights properly, and will combine that with swapping out the internals on the driver's side light. This project has all of a sudden bumped itself to the top of the priorities list, although it's not without competition.
So as things stand, I've got a broken 316ti occupying the garage, a broken X5 occupying the driveway and a touring with a broken headlight relegated to street parking. BMW life in a nutshell.
-
1
-
Even after installing the catless headers I wasn't quite happy with the exhaust tone. It somehow feels too subdued and is missing that throatier tone that I'm craving. It may be placebo but I swear I've driven and felt factory 330i's to have a nicer sound to them somehow.
When doing the engine swap I had both the stock 325i and donor 330i exhausts on hand and decided to stick with the 325 one since it looked tidier without the 330i exhaust flap, which I wasn't going to bother hooking up anyway. Apart from the flap the two looked identical. RealOEM gives separate part numbers for the front, mid and rear (muffler) sections, despite the full exhaust being one solid piece (in our part of the world anyway) - the front two are the same for both 325 & 330, the rear section with the muffler being different, obviously because of the flap but it got me wondering whether the two mufflers might have also been somehow internally different too. Only one way to find out.
@Carbon happened to have a full 330i exhaust laying around and we made it a quick mission to compare it with my 325 one. To make it at least a little bit scientific, I ordered me a cheapo Aliexpress decibel meter.
In the end the 325i exhaust maxed out at 98dB, the 330i exhaust at 94dB. Not sure how much of an influence it would have had but the 325i one had been in regular use and was still warm from having just driven while the 330i had been sitting (indoors) since around Christmas and wasn't fully warm at the time of testing. Whatever difference it may have made, it wouldn't have been night & day so I'm guessing there is no difference in the 325i & 330i muffler internals. Was worth the effort of finding out though. Not sure what made me feel that factory 330i's sound better than what I've got, might be the extra sound deadening I installed in the doors.
Still not overly impressed with the soundtrack the car produces, sounds too muffled even when giving it the beans. I know these aren't the best sounding engines in general and will never sound as good as a V8 but just want a bit more of a throatier rumble without being too obnoxious. Might play around with it a bit more somewhere down the line, maybe a secondary cat delete or an aftermarket muffler or something.
-
1
-
-
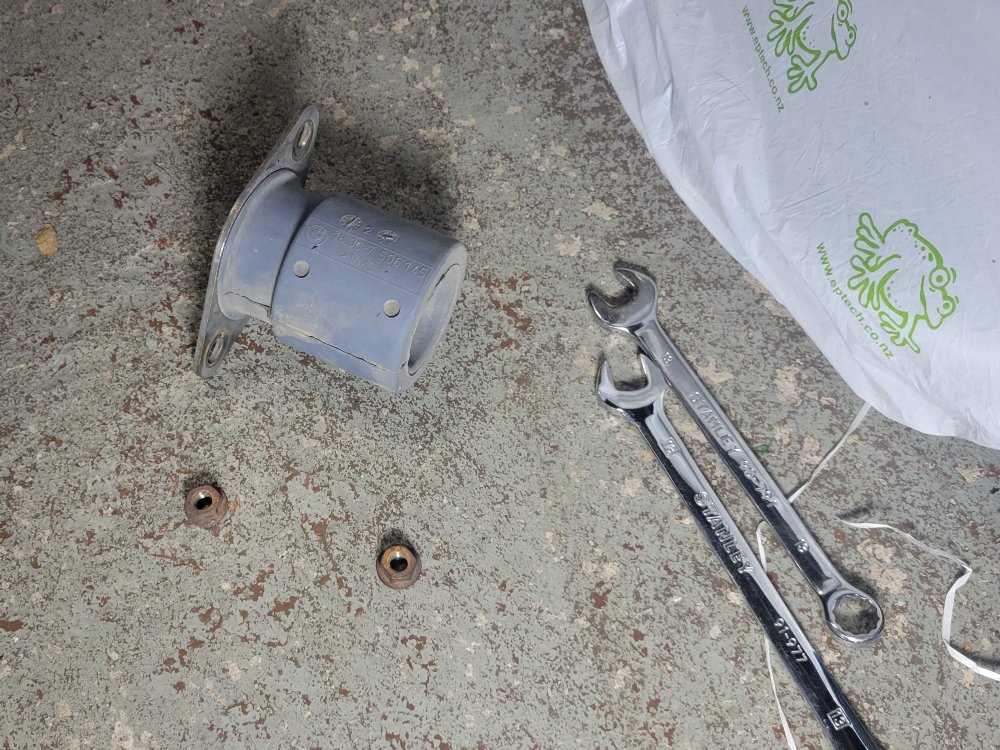
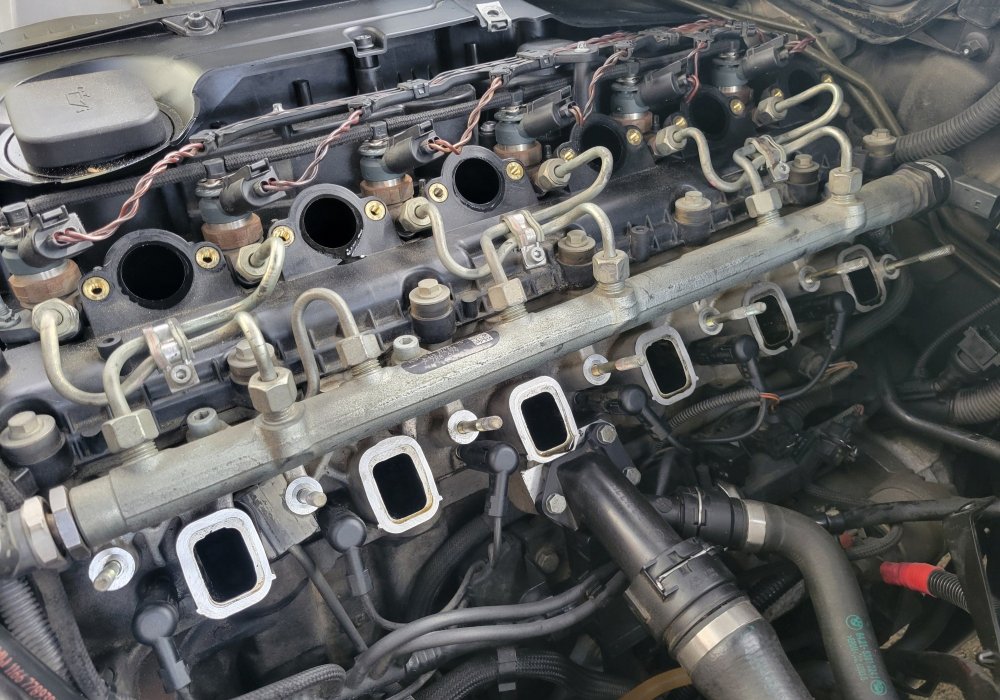
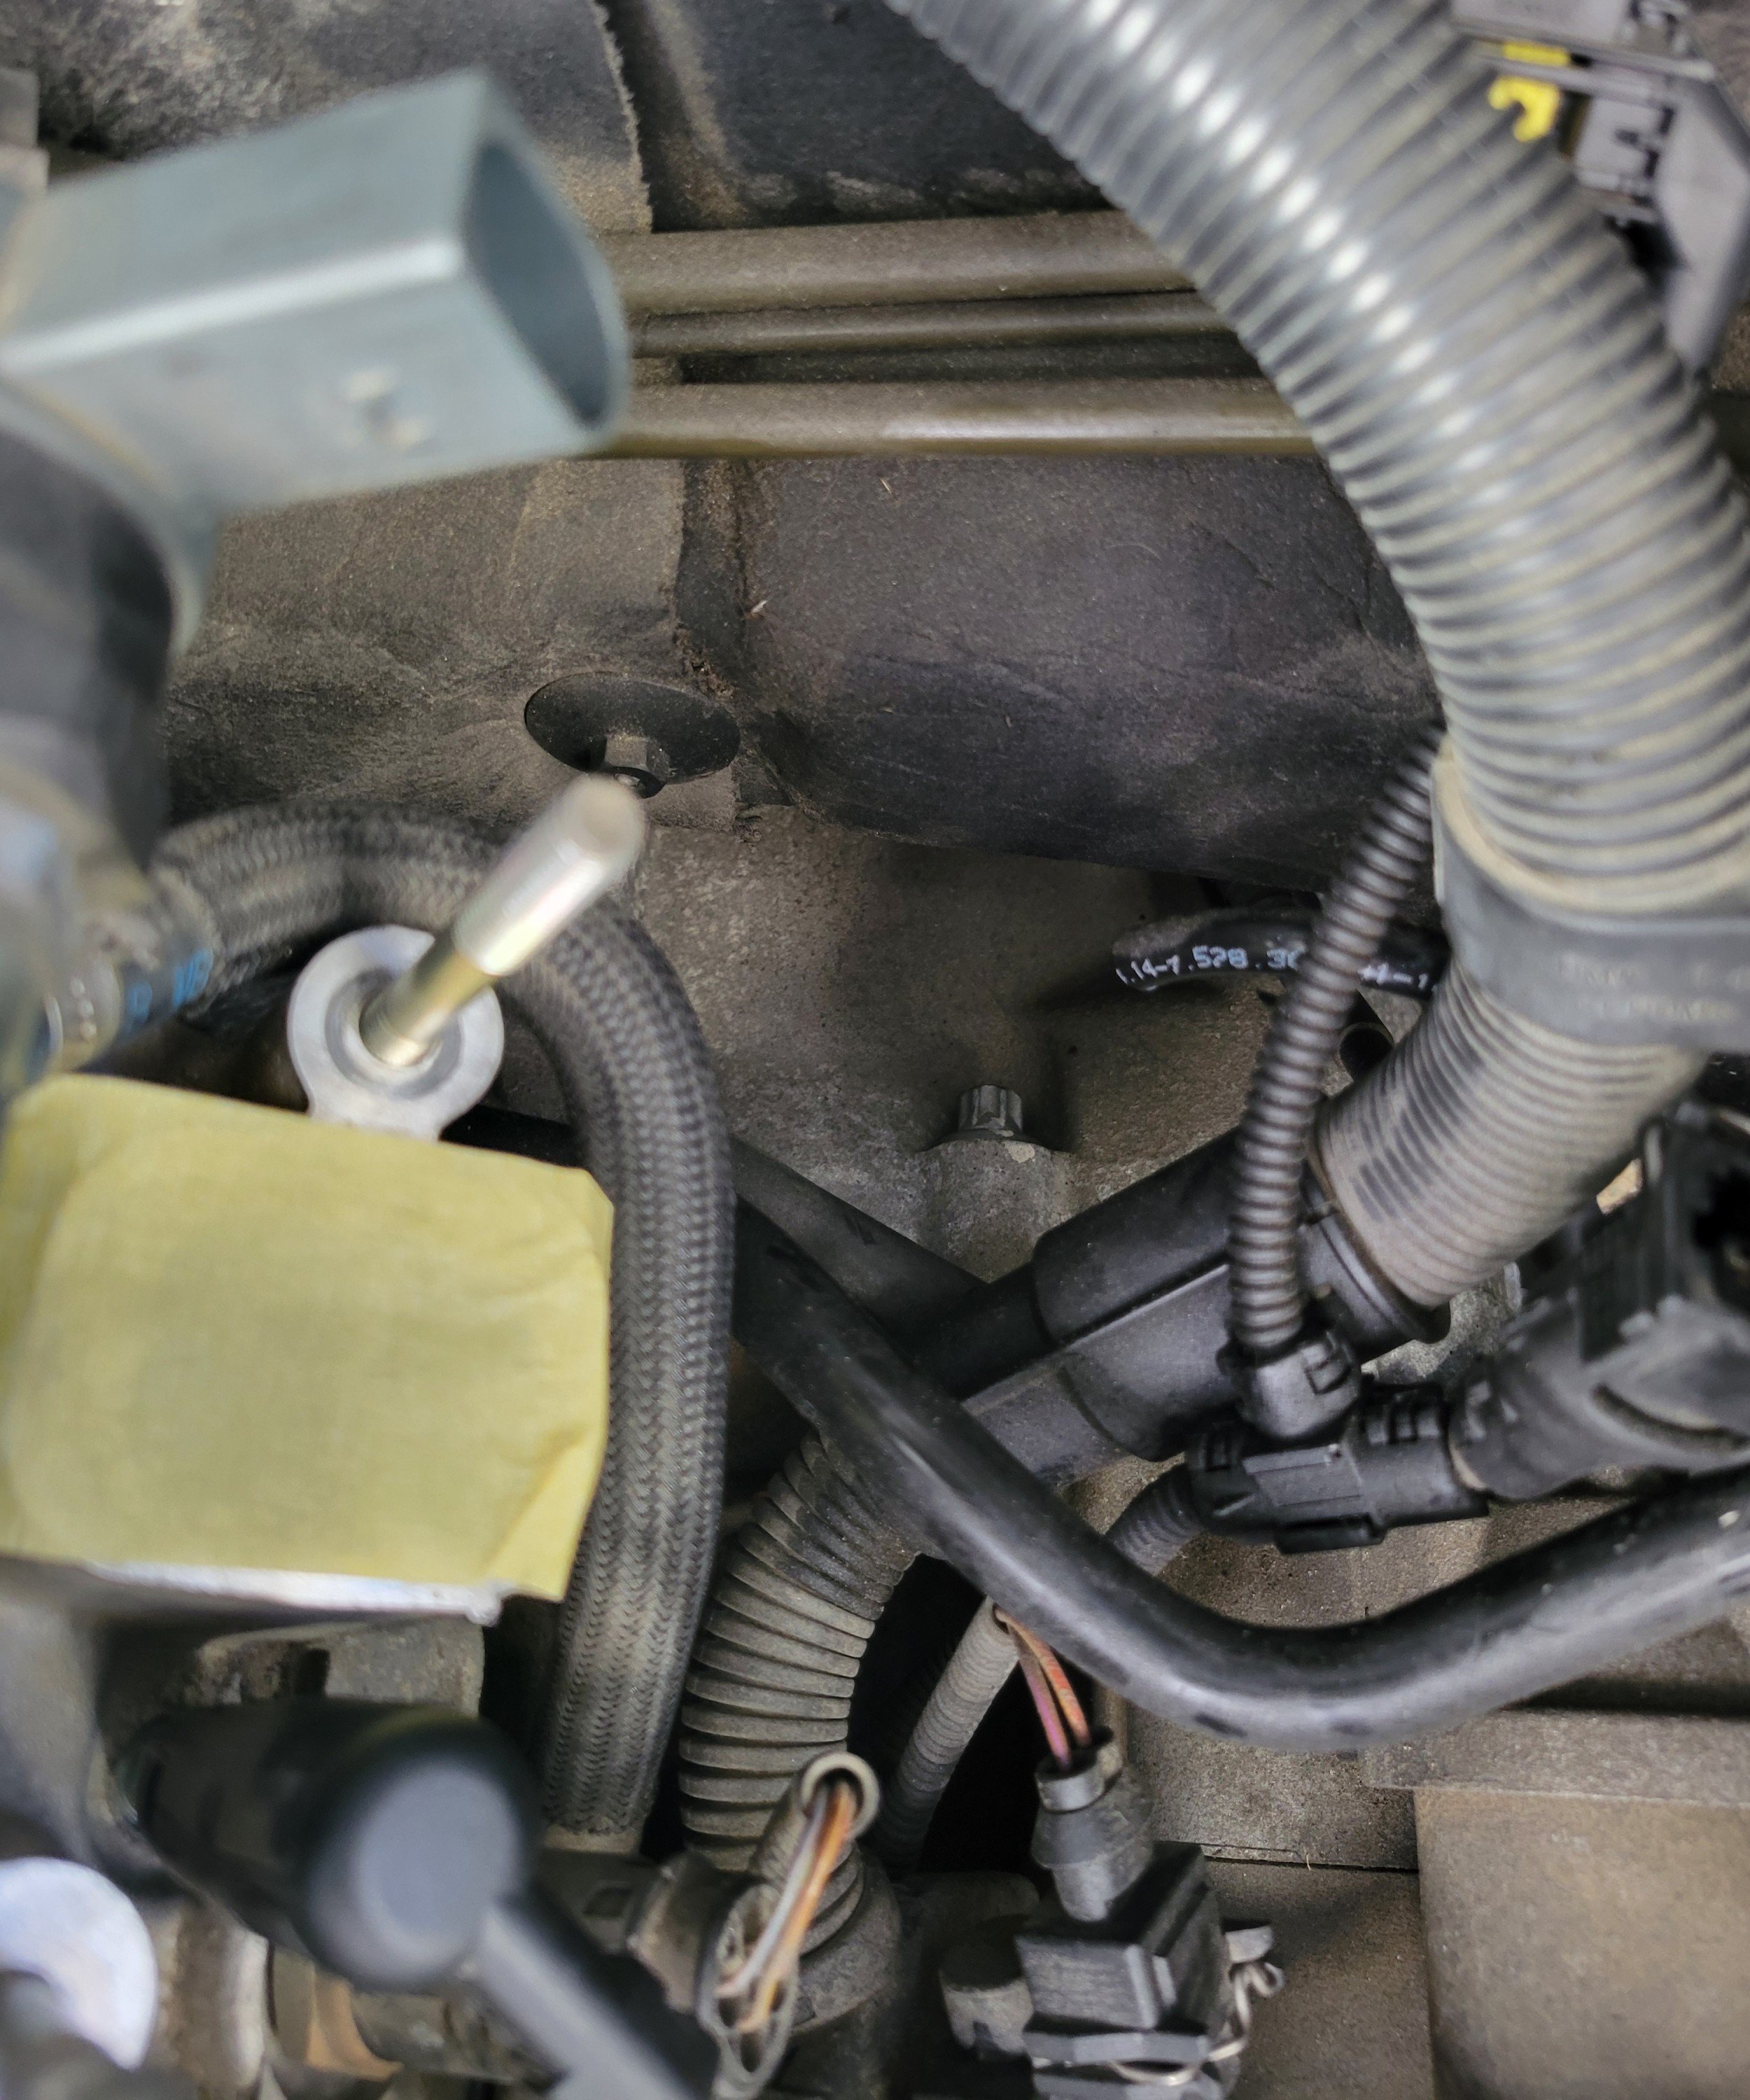
Dug into the starter extraction first thing Saturday morning. Quite an easy job all in all, with no messy fuel lines to disconnect the intake manifold came off in around half an hour giving decent enough access to the starter/bell housing bolts from up top. Still quite a tight squeeze but not as hard up against the firewall/transmission tunnel than you'd have on an E46 and such. Cracked the bolts loose using a swivel head ratchet and then used a 10mm ratchet spanner to back them out the rest of the way. The intake itself was still nice and clean, just slightly oily, which was good to see.
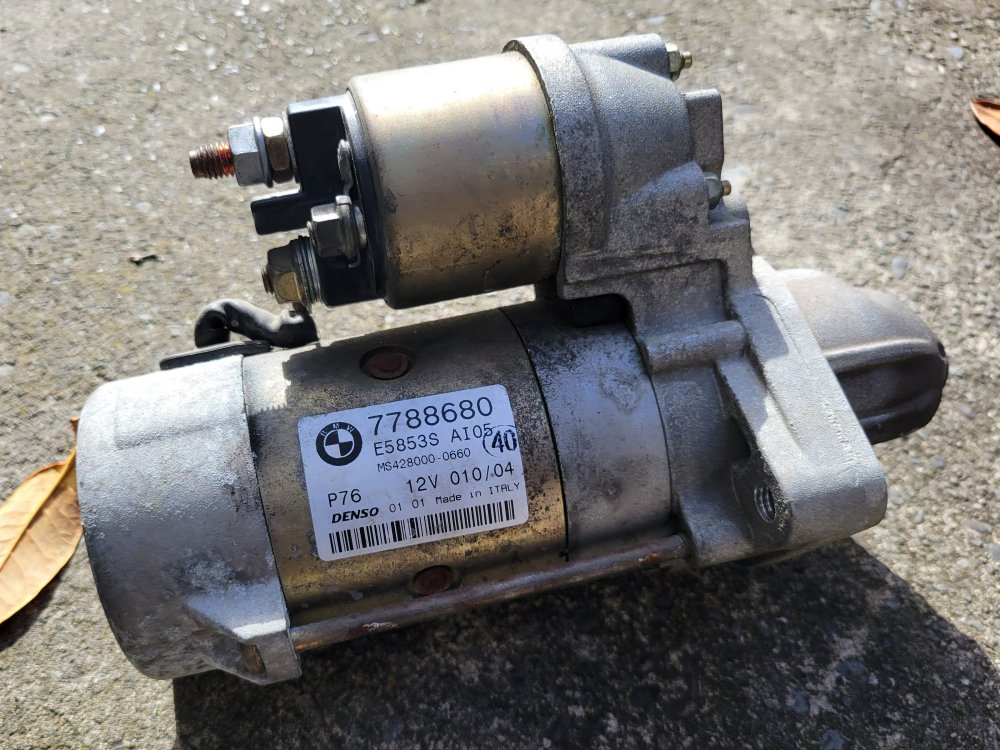
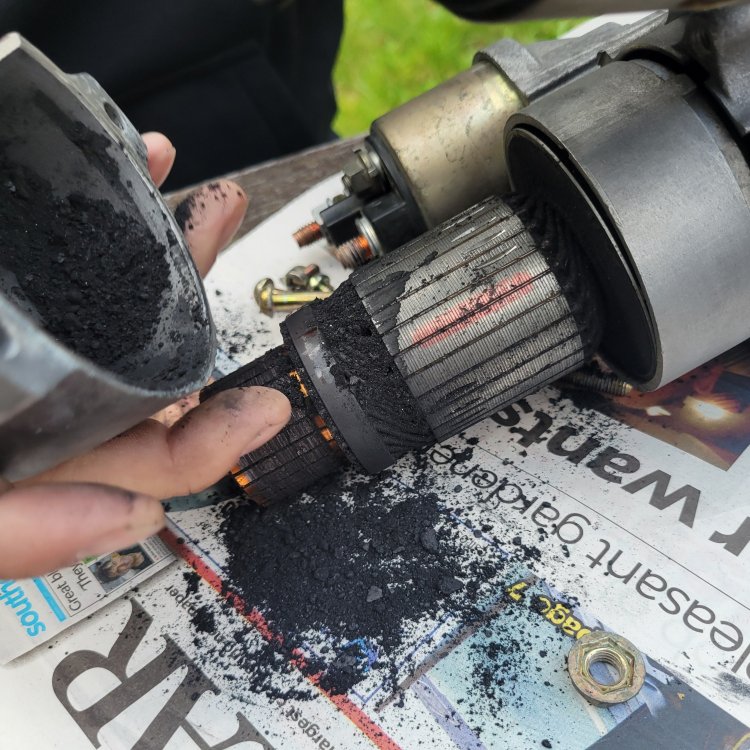
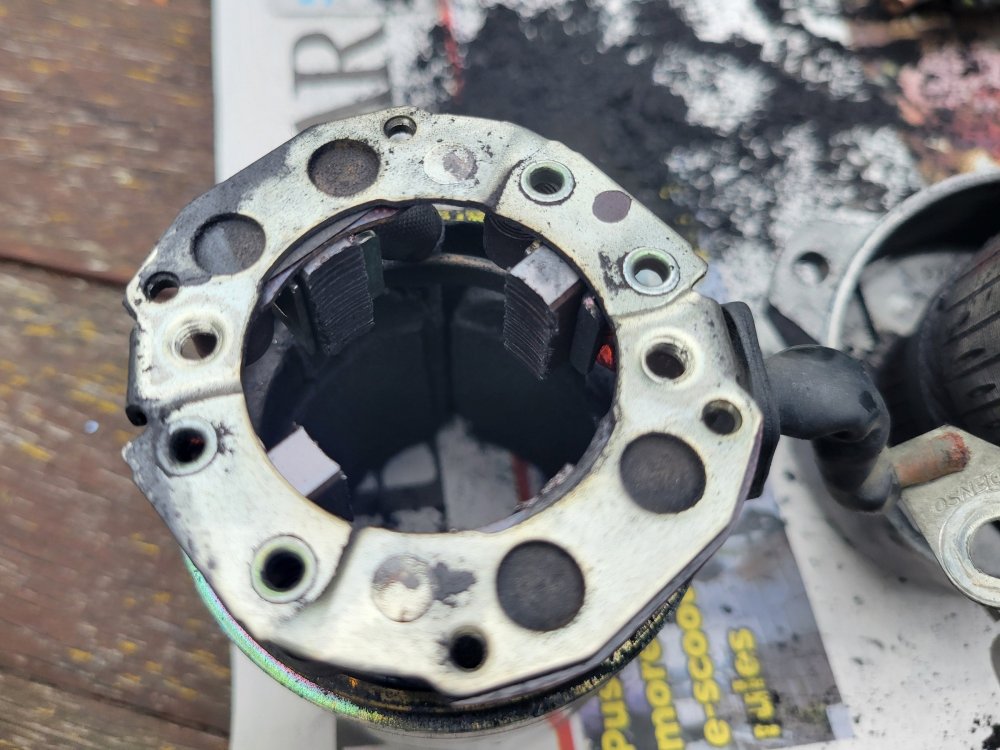
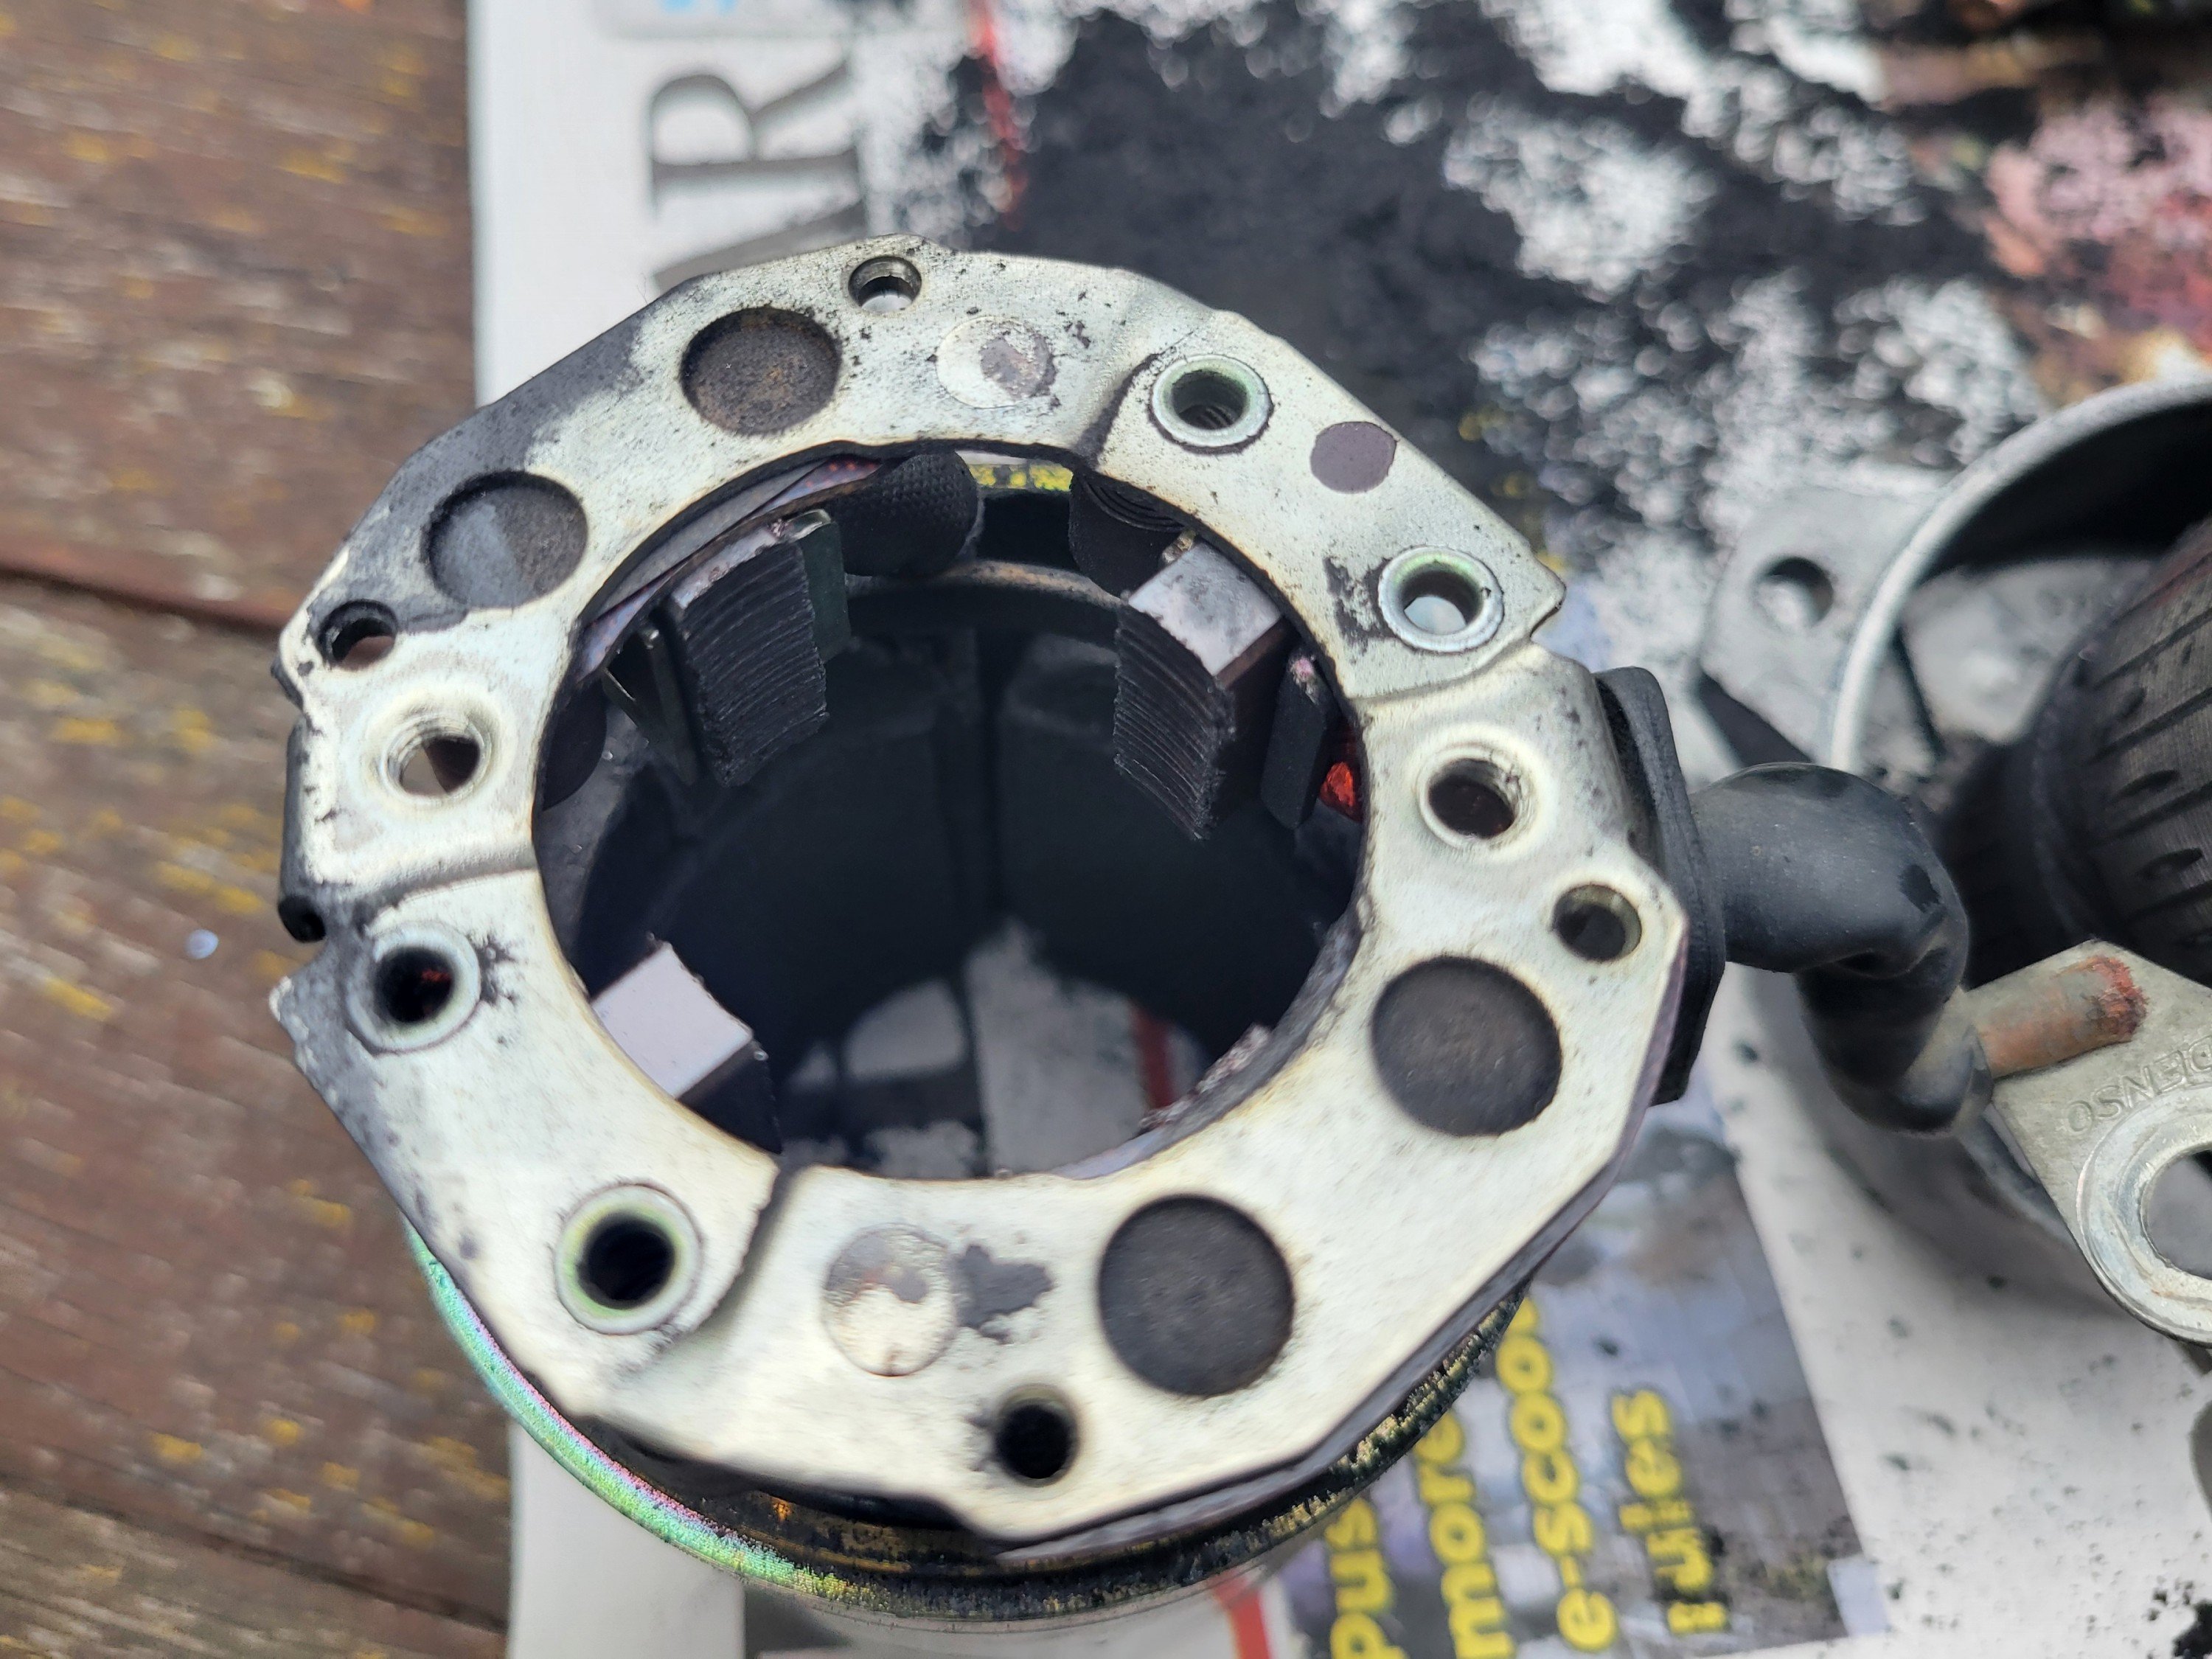
Took the starter to my mate who split it open and to discover brushes that were very much perished, leaving behind an impressive pile of carbon. From what he saw he reckoned it should be back in business with a good clean, regrease and new brushes. That would be a relief as new ones of these chunky starters are $500+.
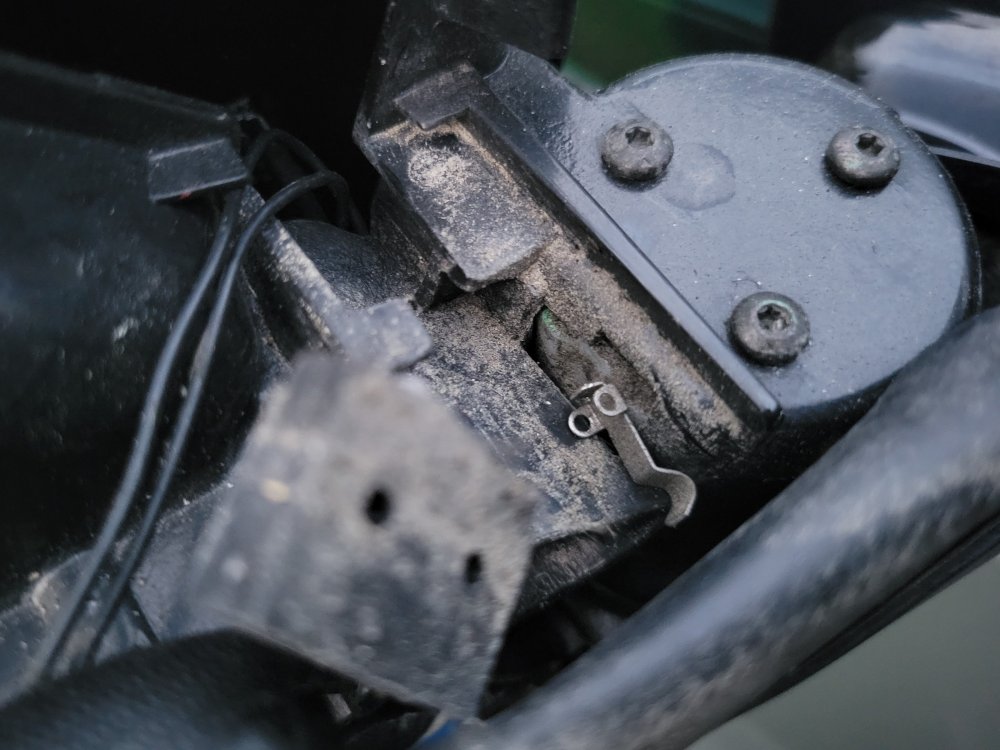
Left it with him to sort out during the week and scooted back home. Still had plenty of daylight left so tinkered on fixing an annoyance I had with the car ever since purchasing it - when pressing the button to fold in the side mirrors, they would fold in and go straight back out again, refusing to remain tucked in. Did a bit of digging and landed on this video which looked worth a shot. Popped off the mirror covers to inspect - the passenger side was fine but sure enough, on the driver's side the little metal lever had fallen off the sensor mechanism and was just sitting there. Gave the area a good clean, bent the tabs in slightly, reseated the lever and fixed she was.
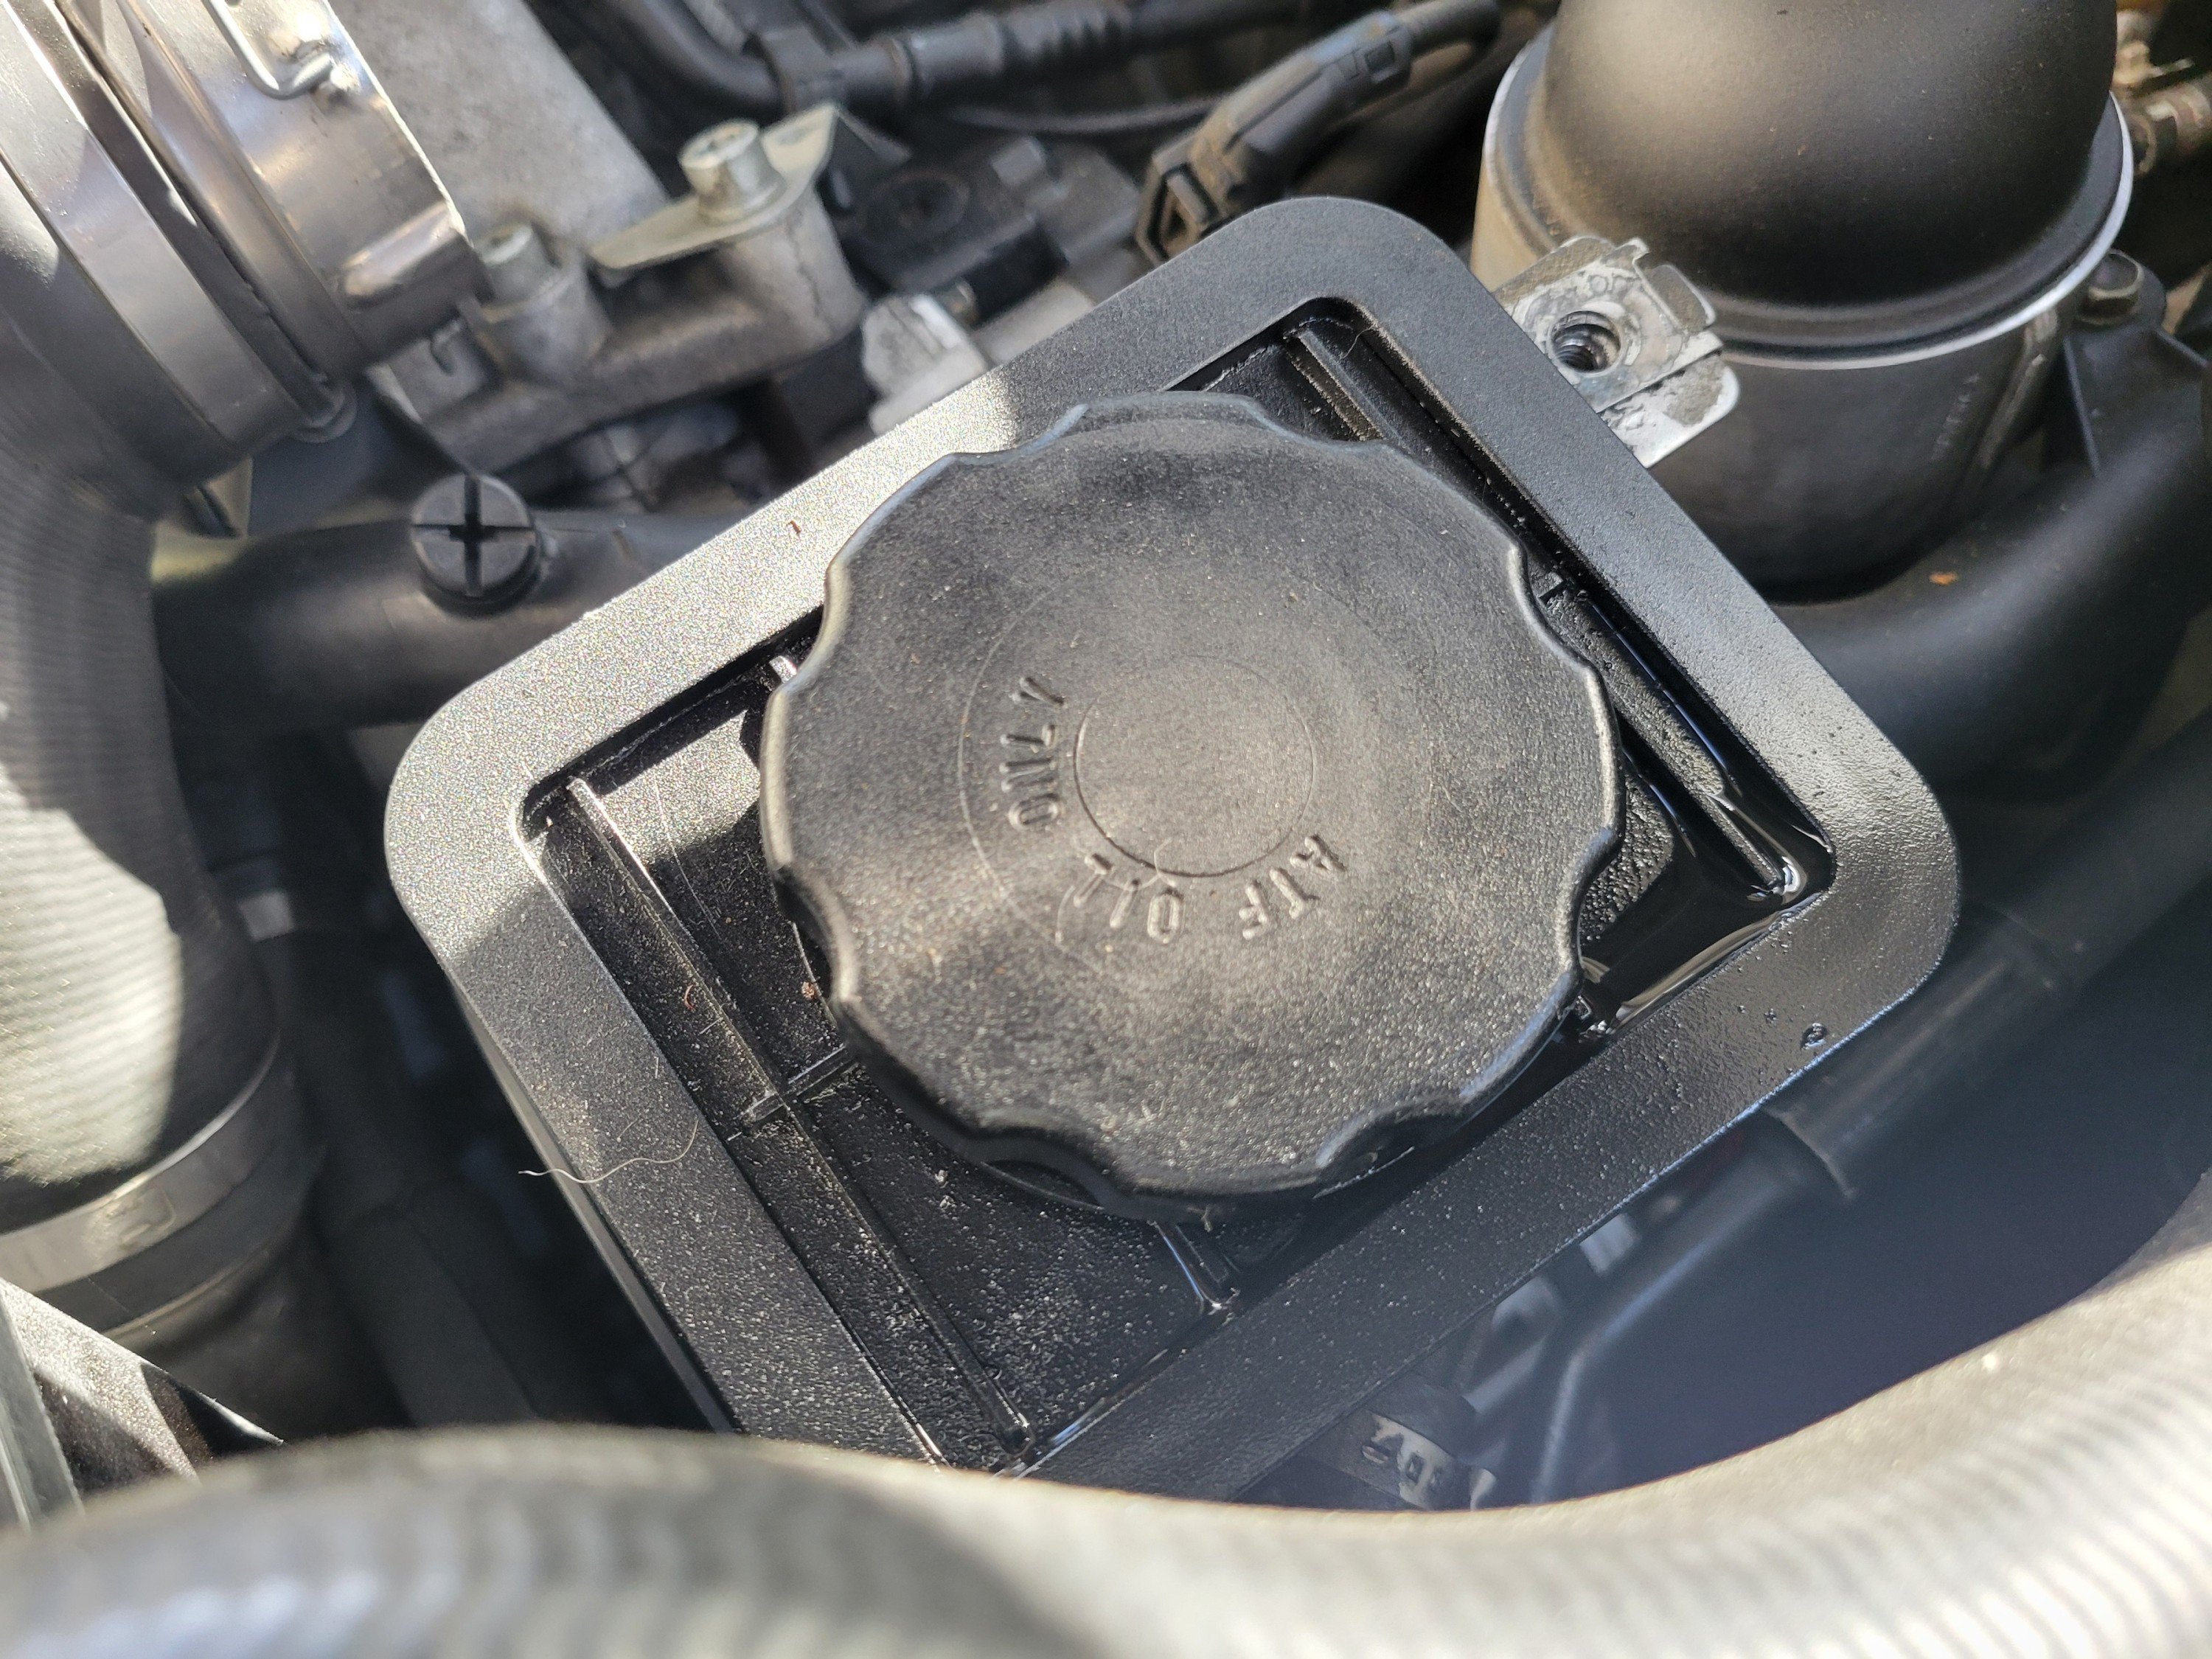
Also noticed the power steering reservoir had gotten wet again. I gave the area a good clean when doing the first batch of work on the engine so this was fairly new. The O-ring in the cap didn't look too bad but I managed to find a slightly chunkier one in my stash and threw that on. Hopefully that was the culprit of the leak all along.
-
3
-
-
Hahahah I thought I'd be clever but someone already beat me to it. Inevitable

-
6
-
-
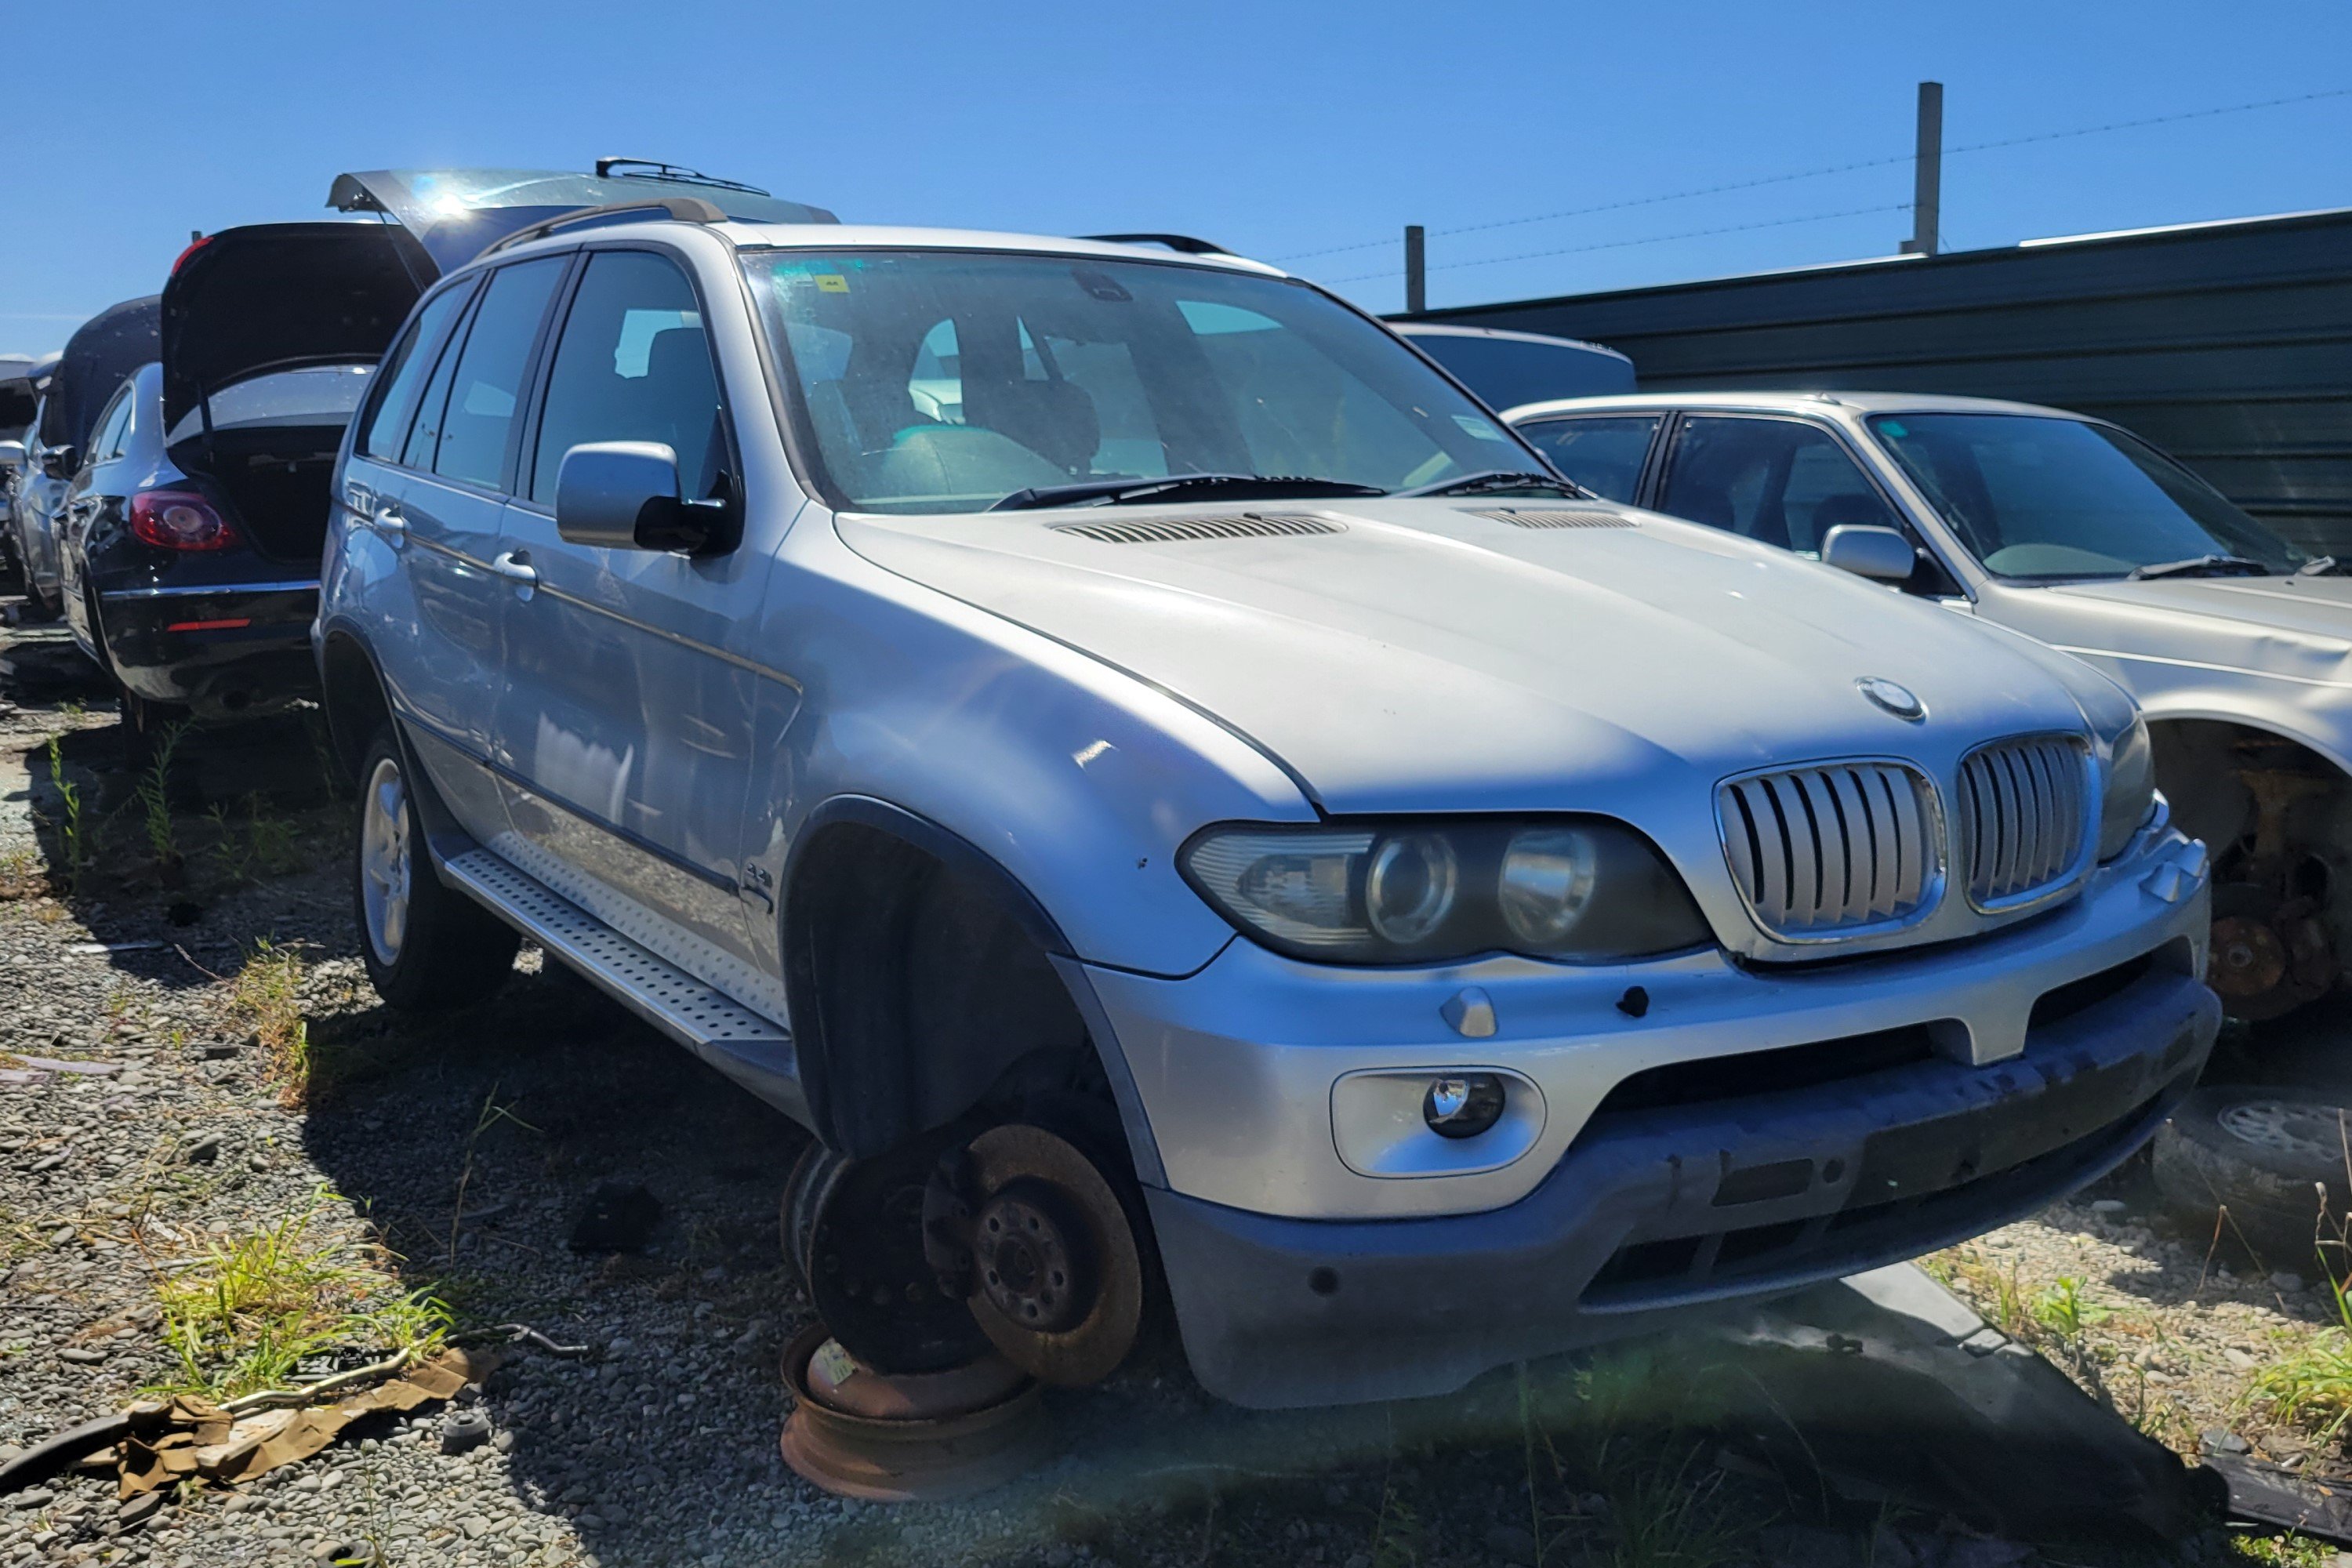
Tested out the X5 as a tow vehicle the other day when taking the wife's horse float in for a WoF. Handled the task with ease despite the float being a heavy old homebuilt lump from the 80's. Lining up a trailer is an absolute breeze with the addition of the reverse camera. At first I thought I might be in trouble as none of the lights worked with the trailer plugged in so I was fearing another dodgy wiring job with the aftermarket tow module but turned out it was just a matter of the pins on the trailer end being too tightly squeezed together. Spread them out a tad and she was all sweet. Didn't notice the rear sagging with the trailer hooked up so not sure whether airbags would have improved the experience in any way.
Then just a couple of days later the X5 got to enjoy a fun ride on the back of a tow truck...
It had been a bit sluggish firing up the past few weeks, the first crank would be a lazy one and seemed to take an extra crank before coming to life. Then the other day it refused to fire up at all after a good 4-5 cranks and only started up after cycling the key 2-3 times. Something was up but didn't get around to addressing it at the time. Then today the wife popped by for a visit to my work and the tractor wouldn't start again when she went to leave, would barely crank until it stopped doing anything at all - no clicking, no grinding, no sound whatsoever when turning the key.
Prior to that, the last time it drove I tested the voltage through the cluster display which said the battery sat at a steady 13.8-14.0V, and still had 12V with the engine off so that ruled out the battery (and the alternator).
My best bet is the starter packing up after 20+ years and 292k km's of service, assuming it's still the original. Can't even be mad if so.
Luckily, the wife still had her AA Roadside Assist membership active, which she had completely forgotten about. The only reason I even knew she had one was that I happened to be on the phone to AA earlier in the day making a change to our house insurance policy and them mentioning that we get a discount due to being members... So we got a free tow out of it. Handy.
Will dig the starter out over the weekend, once it stops pissing down, hopefully. With any luck it's just the brushes that have gone, have a mate who has a knack for these things and can easily rebuild it if that's the case and get her back up and running pretty quickly. Fingers crossed that's the extent of it.
-
2
-
-
16 hours ago, Kodachrome said:I would have thought it being gutted and tracked to sh*t would make it far less, not far more valuable?
Yeah that's crazy. Doesn't even have the M5 body kit anymore. If you wanted an M5 racecar, pretty sure you could grab a stock one for ~$40k, strip it and sell interior, body kit and other no longer needed parts that'd pretty much pay for a roll cage. What's a BBK worth, $5k max? He'd be lucky to get half of that asking price.
-
2
-
-
On 8/23/2015 at 6:16 PM, HELLBM said:Seats are from a E92 M3.
Sorry to dig this oldie up, I know it's long gone but wondering what was involved with making the E92 seats work in an E46? I imagine seat rails patterns aren't a direct fit and the electronics wouldn't be plug & play either. Was it just a matter of re-pinning some connections or do the E92 seats have modules that require some more intricate tinkering/coding to work?
-
What ever happened to this one? Still registered and road legal according to rego check, does it still have the S54 running gear and everything?
-
Sounds like a rough introduction, but on the bright side, you started off with one of BMW's worst engine from the past 20 odd years, so things can only go up from there.
I'm willing to bet the valve stem seals will be shot on the little ti, very common issue on those N42 engines. Very tedious job replacing those, probably beyond the average DIY enthusiast and you do need some special tools. I've done it once and it took the better part of a weekend. You'll be looking at close to a $2k bill if taking it to a shop. The ti is a fun wee car but unfortunately the 4-cylinders in them are absolute pigs and are more trouble than they're worth. Either engine swap it or get rid would be my recommendation.
I dare say you'll have a much better experience with the 6-cylinder, although not without its issues. Luck be with you!
-
1
-
-
Test drove a couple of these before settling for my Swift Sport. The GTI felt real nice and torquey, real fun to drive being a manual and would no doubt blow the Swift out the water performance wise. I absolutely loved the GTI Recaros too, incredibly comfortable but the rest of the interior was what did it for me. Whilst the Polos were seemingly the nicer places to be in, both examples I viewed were really ragged on the inside despite being otherwise quite well looked after - sagging headliners, scratched up and cracked bits of dash, buttons worn and peeling, sagging door card fabrics... All seemed like typical faults, the interiors just didn't appear to hold up to wear & tear all that well, which I felt like would have been too annoying to live with long term. Whilst the Swift was all bare bones & hard plastic on the inside, you could barely find any wear at all, apart from a worn seat bolster. Funnily enough, my Swift Sport also came with factory Recaros so at least it's even on the seat front.
-
1
-
-
Wow, that's a trip! You're probably right about the cause of the failure but would be interesting to hear what Powerflex come back with.
Do you really need poly back there though? Could just go with Meyle HD with solid rubber - sure, it won't last forever but, evidently, neither does this.
How have you found NHV with poly diff bushes btw?
-
-
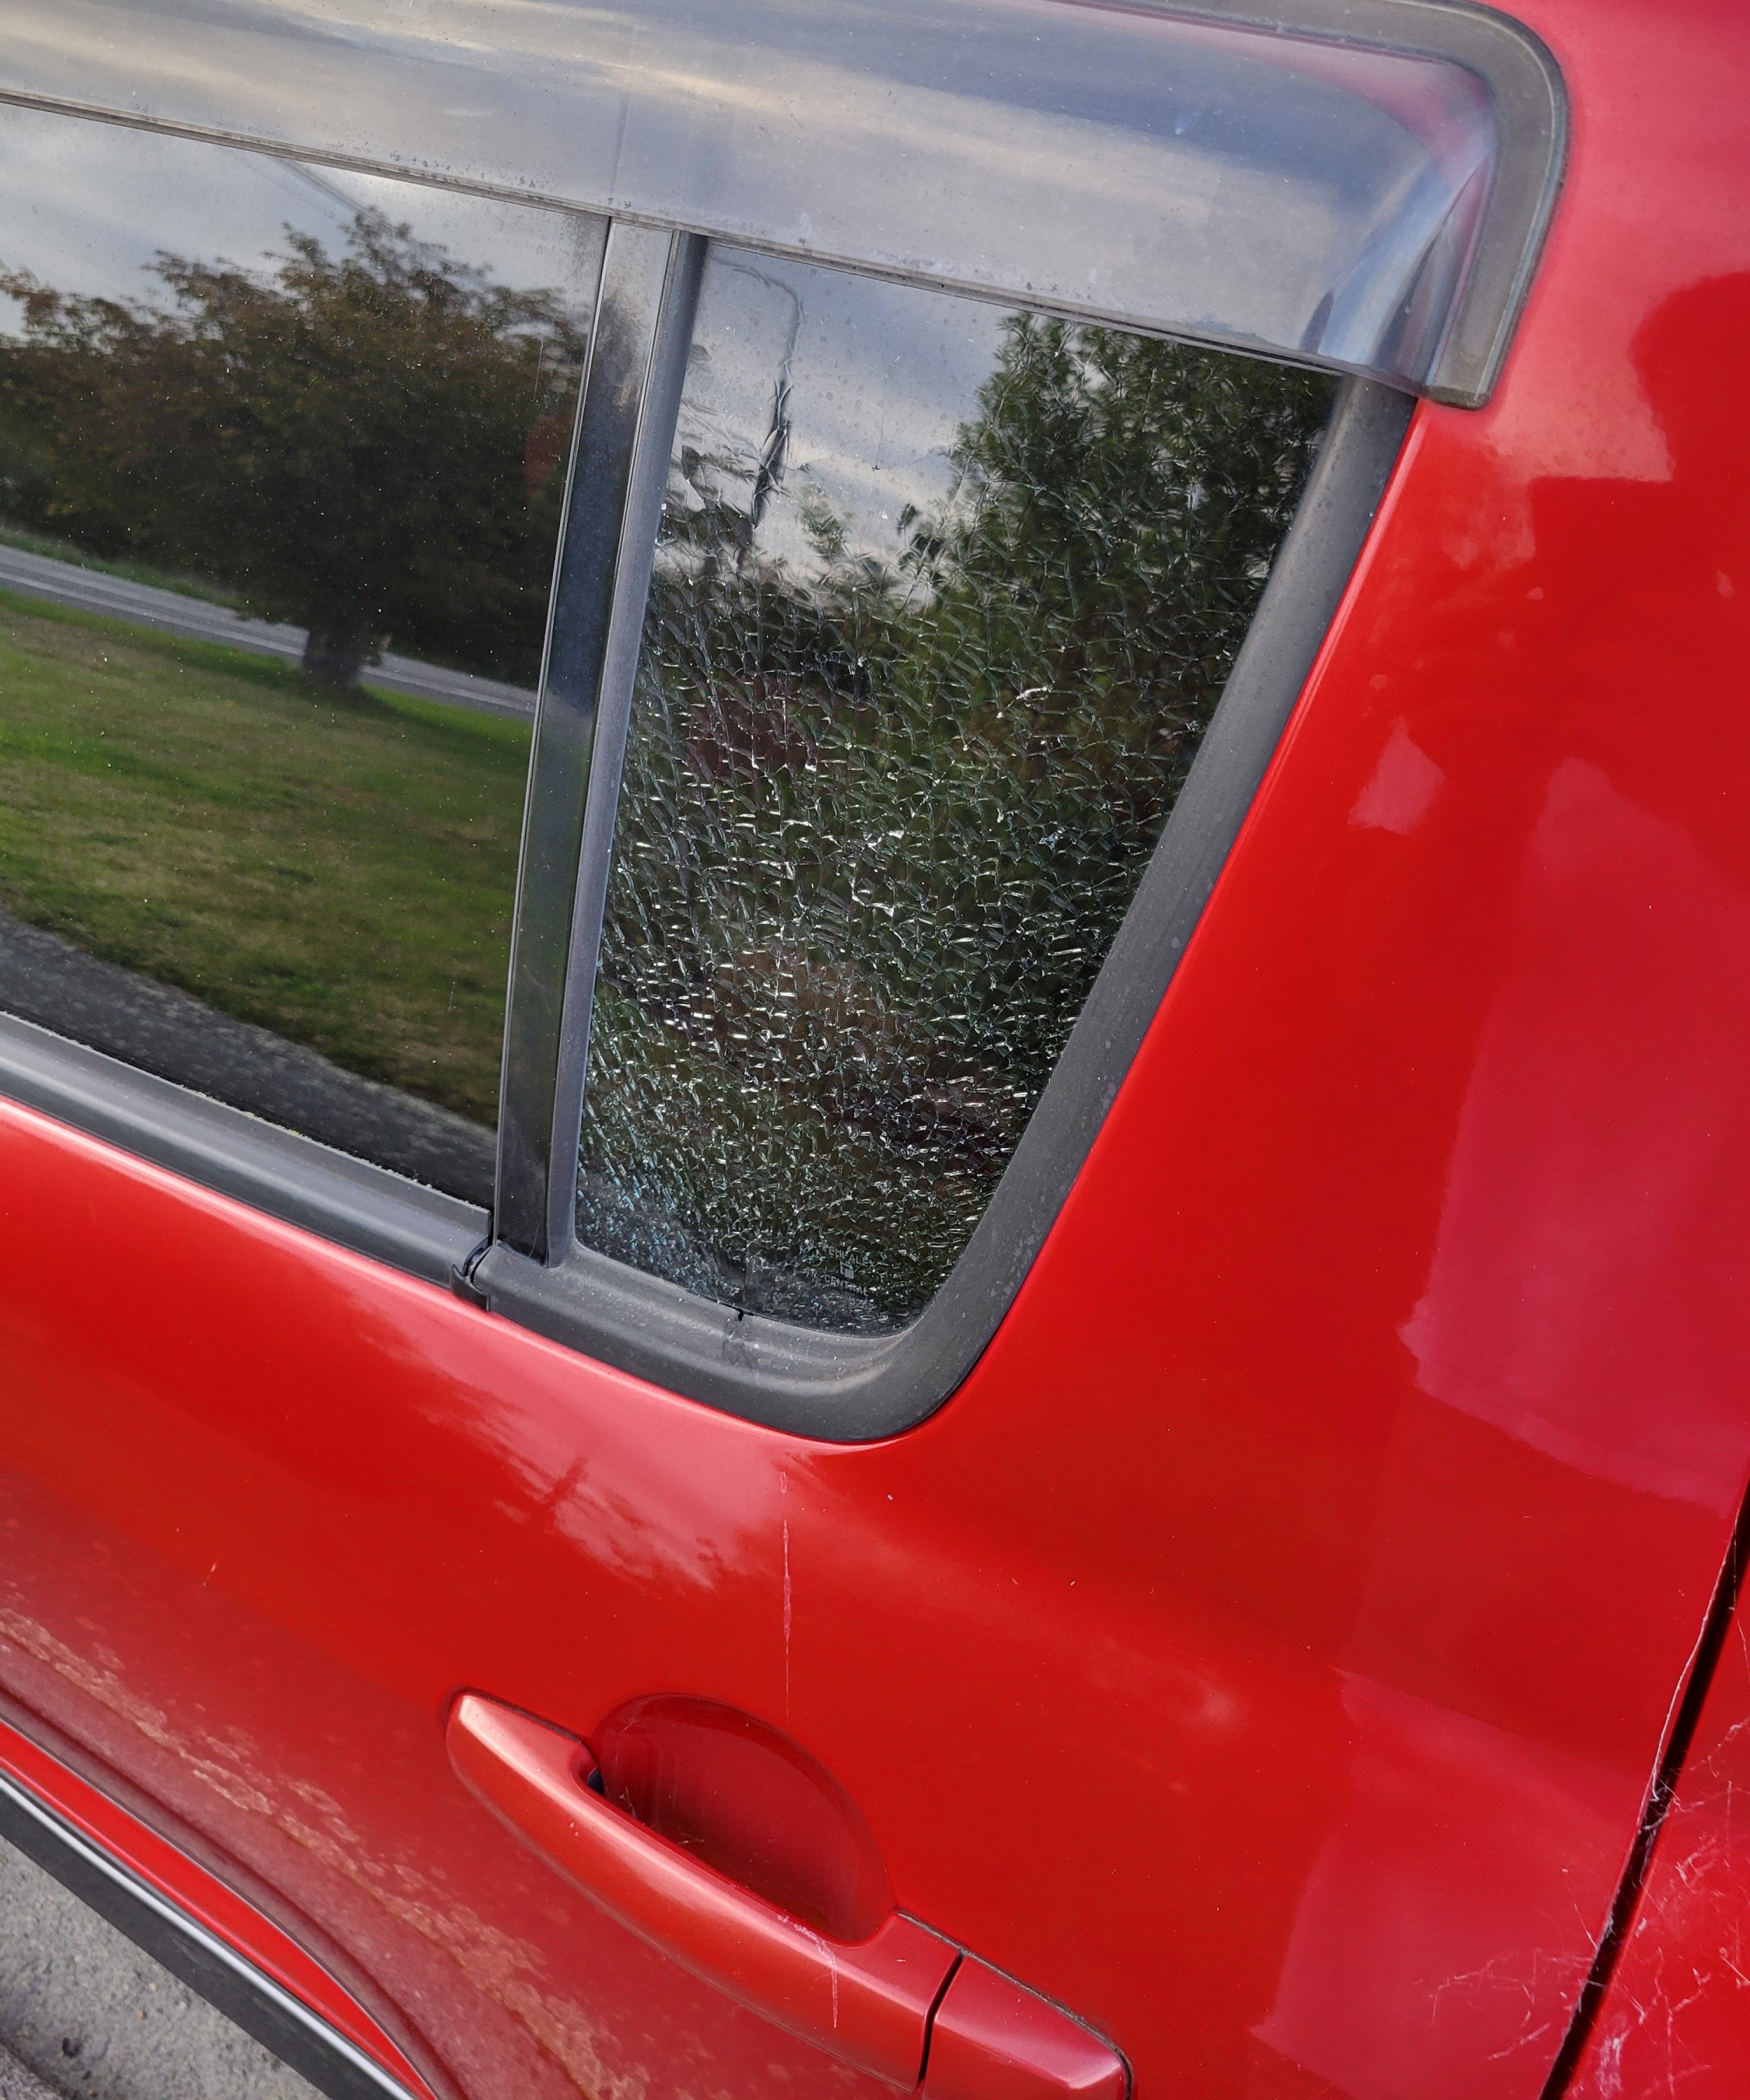
Discovered some numpties had tried breaking into my poor little Swift over the weekend. Hadn't driven it since Friday morning and only discovered the damaged glass Monday evening. No idea what they were trying to do, almost as if trying to pry the glass out from the bottom, also left a scratch down the door and door handle. Something must have stopped them at the last moment (or maybe just noticed that it's a manual...) as they never gained entry. Only needed a wee push of a finger and the glass shattered into pieces. Absolutely nothing of value inside the car so not sure what the point of it was.

Lucky that the quarter glass just slides in and is wedged in the frame and isn't glued/bonded in like on BMW's. Quick trip to pick-a-part, $55 and less than an hour of tinkering later she was back in one piece. Was told at check out that I was far from the first one that day to be after a quarter glass. Sign of the times.
-
Yeah you need a special set of drifts/punches to install the detents and guide sleeves. Happy to lend it out to you, just cover return shipping.
Can't remember the detents themselves being that pricey. I got mine from Schmiedmann a few years ago. One of the pins was expensive, the others were fairly cheap. Can't tell if it's the 5th or reverse one but part number 23-31-7-502-165 - looked through my order history and I paid 59.01 EUR back then, now it's gone all the way up to 81.64 EUR. Yikes.
I got my DSSR from BM Speed Shop, a local fella here in Christchurch. Quality was decent and very reasonable price. Not sure what length you'd need but he might be able to advise or even make a custom one for you if no other ones suit.
-
 1
1
-
-
1 hour ago, euroriffic said:Didn’t have heated rear seats as well to steal? Is another diesel on trademe here currently. Looks like a high spec uk import, has 325k on it for 5k with heated seats, pano roof and possibly air bag suspension. Is very tempting to check it out and make flick mine on instead. Am also wanting heated seats for cold otago winters!
No, the rears were just regular. Funnily enough I've since gone back to it to grab a few other smaller bits and ran into another X5 owner who was hoping for some heated rears too. I didn't even know that was an option until that point.
I was actually relieved to find that mine had the regular coil suspension at the rear, I feel like the pneumatic system might be more trouble that it's worth. Have been vary of air suspension ever since my dad's disaster purchase of a Land Rover Disco II way back when. Amongst a laundry list of issues he had with that car, the rear bags developed a rapid leak at one point and he was stuck riding around nose up for a few weeks like some ghetto low rider. Ended up getting a coil spring conversion kit for a third of the price of replacement air bags. Pano roof would have been nice but another potential source of issues.
There was an X3 with heated seats for sale in Otago a while ago with a supposed blown head gasket, think was only asking around $2k. If it were local I would have grabbed it to part out, even just for the seats. I'm still looking for a pair for my E46 but pretty sure they would have also been interchangeable with the X5.
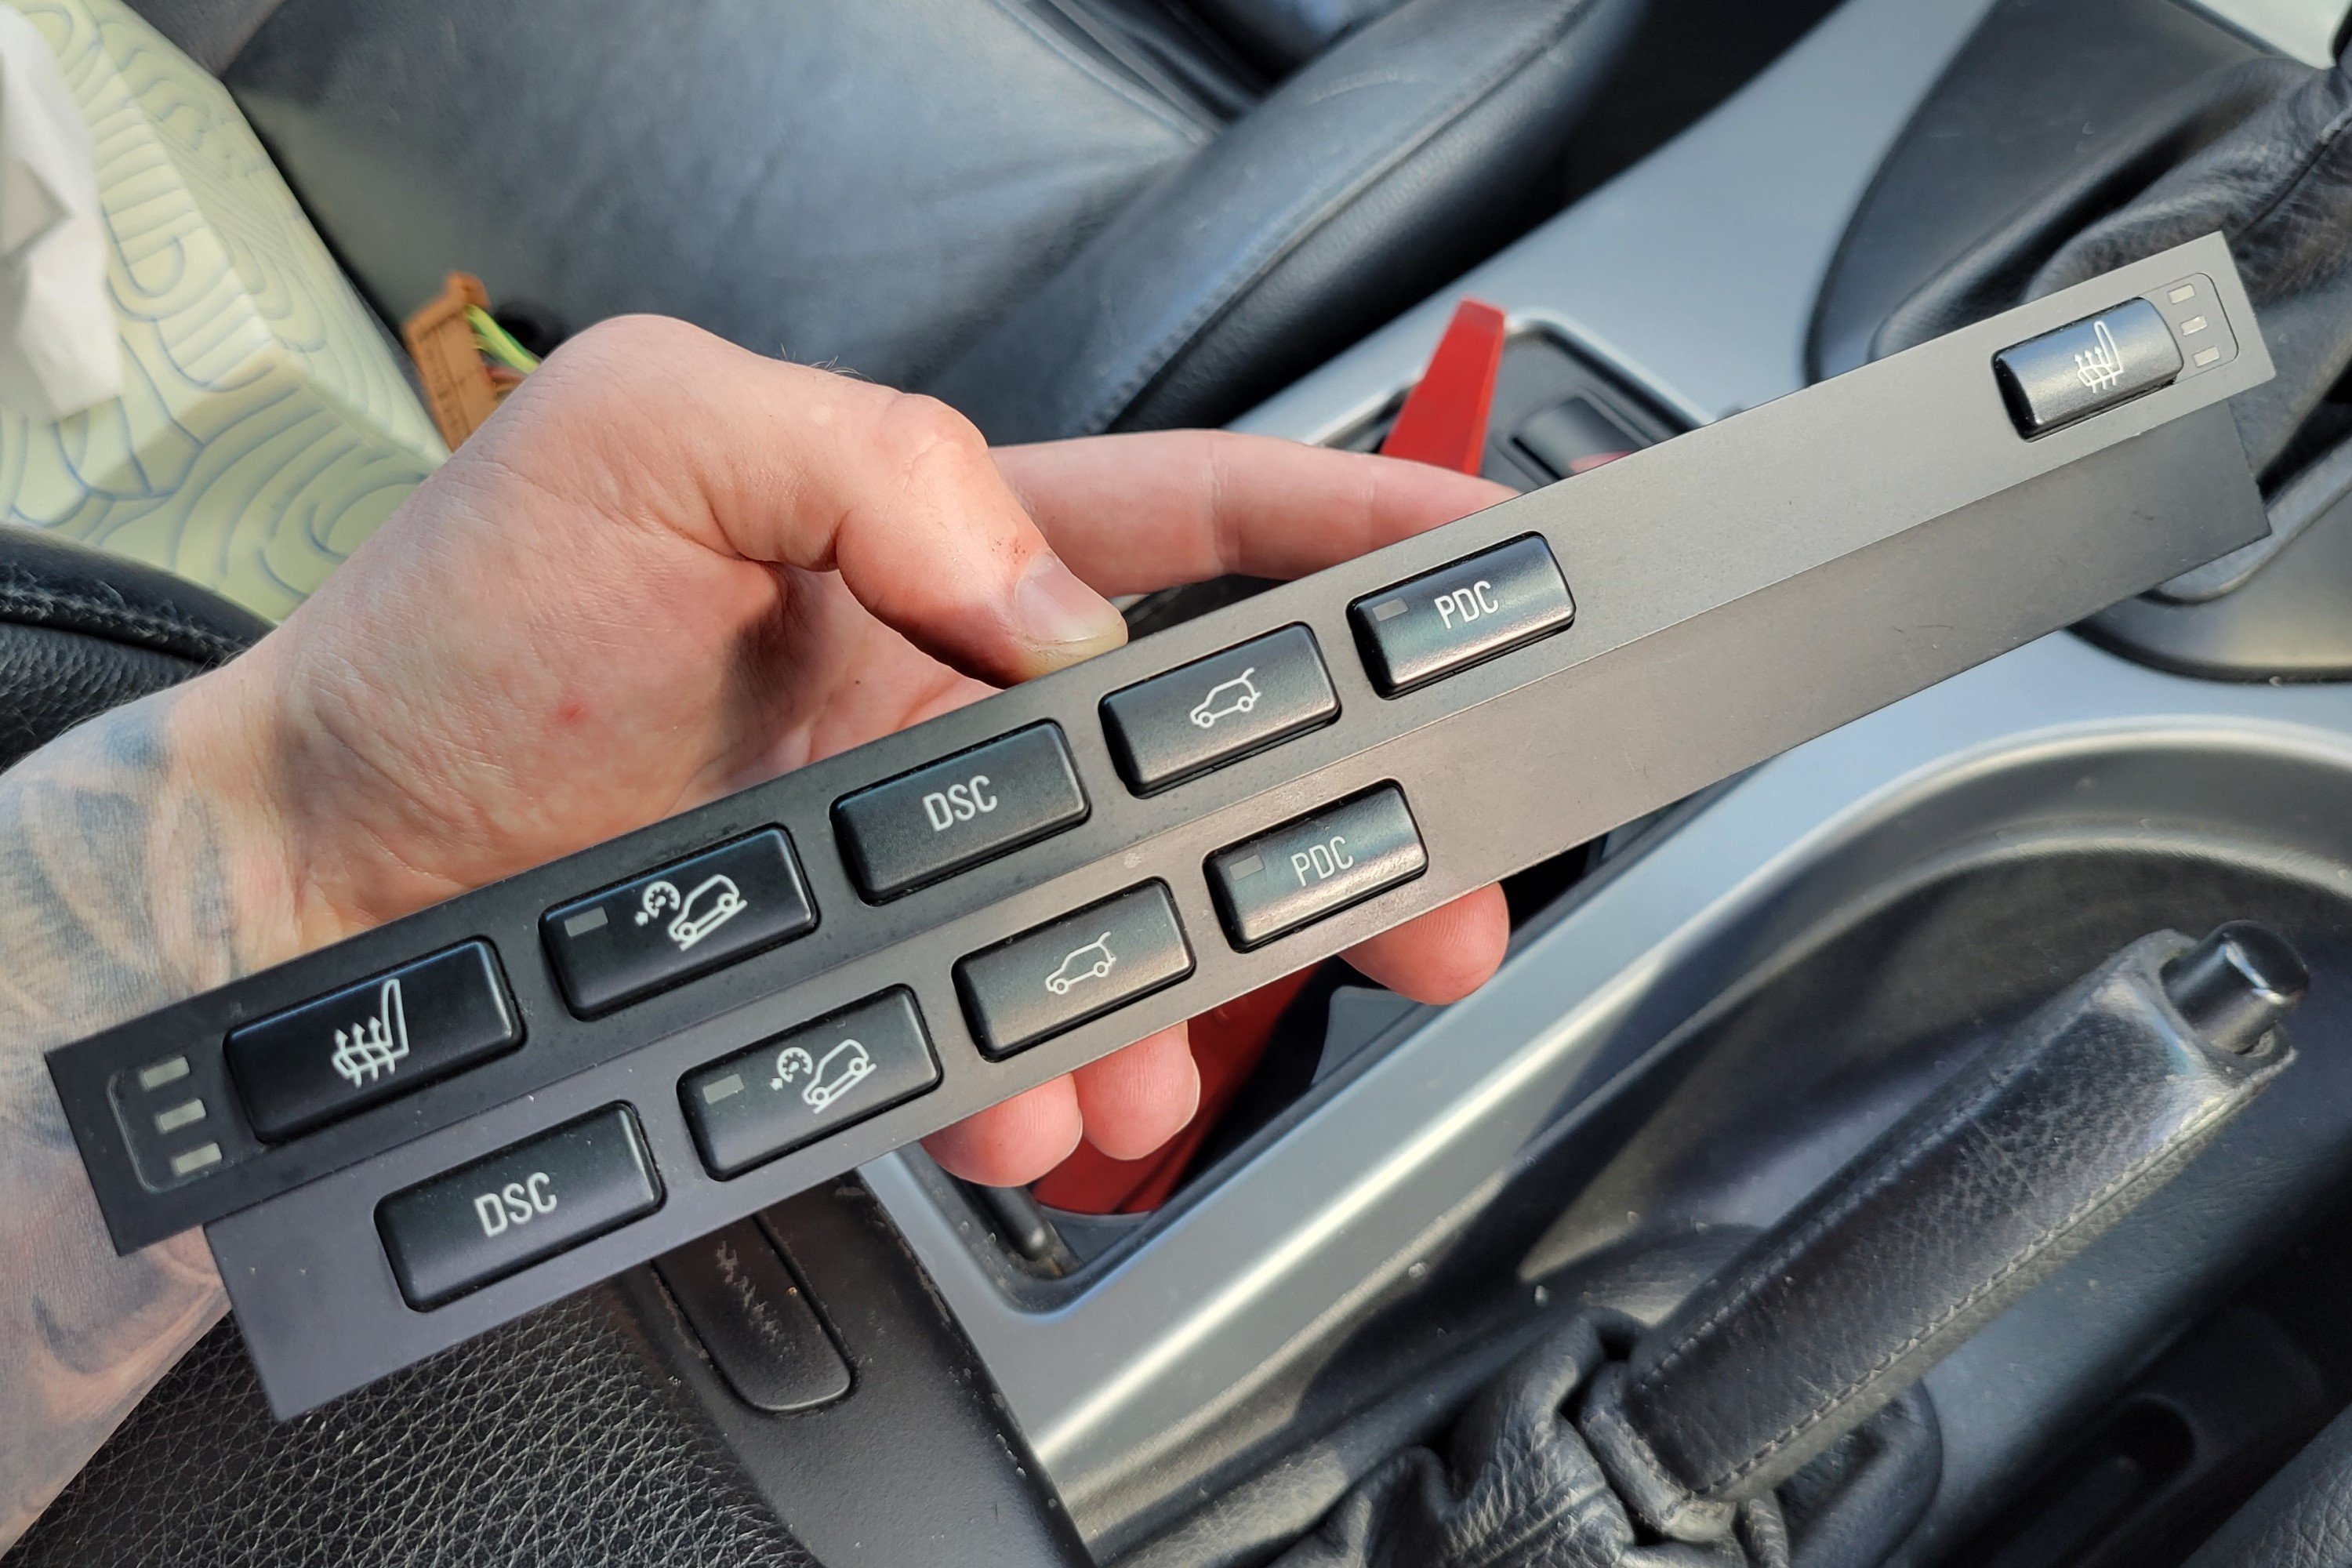
I've got a spare X5 switch panel with heated seat buttons sitting in a box somewhere, happy to send it your way if you happen to come into possession of some heated seats.
-
1
-
-
Have you tried these on your touring at all? Wonder how they'd look/fit?
-
Was taking a casual stroll through Pick-A-Part the other week when by chance I caught a glimpse of a rare sight in these parts - a rogue X5.

Must have been a rush on a Friday to duck out of work as it was yet to be listed on the website so I managed to get in there nice and early. Weirdly enough, another thing they forgot to do was remove the battery. Lucky for me, it made removing the rather tidy heated seats that much easier, or even at all possible.
Somehow crammed the seats in the trusty old Swift and scooted home. Did manage to grab a few other handy bits whilst I was there, including the boot cargo cover, which ended up having a bit of an adventure of its own. While I was loading up the seats, I put the cargo cover onto the roof of the car, which... of course I completely forgot about. Managed to get all the way to the main road, got on the gas and heard it tumbling all the way along the roof before crashing down onto the road behind me with a massive thump. Lucked out that there wasn't any cars closely following me, pulled over to the side of the road and bolted to grab before it got run over. Got a bit banged up but somehow the damage ended up being purely aesthetic and still works well enough. Another lucky break.
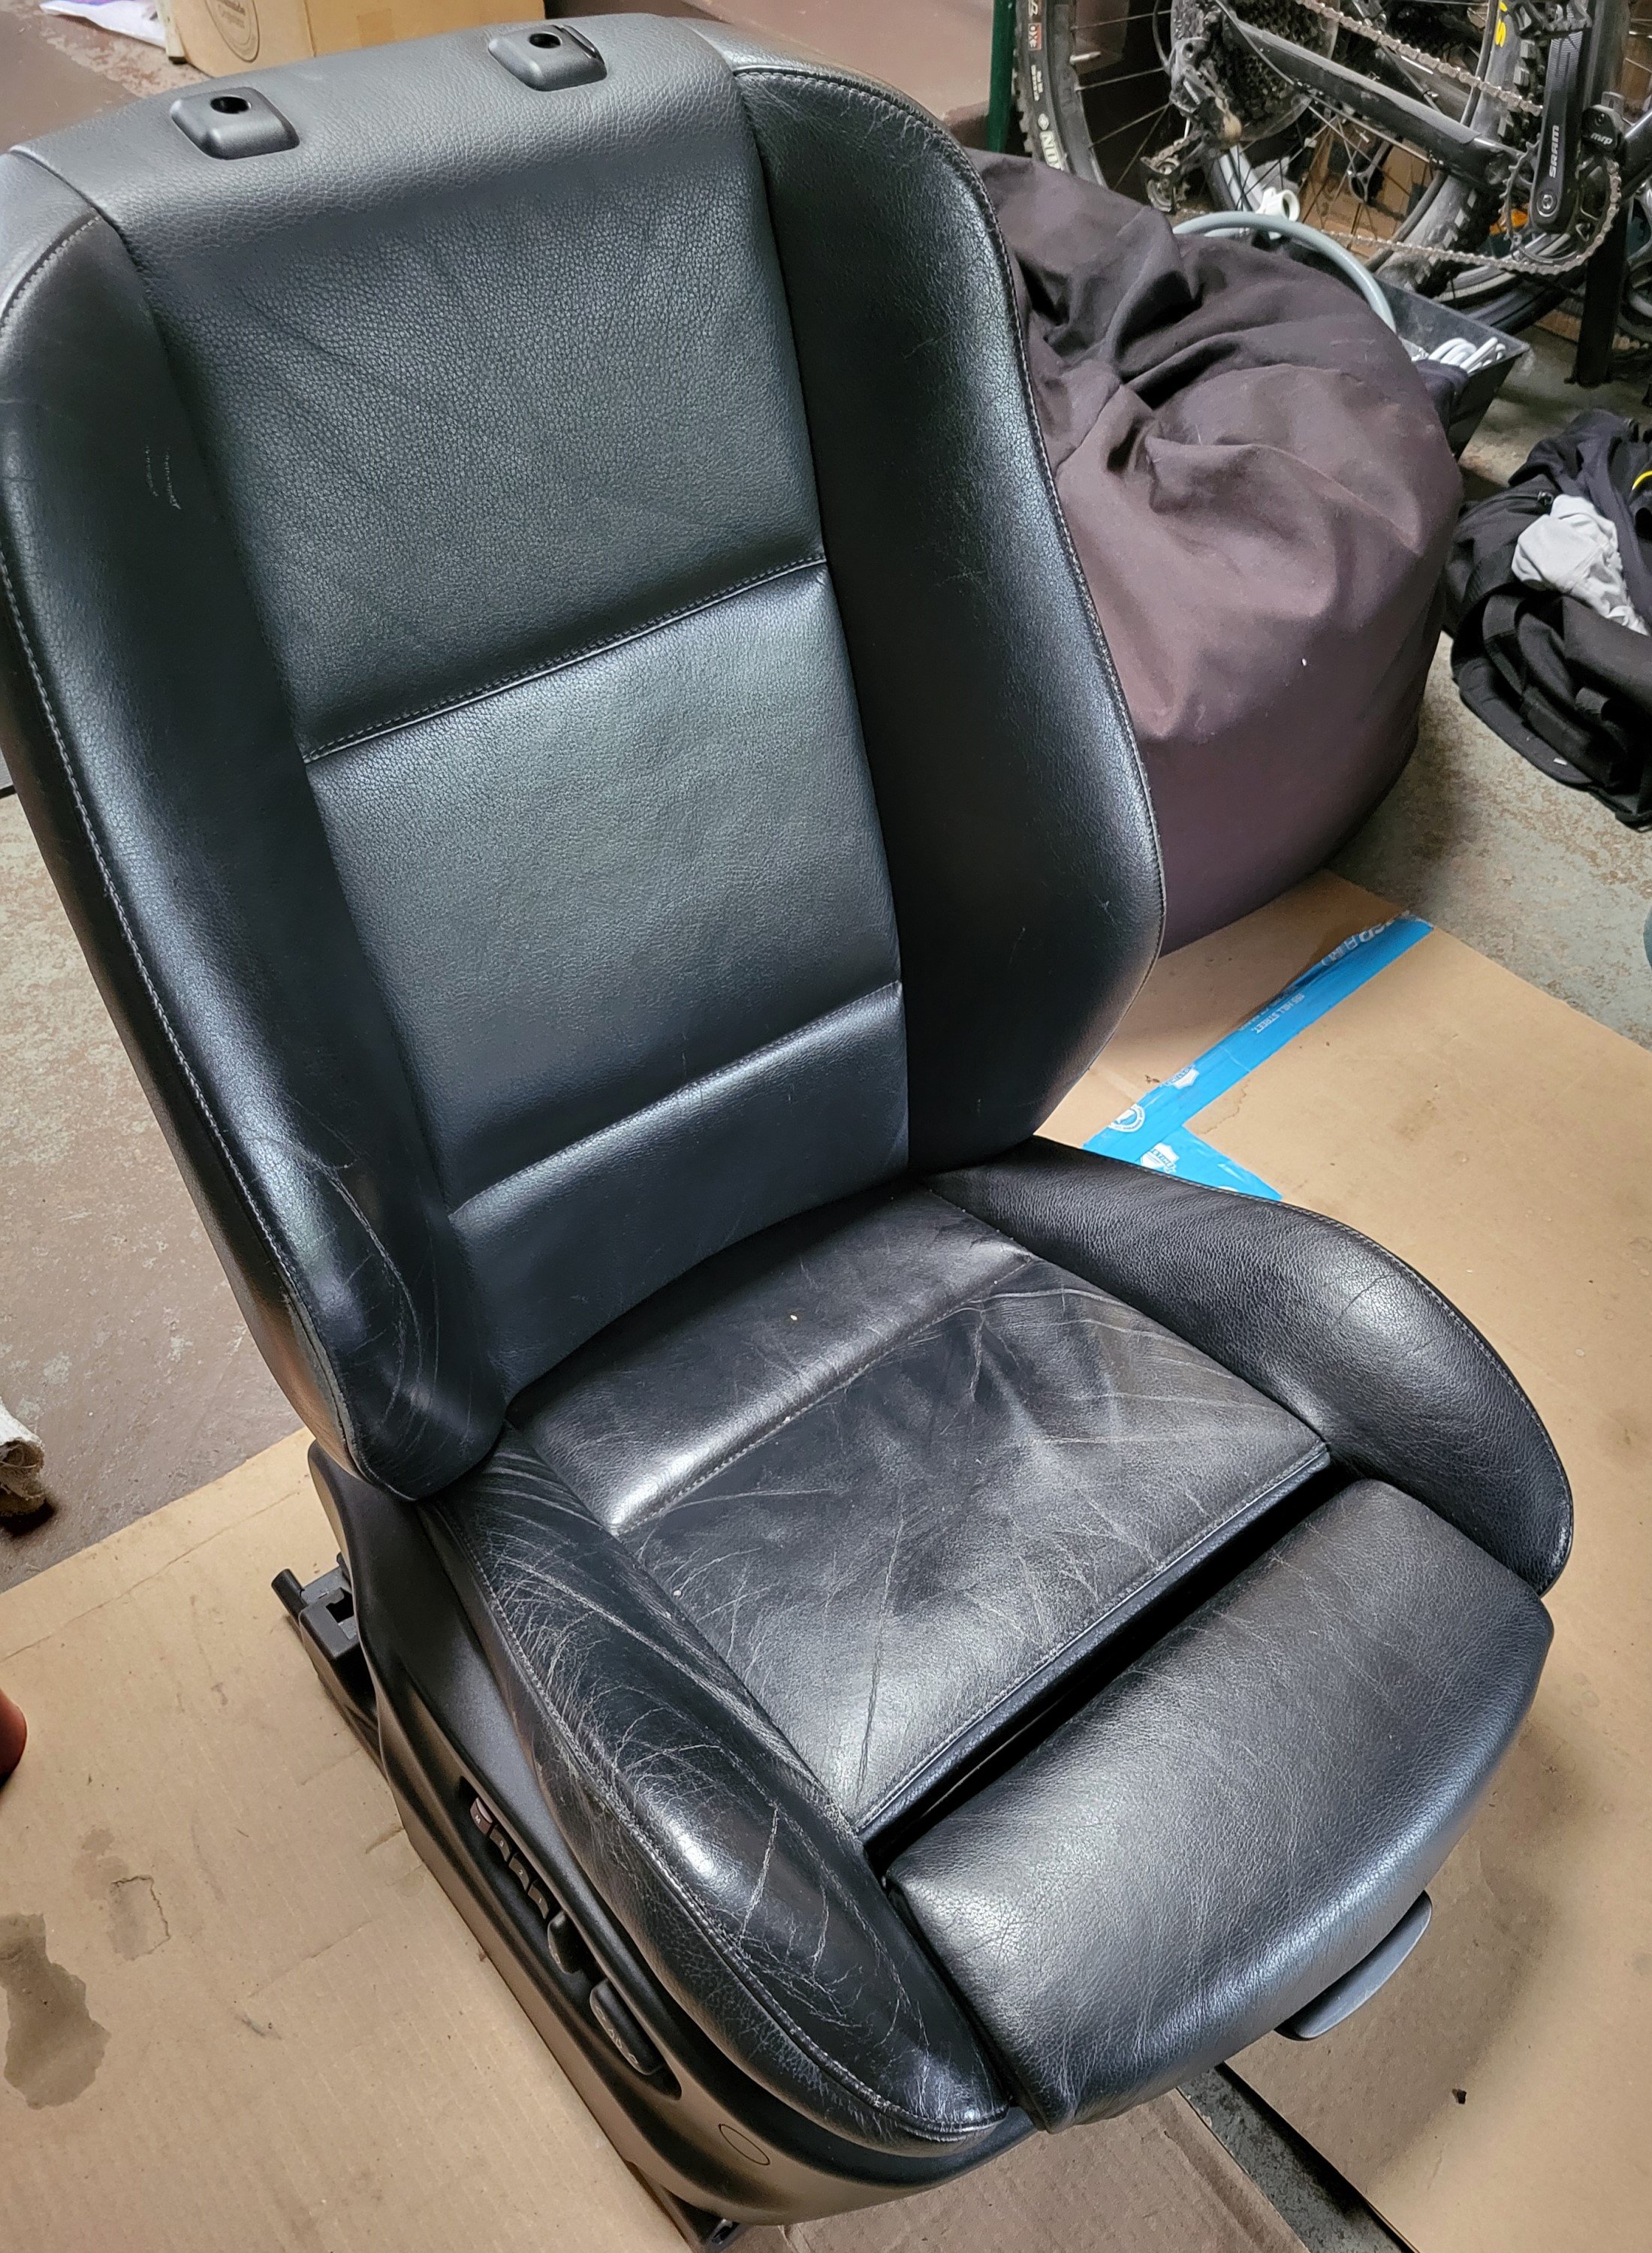
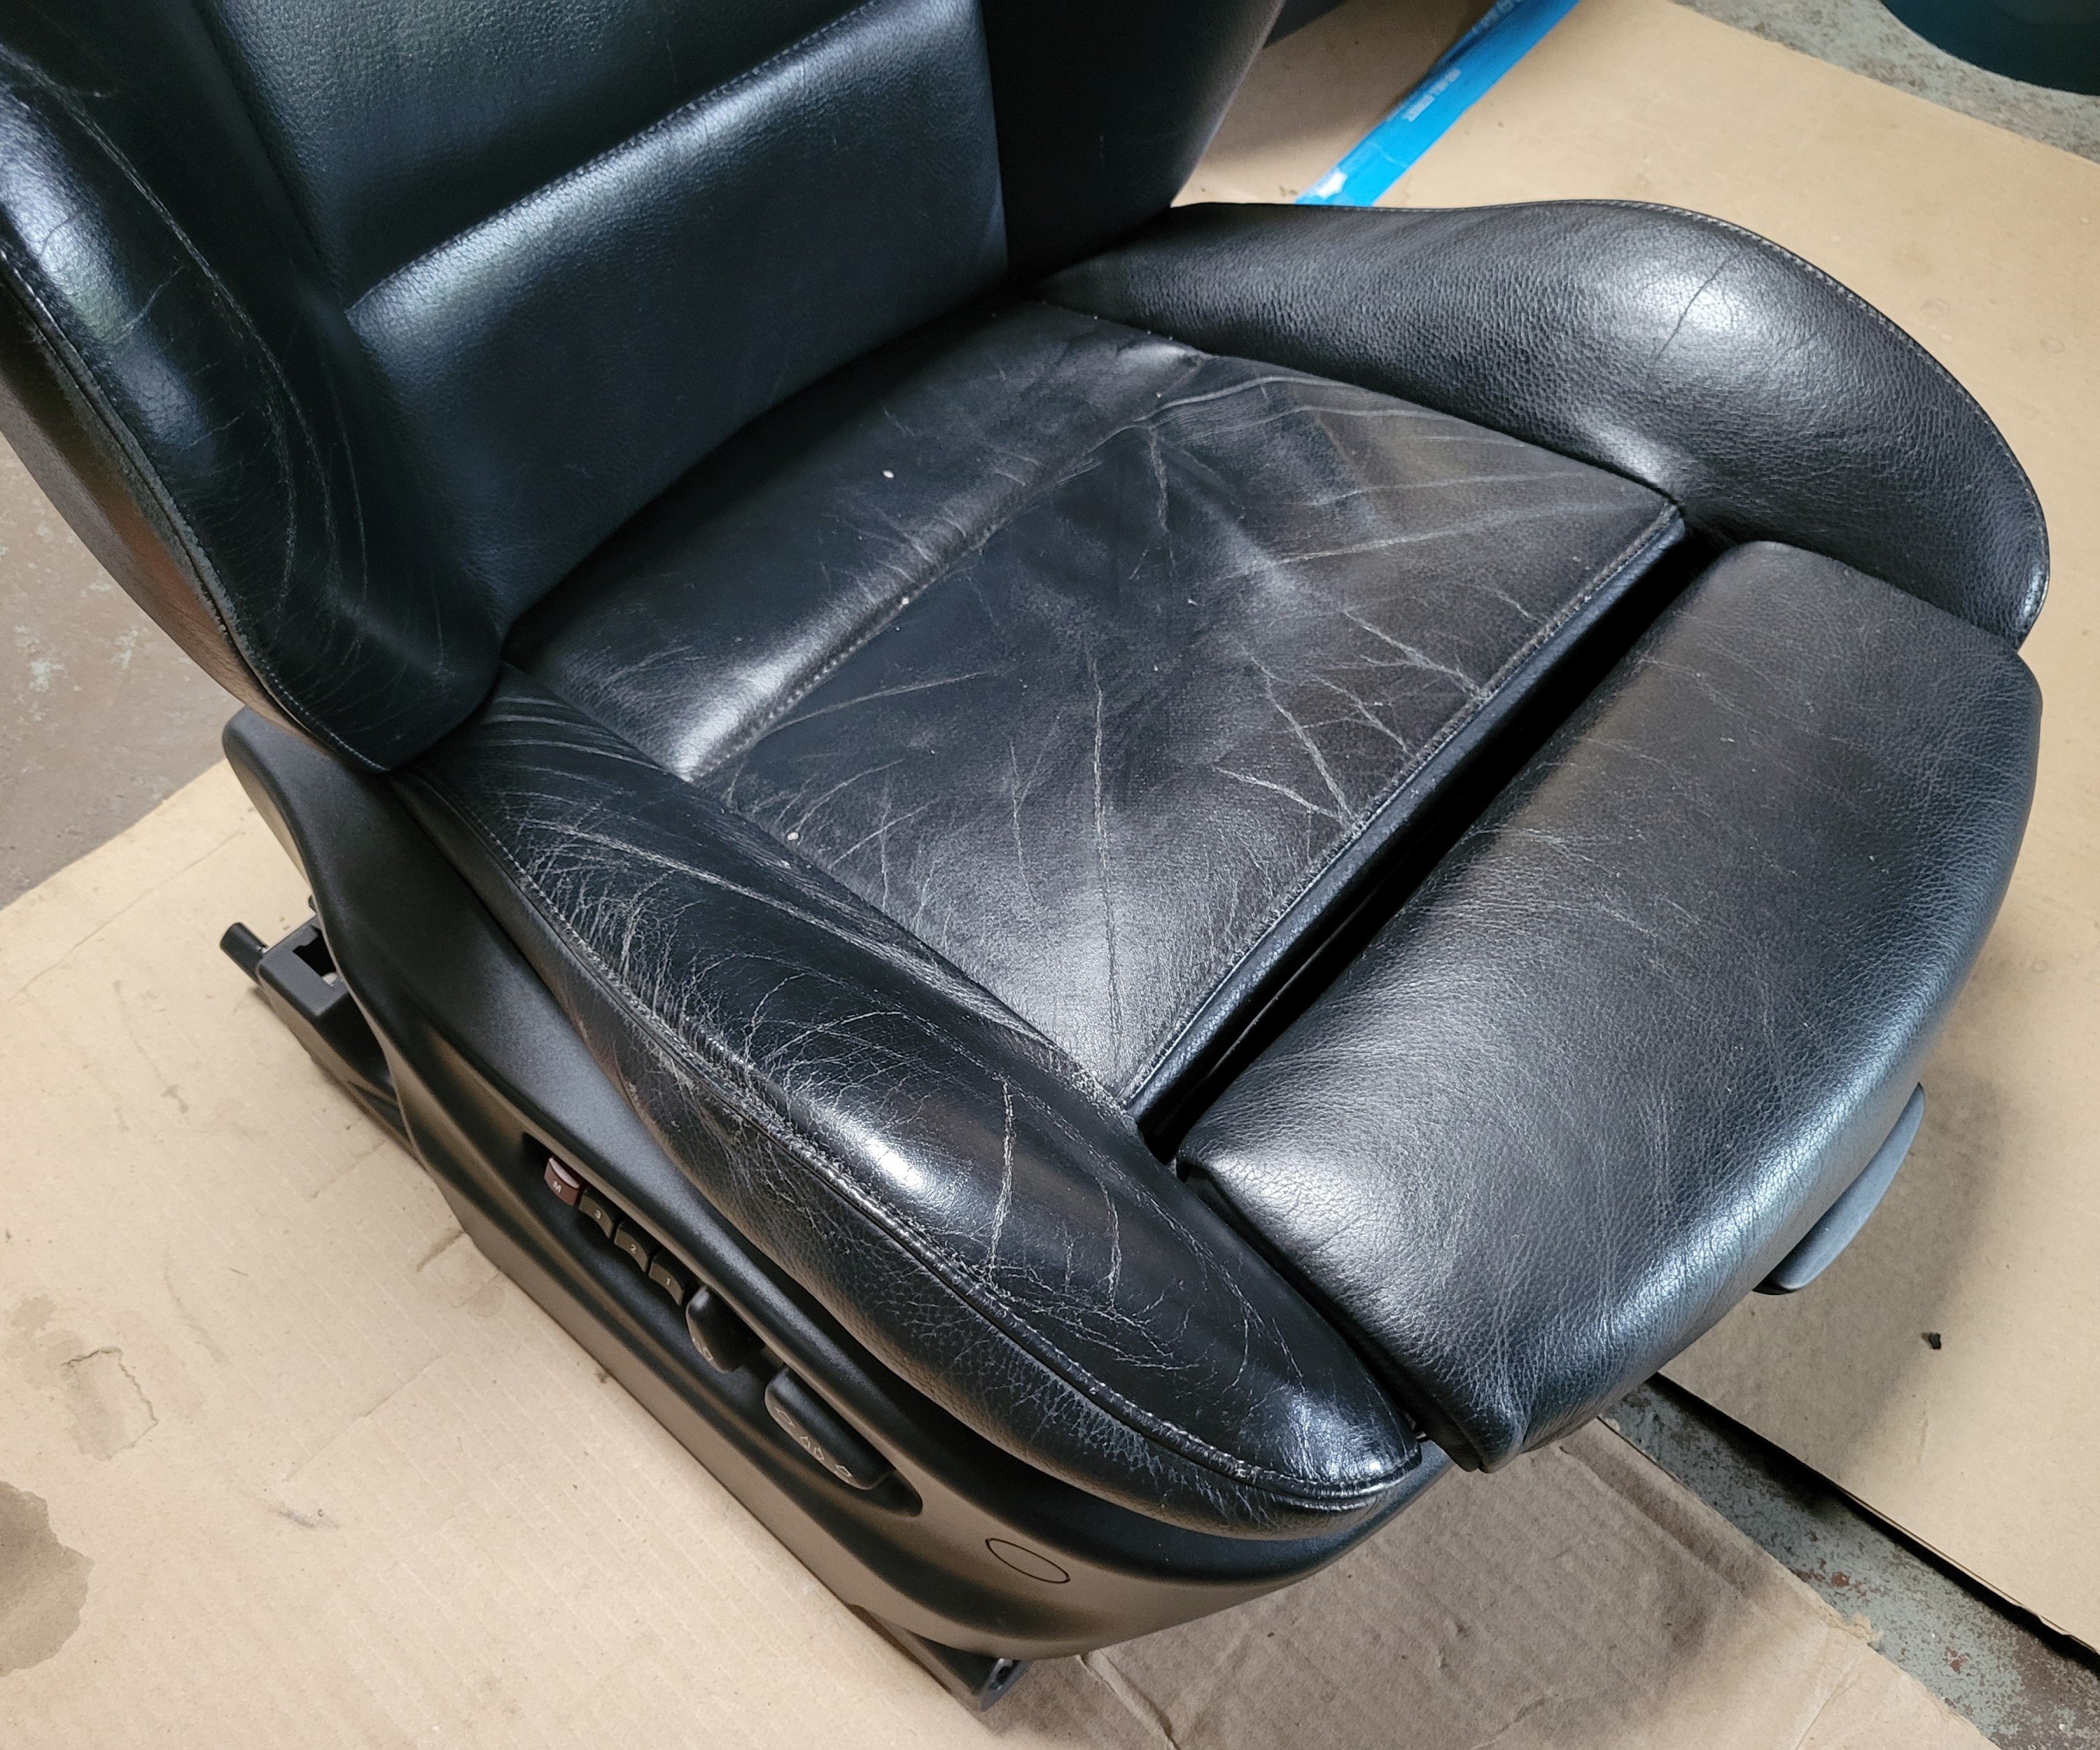
Anyway, got the seats home and gave them a good clean. Used some Lux Soap Flakes / Softly Laundry Flakes for the initial wash, a "hack" I'd read about from some thread on here a while back. I've had a leather recoloring kit from Clyde's Leather Company sitting on a shelf for a while and finally put it to good use. Happy enough to recommend the kit itself but goddamn are they annoying - if you end up going for the same kit, do yourself a favour and opt out of all comms as soon as you've placed your order - I must have gotten more than a dozen emails with "news", requests for reviews, "special offers" and whatnot within the first week.

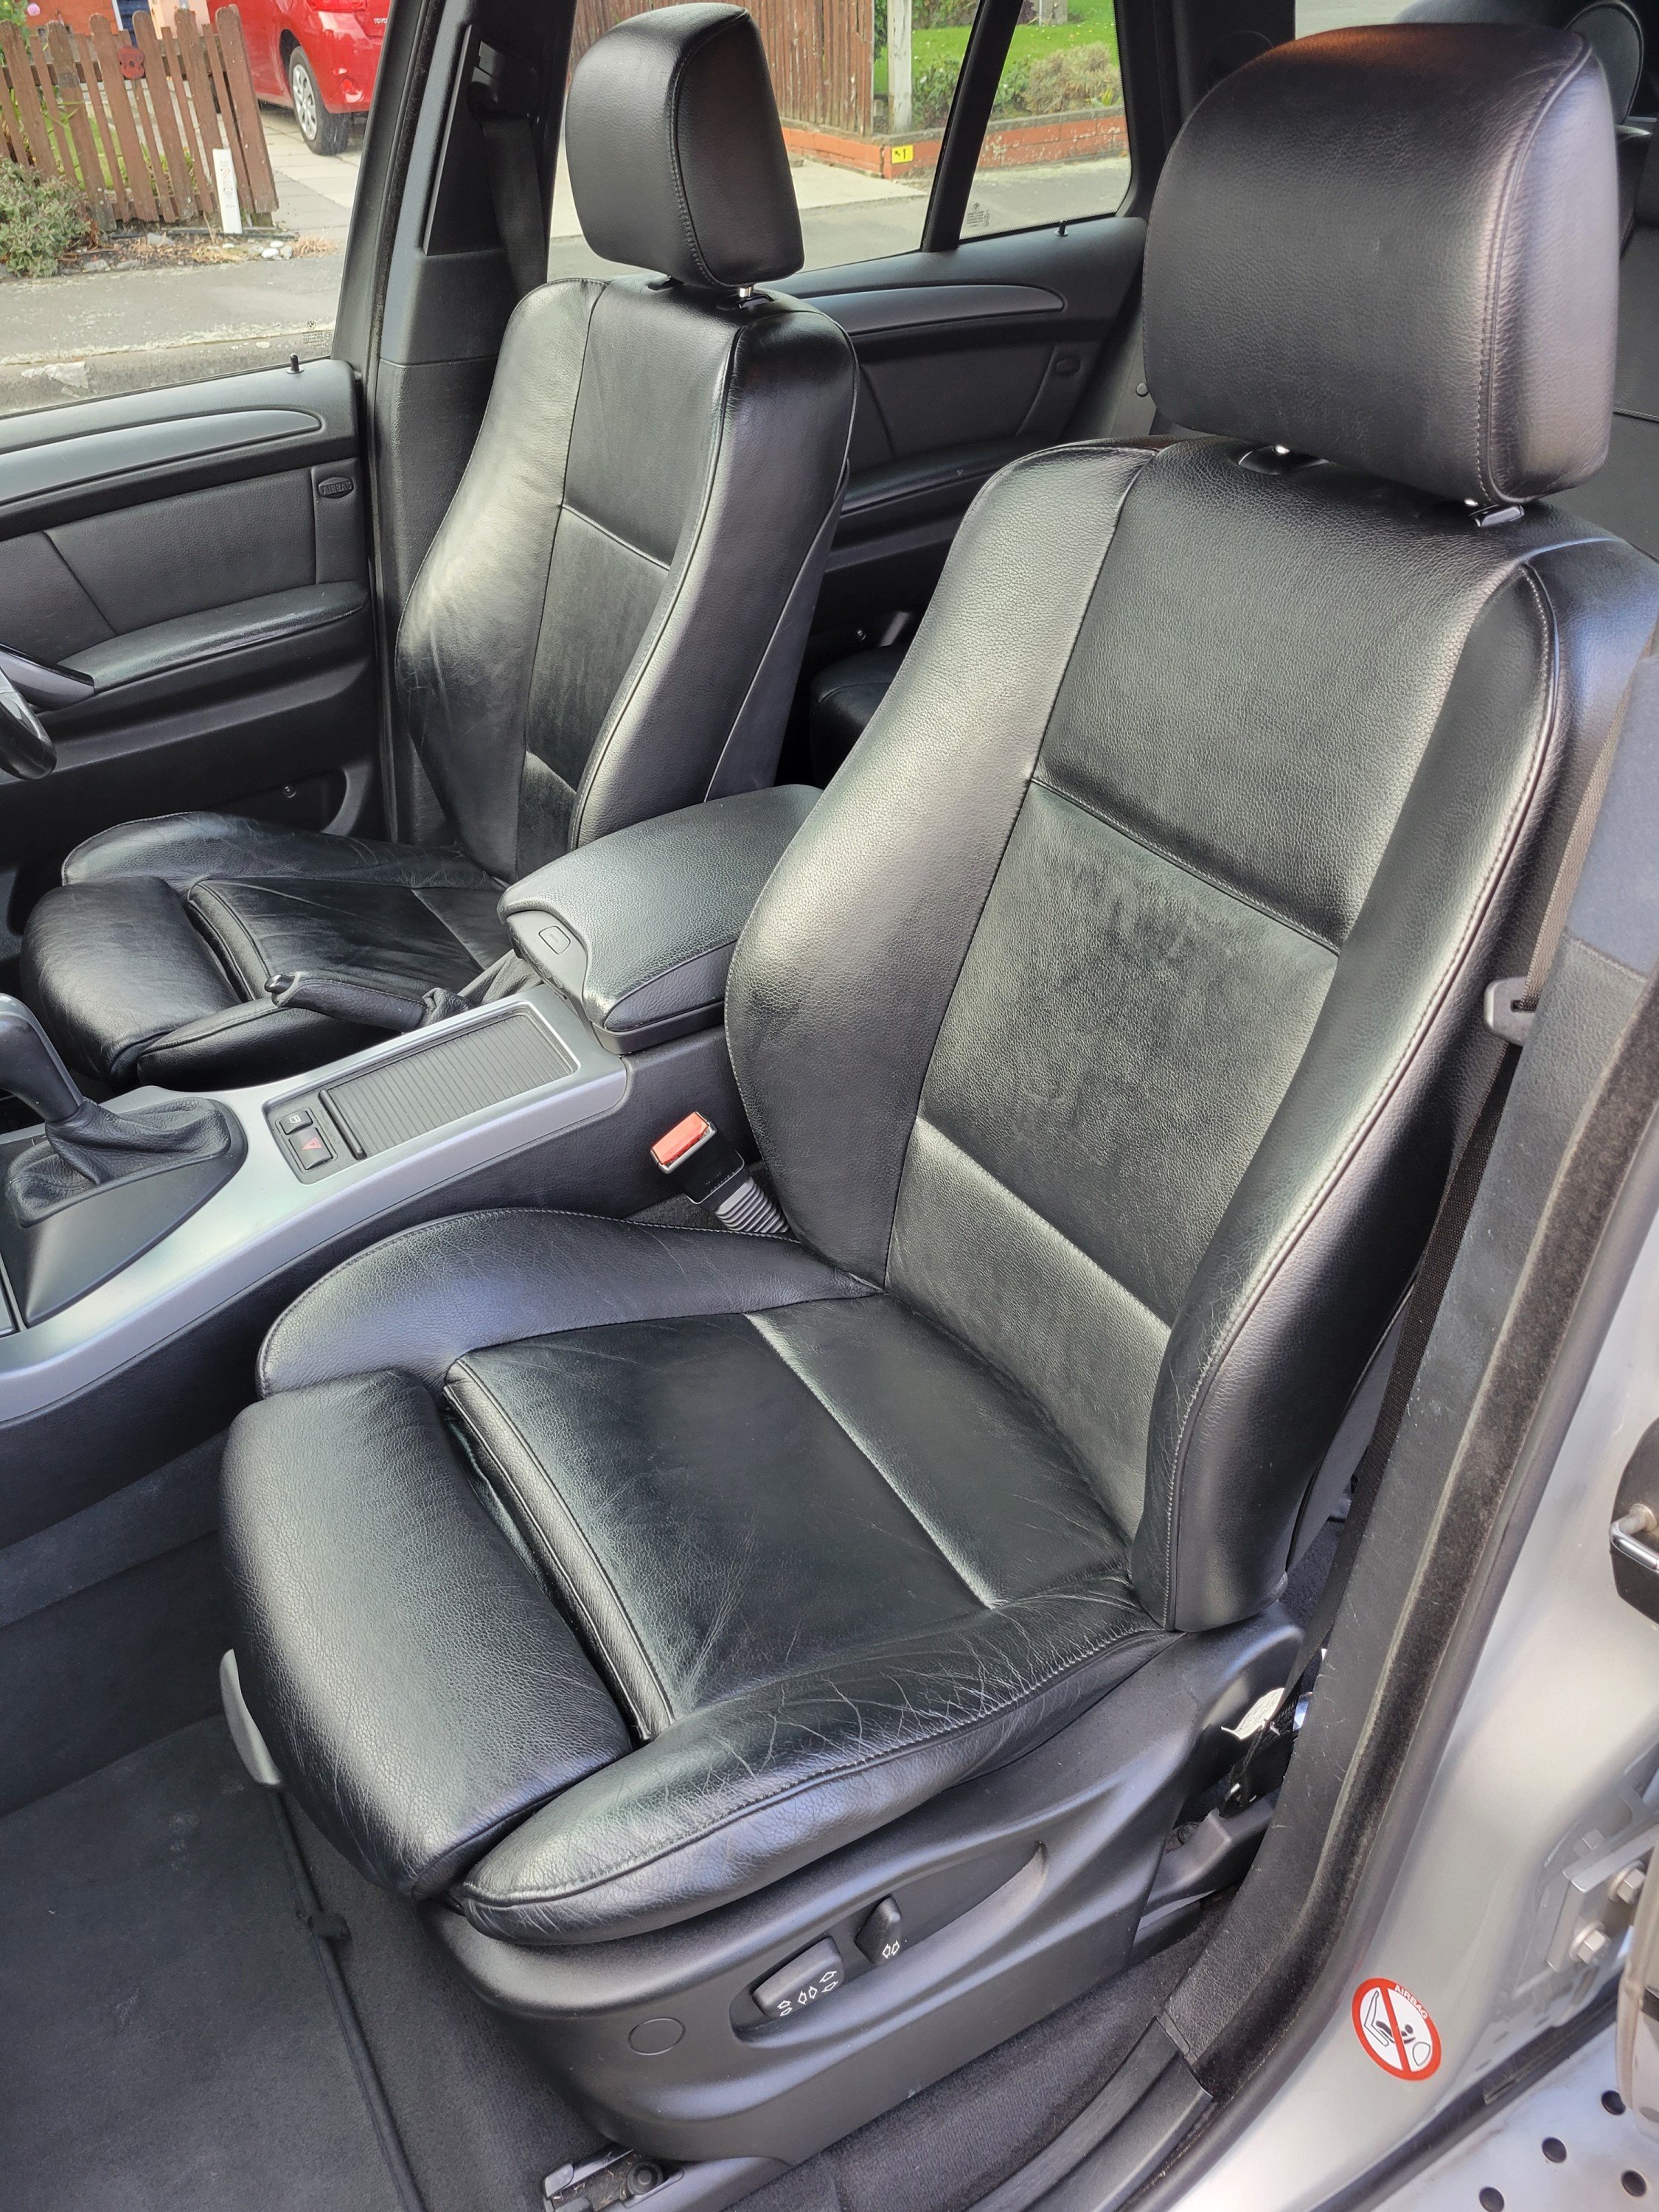
Filled in a few of the bigger scratches/cracks with the leather filler, let it dry, sanded it down a bit with some 600-grit, wiped the whole seat down with alcohol and applied 2 coats of the recoloring balm, then let it fully dry for 2 days before applying the conditioning cream. Initially made the seats real greasy but the shine has come down since, leaving a nice, subtle finish. Got the old seats out, gave the carpets underneath a thorough vacuum, transferred over the seat belt buckles and dropped the new seats in. Unlike the E46, the X5 comes pre-wired for the heated function so all that needed doing is hook up the seats, swap out the switch panel and that was that. Did check over all of the fuses - there's two that correspond to the heated seats, both were already installed but one had a 5A fuse instead of the 30A it was supposed to house. Easy fix.

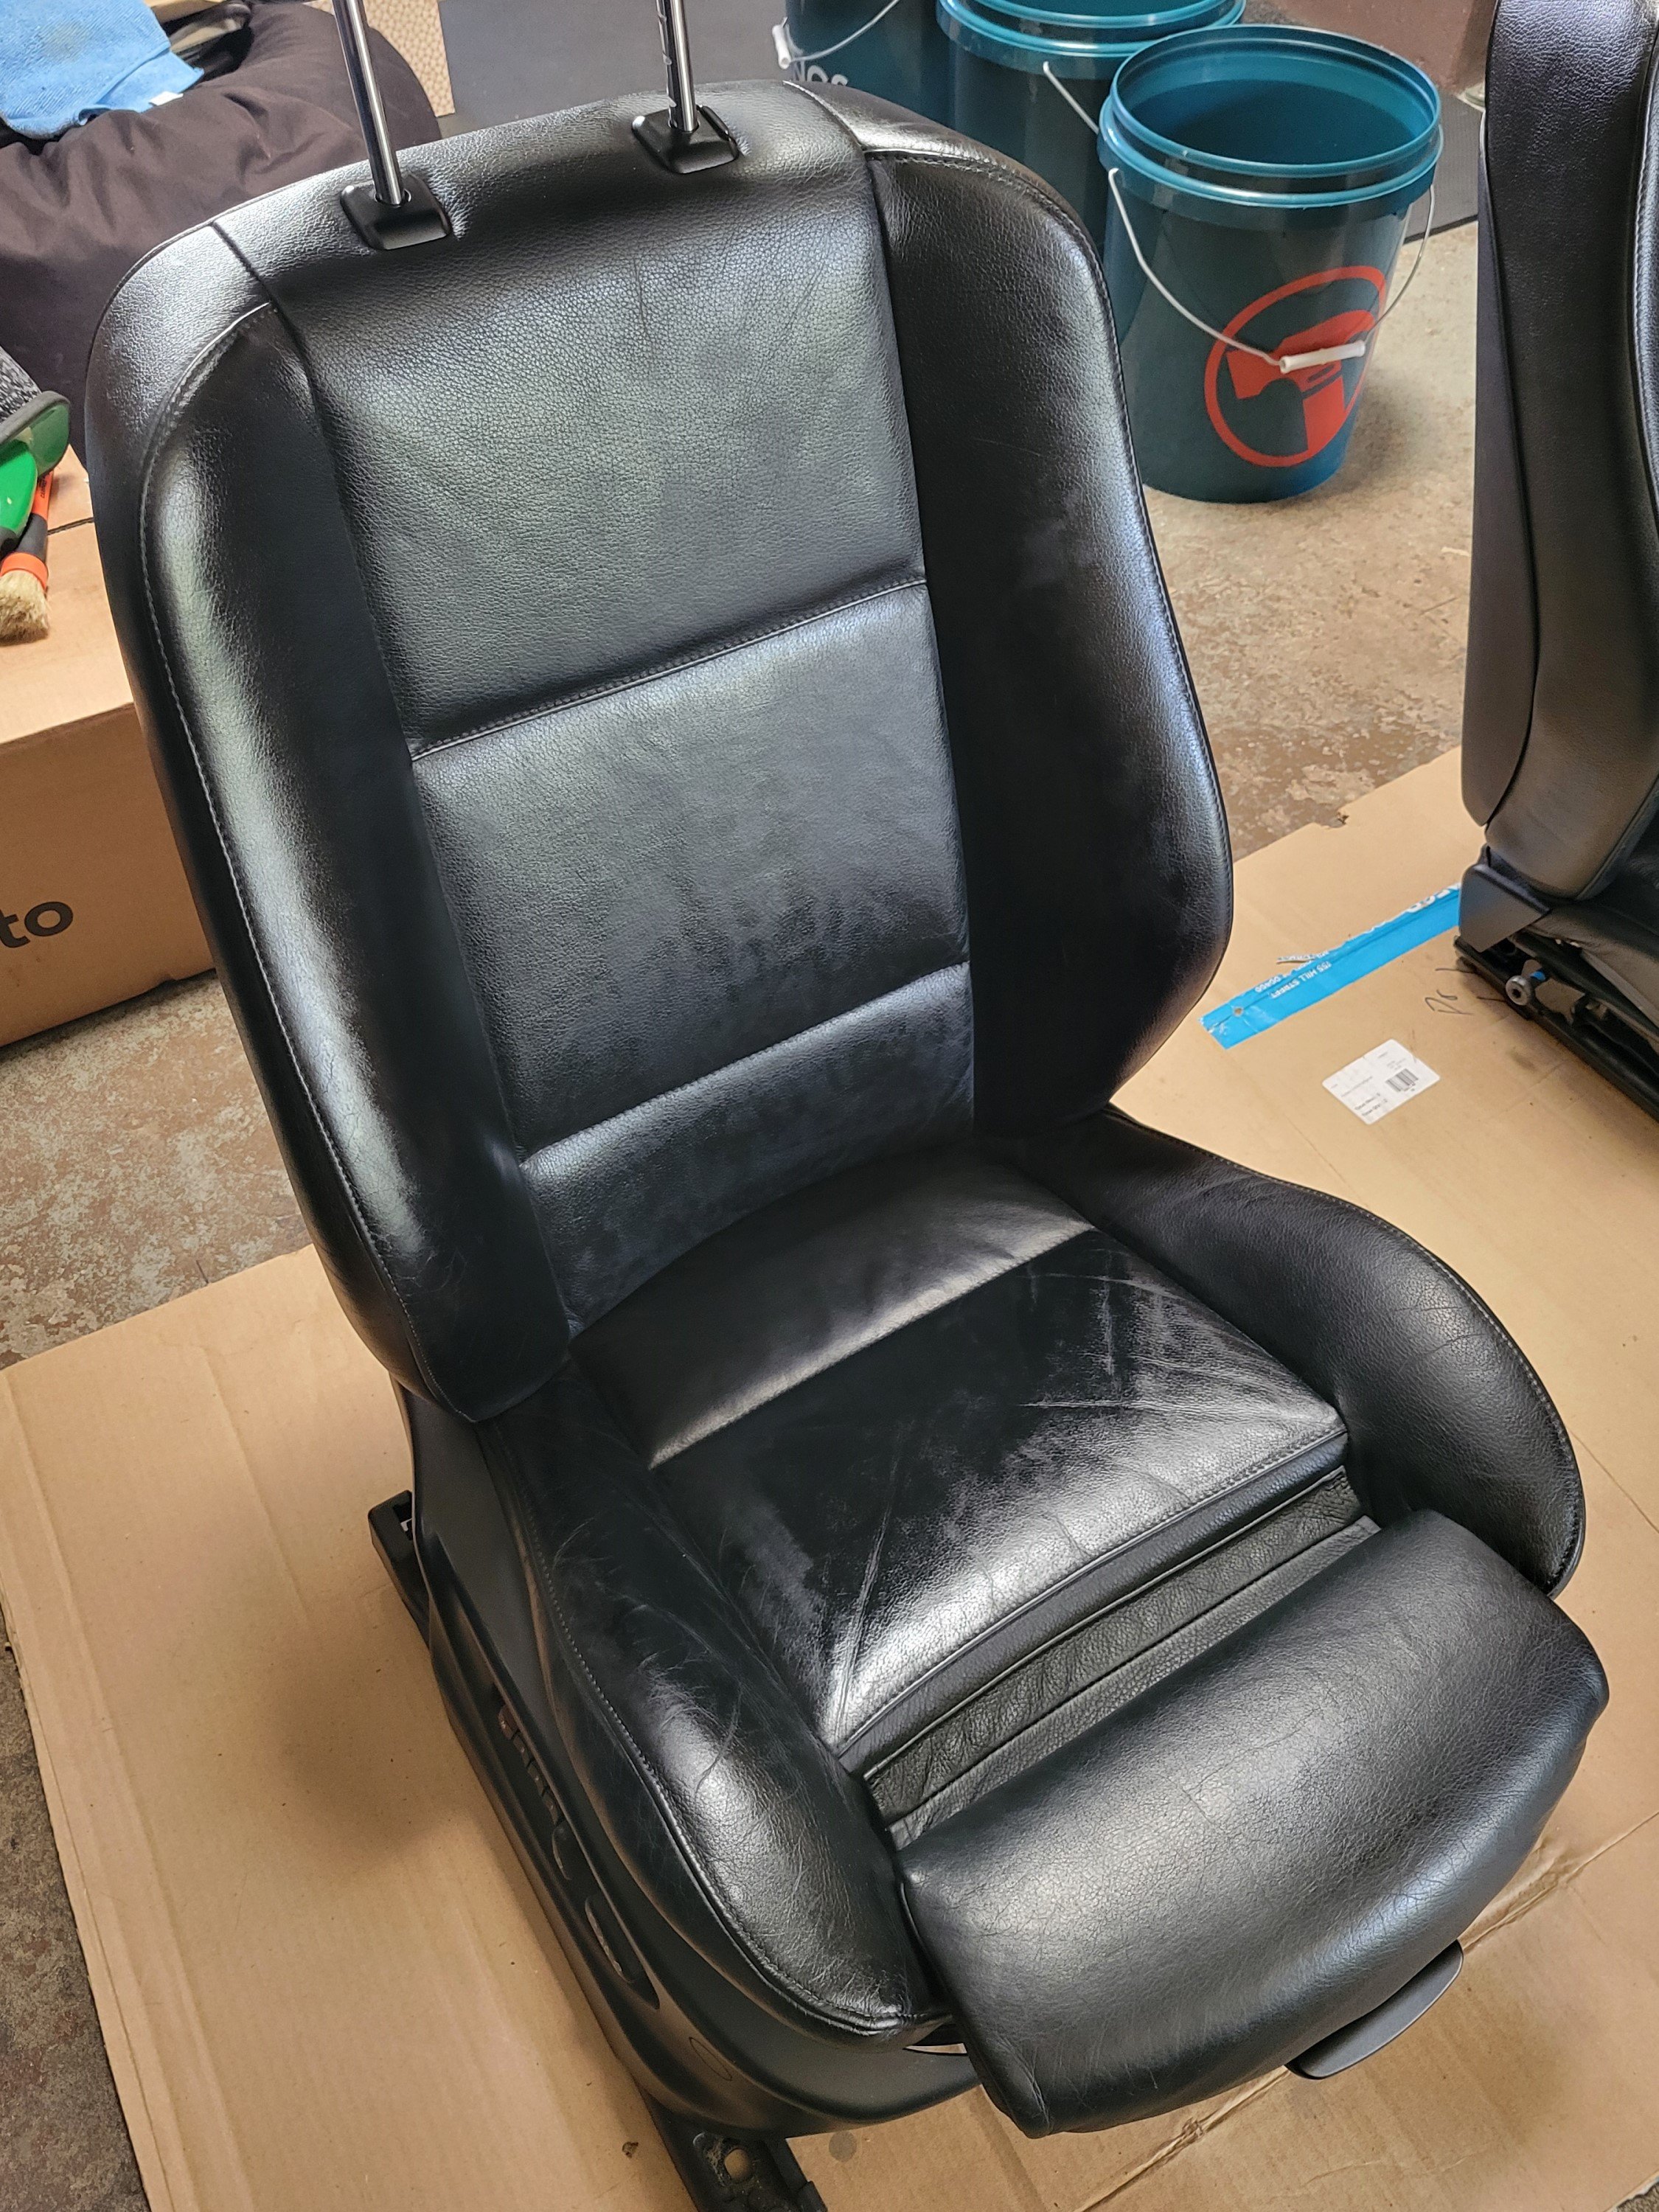
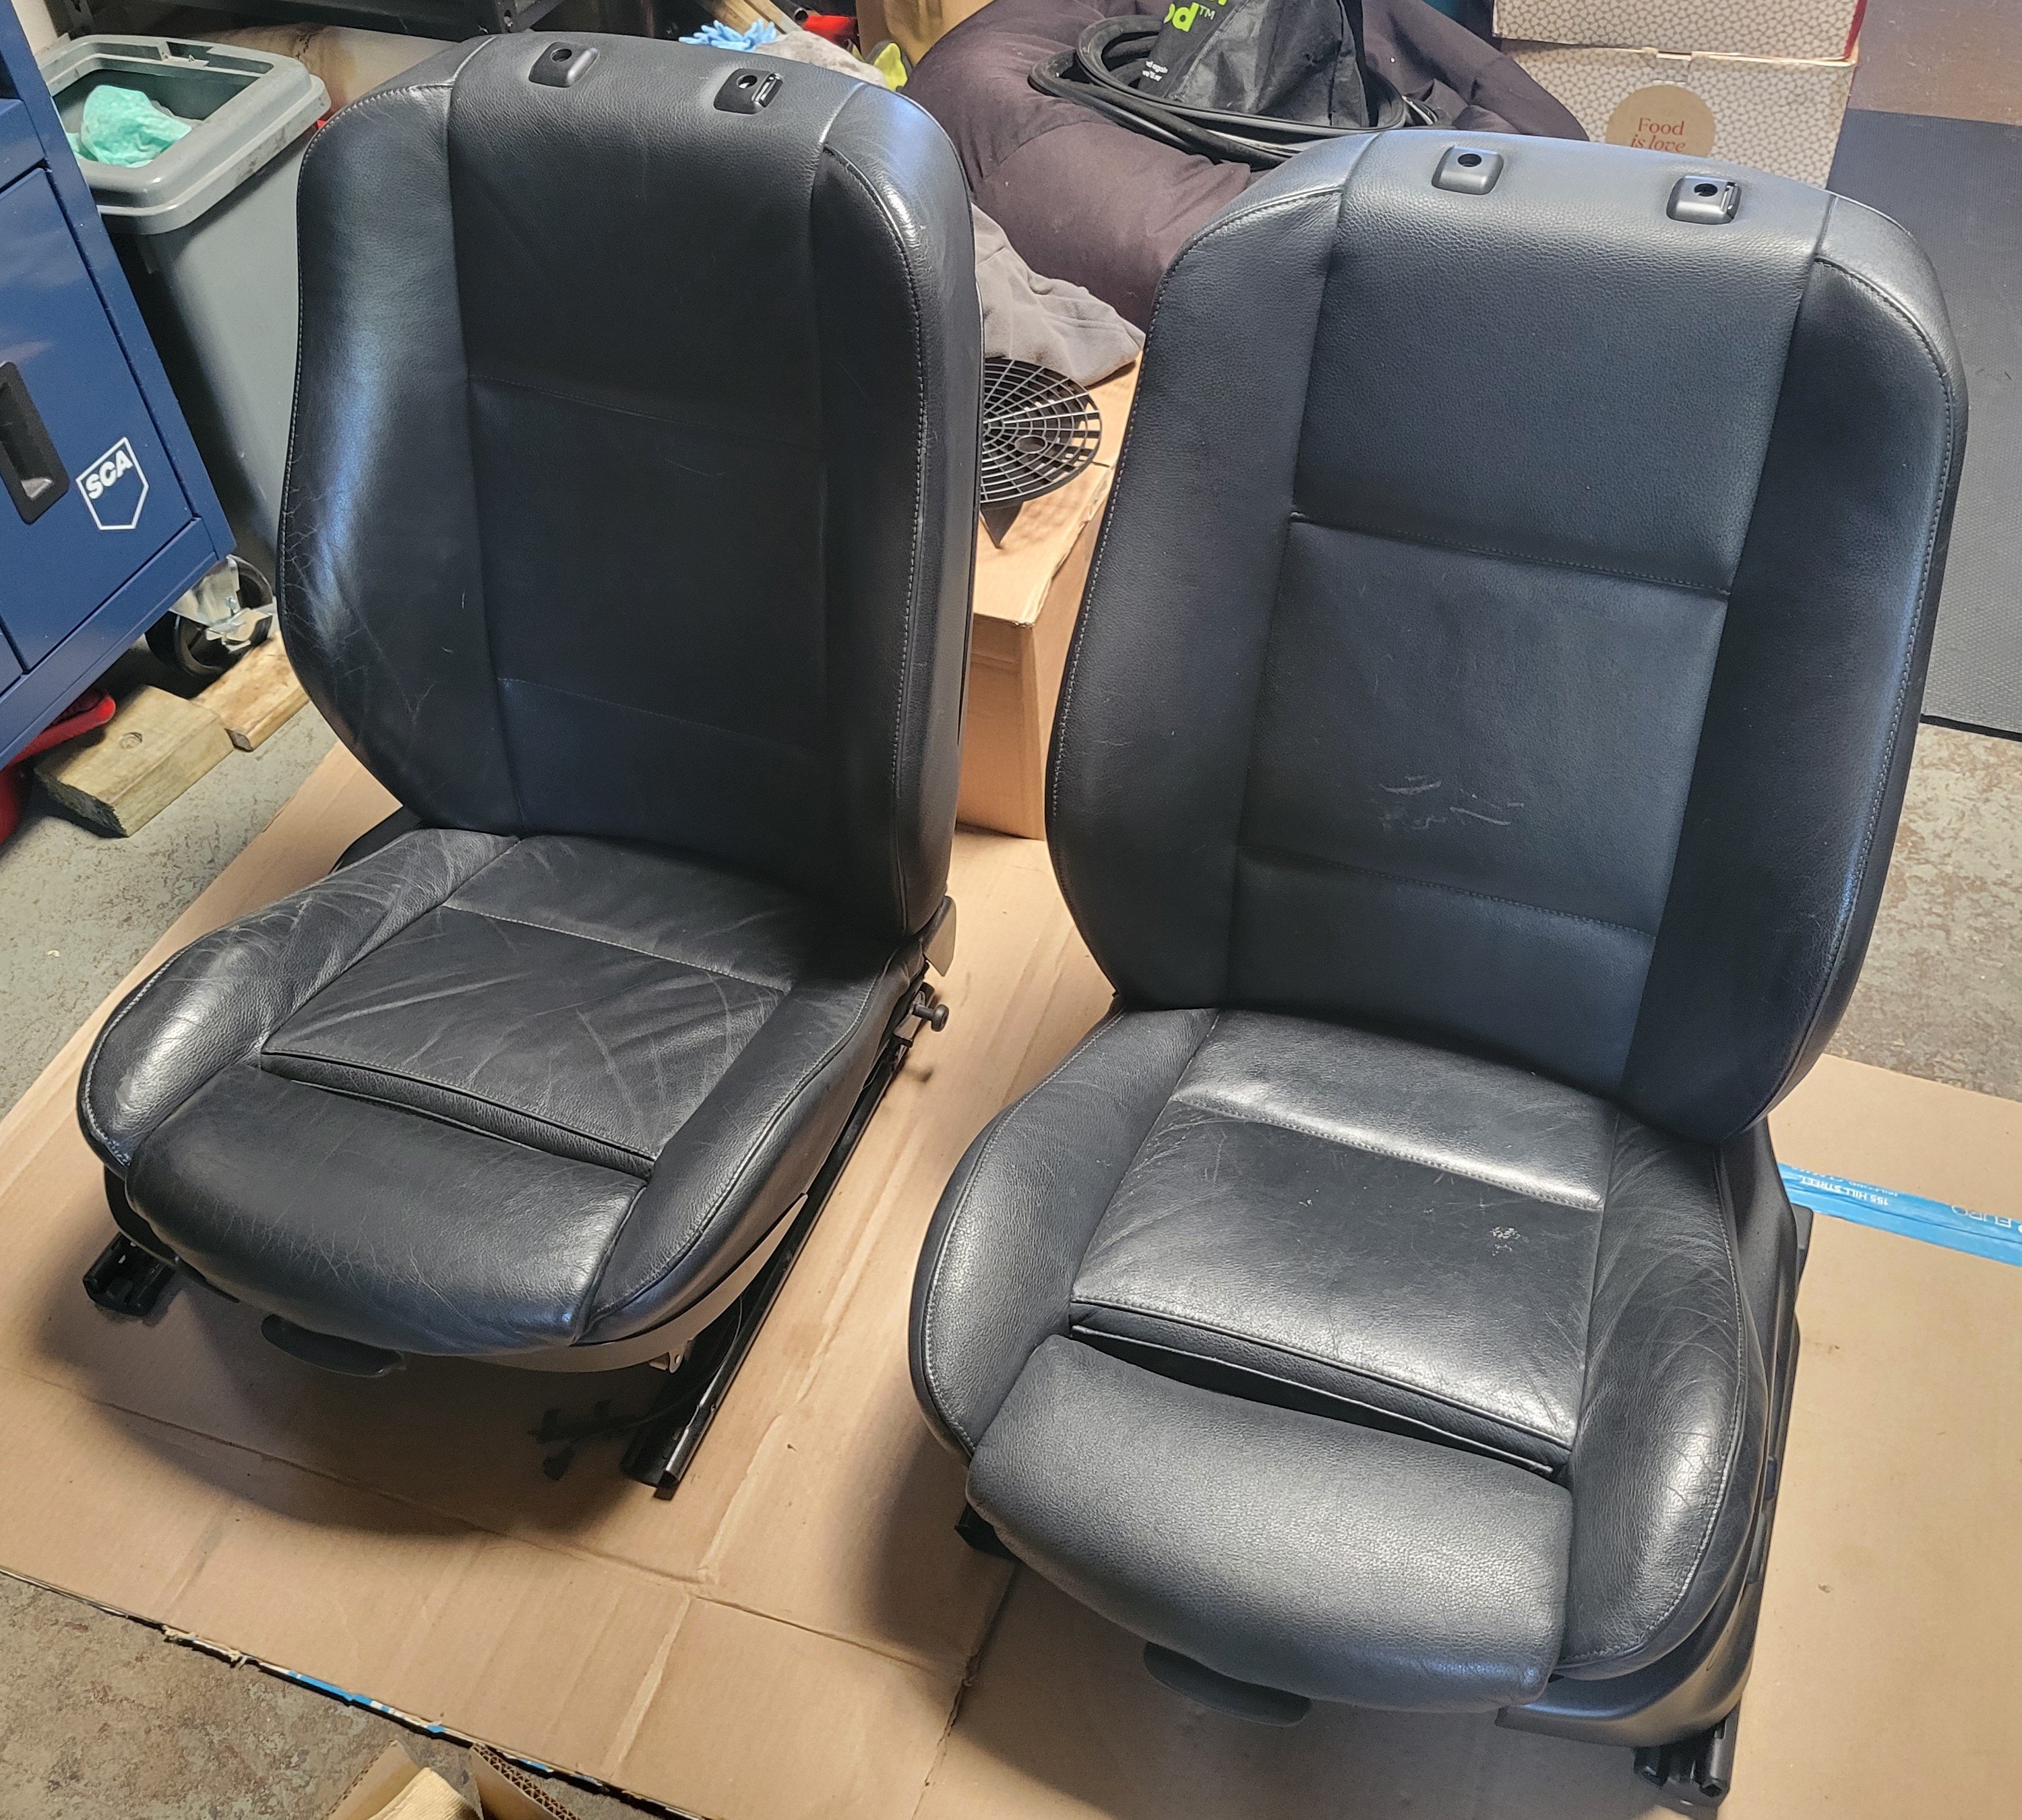
The original seats weren't in terrible condition but the base did have more cracks in the leather and were looking slightly more tired. The new ones didn't really need a full re-dye and could have gotten away with just a good clean but figured I might as well. Both had similar wear in the bolsters but not terrible enough to warrant tackling at this stage. Here's the two driver's seats for comparison.
ORIGINAL SEAT


NEW SEAT - post clean
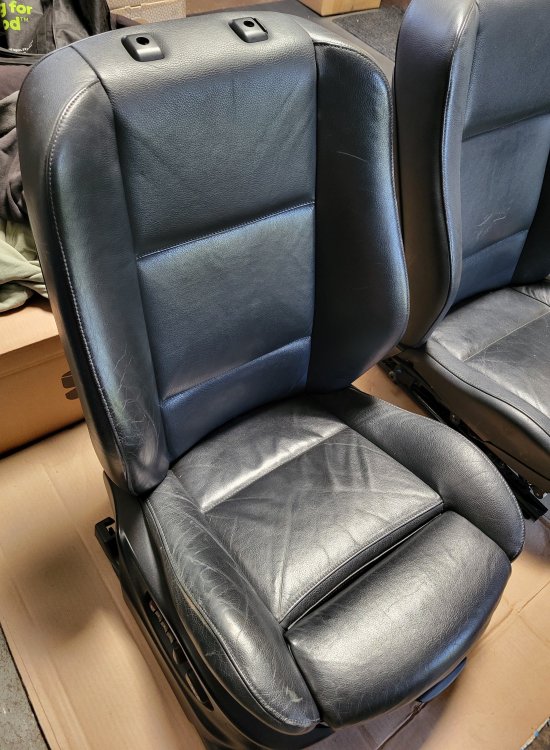

NEW SEAT - post re-dye & conditioner


Not a perfect job, the finish is a bit patchy in places with some shinier bits sticking out but on the whole a massive improvement - some bigger cracks filled in, some cracks are still visible under certain light but don't stick out nearly as much being colored in and a much deeper tone of black overall.

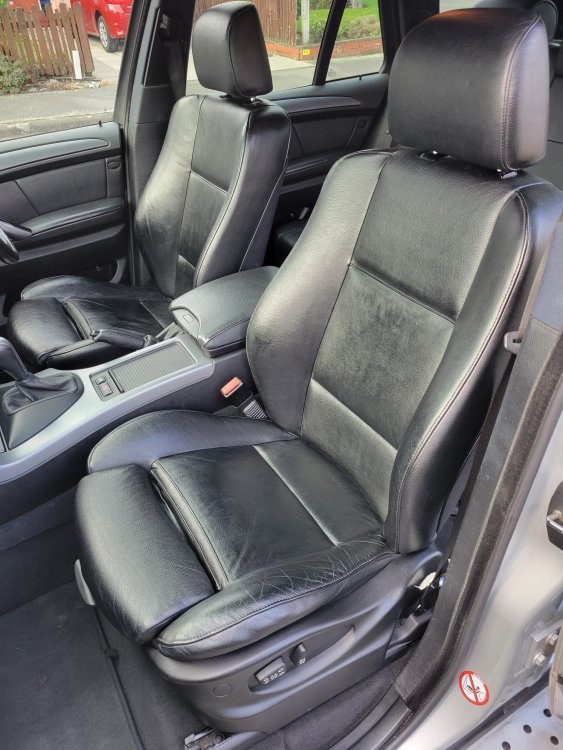
Was surprised to discover that even the extendable thigh bolsters have heating elements in them. Always assumed only the base and seat back would be heated but that's a nice bonus. That's the wife's biggest gripe with the X5 taken care of, should keep her nice and warm in the winter. Wouldn't mind these in the E46 but hey, happy wife - happy life.
-
8
-


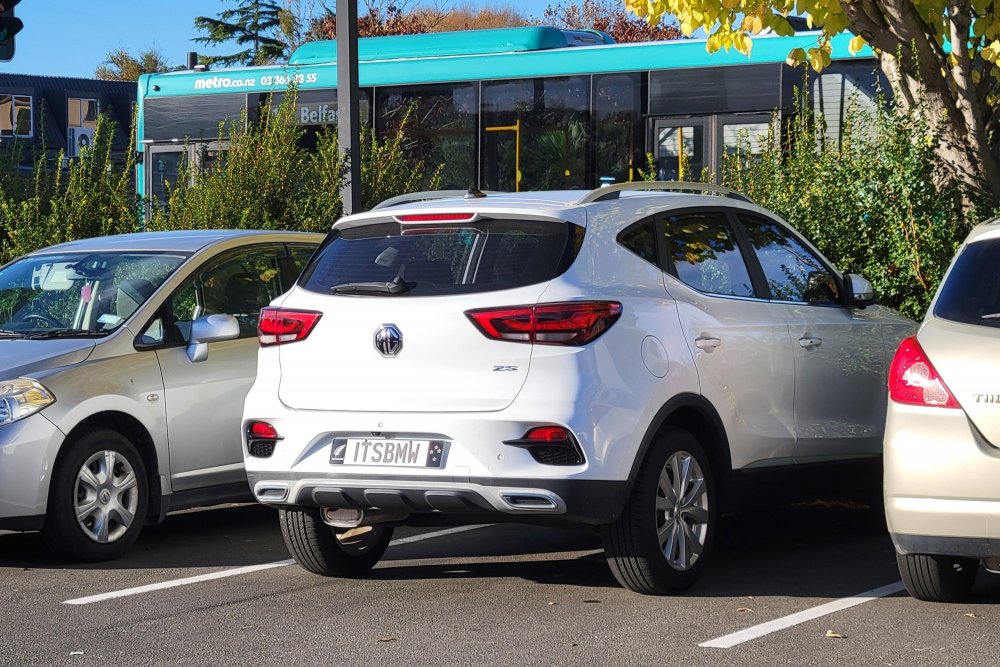
One for the 'tell him he's dreaming file'
in TradeMe discussions
Posted · Report reply
Don't mint the fact that the grilles are black, it's the wannabe F-series slotted design that's utter cringe.
Ohh I feel you buddy. Doesn't do much to increase its value these days tho.