
Vass
-
Content Count
841 -
Joined
-
Last visited
-
Days Won
75
Posts posted by Vass
-
-
Don't look at 2005-2012 320's, they've got the same shitty engine. In fact, don't look at any BMW that's not a straight 6.
-
 3
3
-
-
Pure rage bait. He knows exactly what he's doing.
-
1
-
-
You see plenty of people ignore the problem and drive around in a cloud of smoke for years on end. Common does not equal normal. There's really nothing normal about it, a well designed, properly operating engine will not be burning anywhere close to that much oil. Those manufacturers claiming it to be "normal" are just trying to cover their ass and not take responsibility for putting poorly designed products into circulation. All those faults are fixable but often not financially viable, hence them trying to normalize it.
Not sure where you're getting the $5-9k figure from, might be the case for a V8 or V12 engine, no way it costs that much for a 4-cylinder. I asked the local BM Workshop for a quote for valve stem seals for an N42/N46 earlier this year, got told $1.5k + GST.
As a DIY it'll be a weekend of work, $100-200 in parts depending on any extras you want to do at the same time (spark plugs, vacuum pump seals etc) and a few specialized tools (https://bimmerzen.com/store/product/3/BMW-N42N46-VSCT-Full-Kit).
-
3
-
-
Not that I needed them but got myself a pair of Maxgear bulbs off Spareto, at 9 EUR a piece I just wanted to see what they were like. Couldn't tell you how they compare brightness or longevity wise to premium brands but look good enough to me. Not something I can justify paying 5x for a pair of bulbs.
When it comes to ordering from Ledperf, don't expect a quick delivery. Put in my first ever order with them for some chrome indicator bulbs on the 2nd of October, got a shipping notification on the 4th and haven't gotten a single tracking update since. Coming up to 3 weeks now and no idea where the shipment has gotten to or when I'll receive it...
-
It'll be the valve stem seals... No idea how you're claiming it ain't blowing smoke out the exhaust if it's burning through that much oil either.
For comparison, I replaced the valve stem seals on a mate's car ($1,500+ job if you take it to a garage), replaced brake booster (another typical problem on these), replaced some leaking coolant lines, thermostat and coolant plug at the back of the head. Tidy well looked after car overall. Has been up at $5k for 4 months, only message received was a scam, zero interest otherwise. The market is dead. $5.5k for a car with issues is optimistic, if not outright deceitful.
-
1
-
-
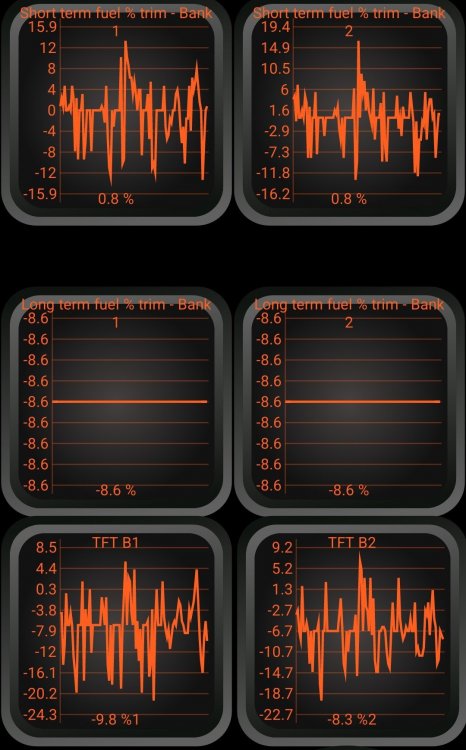
Have been trying to hunt down the cause for the rich running ever since the dyno day. Fuel trims were not a topic I was too familiar with so set out on a bit of an educational journey on the science behind it all. A bunch of Google'ing led me to a number of useful forum threads on the topic, including this priceless guide on reading engine logs by our very own @NZ00Z3. Despite being a Z3 loyalist , he's a bit of a legend over on the E46 Fanatics forums and an absolute treasure trove of information, helping countless people interpret their data logs and get to the bottom of their engine troubles.
I've gone into greater detail documenting the logging journey over on E46 Fanatics but so far, even with the help of the hive mind, haven't been able to find the smoking gun - the LTFT's for both banks have anchored themselves at -8.6%.
- The engine is in great condition, strong compression numbers, fuel pressure within spec, tested for vacuum leaks, no engine codes.
- O2 sensors & MAF are brand new OE, the Rev Rise Test seems to indicate the MAF operating as expected.
- Have re-run the logs having swapped out various components without any change, including a throttle body, ICV & MAF that @Eagle kindly lent me.
- One of the case studies mentioned an instance of rich running being caused by over-oiling a rechargeable K&N filter, which I did run for a while. I swapped it out for a brand new stock filter, cleaned the new MAF as well as re-running logs with a spare MAF without any change.
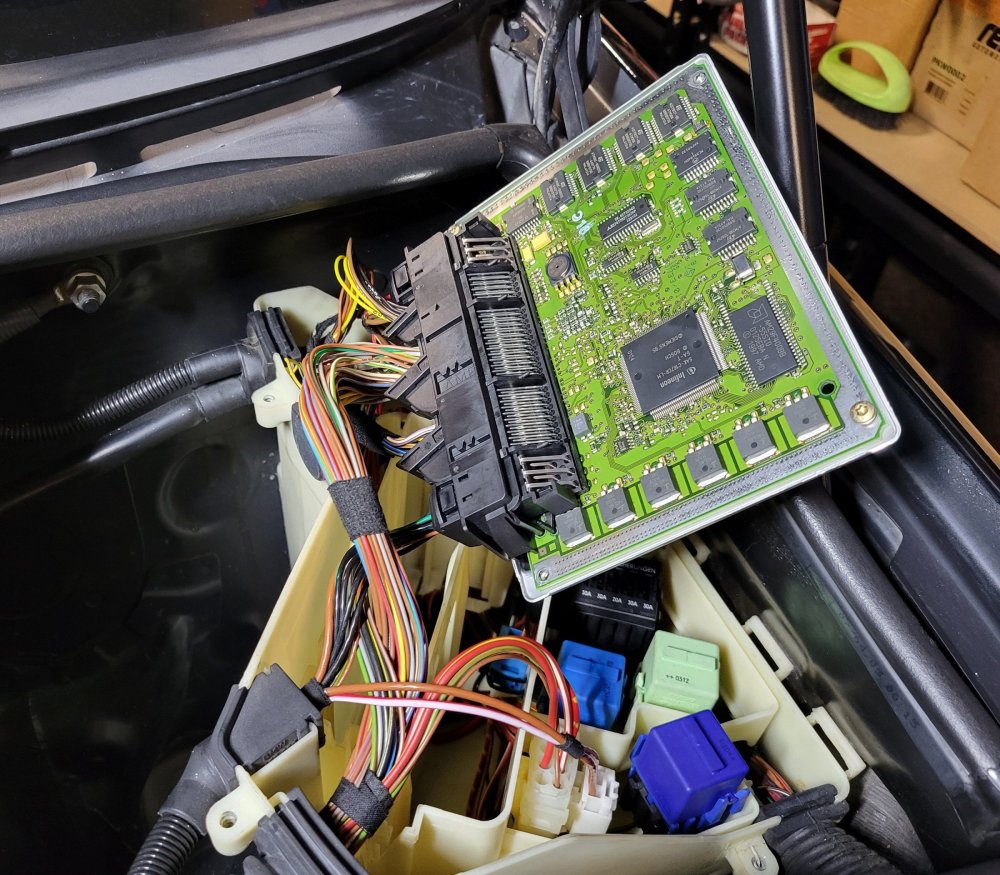
My latest attempts of getting to the bottom of it involved tinkering with the DME. I hacked up a spare body loom I had to make up a bench coding setup. Came out looking pretty crude but does the job well enough. Used a random old 12V, 1.5A charger for a power supply.
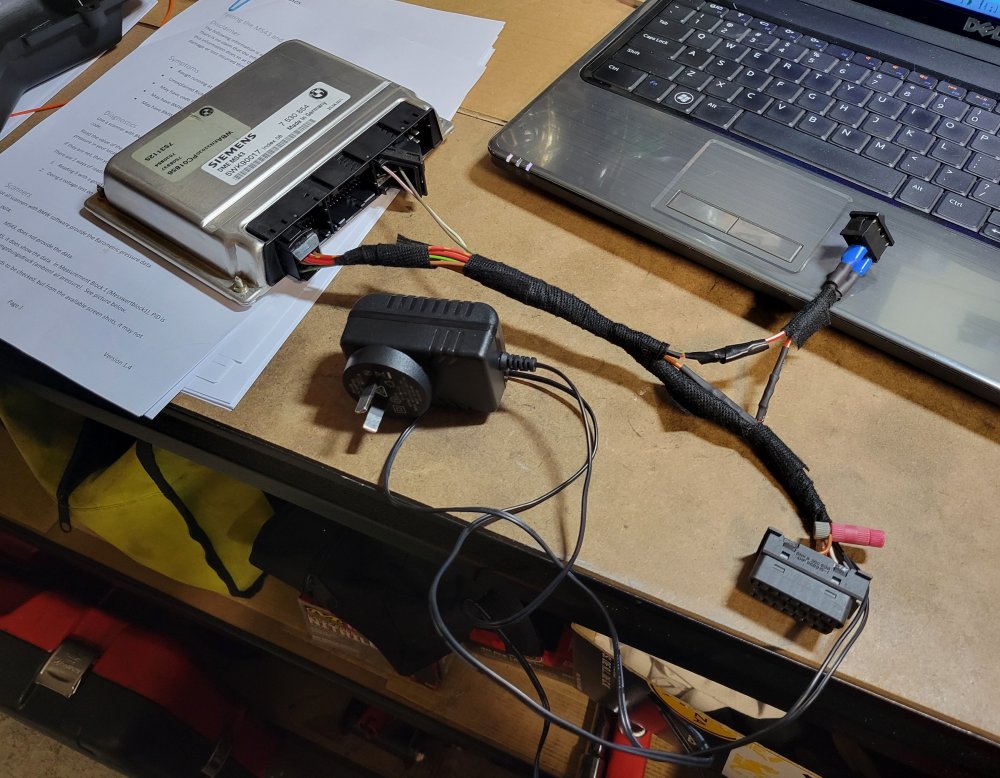
I had a spare DME from the engine donor car which I used as a coding test rabbit and to eliminate the possibility of the original DME not operating correctly. I updated the DME to the latest MS430069 firmware, checked that it's running the latest EU2 tune, did an EWS delete, cleared all adaptations and threw it in the car. It started up on the first crank, ran fine so I took it for a drive whilst monitoring fuel trims. The signs were promising in the beginning but then slowly but surely the LTFT's started creeping their way down before settling at the familiar -8.6% for both banks after around 20 minutes of driving.
With the original DME out on the bench, I flashed that to the latest firmware as well, cleared adaptations, threw it back in and sure enough the fuel trims were back at -8.6% within 5 minutes.
One other suggestion was to test the barometric pressure sensor on the DME since that could also cause false readings if faulty. I did the test whilst the DME's were coming in and out. Read 4.95V between pins 2 & 3 and 4.06-4.07V between pins 3 & 4 on both DME's, which checks out, seemingly eliminating the DME as the culprit.
Running out of ideas at this point, I should probably just leave it alone really. The car is still running fine, I don't explicitly feel any lack of power but knowing that something is not at 100% is still low-key eating away at me.
As was suggested in the other thread, it could just be the type/grade/quality of fuel used in NZ that's behind it but then the dyno results and AFR graphs shouldn't have been as different between the 3 cars as they were. A few weeks back we took @Carbon's E39 for a longer cruise with OBD Fusion hooked up the whole time, his LTFT's never went beyond +/- 0.3% throughout.
Few more things I might still try:
- Will take out the spark plugs and check how sooty they are - would seemingly verify whether the engine is actually running rich or if the DME just thinks it is. Might just throw in a new set regardless. They've only done around 11k km's post engine rebuild but they did go through the whole running-in process, which could have gunked them up somehow I guess? Did read/hear somewhere that it's best to hold off throwing in brand new spark plugs onto a freshly rebuilt engine, advice that I blatantly ignored. So many conflicting opinions on the best running in process that it's really hard to tell what the definitive best practice might be but new ones definitely won't hurt at this point.
- Might look at getting brand new injectors. Had the original ones professionally cleaned, the fuel pressure test didn't indicate them leaking at all, the trims for both banks are the same so should also eliminate any individual ones being faulty. Only thing that would make sense is all of them injecting too much fuel, equally as much so it quite a big long shot.
- Blocked cats? Wouldn't mind a set of catless headers but yet to come across a decent RHD set - Malian Exhaust ones are sh*t, as @Eagle has experienced, Gravity Performance don't ship to NZ and Super Sprint are $4k+...
- LS swap?
-
3
-
A short lesson in "if it ain't broke, don't fix it."
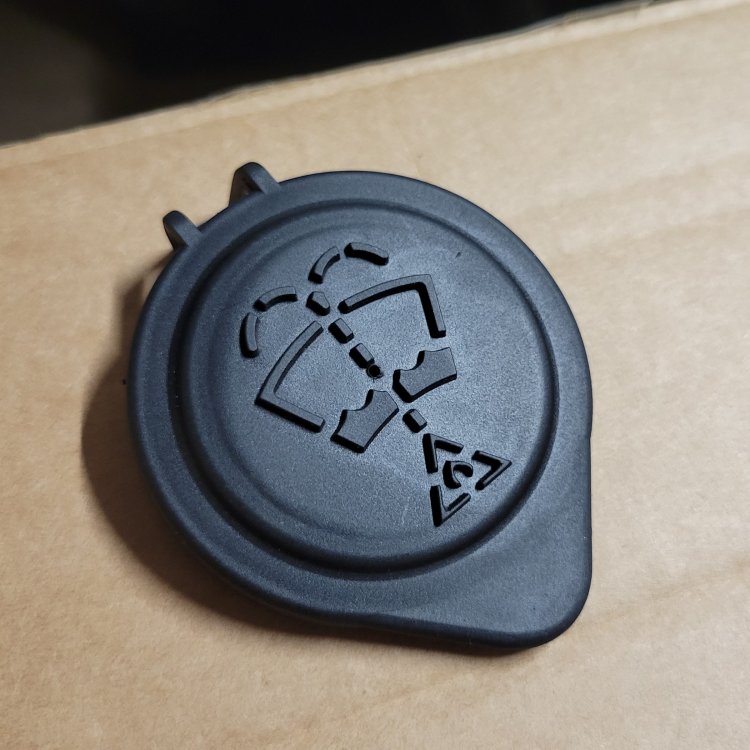
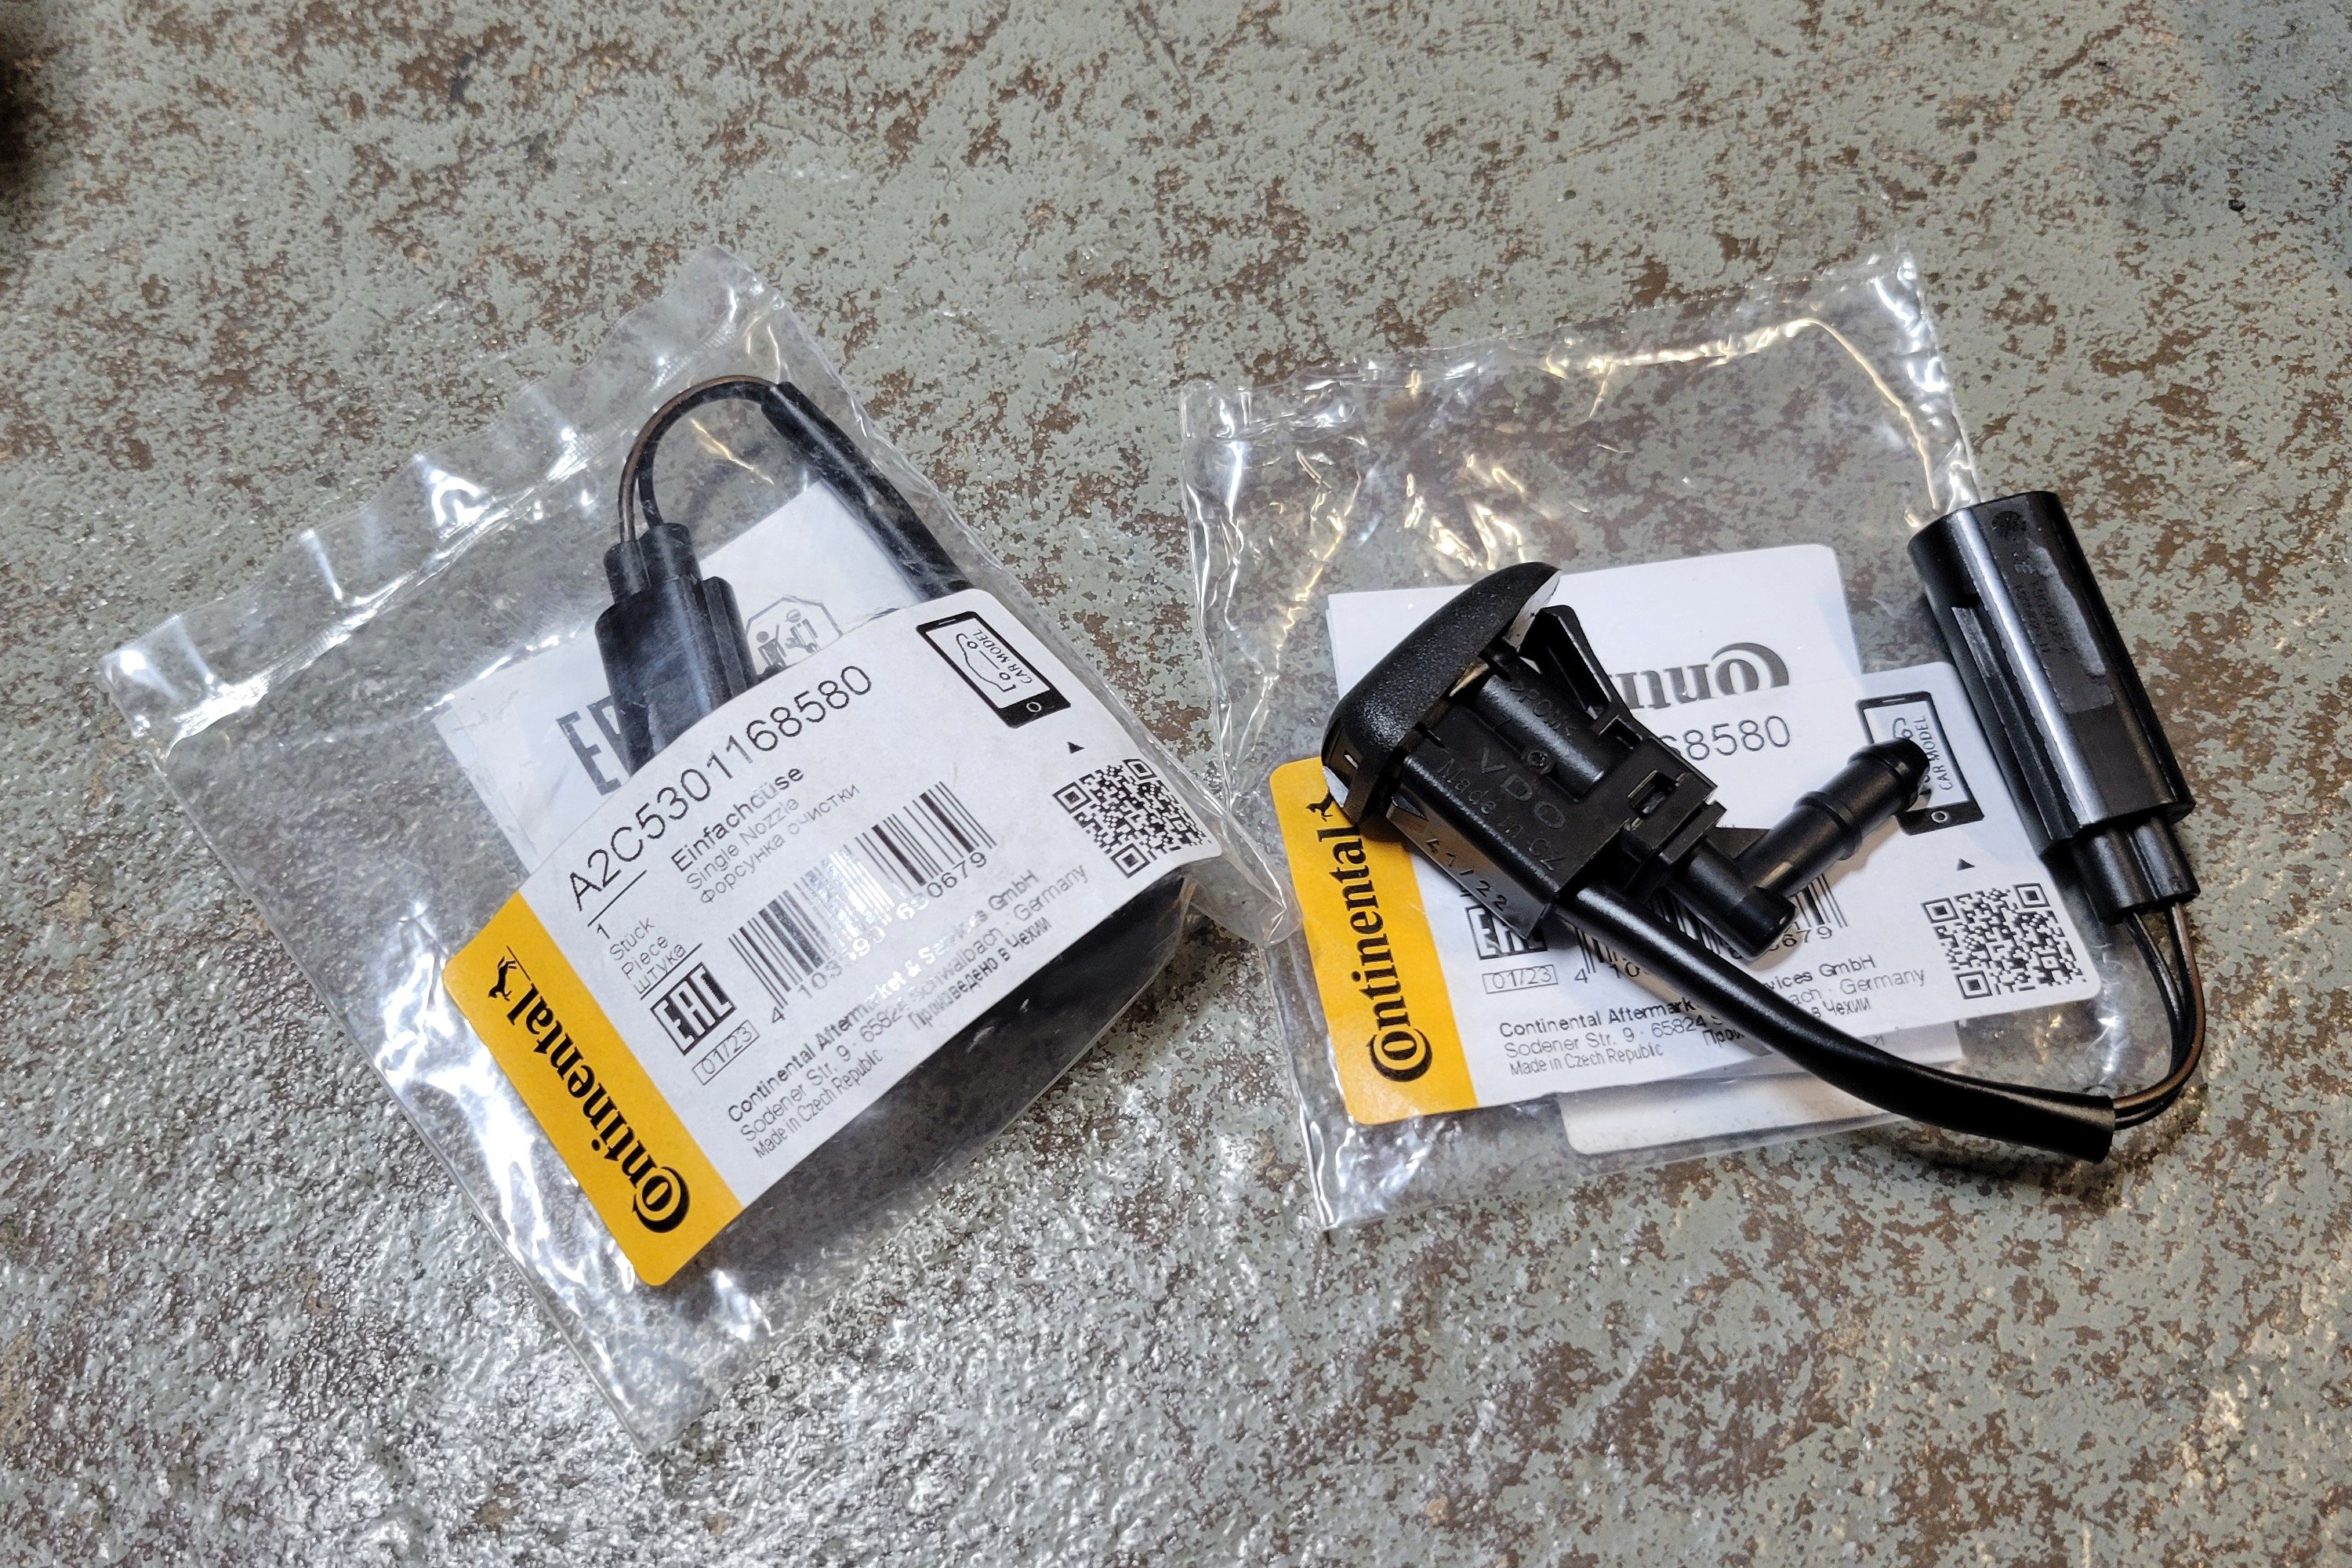
Ordered in a pair of new washer nozzles. Being the fancy heated type they weren't exactly cheap for what they are - around $40 each. With the shipment nearly at my door, only then did I think to look up how common a problem this is and stumbled upon this thread, which immediately made me feel like an utter dumbass. A wee while ago I threw on a new washer reservoir cap, not because of it having anything wrong with it, rather just a visual thing. Didn't think to notice it at the time, but unlike the old one, the replacement was completely solid and didn't come with a vent opening. The fluid would heat up in the engine bay, pressure would build up and without a vent opening the only way out would be for it to push its way out through the nozzles. Physics, duh...
Took the cap off, drilled a 1mm hole through the middle of it, problem solved. Threw the new nozzles on too since they were already here.

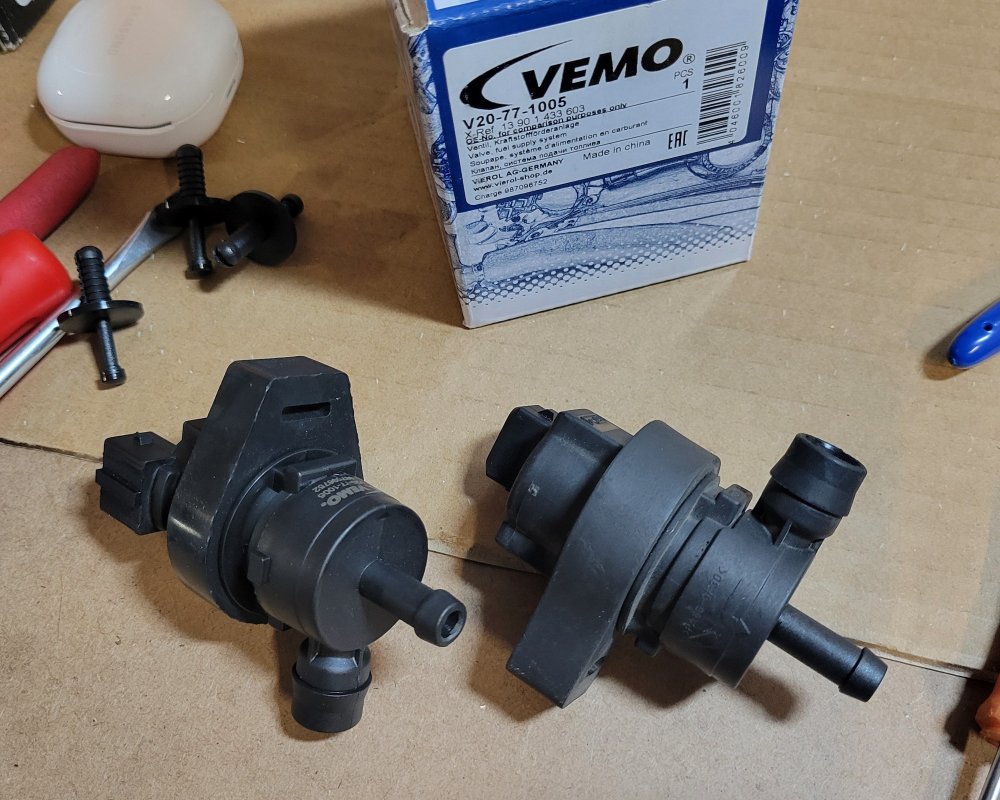
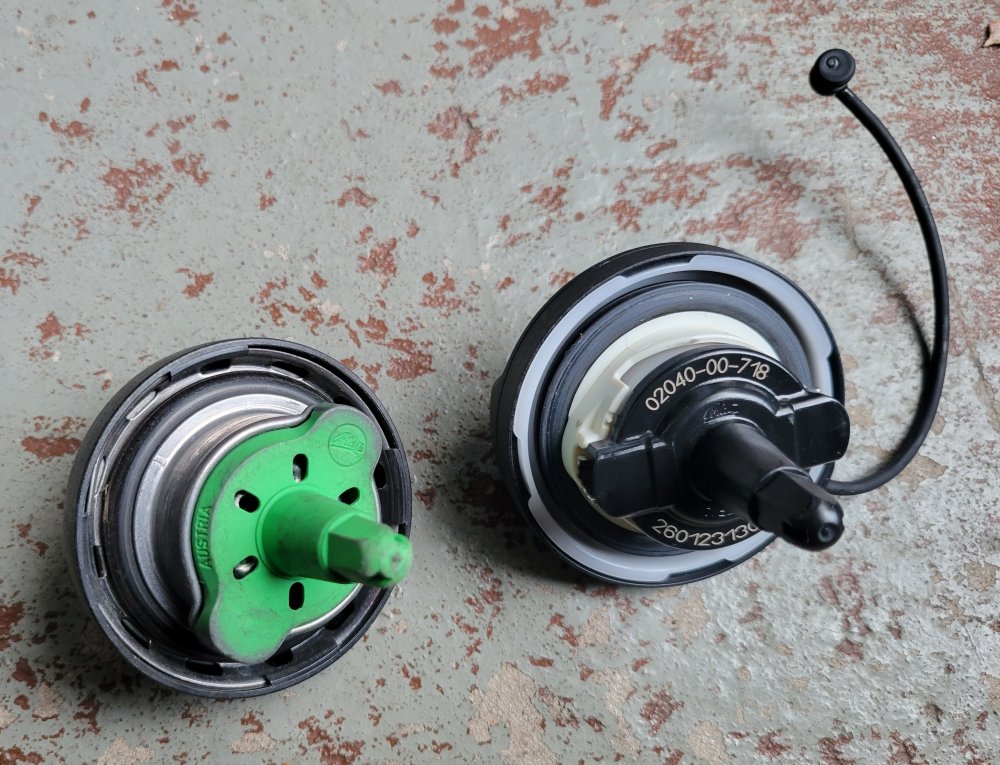
Packed the order out with more unnecessary stuff to justify the shipping costs somehow, anything relatively cheap that I could think of really. Got a new fuel tank vent valve (just because I had an issue with the car stalling that once a while ago), a new expansion tank cap (started weeping occasionally) and a fuel filler cap (seal was starting to crack).
-
1
-
 1
1
-
-
14 minutes ago, treone said:Complete form, pay membership fee, get invited to join their Facbook page/group, attend organised events, network with other members (virtually/in person) - easy! 🤣
Nah there's no membership fee, it's just a small local group, not affiliated with BMW Car Club NZ, although some people are members of both.
-
A car forum dedicated to BMW's of all brands shaming someone for speeding. Fun times.
-
Didn't think there were any real stringent requirements. There's all sorts amongst the group - folk with project cars, newer models, classics, M-cars etc. Wouldn't think there'd be any prejudice against you either unless you did anything to explicitly piss someone off, which I can't imagine how you would have.
The fella currently running it has been away in Aussie for the past few months so probably just not been keeping tabs on things as actively. He's a bit oldschool and prefers to do things over email instead of FB in general. There's typically a lull over the winter months anyway so not much has been going on of late apart from the monthly meets. I'm sure you'll get approved eventually. In the meantime just rock up to the next meet, no one's checking memberships at the door...
It's every first Tuesday of each month, 6pm at the Richmond Club. Usually parked along the back fence, just see where there's a bunch of BMWs parked up and follow suit. I've only just started going again after my car being out of action for close to half a year. There were only a handful of cars and ~12 people at the last one but turnout should start picking up into the warmer months. I'll probably be there at the next one too, just seek me out or send me a message closer to the time, I'll make sure to come and say hi. I'm sure you'll fit right in, it's a nice friendly bunch.
-
Haven't heard of this particular one but seems similar to a few scams that have been doing the rounds. Usually a "potential buyer" will message you, come across as really interested in the car you're selling then ask for a [insert random abbreviation] Report as a pre-requisite for purchase. They'll spin a yarn how that's a deal breaker for them and how for whatever stupid reason they can't run and pay for the report themselves "because it's not their car" and how you're the one that needs to do it. What this basically does is feed your credit card info into their system and they then use if to empty your bank account or sell it off on the dark web...
They tried to rope me into one of these one time, was some Canadian website with a similar layout. Not 100% certain that this is what it is but one red flag that sticks out is they just give a whole street as their address without a street number. Seems a fair bit of effort put into the website though - detailed enough to come across as somewhat legit, vague enough to not lead to anywhere in particular.
If that sounds like a familiar scenario then whatever you do don't put your bank info anywhere near that website. If a buyer wants a report then they can pay for it themselves.
-
2
-
-
Can't see anything E30 about it, even got rid of the Hofmeister kink. Don't actually hate the look, more easy on the eye than the humongous bulges they're offering nowadays but how is this a homage to the E30 exactly? The round headlights?
-
1
-
-
Take just the AC belt off and check if the noise is still there. Take the rest of the belts off, spin all the pulleys by hand, check for noise. Must be something really obvious if it's that loud and instant.
Are the belts routed correctly? Does the AC belt have the correct number of splines? There were 2 different types of AC pulleys, harmonic balancers and AC belts depending on production date. That's the first obvious thing I can think of.
-
On the "performance" side of things, I committed blatant sacrilege by throwing on some intake mods.
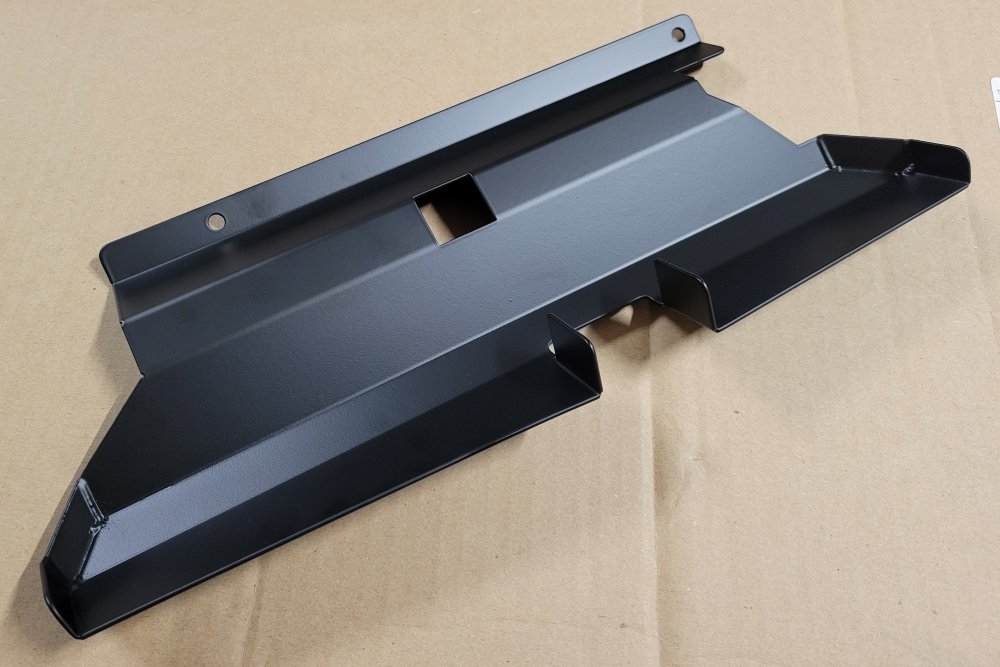
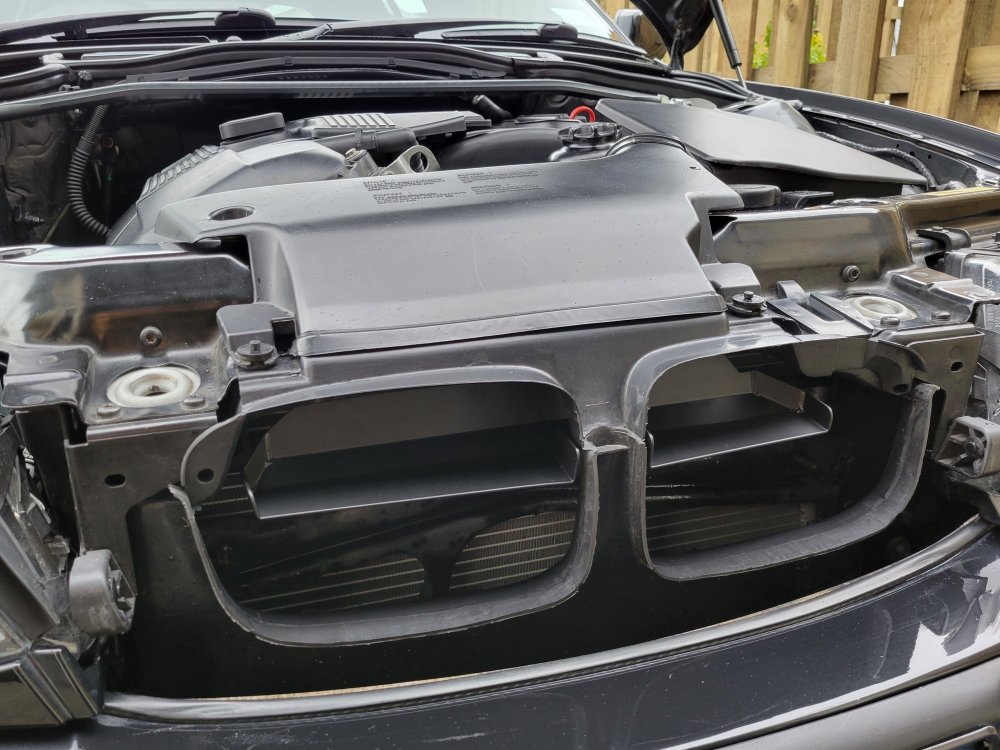
First was a Bevinsee intake air scoop off Aliexpress. Wouldn't usually go for such things but it looked tidy, all black, no logos and supposedly helps with intake air flow and reduces intake temperatures by a few degrees so was worth a shot for the low price.
The second was a Dinan airbox. I've heard of them mentioned over on the E46 fanatics forums, supposedly being one of the few intake mods that are somewhat of an improvement on the stock setup. I'd never be able to justify the price of it though so never crossed my mind actually getting one. I happened to be chatting to @Eagle one day when he mentioned coming into possession of one as a bundle deal on his recent purchase. He didn't feel like using it himself so kindly passed it on. Absolute legend.
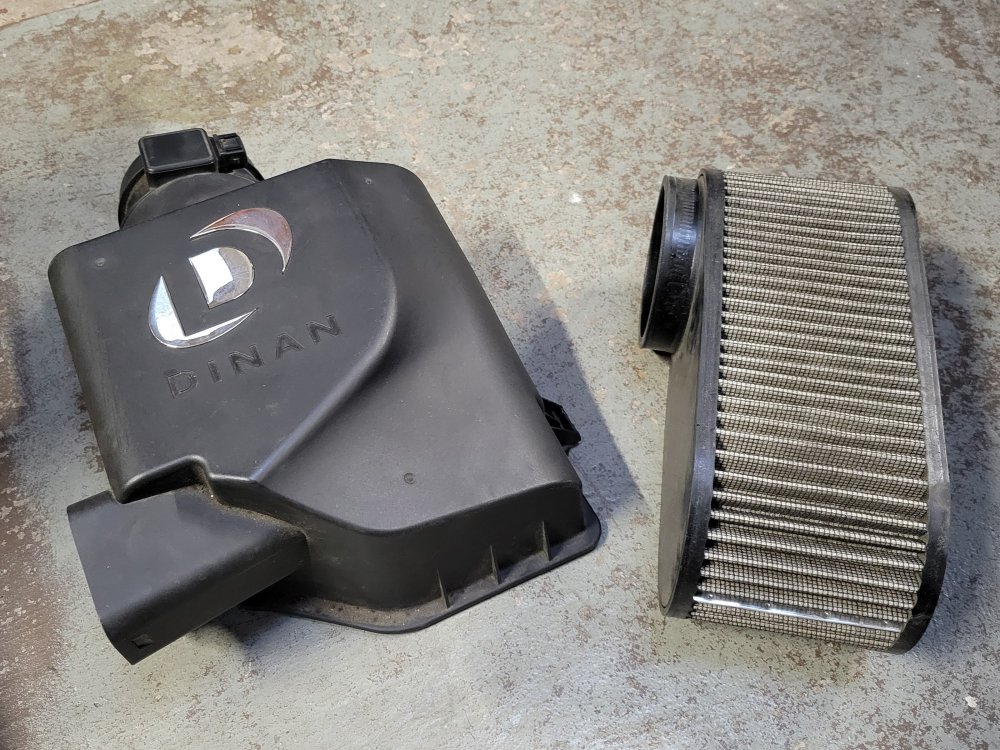
It's essentially just a different lid for the bottom part of a stock intake with a bigger filter fitted inside. Originally would have come with extra tubing which taps into the brake duct and drills into the bottom of the airbox, adding a third source of airflow. Unfortunately it didn't have that tubing intact but it's something I can just whip up as a DIY at a later point.
The filter is an odd shape but the filter elements themselves look identical to the washable K&N filters. Supposedly these aren't washable and need to be replaced every 1-2 years. Unfortunately, replacement filters are stupid expensive, are out of stock in most places and the few places that do stock them don't ship to NZ. I dug around the forums a bit and found reports of people washing and oiling them with K&N kits for years without trouble though so that's what I did.
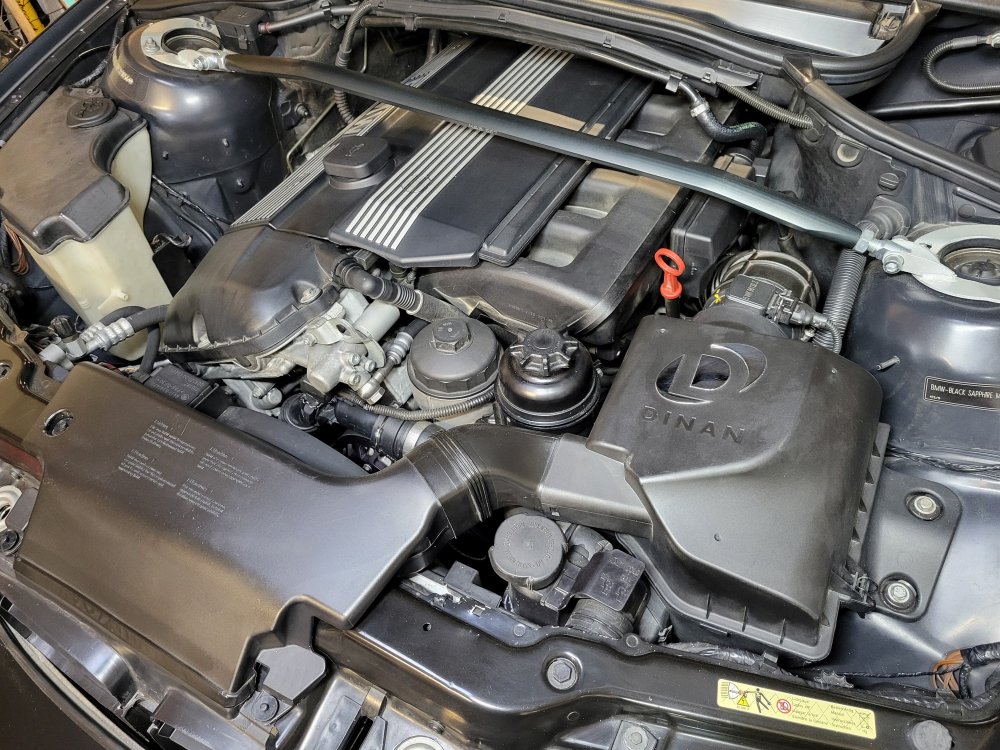
Having taken it on one proper drive so far, the sucky noises do sound more pronounced, which isn't something I ever felt the need for but nice to have I guess. Whether it does anything beyond that in terms of performance, who knows. Does look cool though.
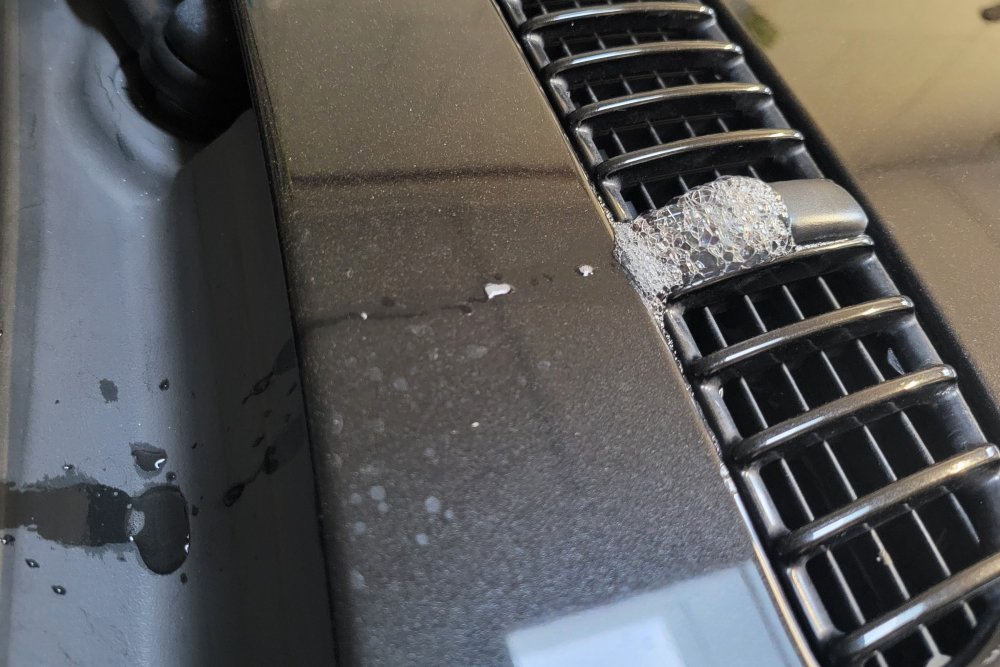
I did discover a few new issues on the first drive post paint correction. The first one being a massive puddle that started forming right after parking up.
The mind straight away jumped to the worst case scenario. Luckily, it needn't have.
Windshield washer fluid.
I had just refilled the reservoir as well. Didn't seem to leak when stationary but once the engine gets warm the fluid bubbling up and pissing out straight out the nozzles. Real weird one. Having talked to @Eagle about it he mentioned there's certain brands of washer fluid that are known to wear out the seals in the nozzles. Pretty annoying but what can you do. Will throw a pair of new nozzles onto my next order and will do some research on BMW-safe washer fluids.
The second issue could also have been more serious but ended up being a simple solution. I'd intermittently get a trifecta of ABS-brake lights pop up on the dash, maybe once or twice a year. Usually happened after the car had been on jack stands so I didn't think much of it. You'd restart the car and the issue would stay away for another number of months. This time around in the span of 2 days and 200-something km's it must have happened a good 25 times. Something more serious was at play. Got so annoying I ended up killing the engine without stopping and restarting again on longer straights.
Initially thought it must be a bad wheel speed sensor - some of the last components I've yet to replace - but having checked live data mid drive they were all returning the same numbers. Dug a bit into the engine bay having gotten home and discovered the positive terminal next to the ABS unit heavily oxidised and looking yucky. Cleaned it up with some wire brushes and contact cleaner, another 200km later and the issue is yet to return. Great success.

-
7
-
-
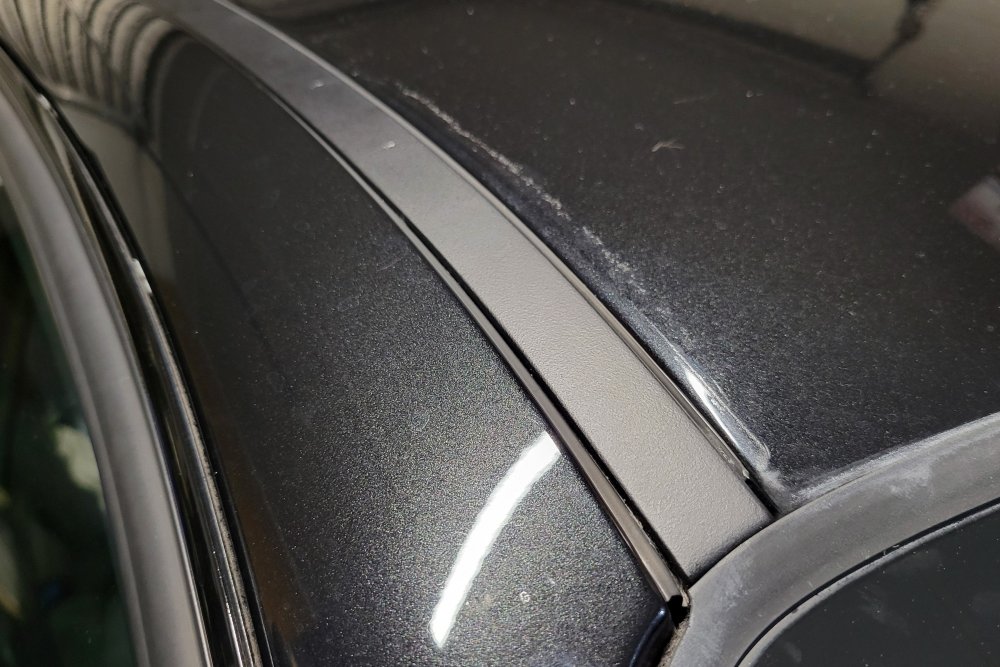
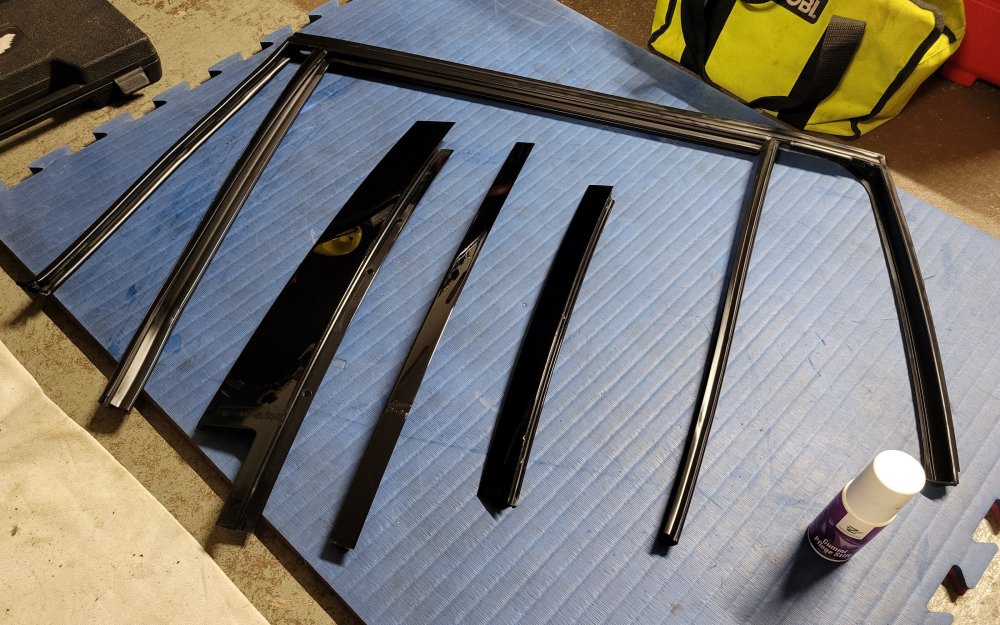
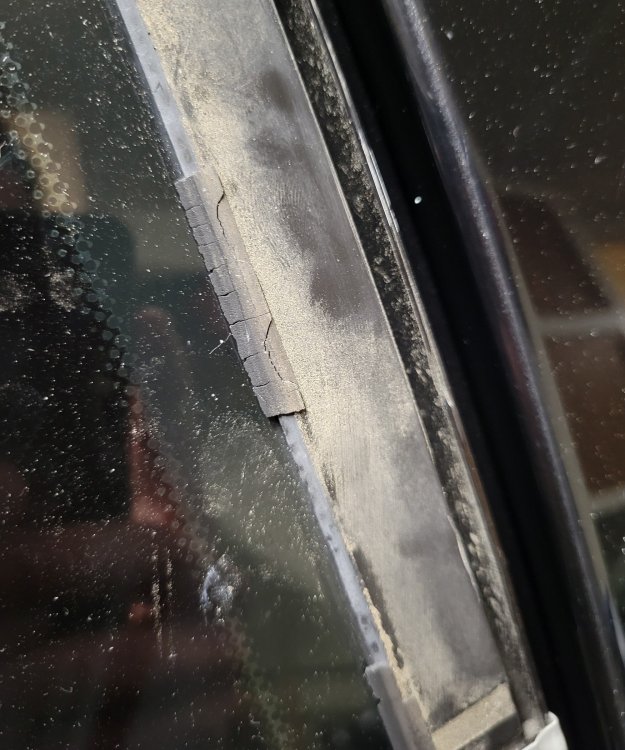
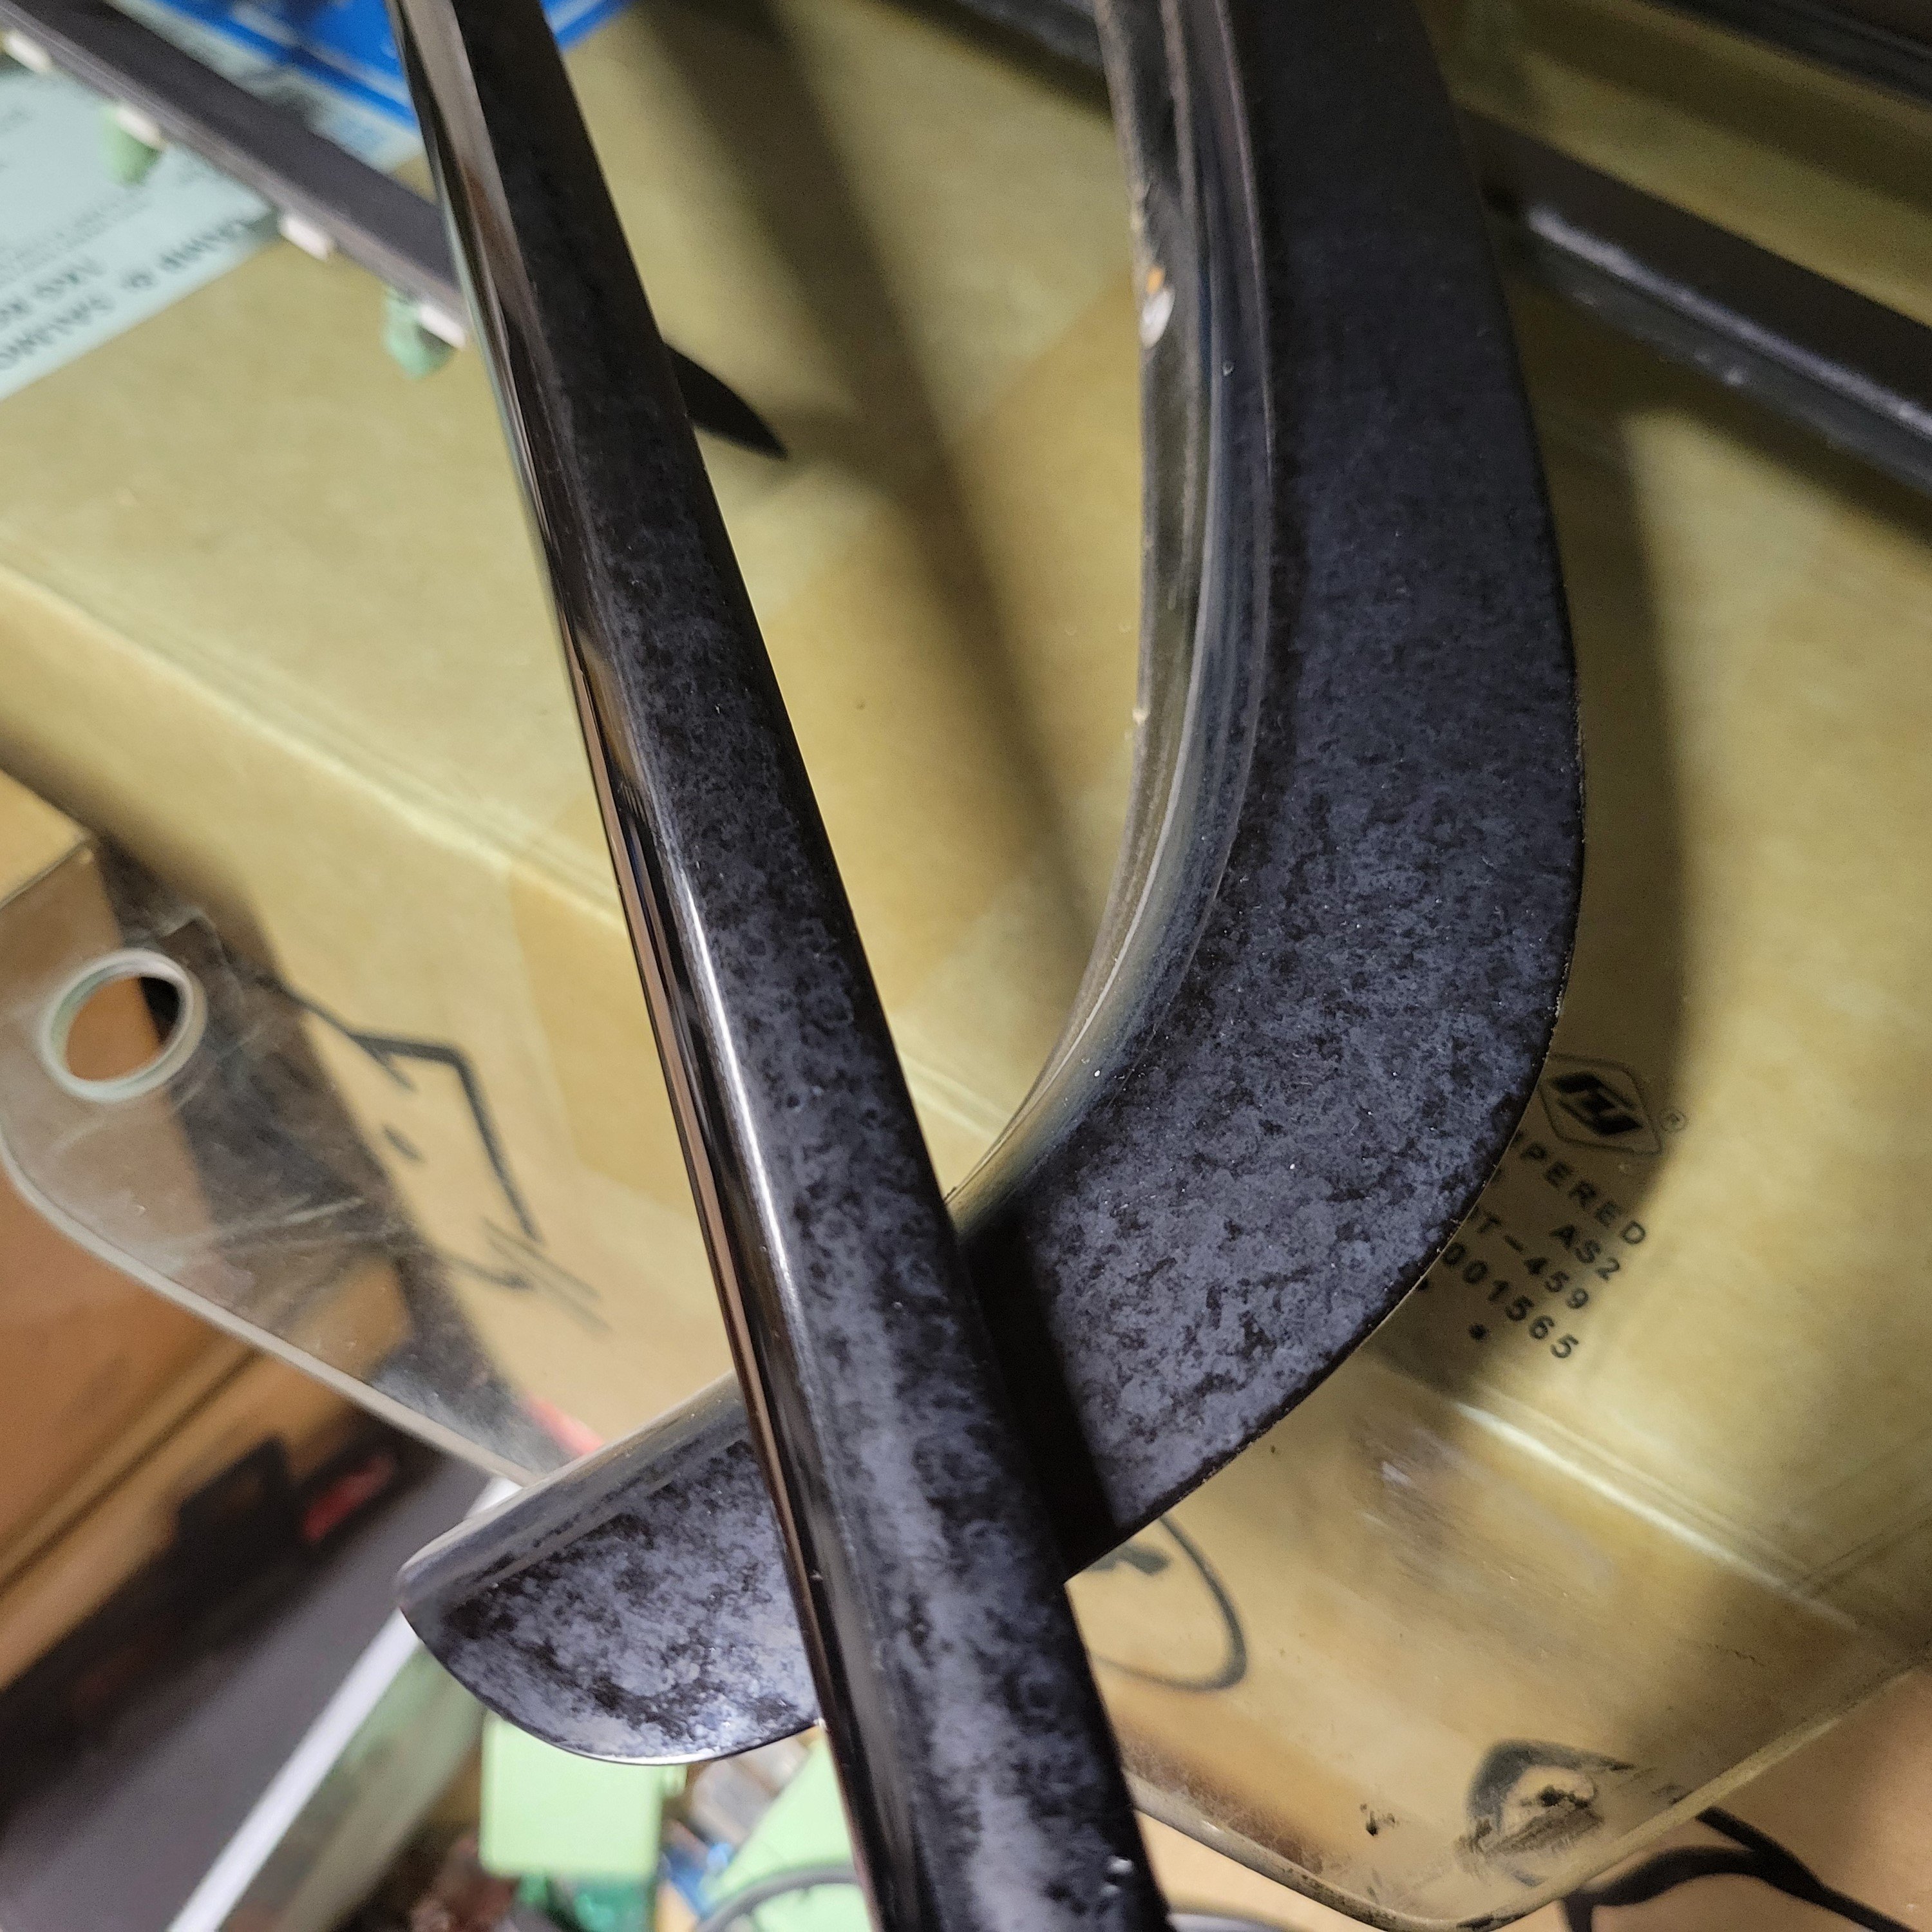
The shadowline trims that go around the windows were looking real tired. The finish is somehow different to the vertical pilar trims, they were heavily oxidized and no amount of cutting, polishing or even wet sanding seemed to do much to improve the look. Ended up giving up and passing them on to professionals to get properly repainted.

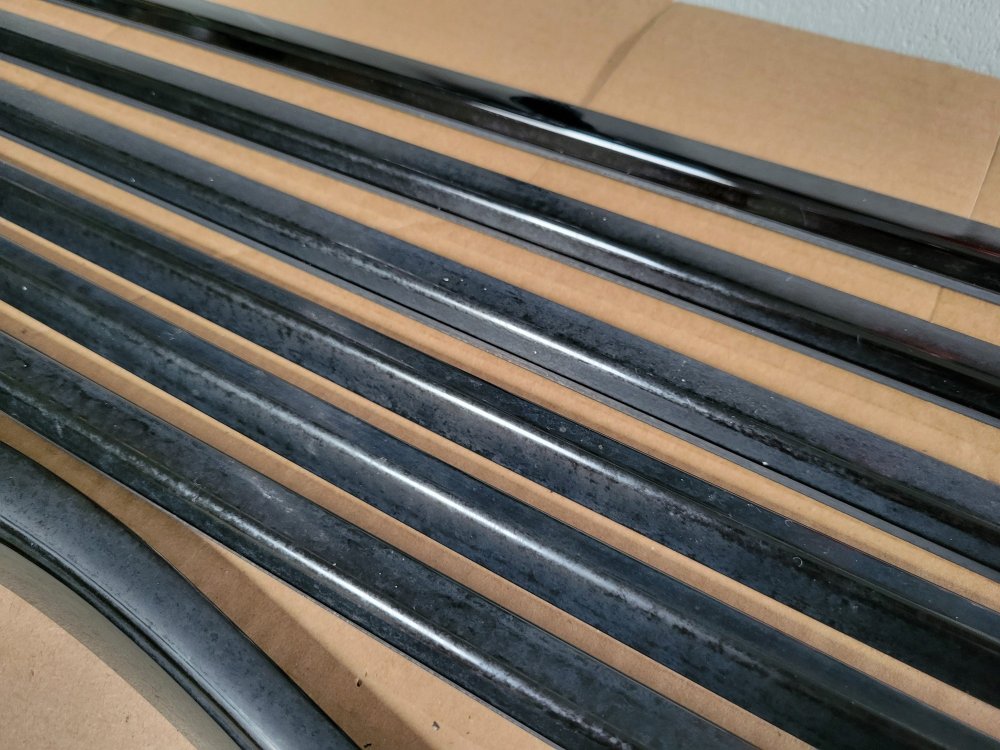
Ended up at Evan's Colour Works in Sydenham. The turnaround was quick, the price reasonable and the finish was mostly good, although did have quite a few dust bits stuck under the paint and a couple of runs. Ended up leaving one piece to get resprayed but the rest came out decent enough with a quick polish. Will have to get some 'after' shots later on.
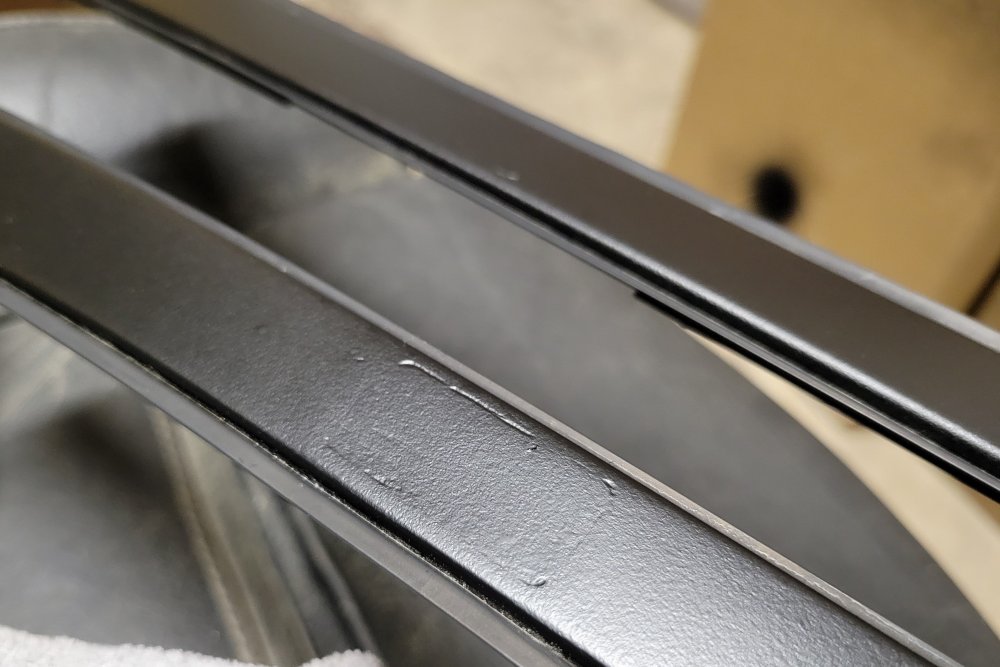
The roof rails were also pretty bad, with paint bubbling up and peeling off in a few places, as well the 3D printed plugs needing filling in. The finish was satin black so I felt more confident in taking these on as a DIY. I epoxied the plugs securely in place, carefully masked off the rubber seals, filled in the gaps around the plastic plugs and sanded down all the rough bits. I used 1 coat of etch primer followed by 2 3 coats of flat black enamel.
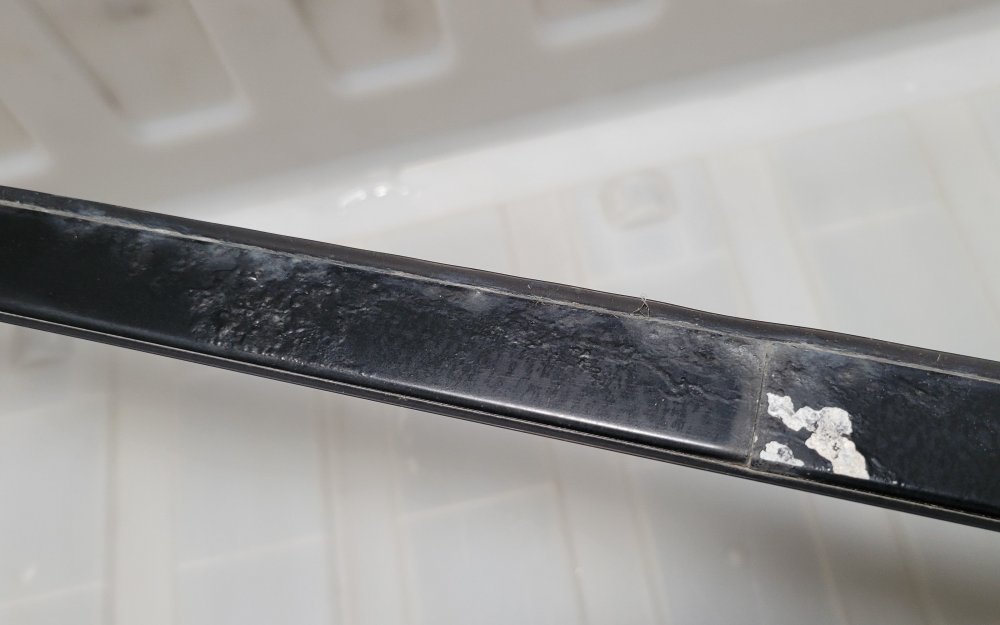
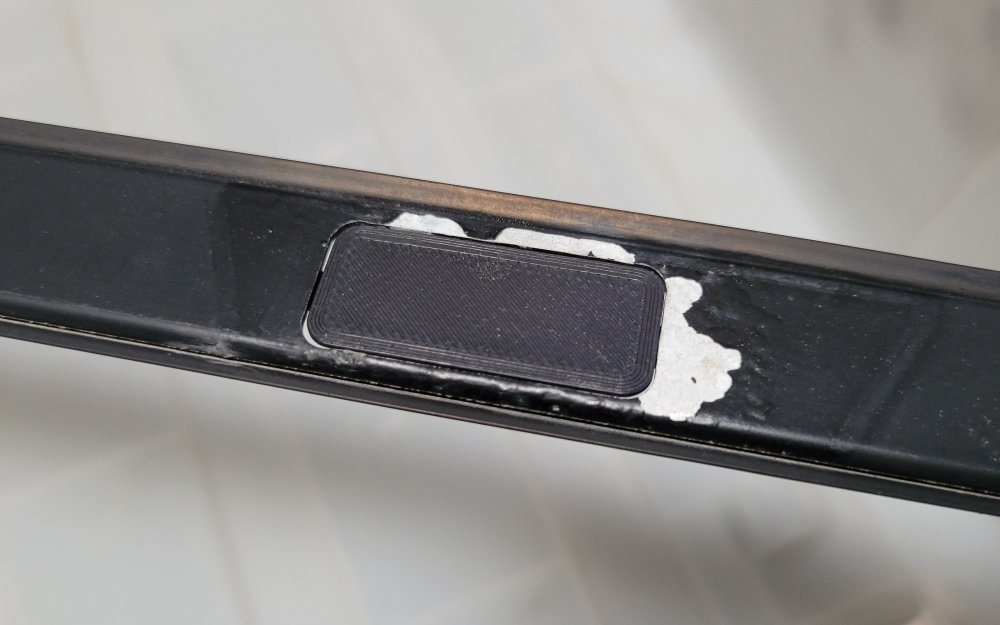
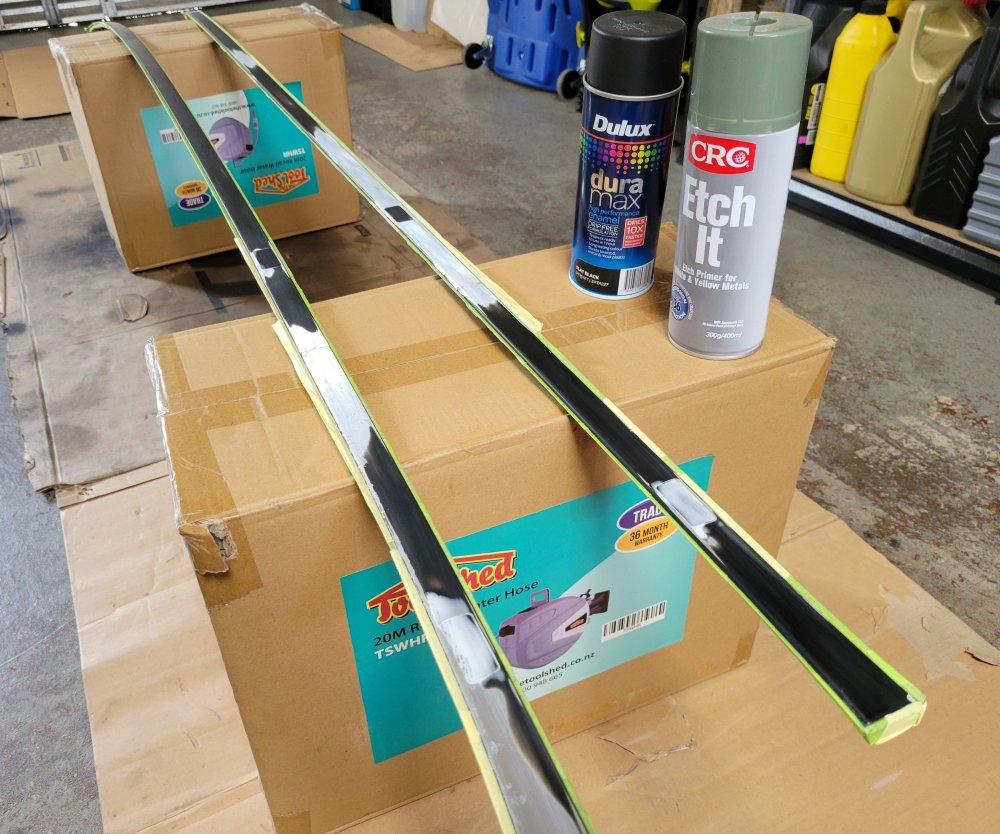
Turned out mostly fine but I did a pretty poor job of filling in around the plugs so was left with a few craters. The spray nozzle was also pretty poor so ended up with a few drips here and there. Will sand it down at some point, fill in the imperfections properly and give it another few coats, whenever I've got some surplus motivation.
I had epoxied one of the taillights back together a few years ago. Mucking around this time I noticed the other one coming apart at the seams as well so it also got the epoxy treatment. Whilst I was at it I also gave all 4 rear lights a cut and polish. Came out really nice, getting rid of the swirl marks and the yellow haze from the clear bits. Photo of a before and after of the inner lights below, no points for guessing which one is which.
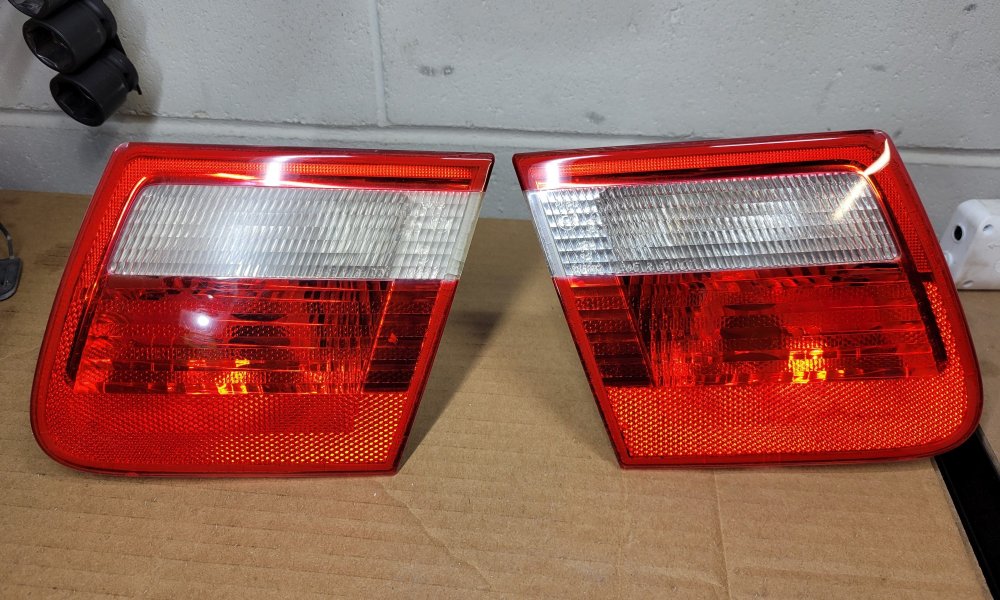
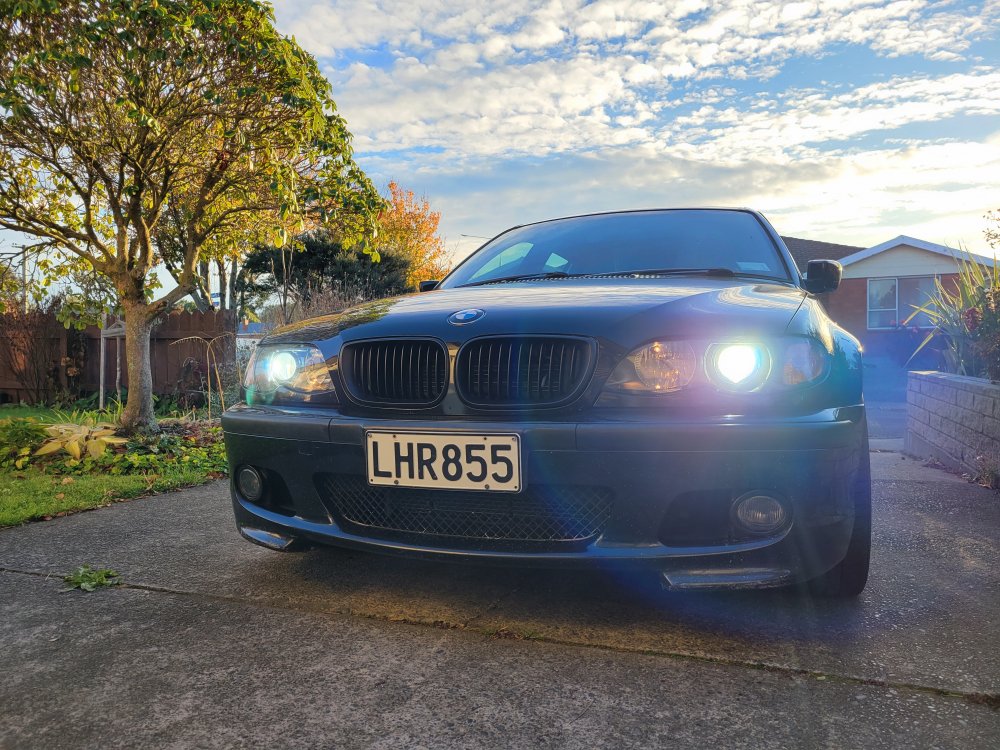
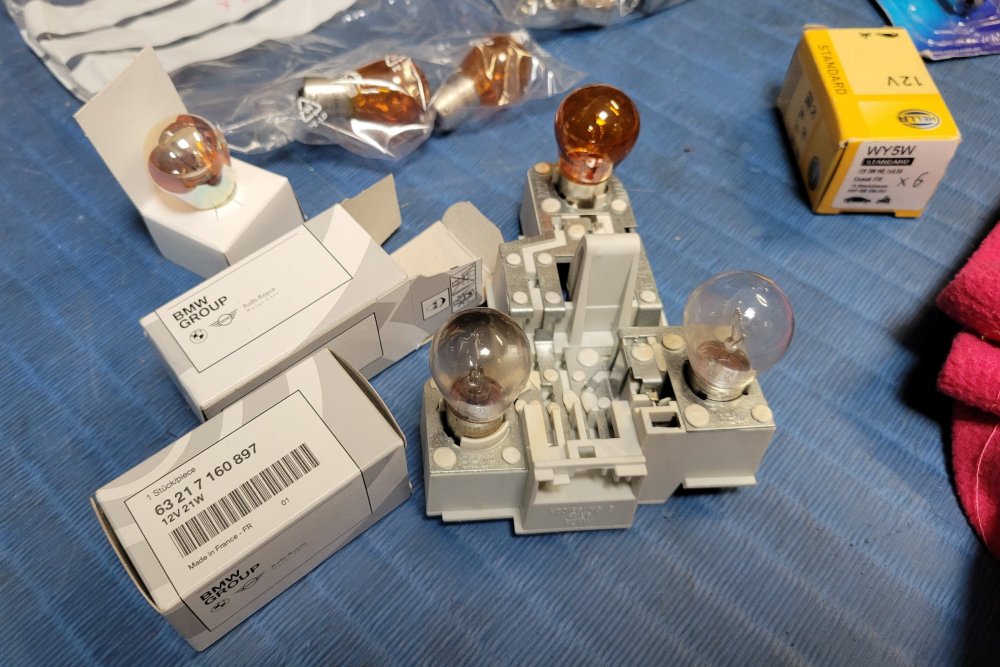
Finished them off with all new bulbs throughout and chrome bulbs for the indicators which made a surprisingly noticeable difference.

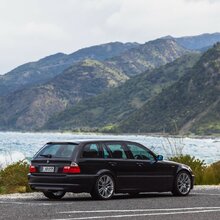
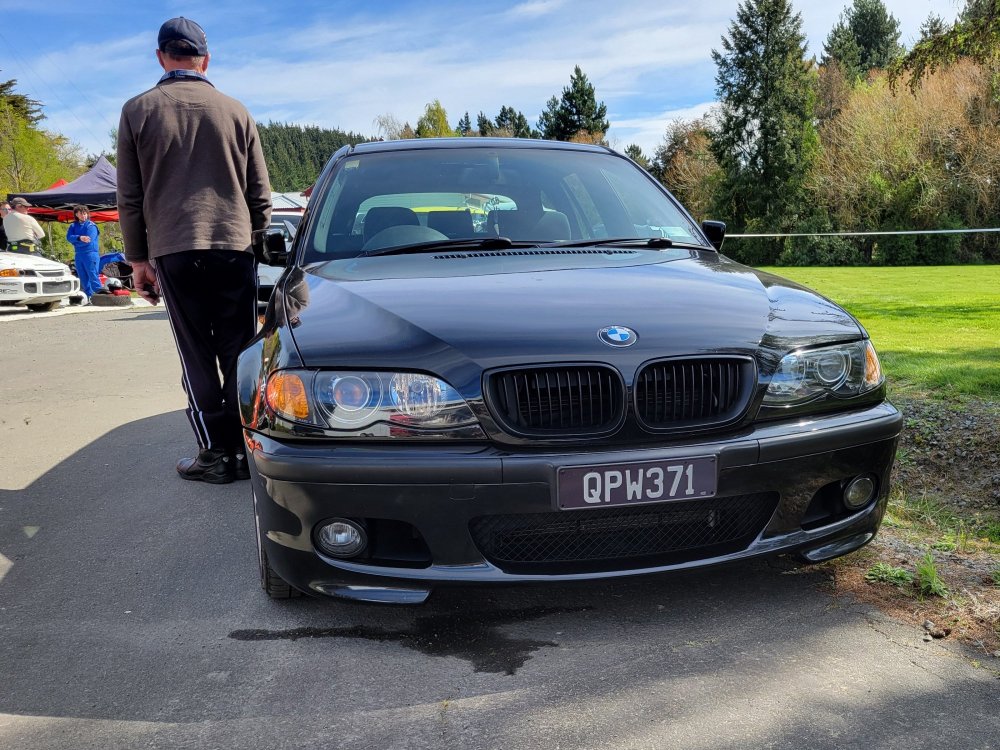
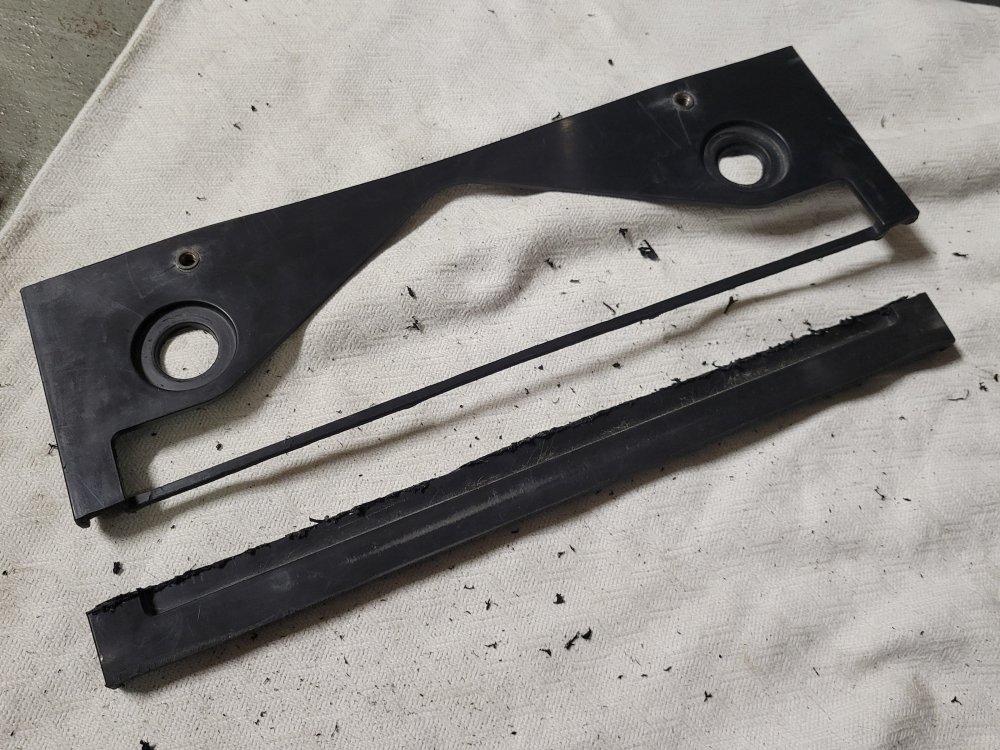
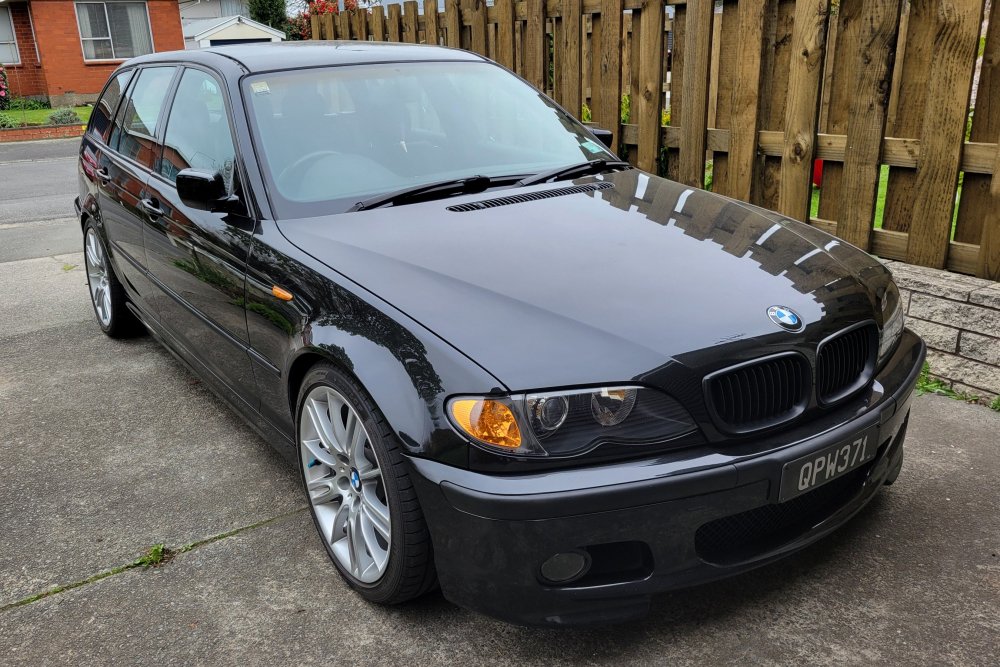
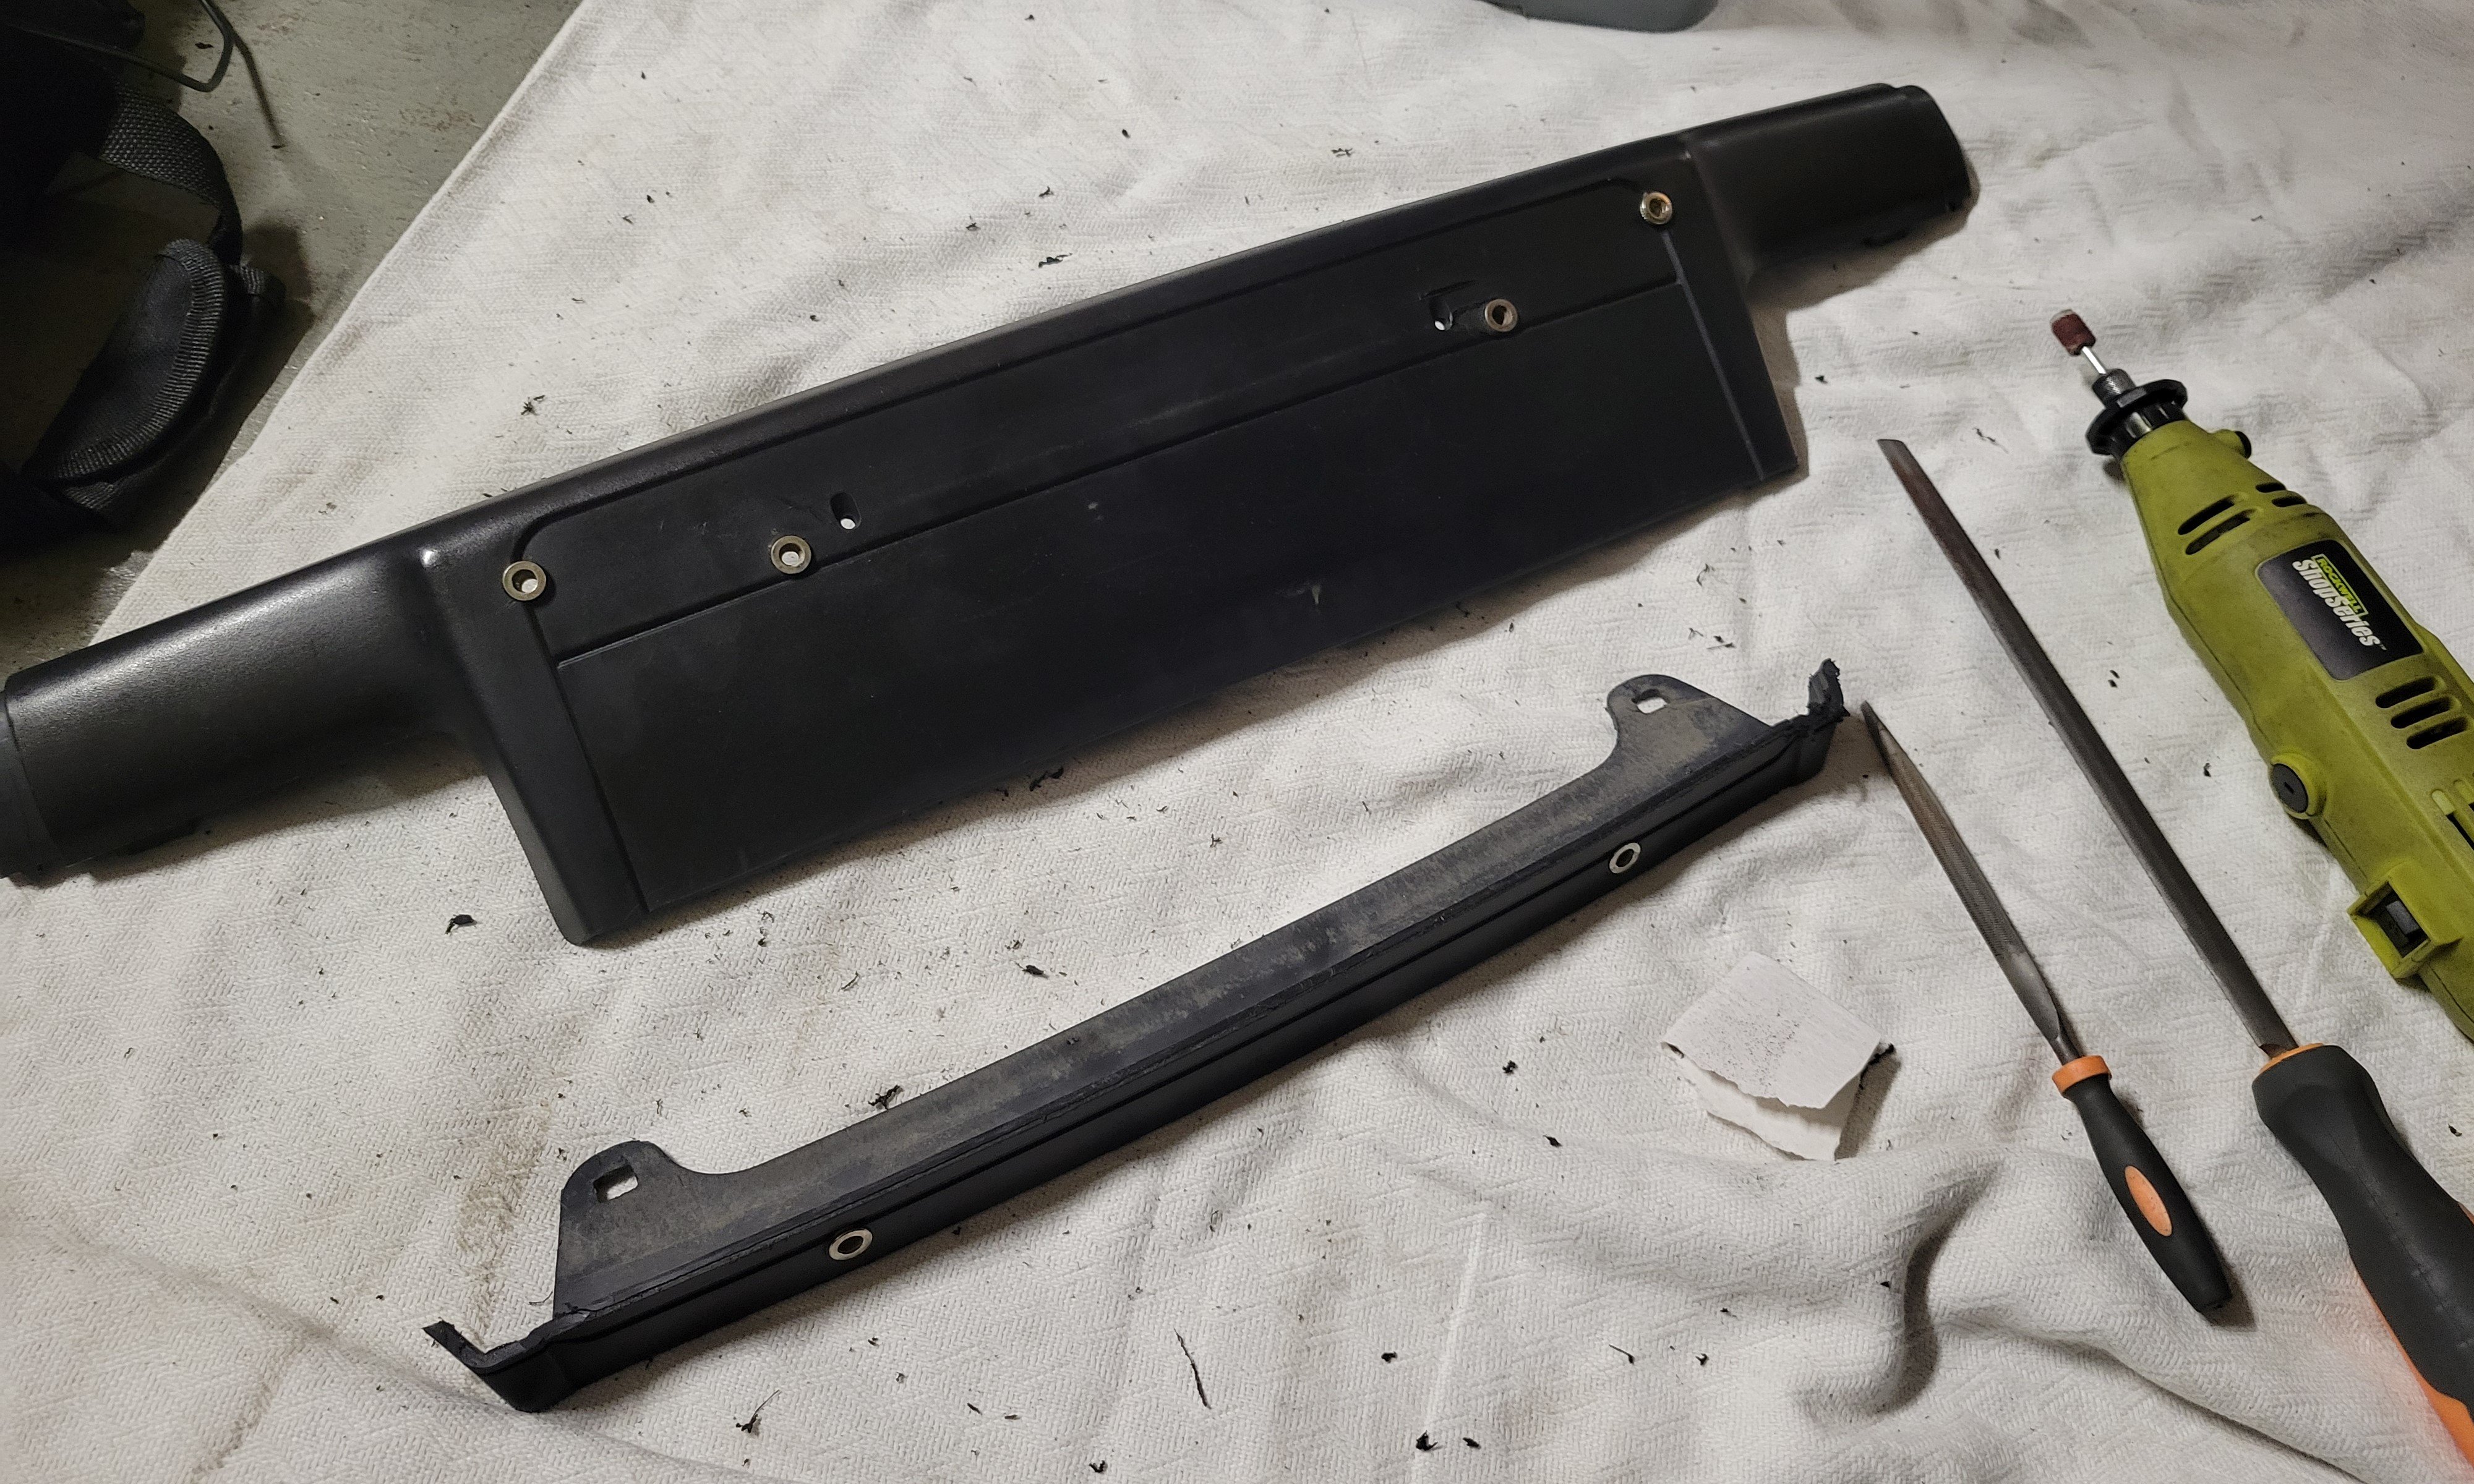
Ohh, and I ended up swapping out for a slim black plate as well. Don't care much for personalised plates and wouldn't be able to justify the price of one, but for $200 I do love the stealthier look. Plus, it'll pay for itself if it does a good job of confusing a speed camera or two... Did get a new standard issue combination though, as a symbolic start of a new chapter if you will. Naturally, the plate holder plinths got trimmed down to size once again. Also, took off the towbar for now. Looked way too rusty for my liking so will give it a lick of paint before throwing it back in. Hoping to come across a towing module soon so I can wire that in at the same time.

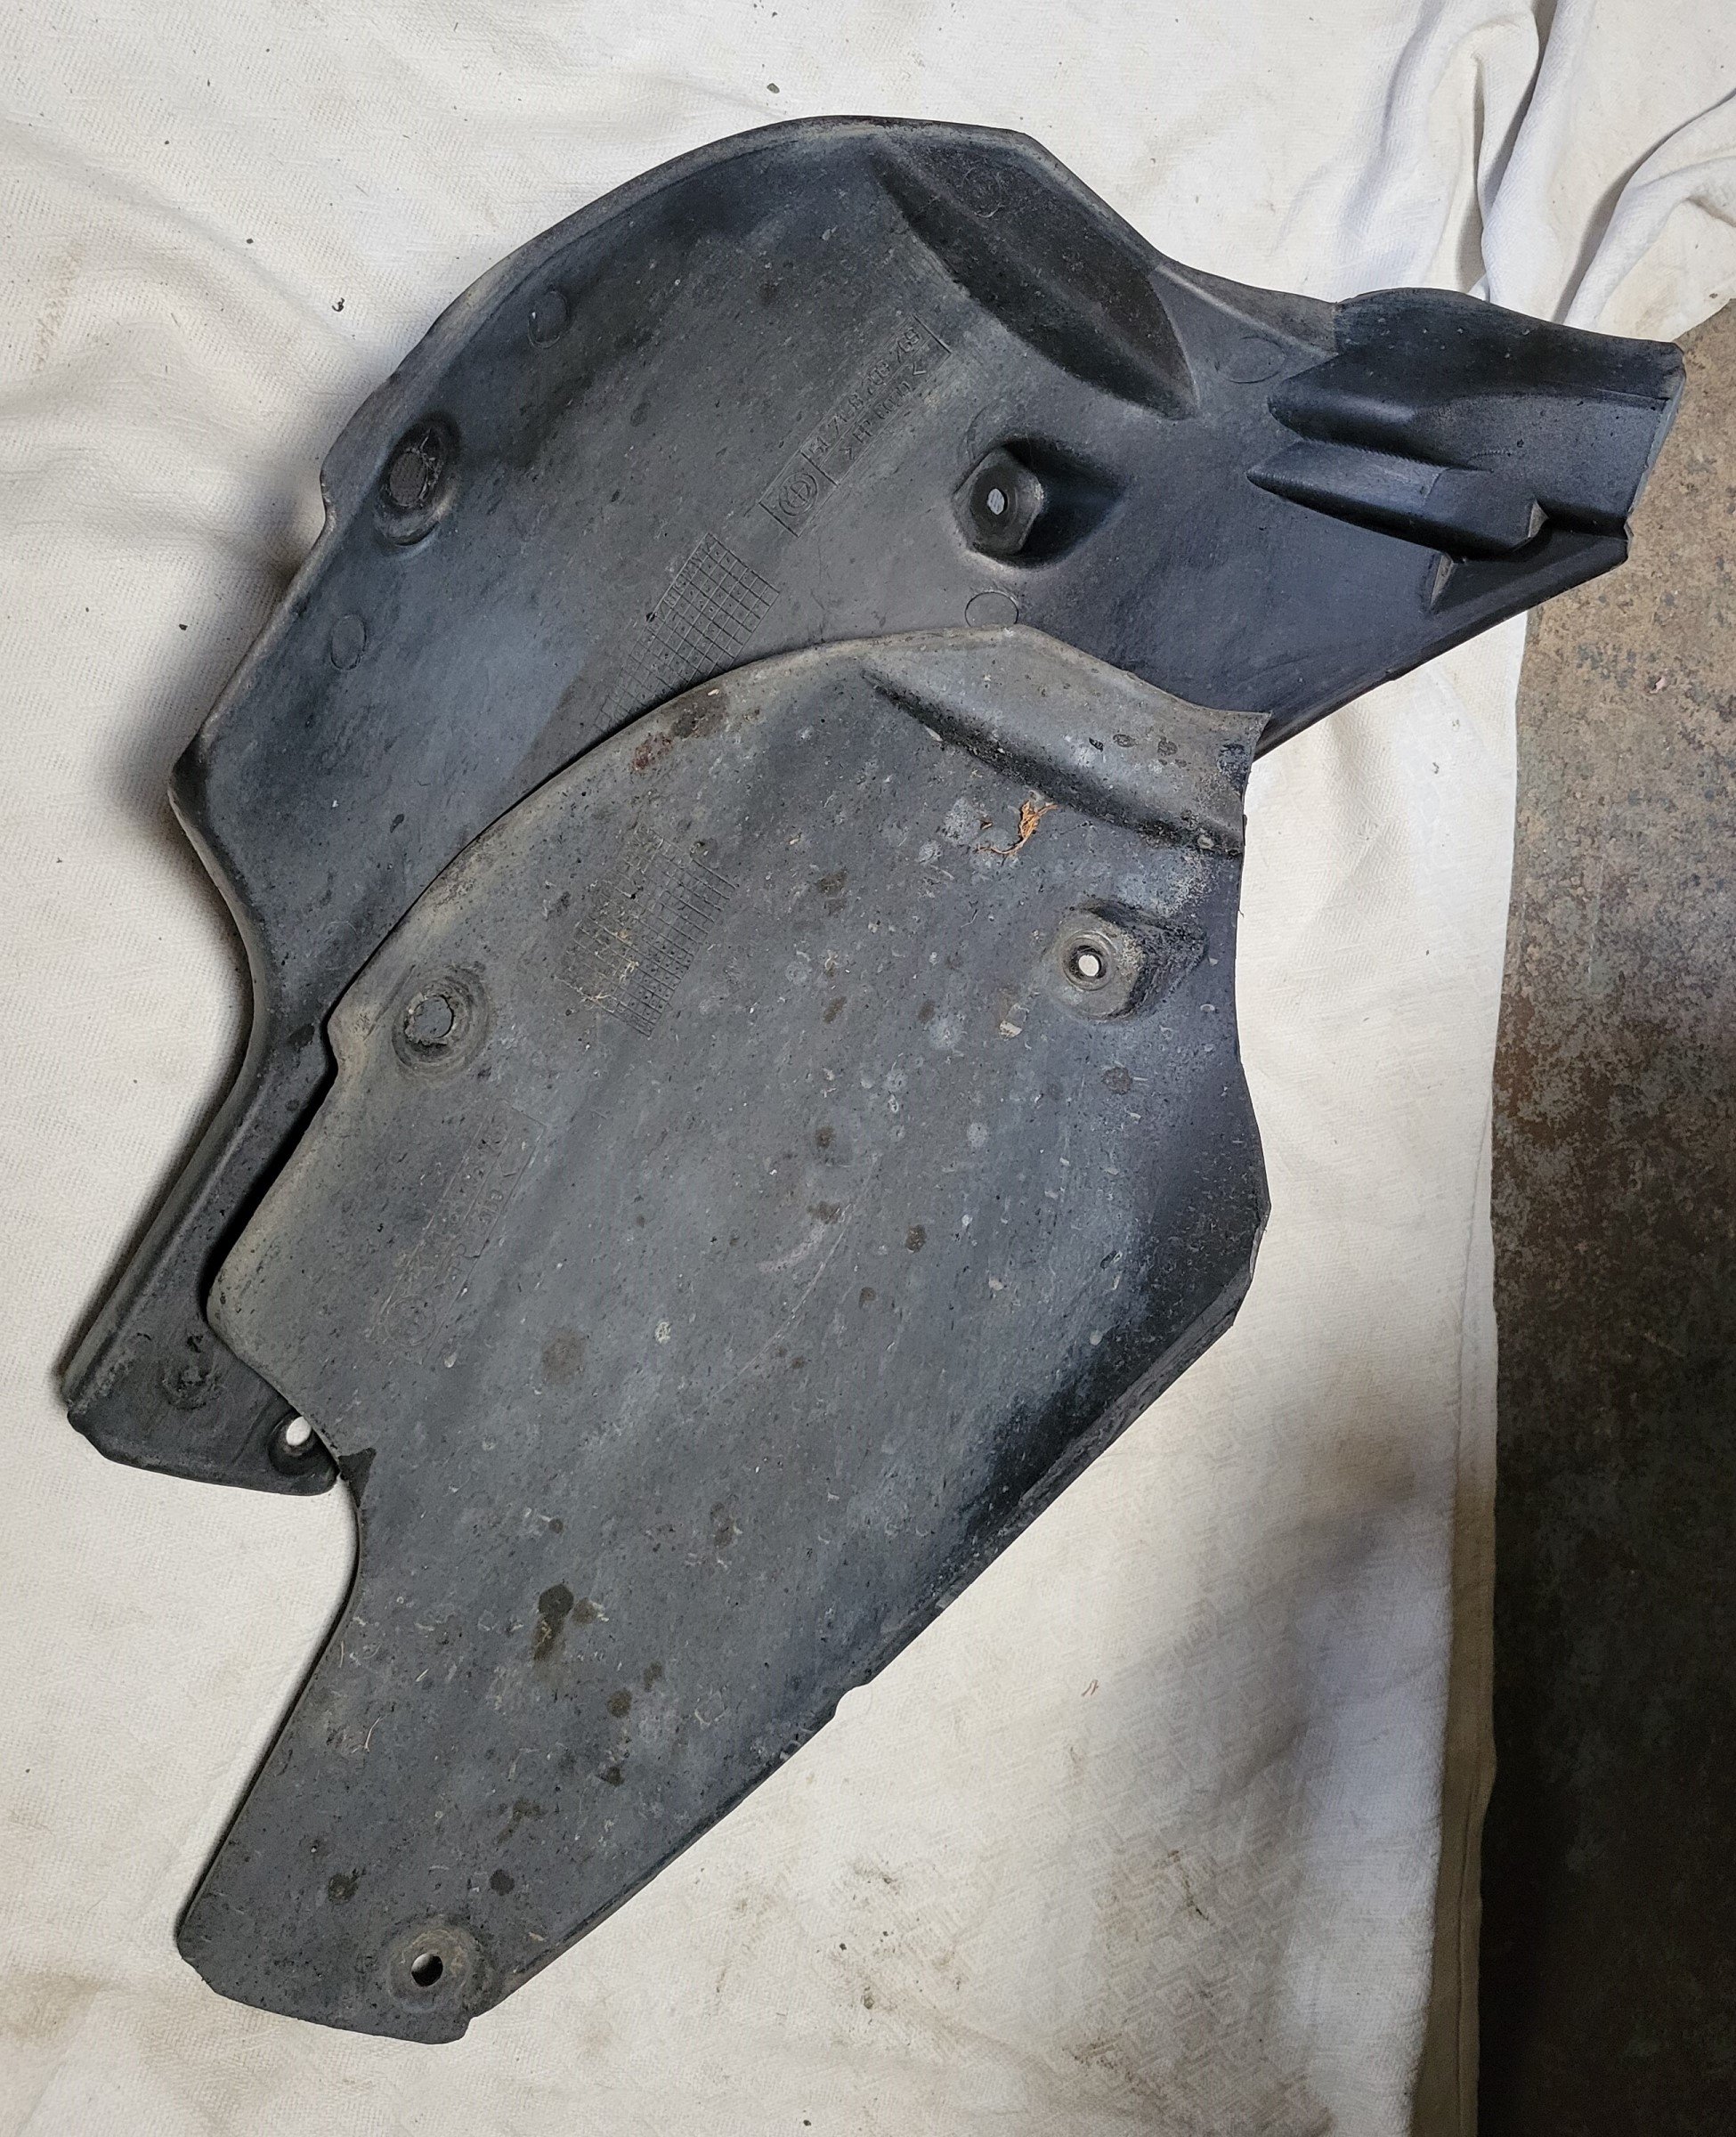
Another small tidy up mission were the rear arch liners. When having the rear guards rolled, the fella doing the job took a good few chunks out of them in quite a crude manner. Fair enough they're the part that rubs against the wheel as much as the guard lip itself but he took away way too big a piece either side, leaving a gaping hole for road dirt to get flung into against the chassis and inside the bumper cover. Not a big deal but has bugged me ever since. I picked up a pair of tidy ones and cut away the protruding parts in a more conservative manner. Then gave the bits some Carpro Perl treatment (the bumper and door trims got the same) and threw them in.

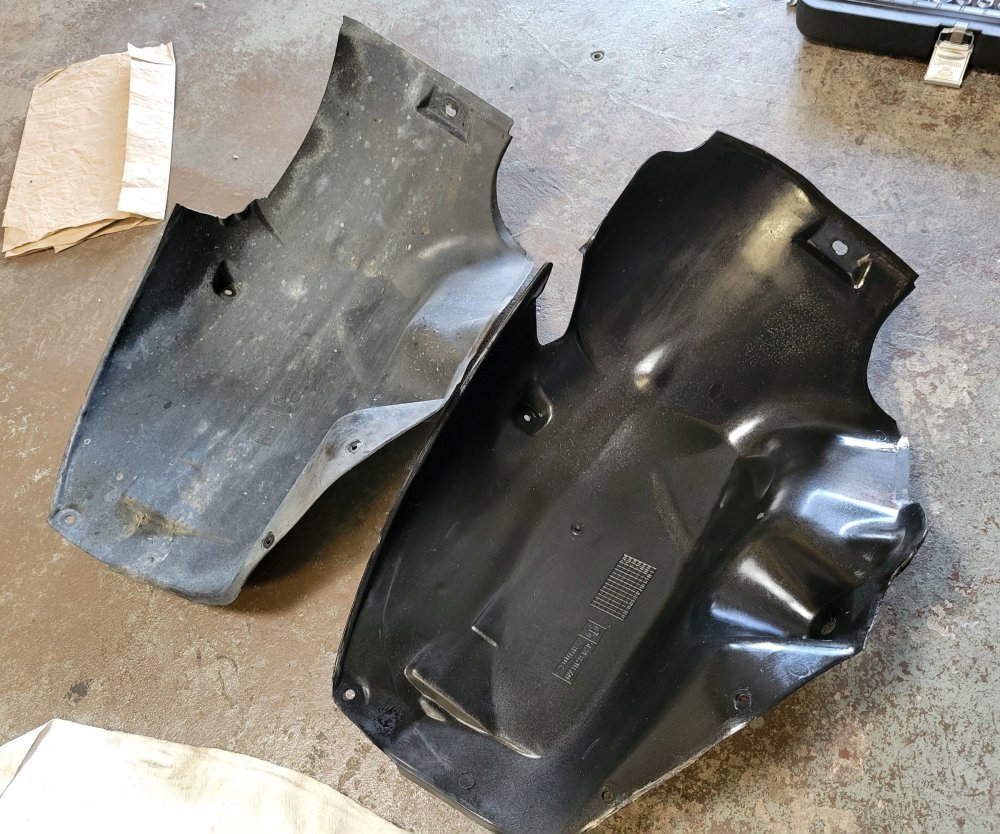
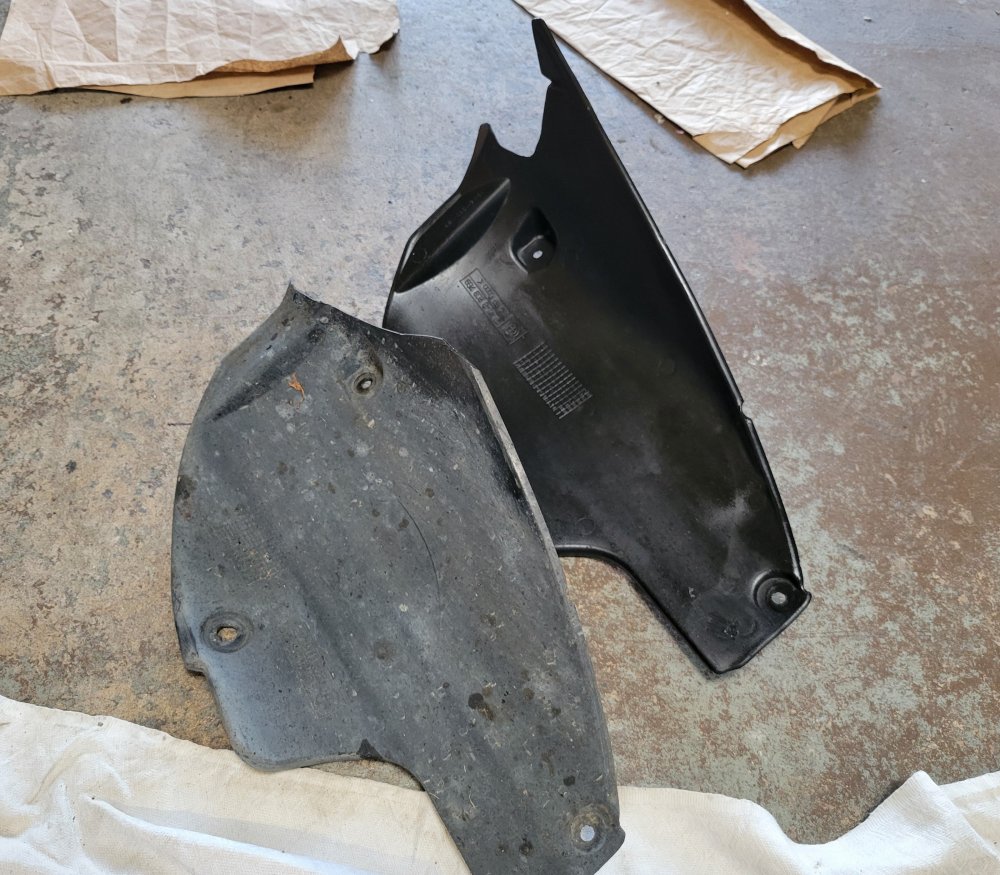
Can now sleep a bit easier at night.
-
3
-
-
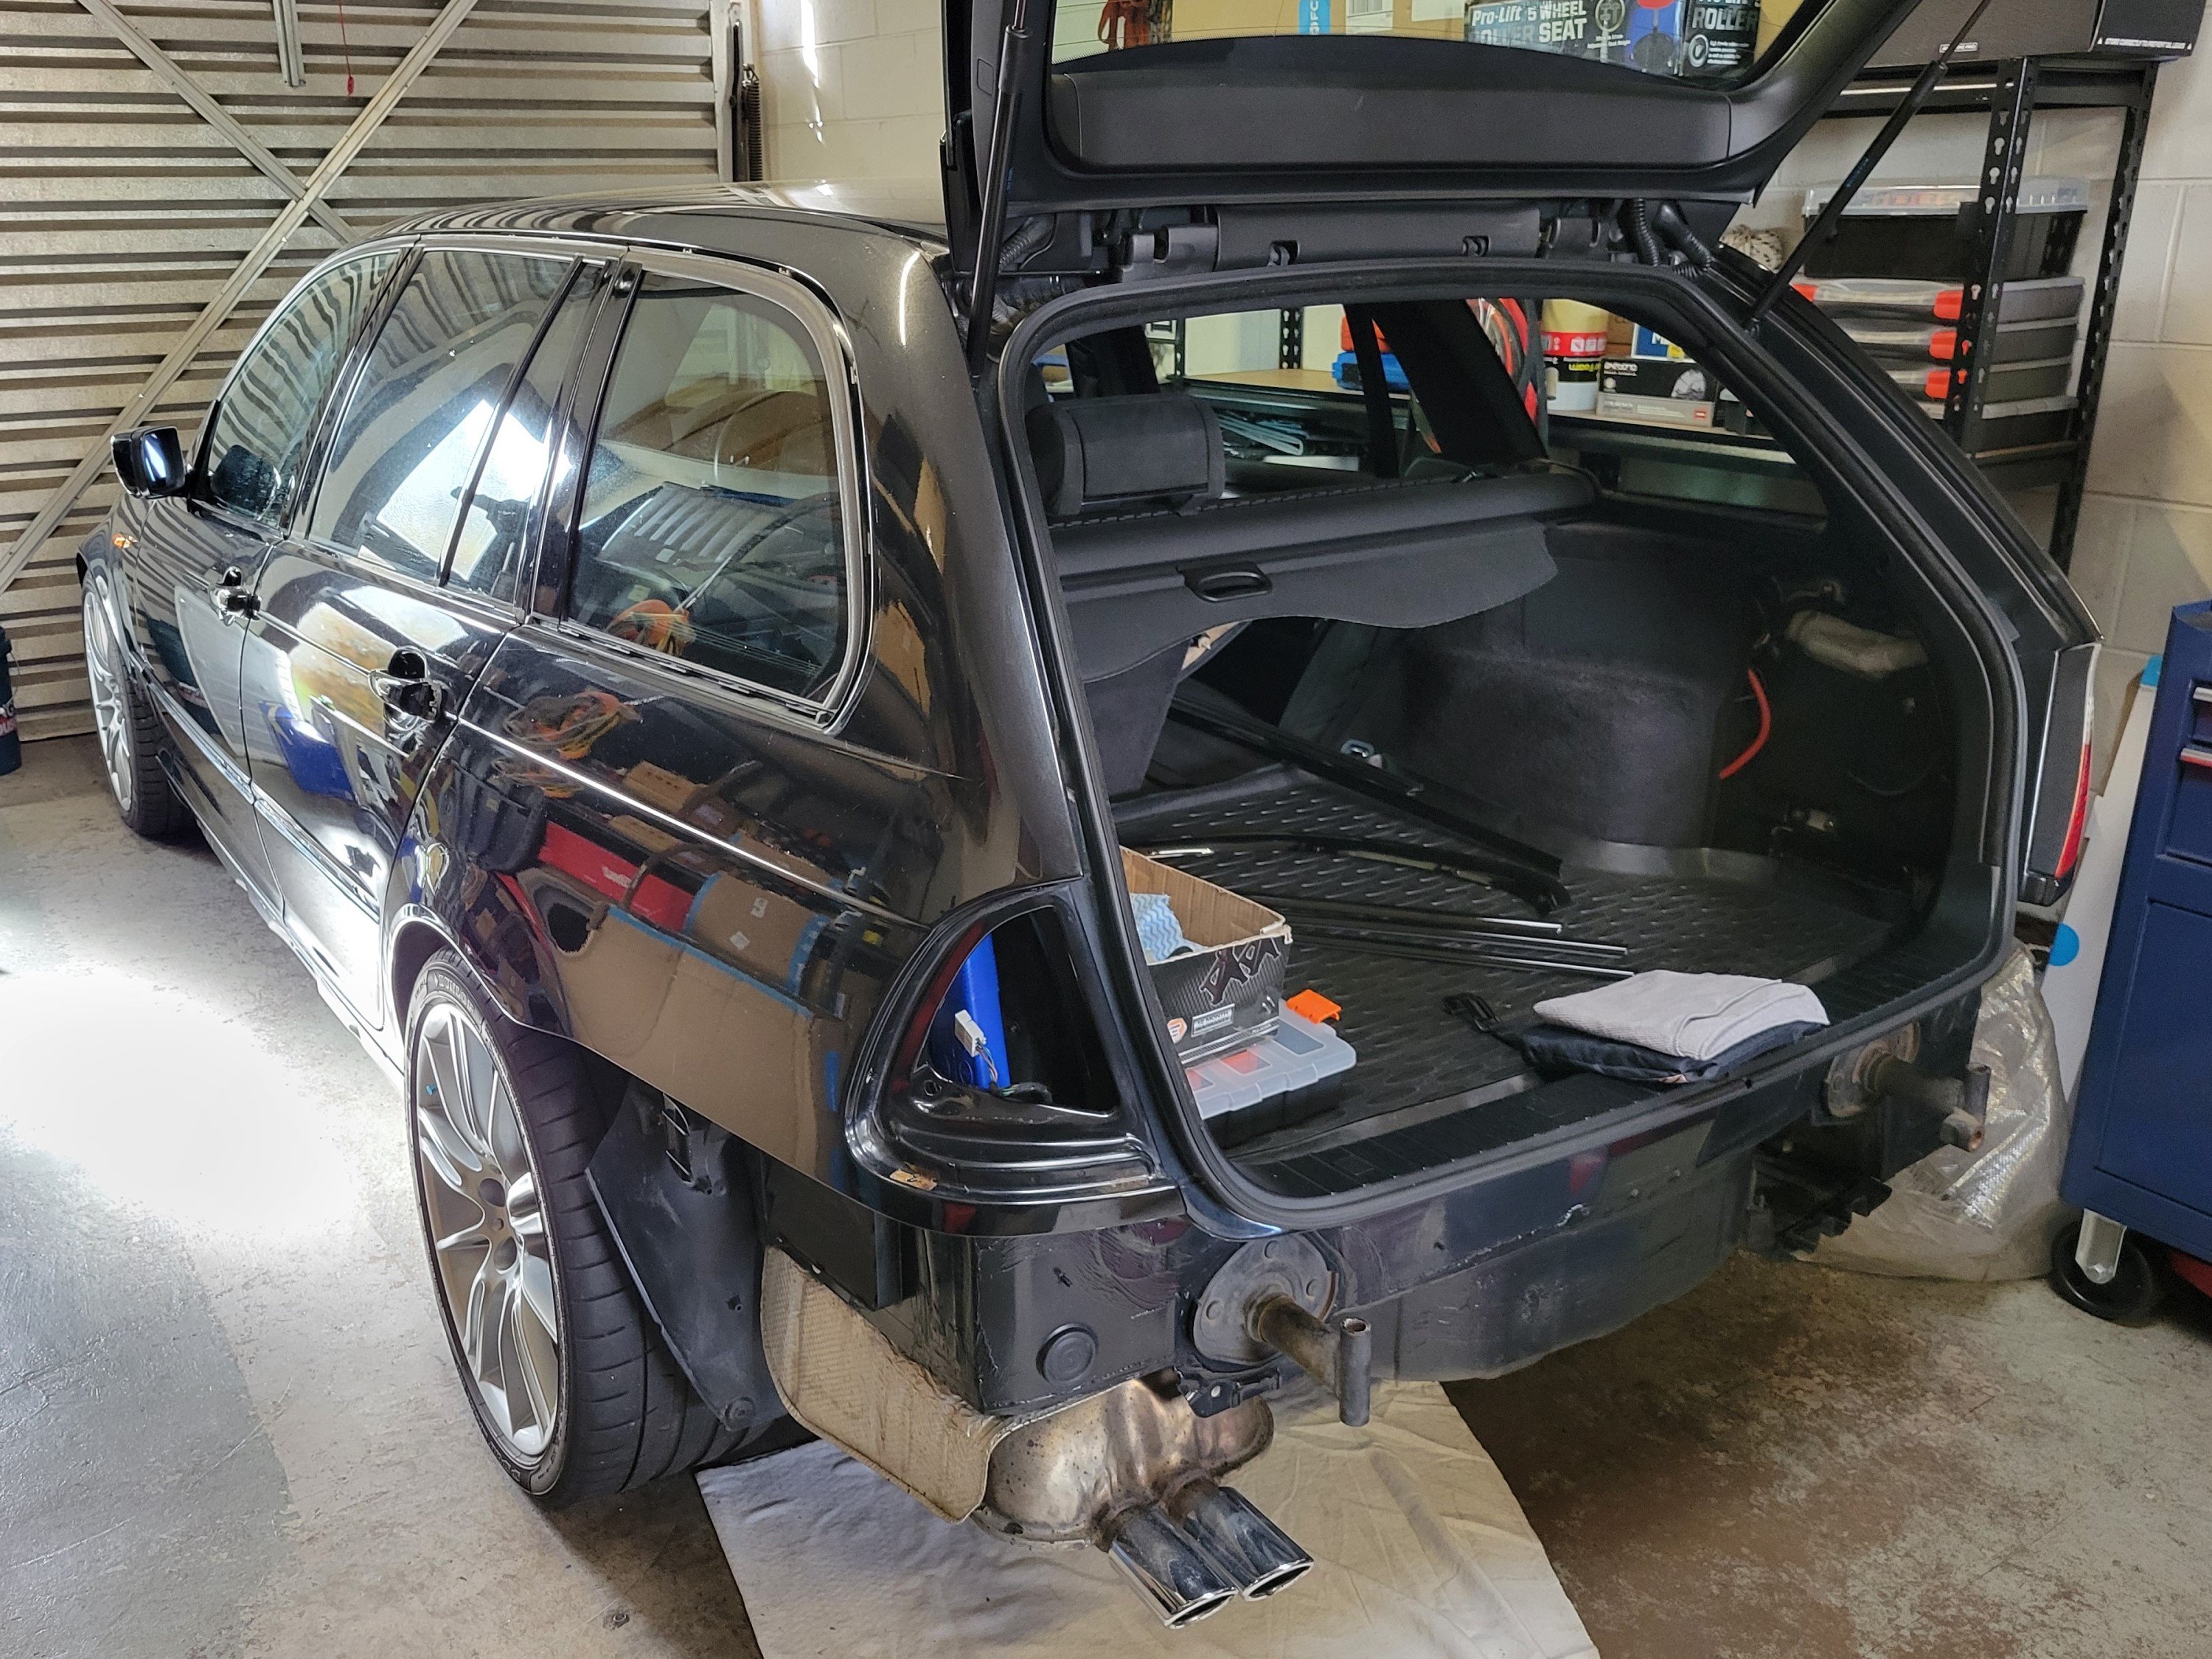
Long overdue update.
After being in various states of disassembly even since before the dyno day back in June, she's finally back in one piece and looking better than ever. As these things tend to do, a little pain correction snowballed into a full blown detailing mission spanning a good 5 months.

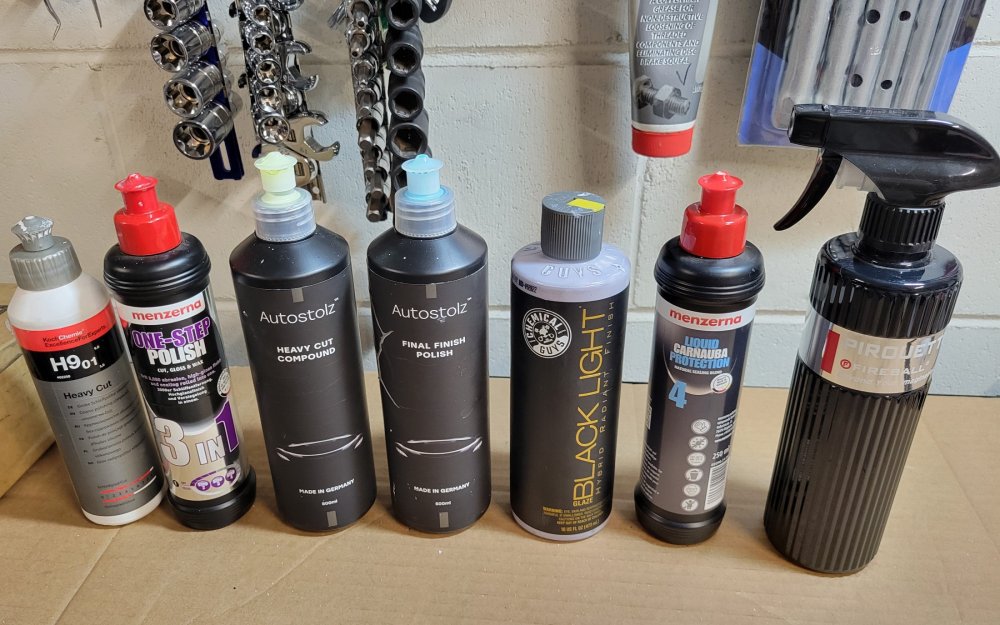
No panel was left untouched by the end of it. Started running out of the Koch Chemie heavy cut compound I had so switched over to the Autostolz offerings halfway through. After the heavy cut, finishing polish and touching up and deeper scratches and rock chips, each panel got 2 coats of Chemical Guys Blacklight glaze, followed by 2 coats of Menzerna liquid carnuba wax and topped off with Fireball Pirouette spray SiO2 sealant.
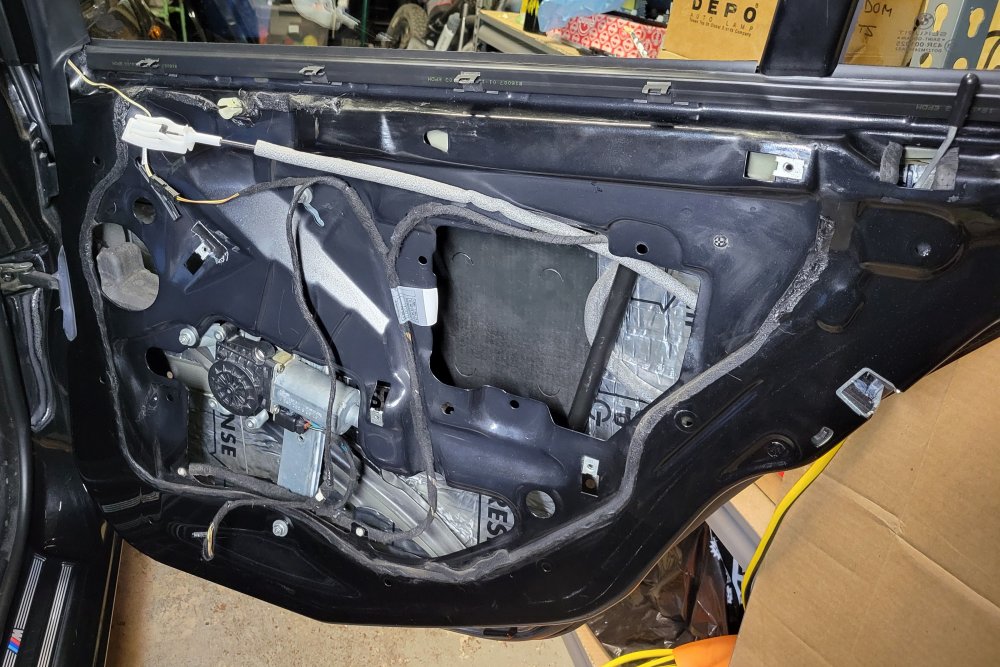
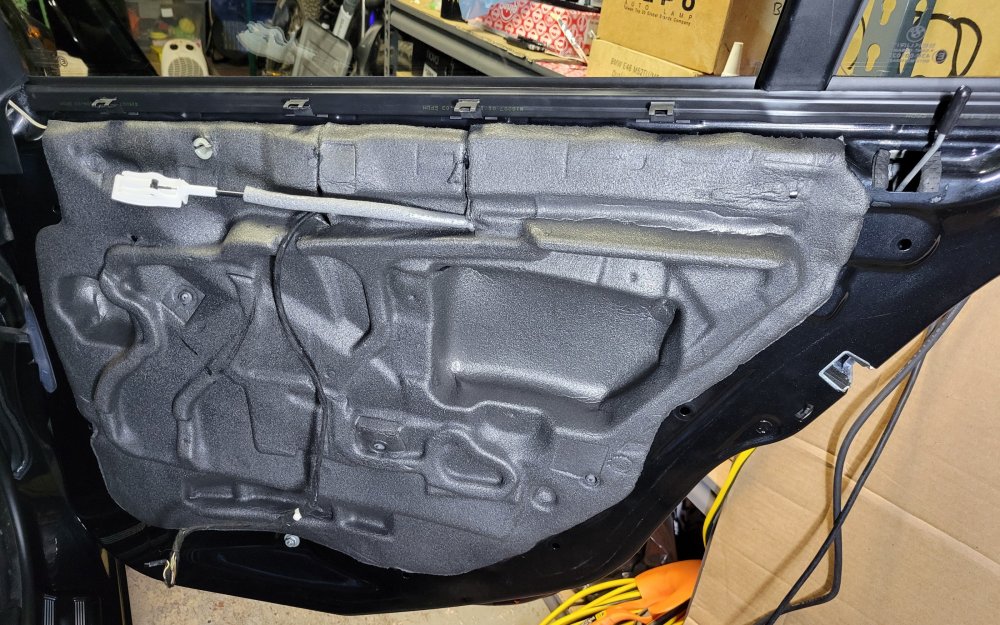
All 4 doors got taken apart down to bare shells & wiring, installed sound deadening, door lock and window mechanisms checked over and relubed, rubber seals treated with Gummi Pfedge and vertical pillar shadowline trims cut & polished.
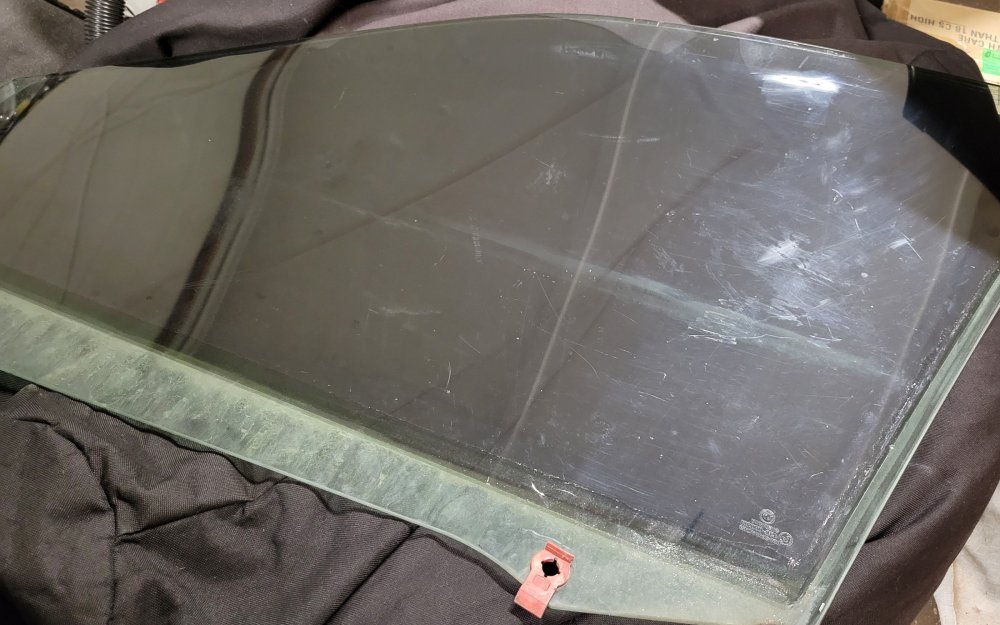
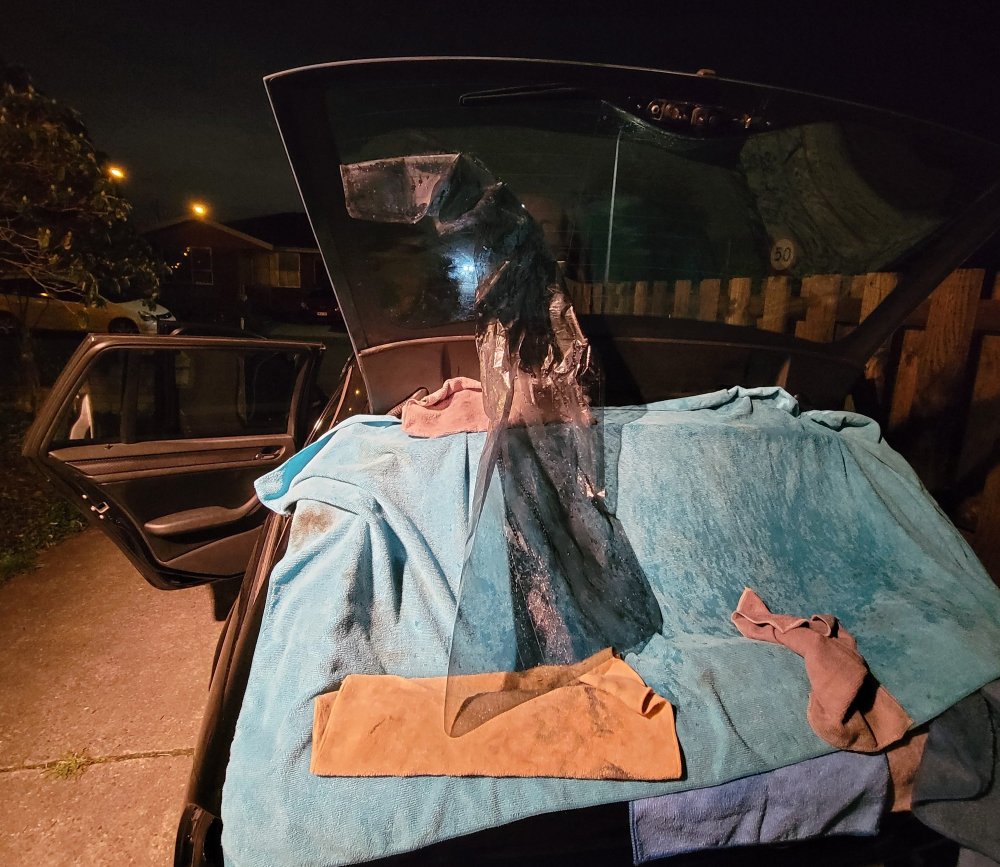
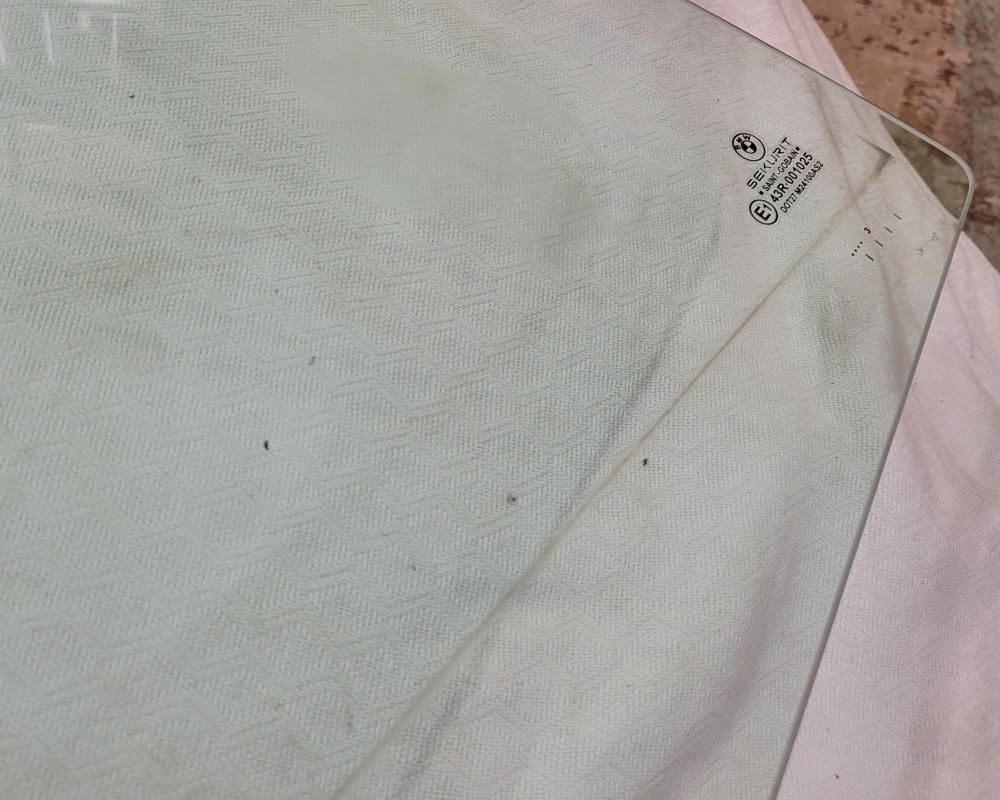
All the window tints were looking real tired, either from shoddy quality or purely due to age so off they came with the help of my tiny steam cleaner. The door ones were the easiest to do whilst the windows were out of the car. I rushed a bit on the first one and did the whole window on one refill, which left behind quite a bit of residue that was a pain to scrub off. From there on I slowed it down, only gently pulling on the film whilst dousing it with steam at the base. The average window now took 3 refills but now only left behind very minimal glue residue. The rear window alone took over an hour of mucking about and about 8 refills, dragging the job well into the night. Well worth the effort though.
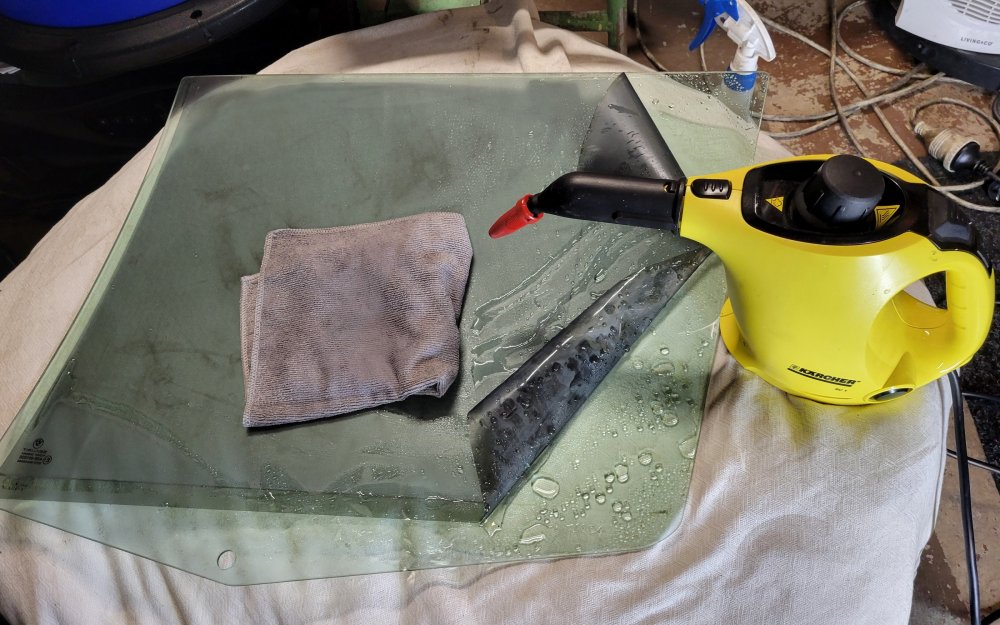
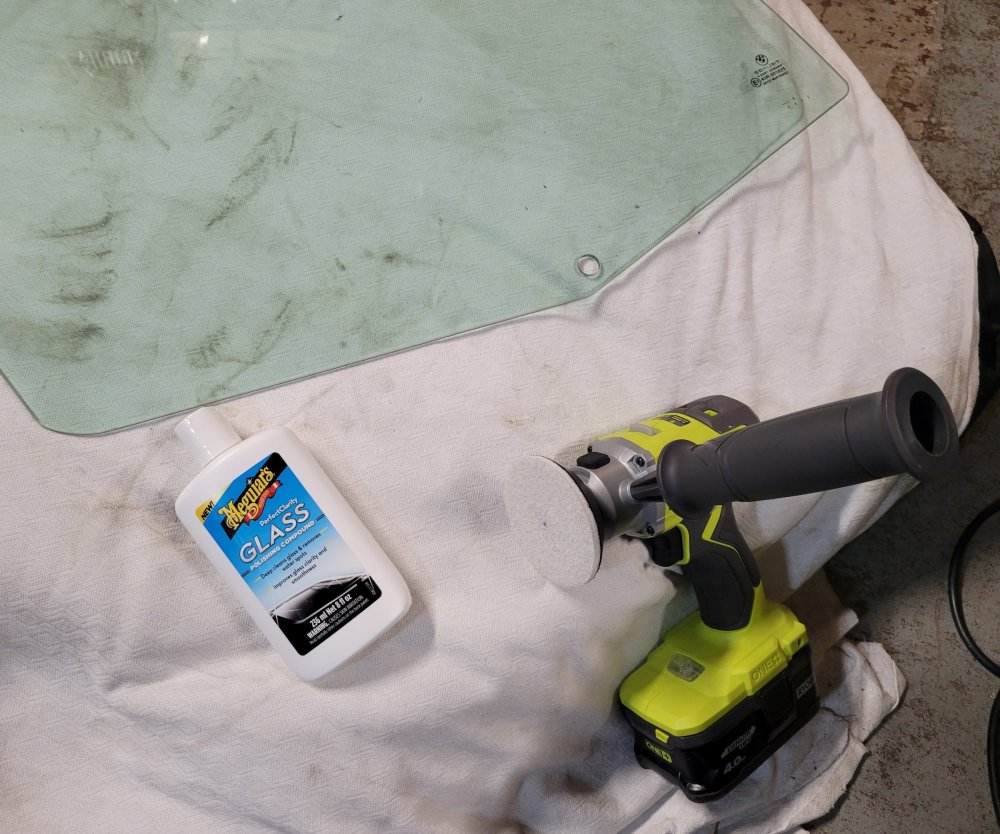
I then gave the windows a quick polish with Meguiar's glass polish and a special glass pad. Didn't do much on the deeper scratches but helped get rid of stubborn water marks and old gunk from the edges of the windows where they sit against the seals.
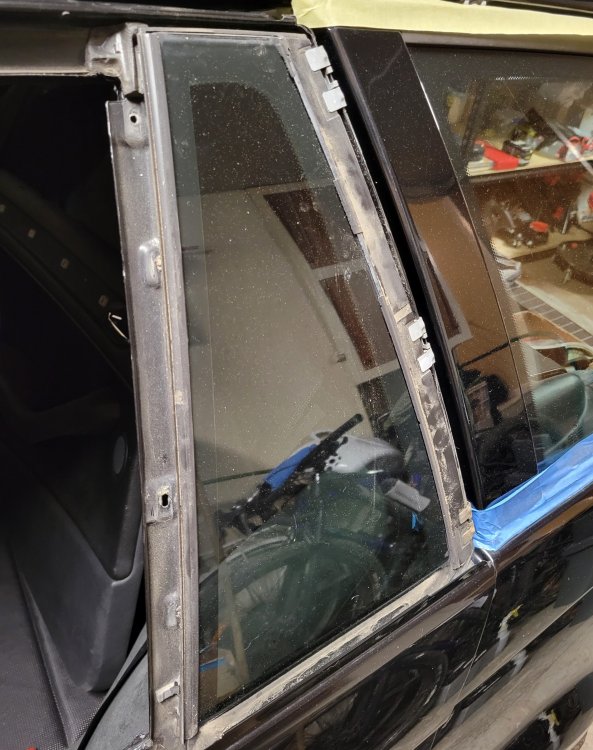
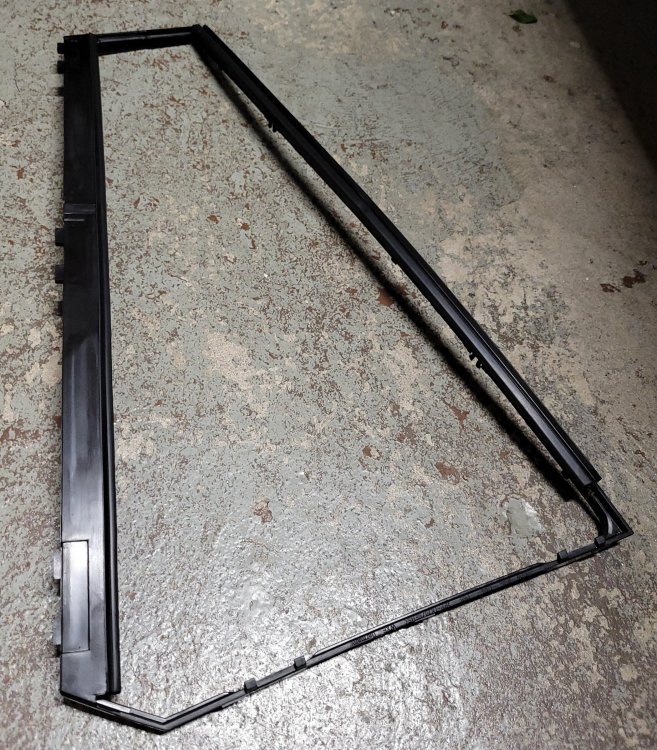
One annoying bit I ended up abandoning were the seals around the rear door back windows. They were badly perished on both sides so I got replacement ones a while back. They come in one piece as a surround for the whole window. With the doors apart did it became apparent that there's really no simple way of replacing the surround without butchering it. The bottom bit is too wide to slide in between the door shell and the window so would need to be cut off or trimmed down. The whole thing also seemed to be held in place with whatever sealant was used for the window. I didn't want to risk ripping some of it out and compromising the weather tight seal so reluctantly abandoned the mission for now.
With the windows back in, I buttoned the doors up with "new" vapour barriers. 3 of the 4 original ones were ripped and torn to various degrees so I scavenged good condition ones from good ol' Pick-A-Part, carefully peeling them off the doors leaving all the butyl attached to the foam. Walked away with a full set of 4 for a whopping $5. I gradually heated the butyl up with a heat gun as I went around the door and stuck it down with a sound deadening roller, making sure it's nice and secure all around. Good as new.
-
1
-
-
That's crazy. Hopefully hasn't spread to the rest of the engine that badly. I'd take the radiator hoses off and flush the whole thing through a few times, even with just a garden hose. The radiator too, or just replace. There's a drain plug on the exhaust side of the block, bit of a pain to get to but worth draining the last bits of crap out of the engine if you can be bothered with the hassle. I'd then fill it with just demineralised water, run it up to temp and do another flush (or two if what comes out is still yucky) before filling with coolant.
-
 1
1
-
-
Christ on a bike, why would you go through all that effort... on a bloody 118i? That's a mighty impressive financial mistake.
-
Awesome purchase man, it's looking mint. Kind of in the same boat at the moment as we're expecting our first in a few months and am looking for a family car for the wife. Tossing up between an X3 & X5 and also leaning towards a diesel for the fuel economy and towing capabilities. Really keen to follow your experience with it, especially being higher mileage. There's one being sold locally to me at 290k km's, which is slightly off-putting but seeing yours still going strong at well beyond that is really encouraging.
-
Let me tell you about bottomless pits...

As far as water pumps and coolant changes go, it's a fairly minor hit, especially if you DIY. Fairly quick and easy job and well under $200 in parts and consumables if you're smart about it. Check the date on the thermostat too, it'll probably be 10+ years old and well worth changing with the coolant drained.
Hope you caught it before the temperatures crept too high, these engines are very sensitive to overheating with both the block and head being aluminium.
-
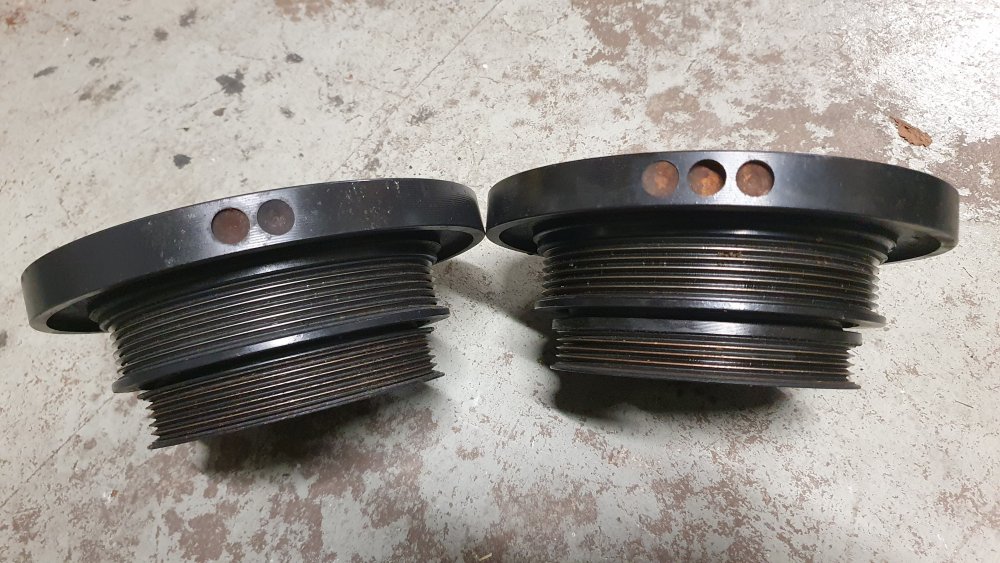
Replace the water pump, it looks to be well munted. The pulley looks to be solidly attached and it's the whole assembly that's loose. Even with no bolts holding the pump in place it shouldn't have that much play. The water pump is a critical maintenance item so it's well worth throwing on a new one regardless. The pulley itself is reusable but it's plastic and does get brittle over time, they often crack and break when taking off so you might need a new one of them as well.
-
1
-
-
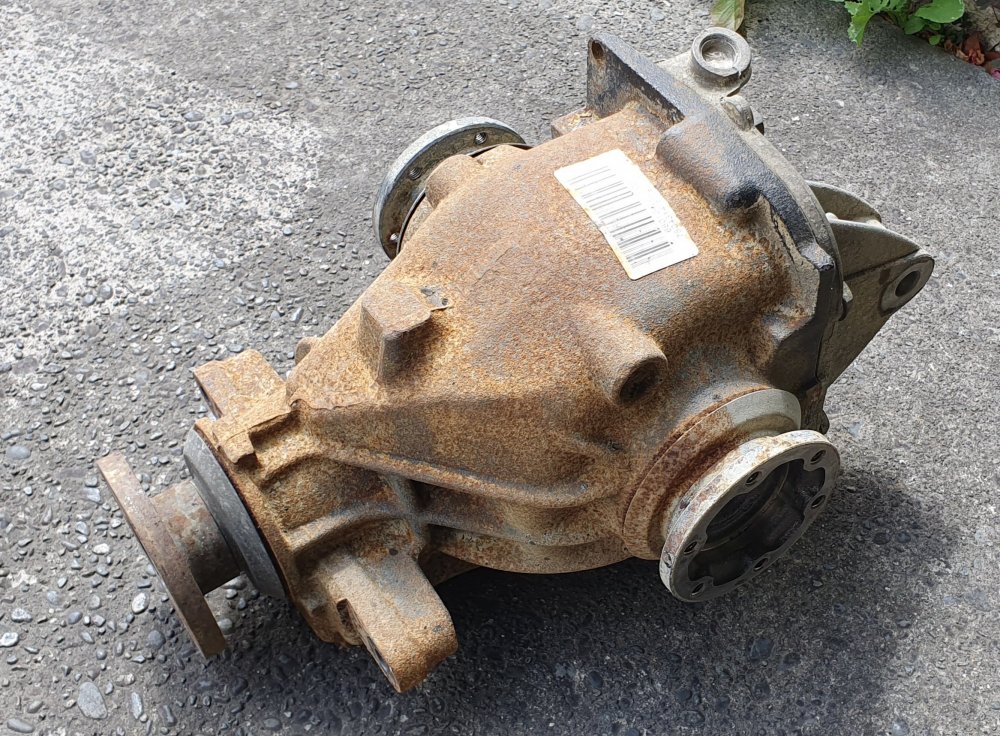
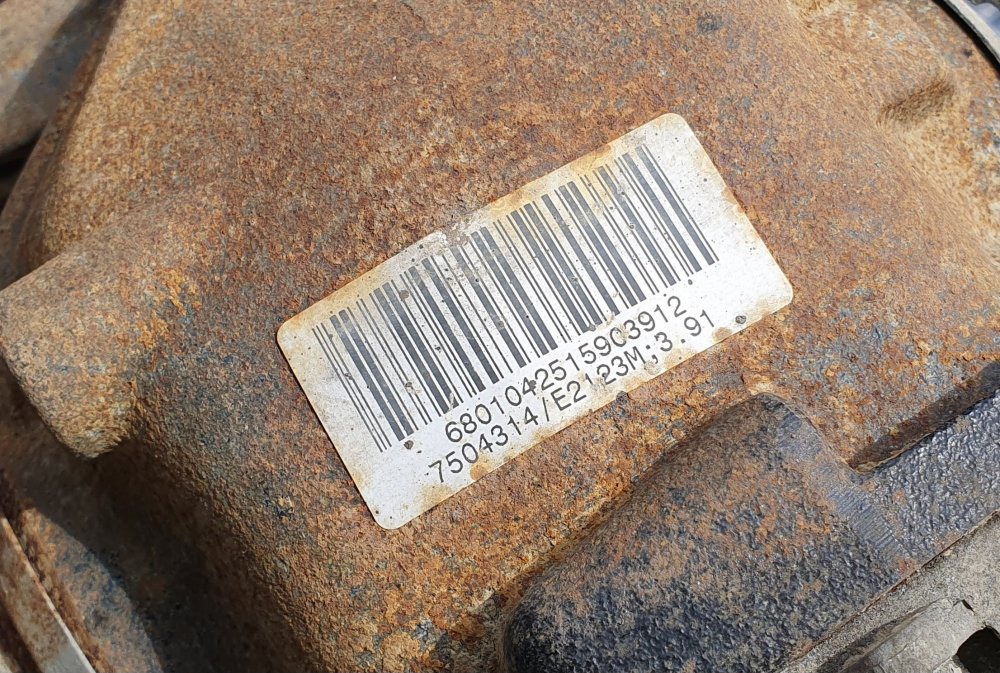
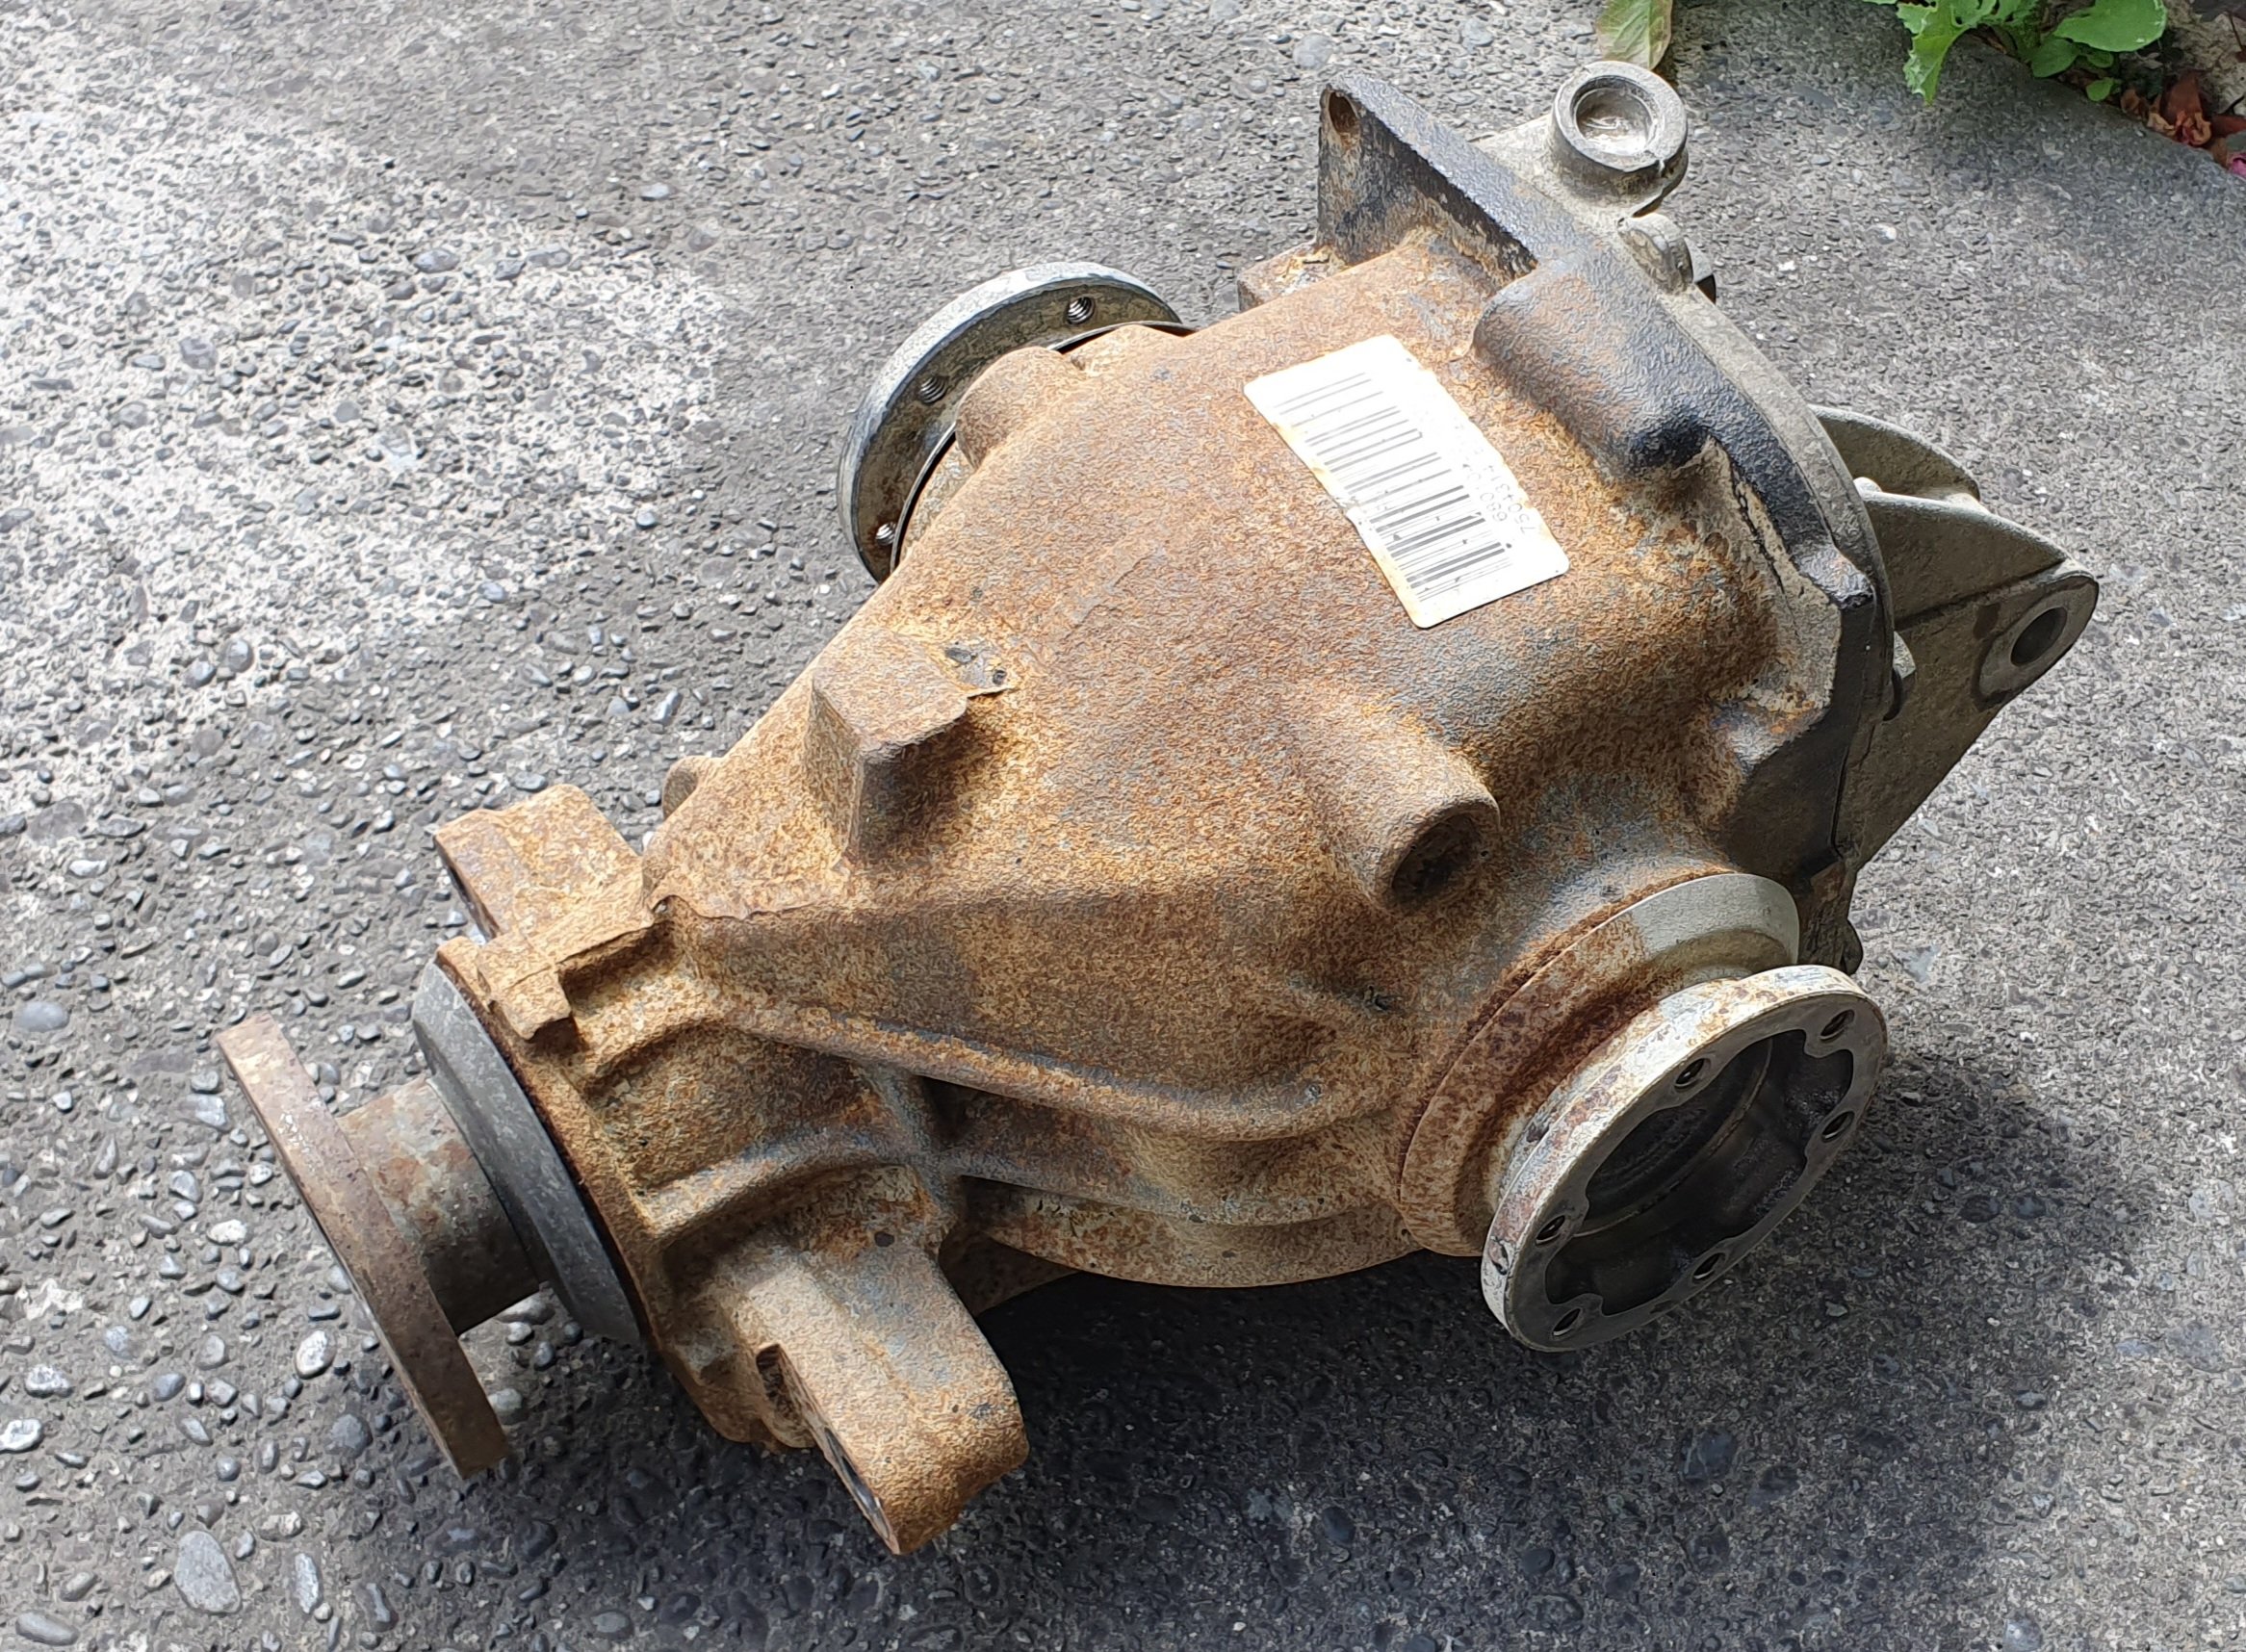
17 hours ago, Cement said:Did they have a mid case diff ?
I honestly wouldn't know how to tell, could me small case? I'm yet to figure out the difference. Here's one I pulled from a 320i I parted out. They should be dime a dozen at any Pick-A-Part.
-
E46 320i automatics came with 3.91 diffs. No idea on specifics or how interchangeable the internals are though.
-
Wouldn't the coding depend on which variant the new 330ci turns out to be? Don't think the donor car matters unless you're swapping modules over for some reason. But yeah will be one of the two links anyway. Don't think the type of clutch switch matters either, both the hall sensor and the trigger type ones send the same type of signal I would think.


Black Plates with Silver Text Being Discontinued
in News
Posted · Report reply
Get yours while you still can fellas.
Following email being sent around by Kiwiplates, as well as there now being a disclaimer at checkout. Surprised it lasted this long tbh, the "issue" has been known for a good while.