

hunter
-
Content Count
599 -
Joined
-
Last visited
-
Days Won
9
Posts posted by hunter
-
-
Turns out the brass screws don’t fit very well compared to the OEM plastic, they just don’t seem to seal up very tight.
the one I added to the top hose leaked immediately
Even the previously installed one on the reservoir had a trickle leak noticeable under torch light.
so back to plastic fantastic all round.
-
Yeah the top rad hose looks all good I think with a brass bleed screw in it it’ll be sweet as
-
yeah, i think that one in the hose came with it, i had an extra one in the car just in case it was needed, that was OE, don't think it was used though.
Seems to be some defective examples, probably recycled plastics ?
-
Not a great month for keeping fluids in the car in Feb.
first, the hose from the washer reservoir/pump split just behind the bumper, and then completely disintegrated whilst I was inspecting it.
the line that runs behind the wheel liner is all sorts of different hoses and joiners so has been "repaired" previously - a new hose with new joiners from BMW is now waiting to go in.
Second, the brand new top radiator hose bleed screw decided to blow its top while I was towing a trailer load of sand across town. Thankfully the bottom half of the screw stayed put so I was able to get home before all the coolant jizzed all over the engine bay.
I had to remove the top radiator hose to get the remnants of the screw out and it was like a sponge, thoroughly soft boiled never seen this before has anyone else?
I have a brass one to go back in its place with some fresh BMW blue juice.
-
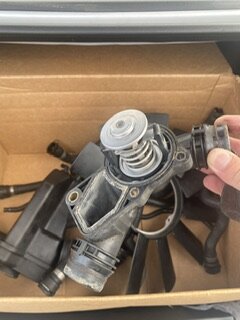
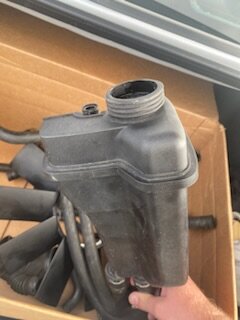
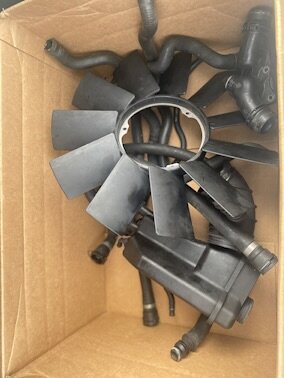
Box of E39 6cyl cooling parts, most from 2015-ish
Recently replaced for new as a whole system refresh these parts are all in good working order when removed.
we have;
- Cooling fan
- various coolant hoses
- Coolant reservoir
- Pulley
- Thermostat
All for 75$Pick up only, Hamilton
-
Thats Toyota Corolla's level of clear coat failure. Maybe it has had a respray in the past?
-
 1
1
-
-
A friend has kindly secured a set of E38 illuminates interior door handles for me.
They will add a touch of 7 series class to the interior and a reasonably straightforward retrofit.
Example, from E39 source, here;
-
1
-
-
Yeah, it's a process alright. Today's effort is done, need a multimeter to do some testing, will pick one up this week.
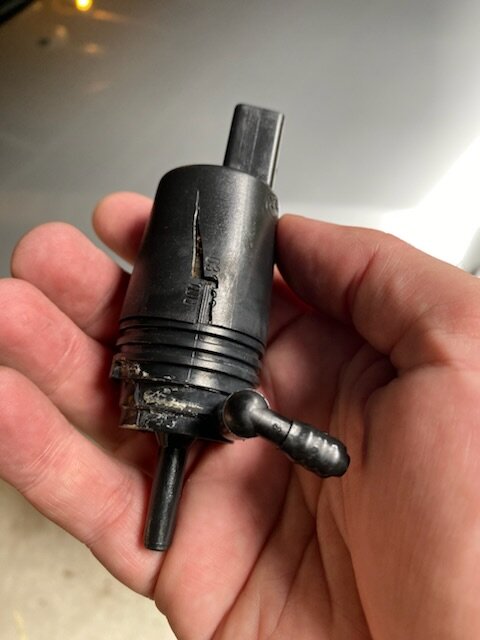
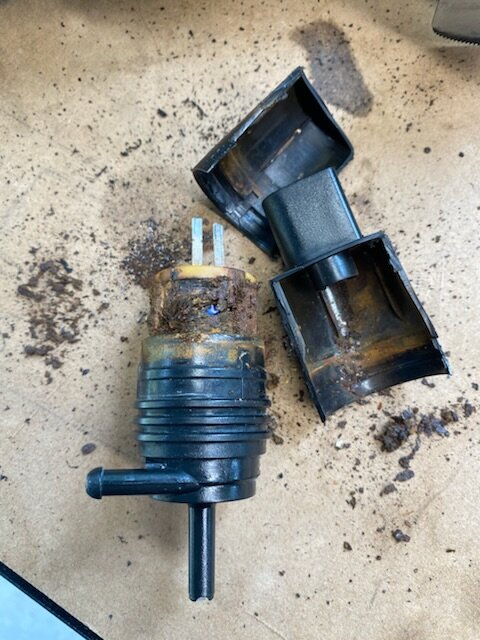
In other news, my Intensive washer system pump has blown, rust expansion cracking the housing and the rubber hose has been baked into plastic and fallen apart - lol always something.
-
this may be why the fan thermostat switch isn’t working. Exposed wires touching each other. Brown n brown with white stripe.

-
-
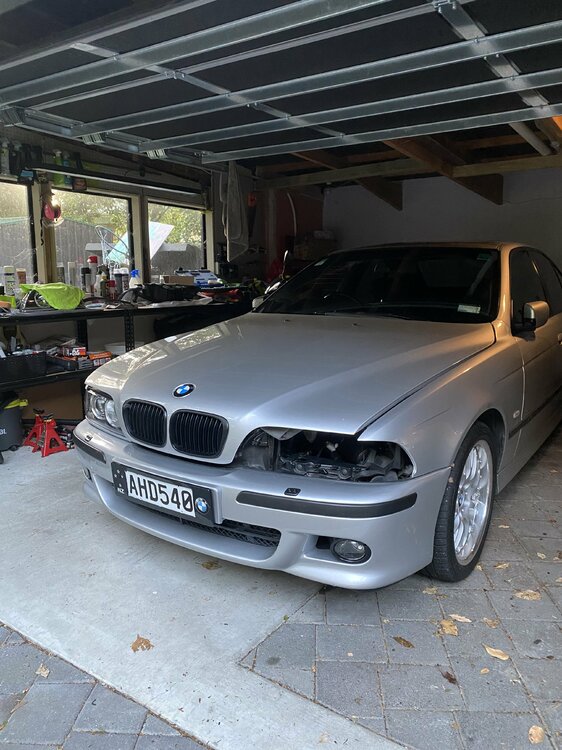
Due to time, skill, and wanting to spend time with the family this week while on holiday, Eagle gave me a hand to put the new cooling system in place. Thanks very much again Jarrod car is back and working perfectly.
The only gremlins appeared lately is the fan not having reliable electrical supply the seems to be due to some compressed wires in the loom around the headlight.
they have like the way they do since I’ve owned the car.
This will need further investigation when it’s not so hot, and I can stop sweating into the engine bay to look at it.
so, the only thing to do now is to drive the wheels off the car 😎
-
2
-
 1
1
-
-
Man, this looks cool. love the ACS kit on these. GLWS
-
Bump
-
Halogen self-levelling lights were just removed from the car (2001 model) In really good condition aside from some aged lens wear. The adjusters are not broken. Come with all bulbs except the indicator. 2001 manufacturing year: These can be heated and split easily to replace the lenses.
Lenses can be purchased off eBay.
$250 pick up from Hamilton.

-
Reviewing what is left to do on the car to refresh items that haven't been in my care, the main points are;
- cooling system (except Radiator, which was replaced 18 months ago)
- Vanos service/rebuild (got the big x8r kit)
- PCV system
- water pump
- thermostat
- water pump pulley
- various temp sensors
- related gaskets
- fan clutch
So as it 'tis the season I've ordered bits or bits have just been delivered for all of the above, thanks Santa

-
2
-
-
-
-
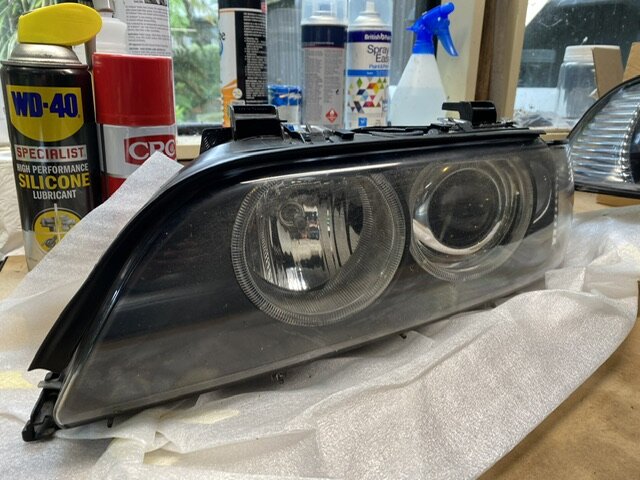
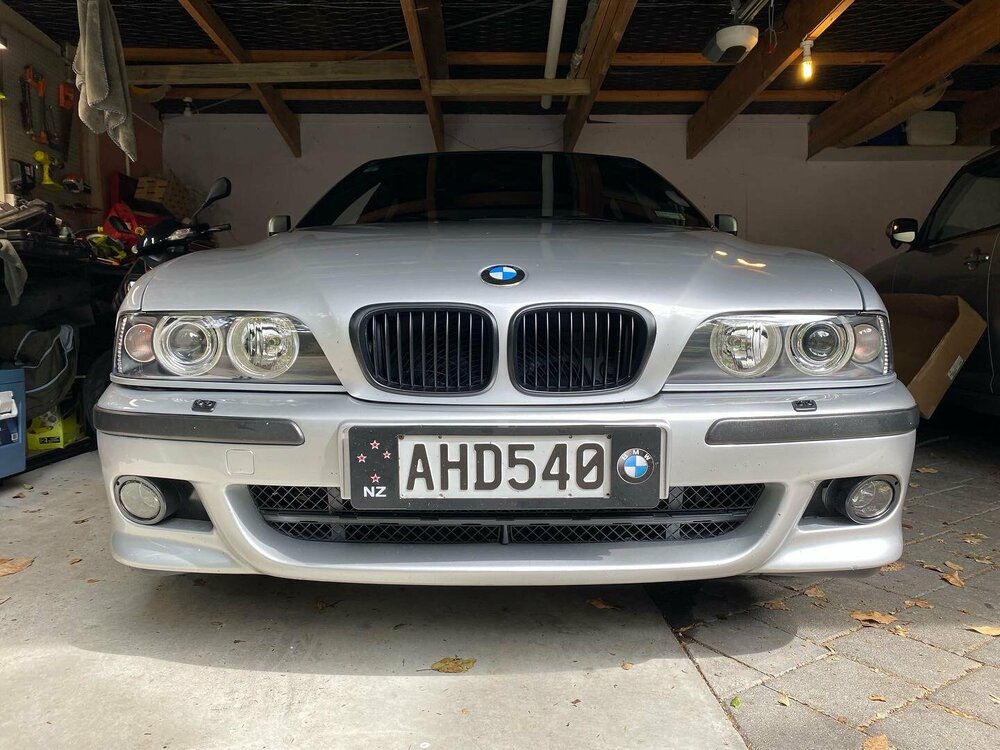
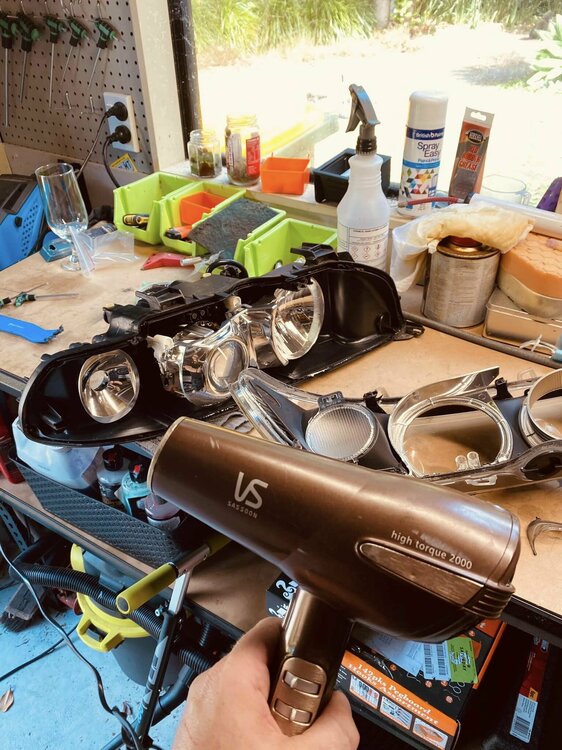
Last week I had the lights protected by Obsessive Car Detailing in Auckland. Great team and you can't see the film unless you're really, really looking.
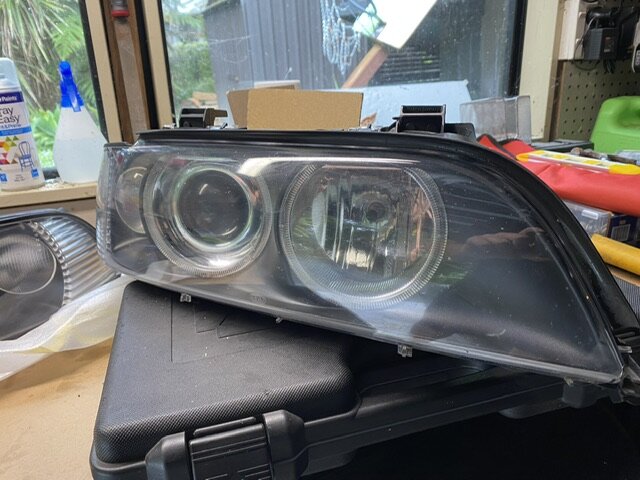
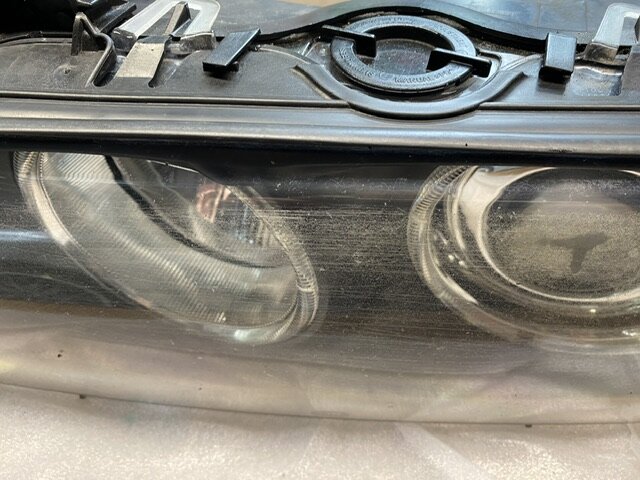
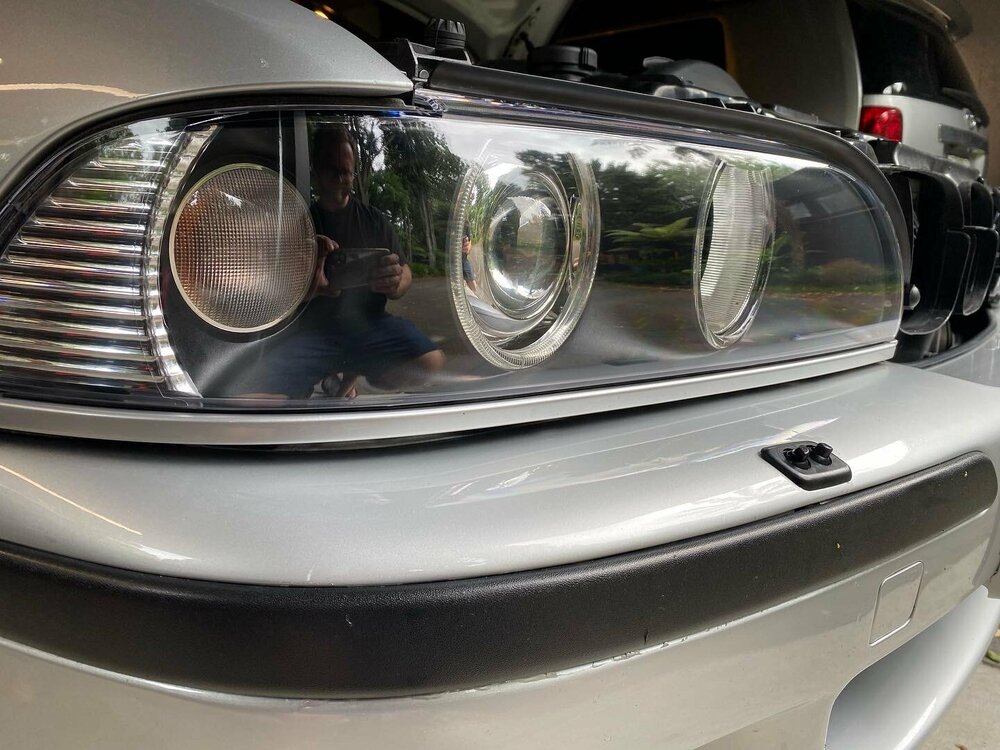
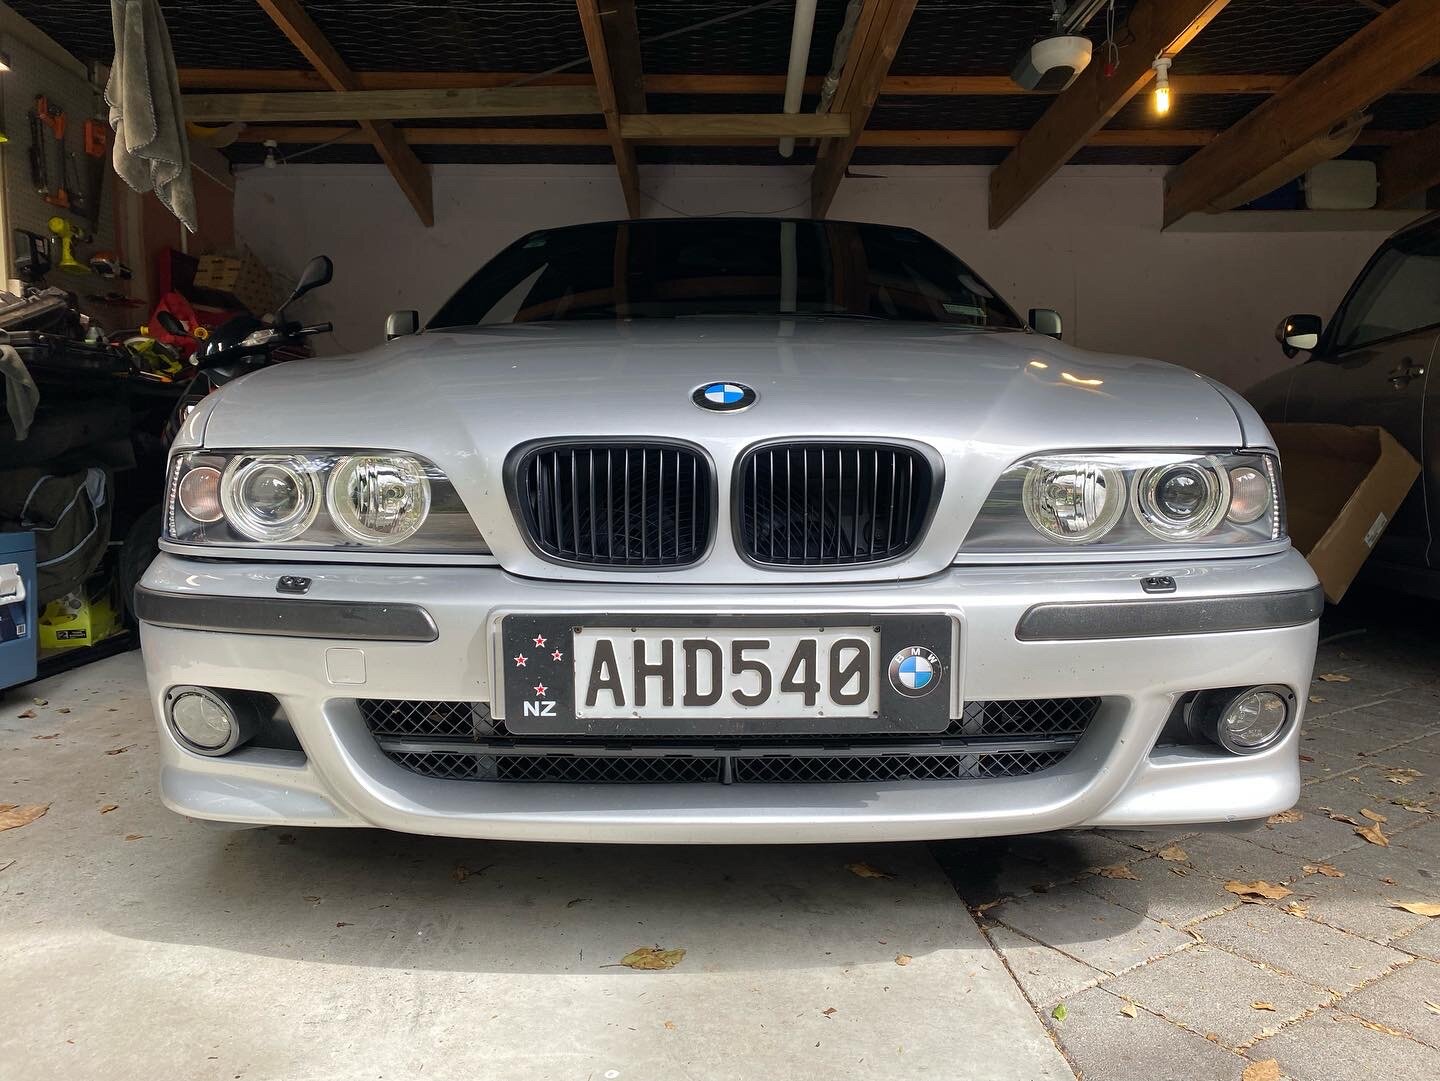
I installed the headlights last Sunday afternoon (11 December) after the 24 hours waiting time for the protectant film to fully set in place. They look amazing both off and on. the Auto levelling works as it should and they are adjusted pretty well but will need some fine-tuning at some stage to ensure the aim is in spec.
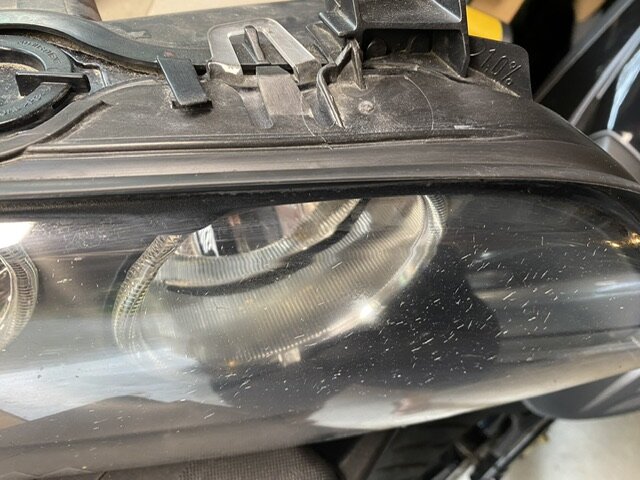
After a short drive in the rain on Sunday, I noted some very light condensation in the left-hand side. This dissipated pretty quickly but was concerning as it meant the seal wasn't weather-tight.
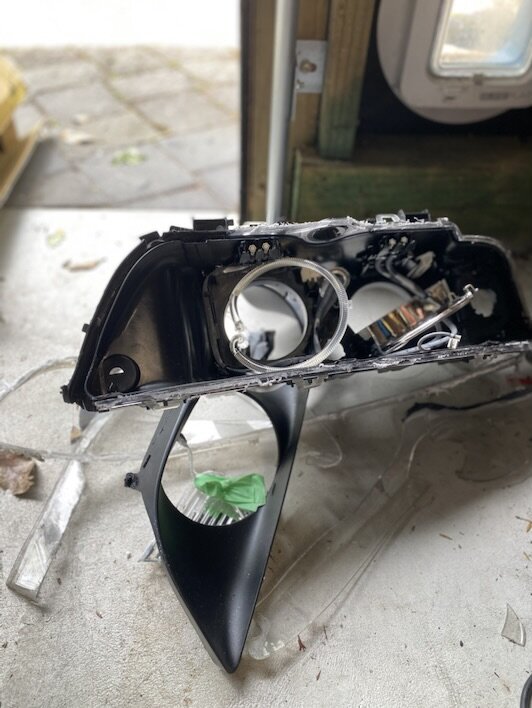
I decided to remove the light, separate it again, and reseal it from scratch. Upon removal, I could see I hadn't been liberal enough with the sealant on this light and it had rolled rather than bulged when I had pushed the lens home. ( I've also read that Xenon and LED units don't get as hot as Halogens, so won't evaporate moisture to the same level.
The sealant was heated up in small sections and scraped out using a plastic trim tool. An all-new more liberal bead of sealant was laid in the channel and the light reassembled.
The light is back in the car now and working great, fingers are crossed that the condensation doesn't return as I don't fancy pulling it apart again
This closes the lighting chapter in project E39.
-
7
-
-
On 12/10/2022 at 3:38 PM, Eagle said:Im not fatty with 36" waist,
i take exception to this

-
 1
1
-
-
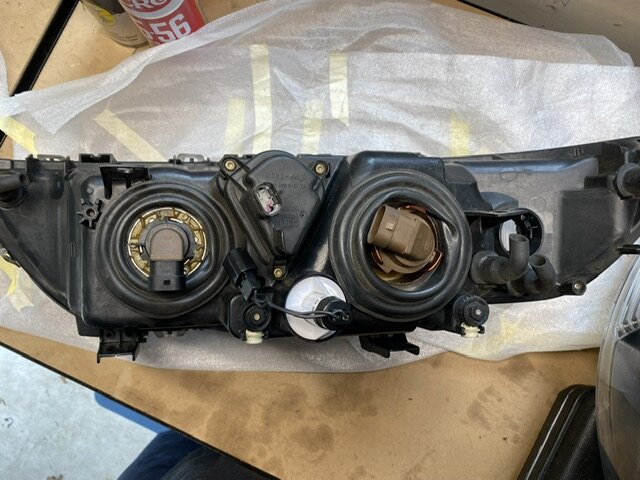
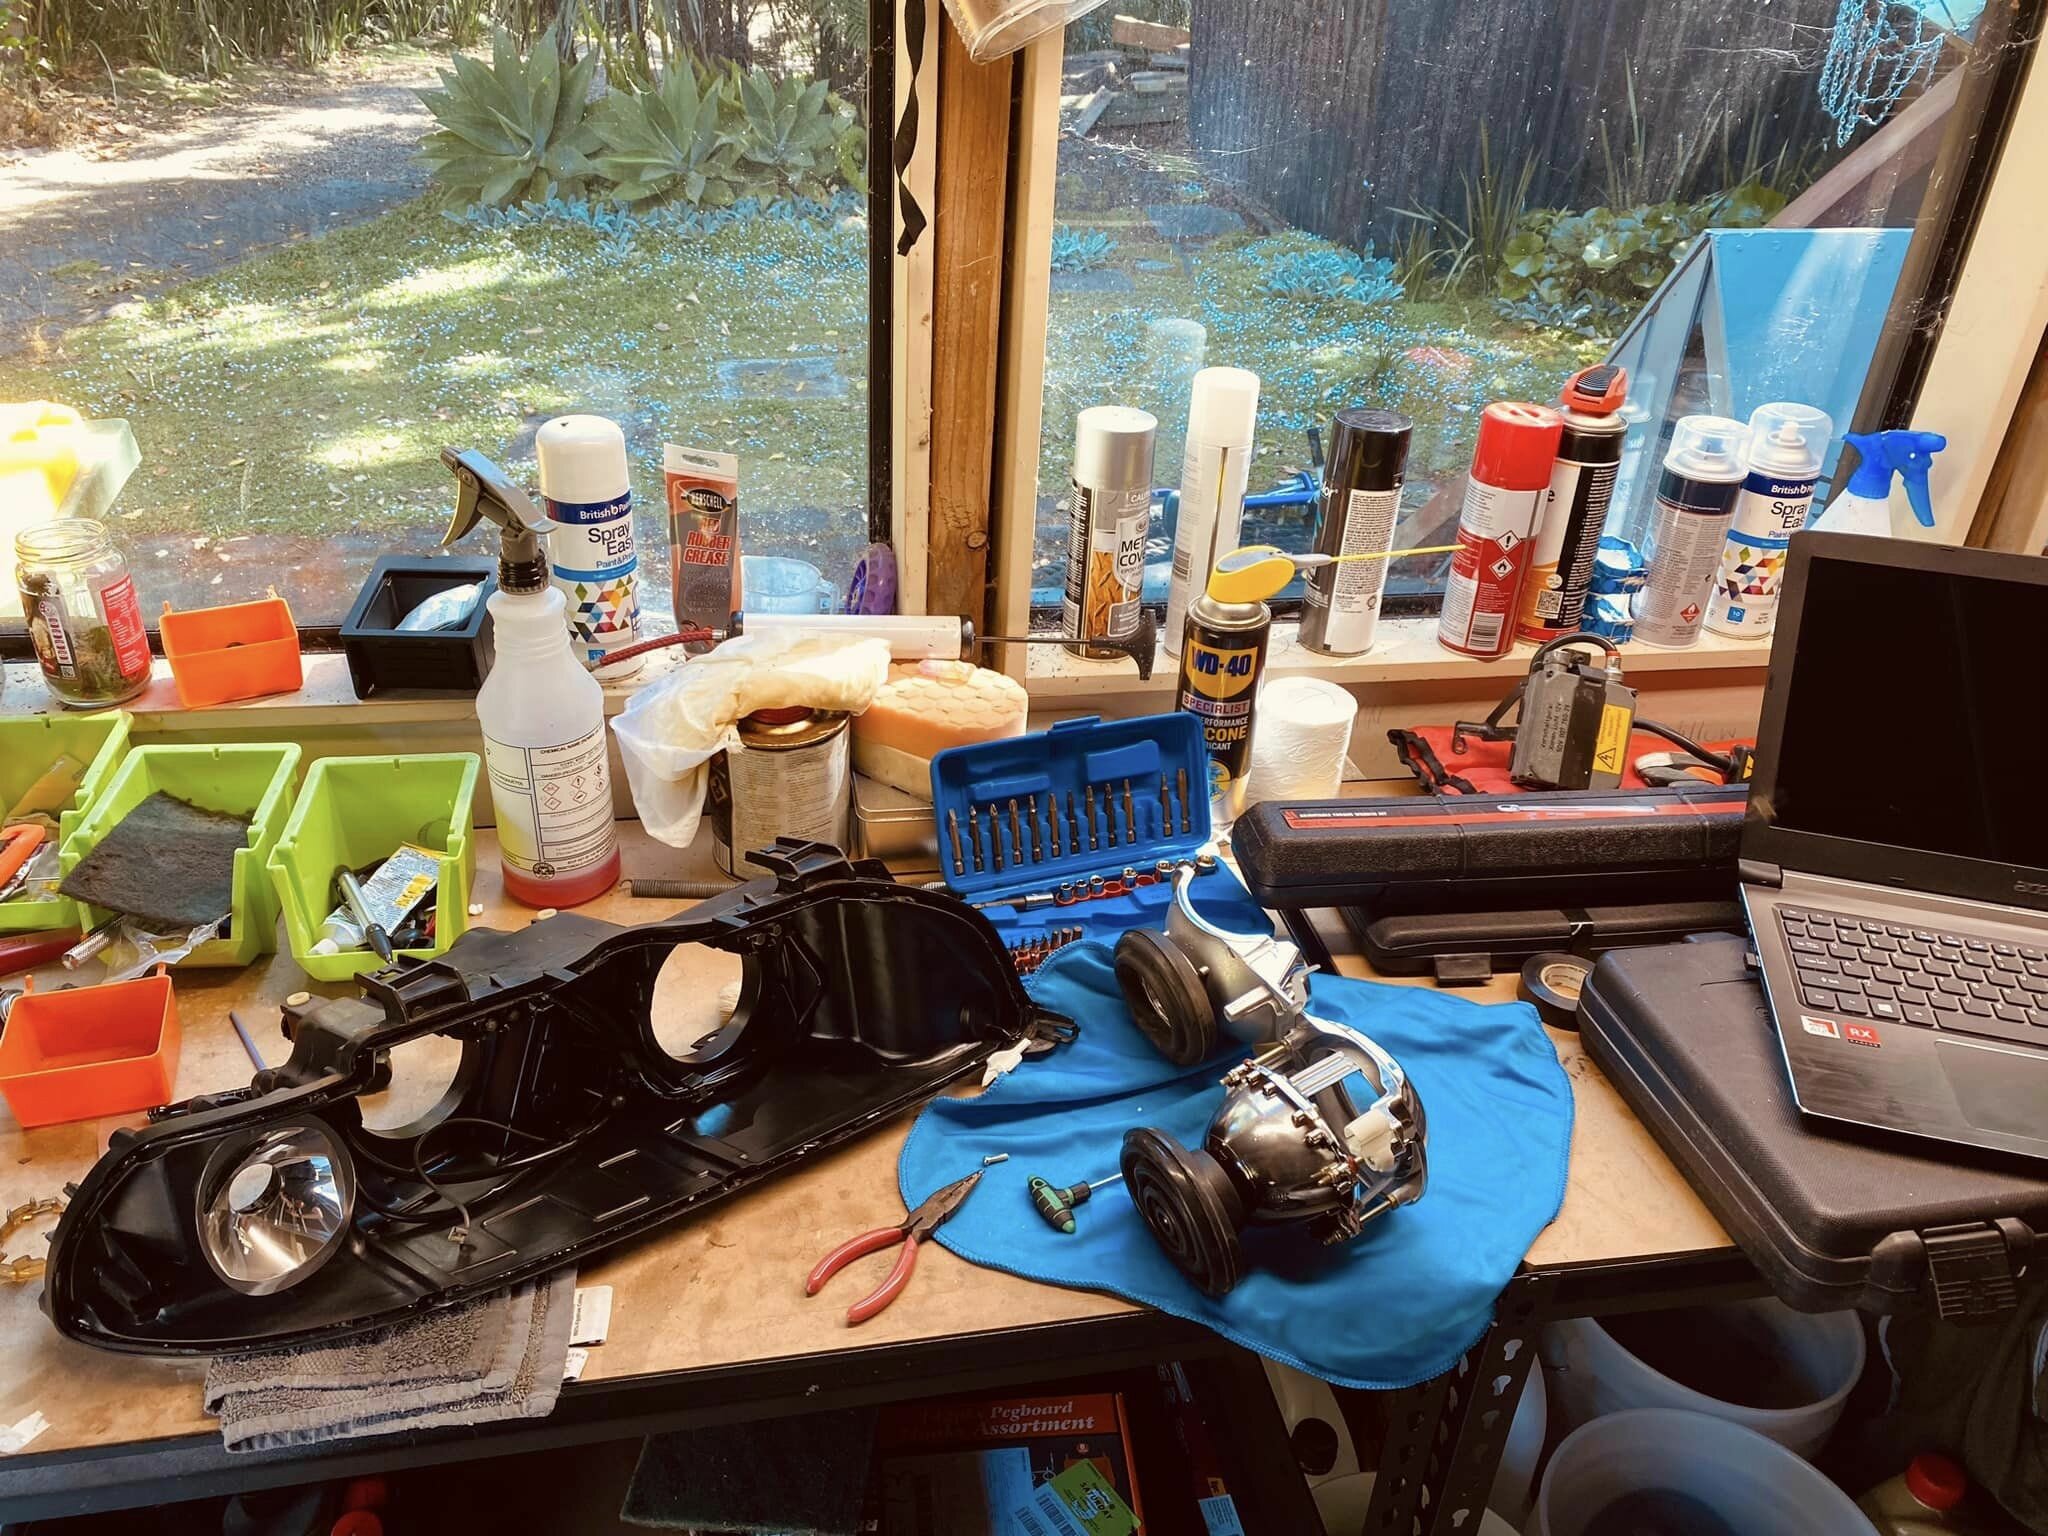
Sunday garage session.
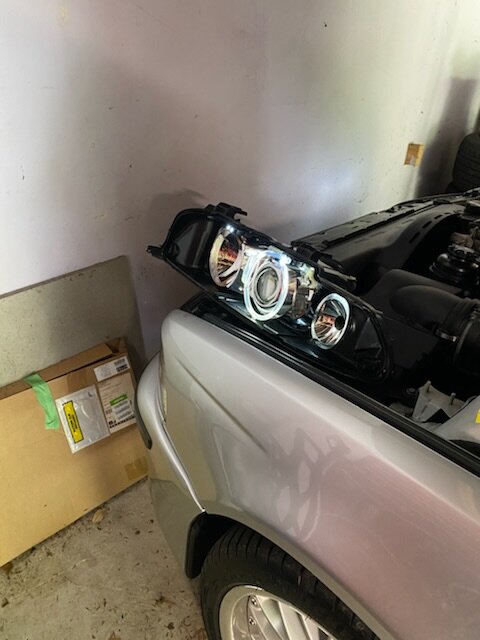
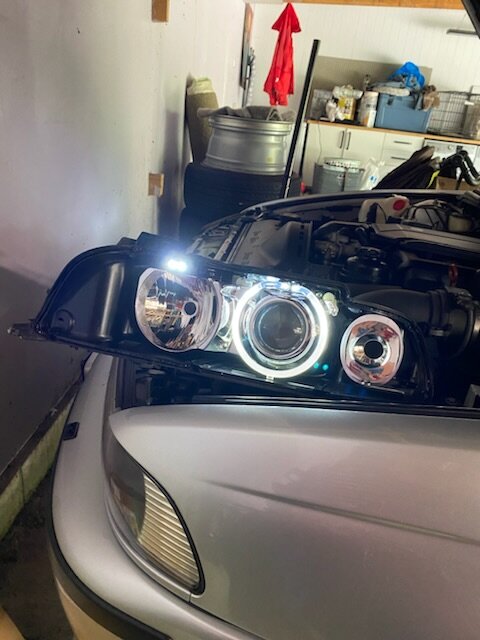
Completed my xenon rebuild today. Light two was a bit more work as I had to replace one of the xenon reflectors. These aren’t available new but managed to get a second hand one from BM WORLD LTD
the spare light put up a fight when I came to dismantle it. Being a 06/2001 build it uses epoxy rather than butyl to bind the lens to the body. Out came the power tools. Sorted.Refurbished light is all back together (tested at each assembly phase) and now awaiting an appointment to have paint protection film applied.

-
3
-
-
Wtb. Left hand e39 facelift headlight for parts.
Specifically the the halo reflector on the left hand low beam.
I don’t need the rest of the light so as long as reflectors are ok.After taking apart my light I noticed the reflector for the halos has significant marring on it and is affecting the performance of the halo.
-
1
-
-
Great day today, with a new Left-hand steering knuckle upfront the car is aligned to Spec again. probably the first time since I've had it (3 years) that has it been this "true".
Big thanks again to @Eagle for the mechanical assist.
The car is also sporting new sway bar bishes and brake lines.
Few more maintenance items to replace before a big south island trip next year as well as completing the Xenon project
-
2
-
-
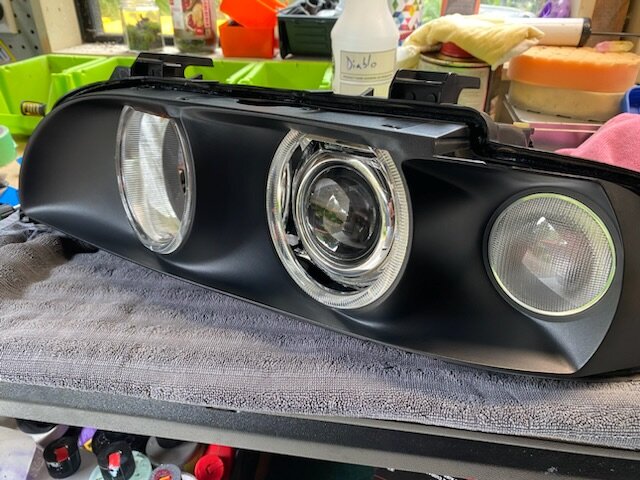
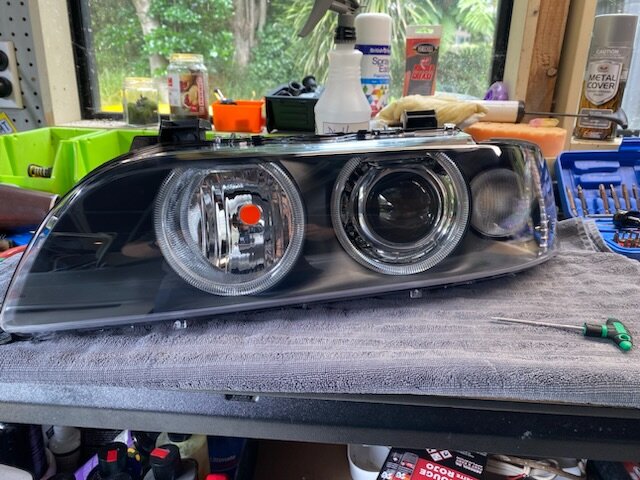
Xenon light project kickoff today. Separation aided by Vidal Sassoon.

-
1
-
-
took the opportunity today while the family was out of the house to rebuild the flappy and "getting louder" DISA valve using the German Auto Solution (GAS) rebuild kit.
This has some advertised design improvements of the aged OEM unit, so will see how it performs.
The process was easy due to detailed (47 steps) instructions on the GAS website, hardest bit was cleaning the old seal out of the base of the unit.


Project E39
in Showroom
Posted · Report reply
Coolant is holding well after a coupe of drives around town.
today I replaced the headlight washer hose with a new part from BMW. went in super easy. A previous owner had repaired this section before with several metal joiners.
for a touch of passenger luxury I also installed some Febi rear cup holders. 🤣