Jump to content
Sign in to follow this  
E30 325i Rag-Top

E30 Race Car - Jim Richard's JPS M3 Tribute.

Recommended Posts

For the price you can buy the panels it's not really worth it tbh. I did order a number of spares, originally to make up another full set of front, rear, F Guards, Rear Guards and side skirts so I would have a whole set to on-sell, but after the cock up with the steel rear panels I am now short a set of those so will probably just keep the rest as spares.

sanding and filling FRP is bad enough, but working with the resins is total brain damage. Want to keep as far away from that stuff as possible so not even thinking of making any parts or splashes off of these parts.

Share this post


Link to post
Share on other sites

The steel outer halves of the inner guards have now turned up, just in time for my week off next week - so will be back to cutting and grinding in anger. Fingers crossed I should make some good progress with these if I get a good solid run at it!

Share this post


Link to post
Share on other sites

look forward to regular up dates of your progress

Share this post


Link to post
Share on other sites

So with a bit of time off from work I decided to get stuck into chopping off the rear guards to start fitting up the fibreglass ones. Decided to go gently and do it in small pieces so I could make sure that 1) I didn't chop out something behind the skin and cause problems there and 2) it left a reasonably neat and tidy edge to fit up against and 3) by taking it a bit at a time I could get the hole the right size!!

still looking for the rust that I was told was sure to be in there, maybe I should stop cutting now...??

IMG_1734 (2).JPG

As I said before I order a pair of the M3 outer guards to save me from having to fabricate something up to get the wheel arch the right shape, using the proper panels it was more likely that I would end up with a "correct" position of the outer lip to fit the fibreglass guard up against.

IMG_1737.JPG

My welding skills are more than a little rusty, but I'm reasonably happy with how it has turned out. Only one small wound to the hand, and small amount of blood plus one small fire equals a win in my book!!

  • Like 4
  • Haha 1

Share this post


Link to post
Share on other sites

good progress, Jon, keep the updates coming

  • Thanks 1

Share this post


Link to post
Share on other sites

Yeah, definately 5-lug. Got a Ti rear end to go in now, and looking at options on the front. Needs to be a "good" conversion to keep suspension geometry etc. Long term I would love to get some centre locks :wub: so I can run some gold BBS E50s :wub::wub: or even the correct Simmons wheels that were on Jim's car :heart:

  • Like 1

Share this post


Link to post
Share on other sites

nice work Jon, getting serious now. And love the commitment . 

Share this post


Link to post
Share on other sites

Great progress Jon. So be ready for 21/22 season huh?

  • Haha 1

Share this post


Link to post
Share on other sites

The aftermarket M3 indicator lenses turned up, even with my staff discount just the lenses were ridiculously expensive for genuine parts, so for a race car I’m happy to use copies.819648D9-A326-4A7D-B200-7B863BF84C8E.jpeg

With a bit of kiwi ingenuity I should be able to get the aftermarket indicators, that were supposed to fit an M3 but don’t, to work with them.

EA4DD0F6-F71D-4611-A14C-683E27D2BD85.jpegEnd result will look heaps better then the bodge up I had on my old M3 bumper any ways.

Now working on modifying the facelift bumper mounts to make them lighter and work for both holding the bumper and connecting the A-frame for towing.

Share this post


Link to post
Share on other sites

Also been thinking about and playing with the graphics and logos side of things in between sessions in the garage/sauna - damn Auckland and it's humidity.

Mentioned before changing it from John Player Special (JPS) to Jon Tyler Special (JTS) as a little personal touch, so found a couple of logos and modified them up to look like these:

jon_tyler_special_logo_2354.gif

JTS Team Logo.jpg

Pretty happy with how they look on the screen - now to try and see what they look like in real life. I will be working with Dave Farmer from GT Designs in Tauranga on the signage as he has got some pretty good new gear for working on this stuff and is a fellow Bimmer lover!

  • Like 3

Share this post


Link to post
Share on other sites

Wow, so it’s been a year since I last posted on this thread - so yeah, progress has been  slow. Have done a few bits and pieces, but not a lot that is major

- filled and sanded front guards, bits of front bumper, boot lid, spoiler,etc

- scraped underseal from inner front guards and front floor, then repainted with etch primer.

- bought a few more bits and pieces including some genuine M3 bumpers and boot + spoiler, need to decide if going to use them on a race car!

Major road block has been the rear quarter where I have been a bit stumped. Have now decided on a a plan B.

Cut out the whole panel to use all of the FRP replacement, but it’s a prick of a thing to fit around the pillars and window, so putting the top of a steel panel back in..


220ED8B3-70A6-474E-B392-7D2068B80B6D.jpeg

4EE92E1C-FB47-4D95-AC66-C1412A95D365.jpeg

Share this post


Link to post
Share on other sites

Using the large parts thrower to drill / mill the spot welds off the replacement panel - worked pretty well, and no injuries = winning!607E3624-23C6-4502-B043-4B00CE19AFC6.jpeg

Share this post


Link to post
Share on other sites

When you’ve cut too much out what do you do, keep cutting, right..?

8608C582-C768-4E13-938C-590951D833E8.jpeg

  • Like 1

Share this post


Link to post
Share on other sites

So after what feels like weeks of cutting, grinding, filing and shaping the replacement section finally fits in the hole and is ready for gluing into place.

CB5A19B5-3AC1-4422-93EE-FD879E653C5D.jpeg

  • Like 1

Share this post


Link to post
Share on other sites

Pleased to see you making progress, Jon, keep the updates coming

  • Like 1

Share this post


Link to post
Share on other sites

hay Jon, I came here to give you some words of encouragement on your project.

hurry the f**k up. You only got 7 months until the start of the 20/21 season

  • Like 1
  • Haha 2

Share this post


Link to post
Share on other sites

Thanks for the encouragement Rich!

Tbh I got a bit sidetracked with some genuine M3 parts I managed to buy at reasonable prices - front and rear bumpers plus boot and spoiler.

The boot is far too heavy to use on a race car, but the bumpers and spoiler are probably going on the car.

Taking hours to remove the hundreds of layers of paint on the bumper to make the finer details visible, they were buried under the thick paint.

Will be easier to mount using the “proper” fixings etc.

Share this post


Link to post
Share on other sites

Still sidetracked on the genuine E30 M3 parts. They have been helpful in nutting out how to mount the fibreglass parts, but I’m spending far too much time chipping the paint off and cleaning them up to be honest.900AE0F2-AF30-4E7D-9905-8476758E16F5.jpegPaint layers on the rear bumper are stupidly thick, thankfully coming away reasonably easy.

A0E04DD5-A860-4D06-B39C-ACF4C314EDEC.jpegFront bumper is pretty much there for prime and paint now. Using the wooden dowels for location to work out mounts, etc.

01D7F2D7-D2B2-4090-BC56-4F9726F1345A.jpegGenuine spoiler ready for priming, mocked up in fibreglass boot lid. Spoiler is a bit heavier, but is correct for the JPS M3 so will use that. Genuine boot is made from “fibrolite” or something and weighs heaps so won’t use that.

To make more work for myself and things more difficult, I have decided to use the genuine bumpers for display & classic “gentleman’s” racing and the fibreglass for the more competitive BMW class.

Having them interchangeable adds another dimension of complexity, but I have a good idea...

  • Like 2

Share this post


Link to post
Share on other sites

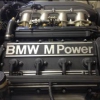
I bought many more horsepowers for the car from the parts dept...

CFB24883-CAD0-401C-82AA-A26630E0C7A5.jpeg

I was in two minds about putting the M3 badges on a non-M3 as it really is a pet hate of mine. As this is 1) a race car with lots of genuine M3 parts, least of which engine and box plus 2) it’s a tribute to JRs car and that had the badges on, then I can sleep at night with my decision.

  • Like 3

Share this post


Link to post
Share on other sites

I still can't resist buy stuff online, this time from a well know classic car enthusiast in Pahiatua of all places! A bit of bling to brighten up the engine bay (and maybe some performance increase due to strongers spark...)

Red Wires.JPG

Now the first side is pretty much ready for the GRP panel to go in, I have started on the other side of the car - idea being to fit both of the guards at the same time as I am rivet and gluing them in. This side is a little more tricky as the vent bottle for the petrol tank is tucked up inside the wheel arch, so trying hard not to damage that in the proces of cutting everything out and cleaning everything up. Plus this side is where a replacement rear quarter was tacked on after I backed it into the safety barriers at Pukekohe many years ago, so there is a bit of tidying up to do around that in places, rust to be treated etc.

Other Guard Off.JPG

  • Like 3

Share this post


Link to post
Share on other sites

don't know how you do it,

put so much effort and love into a project which some idiot could sideswipe on the first lap, watching races you kind of think these things are just expendable playtoys and for some I guess they are but after all that work I'd be too scared of bending it

  • Like 2

Share this post


Link to post
Share on other sites

Finally putting stuff back on the car rather than taking it off, turned the corner so to speak... new wider arch on, without setting fire to the fuel system behind - win!!

40E2F9BD-F9A7-4071-BBCD-0DED7E2D9F24.jpeg

Also got the correct width shield from an M3 to keep the stones and crap out..

531F8DB9-767C-4D30-B327-BE3FA66AEE3E.jpeg

Also got some adjustable rear springs to go in..

F8320BEA-58AA-4EBA-8AB0-EDB29F869856.jpeg

  • Like 2

Share this post


Link to post
Share on other sites

Join the conversation

You can post now and register later. If you have an account, sign in now to post with your account.

Guest
Reply to this topic...

×   Pasted as rich text.   Paste as plain text instead

  Only 75 emoji are allowed.

×   Your link has been automatically embedded.   Display as a link instead

×   Your previous content has been restored.   Clear editor

×   You cannot paste images directly. Upload or insert images from URL.

Loading...
Sign in to follow this  

×
×
  • Create New...