325_driver 422 Report post Posted February 1, 2021 (edited) Outside just doing a bit of final shaping on the primer runs, the shadows really help reveal what the final result will look like. Was struggling to reveal the low spot with guide coat and sanding but the shadows from the sun directly above show it really well on the rear lhs arch Shadow feathers a bit better now And the rhs looks pretty sharp now, going to tripple check the shadows tomorrow Edited February 1, 2021 by 325_driver Quote Share this post Link to post Share on other sites
325_driver 422 Report post Posted February 6, 2021 (edited) God, Chucked her in the light, letting the shadows show what the guide coats are even struggling to show and she needed a few more runs, nightmare! Why the hell was this panel so warped haha She's good now, moar block sands, and some 3am finishes so i could use some lighting to cast shadows on the area as i was having to move the car around the drive way to use the sun to cast the shadow haha Edited February 6, 2021 by 325_driver 3 Quote Share this post Link to post Share on other sites
325_driver 422 Report post Posted February 22, 2021 (edited) Have started sanding down the bonnet and rest of the car now, home stretch Did a few more long sands and guide coats sharpening up the lines and shadows on this panel too, the results are REALLY starting to show now. Its amazing how you think you have it close, and then you put it out in the light and realize things are still warped to buggery It seems obsessive trying to get that line really crisp, but if its not 100% flat and the surface below the line doesn't feather into the next countour, it REALLY shows drastically when the light hits it, a small kink makes the entire side look rippled as. Something about those arches and contours very unforgiving. Having to dig deep though and stick to the process of guide coats / right sanding blocks for the job and grind away at it, and then repeating with more primer runs. I'm pretty much signed off now on the panel work and im in final sand down stage! HERE WE GO Edited February 22, 2021 by 325_driver 3 Quote Share this post Link to post Share on other sites
325_driver 422 Report post Posted May 7, 2021 (edited) Been a while busy fixing some complicated panel damage on the missus car when she had a date with a tow bar and the e91 I picked up, had a major pain in the ass moment, some 1k primer that I thought was removed decided to cause major issues in places and primer was cracking in areas. Good thing I left it for a while for this to reveal it's self. So took some time sanding back and essentially redoing a major chunk of those quarter panels. Any way worked out for the best having re visiting it with fresh eyes I realized that rear right hand side just wasn't symetrical when comparing to the lhs or compared to the kink depth on doors. I've learned how to cast shadows to guide the sanding path and feather that curve nicely So provided no unexpected delamination appears, body work is officially done Going to probably seal it with some left over base coat for good measure and have it outside to eye up panels. But yeah final sand down inbound and disasembly mode. Hoping weather keeps hot, don't like painting with Cold weather. Edited May 7, 2021 by 325_driver 3 Quote Share this post Link to post Share on other sites
325_driver 422 Report post Posted May 8, 2021 (edited) Put what I'm hoping to be the last guide coat / test spray. Shadows and lighting so close to perfection, trying to figure out if it's near enough or my eyes making up things on it haha To paint or not to paint? Anyone got a coupe in tauranga I can eye up to compare 😂😂 Edited May 9, 2021 by 325_driver Quote Share this post Link to post Share on other sites
Olaf 3426 Report post Posted May 8, 2021 Looks fab. Send it! Quote Share this post Link to post Share on other sites
325_driver 422 Report post Posted May 11, 2021 (edited) Finally happy with the body is work was looking at rhs with some newly learned technique's casting shadows and sanding it with some longer firmer blocks found a few more areas that were really taking the definition away from the line. Was hard to see in photos but in the flesh it was pretty obvious when you run your eyes over it from different angles. I bit down on the mouth piece and slugged out a few more small filler > primer > guide coat > sanding runs and have got it to something I'm signing off on. Doing it at night is ironically ideal at the moment as the shadows under the line are really apparent and you can sand to better shape it and sharpen it up. I sealed it off with some left over base coat from another car and the proof is in the pudding she is looking Sharp, and also no strange reactions with the remnants of 1k primer I was dealing with so that's a relief. Sure there are some areas that I know about that I know to be slightly off but good luck finding them with the eye once paint is on. One hell of a learning journey for me with body work. Started to clean up the dust everywhere, bonnet is primered for a sand down, and I'm moving onto the rest of the car now which is just sand down with 400 grit as I've delt to all dents. Edited May 11, 2021 by 325_driver 2 Quote Share this post Link to post Share on other sites
Michael. 2313 Report post Posted May 13, 2021 Satisfying work once you get it right. Quote Share this post Link to post Share on other sites
325_driver 422 Report post Posted October 6, 2021 Well I've been busy on a few other car projects, and luckily I left it. Came back to revisit it and some cracking in the primer had started to occur. Turns out I didn't get all the 1k primer off before the 2k. So out with the 40 grit start again. Learning to use shadows and filler for as long as possible before moving onto primer & guide coats. Guide coat Sanded it down still sharpening up shadows final bit, it's so close. Just need a few more long sands on the line and the arch lips and then ready to send it. 2 Quote Share this post Link to post Share on other sites
325_driver 422 Report post Posted October 10, 2021 For anyone that's interested, here's probably the only way (with the tools and environment i have) to get this kink right due to the curves on that arch and if its off by a little bit the shadow really does look warped in reflections When its 90% there the rest has to be done nearly in the dark sanding out where the shadows show high or low points. It gets a bit tricky because a dip in the shadow can represent either a high spot say below the line or a low spot on the kink. I found this very challenging on the other side because it was so rippled to begin with, so some very careful sanding 2 Quote Share this post Link to post Share on other sites
Chanderpaul 15 Report post Posted October 12, 2021 Insane patience and dedication mate. Here's a great body work youtube channel if you ever manage to get some down time from all that panel repair. https://www.youtube.com/c/PaintSociety Quote Share this post Link to post Share on other sites
325_driver 422 Report post Posted October 12, 2021 @Chanderpaul yeah the main hurdles were -1k primer reactions, cost me Huge time on re work, maybe even as much as 80% - learning how to sand that curve, the right blocks the right softness shape etc I realized it just can't be done without specific shapes. - shadows and lighting, due to the feathered contour both x and y it makes it some what challenging to sand even with a good arsnel of sanding blocks, have to do it in the dark with a torch and sand / build as you go It's definitely trial by fire If I had to do it all again I'd probably be 1000% quicker and do it slightly different, I don't think I'd move to primer runs until sufficient shaping was done in this case using shadows. In saying that this panel has made my panel & paint points 1000x Better, had a few other projects on the go that I ate up for breakfast with mint finishes. Home stretch now anyway, just doing a few last guide coats, it's not forensically perfect I'm approaching the limit wih my current setup but it's definitely sharp 1 Quote Share this post Link to post Share on other sites
325_driver 422 Report post Posted October 13, 2021 At long last, sealing the panel off no signs of reactions, primer lift, bubbles etc touch wood .... its not forensically factory, but line is crisp and shadows feather nicely round the bend so i can live with it Quote Share this post Link to post Share on other sites
325_driver 422 Report post Posted October 14, 2021 (edited) Sanded down the guide coat. Cut into some metal so 1 more primer run, sanded to 400 so I can seal this panel off with some black. Will be sanding to 600 on it before putting the actual color on. Just wanted a coat on to visualize and seal it off while I give it a bit of a clean up and disassemble. It's looking sharp. Edited October 14, 2021 by 325_driver 1 Quote Share this post Link to post Share on other sites
325_driver 422 Report post Posted November 4, 2021 Been doing some wet sands to really get these panels scratch free and looking mint before I start disassembling and masking up. Those lines starting to look OEM Not 100% forensically feathered but In general the reflections in it looking mint I'm using straight black tinter as a base coat to seal off and wet sand back with 600 grit. It's definitely added a little bit of cost to the bill as it's $70/l and I've used approx that. But a good job is worth it. Prefer to wet sand this than see some scratches in the actual base coat which is $150 p/l ! 2 Quote Share this post Link to post Share on other sites
325_driver 422 Report post Posted December 23, 2021 Finally got a run of clear hot weather lining up At long last panel work complete on the shell, primer work holding nicely no reactions at all and lines and contours are crisp. Commence painting on Monday when base coat arrives Going to give it a nice clean first, final wet sand on a few other areas. Going an Audi green on this one as I picked up another e46 330ci instead of 325ci so will be selling this one and painting the keeper car artic race blue. 1 Quote Share this post Link to post Share on other sites
325_driver 422 Report post Posted December 29, 2021 Ended up going AZORES green from Audi. Still need to do fenders trims bumper and Its quite reminessant of oxford green but a bit more forest green in dark and a bit more pearl in light. 2 Quote Share this post Link to post Share on other sites
E28E30 336 Report post Posted December 30, 2021 Looks awesome @325_driver, great colour Quote Share this post Link to post Share on other sites
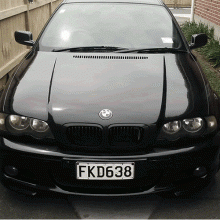
325_driver 422 Report post Posted January 23, 2022 Basically all wrapped up now trim assembled Not usually a fan of chrome or amber lights but this colour combo really works. Found a nice set of 18" reps for it that suit perfect. Camera really doesn't do this color justice. 7 Quote Share this post Link to post Share on other sites