
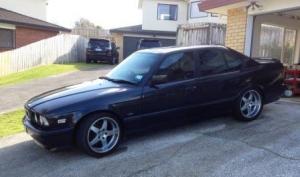
kiwi328i
-
Content Count
469 -
Joined
-
Last visited
-
Days Won
2
Everything posted by kiwi328i
-
It might pay to tell us what you are wanting. Too often we look overseas to look for solutions that could have been sorted here. Weight is the enemy, and springs are heavy. Try to avoid going over $400.00NZD, because if you do, you get a $60.00 tax and 15% for every $100.00NZD thereafter. Something like that. That's coming straight from the supplier. I don't think you can avoid that particular tax, unless of course customs don't pick it up. Cheaper freight is a different issue and others may be able to help, I always use the suppliers conventional methods because then at least if it doesn't get here, you only have to deal with one company. Kiwishipping gets mentioned on here when it comes to cheap freight if that helps.
-
Aftermarket / Performance M60B40 ECU chipping.
kiwi328i replied to sonic_attack's topic in Performance
Hey, I thought I would mention as I just checked my bimmerforums messages. DUDMD was going (and I hope eventually soon) going to do me a chip for $140.00usd. For me at least that's a $259.00usd difference... I have also trolled DUDMD's posts, and I am more than convinced personally. I told him of my particular set-up and he said no problem. -
Have a look at my project. I mig'd 2 of those. Another 2 I had to drill out as best as possible and clean it up. Being aluminium you cant get too aggressive with anything. Doing what you did is probably best. It doesn't take too much pressure, but yeah you don't want to have to go back and re-do it.
-
O.k. So 2 nights ago I ticked a few boxes. Got the lights in, bloody plastic bits are half gone, so I will at some stage get the fiberglass out etc. Got the bonnet on, which really should be done with 2 people, or its painful. Got the right amount of oil in which must be nay on 9 litres. I was soo worried about the oil level sensor and different oil pan....and heck it didn't have enough oil. I was thinking of my 328i coupe that took 5 3/4 litres...egg. Put some water in the wiper thingy..which has a crack where it connects to the car...more fiberglass, but at least I know the level sensor for it is working. I was still having the oil lamp icon turn up on my dash, which went away as soon as you gave it the berries. Whilst I didn't have a "low oil pressure" message on the dash, I was still miffed. As I know those oil pump bolts were tightened, I doubted it would be the pump. Just as well Brent mentioned "also the oil pressure switches often fail on these", so after some faffing around I got the 3.0 on there. That sorted that and the icon has not returned. So up until last night, no messages, sounds o.k...except the high idle. I cleaned both I.C.V's that I have, same part number but as nothing from the donor was worth anything, honestly the previous owner of whatever it was, must have just driven it to death! I used the 3.0 one just in case. I called Brent and I concurred, everything else being equal, it could only be the throttle position sensor (tps). The 3.0 one was burred, so more faffing around, bang bang with a dot punch, switched them over and wallah. I kicked it in the guts... My idle went to 750, and I thought, well that's much better, but not perfect, as I know my old 3.0 was around 500-550. In about 2 mins it had settled to 500-550 and I am over the moon. so I let that idle. Last night I re-silicone-d the little tabs that hold the engine cover, they look mint now, 2 of them were totally broken and the other 2 were about to be. Engine cover on. It has been a journey. Now I just need to take it easy for a bit to bed that clutch and flywheel but I cant see any problems as it works as it should at the moment, I am guessing it can only get better. After driving the car, I have just affirmed myself that I will keep the 3.07 and wait for a suitable lsd centre to fall into my lap and do that. Thanks to all of your comments especially Brent the E34 guru. I did a small video of the idle but you can only upload 2mg...oh well.
-
8.5L? Well that explains that I guess. It's between the 2 on the dipstick, but I will have another go tomorrow, if it is just a matter of volume, I will sort it easy. I checked all of the 10mm and 13mm bolts in and around the oil pump, none were really loose, just some not as tight as you would expect it to be. I didn't bother cleaning and thread locking them. The tension looked about right so left that also. I guess I was lucky with this donor motor. Cheers Brent.
-
Thanks everyone. Well I got some more oil. I was trying to think of all the things that couls be attributing to the higher than usual idle. I remembered that little squiggle of a vacuum tube hanging off the fuel rail. Yes, to be sure, it was still there not connected to anything, so I put that back on the rear of the PCV. Put oil in, started it up, and it ran well, idle is now in the high 600's, which is better, ran smoother too, I am guessing the ECU may have come on board too, either late last night or maybe it had a wee think about things overnight, who knows? It soulds good. So the only problem at the minute is, the following Low beam dip, or similar, which is I am gussing because the lights are not connected Water fluid low, because that isnt connected either Oil level low, now this bugs me, because I used the 4.0 litre oil pan. It is different, I dont know what the donor was, but the donor pan comes with an integral gasket for the oil level sensor. The 3.0 litre does not, it has an O-ring instead. As the donor oil level sensor was cut, I used my 3.0 litre original as it fits. I just didnt use the O-ring and it fits the integral gasket on the 4.0 litre oil pan just fine. I checked realoem and low and behold there are 2 types of oil level sensors for the 2 separate pans. Maybe I cannot interchange them? If I cant work it out tomorrow, I will change the pans over. Rather not though. Hey Brent, " did you check the oil pump bolts havn't come loose?? Oh yeah nothing had come loose, but I tightened them all up for good measure also the oil pressure switches often fail on these,also check for broken wires loose conections etc. I kept the original one, and as long as it doesnt bring up a message, all good. have you checked the ICV is free and not sticky etc, check for air leaks too." These are all good. So I dont think I have oil pressure problems, the car rusn too well, and I tightened everything. The oil dummy light is on, and I am guessing it is due to the low oil level, NOT the pressure. Need another day.
-
ok, so it stopped raining today, mean as, I am in. Plugged in Oil Level sensor Cable tied things that had broken Coils on injector rail nutted down oil in power steering fluid in coolant in fingers crossed So I kicked it in the guts, and after a few cycles it started Bit rough to begin with, a bit of smoke Idling high, but after 10 mins it was better Smoother too after 10 more mins, but still a bit high Oil level low light on and its late I reversed it down the drive, clutch is fine, standard basically, and forward, same deal, just like oem, I don't have the lights on yet, so couldn't give it a fand down the road It got a bit hot Tomorrow will be more oil, track down the ambient temp sensor as this might be affecting the idle Feck knows what else could affect the idle Hopefully cooling down tonight any air locks should take care of themselves Will take some photos tomorrow if its fine!!! ye har
-
Aftermarket / Performance M60B40 ECU chipping.
kiwi328i replied to sonic_attack's topic in Performance
Hey Rod, keep us posted, I just got my M6040b running and that is my next mod for sure once I have it running at sweetly as possible. I am going to go with DUDMD, sometimes when its close you have to go with your gut (not that it makes it any easier sometimes) -
Hi as per photos. I got these off trademe for next to nothing. I don't think I will ever use them. As per pics. Left and right side. I am not sure which X5 it is off, but by using google images I think they look like the ones off an E53 version. Call me on 021795306 and negotiate. Cheers Lionel
-
Aftermarket / Performance M60B40 ECU chipping.
kiwi328i replied to sonic_attack's topic in Performance
Found it: http://bimmersport.co.nz/topic/47215-performance-chipped-my-740i/?hl=dudmd#entry512401 -
I didn't take any photos yesterday, and whilst the storm was blowing shite everywhere, I thought I better get it down. The thing I had to worry about was all the crap falling into the engine, so I did my best, but it was far from ideal. And it was cold. But I got some things done. Silicone the valve cover gaskets in a few places so it doesn't fall it whilst wringling the thing in there. Silicon the half moon areas on the heads themselves and the where the head joins the timing cover as its not perfectly flush. Drivers side is always a marnus as it fouls everything especially the aircon pipes. Passenger side same thing, slightly easier. Clean all of the nuts, washers and rubber grommets. The grommets where covered in bits of old paint. I am so glad I did those covers, as the old paint goes everywhere. Pulled the old sparkplugs that were oiled to the max. Put my old ones back in, same NGK's and looked only slightly better. this was done at night, so the next time I look hopefully I haven't totally stuffed it.
-
Cheers guys, The product is called VHT Wrinkle plus. You can get it from Repco or Supercheap I think. I got it from an automotive paint shop in Rosedale I think, but it shouldn't be to hard to find in a shop. You need a primer, get a good one for metal, there are so many to choose from, luckily I was in an automotive paint shop, good luck if you are getting advise from some of the more common shops. You need to get all that flakey crap off too, and if you are doing magnesium/aluminium valve covers, you need to have them blasted I reckon. I aint an expert, just a tutu really.
-
So anyway it's another storm of the year so I have to do the valve covers in the garage. I am going to use the VHT wrinkle plus black. You need heat. I goggled loads of stuff on how people have used it to best effect. It looks like a bugger. Mixed results using any method is what I gleaned so I just went for it. Here is your average, paint peeled valve cover. And another view, don't know where my images of them off are but you get the idea. So I got them media blasted a month ago or so. I cleaned them up with a drill with a wire brush wheel head and cleaned them up because they were already well oxidizing. I know I should have primed them straight away. I then primed them in a flash etch spray can black, cant remember now, but coverage was ok. I made sure you hit where the seals go, because you want that area coated. I aint going to paint that with wrinkle, because that would be daft. You want a smooth area for sealing sake. And you don't want it exposed either as it will oxidise, so just careful spray strokes and cover as best a you can. So I tried the fairly heavy decent coat with 5 mins in between, 3 coats in all. Here's the results: Together, I had them further apart when I actually painted them because you want to be able to move around them. Just drying here. All in all, I am more than happy with the results considering its a bit of a black art. After the three coats I almost immediately hit them with the heat gun. I don't have a flash one, so I don't know the temperature, but hit them both well. I saw some absolutely terrible ones on the internet, with the exact same product and though feck that if they turn out like that. They were either just worm lines in the mud effect or glunky (tech term) muddy yuck effects. I got what I wanted. My guess is the hitting them with heat before it gets to dry 'properly' on the last coat. No need for an oven. My garage was cold as, and that probably helped slow down the time too. I think I would have done a better job, one at a time so you can focus your timeframes better. But heck 80% of this is under cover anyway so what the hey? I also bought, some oil, antifreeze, fuel injector cleaner, so as soon as that sun peeks over...I am in there!
-
I am guessing Arrow Wheels could do it, as they have their own wheels with their own barrels. It would seem they could machine the centre to suit the closest diameter barrel they have drill the holes and attach it all together.
-
I had a set of those on my 328i. They were not light. Would you not want a lighter wheel that is cheaper to replace in the event you ding one?
-
Another day. Cleaned up the manifold, took the PCV off the 3.0 as it was god and the donor was damaged. Cleaned inside with petrol. The donor fuel rail was damaged too so swapped that out, replaced both front and rear manifold gaskets, re-cleaned intake manifold gaskets. Engine mounts check, one bolt was turning so lifted the engine to create tension and banged it in, should be fine. Exhaust back on check Flywheel bolts check bar 2 Transmission mounts back in check Tensioners in check Belts replaced check power steering crap, all back in, major headache Throttle body, realizing the 4.0 is bigger, cleaned that up. I moved the as much of the original stuff over, as its a little different Breather pipe o-ring replaced put the manifold on Hooked up all the knock sensors and other sensors Radiator in, top and bottom hoses in Rear accumulator hoses on, replacing as many of those b-stard bmw hose clips Cleaned all of the fuel injectors I was going to use the 3 litre ones as I know they work, but bugger it cleaned the 4 litre ones up and put them in, time will tell. Starter motor in and seems to mesh properly Put fuels lines on, and took forever, why bmw designed the fuel rail that way, I don't know, access is super ridiculous. overflow back on. Still have to paint the valve covers and put all that on, then I will be very close to giving her a first start Heck I just remembered, better put some spark plugs in
-
So I wasn't thinking about doing any work today, but the bro was keen. I go some new pressure plate hex heads, like the originals, and $40.00 worth of new flywheels bolts, std ones are still in the original d.m flywheel, and the donor M60b40 auto ones are only 30mm. So I bought 40mm, not as good a grade as the oem bmw ones but good enough, a bit of medium blue threadlocker and its in there. No clutch alignment tool, so I hope my eyechrometer is bang on. There isn't a whole lot of space between the sprung hub and the heads of those flywheel bolts but hey? I put a new pilot bearing in as well, remembering an auto wont have one. Finally wriggled the engine in, I can see why doing it without the exhaust manifold on is probably the go. It's tight alright, and there is a bit of wrestling, but it's o.k. More wrestling getting the input shaft in as well, but it went in eventually. Trying not to munt the engine mounts, cause I really do not want to pay for new ones, one of the bolts got a bit munted, I am guessing if you get them really wrong, the oil will probably piss out all over the place or disintegrate the thing? Looks ok, and still got an extra one there if it is damaged. New plastic pivot thing, new wire thing that keeps it there, a bit of grease on all of the friction areas including the input shaft. Got the bellhousing bolts on, well 3 of them before the cats and dogs came down in a hurry. All in all a great mornings work. This is what I have been using pulling things in and out, an old swing frame. Poor kids, I am sure they understand.ha. Left hand side, looks pretty untidy, another day though and I could have most of this back together Right hand side, again, looks like crap, but its in and yeeeeharrrrrrgh. Another day void of rain, and I think I might be close to giving it an initial start.
-
Knowing that the base 530i oem flywheel and clutch kit would probably die fairly quickly if I was to drive it like a rental, I decided upon looking at alternatives. The problem with knowing what you don't want, i.e. standard is a good starting point. Knowing where to stop knowing all along being a car guy, you are probably going to buy something you don't REALLY need to is the problem..., but it gives you a nice 'cushion' should the need arise. I knew I didn't want a twin clutch set-up or a V12 280mm aluminium flywheel conversion either, because that would be ott, so I pegged it back to where I am now. It's so easy to go overboard. Many guys I see with the 530i to 4.0litre conversions I noticed actually underestimated the torque, by using uprated 328i clutch kits, so I also wanted to get a level above that. The stories of dying oem dual mass flywheels, also put me off using the std flywheel, so what I am came up with is a Frankenstein approach, that hopefully works. If by Joe the bloody pressure plate starts giving me grief I would uprate that as the next step I guess for more clamping strength, again I will probably try to modify it, or hell modify the oem one, which looks mechanically similar, I can use it as a guinea pig now I guess.
-
Ramped up? What's ramped up? What the heck have I missed now? Considering the amount of variables, I have gone bog standard on both the clutch disc and pressure plate, if there is such a thing on this project. It's not like they are supposed to be in this car in the first place, but considering its a bog standard M60B40, both the M3 p.p and the M5 clutch disk should suffice. From what I could see the M3 pressure plate looks almost like the original p.p, which I guess shouldn't be too surprising, as they are both 3litres odd.
-
Hey Brent, I noticed you replied and thought crap, I have missed something. Well I may have, but I digress. Well I am guessing you are asking about the cost of the custom flywheel.? $520.00nzd. Of all of the other options, I think I went the right way about it. In theory it should work. If it looked a bit dicey you would have mentioned something. Ahh it's all fun and games, when you are trying to do something no one has tried, and hopefully it doesn't end in tears.
-
OK. So after a few emails and text messages with the engineer, I was ready to just go buy that lovely looking TTV racing all steel single mass flywheel from the U.K. Anyway, after basically telling the bloke what I needed, and he telling me every other option bar the easiest one , I said look, use the steel machined ring gear from the Auto I provided. It will be oem strength and finish, proven and it will fit. Add whatever blank bit of steel, with the appropriate dowels and machine the flippin thing to suit the E36 M3 97+ pressure plate and E34 M5 Clutch disk. How hard can it be? (not that anyone I have seen anywhere in google land has done it) So I wait a few days thinking, o.k, I am either going to get a nice surprise, or a fricken P.O.S. Well I picked it up, and low and behold, it is as ordered. I think he did a great job. The brilliant thing about it all is that, the easiest option was the best. He was going to buy a suitable ring gear then blah blah blah, which was let's say cost prohibitive. Then he was just going to machine the whole thing which was even worse! Not only is this easier, if it all goes pear shaped I can get Auto ring gear's easy, having it in 2 parts means I could machine another flywheel to suit another clutch kit down the track (Cause I love this sh*t) Well I guess the proof will happen when its in and running... I thought it might be wise to take some images and weigh the thing, and see how it shaped up. The original 530i sachs pressure plate at 5.5kg The new E36 M3 97+ sachs pressure plate at 4.7kg (they look all but identical) New pressure plate and Clutch disk at 6.2kg Old pressure plate and clutch disk at 6.6kg Old original dual mass flywheel at 12.5kg New custom flywheel and old Auto M60B40 ring gear at 10.7kg Old M60B40 auto ring gear (from donor motor sans flex plate) and new machined flywheel that fits like a hubcentric hub (and to think I didn't even have to tell the engineer that either!) A great image of the new flywheel, notice the huge recess, to fit the sprung hub side of the clutch disk...well in theory the bloody thing better work! I didn't bother to bang the pressure plates down and pull out the vernier calipers but the stack heights look pretty close, and I did get that point across to the engineer, so heres hoping I don't have to measure anything. I was thinking about getting it all balanced, but think nah, it should be good to go, I don't want to be too rangi...but lets face it, sometimes the moths that fly out of my wallet are trying in vain to tell me something? Oh, so my maths tells me, the old reciprocal mass comes to 19.1kg, the new at 16.9kg. A miniscule 2.2kg saving, not that weight savings was the priority, strength and longevity was, the weight loss is just an added bonus, it was also cheaper than any of the aftermarket flywheels, and the clutch disk and pressure plate were below the new costs of the originals, so wins all around. The car has done over 300k so the flywheel life left was mmmm anyway, the 4.0 was just going to get it to the grave a little bit quicker. It was just an added insurance really doing all of this. I could really have just changed the oem clutch disk. But on that note I could have just left the 3.0l in there too, and who the heck would support me on that one on this forum?ha.
-
Aftermarket / Performance M60B40 ECU chipping.
kiwi328i replied to sonic_attack's topic in Performance
A member here did the DUDMD chip so maybe he might chime in, he thought it was pretty good in his E38 I think? I am going to go that route myself once I have done a few other things. I think he wanted $140.00usd from memory, and if it does half of what it does, its got to be worth a shot. I haven't seen real dyno figures with those kind of increases and it doesn't seem likely does it? Who buys a V8 for fuel economy anyway? -
What a crap month of rain. So what have I done... Well I have replaced the following valley pan gasket, homemade...er yeah I hope it holds up to, have a look at the images of yet another valley pan bolt head breaks, well 3 of them, welded 2 bigger heads, and the third...had to be drilled. Same with the waterpump, had to drill that out as well, painful. But all gaskets replaced all O-rings, all gaskets. Makes me think cast iron is better when things break. The oil level unit is different, so I used the 530i one that comes from the oil pan with the pan bolt on the side, no pan gasket, took the unit and put it on the 540i one with centralized oil pan bolt and connected gasket for the oil level unit, different heights apparently, so I might have to take it off and check to see if it doesn't hit anything internally. My original left engine mount was starting to crack, the donor had a good one, so that's moved over. I have mixed and matched and used the 530i stuff where possible. It's all done really. I had a few issues with the bloke machining the new flywheel...after 2 weeks of nothing he tells me he cannot use the ring gear as its machined...yeah he's that awesome. Anyway I have got him back on track. I told him to fabricate something to the front of the auto flexplate ring gear I also gave him, I will do the rest, fingers crossed he knows what he is doing.
-
I did the fan delete mod, just google it, it's been done many times before. My M52 328i ran sweet as, no problems for 2 years before I sold it. I think it was a new lower thermostat and temperature switch, viscous and fan off and done.
-
Umm, it looks a little front heavy to me. There are soo many MS E39's out there, even I would be looking at other options, but I don't know if this is it. I think the E39, if not all BMW's are very sensitive to aftermarket kits for whatever reason. However, dropping it and putting on bigger meats always did our cars well mostly. Keep looking I think. Back and sides are not bad, but I think you could do better for the front.
