

Vass
-
Content Count
614 -
Joined
-
Last visited
-
Days Won
46
Posts posted by Vass
-
-
Well done dude, that's a mighty good effort, nice and quick turnaround. Get a lot of hate these engines but should he a good runner for someone for a good while now that the major weak points got addressed.
-
 1
1
-
-
Must be something in the air... A factory manual 325ti? Get out of here. NZ new too. That front lip looks pretty sus tho.
https://www.trademe.co.nz/a/motors/cars/bmw/compact/listing/4321158011?bof=6OvHNJsC
-
The "gets X km to a tank" crowd makes my blood boil.
14 minutes ago, Apex said:"Rare". There are 8 the same colour on Trade-Me alone.
Or, its increasingly popular variant - "rear".
Other notable pet peeves are "sort after" and "Manuel" [sic]. Must be a Mexican import.
Scary amount of people out there that should have their high school certificates revoked.
-
 3
3
-
 2
2
-
-
Most cost effective way to source a full engine setup I've found is to keep tracking Turners and Manheim damaged car auctions for a suitable one to pop up locally. That way you can be sure you get absolutely everything you need to get it running and neglected is fine since you're rebuilding everything anyway. Take what you need, part out the rest and you might end up with a free engine and a slight profit on top. Some extra hassle for sure but if you're not in an awful hurry then might be worth it. That's how I went about it anyway.
Here's a local M54B30 for you. Might not be an ideal candidate with being AWD (I think?) but keep looking and something will pop up.
-
8 hours ago, Harper said:...not to mention without the subframe RACP issues... Compact master race.
Is that so? Or just not as well documented due to lower popularity and lack of 3L+ engines from factory?
-
1 hour ago, Eagle said:Built by @BM WORLD
Looks fine to me. Hatchbacks can only go so far in the looks dept.
Yeah my bad, keep getting them mixed up.
Somehow doesn't look right with the sedan front end, the front and rear just don't match. Actually prefer the bug eyes to go with the shorter rear.
41 minutes ago, Harper said:Yeah saw that this morning, very coincidental timing. I've watched brents videos a few times over now as inspiration. I'll definitely be leaving the compact front end on it, I love the quirky/ugly bug eyes.
Surprised it's not listed as a 330i instead of a 316, would have figured it would get more interest that way but interesting to see what it ends up selling for.
Yeah hard to price it I imagine. A lot of work has gone in no doubt but $15k seems a bit optimistic given that you can pick up a manual coupe for roughly the same money.
Happened to sit at the lights next to a near identical white 316ti Msport today. Did look pretty sharp, apart from the sagging front bumper. Actually tempted to buy it if I ever see it come up for sale 😁
-
Here's one for inspiration, built by HellBM some years ago if I'm not mistaken. Looks all sorts of wrong though..
https://www.trademe.co.nz/4316428545
They had a series of videos on this build on youtube as well. Can dig it up if that'd be of any help.
-
1
-
-
f**k all new cars in general. Soulless crapbuckets.
-
4
-
3
-
-
HPR 5 5w-40 5L $48.49 @ SCA
-
4
-
1
-
-
1 hour ago, cleanish_e46 said:Next thing she's giving me the keys and said if you still like it at the end of the month, you can buy it.
Wait... what!? 😯
-
2 hours ago, Harper said:I'll keep the old style coils for now but not opposed to swapping them, whats the benefit to changing to the new style?
Come to think of it, I don't even know. Forget I asked.
-
1
-
-
Yeah haven't been too impressed with FCP of late but went with them for a few items that other places didn't have. Their use of UPS is what pisses me off the most. Website is a pain to use, all tracking updates stop the moment the package arrives in NZ and no way to leave delivery instructions. The last package was plunked right in the middle of the front porch on a rainy day and was soaked through by the time we got to it. A Spareto package was delivered same day and left in the dry at the back door as per delivery instructions. Messaged FCP and said I'm not using them until there's no shipping options other than UPS. They replied saying the feedback came at a good time as they're currently reviewing their exclusive shipping provider contract so... here's hoping.
That alternator duct I mentioned getting destroyed a few posts back I'd gotten from FCP at the beginning of the year for $30 USD. With this latest order I thought screw it, I'll throw in a new one of them, only to discover the price had jumped to $72... Gross.
-
1
-
-
Uff looks a real tidy one that, anything majorly wrong with it that you're parting it out or just git it cheap enough?
You doing much in terms of engine refurb, gaskets-seals-chain guides or just dropping it in? Keeping the old style coils or switching to the updated valve cover?
-
Hahah haven't yet but have had a review on another item deleted before 😄 Dodgy buggers.
-
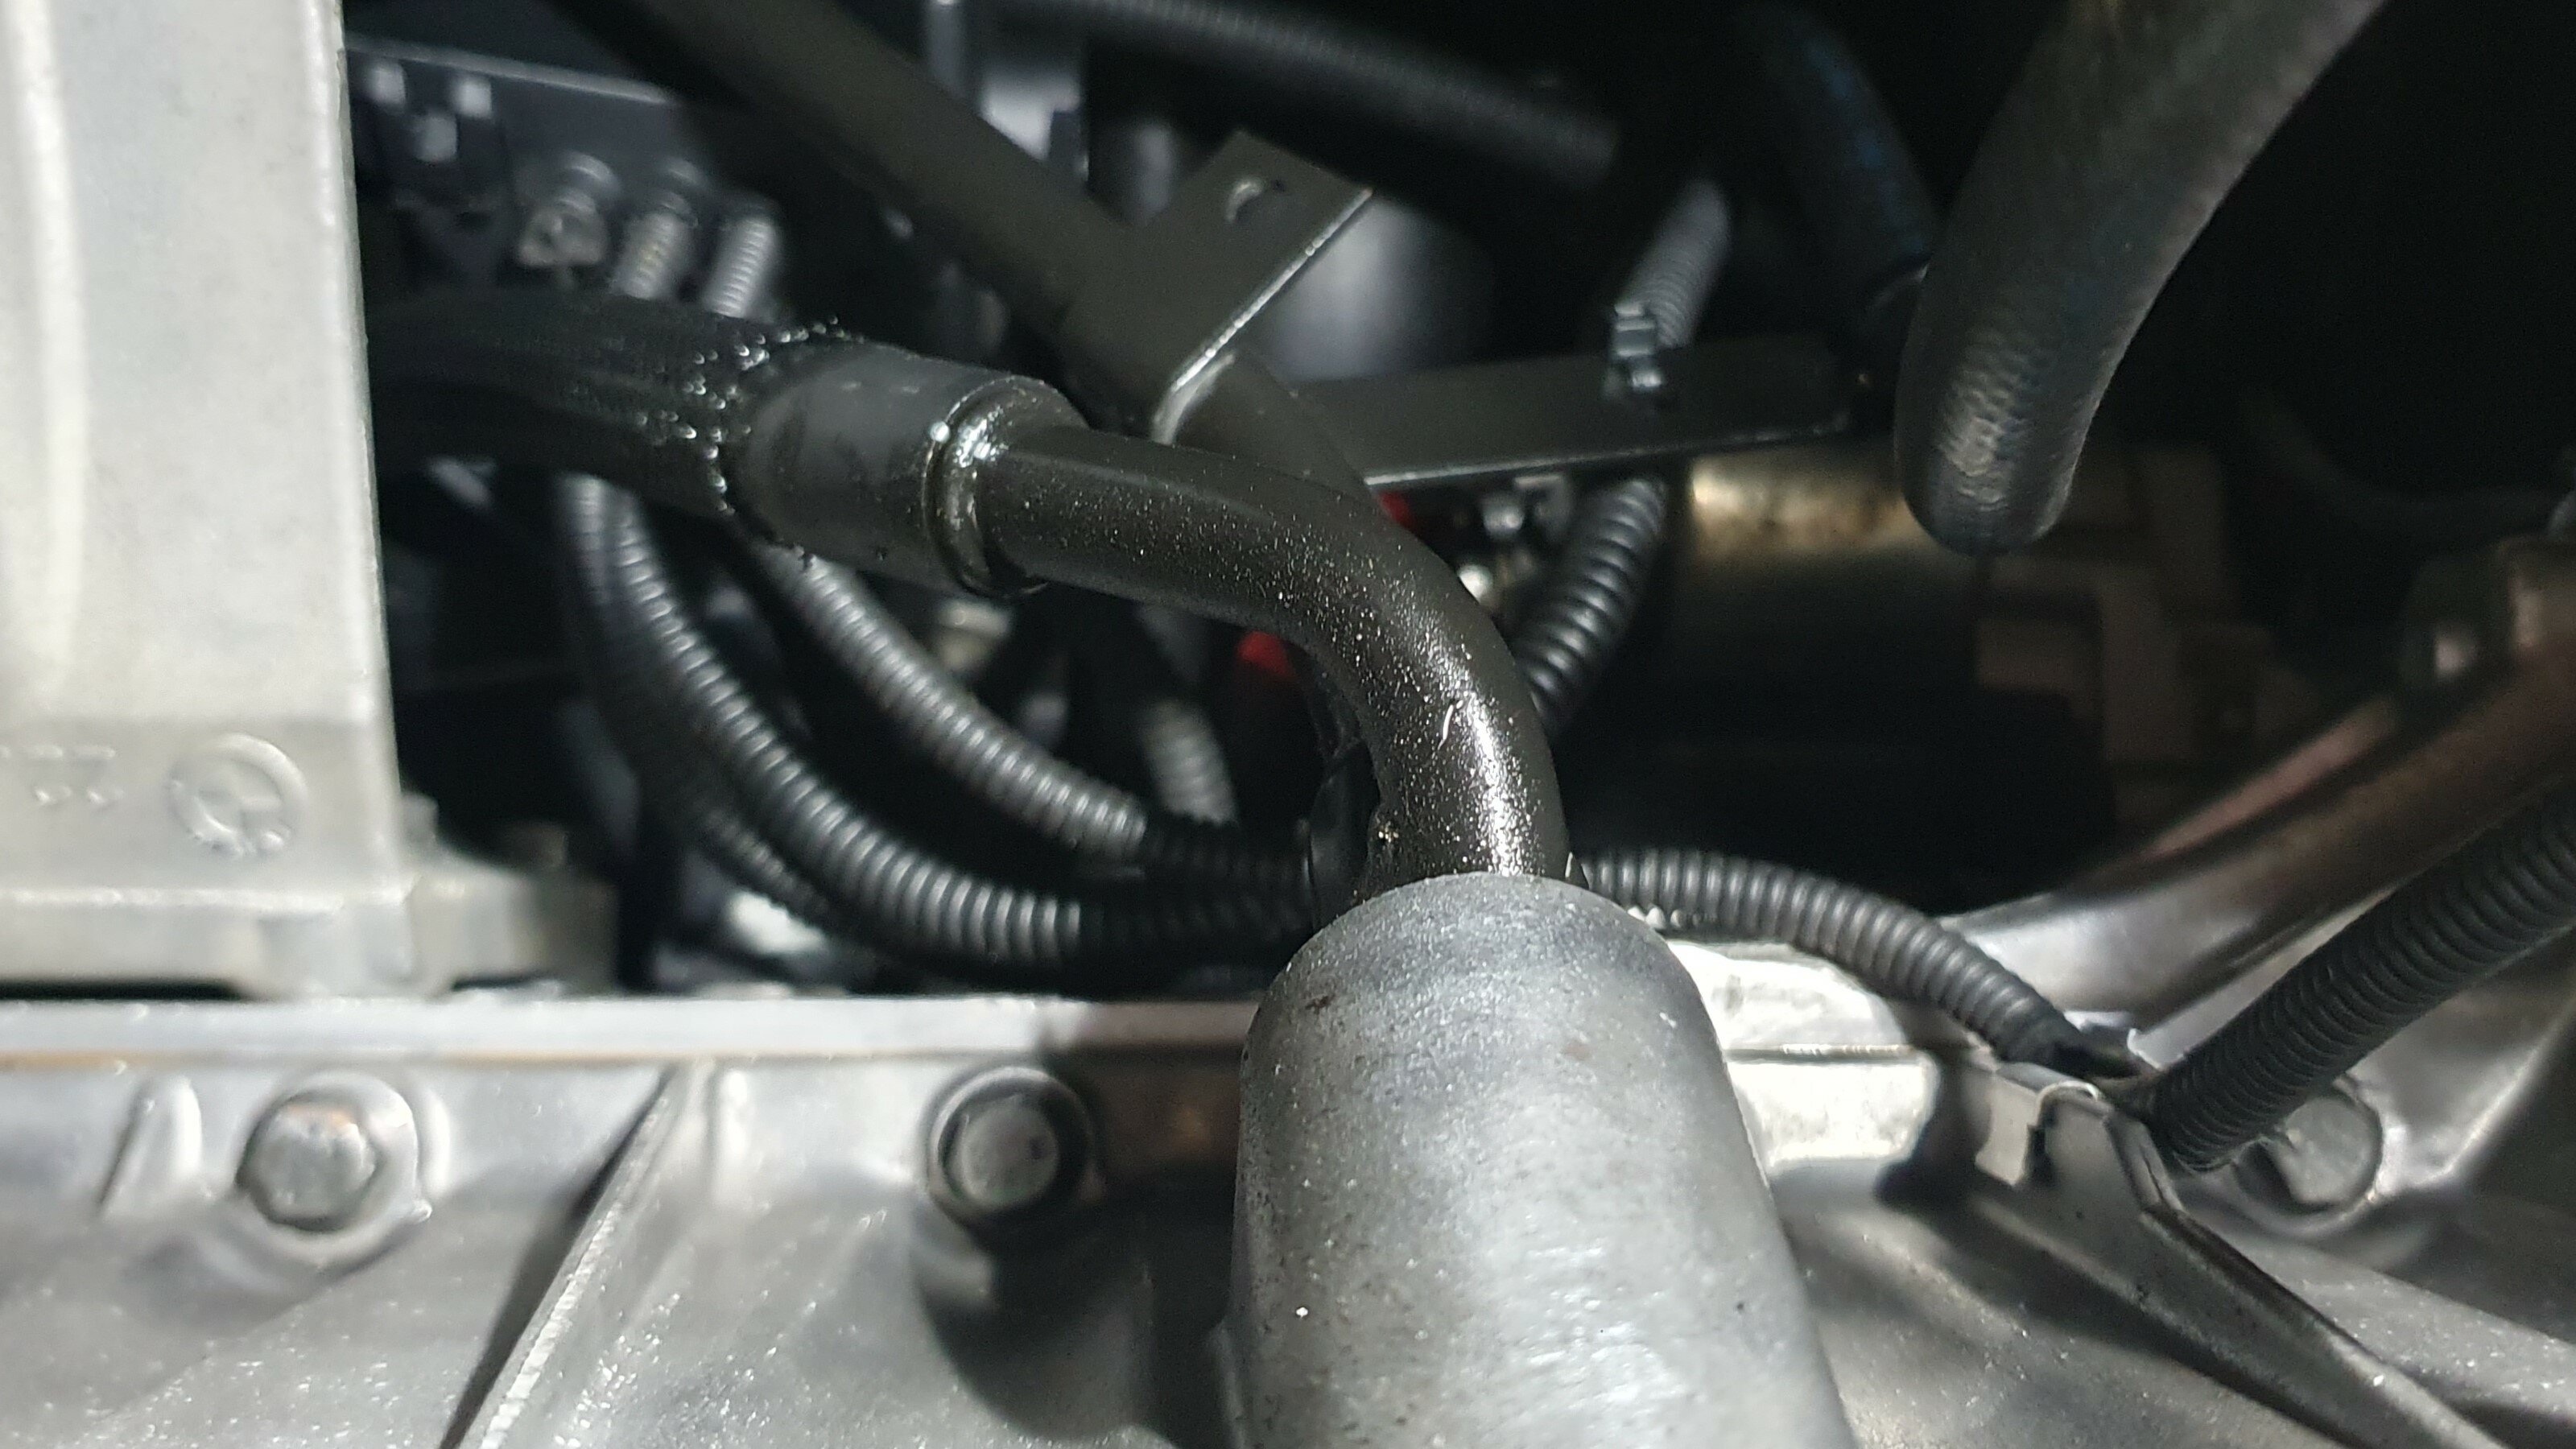
Back from overseas, dug straight into sorting a few issues before even waking the car up from its 3 month slumber.
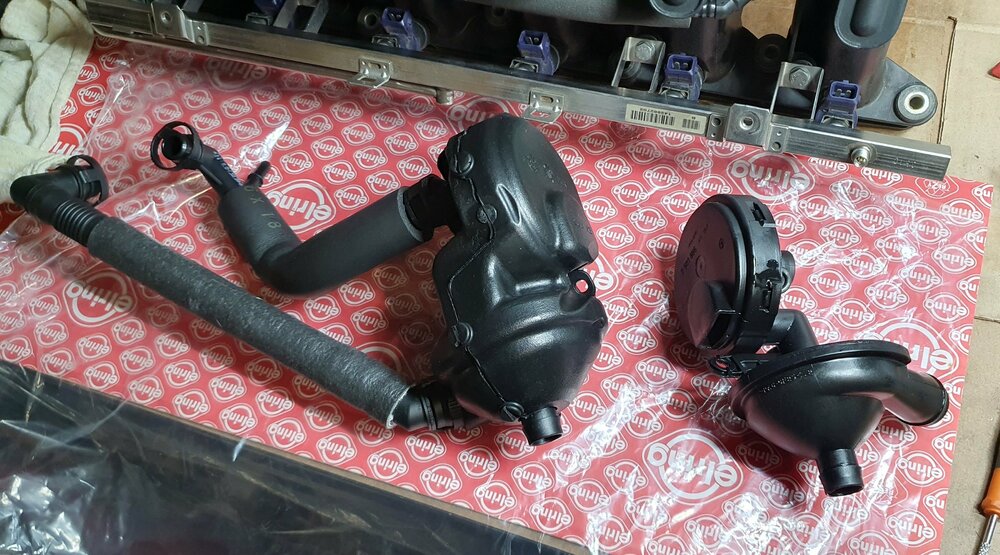
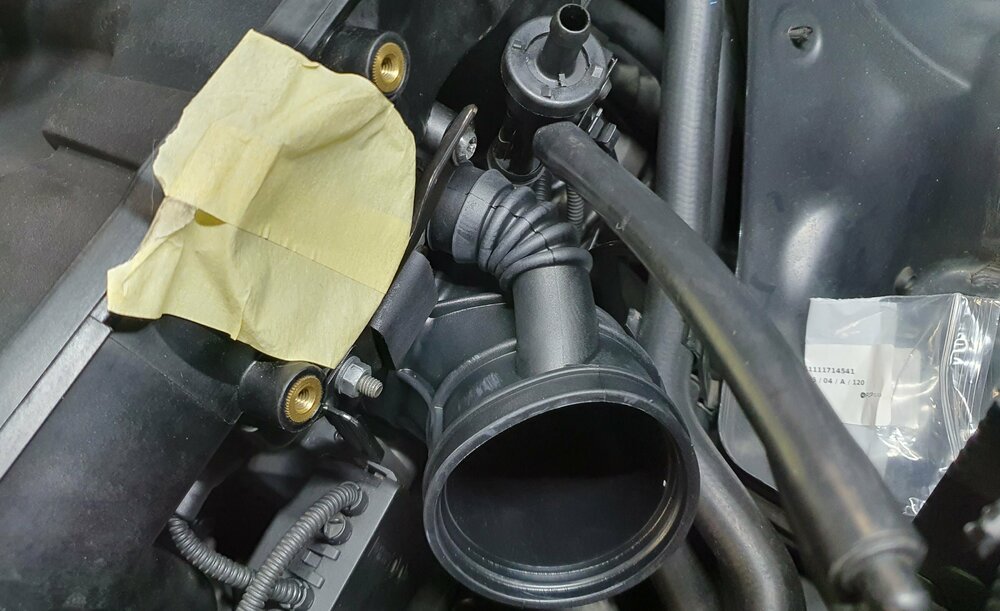
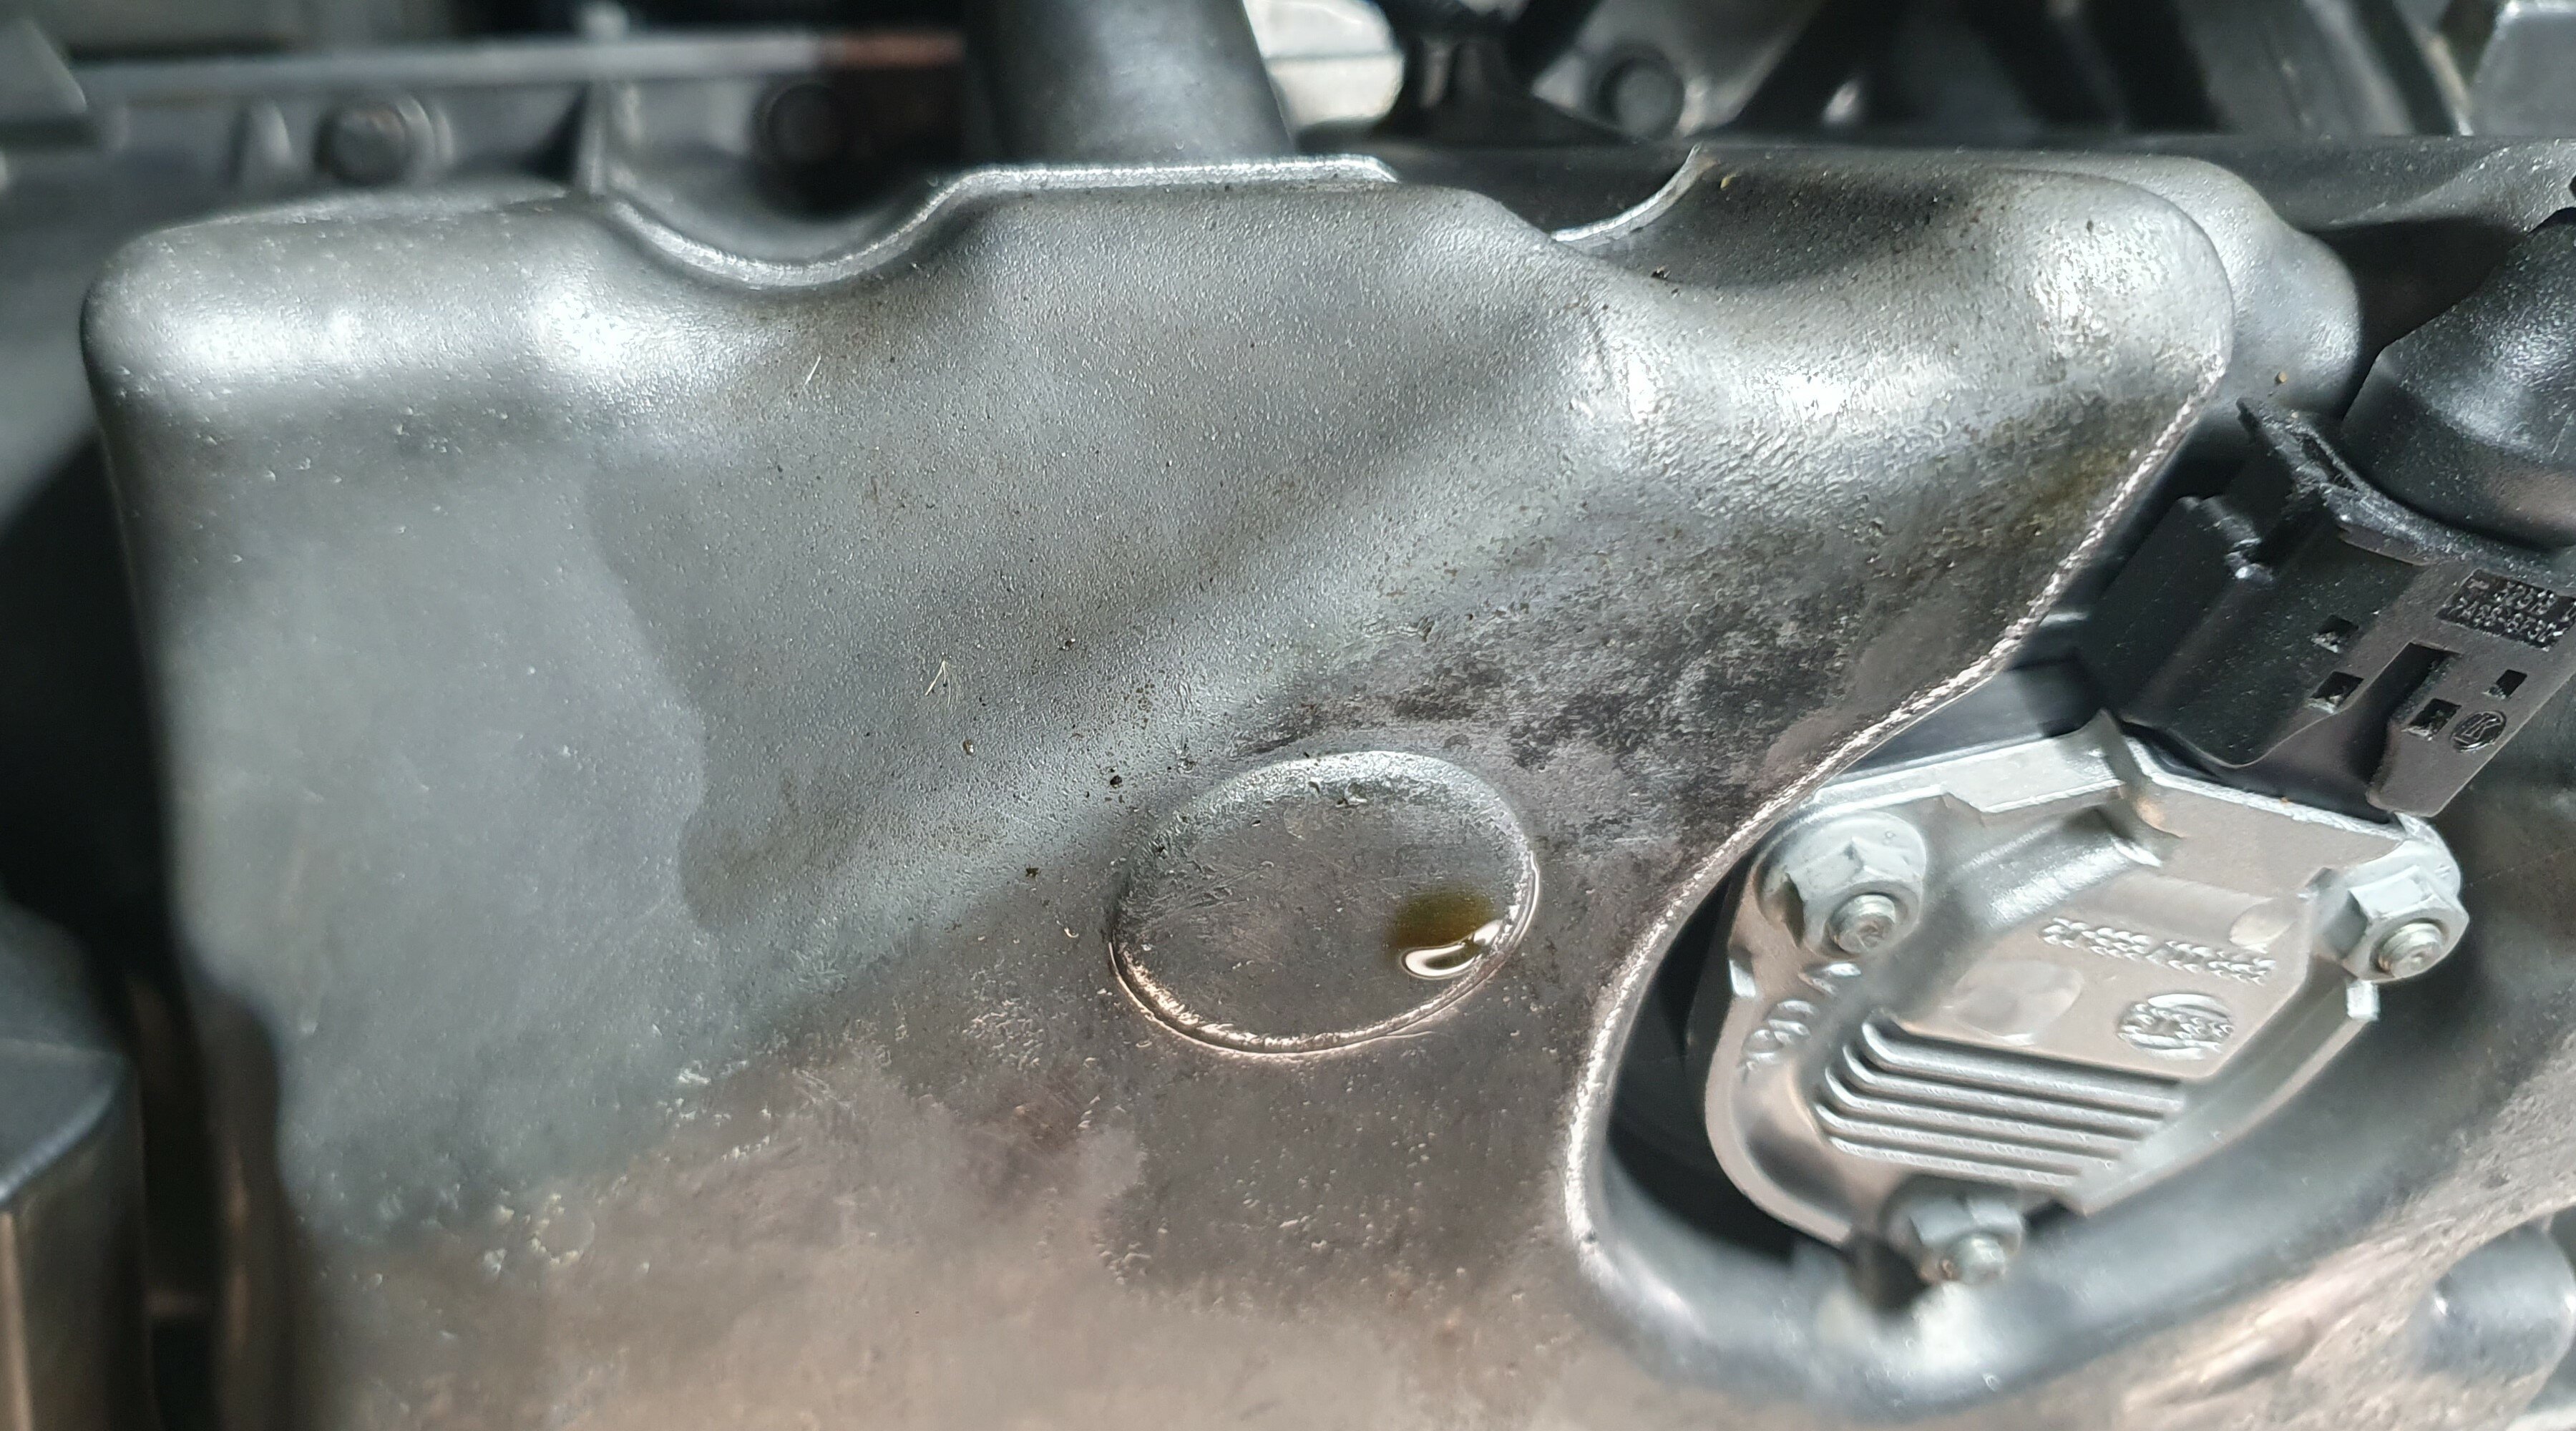
When replacing the diff, I noticed some oil dripping out from the bottom of the CCV valve, running down the return tube and onto the oil pan. Was making enough of a mess to be worth addressing.
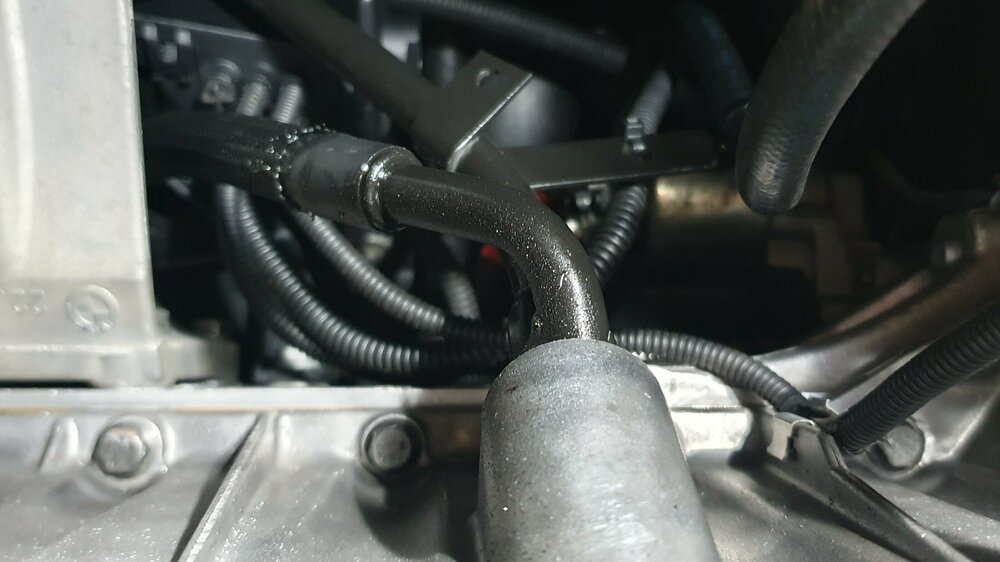

Hard to tell what the main failure point was as 2 of the 3 hose connections were covered in oil as well as it looking like the diaphragm housing had split at the seams and oil was weeping out from there as well. Due to it being the highest up saturated area, I suspect its the latter and the oil just ran down from there, although the bottom return hose also seemed to wobble around excessively so might have been multiple failure points.
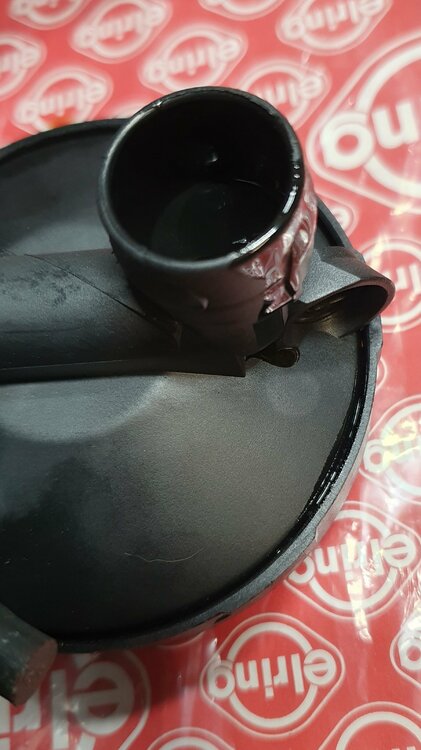
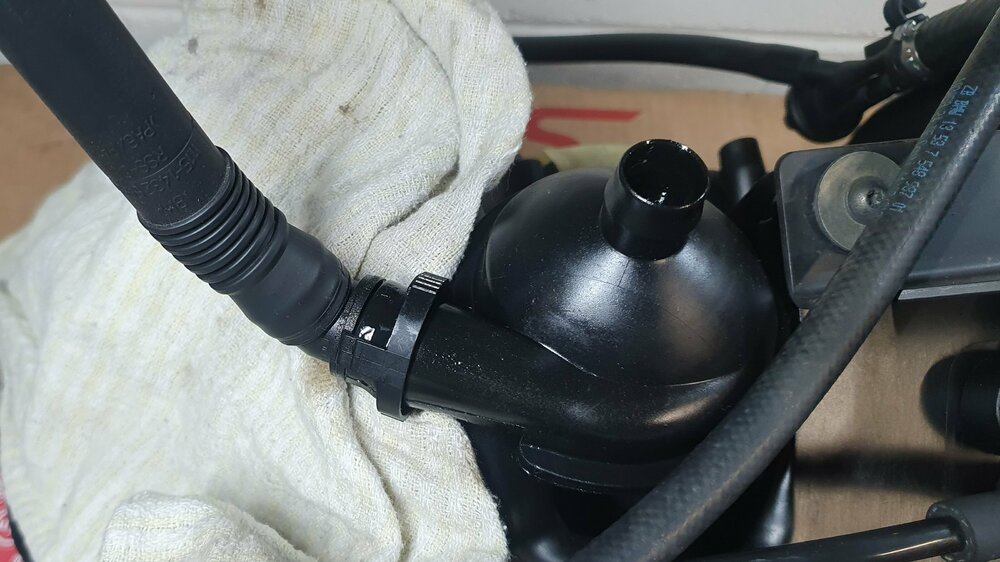
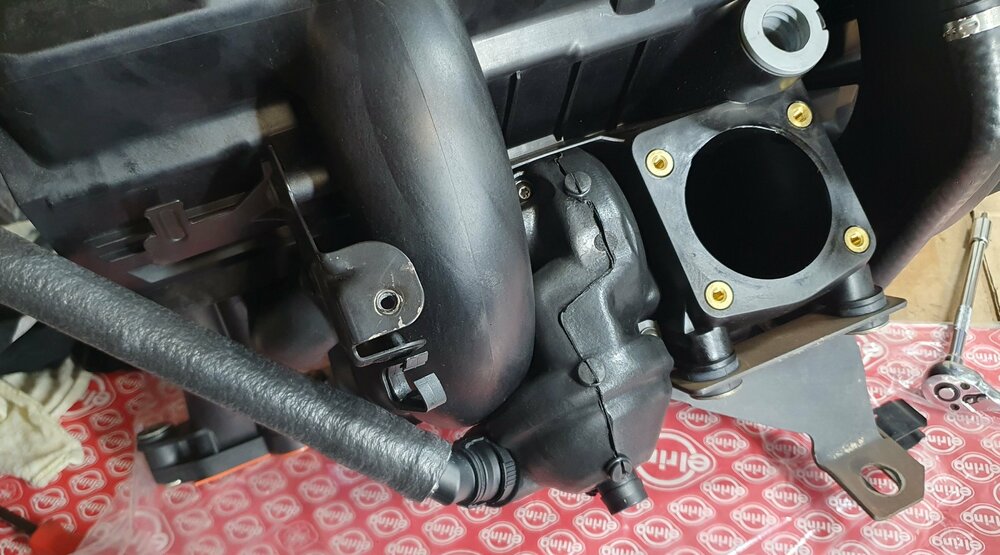
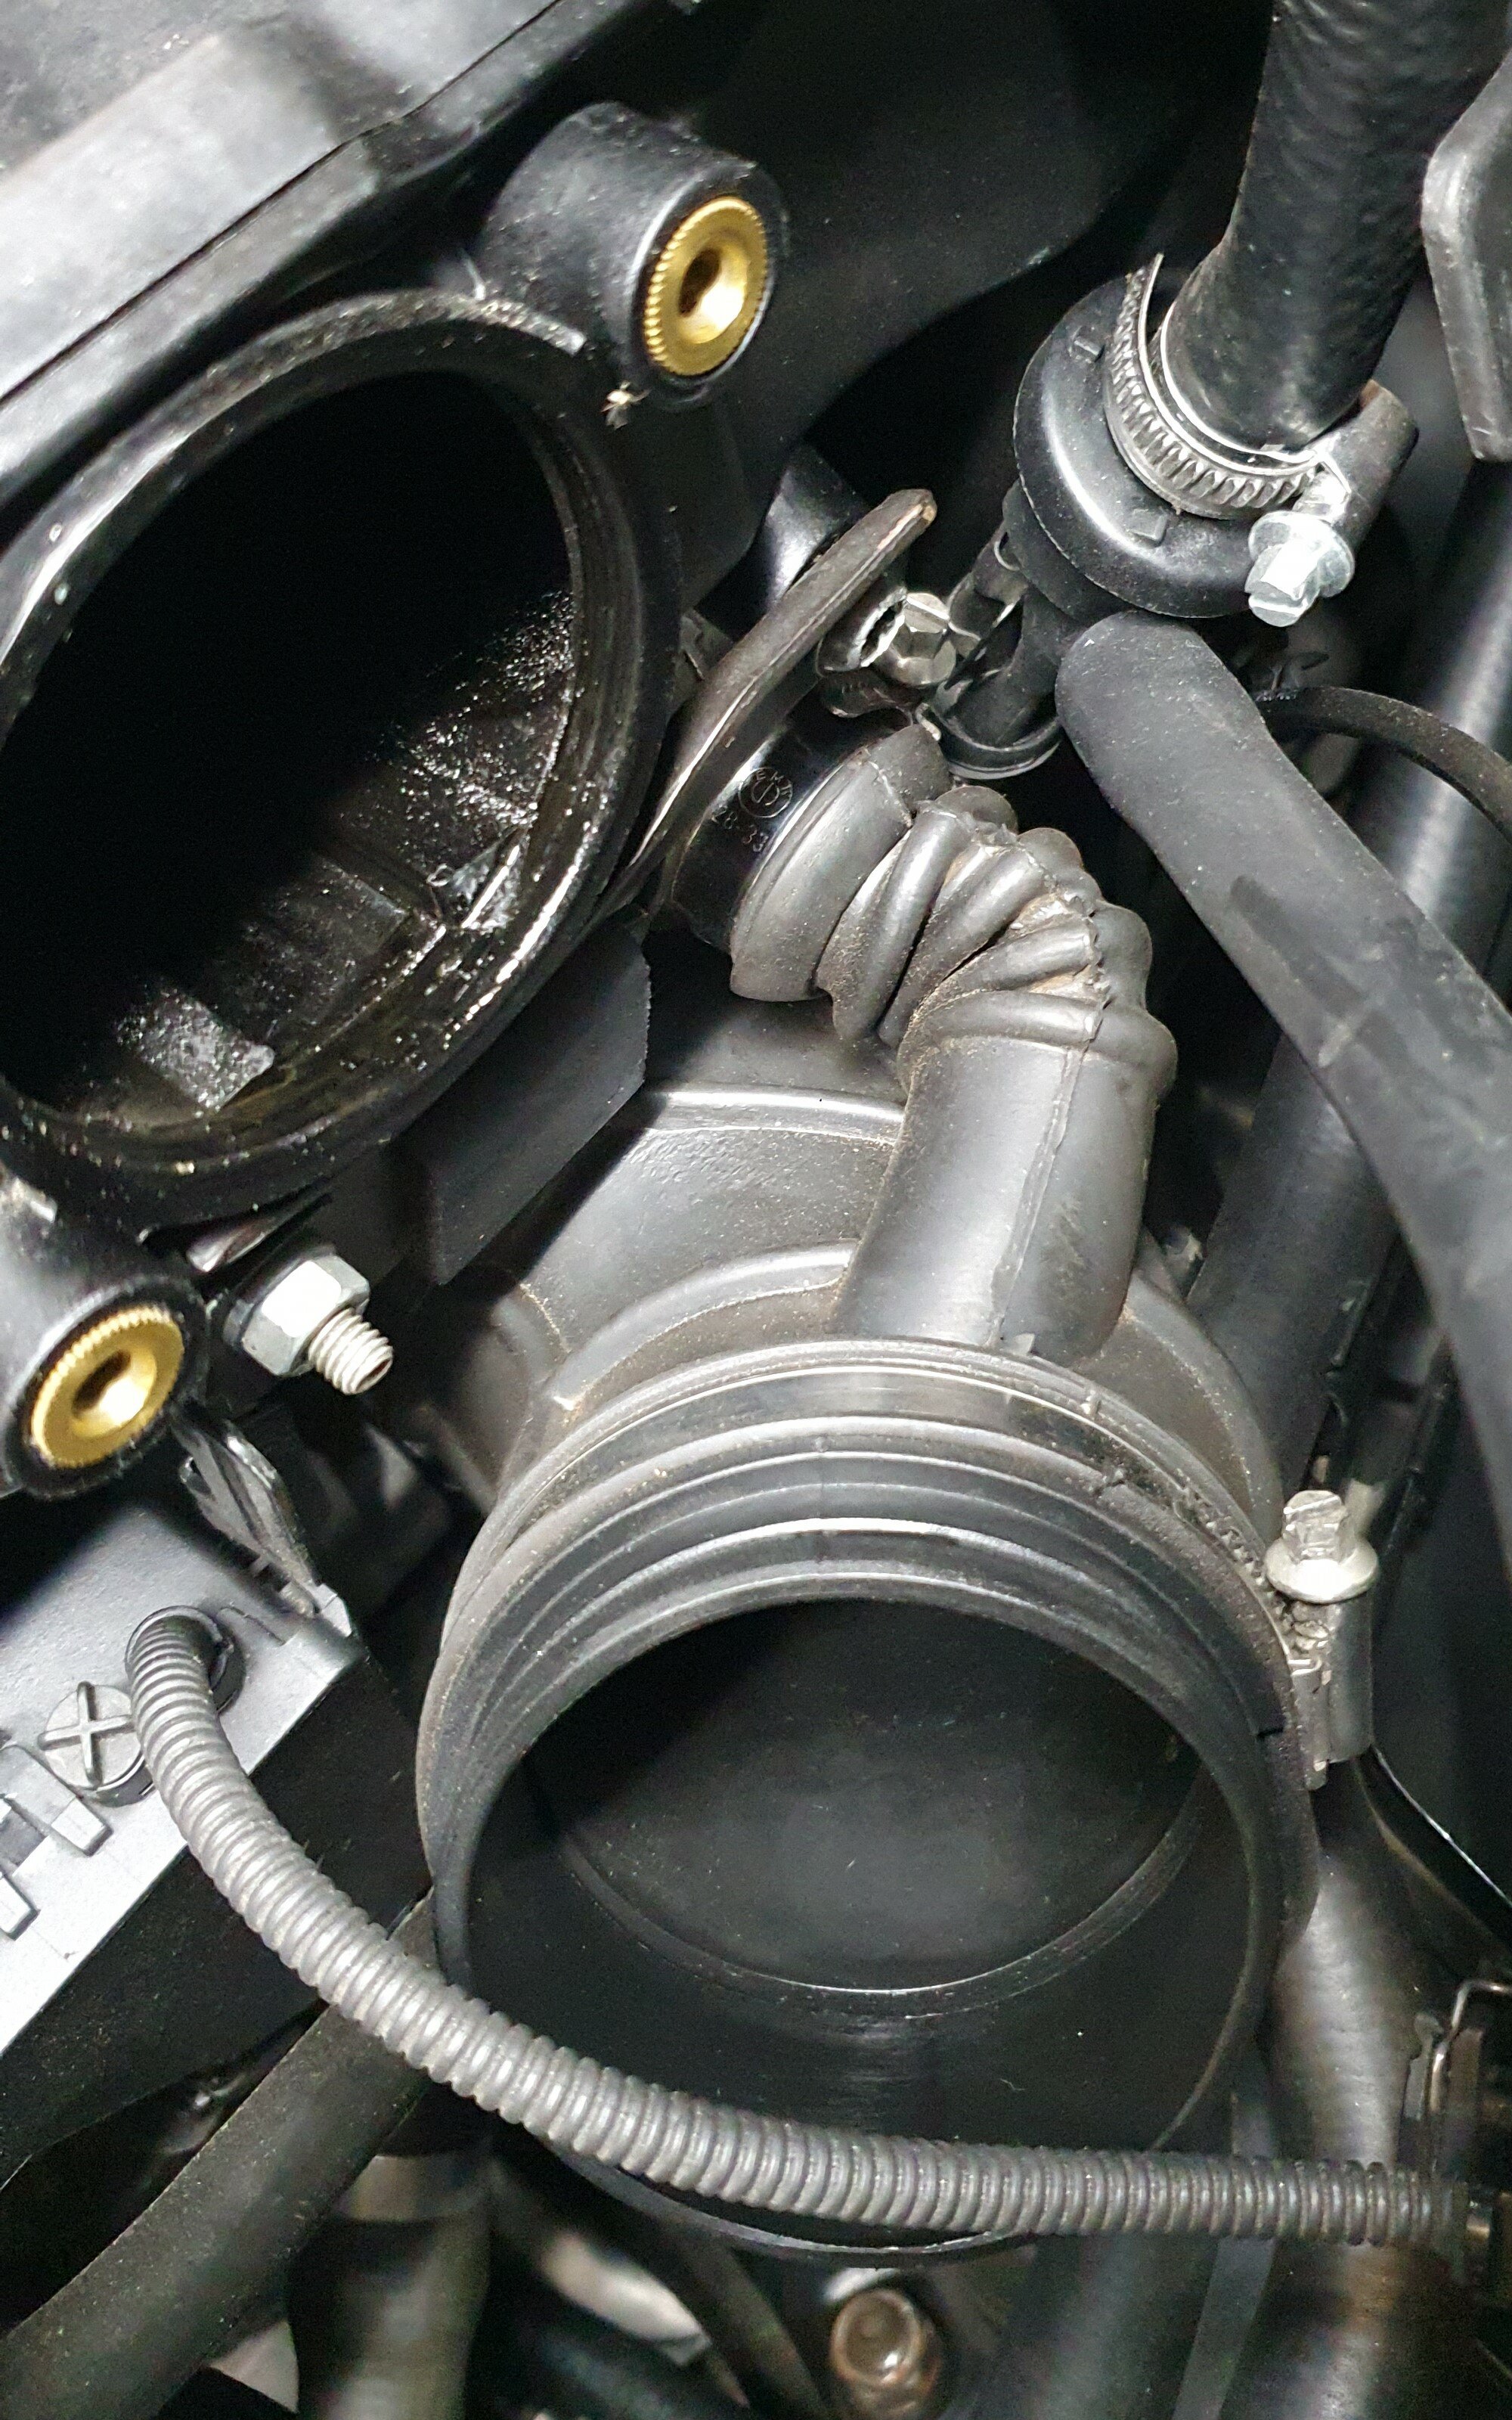
Not awfully happy about it, being a brand new part that failed after barely 2,000km but it is what it is. Had read a bit of negative feedback on that particular part from FCP Euro and it being a bit sketchy how they don't specify who their "OE SUPPLIER" is but figured I trusted them enough to give it a go. Guess the internets were right on that front. Went with a little "hack" I'd read about on E46 Fanatics - buy a genuine BMW Cold Climate Version of the CCV. The cold climate valve is just a regular one in a foam jacket around it, you can just remove it and end up with a genuine CCV with two additional genuine hoses for around half the price of just a regular valve alone. Not sure how the pricing makes sense on that but it has held up for a number of years now so a good tip for anyone looking to do a CCV refurb.
Figured it wouldn't hurt keeping the jacket on for the occasional morning frost we still get around here, summers don't get that awfully hot here either so figured there's no real downsides to some extra insulation. A much tighter squeeze installing it with the added padding, definitely not a job I'd want to do with the intake still on the car. Will monitor how this one holds up, I do have a bit more faith in it being a genuine BMW part. Hopefully it was just a faulty batch and not an underlying issue with the engine producing excessive pressure or something like that.
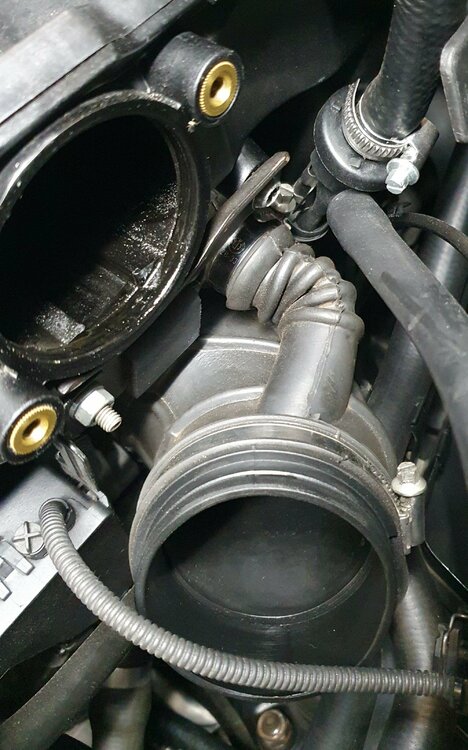
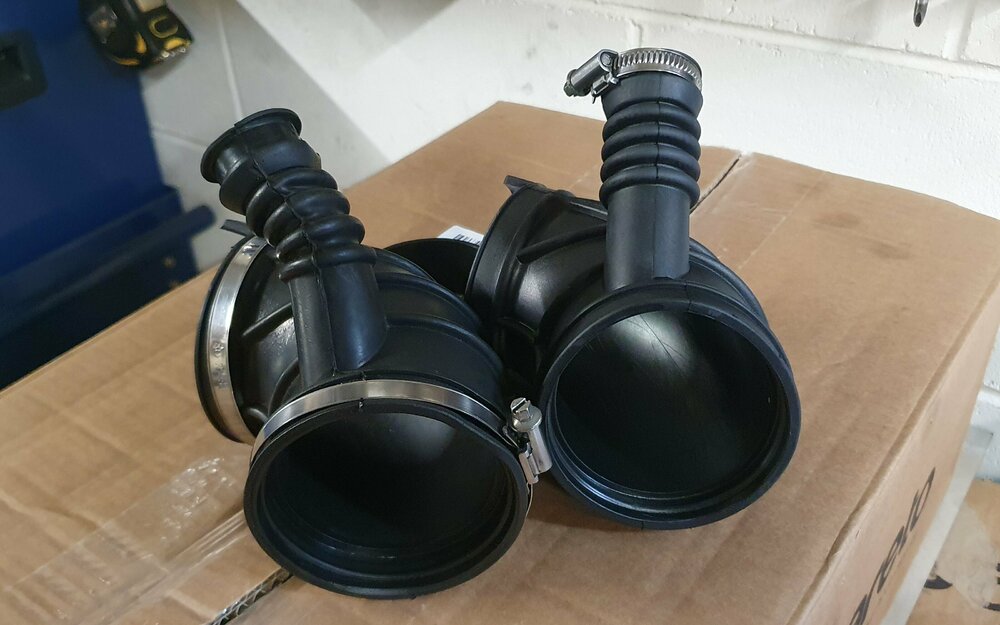
Another bit that annoyed my was the way the lower intake boot sat. No matter how I tried to align it, the smaller offshoot going to the ICV just didn't want to sit right and looked like it was caving in on itself. Decided to replace the Febi hose I had with another genuine part. The quality of the rubber feels better even just looking at it and it does seem to sit straighter. For now anyway.
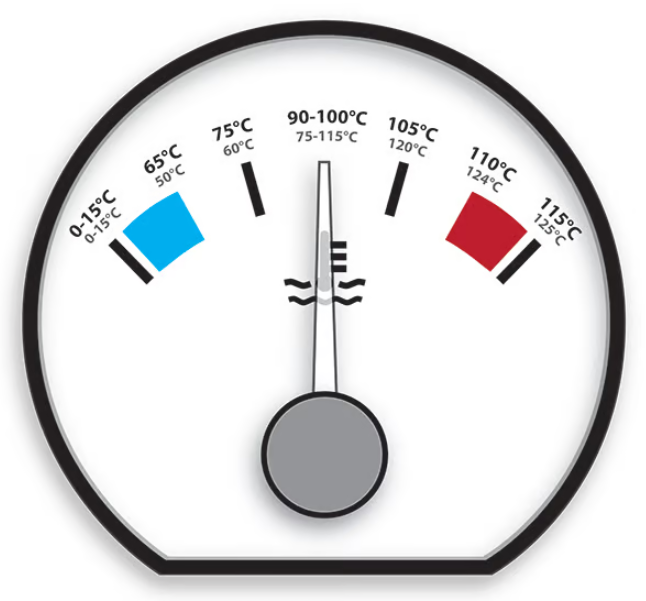
Did a slight mod changing the temperature buffer on the cluster to make it more accurate and informative of potential overheating situations. Basically, with default programming, the temperature arrow pointing straight up indicates quite a wide range of temperature and doesn't give you much warning of the temps going up before it being too late. With very simple coding you can change it to what it is below.
Lastly, replaced the front indicators, both the headlight side markers and the fender ones. Of the front ones, one side was cracked, the other kept getting condensation buildup inside and both the fender ones were foggy and faded. TYC brand ones looked to have good reviews and were cheap enough from Spareto so I ended up getting sets of both clears and ambers. Put the latter ones on for now to switch it up a bit, quite like how they break up the monotony up front. Will see which one I end up sticking with long term and will sell on the other set.
Boxes of new parts keep stacking up in the garage. New additions are an AC compressor, condenser, drier, expansion valve and a full set of O-rings, all ready to get the AC back up and running in time for summer.
-
3
-
-
Yeah, the exhaust will have to come off when removing the gearbox, the old gasket will likely be perished and the old nuts will be well rusted. With luck you'll manage to get the nuts off without the studs breaking off. Use plenty of penetrating fluid beforehand.
-
1
-
-
2 hours ago, Chanderpaul said:Thanks for the advice. Sounds like I will have to find a quiet weekend and get the manifold off. I had a look on RealOEM at the diagram and ended up down a rabbit hole with a huge shopping cart of things. What parts would you recommend as a minimum?
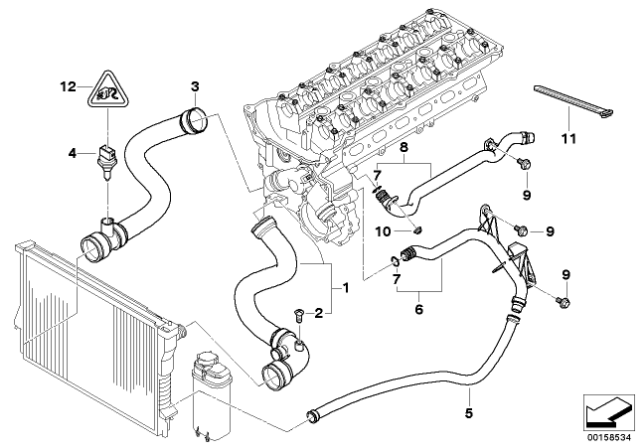
#6 & #8 coolant pipes, Intake manifold gasket. - Are things like fuel injector o-rings and o-rings for the air distribution manifold something I should also consider?
Also does anyone have experience with the 02 Pilot mod or similar with M54s ?
Good old shopping cart blowout, happens every time

I don't think the injector & distributor O-rings usually go bad, they're not exposed to direct oil or particularly high temperatures, but then again they're fairly cheap and you might as well I guess. I changed them on mine but that was part of an engine rebuild and not much was left untouched by the end of it. You could take the injectors to a machine shop and have them professionally cleaned & flow tested whilst they're out, usually costs about $15/each but that's an extra optional step.
Another cheap item to replace is the oil dipstick seal/O-ring where it goes into the oil pan - common source of leaks and the dipstick gets in the way when removing the manifold and will need to come out anyway.
Other stuff - give the throttle body and idle control valve a good clean whilst they're out. Lube up the ICV a bit before putting it back on - good writeup on how to do it at the bottom of the first post on here. The gaskets for those two might be worth replacing although they don't commonly fail - go for it if they're cheap enough.
Check the condition of the DISA valve. The shaft can sometimes break off, there's also a metal pin at the tip of it that can fall down the intake into the combustion chamber and grenade the engine. Haven't seen that happen on any of the E46's I've had but the risk is there. There's rebuild kits out there but that's probably a separate mission (if you end up going that route eventually, be careful to get the right kit as they're different between 2.5L & 3.0L engines and some suppliers don't specify which one it's for). At minimum, replace the DISA O-ring - there is no factory replacement available, the original seal is molded into the body of it, you'll have to cut the old orange one out and get a generic O-ring as a replacement. I got mine from Seal Innovations but whatever O-ring supplier you've got locally should be able to help.
Potentially replace the intake boots if they're showing signs of aging, another common source of vacuum leaks. And then give the MAF a clean with the special spray.
But yeah, as you say it is a whole rabbit hole you can go down and it can snowball real easily. Just depends on how far you want to take it really.
Edit: Can't say much on the 02 Pilot mod, sorry. My old M54B25 did start having oil consumption issues but I went down the engine swap & rebuild route instead.
-
1
-
1
-
-
44 minutes ago, Chanderpaul said:Found a lot of smoke coming from under the intake manifold so I have ordered a full CCV kit. Need to determine if I will take the intake manifold or do the reach around.
Also the breather hose to the rocker cover so had to make do with a coolant line to keep it going.Might be worth pulling it if it's never been off before. Makes the CCV job a lot easier and gives you a chance to do a bit of a cleaning job and also tackle some other jobs whilst you're in there. It's a good idea replacing the two plastic coolant pipes that run under the intake manifold (#6 & #8 on the schematic below). Those always rot and break off at the point where they attach to the block and the head, can often cause annoying coolant leaks that are hard to get to.
Just took off and reattached the intake on mine this past week, not too terrible a job. I'd go that route if I ever need to replace a CCV again.
-
2
-
-
Manual swap 😏
But seriously, transmission mounts, CSB, driveshaft guibo. If you're emotionally attached to the auto box, drop the pan, chuck on a fresh filter & oil.
-
2 hours ago, Harper said:The 3L M54 with the auto 330 diff should make this thing feel pretty lively I think.
Your experience may differ but I found the auto 3.38 diff near enough unusable with the 5-speed ZF. You race through 1st gear way too quick and the car kept lurching when getting on the power too quick from standstill or going over railway lines and such. I just couldn't live with it.
-
They get a bunch of hate the ti's but in Msport trim they actually look pretty tasty, especially the rear. Looks great in white this thing, good find! Very keen to follow the progress.
Are these the same wheel base as the rest of the lineup or will the driveshaft need modifying? Not sure on specifics but I think the rear subframe on these was somehow different from the other body shapes as well.
-
That's the one. Part itself isn't too expensive but getting to it is a bit of a mission so labour will be the biggest chunk of the cost unless you go the DIY route. Ideally, you'd do both sides as well - if one's worn out then the other likely won't be far behind either. Then once it's all apart, you might discover the shocks are worn out as well and have no rebound...
-
Who are those parties you mentioned, if you don't mind me asking?
-
7 hours ago, Arata said:Thanks for the info Vass.
so you suggest to take it to the shop and just get hardness test instead of pressure test?
Basically. The way they explained it to me was that the hardness test will give an indication of whether the engine had overheated at some point or not, and if it hasn't then the head won't have problems sealing or holding pressure, so long as the surfaces have remained flat. You can easily check the top of the block and bottom of the head with a straight edge and a feeler gauge. Have a quick look on YouTube to see how it's done, a feeler gauge will be something like $15-20 from one of the retailers.


The Barbara Chronicles
in Projects
Posted · Edited by Vass · Report reply
Got onto the 330i brake refurb. All disassembled, I had them vapour blasted by a fellow bimmerhead I'd met, saved a good number of hours on the wire wheel.
Gave them an additional scrub and 3 coats of satin black caliper paint.
Then threw on new seals, guide pins, rattle clips, OE rubber hoses and a set of speed bleeder valves, as well as Akebono pads (sorry @Olaf, I'll be careful).
All tidied up and set aside.
Also scrubbed down and major rust off the subframe and control arms, gave it a few coats of rust converter primer and the same satin black paint. Will get onto pressing in the new bushes and bearings next. Front hubs are also now disassembled and awaiting a tidy up.