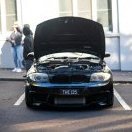
elias 396 Report post Posted February 25, 2022 Hello, Thought id start a thread to keep track of the progress on my 2008 bmw 135i. A bit of background, before this car, I had a 2004 e46 330ci m sport that I bought for $1000 with a crash damaged front end. That was my first project car and taught me most of what I know about cars, I fixed the front end, stripped and restored the entire interior after finding water ingress, rebuilt the cooling system and replaced a few gaskets. Once finished, I felt that it was time to sell it as it wasn't a car I felt like should be modified being somewhat of a classic, I sold it to an e46 collector and began the search for my next project, it had to be small, fun and fast, preferably n54 powered for easy performance gains, decided on a 135i. I bought my sapphire black metallic, black leather interior, 135i in late October, 127,000km bone stock leaking oil, overdue a service, cracked 3rd brake light and broken LED in RHS taillight and a dirty interior, and on the drive home it went into limp mode. Great introduction to N54 life. Not really a surprise when you got it at price that makes it the cheapest low(ish) km 135i for sale. However it wasn't all bad, it had extensive service history, used to be under auto sure mechanical insurance, had the water pump and thermostat replaced, and a transmission service done as well as regular oil changes at 10k intervals, that is until the owner I bought it from got it, who only owned it for a few months. Catching up on things ive done so far: First thing I did was address the issues, scanned codes, limp mode was for exhaust Vanos mechanism, most likely just needed a clean from the old oil. Did an oil change, cleaned the Vanos solenoids and that fixed the limp mode. However I found the following issues; leaking sump, valve cover gasket, OFHG, oil cooler gasket, wrong coolant. Time for an FCP euro order, added PCV valve, top radiator hose, expansion tank hose, coolant flange and also a new drive belt to the list. I worked my way through all of the hoses, gaskets one by one, learning as I went and eventually had everything except for sump done. Valve cover took 2 attempts because I couldn't find a tool for the ground lead studs anywhere, eventually I contacted Ray from HellBM who ended up giving me one for free o massive thanks to him. Filled the cooling system with correct bmw coolant and bled it, so easy with the electric water pump. No more leaks. Gave the car a good clean, cleaned the interior, rewired the paddle-shifters for left down right up, and installed silver interior trim in the place of the woodgrain. Now the sump wasn't a job I wanted to do myself, I don't have access to a garage, nor a car lift so dropping the subframe didn't seem like a fun task, decided to let Michael from Euromotive handle this and got him to install catless downpipes and larger high flowing silicone turbo inlets too while he had the subframe out of the way. Next was coils and plugs as it had started to misfire on the way to the workshop, one of the coils in the car was a Chinese one and ripped in half, leaving rubber stuck on the spark plug after removing it, spent an hour in the car park with needle nose pliers puling bits of rubber out. Eventually got the new coils and plugs in and car ran smooth. Next step after fixing all the oil leaks and misfire was replacing the drive belt that had oil all over it from the OFHG leak. Did that, easier than I thought with the inlet in the way. Also installed pcv valve and oil catch can. At this point car was running smooth and no issues, decided it was time to make some more power, bought a bigger intercooler, metal charge pipe and installed them. Angle grinder came in very useful in making room for the intercooler. Flashed MHD stage 2+ and car felt ridiculously quick. And sounded good with the hatless downpipe and inlets. Then installed some dual cone intakes and blanked off inlets so that DV vent to atmosphere for more noise. Decided exhaust wasn't loud enough to match intake noise, so cut off muffler and welded in 2.5inch steel pipe with thin stainless exhaust tips, sounds better now but will go back and change this slightly. Decided that power was more than enough (for now) and time to move on to some handling and aesthetic changes. Bought a set of 18x8 et38 CSL style wheels (in white which is a unique look) from an e46 and they fit rather well. A little bit of rub on the front guards, but nothing a wheel alignment shouldn't fix. Also bought a set of second hand aragosta coilovers with adjustable front camber plates so that I can fit some wider tires and dial in the ride height as well as firm up the suspension. Got 6 well used dunlop direzza 03g 245/40/18 semi slick tires for free so will see if I can get them to fit to gain some traction. White wheels and a nice clean engine bay: That is where the project currently is at, waiting for a new 3rd brake light as it cracked again so I can take it for a WOF and then install my coilovers and try fit the 245 tires and hopefully get the wheels repainted soon, thinking either shadow chrome, gunmetal, or gloss black... More things coming soon 10 Quote Share this post Link to post Share on other sites
Vass 1054 Report post Posted February 27, 2022 Nice one man, cool to see you digging into it. Love those 1-series coupes, absolute go karts those things. 1 Quote Share this post Link to post Share on other sites
Braydon 40 Report post Posted February 27, 2022 Nice work on getting that all done! 1 Quote Share this post Link to post Share on other sites
elias 396 Report post Posted March 2, 2022 Managed to make a little bit of progress between uni lectures, car passed its WOF, dropped 2 wheels off to have the 245 semi-slicks fitted so I can test fit them once I try install coilovers hopefully this weekend. Still need to find a pair of C spanners to adjust the coilovers with somewhere. Also got to try figure out if the rears are true coilovers or if the spring goes next to the strut, this suspension stuff is new to me so not entirely sure just by looking at them... Also cleaned the surface rust off and painted the vacuum canister bracket. 2 Quote Share this post Link to post Share on other sites
elias 396 Report post Posted March 8, 2022 A bit more progress on the 135, managed to install the front coilovers, wasn't too difficult, trickiest part was getting the old struts out but with some spring compressors and a bit of force they came out eventually. Installed the new coilovers with the camber plates set the the maximum amount of negative camber to try fit the 245 tires. Left preload untouched and shortened the struts 25mm compared to the original ones to account for the much stiffer spring rate. Tried to fit the front wheels but they wouldn't go on, tires didn't clear the coilovers, was not very happy after spending hours researching fitment and trying to find the ideal offset for it to not work. Next day, come up with a plan, preload the springs more/wind the collar up higher to get the spring to sit above the tire so it would clear, tried that, couldn't preload them enough to get them high enough. New idea, remove the helper spring to shorten the length of the springs. So coilovers had to come back out, bit of a pain, removed the helper springs and reinstalled them. Maxed out negative camber on the camber plate and the strut towers, and tried to fit the wheels/tires again, success they now cleared the struts. Did this both sides, dropped the car off the jackstands and it looks like it may just work! Desperately needs a wheel alignment as all the camber has caused a lot of toe out. Haven't driven much to test for rub but will try install Rear suspension next, then get a wheel alignment and take it for a drive on some bumpy roads and see how much rub I get. Might have to go down to a 235/40/18 tire or ideally even a 245/35/18 but those are hard to find. Ride height is still a bit high but I don't know how much I can drop it before the wheel/tire starts getting close to the spring assembly again, we will see, rear suspension next! Slow progress but with how little room there is in the front guards a 245 square set up is tricky to fit. Will be interesting to see if the 245s will fit on the rear, im fairly certain I will need a guard roll and some more negative camber, hoping that it will handle a lot better with the stiffer suspension and grippy square set up. For those wondering wheel sizes are as follows: 18x8 et38 245/40/18 dunlop direzza 03g any higher offset and it won't clear struts, any less and wheels will poke like crazy, square shoulder of these tires don't help. 1 Quote Share this post Link to post Share on other sites
elias 396 Report post Posted March 11, 2022 (edited) Rear coilovers went in, had a bit of trouble dropping the lower control arm on one side but eventually got it. Shocks went in pretty easy both sides, put the springs in too and all seems well. Only issue is that the springs are a bit short, even at maximum preload they aren't entirely tightly held in place at full droop, they won't fall out but not super tightly held in place. Rears are very low compared to front, tried raising ride height by extending the strut but can't spin the lower half without the whole thing spinning... something to figure out another day. Rear tires rub a lot, as to be expected, booked in for wheel alignment at Sparg's autotune on Tuesday, then will get the guards rolled and give the 245s another test fit, otherwise will go down to 235s. Still need to figure out some adjustments for the rear, maybe find a longer spring that I can buy somewhere, or how to set these ones up prolly, if there's anyone in auckland that knows their suspension stuff and would be able to help that would be appreciated, happy to supply some beers or cash for your time. Some work to do still, need to find a flat bit of ground somewhere to take some ride height measurements, but progress none the less. Edited March 11, 2022 by elias Quote Share this post Link to post Share on other sites
qube 3571 Report post Posted March 11, 2022 You could try the guys at autolign in Mt Wellington if its near to you 1 Quote Share this post Link to post Share on other sites
elias 396 Report post Posted March 15, 2022 Some more progress, car was in for its wheel alignment this morning, all taken care of nicely to custom specifications by the legends at Sparg's Autotune in glenfield. Car feels much better now, still a little bit wobbly side to side with the coilovers, probably due to subframe bushings now being softer than the suspension... may need to replace those at some point. Next up is rear guard roll, then try fit the semi slicks again. Also need to look into possible changing springs, seem a little too stiff on the front especially, and the rear springs bit short, car is a bit too low and preload is maxed out. Need to adjust ride height slightly and get the proper wheels and tires on, so no shortage of things to sort out! Quote Share this post Link to post Share on other sites
elias 396 Report post Posted April 1, 2022 After a bit of research decided to replace the 12kg/14kg f/r springs with 7.5kg/12kg f/r to achieve a better front rear balance and smoother ride overall, 12kg is ridiculously stiff for the front. Got a pair of 12kg 220mm length bc coilover springs and installed them in the rear along with some new rubber dust boots, cut some spring insulators out of a piece of 3mm rubber sheet and the rear end is now much quieter and feels a lot better over bumps, still quite stiff but not harsh. Ordered front springs from speed factor in tauranga which should be here soon hopefully. Once those go in it'll be time to sort out the ride height and finally get the guards rolled, MTS in wairau have told me they'd call me back about 5 times about getting it booked in, mag and turbo's guard rolling technician is on holiday so might just take it to auto stance... Also installed a small carbon fibre boot lip spoiler. 1 Quote Share this post Link to post Share on other sites
qube 3571 Report post Posted April 1, 2022 Had a little chuckle at “guard rolling technician” haha If you have the time and patience I suggest giving it a go yourself. I think a few members on here might have a roller to lend you if you ask. 1 Quote Share this post Link to post Share on other sites
elias 396 Report post Posted April 1, 2022 haha fair enough, that was their words not mine. I do have the time and patience so maybe I should give it ago myself but I don't know if I trust myself to do it neatly without destroying the paint, they do need to be rolled quite a bit to fit the tires that I want to, ill see how busy auto stance is, but definitely something to consider. Quote Share this post Link to post Share on other sites
elias 396 Report post Posted April 6, 2022 (edited) Decided to have some fun today and do some data logs and 0-100 times (started raining just as I left home :/) Thought I heard some wastegate rattle on start up so decided to try do some logs to see if turbos were leaking boost yet but didn't look too bad, boost was pretty close to target. 0-100 times were very bad, mostly due to the lack of traction and also the fact that the car was on the 95ron map, only targeting about 17.5psi of boost. Best time I managed was 5.8seconds using about 80% throttle, spinning 1st, 2nd and 3rd gear and moving sideways about as much as forwards, will need to try again on dry roads with some better tires, good fun though trying to hold it straight. No check engine light after consecutive pulls though which was nice. Edited April 6, 2022 by elias 1 Quote Share this post Link to post Share on other sites
elias 396 Report post Posted April 8, 2022 Think I found the cause for the wastegate rattle, bad vacuum line to the vacuum canister. Will give it another go today Quote Share this post Link to post Share on other sites
Jacko 2241 Report post Posted April 10, 2022 I did a 5.4s 0-60 with 130, its definitely all about putting it down - LSD and decent tyres make all the difference. Quote Share this post Link to post Share on other sites
elias 396 Report post Posted April 10, 2022 (edited) yeah definitely, good tires will make all the difference, car now decided to develop a combustion misfire on all bank 1 cylinders so will need to sort that first. Trying to figure out what could cause a misfire to occur on all of bank 1 at the same time, was thinking O2 sensor or maybe DME mosfets. Mosfets would make sense as rear tires were pretty average and traction control was stepping in every few seconds of some rather spirited driving, maybe it had to work a bit too hard and fried itself... that being said I believe its MSD81 ECU which doesn't seem to really have this issue... really hoping its not injectors. Edited April 21, 2022 by elias spelling Quote Share this post Link to post Share on other sites
elias 396 Report post Posted April 21, 2022 (edited) Tried swapping coils and plugs from bank 1 to bank 2, but to no avail, still misfiring, eventually got code 29DC injector cutout so doesn't seem to be cylinder specific. Suspect fuel pressure issue. Looking through the MHD data logs of the misfire, the fuel low pressure sensor reading drops before the rail pressure crashes which led me to believe that the LPFP was failing. Bought a replacement (low km OEM from a fellow enthusiast) swapped it in which was a rather interesting procedure as my tank was full, so had to siphon it out first and ended up breathing in petrol for a god hour or so as some of the plugs/clips on the pump were very stubborn. Eventually got it all pieced back together but issue still persisted. Decided that maybe I need a workshop with ISTA to have a look at doing a test on the HPFP, in the meantime I replaced some vacuum lines, didn't do the wastgate ones as they are almost impossible to reach, seems like you would need to remove the heat shield but the back most bolt is blocked by the steering column... On my way to Michael at Euromotive workshop to try and help diagnose the misfire/injector cutout issue, it became quite evident what the issue is. I had MHD data log going while driving to keep an eye on things and try avoid any damage to the engine, going up the harbour bridge (very gently so it doesn't misfire) rail pressure dropped lower and lower eventually sub 100psi and the car went into limp mode, and just ran the rail pressure off the LPFP, so about 80psi. This time low pressure sensor readings remained unaffected so it was evident the HPFP was at fault. Got to the shop, scanned codes and it confirmed HPFP as the issue. Managed to find one out of a n55 5 series (newer version of HPFP) at a wrecker for fairly cheap compared to new prices so installed that and car drives well now, rail pressure responds much faster to throttle input than it ever has. Still need to roll my guards and put the proper wheels on... but at least the car runs properly again, quick drive down one of my favourite roads in the area. Edited April 21, 2022 by elias 4 Quote Share this post Link to post Share on other sites
elias 396 Report post Posted April 25, 2022 Finally got around to changing out the front coilover springs for some 7.5kg springs, previous ones were 12kg, far too stiff for anything other than extremely smooth surfaces. Put some helper springs in too to get correct preload. Much smoother ride now with better front and rear spring rates, still need to dial in ride heights etc but a very nice setup now, stiff but not excessively harsh. Next up guard roll, if anyone on here in auckland has a guard roller I could borrow for a box of beers or some cash that would be much appreciated, can't seem to find a decent shop to do it, auto stance said nah can't do much without even taking a glance at the car... 3 Quote Share this post Link to post Share on other sites
elias 396 Report post Posted May 9, 2022 (edited) Made a bit more progress, been very busy with uni assignments recently, redid a part of the exhaust, my welding isn't particularly good, and this thin walled steel with flux core isn't the nicest thing to weld either, but looks a bit better than before, painted it so it doesn't rust as quickly. Also decided to take matters into my own hands and bought a guard rolling tool, will give the rear guards a go tomorrow and see how flat I can get them, and then maybe bit more negative camber when I go for a wheel alignment after adjusting ride heights and they 245s may just fit. Also acquired a pair of 235/40/18 fallen rt615k+ tires for the front, the 245s maybe be a bit too hard to make work on the front, don't want them to rub in corners. Will take a fair bit of rolling to work... Edited May 9, 2022 by elias 2 Quote Share this post Link to post Share on other sites
elias 396 Report post Posted June 5, 2022 (edited) Haven't been able to do much to the car recently, but took it out for a drive and took some photos. Subframe bushings, ride height and wheel alignment next up on the to do list, and hopefully a limited slip diff a little bit later on... Edited June 5, 2022 by elias 2 Quote Share this post Link to post Share on other sites
elias 396 Report post Posted June 8, 2022 Ordered some new subframe and diff bushings for the car, should be here in a week or so, hoping to get the subframe bushings installed soon and hopefully fix the sloppy/vague rear end. Should be a fun job... Diff bushings will go in later on, when I hopefully put in a Mfactory limited slip diff soon. 3 Quote Share this post Link to post Share on other sites
M3AN 4113 Report post Posted June 8, 2022 Great work, and persistence, Elias, this is coming along nicely! 1 Quote Share this post Link to post Share on other sites
elias 396 Report post Posted June 13, 2022 (edited) Rolling the guards on this car proved extremely difficult due to the fact that the lip is two layers of metal which is extremely stiff and hard to bend and the seam sealer stud in behind the lip. Removed the seam sealer with a wire wheel on a drill, very messy job, got the rubber dust everywhere, not pleasant in the eyes. Gave it a go with a guard roller and heat gun, 1hour later and no change. Decided to change up the approach and got a rubber mallet, with some heat and eventually managed to hammer the inside lip a lot flatter. Not a huge amount of room gained, but definitely a noticeable change, won't do anymore because I don't want to risk warping the guards. Will touch up the paint where the wheels rubbed it off and where I took it off with the wire wheel, and then fill the small area behind the lip back up with seam sealer to make sure no moisture can get trapped in there and slowly rust out the quarter panel. Then will just need to trim back the guard lining a bit to keep it away from the tire. Will most likely go to a 235/40/18 tire and adjust camber as necessary. Subframe and diff bushings also arrived today, only took 4 business days all the way from the US which was very quick. Would definitely recommend condor speedshop, great to deal with, answer emails quickly and products seem very high quality, machining is very precise with an excellent finish. Went with the UHMW bushings with aluminium inserts, they split into 2 pieces so should be much easier to install than oem ones. Looking forward to seeing how the car feels once I get them installed. Edited June 13, 2022 by elias 1 Quote Share this post Link to post Share on other sites
elias 396 Report post Posted June 15, 2022 (edited) Big day on the tools today, installing the new subframe bushings. Managed to borrow a subframe bushing tool to remove the OEM bushings. Overall the job was a lot easier than most people make it out to be. The hardest part was removing the OEM bushings. Easiest way I found was to start with the rear bushings, remove the rear subframe bolts, loosen the front mounting bolts slightly, then put a jack under the subframe just behind where the diff is and gently lower it until there's enough room to get the tool in between boot floor and subframe. Then spray a lot of lithium grease in the gaps in the subframe, and pull the bushing out. For the front ones, loosen the rear mounting bolts, place the jack under the front of the diff, remove the front mounting bolts and gently lower jack till there is enough room. Then remove the bushings. Installing the new Condor speed shop UHMW bushings was extremely easy, I placed them in the freezer first thing in the morning, before getting started on the car. The bushings split into two pieces, one goes in from each side and then the aluminium sleeve goes down the hole in the middle. I sprayed some more grease into subframe, and then simply pushed the bushings in by hand, took all of about 30 seconds per bushing. Then just bolted everything back up, torqued to spec and job done. Only issue I came across was the brake lines, I lost a lot of fluid, but I was planning in doing a flush anyway so will need to flush/bleed the brakes tomorrow, got some Motul rbf600 which should do nicely. Then give the car a clean and a test drive. Edited June 15, 2022 by elias 1 Quote Share this post Link to post Share on other sites
M3AN 4113 Report post Posted June 15, 2022 How did you lose brake fluid replacing bushings? 1 Quote Share this post Link to post Share on other sites
elias 396 Report post Posted June 15, 2022 (edited) 24 minutes ago, M3AN said: How did you lose brake fluid replacing bushings? good point, probably should've explained a bit better, I undid the brake lines that are attached to the subframe, in order to not damage them when lowering the subframe, they are hardlines on the one side and don't have much flex, didn't want to snap them when moving the subframe around to get the bushings in and out Edited June 15, 2022 by elias 1 Quote Share this post Link to post Share on other sites