Leaderboard


Popular Content
Showing content with the highest reputation on 03/23/17 in all areas
-
3 pointsWould be a cool project. A big job however. Have you done an engine swap before? Must consider these parameters: Custom engine/gearbox mounts - how to design them, what they will be made from etc Positioning the engine as far back and low as possible while keeping the driveshaft angle within the fine tolerance the joints require. Setting the position to dictate where the manual shifter will sit is also something to consider. Custom driveshaft modification to adapt to the 560 trans prop. Engine oil sump, M73s are a front type so would clash with the subframe / steering rack. Custom engine headers, stock ones might work, but often don't without modification. Need to also factor in the steering shafts proximity on the drivers side. Might be reasonable space given its a 60 deg block. Wiring wiring wring Fuel lines, power steering and coolant lines, fairly simple but depending on fittings you'd have to have some custom made to suit (namely power steering lines. A 330i is a good option in M spec trim as you already have the bigger axles, 188mm diff, larger hub bearings and brakes than the smaller engine models. That said I think the 325i, 328i get similar specs afaik. Budget and cost is the other factor, doing this properly wouldn't give you much change left out of $20,000. My own personal thoughts say that for the amount of work required there are better options than an M73B54 engine, while the V12 aspect is unique and interesting, it's fairly low on power for a 5L engine, 320hp isn't a lot in a heavy E46 body, that said, the torque is pretty good at close to 500nm, so it will shift but to what degree of excitement? Keep in mind they only rev out to 6000rpm so aren't a screaming V12, more so a lazy big 6 cylinder given their signature exhaust note. Wish they were more like the Ford/Aston 5.9 V12! For more performance gains, at a lesser cost and with bolt in options you could use: S54B30 M3 engine. Would bolt in. Supercharging (twin screw) M54B30 would yield excellent cost effective results. V8 LS swap using parts from Vorshlag USA header and mounting kit. Supra 2JZGTE, an easy 400hp / 500nm powerhouse without really doing a lot.
-
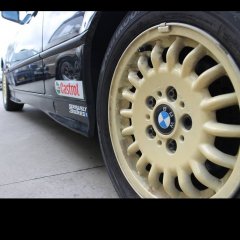
2 pointsNot a lot has happened lately, But we will try and get those E46 325i brakes on, and maybe the LCAs. Oh I did score a half cage! With some modding itll fit great! Needs to be triangulated and a harbess bar put in. But that points us to the direction of harnesses and that means not road legal without being a pain so let's see what happens. Wheels to get painted ice white, and the smokers teeth yellow wheels will be gone.
-
1 pointYeah its hopeless, I was spinning through 3rd and that was feathering the throttle with r888's. Was really surprised at how low traction was compared to on the streets.
-
1 pointyou will have to try all these things , also , how good are your tyres? how quickly do they get grip etc . trial and era ,
-
1 pointI lifted my car and removed some of the stance nation camber from the front end so its a little more driveable and so I don't draw attention from the boys in blue while daily driving it. Cert guys in chch are both away until April so may have to take it to Temuka or Dunedin to get it done before then! The fitment in the front was nice while it was slammed out and had mad camber (Still had another 15mm lower to go on the struts too!)
-
1 pointthanks for the insights Jon, it must be an exciting time preparing for a new model launch. I'll certainly tempt myself with a test drive. I'm still getting used to the quantum leap of the e60 over the e46, the G30 might blow my mind!
-
1 pointThere are quite a few in-country already, every dealership got at least one 530d model as a demonstrator. The first customer 540i models have arrived, and the 520d is not far away now. Wingers Welly demo went up to Manawatu and Hawke's Bay for their launch events as they are part of the same group which may explain why it wasn't on site when you were there. Ask for a test drive - the new tech is pretty impressive.
-
1 pointHave a look at Rays (HellBM) E46 M3 Convertable with the E39 M5 engine. He used the complete E39 cross-member steering and suspension in the E46 (with a lot of fabrication work). Given E38's and E39's are very similar, this would be you best guide to what to expect. Someone else on here recently put an M60 into an E46 wagon, and made a neat dry-sump setup to drop into the E46.
-
1 pointUpdate #12 Couple of weeks since I last updated here! After epoxying the plates and waiting for them to set they looked like this: Notice how the epoxy has turned purple now that it's set! Cool visual indicator... Really pleased with how the epoxy process has gone. We got good beads around the edges of the plates, without too much excessive spill, meaning we got the quantity of epoxy about right. With the epoxy set, we next cleaned up the plates and excess epoxy with the die grinder, cleaned the surface with acetone, and then undercoated the bare metal surfaces with PA10. Once the PA10 undercoat layers were done, we seam sealed all the edges. This left things looking like this: I won't claim to have done the world's most professional job with the seam sealer, the finish isn't perfect, but it is completely functional. :thumbsup2: With the seam sealer drying, we moved on to pressing the new bushings back into everything. :taser: First up was the subframe. We used my friend's 6 ton press to press the subframe bushes - given it fit in the press. We used a turned brass puck to spread the load across the surface of the bushing. And hey presto! In short order, the subframe looked like this: :thumbsup2: The front diff bushing was a PITA. Used the same process as getting it out. Took ages. Glad I don't have to do it again for a long time. :raspberry: We did the upper control arms in the press as well - all pretty straightforward, and with the trailing arms we did the bushes and the ball joints using the threaded-rod approach. They all went pretty smoothly - no major issues. Didn't get photos of everything, but here are the trailing arms: And here's the subframe, with upper and (new) lower control arms reattached: It's all coming together :parrot: During the week, Dad got some colour-matched top coat for the now reinforced RACP mounts. Here's the end result - very pleased indeed with how it's turned out. It was a process that I wasn't planning on having to go through, but having done it I can say it went much smoother and easier than I was anticipating, and I'm really happy with the end result. There's a couple of touch ups still to do with the top coat, but really pleased with how it's looking. Then there was last weekend. Putting the fuel tank back in. It was a comedy of errors and circumstances (I didn't see it as a comedy at the time :facepalm:). Steps to repeat our experience on Saturday. Decide to put fuel tank back in car. Observe that the hose clamps you have on order for the fuel tank haven't arrived. Decide to go to automotive store to get short length of hose to replace the piece you had to cut to get it off, and hose clamps. Get to automotive store and discover entire retail area is closed due to power cut. Drive through terrible traffic (because of the power cut no traffic lights are working) to another automotive store. They didn't have what you wanted anyway. Go to racing supplies store who very kindly give you the piece of hose you need for free. Go to marine store who have hose clamps. Go home. Discover that BMW didn't note on the technical diagram that one hose clamp is smaller than the rest -_-. Go back to Marine store. Go home. Get fuel tank under car and start hooking everything up. Notice that a piece of hot weld has bounced across the garage and landed on fuel return pipe. Note that fuel pipe has hole in it. Decide that today was not the day for fuel tank installation. Give up. TL;DR: Sometimes it's better to just stay in bed. On the plus side, that's the biggest problem we've had this entire project. Dad picked up a 6x1 joiner on Monday, and hey presto, fixed. We'll wrap it in foam before reinstallation so it's not vibrating about. And here's a couple of pics of the fuel tank before the attempted installation, along with the replacement piece of hose. During the week Dad also assembled the rear brake callipers: Parts ready to assemble: Piston, seal and dust boot installed: Ready to install guide bushes: Guide bushes installed: So definitely getting there. This coming weekend will be fuel tank installation :shifty: and reassembly of the rear end. Meaning that the weekend after we'll be onto disassembly of the front end. :parrot: