Leaderboard
Popular Content
Showing content with the highest reputation on 03/04/14 in all areas
-
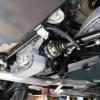
2 pointsI have been in 2 minds as to whether I should post my experience with the dreaded E46 M3 chassis crack, on one hand it is negative for resale purposes while on the other it is potentially good information for fellow Bimmersporters and I reckon the repair is up to any scrutiny. I found the crack after viewing a Reddish Motorsport video, I had looked before (with the entire subframe out) but I did not look in all of the right places so I don’t know if is new or was existing. In my case the crack was located in the classic spot (i.e. left hand rear subframe mount at the floor crease). Why do our cars fail here? Don’t know but previously we could comfort ourselves that very few cars were affected but it seems to me that as time goes on (i.e. km’s) the instances increase exponentially. After stripping the vehicle underside and inspecting all of the subframe mounting points I found that there was only 1 crack and that it was fairly small (30mm long). Based on this I decided to weld the crack, fit reinforcing plates, inject BMW structural “foam” and repaint the underneath of the car. Bearing in mind that the size of the crack (small) + the internal and external reinforcing being applied I chose to epoxy the reinforcement plates on rather than weld them. I had the necessary gear/skills to weld and it would have been cheaper but I felt it would have been too “invasive” when all things were taken into account. I also decided to use the structural foam in the LHR and RHF cavities as these are the 2 places where the cracking normally begins. This is because the LHR subframe mount is subjected to tensile stress (from motor induced rotational torque (anti-clockwise look at the rear of the car) and axle induced rotational torque (anti-clockwise looking at the right hand rear wheel). The RHF subframe mount is subjected to compression stress (i.e. the opposite of the LHR). The other 2 mounts (and ultimately the whole floor panel) really only seem to fail once these 2 stressed mounts have failed. There are plenty of DIY’s out there so I haven’t gone into the full detail here, a few things to note though. Regarding the rear mount, since I had the subframe out I chose to blank off the rear cavity (using expanding foam) from the bottom of the car rather than inside the boot as per BMW’s T.I.S. Regarding the front mount, I spent a lot of time estimating the size of the cavity that the mounts are encased in and found that it is quite large. This prompted me to use expanding foam to keep the structural epoxy localised around the mounting point, this is not something I have seen done before. A lot of people use a hand actuated epoxy applicator gun but this is very hard work, instead I made up a mechanised unit as per the following photos. Regarding costs the BMW structural foam was $263 per pack (2 x 420ml tube pairs) – I brought 2 packs. The reinforcement plate epoxy was $40/tube – I brought 4 but could have got away with 2. If anyone is interested I have the gear I used for this job available (diff/axle carrier frame, reinforcement plate templates, reinforcement plate clamps and foam dispenser gun). 1. Crack viewed through the RHR sway bar mount (exhaust removed) 2. Close up of the crack 3. Home-made reinforcement plates (2.0mm) 4. Underside stripped and mounting points cleaned up 5. LHR mount ok apart from crack to the left (you need to look out for separated spot welds as well as cracks) 6. LHF ok 7. RHF ok (circular shape around thread is not a crack, it is the boundary line between the body panel and the threaded insert) 8. RHR ok 9. Crack ends drilled 10. Crack welded (gas - 2 passes) 11. Plates coated with epoxy after scouring with 60 grit and cleaning with electrical contact cleaner 12. Reinforcing plates fitted and compressed into place with 2D clamping plates (rear), not something I have seen done but a must I reckon 13. Front reinforcing and clamping plates (all left in position for 1 week) 14. Car fully masked in preparation for underside painting 15. Underside primed after degrease, scuffing and prepsol cleaning 16. LHR mount after base and clear coat 17. RHR mount after colour 18. LHF mount after colour 19. RHF mount after colour 20. Fuel tank back in 21. Rear axle on its way back in (note blue painted support tool which made the process quick and easy) 22. Expanding foam being applied between rear mounts as per the T.I.S 23. Expanding foam being applied to RHS of front mount cavity (through OEM drilling) – LH done too (although I didn’t fill the LHS with structural foam I prepared all sides in case I want to do at a future date) 24. Expanding foam being applied to the centre of front mount cavity (through new drilling) 25. Expanding foam being applied to the “tunnel” that runs between the front and rear cavities (modified version of T.I.S method) 26. Holes plugged (plugs at 11:00 and 4:00 o’clock in photo) 27. 4 x BMW structural foam packs plus homemade applicator gun 28. Applicator being used to fill RHF subframe mount cavity 29. Applicator being used to fill LHR subframe mount cavity Last photos show exhaust re-polished and rear box – 3rd and final piece of work in the “gutting” exercise - last remaining fibreglass packing removed from the inlet section (patch at 2:00 the only evidence) plus underfloor plastics repainted
-
1 pointHey Guys, I got my hands on Amit's (AMDAMAN) E46 M3 start of the year, and it really needed some TLC! Products Chemical Guys Honey Dew Snow Foam Chemical Guys Citrus + Gloss Hyper Wash Chemical Guys Medium Clay Kit Chemical Guys 3n Nano Pro Polish Chemical Guys Pete's 53 - Black Pearl Signature Paste Carnauba Wax Chemical Guys Green Clean All Purpose Cleaner & Degreaser Chemical Guys Extreme Leather Cleaner Chemical Guys Pure Leather Conditioner Chemical Guys New Look Trim Gel Tools Hose Karcher Water Pressure Washer x2 20L Plastic Bucket - Using the 2 Bucket Method Auto Masking Tape Chemical Guys Detailing Apron Snow Foam Lance - Karcher Fitting Meguiars Gold Class Deep Chenille Wash Mitt Detailing Brush Set Kestrel DAS-6 Power Plus Dual Action Polisher Lake Country Kompressor Orange Light Cut Chemical Guys Black Finishing Pad Hex Logic Chemical Guys Waffle Weave Huge SUV Microfiber Drying Towel Chemical Guys Elite Ultra-Plush Super Premium Microfiber Before Shots! Snow Foam! Chemical Guys Leather Cleaner and Conditioner! Swirls Galore Chemical Guys Clay Bar - To remove all contaminates that can't be seen by the naked eye, but can be felt by gliding your fingers over the top of the surface of the car, it'll feel very rough and not smooth at all. Single pass with the DA Polisher, Lake Country Kompressor Orange Pad and Chemical Guys 3n nano pro polish! Getting under the door handle with hand applicator, using the 3n nano pro polish After Shots!
-
1 point
-
1 pointI have been a customer of Vodaphone and it's predecessors since 1992. They have been totally consistent through all that time and they have charged heaps and given piss poor service, dropped calls, had poor coverage and promised heaps but delivered bugger all. In the middle of Wellington I lose about 75% of the calls I make. I would like to congratulate them on this piss poor performance. No other company I deal with has managed to provide worse service and still survive. You can call them about their lack of service but they don't answer the phone unless you have an hour or so to wait. I also have phone lines etc with those dull sparks Telescum but they are no better.
-
1 pointAgreed. Seems strange since Lux flakes are just soap flakes. I have scraped off the black rubberised paint on the buttons on a steering wheel before to reveal the black plastic below - if the black plastic is deteriorating you must surely have had some other solvent in the mix.
-
1 pointVery cool. I havr been looking at some chemical.guys products lately. Where did you purchase. Their main website only ships to certain countries Sent from my GT-I8160L using Tapatalk 2
-
1 point
-
1 point
-
1 pointdont forget the loss of value when you sell an unfinished project noone is as passionate about as you
-
1 pointhey! I'll have you know I catch the bus everyday. the M5 sits tucked up in my garage But yes Hataitai is ridiculously easy to get to town. But it's still a suburb. We have some of the best takeways also. $10 taxi to town. $20 to the airport. A good coat & gloves are a must. Don't think you can get away with an umbrella. It screams tourist.
-
1 pointThe motorist is a cash cow for governments world wide. It's a captive tax stream - you can't get away from paying, and if more money is needed, it is one of the first areas to see hikes in taxation. If you don't like it, what will you do? Stop using your vehicle? In NZ, especially, that's not an option as the lack of viable intercity public transport dictates you must be personally mobile. Some sort of rationalisation seems appropriate. At the moment it's a system designed by bureaucrats, and that never bodes well!
-
1 pointWork out what you think is a realistic budget and then apply the 3x rule. 3 times as expensive. 3 times as hard. 3 times as long.
-
1 pointA rough calculation for any car resto project: add up the car purchase price and your bank balance, then add 1 wife/girlfriend and the cost of something really cool and very expensive, that in 10 years time, you'll wish you'd brought instead of the unfinished pile of crap you've got in the shed Been there, done that. ALWAYS buy the best car first (even though I never do )
-
1 pointThere are six screw clips on the top, and four little white push clips underneath. A few of the pushclips were missing on mine, but i managed to fish them out of where the last people in there had dropped them. All my screwclips were fine, so you're probably unlikely to need new ones of those, but it'd probably be worth getting a few of the pushclips in case yours are missing. In the guide i was following, no, he did not need to loosen the bonnet. The realities once I was doing it meant there was no way of getting the corner clip in without either grinding it down, or loosening the bonnet off. One side of mine went in fine, but the other was never going to go in without intervention, for one reason or another. Turned out the bonnet part wasn't very hard, probably just should've done that in the first place. P/N for cowling: 51711977678


