Leaderboard
.thumb.jpg.04807d42ad69838062fa7df5f4a7a884.jpg)


Popular Content
Showing content with the highest reputation on 06/18/23 in all areas
-
4 pointsChanged the title of this thread to be more reflective of what goes on in the shed... Been a bit busy with life etc, attended the Holden Nationals with a mates car I've been helping restore, then a brief visit to Australia, followed up by a BMW Car Club South Island road trip in the M5 which was just fantastic, cruising down and up the country with @hunter and 20 or so other owners. The 740 msport has been the focus otherwise. Bought a large chunk of a 735i msport part out with the same interior, and set about swapping out seats, parcel shelf, under dash trim etc etc to significantly lift the interior (sold the now second full msport interior seats / doorcards for a massive $1.50 on the open market...), replacement steering wheel I had in stock, wiring loom tidy. Also decided to replace the 4 shocks with genuine BMW msport like for like. It was the larger jar of vaseline... Also have done some suspension arms, ball joints, engine mounts, sway bar links and bushes, tie rods, brakes tidy up. A wider insert for the boot to accommodate the "BMW711" plates which have just gone on. The radio was playing up so I scored another C23 Oceania module which a member in our e39 M5 group was offloading. All sorted now and a bluetooth module is on the way to replace the CD changer. Ripped out all the old Nav gear as well. A bit of paint work went on before it got too cold, mirrors, top of passengers door. Next summer there will be more to come... But up next is the rear main seal oil leak fix, which means transmission out. There will be a bit of other "while you are in there" preventive stuff like driveshaft bits and cleaning. Not to forget a few engine gaskets and fluid changes. A power steer hose was leaking so a home fix was enacted saving a few hundred dollars for a new pipe/hose. Still lots to do but coming along nicely....
-
3 pointsGot the roof bow welded in which is a milestone task ... got very specific with the prep on the car body since this will be buried and generally speaking the weld through primer blows. Prepared the exposed side of the bow for welding ... will epoxy coat all of the welds and surrounding area. All done pending 1st inspection, then will do the epoxy and I'm free to mount the roof itself (after sanding the clear coat flat and applying a few more coats, then ... probably sanding it again and polishing)
-
2 pointsParts from BMW arrived a little early ... not much to say really here but will leave the pics in case anyone wants to replicate. Most of the videos don't show how the bow was welded into place etc and the detail of where it actually meets the B pillar. It's all about the roof bow and getting the first cert inspection out of the way at the moment. Will make some mock ups of the plug welds I need to do, to get the settings dialled in ... that first one will be hella nerve racking !!!
-
1 pointHi there !!! I'm from Singapore and have been living and working in Auckland since 2016. Was previously a long term member of https://www.bmw-sg.com/forums/ but have since left the forum after not owning a BMW for a few years. Last BMW was a Hamann-tuned E46 back in 2012. Not driving a BMW currently but planning to get one for the wife (and hopefully for me too!) Just checking out the BMW scene in Auckland and NZ in general! So a big hello to everyone out there... and of course, any form of advice and guidance is greatly appreciated! Cheers! Ash
-
1 pointWelcome 👋 I see you have a Mazda MPV ... my daily is the Honday Odyssey. Maybe we need a people mover sub group 🤣
-
1 pointQualitat in Penrose?
-
1 pointDon't be afraid to buy off ebay either. I have bought a heap of stuff from Latvia and Lithuania and its all been good aftermarket, or genuine parts, and good prices with shipping.
-
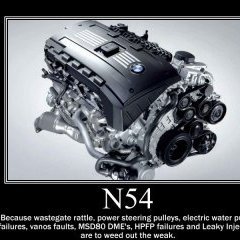
1 pointOk, so more general admin on the car, while patiently waiting for parts to arrive. New Tial Q BOV, genuine! onto new front facing plenum charge pipe, all fits well, minor miracle. Using some prefered products for air pressure plumbing, NPT 90 deg swivel fittings w/ high temp nylon hose for the BOV to under the intake manifold fitting. Turbo guard as a no filter option Headlight lens 1 sealed back onto housing and completed using all new headlight specific sealant, happy with the results for sure. Glad wrapped to fend off any garage rash Not going to paint or powder coat the calipers, but Cerakote C series ceramic coat them. All stripped down, replaced the calipers bolts to grade 12.0 cap bolts instead of the star headed 10.9s that are easy to strip, as two did whilst removing to separate the caliper halves. Colour likely https://www.cerakote.com/shop/cerakote-coating/C-148/burnt-bronze new AP Racing seal kit inc dust boots and nipples arrived. New AP Racing CP5555 pads, very similar to ferodo DS2500. Will get calipers sandblasted first, not thats there any paint left, but to get a good key/surface finish for the cerakote to bind to. A 5 day cure tho after application... After reading for days and nights the fuel tank is back out for a Walbro/Ti Industries 535 aka 295 pump as the main pump. EKP cooling mod approaching also...found a 3d printed new cover that incorporates a fan alongside heatsinks to go inside. It'll need more fuel if I delete the HPFP and Di, more to come on that... While im under the car I may get hubs and arms cerakoted while im digging around in there. The US military use it on some of their weapons, and found a local who is reliable and cheap applying it, save myself anymore cancer breathing it in. So for sh*ts n giggles, the HPFP and HP injectors will be removed shortly and to run port injection only. It some ways its a backward step. The system is pretty good, if not getting very pricey to replace these parts. Its the ECu being the biggest headache when N54 start getting pushed. Going standalone ECU, this is a major step in being able to control the engine as opposed to suggestions with the MSD80/81, and avoiding a life dealing with MSD codes. I've experienced enough, now Ive read enough to have made my mind up. HPFP and Di delete kit on its way. Thank you to Dan Buchner on this decision. https://vargasturbo.com/product/vtt-n54-di-injector-delete-kit/ Might get my money back on a Maxx Ecu with the prices of index 12's these days sheesh
-
1 pointIf it’s been sat in a shed for 15 years without moving or being started then a lot of $$$ would be needed to bring everything back up to scratch - all rubbers, etc. before you even start to think about panel and paint.
-
1 pointDepends what it owes him, $5 or $6k of paint work can still make a car look pretty good. A 320i 14 years ago was probably $2500.
-
1 point$15k Can't see it being remotely profitable unless you're a panel beater TBH.
-
1 pointAnd next was the application of hard high build primer. After this phase it will sit for a week or so to harden up then it will be block sanded to get all panels perfectly straight. Then it will be into the booth again for primer then colour (stock Polaris-Metallic) then clear coats. The motorsport shadow line window trim is also being done.
-
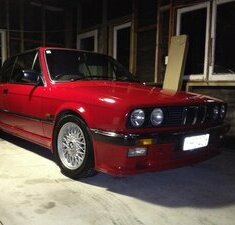
1 pointTime to resto the outside. The clearcoat gave up last year and didn't take to fondly to the amount of rain we have over summer and started to craze and peel. Not bad for 37 years. First round is a massive cut back of all sections to a good base removing all the old shmoo. The front Tech1 bumper was particularly difficult because of the hard-shell hammarite style paint, great for stone chips but not so great for removing. The shop took it back to raw surface which I was quite happy about. As a car person, it is always a fun time taking paint off a car, you never know what you're going to get. I guess I have been extremely fortunate in that the a lot of credit goes to the previous owners of this car where there is no accident damage or bodge-ups to be found. I have always kept the car in a garage, away from sunlight when garage and pretty diligent with cleaning and maintaining the car with the right products. Just few small bits of under paint surface rust on the top metal caps on the bumpers where water was now starting to soak through the clearcoat. But all in all the car is as straight as an arrow. Great base to start the resto from.