
Neal
-
Content Count
1813 -
Joined
-
Last visited
-
Days Won
14
Posts posted by Neal
-
-
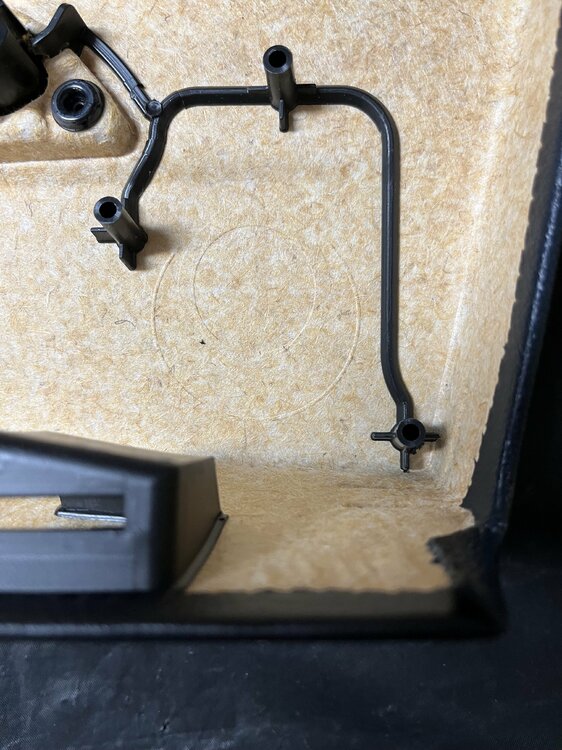
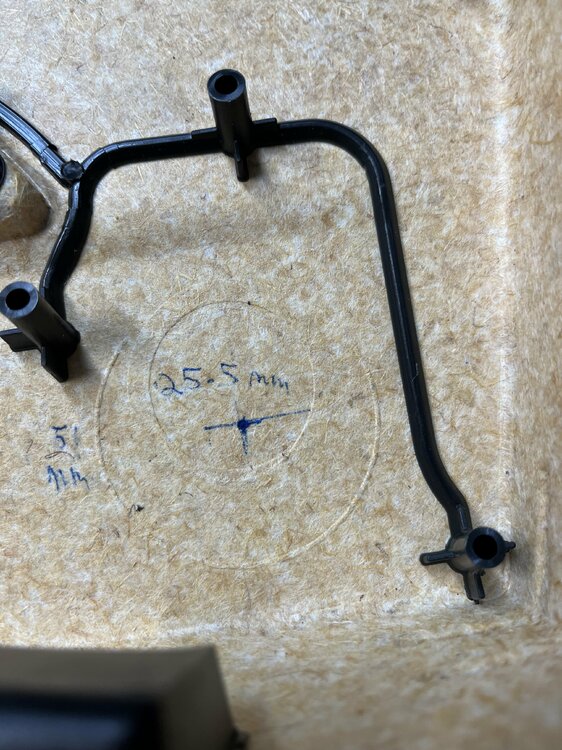
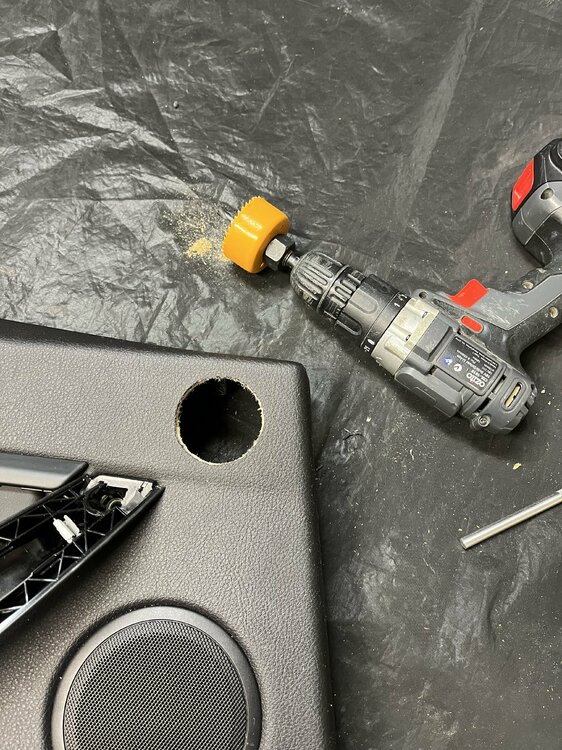
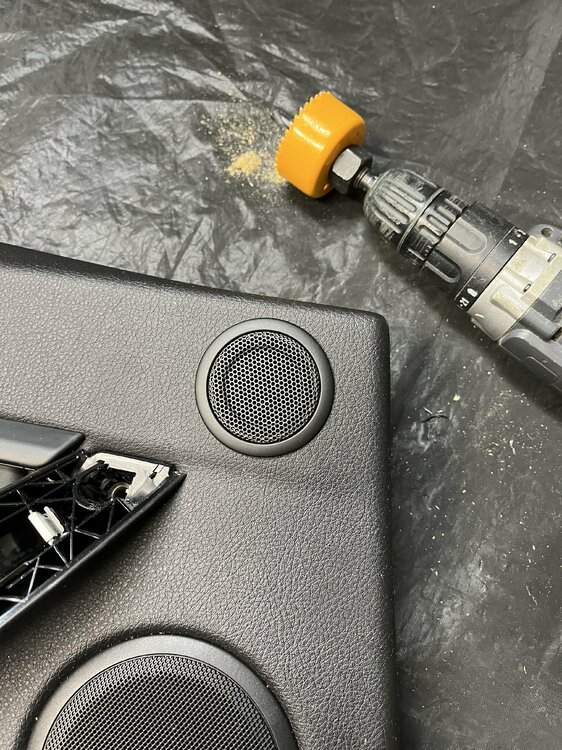
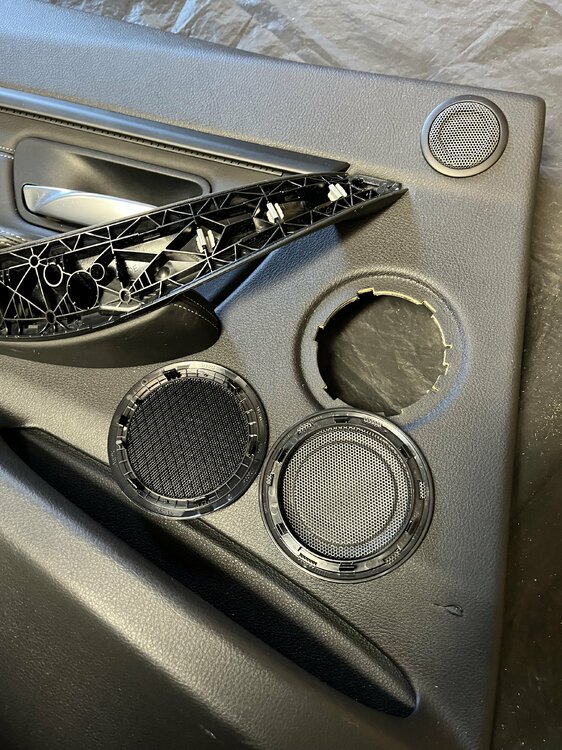
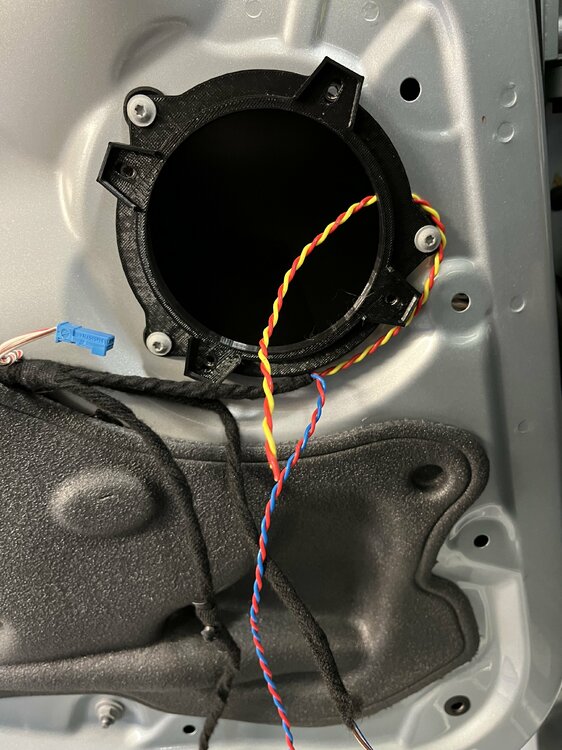
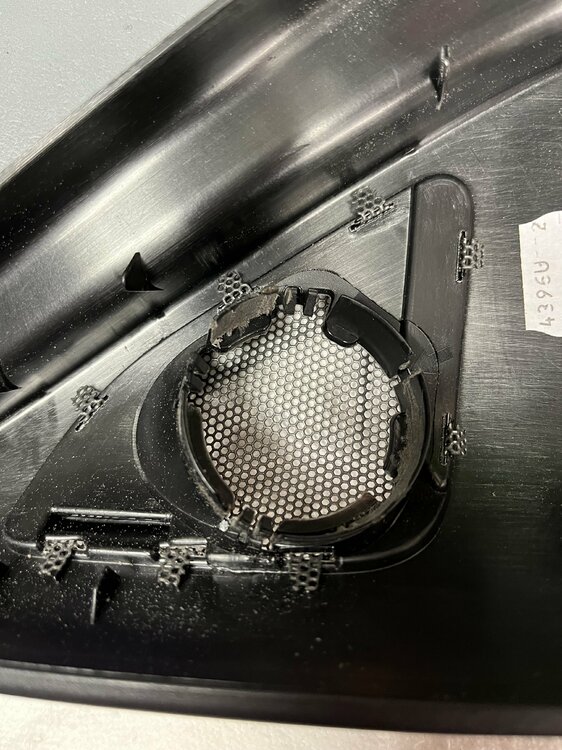
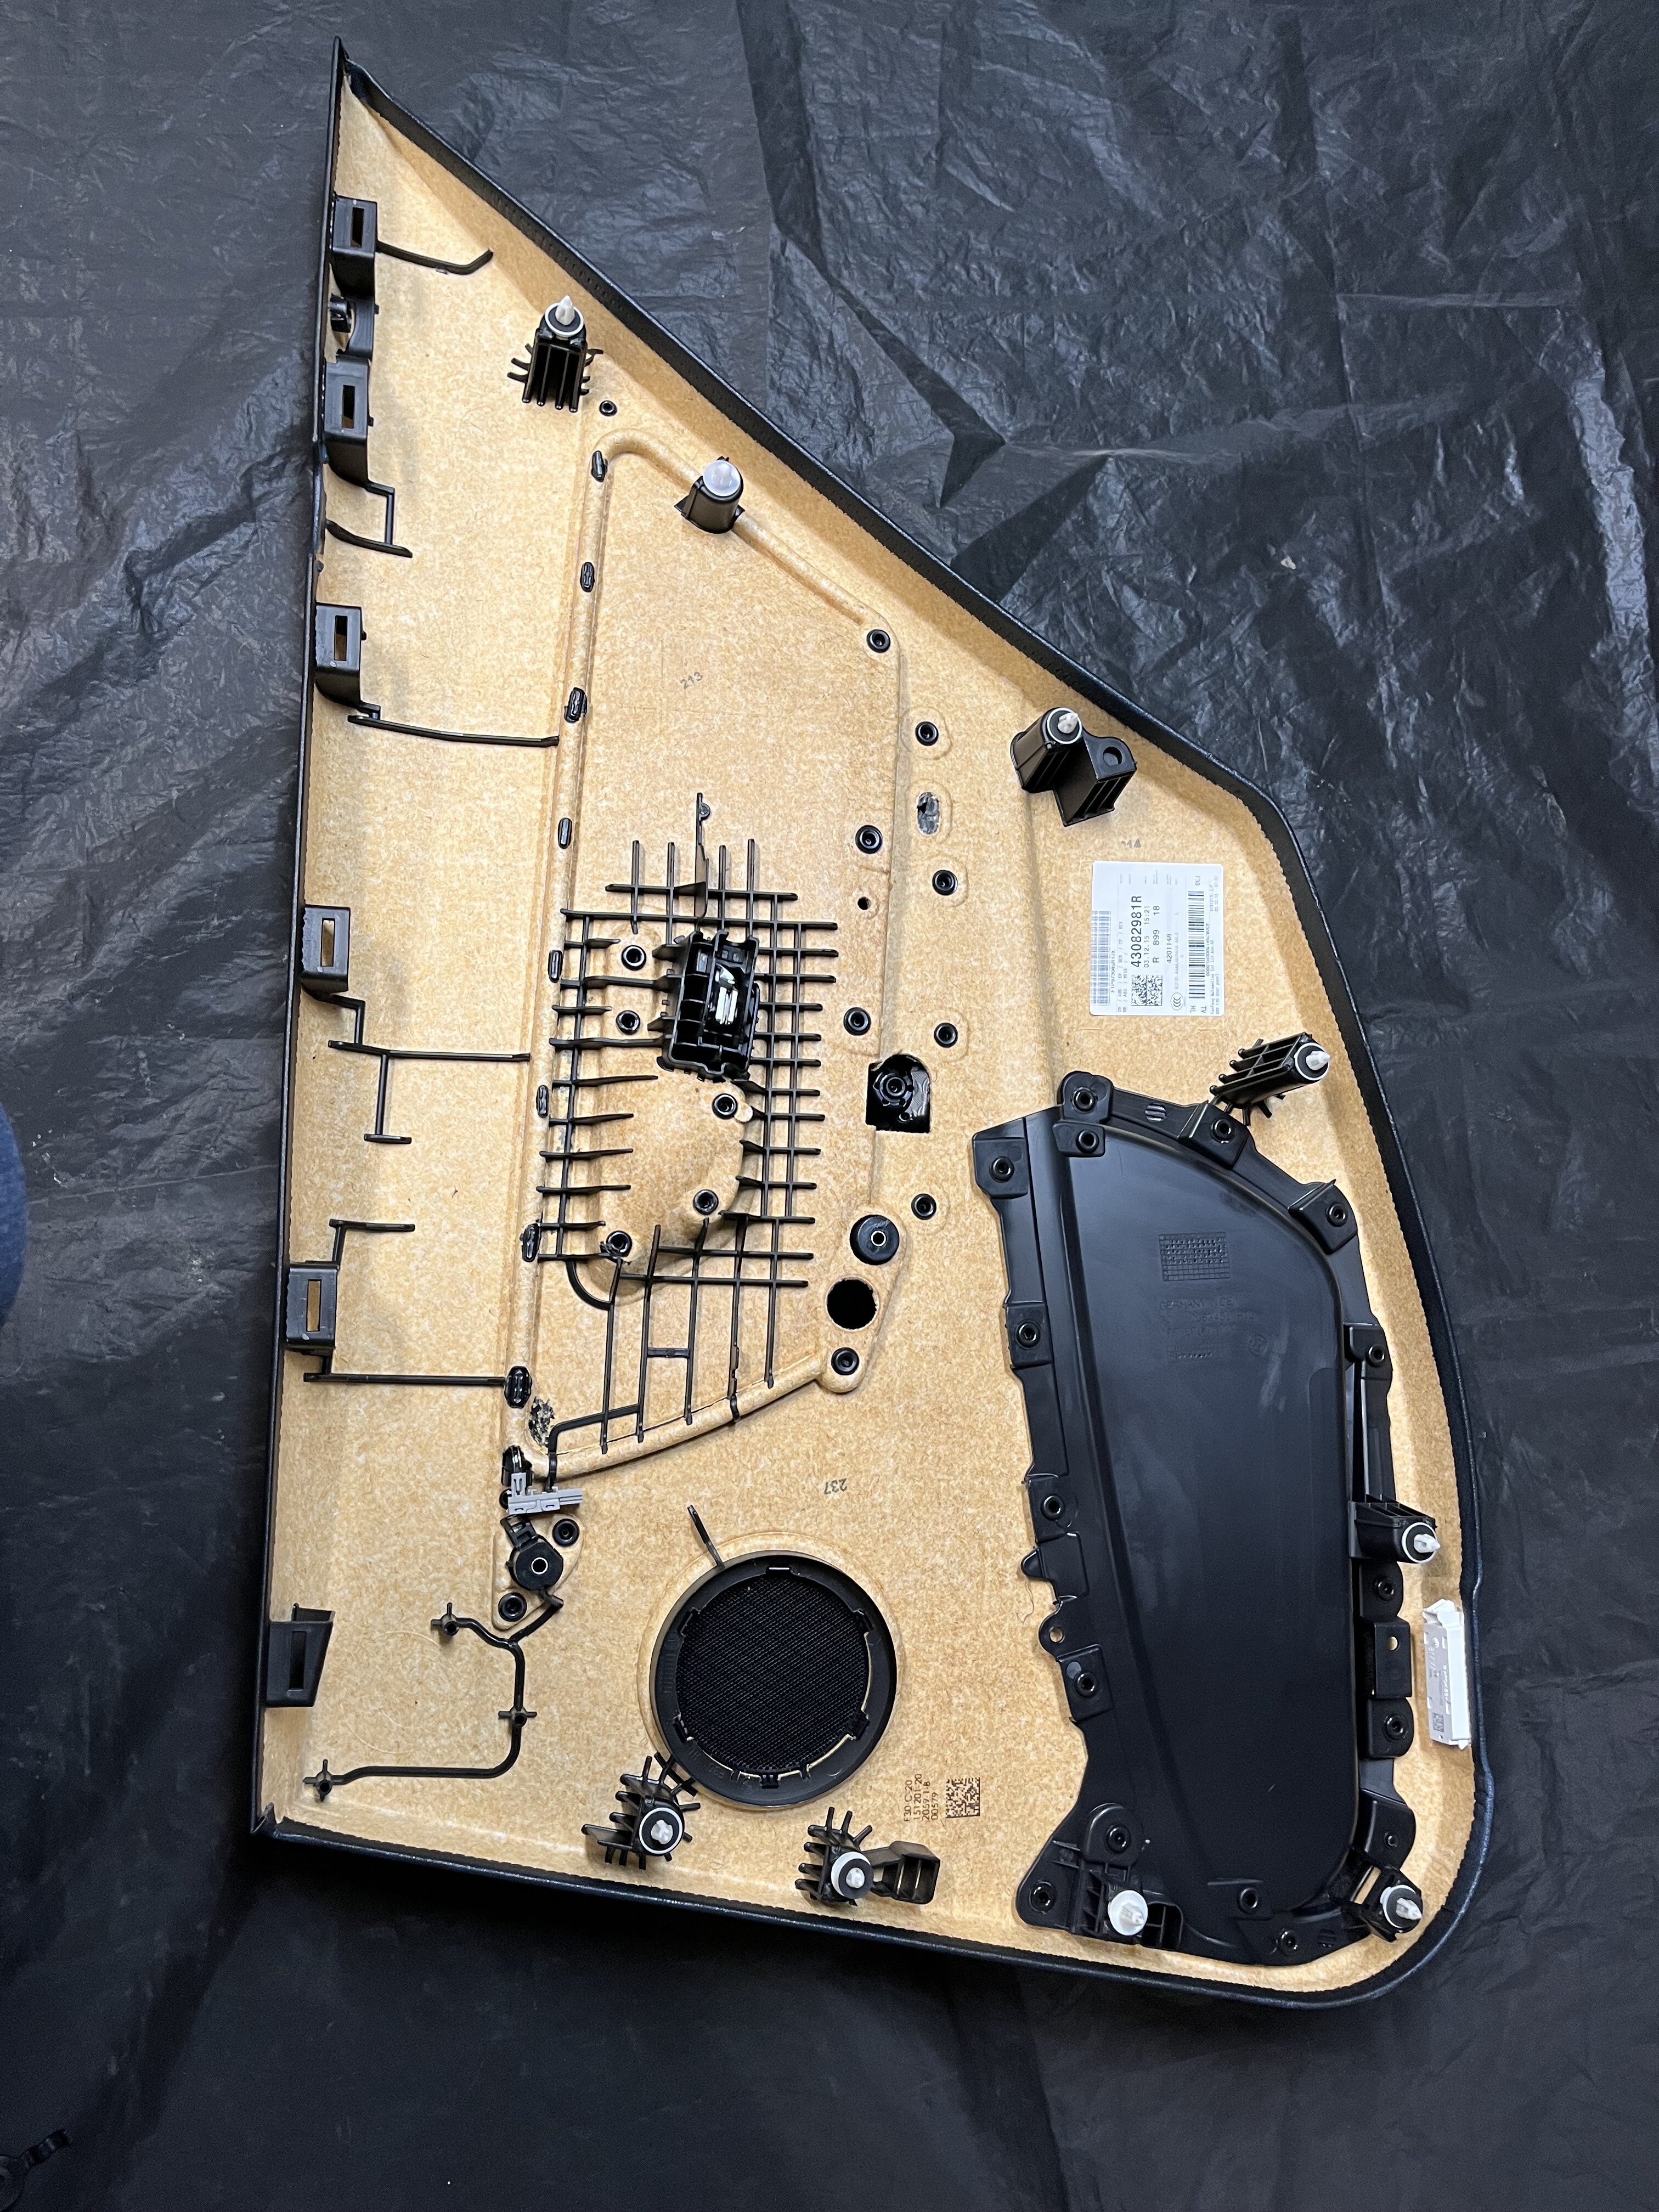
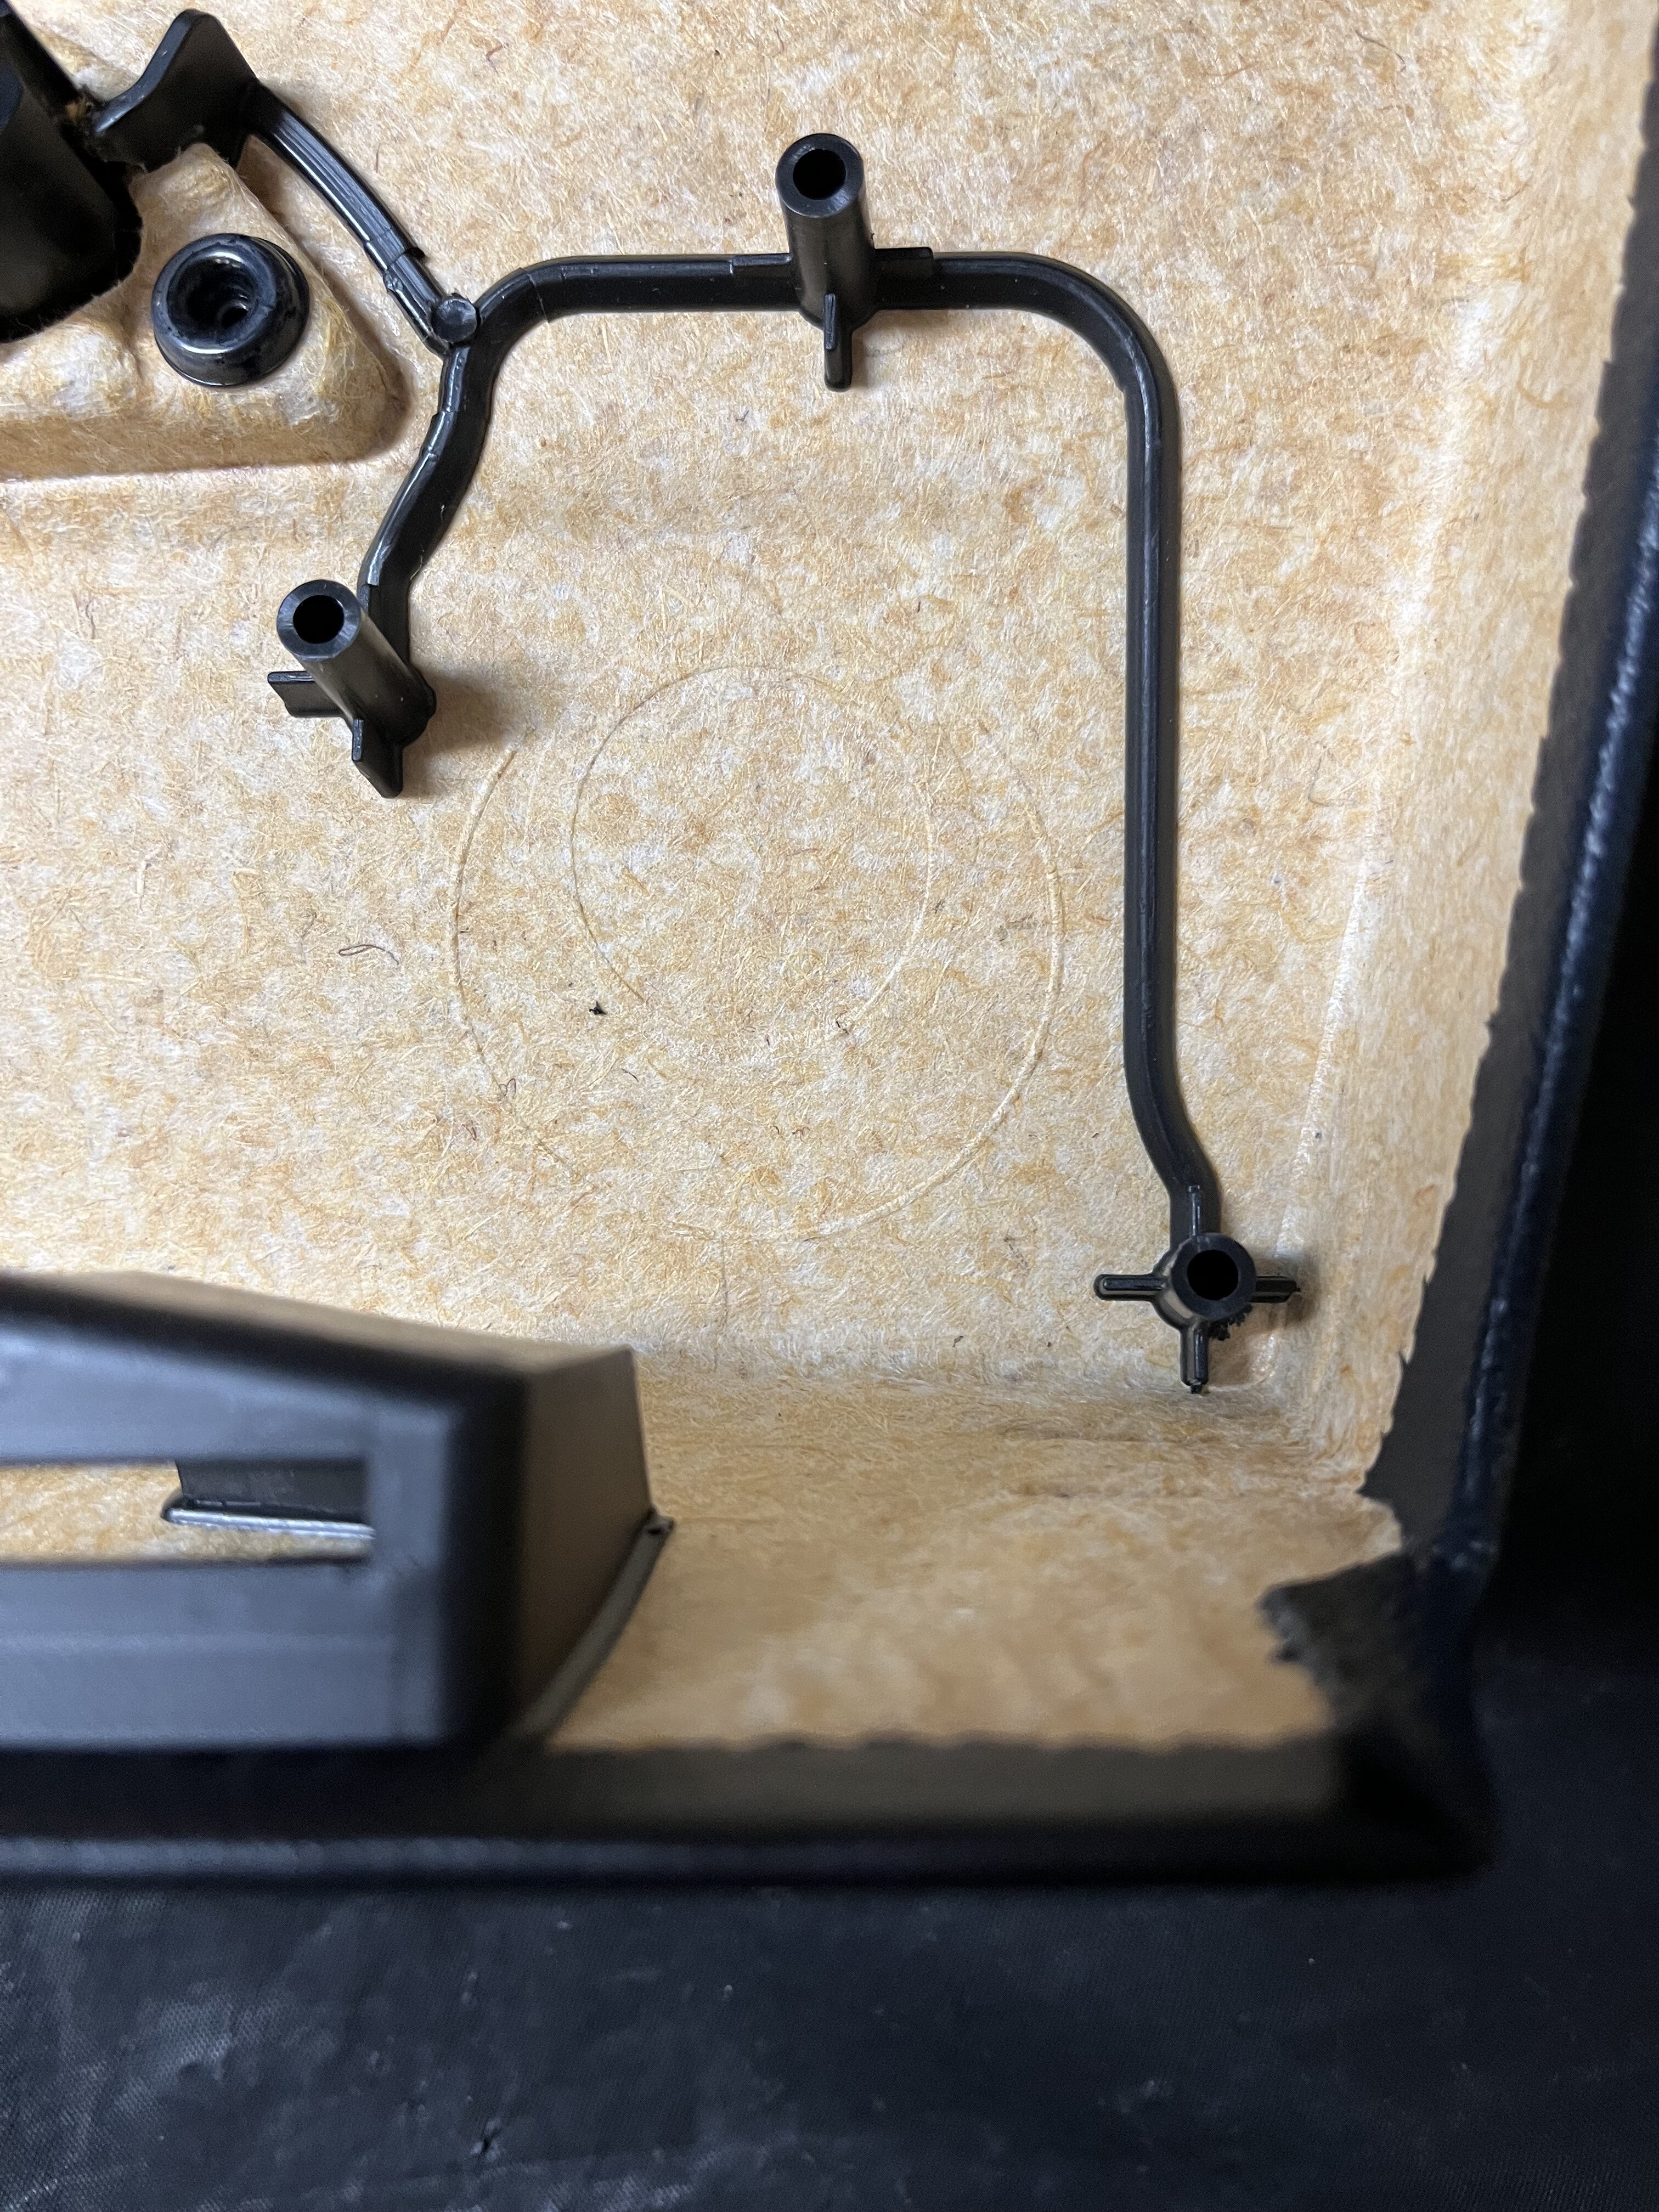
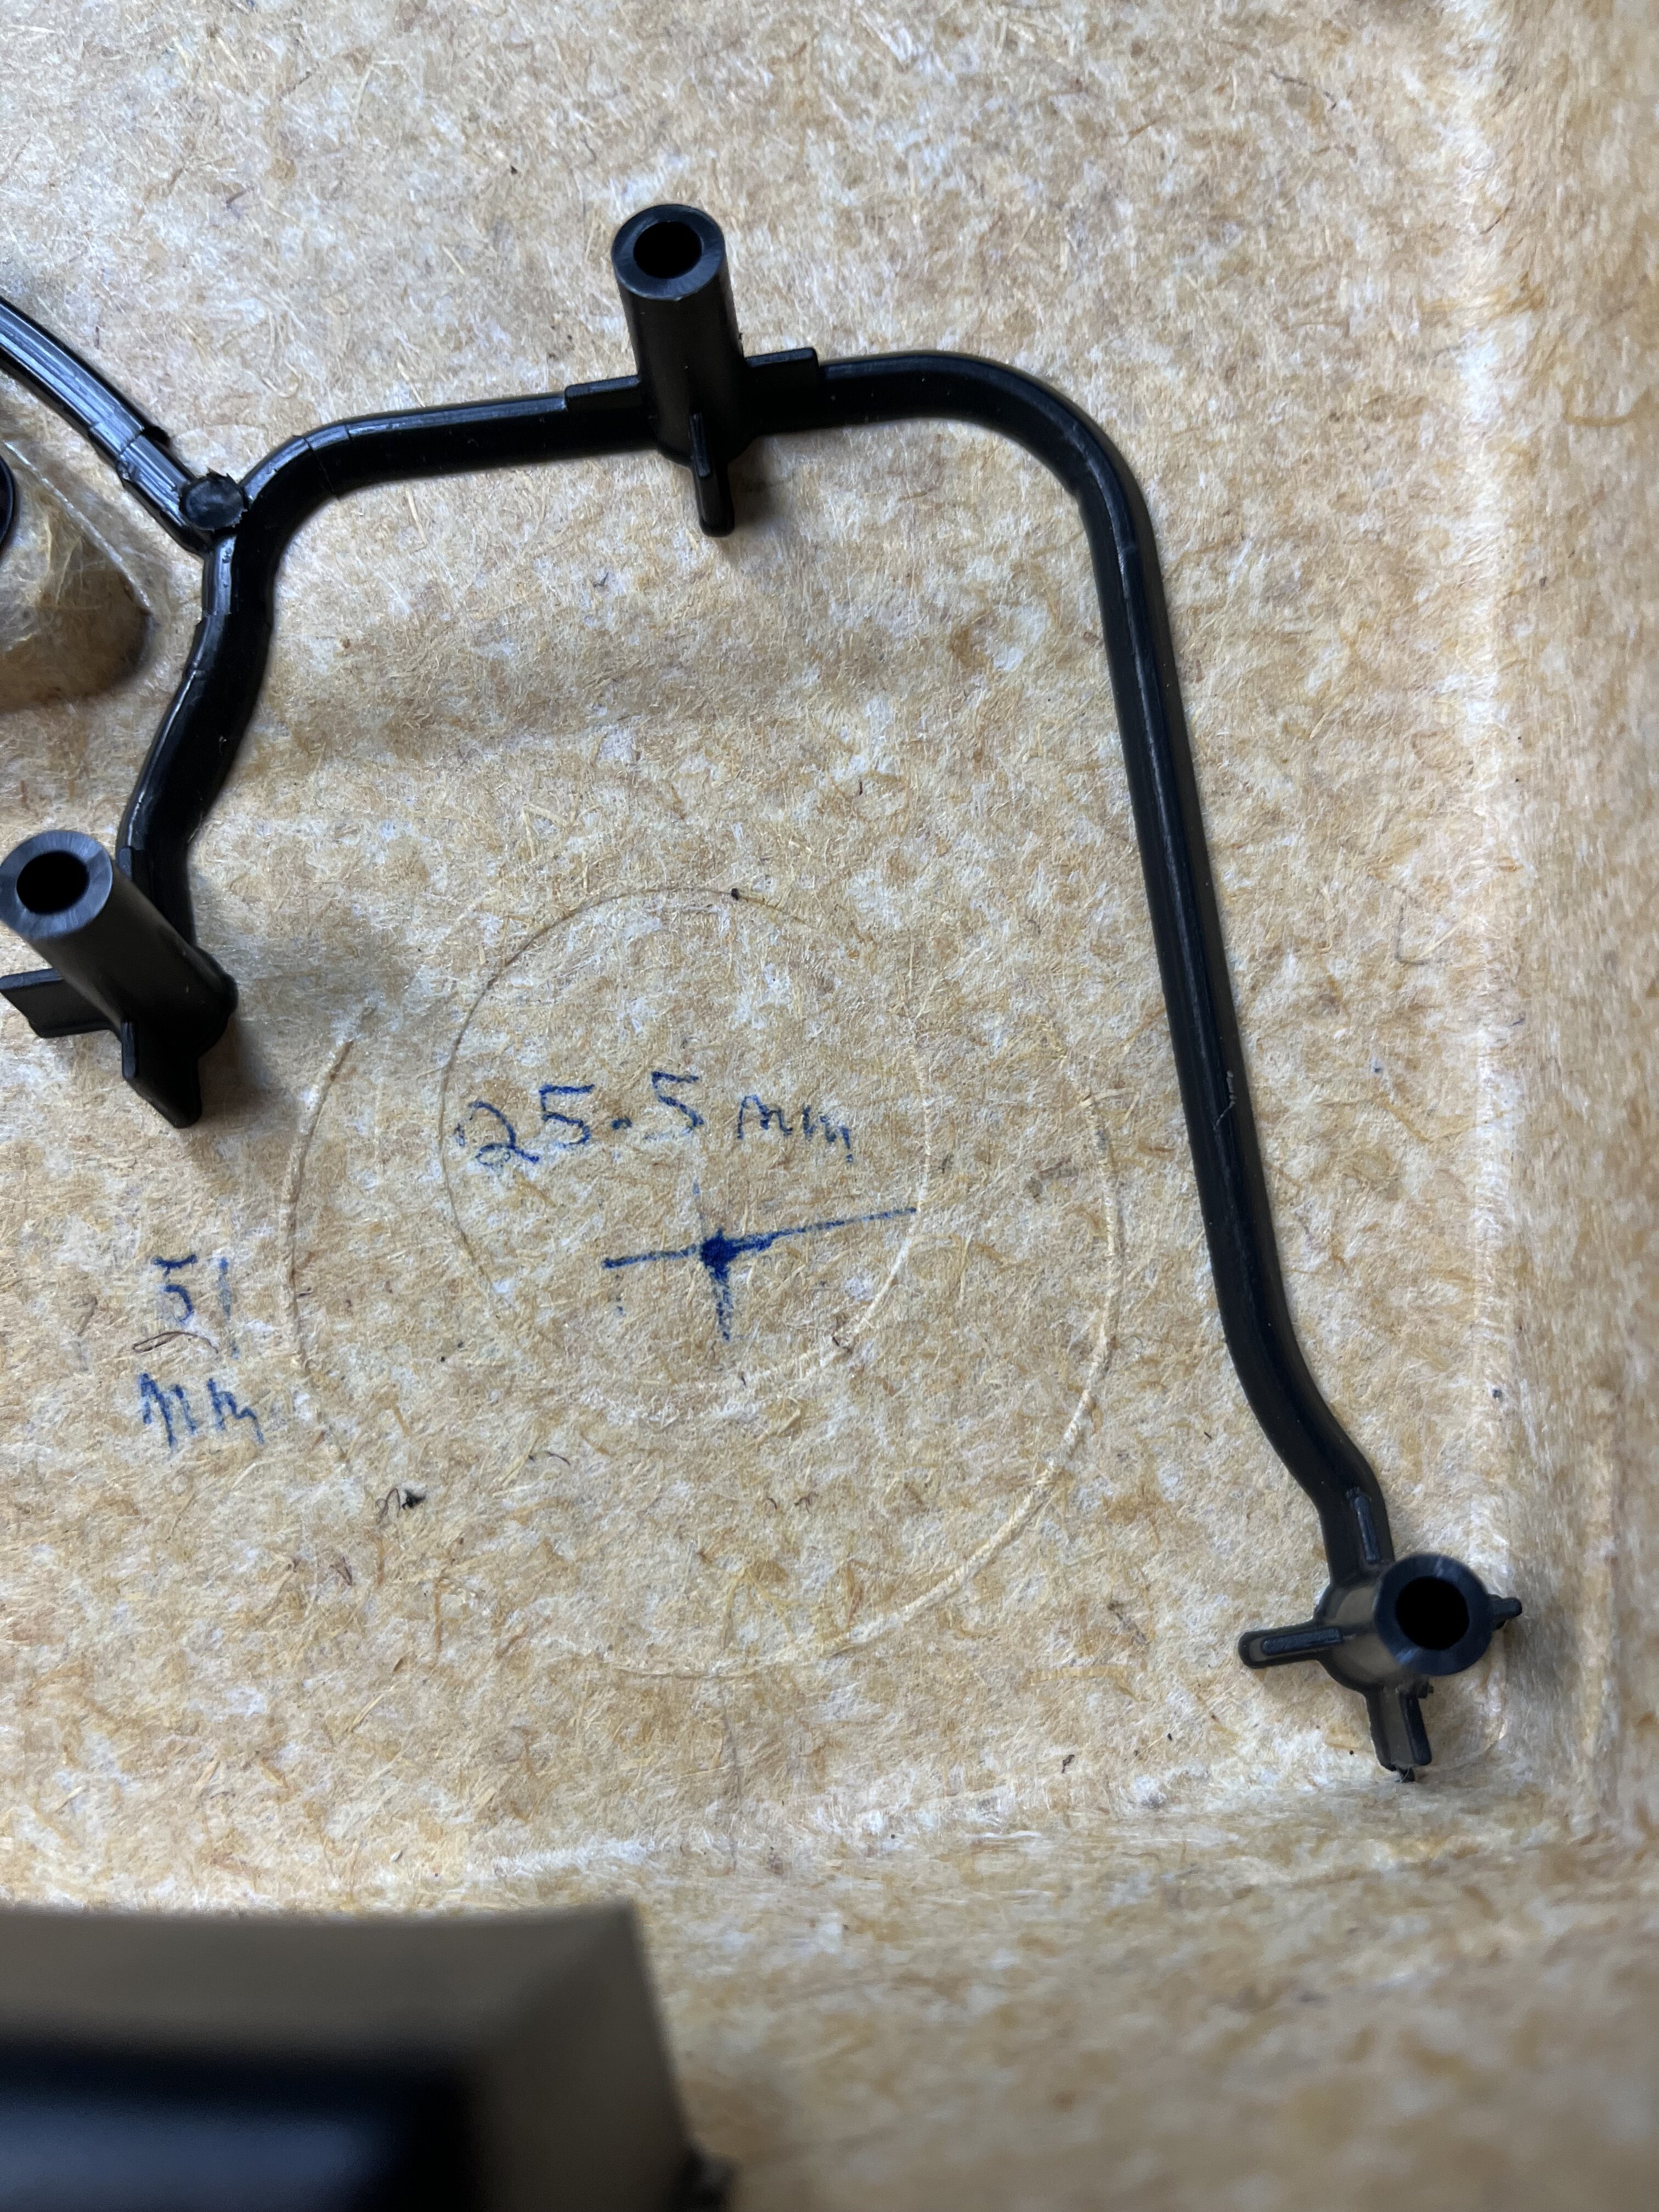
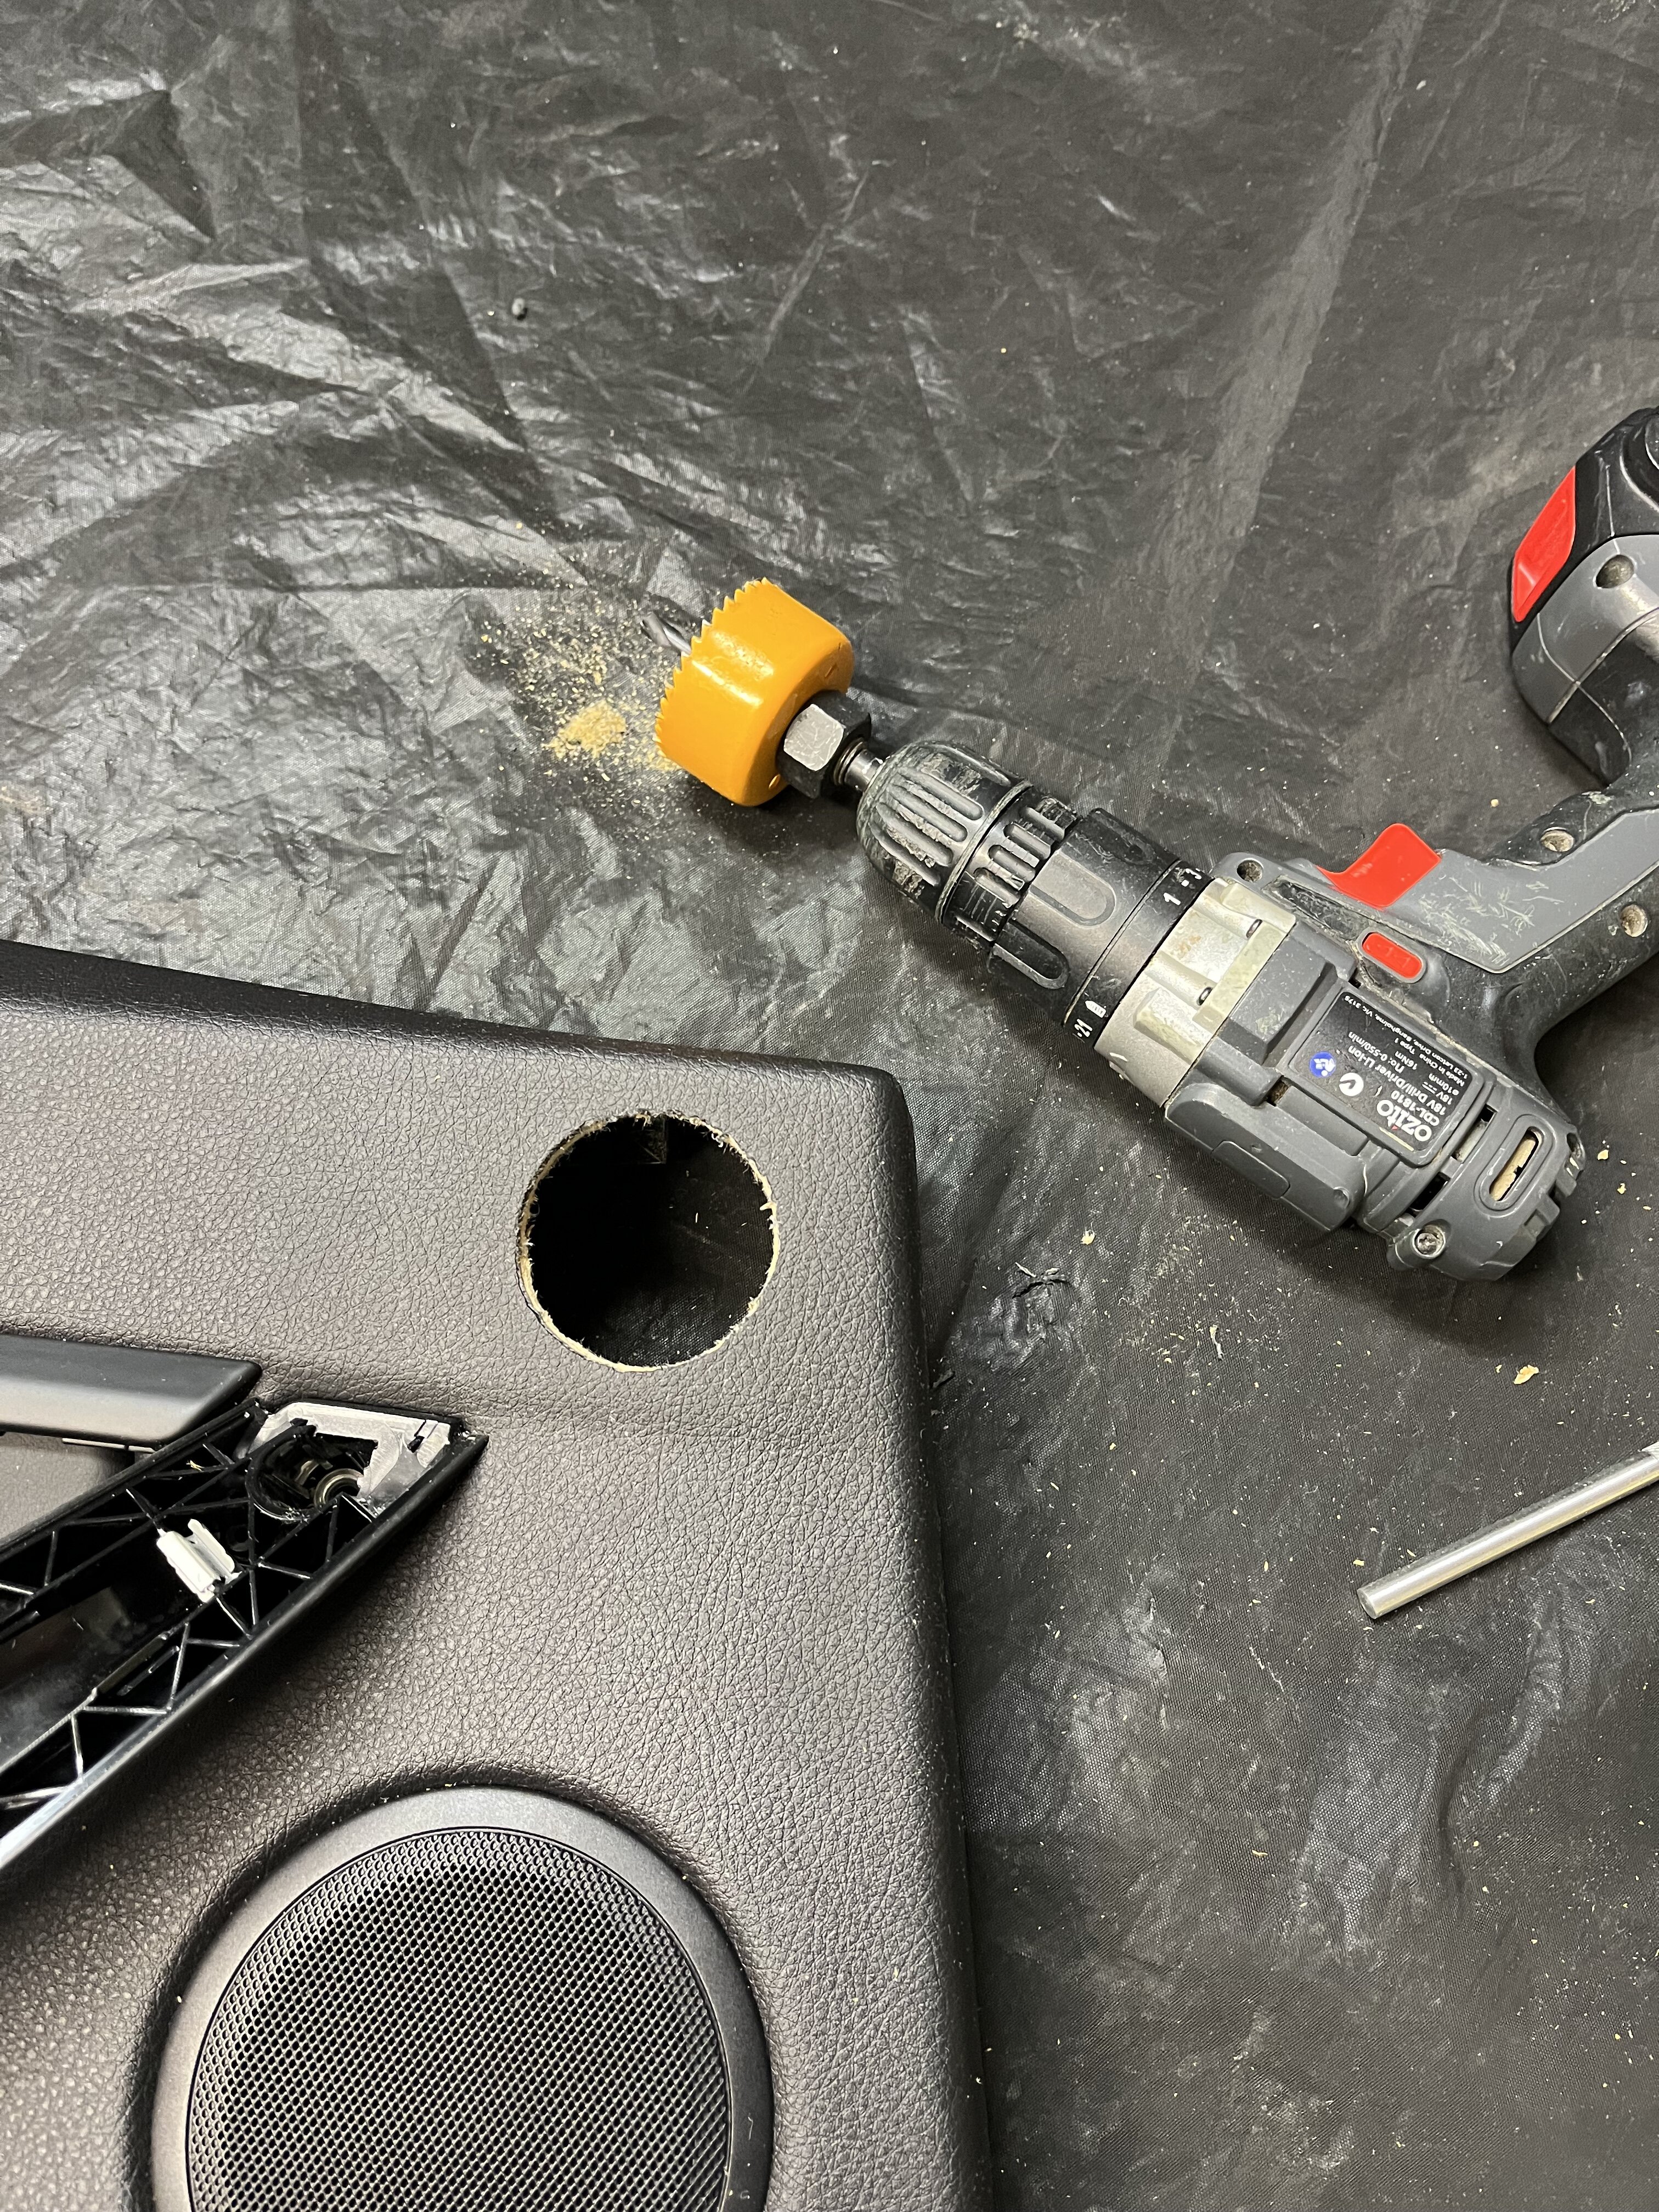
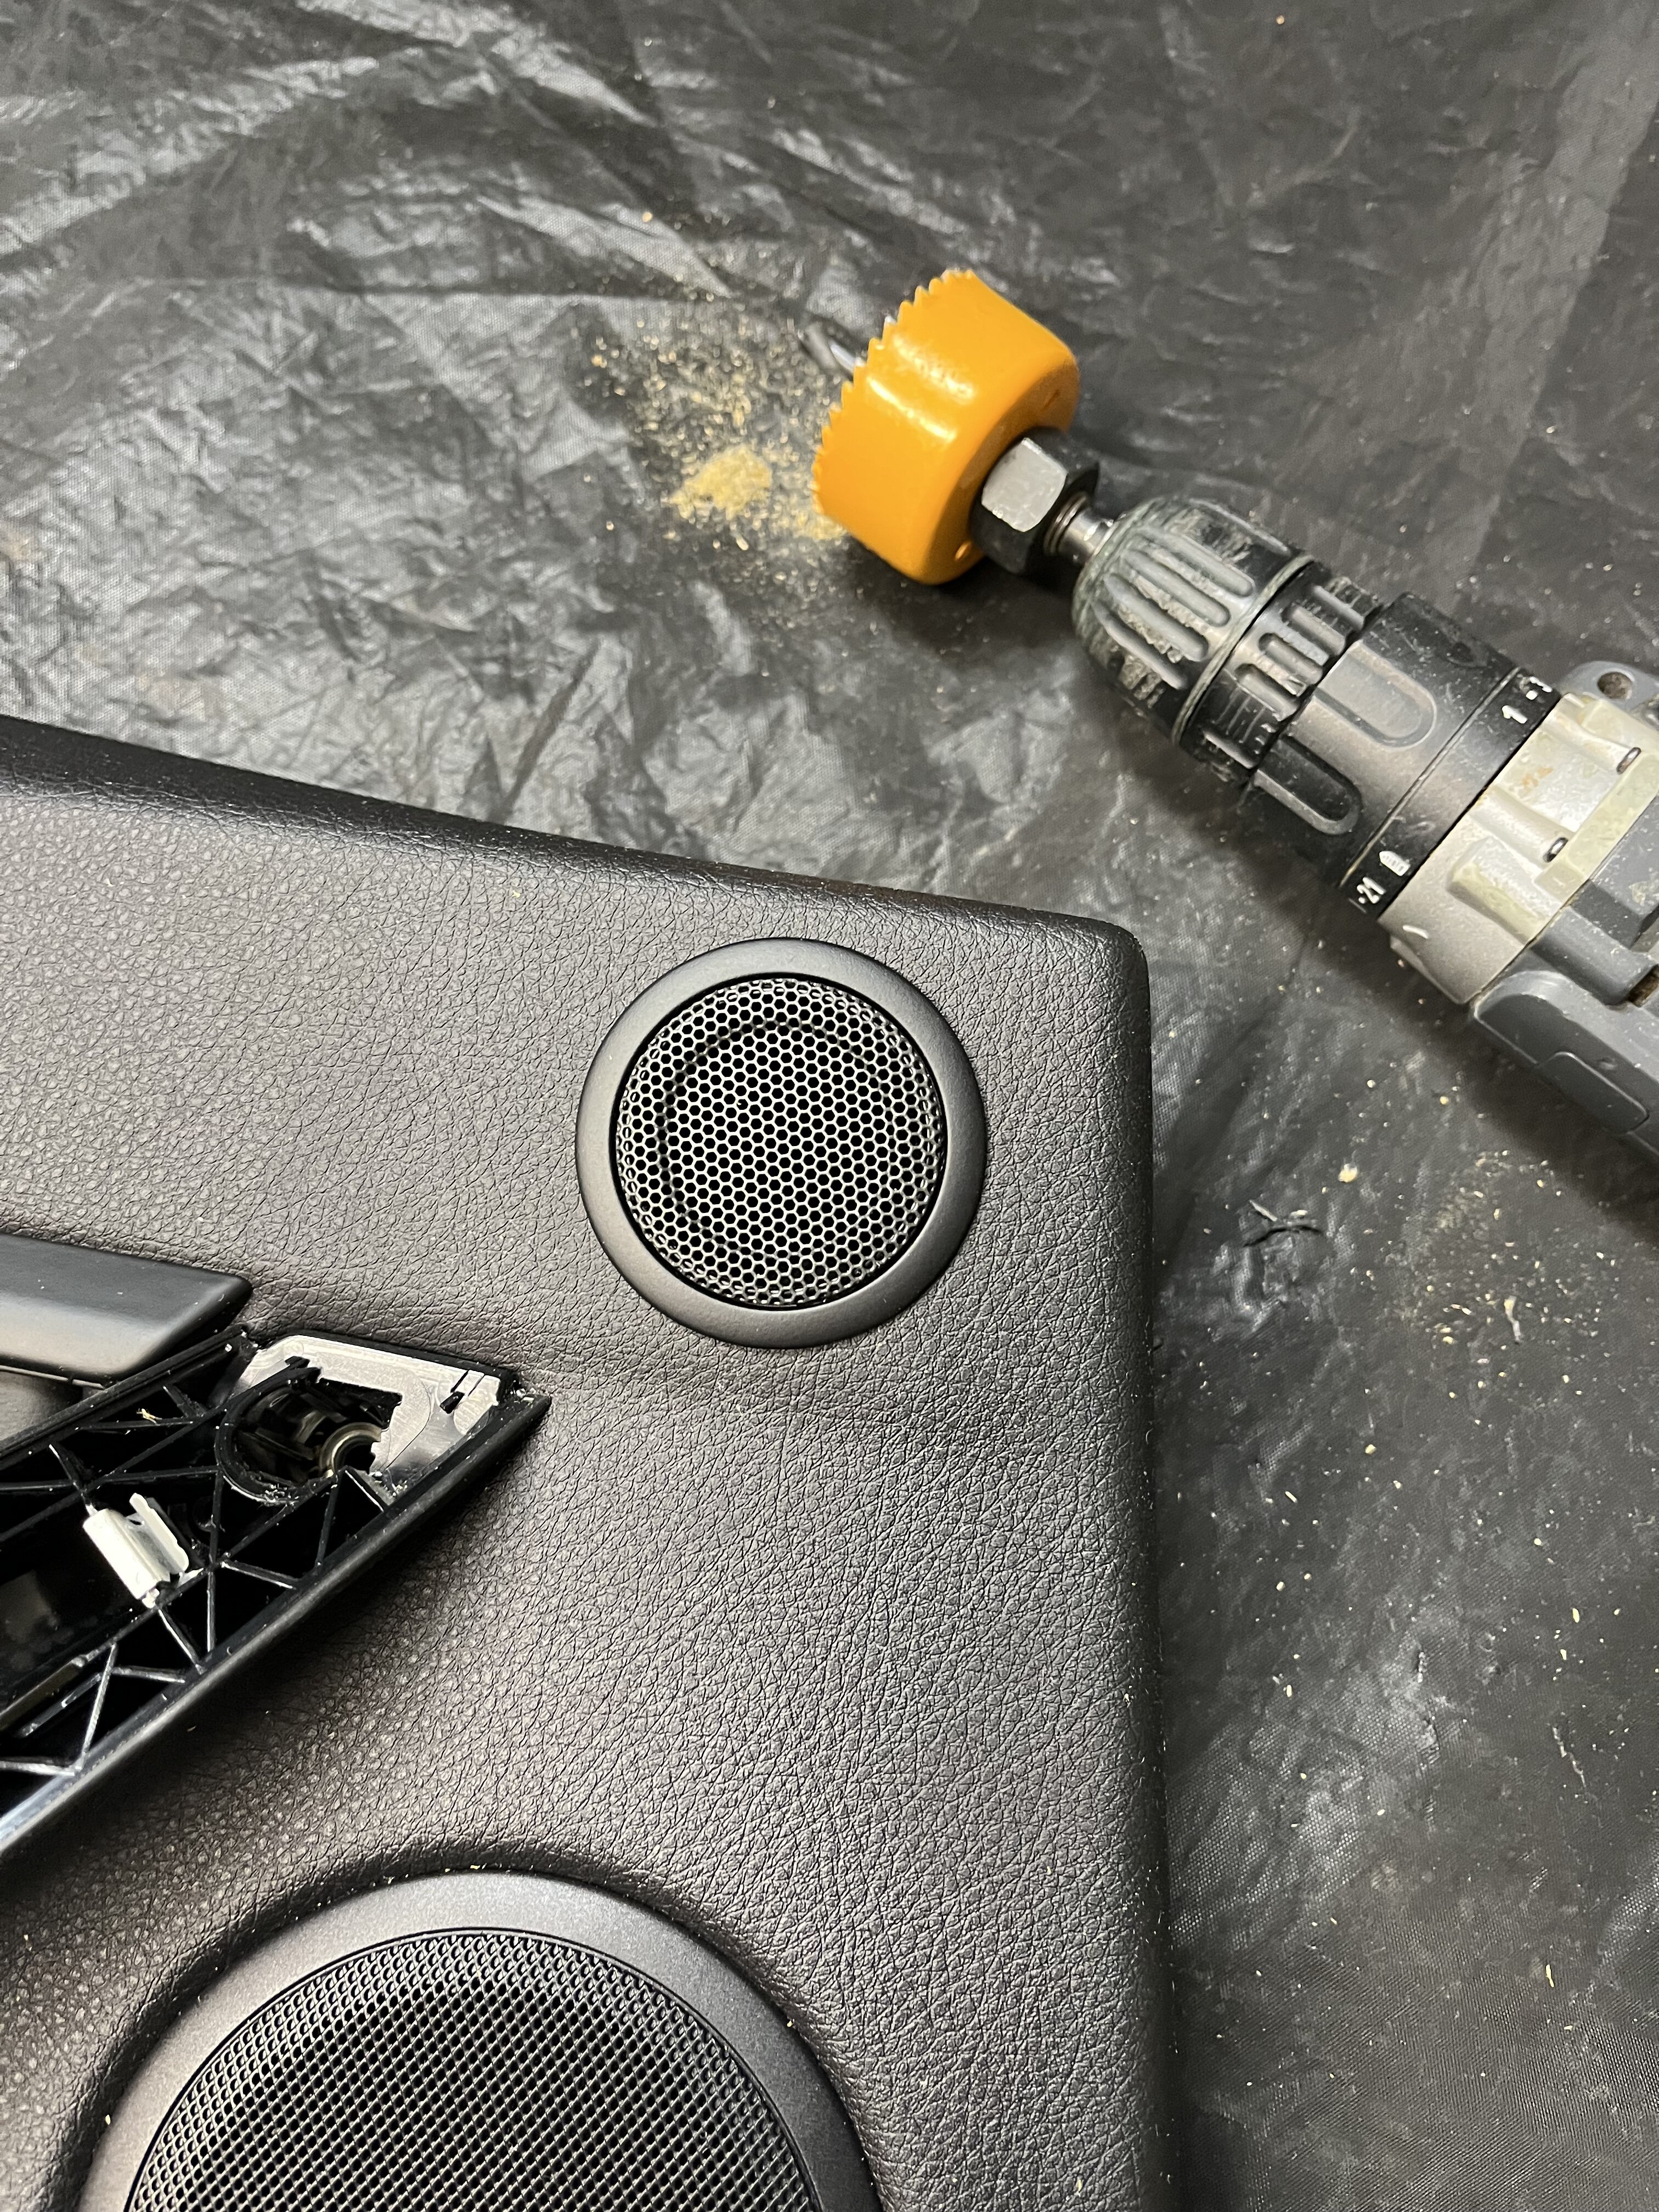
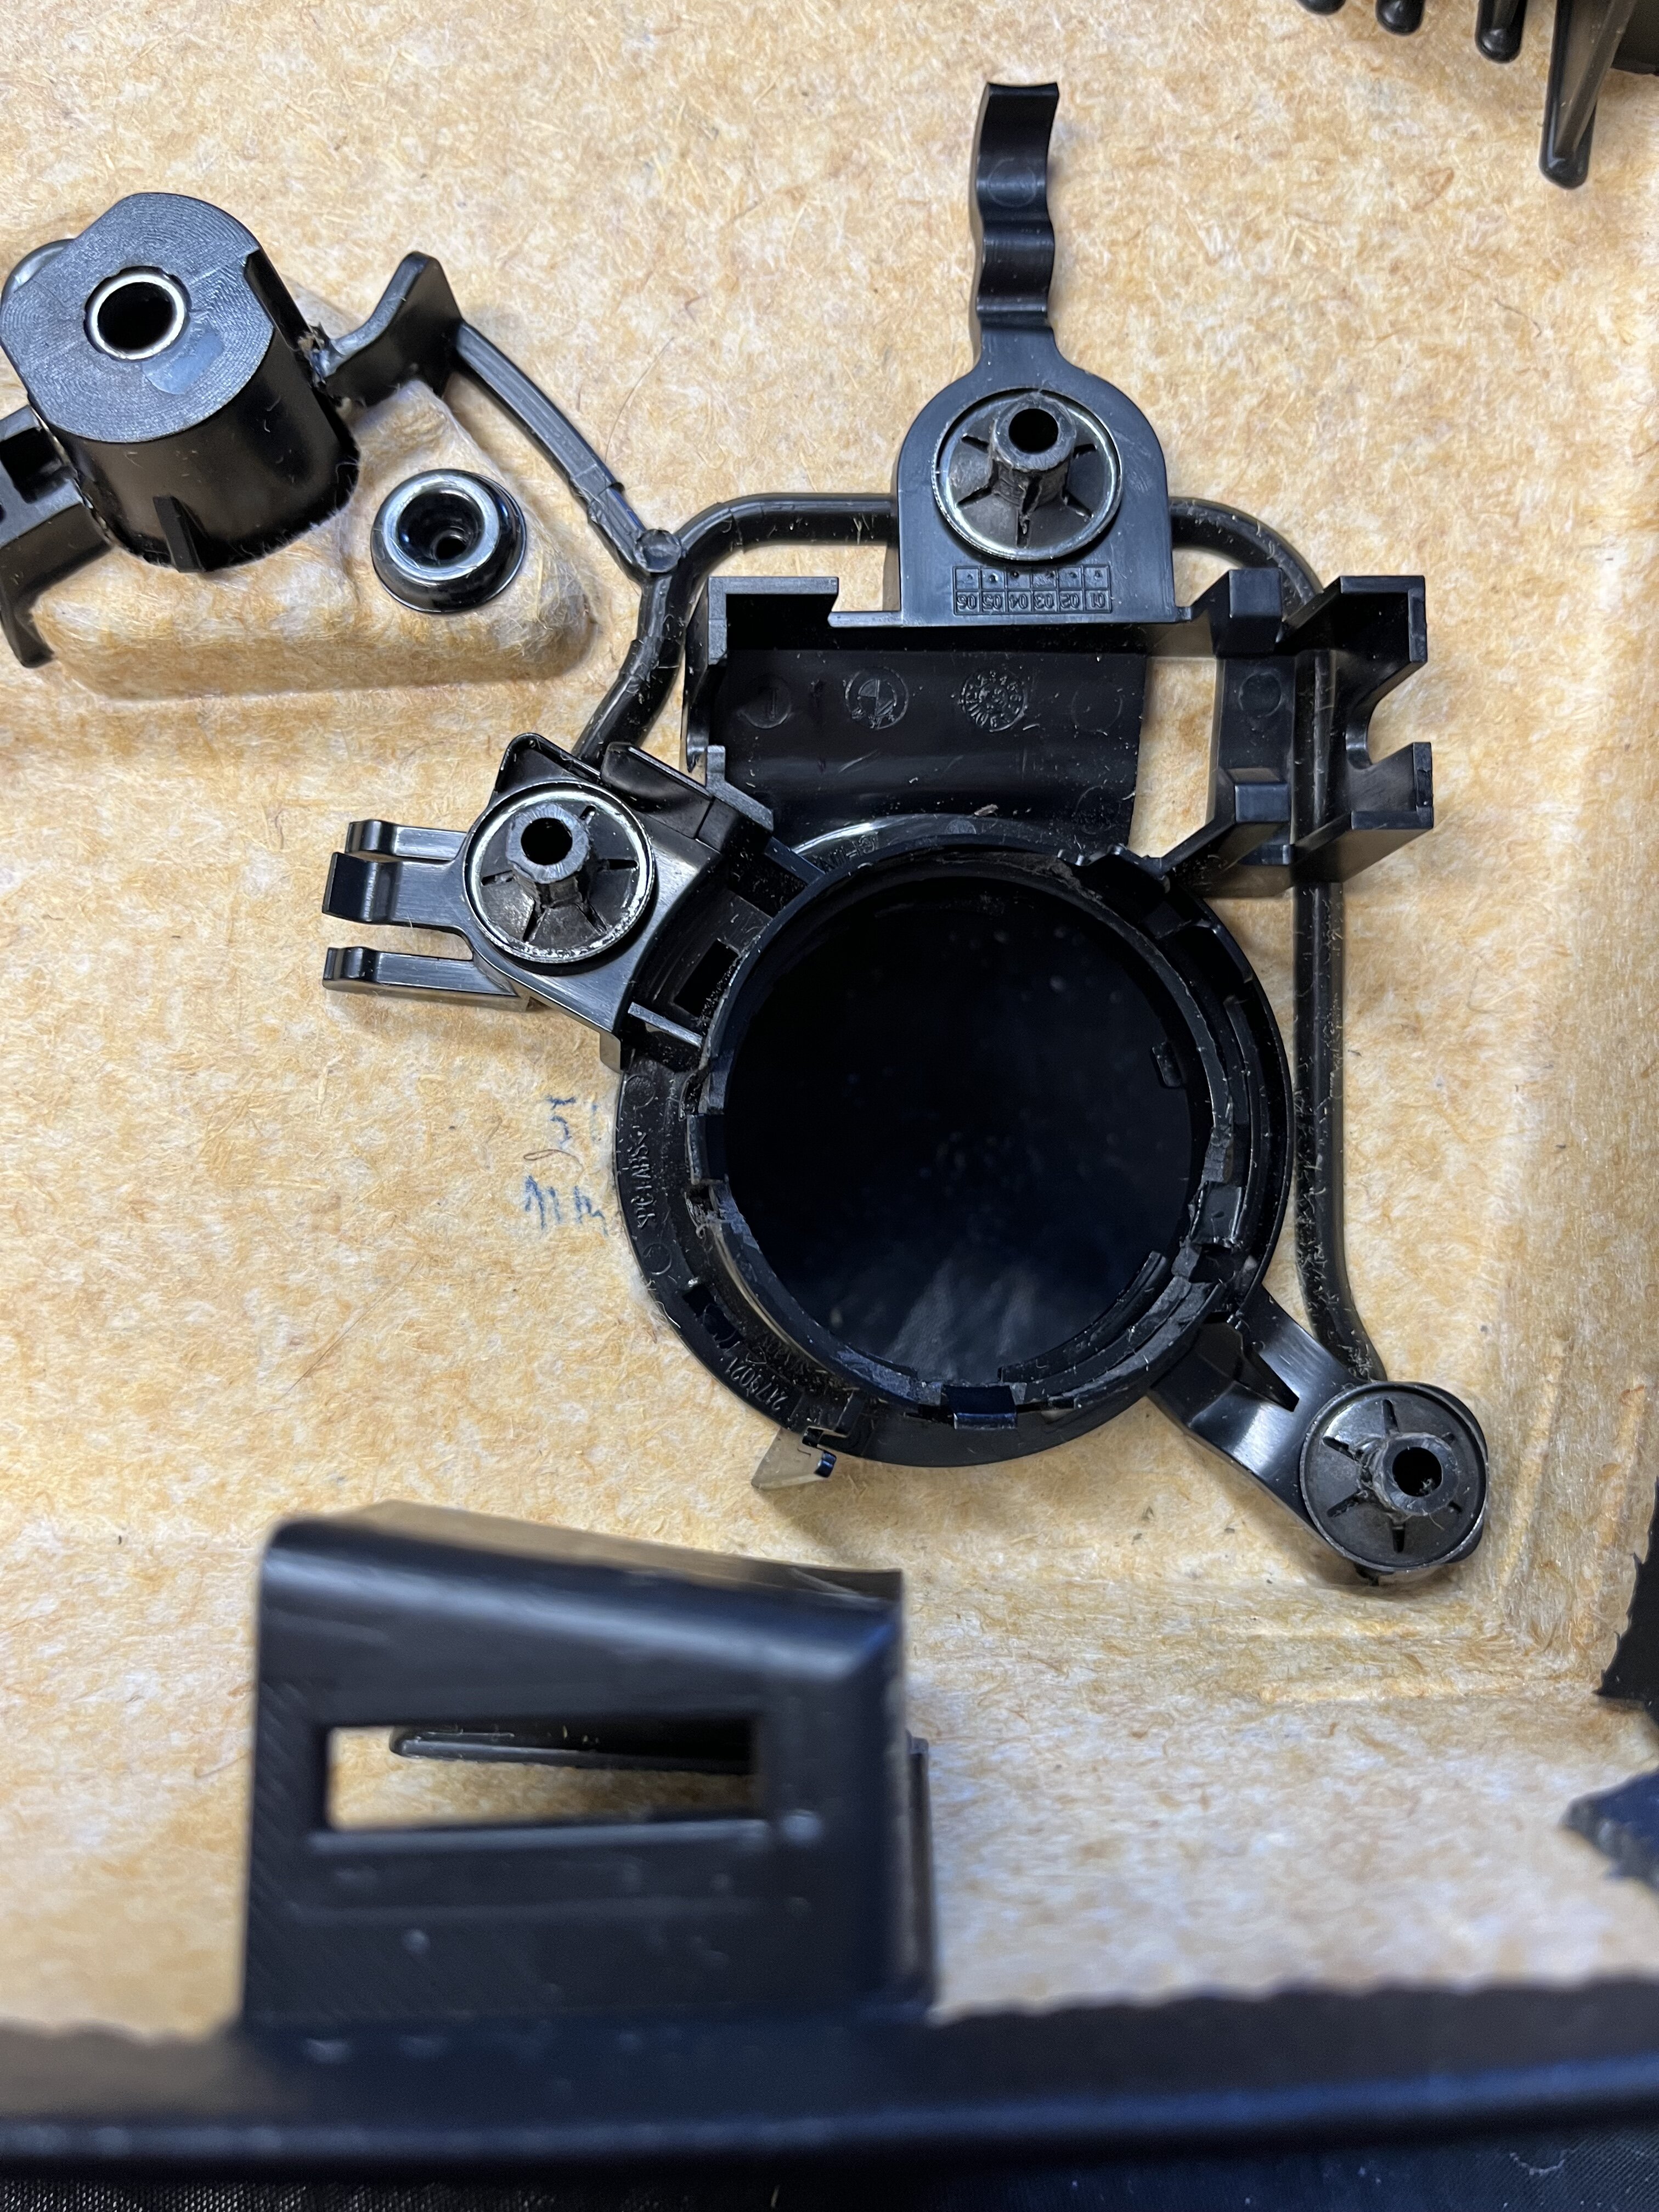
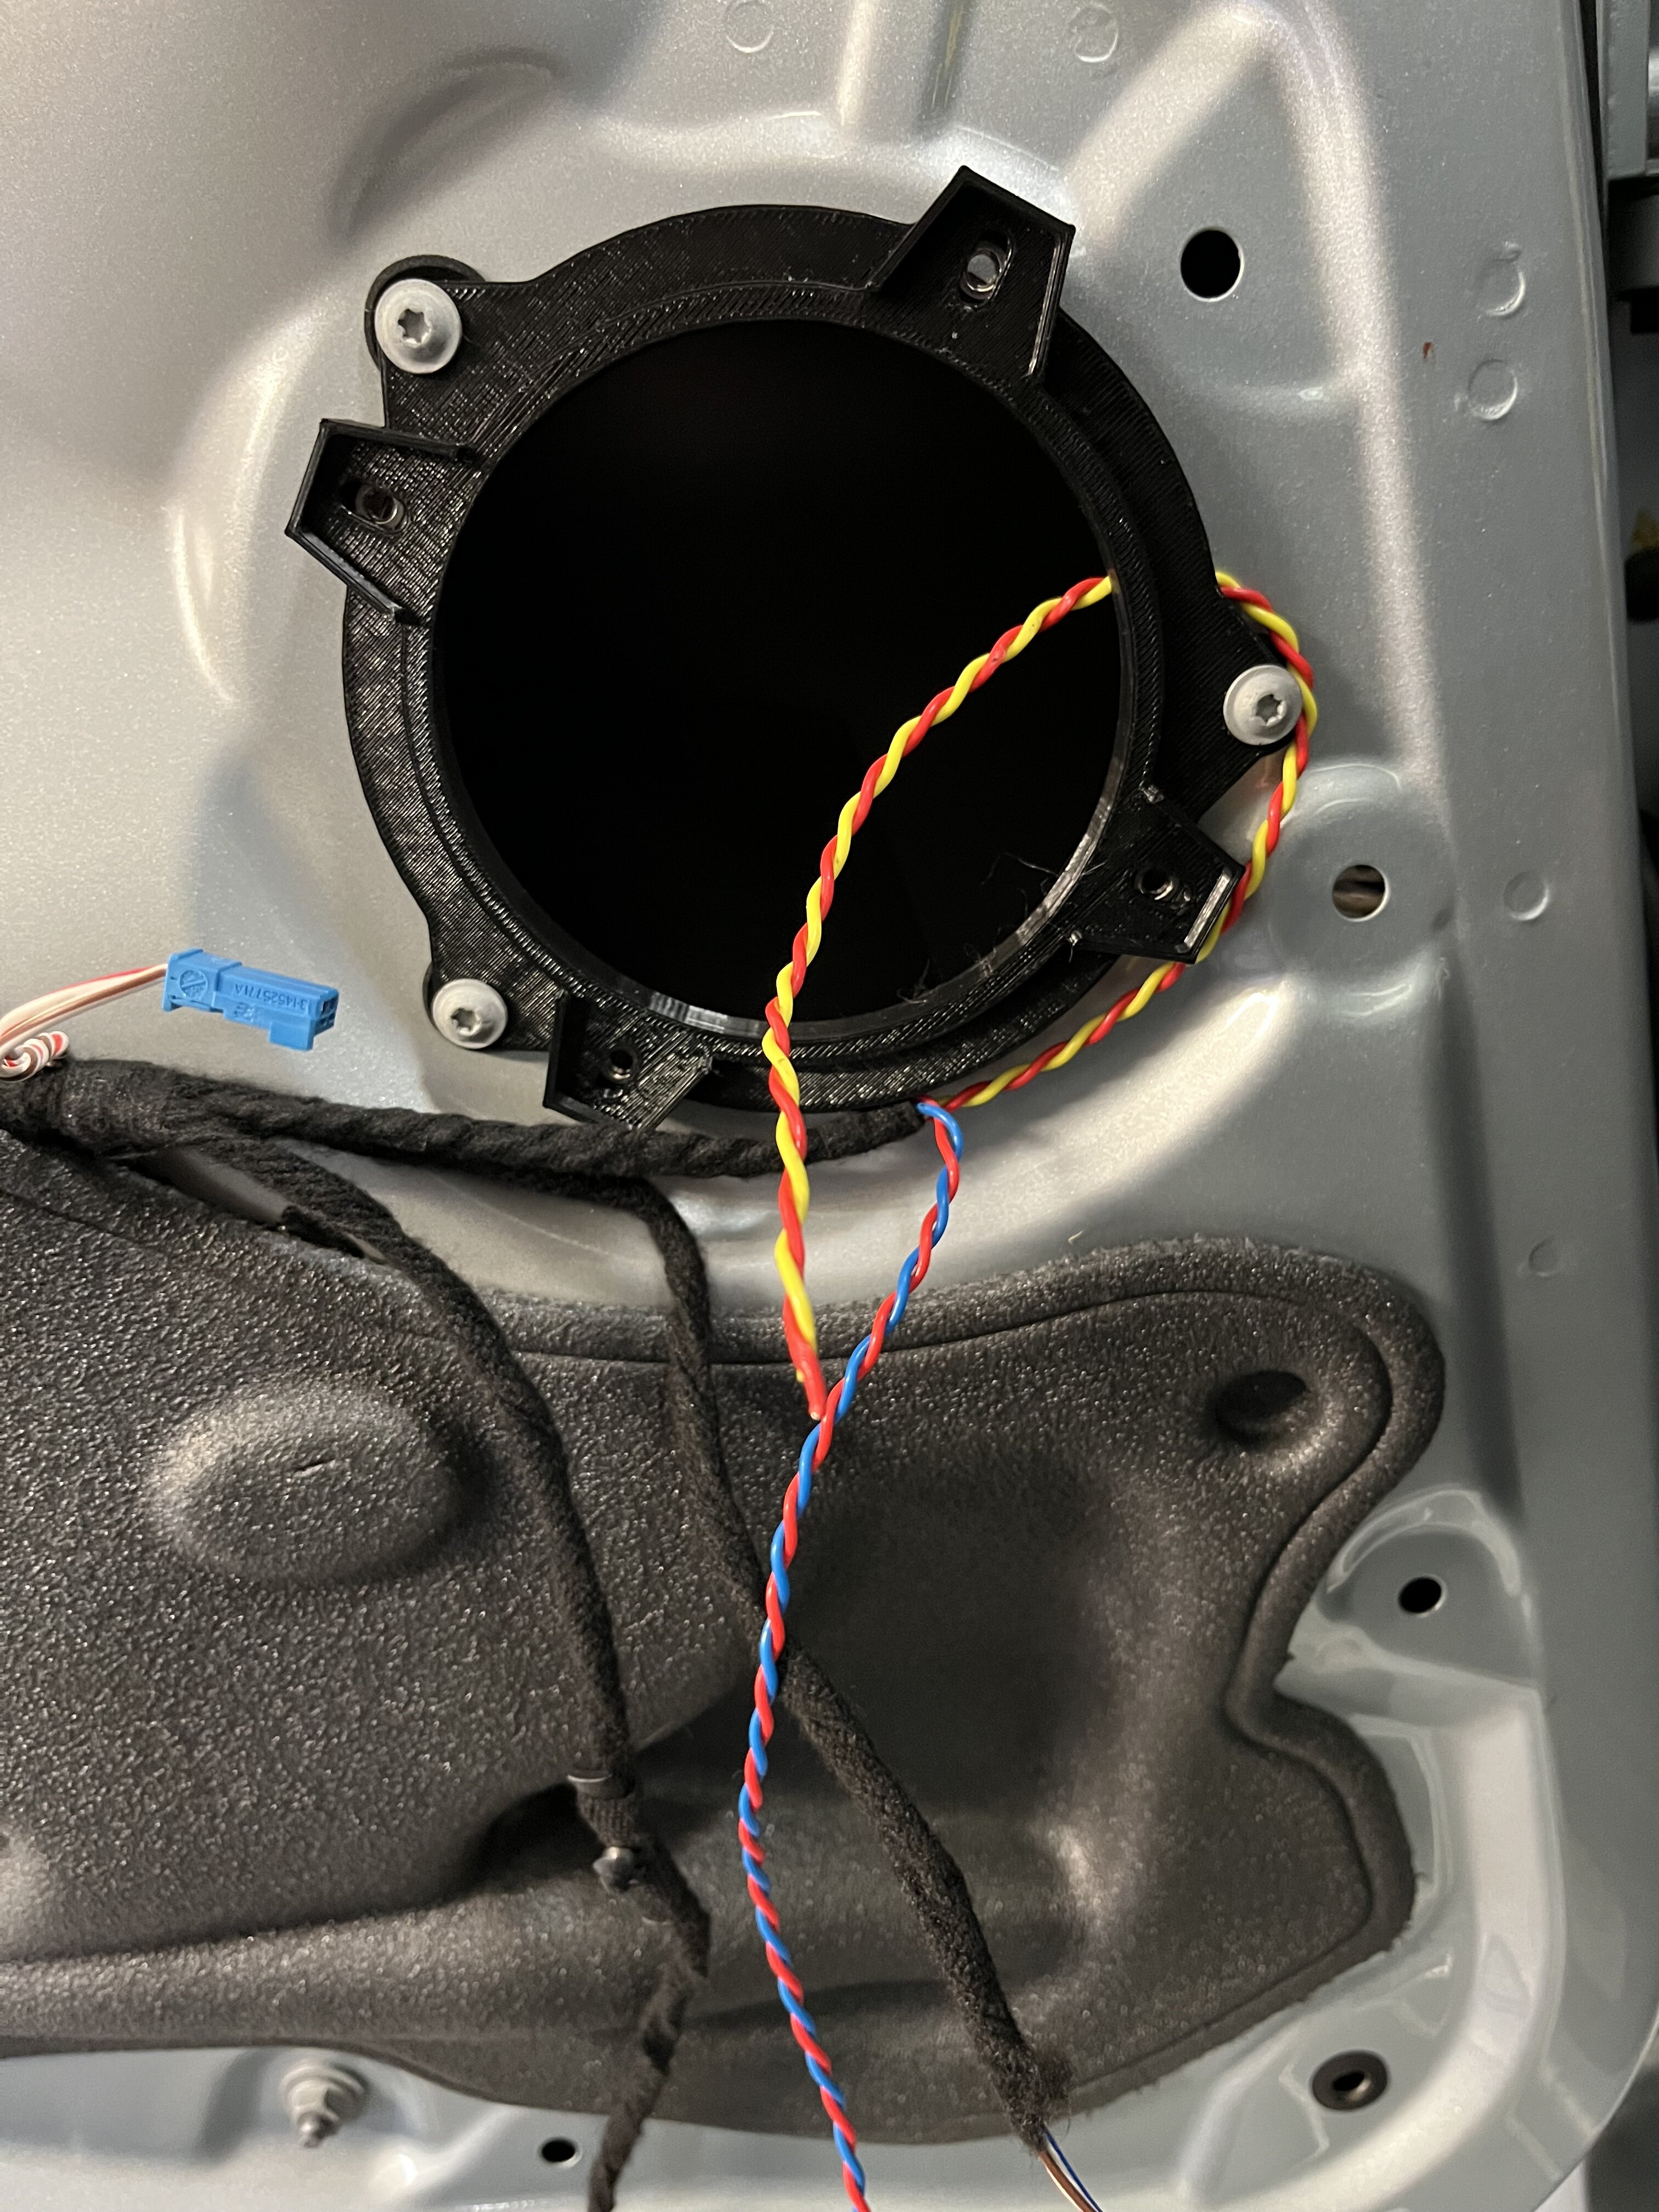
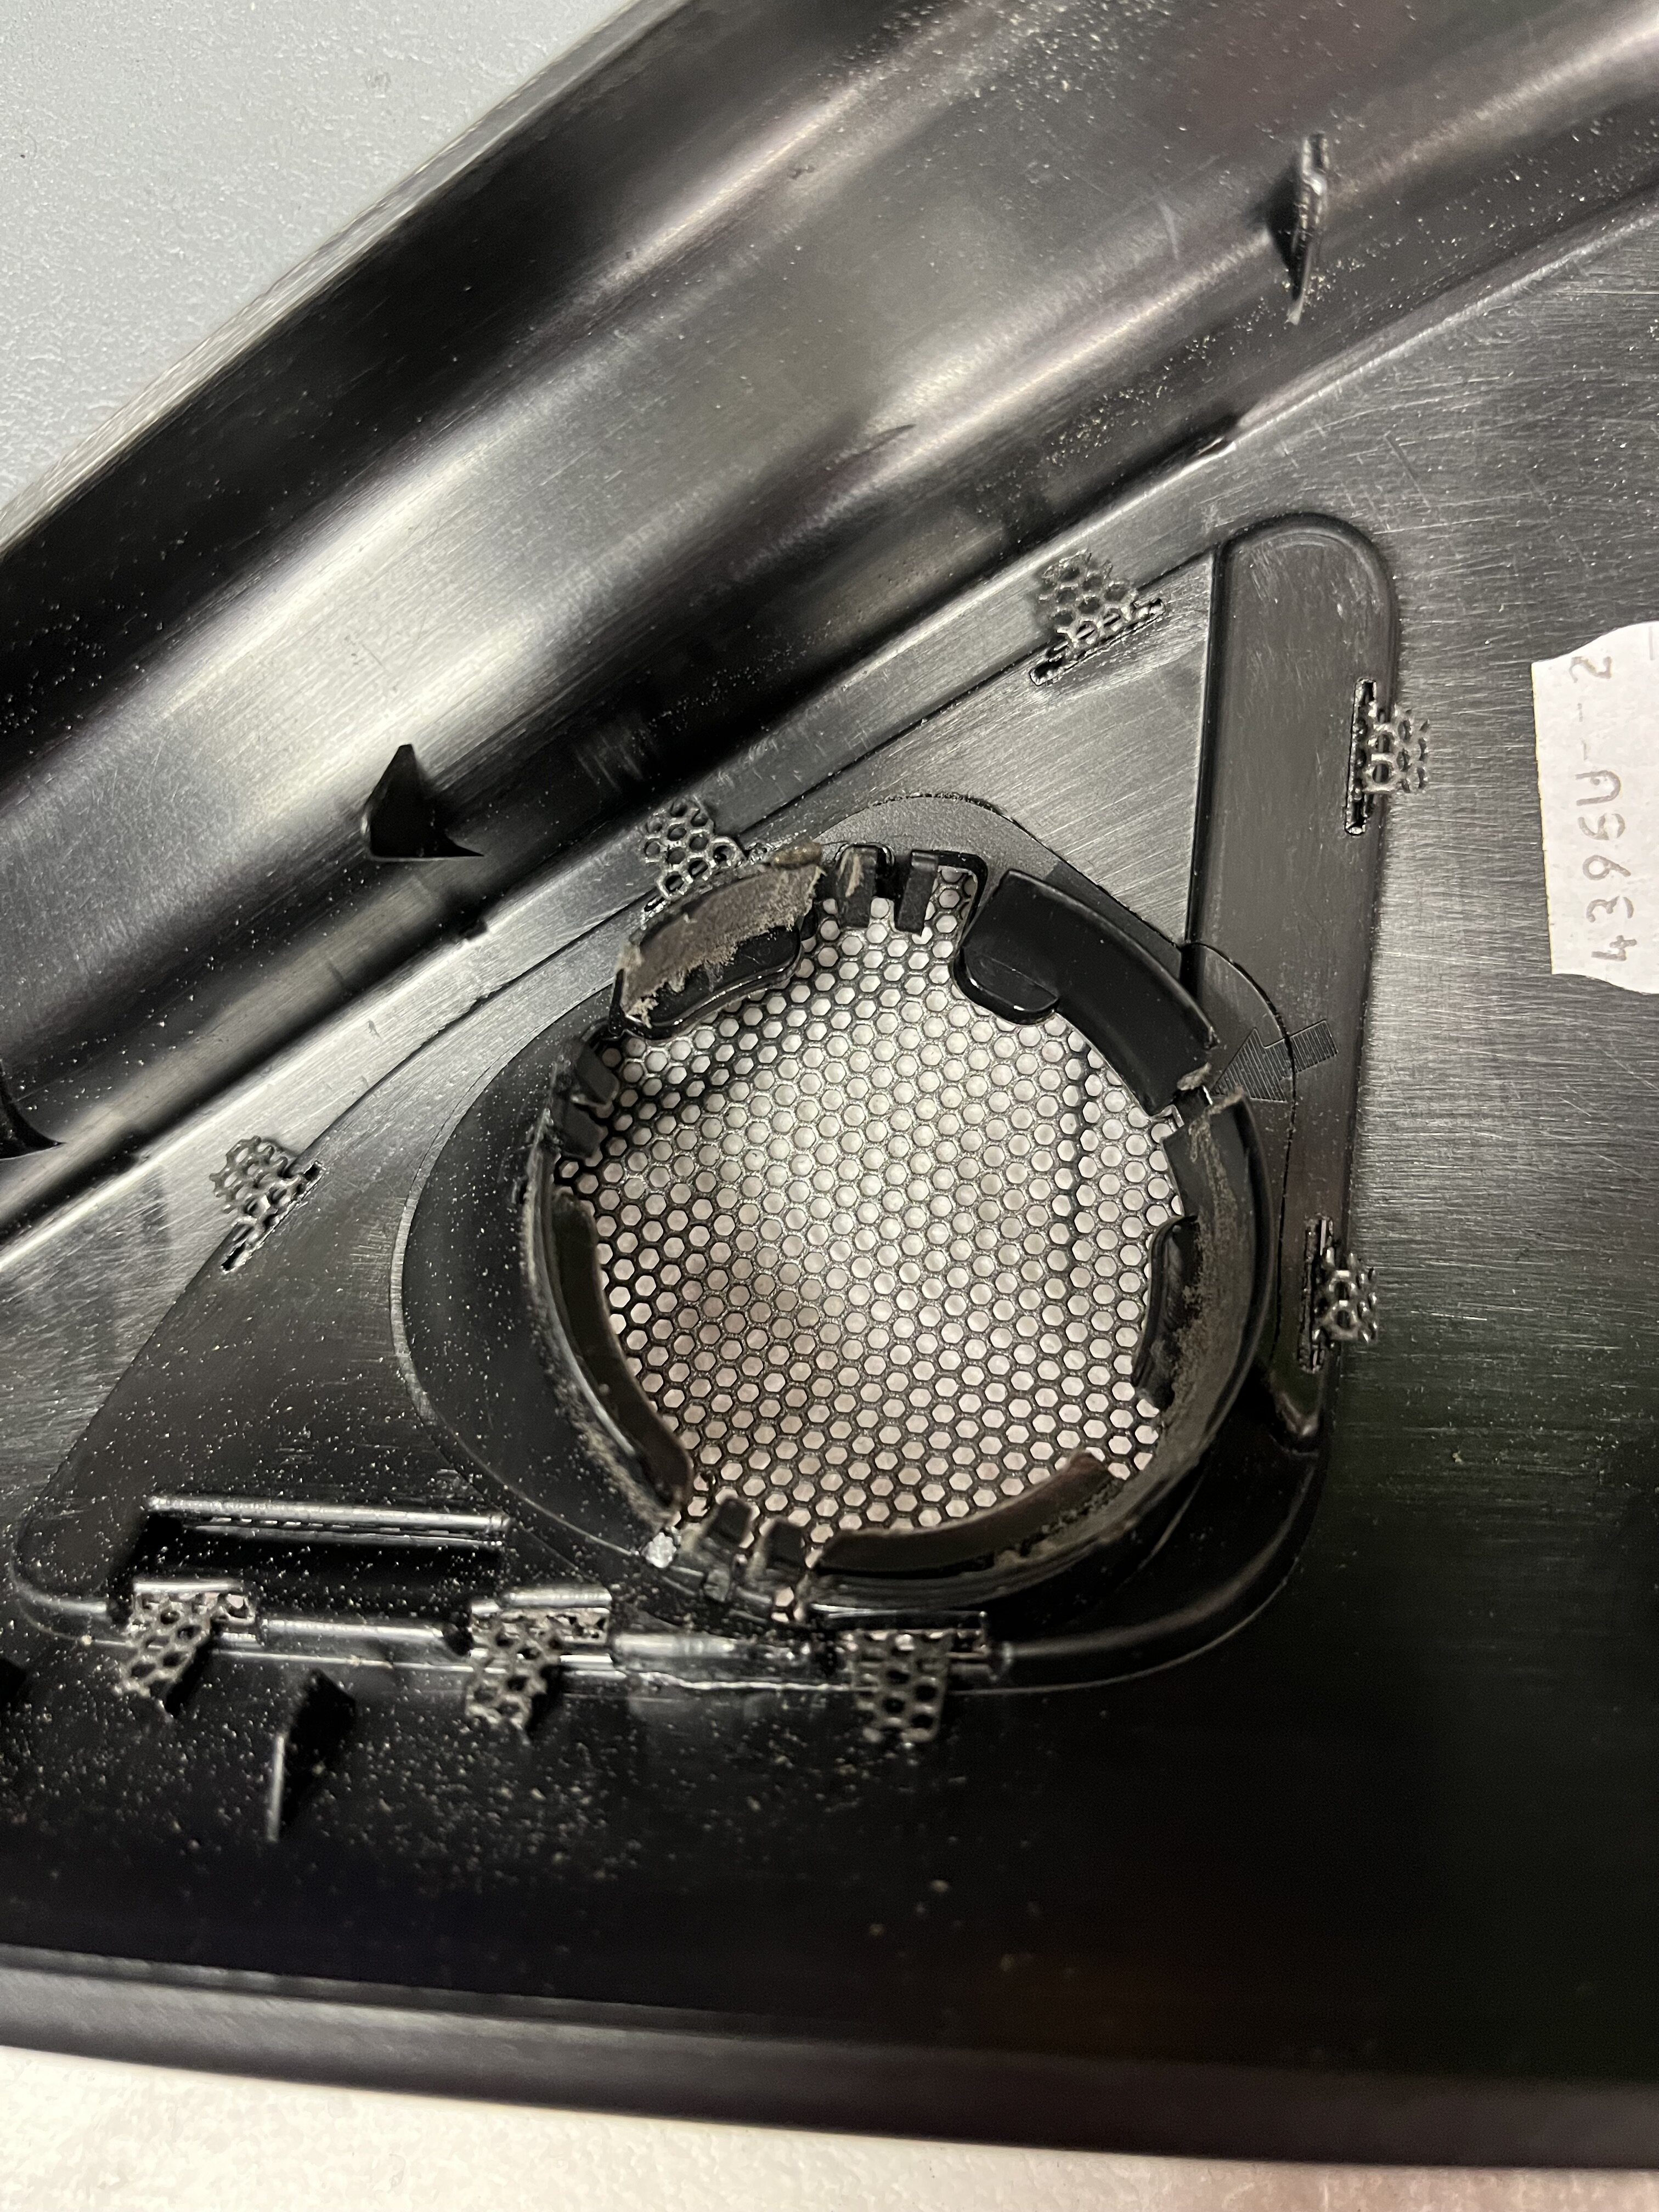
Second part was to create hole in door card for oem tweeter mount and grill.
Must admit that I was a bit nervous about doing this as getting it wrong could mean new door card. Fortunately BMW have marked the inner door card with an indentation which by my measurement as 51mm in diameter. I also measured the inner side Harman Kardon grill and 51/52 mm is about right for hole size. So by measuring 25.5mm from either side of the circle to create a y axis and then measured up 25.5mm.
Checked everything three time and drilled a pilot hole from inner to outer door card.
Then flipped the door card as you want to cut through the vinyl first with it supported by the door card material. Stops the risk of the fabric tearing if going other way. Also checked that 51mm hole saw was running true before drilling.
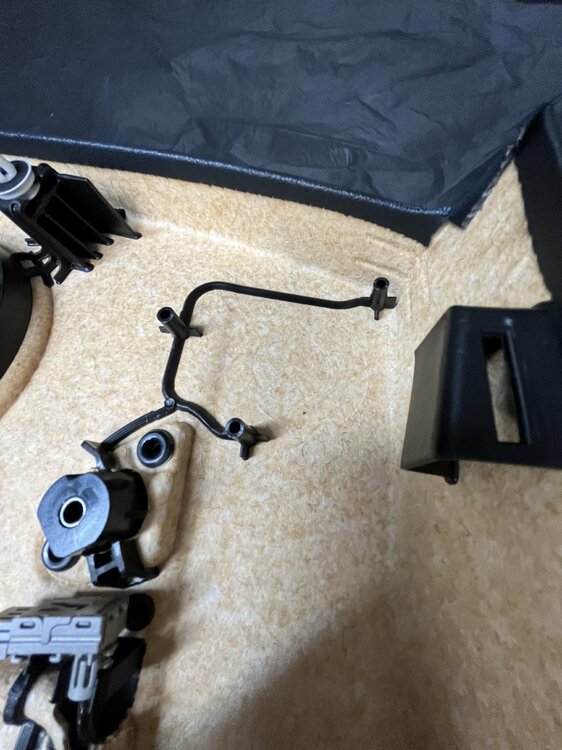
Once hole drilled simple case of installing tweeter bracket onto three plastic posts via m6 axial clips. These have a very tight fit so used a 11 mm socket and small hammer to push them on.
Also added a Harman Kardon grill to mid bass hole as they are a bit more acoustically transparent.


-
 1
1
-
-
Was time to get on with a door so I picked a rear first.
Principles for rear door.
- Leave water membrane intact and cause minimum disruption and create no extra holes
- Modify door card to allow Fitment of OEM tweeter bracket and speaker grill
- Keep audio wiring path simple and oem like by mounting crossovers in boot
- Add some sound deadening to help audio but not to make make M3 quieter
- Allow tweeter to be disconnected via oem connectors should door card be removed
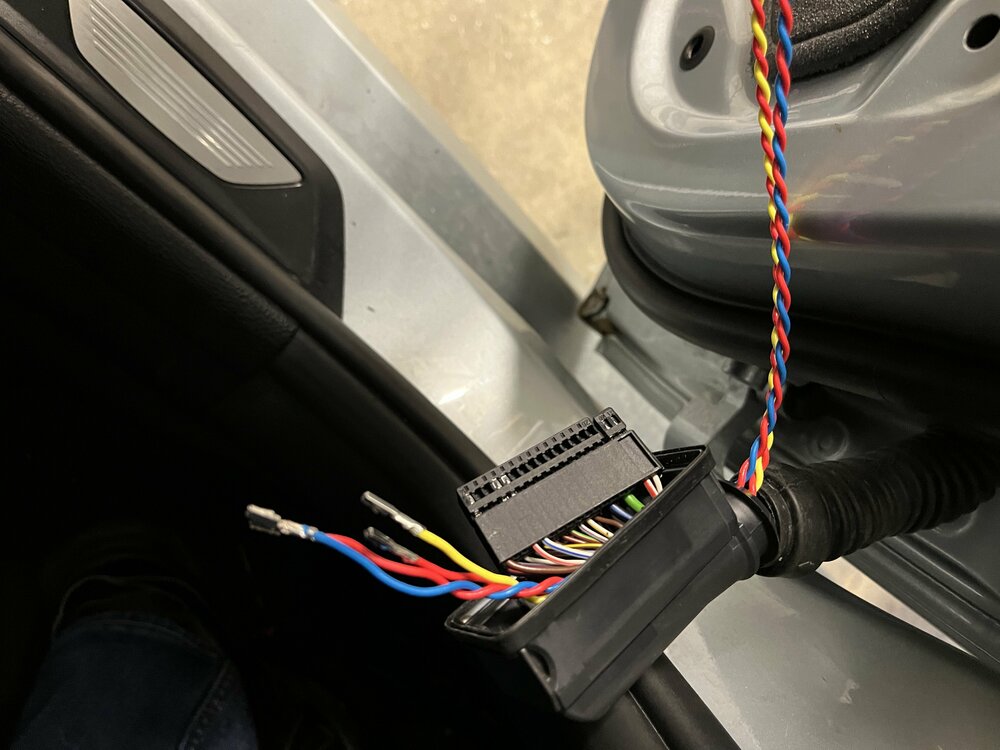
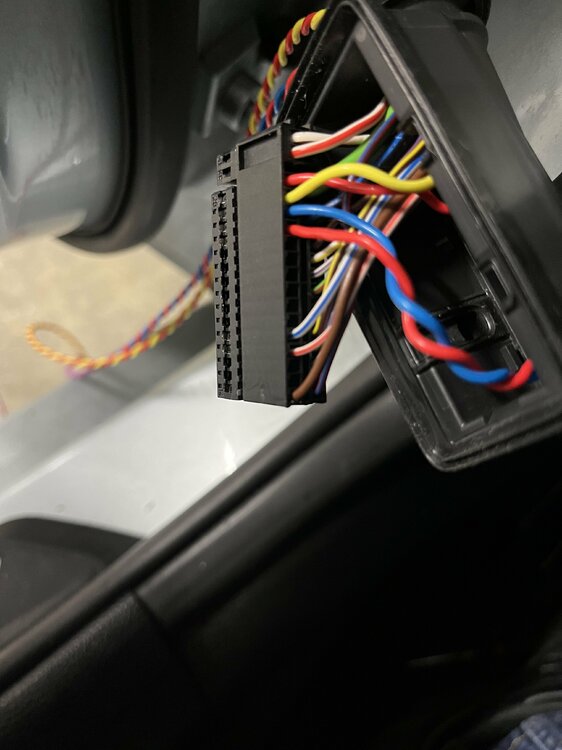
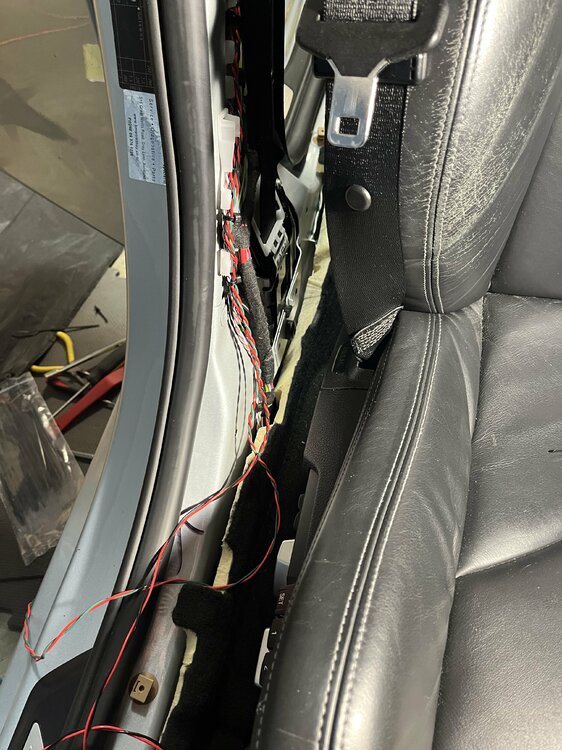
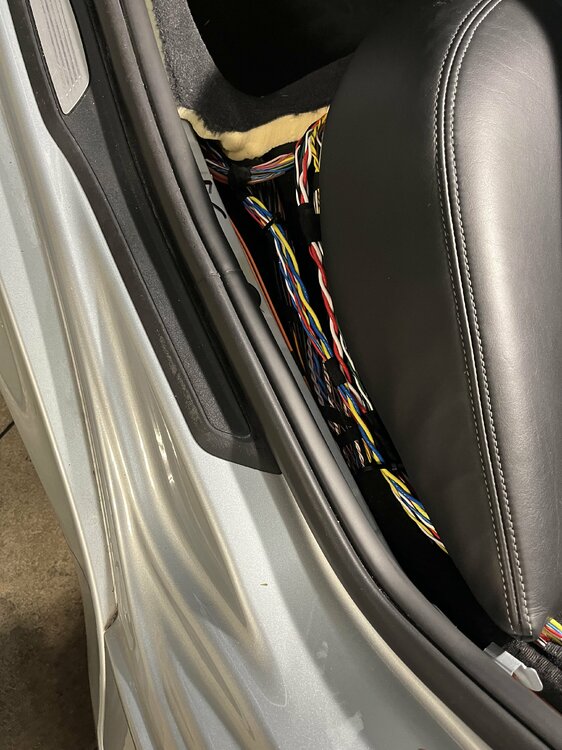
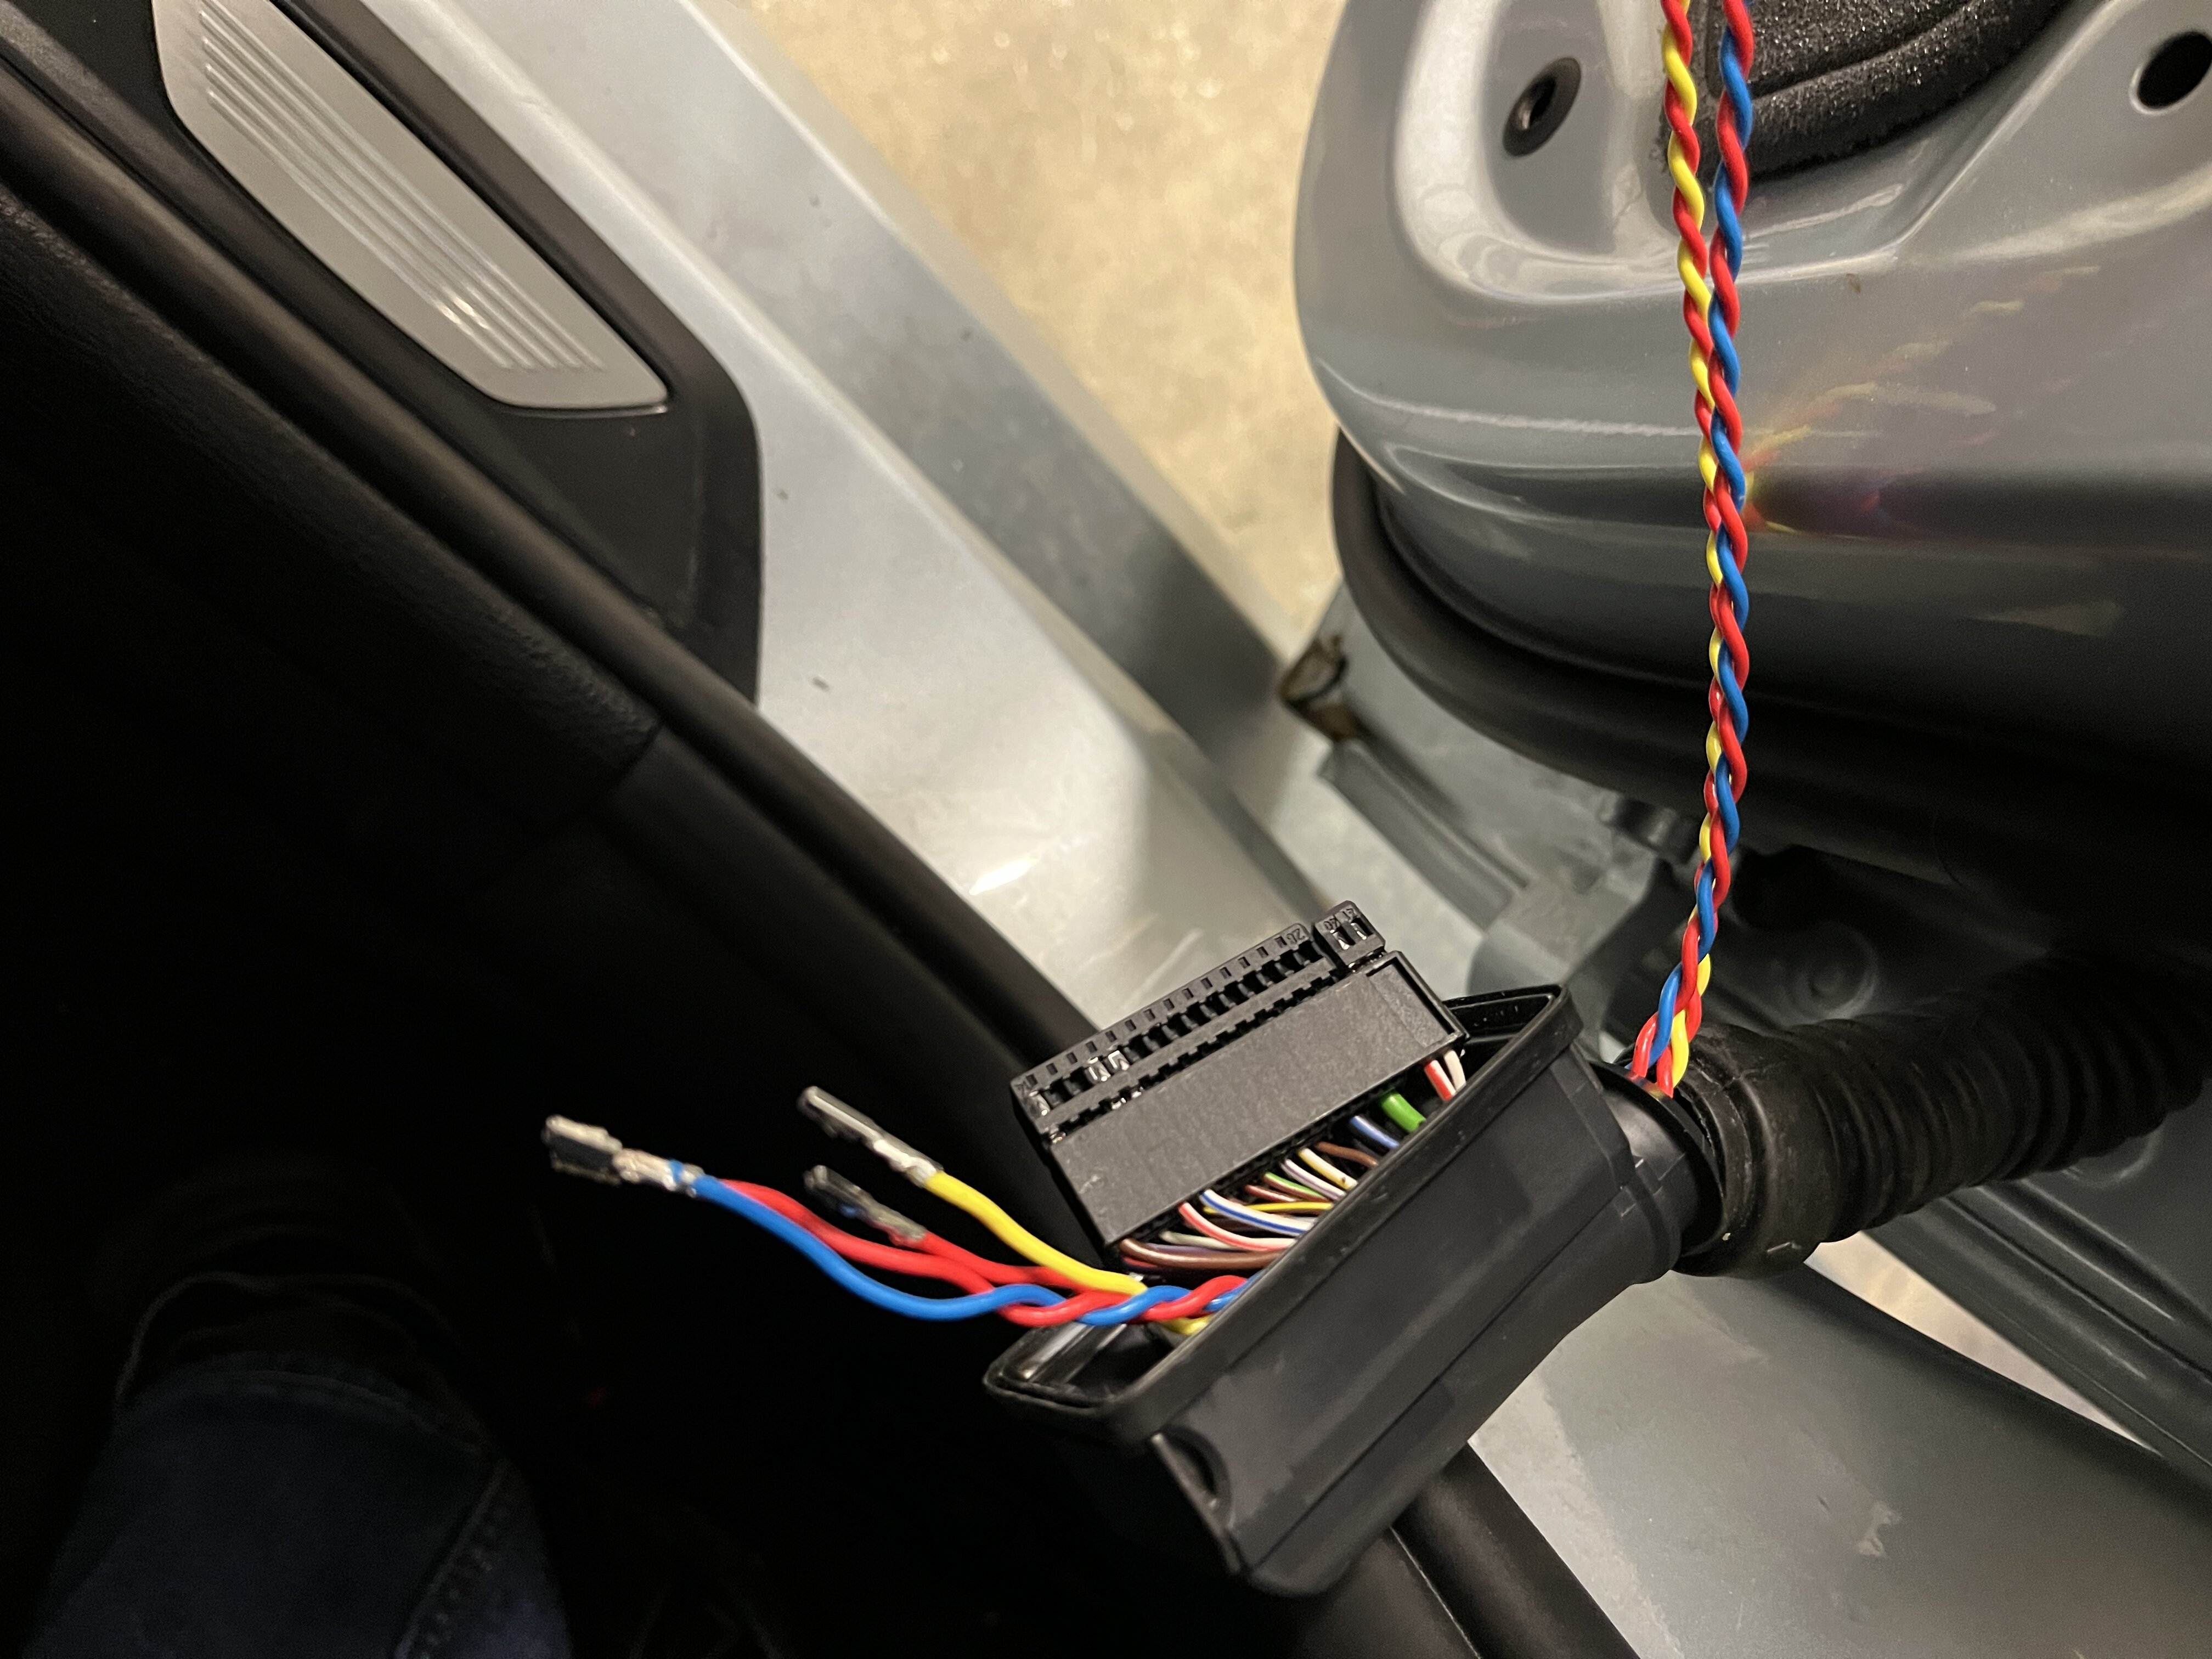
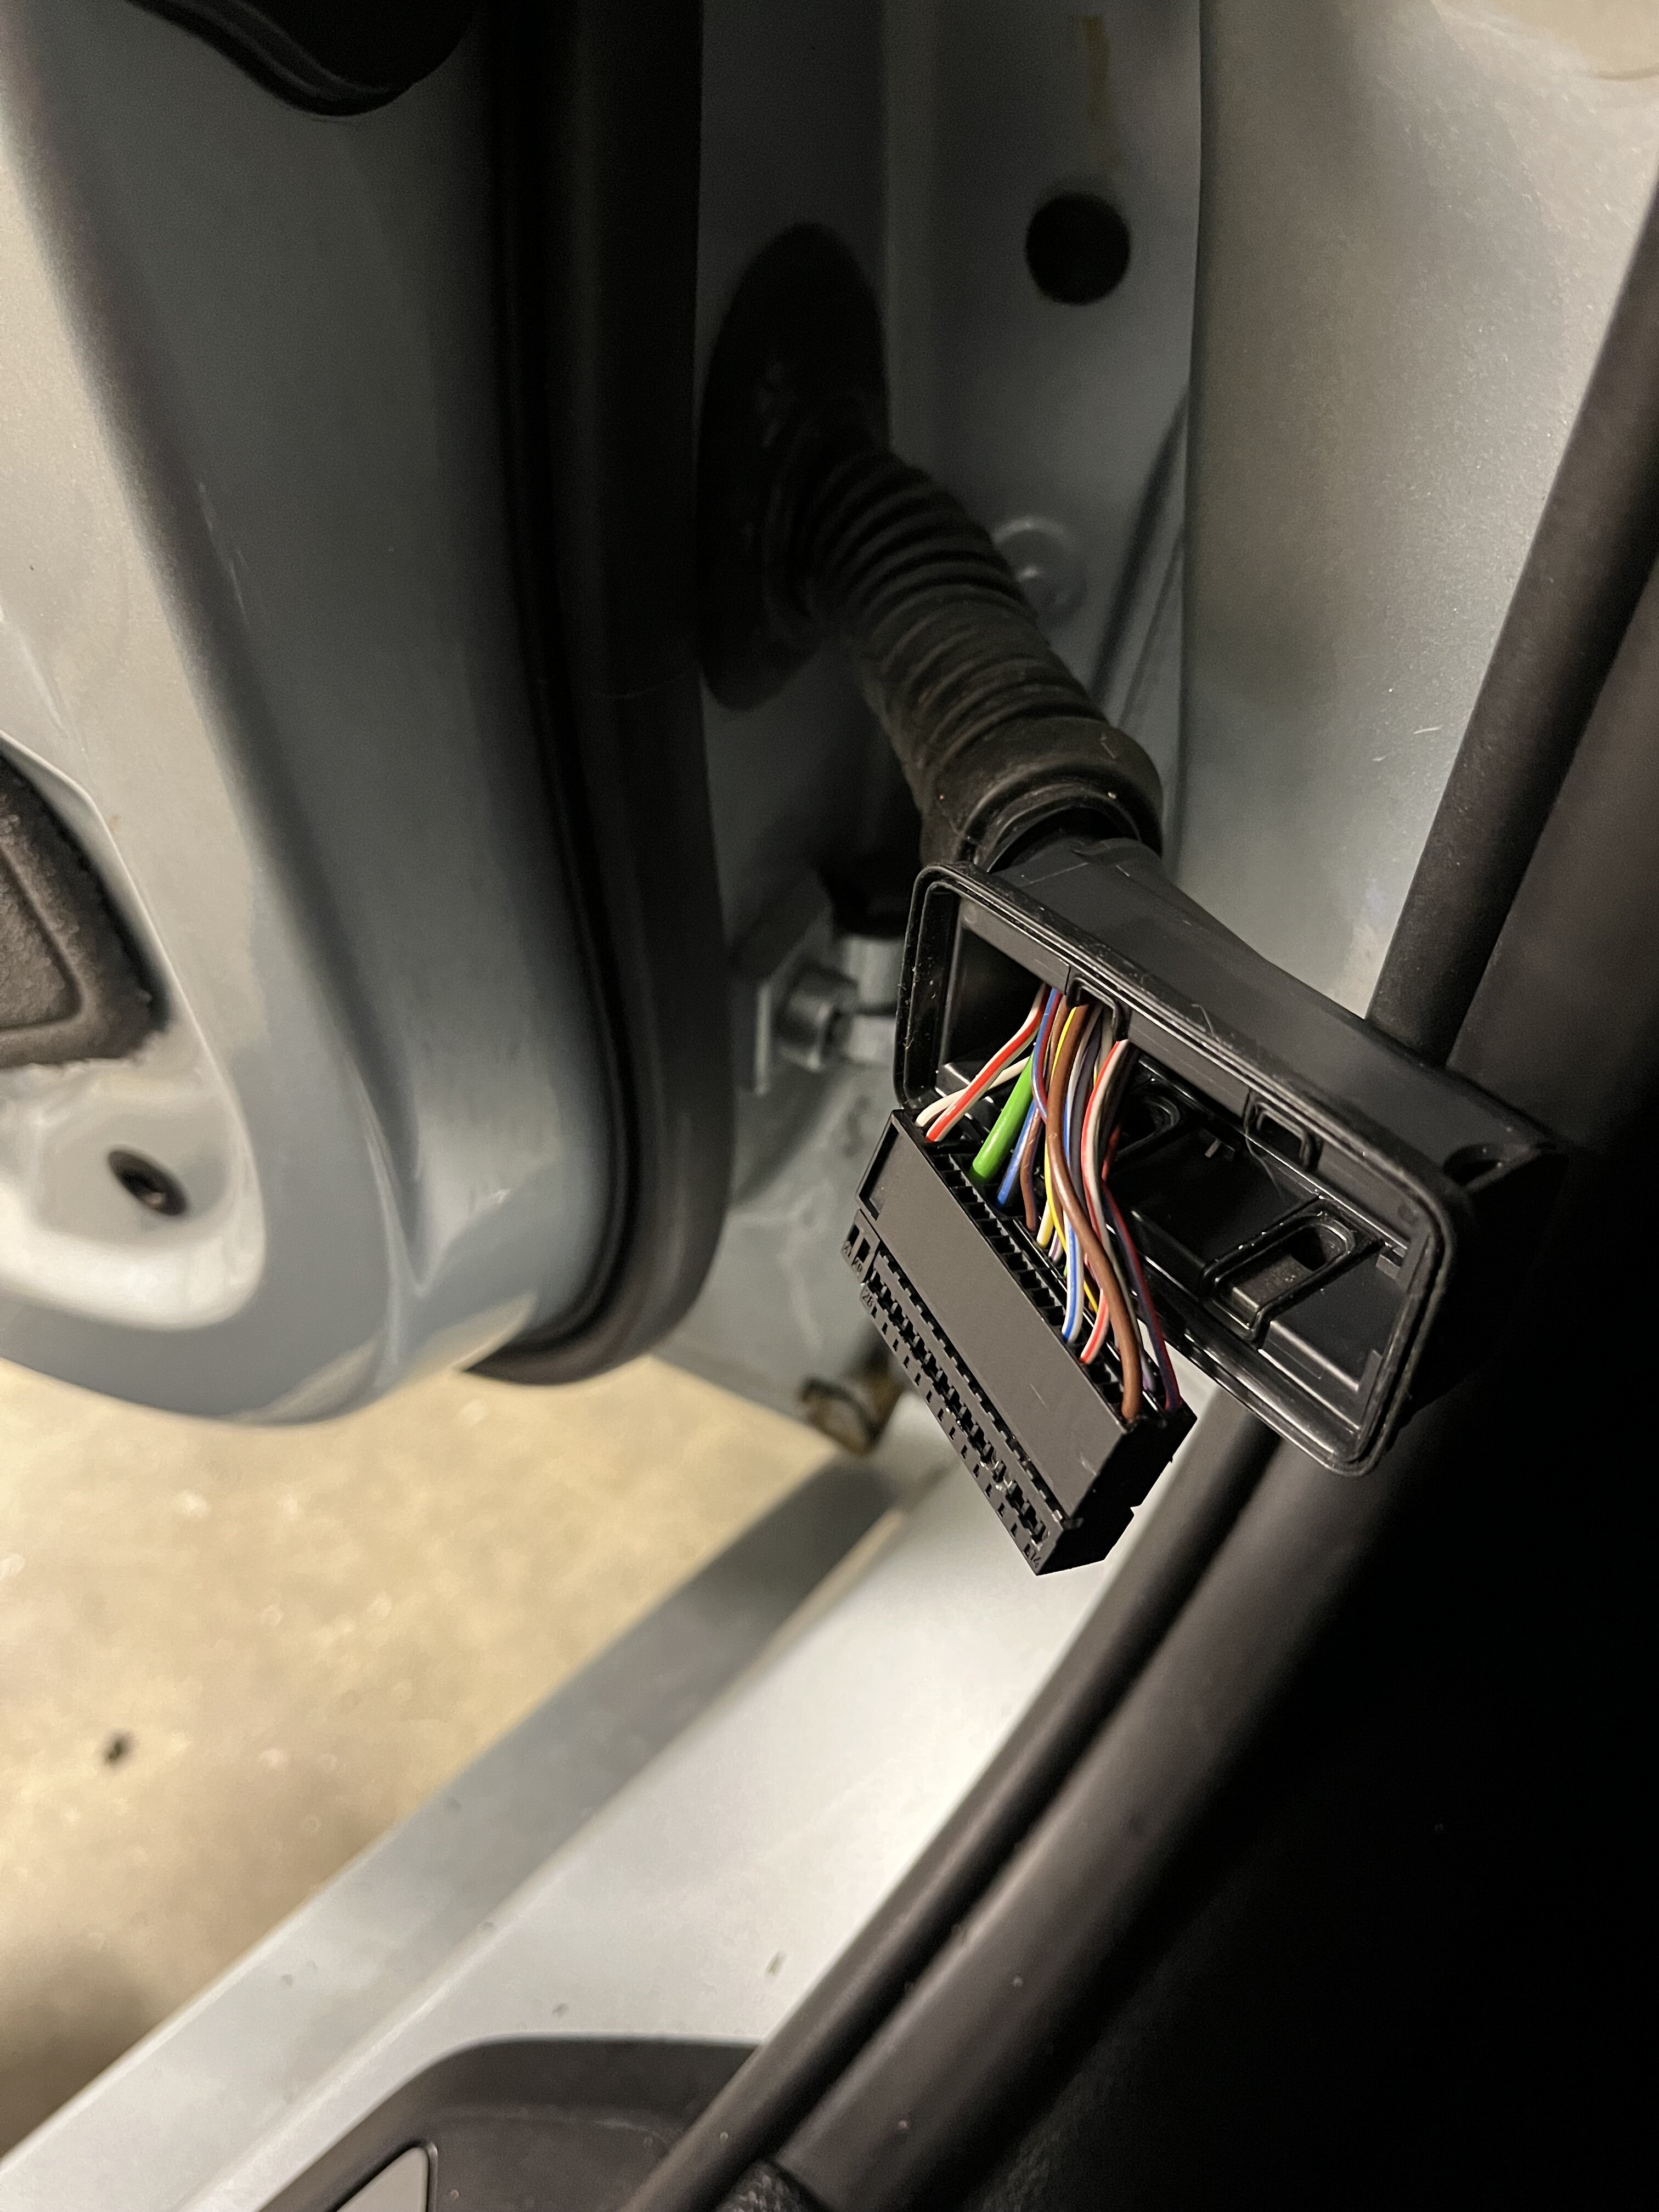
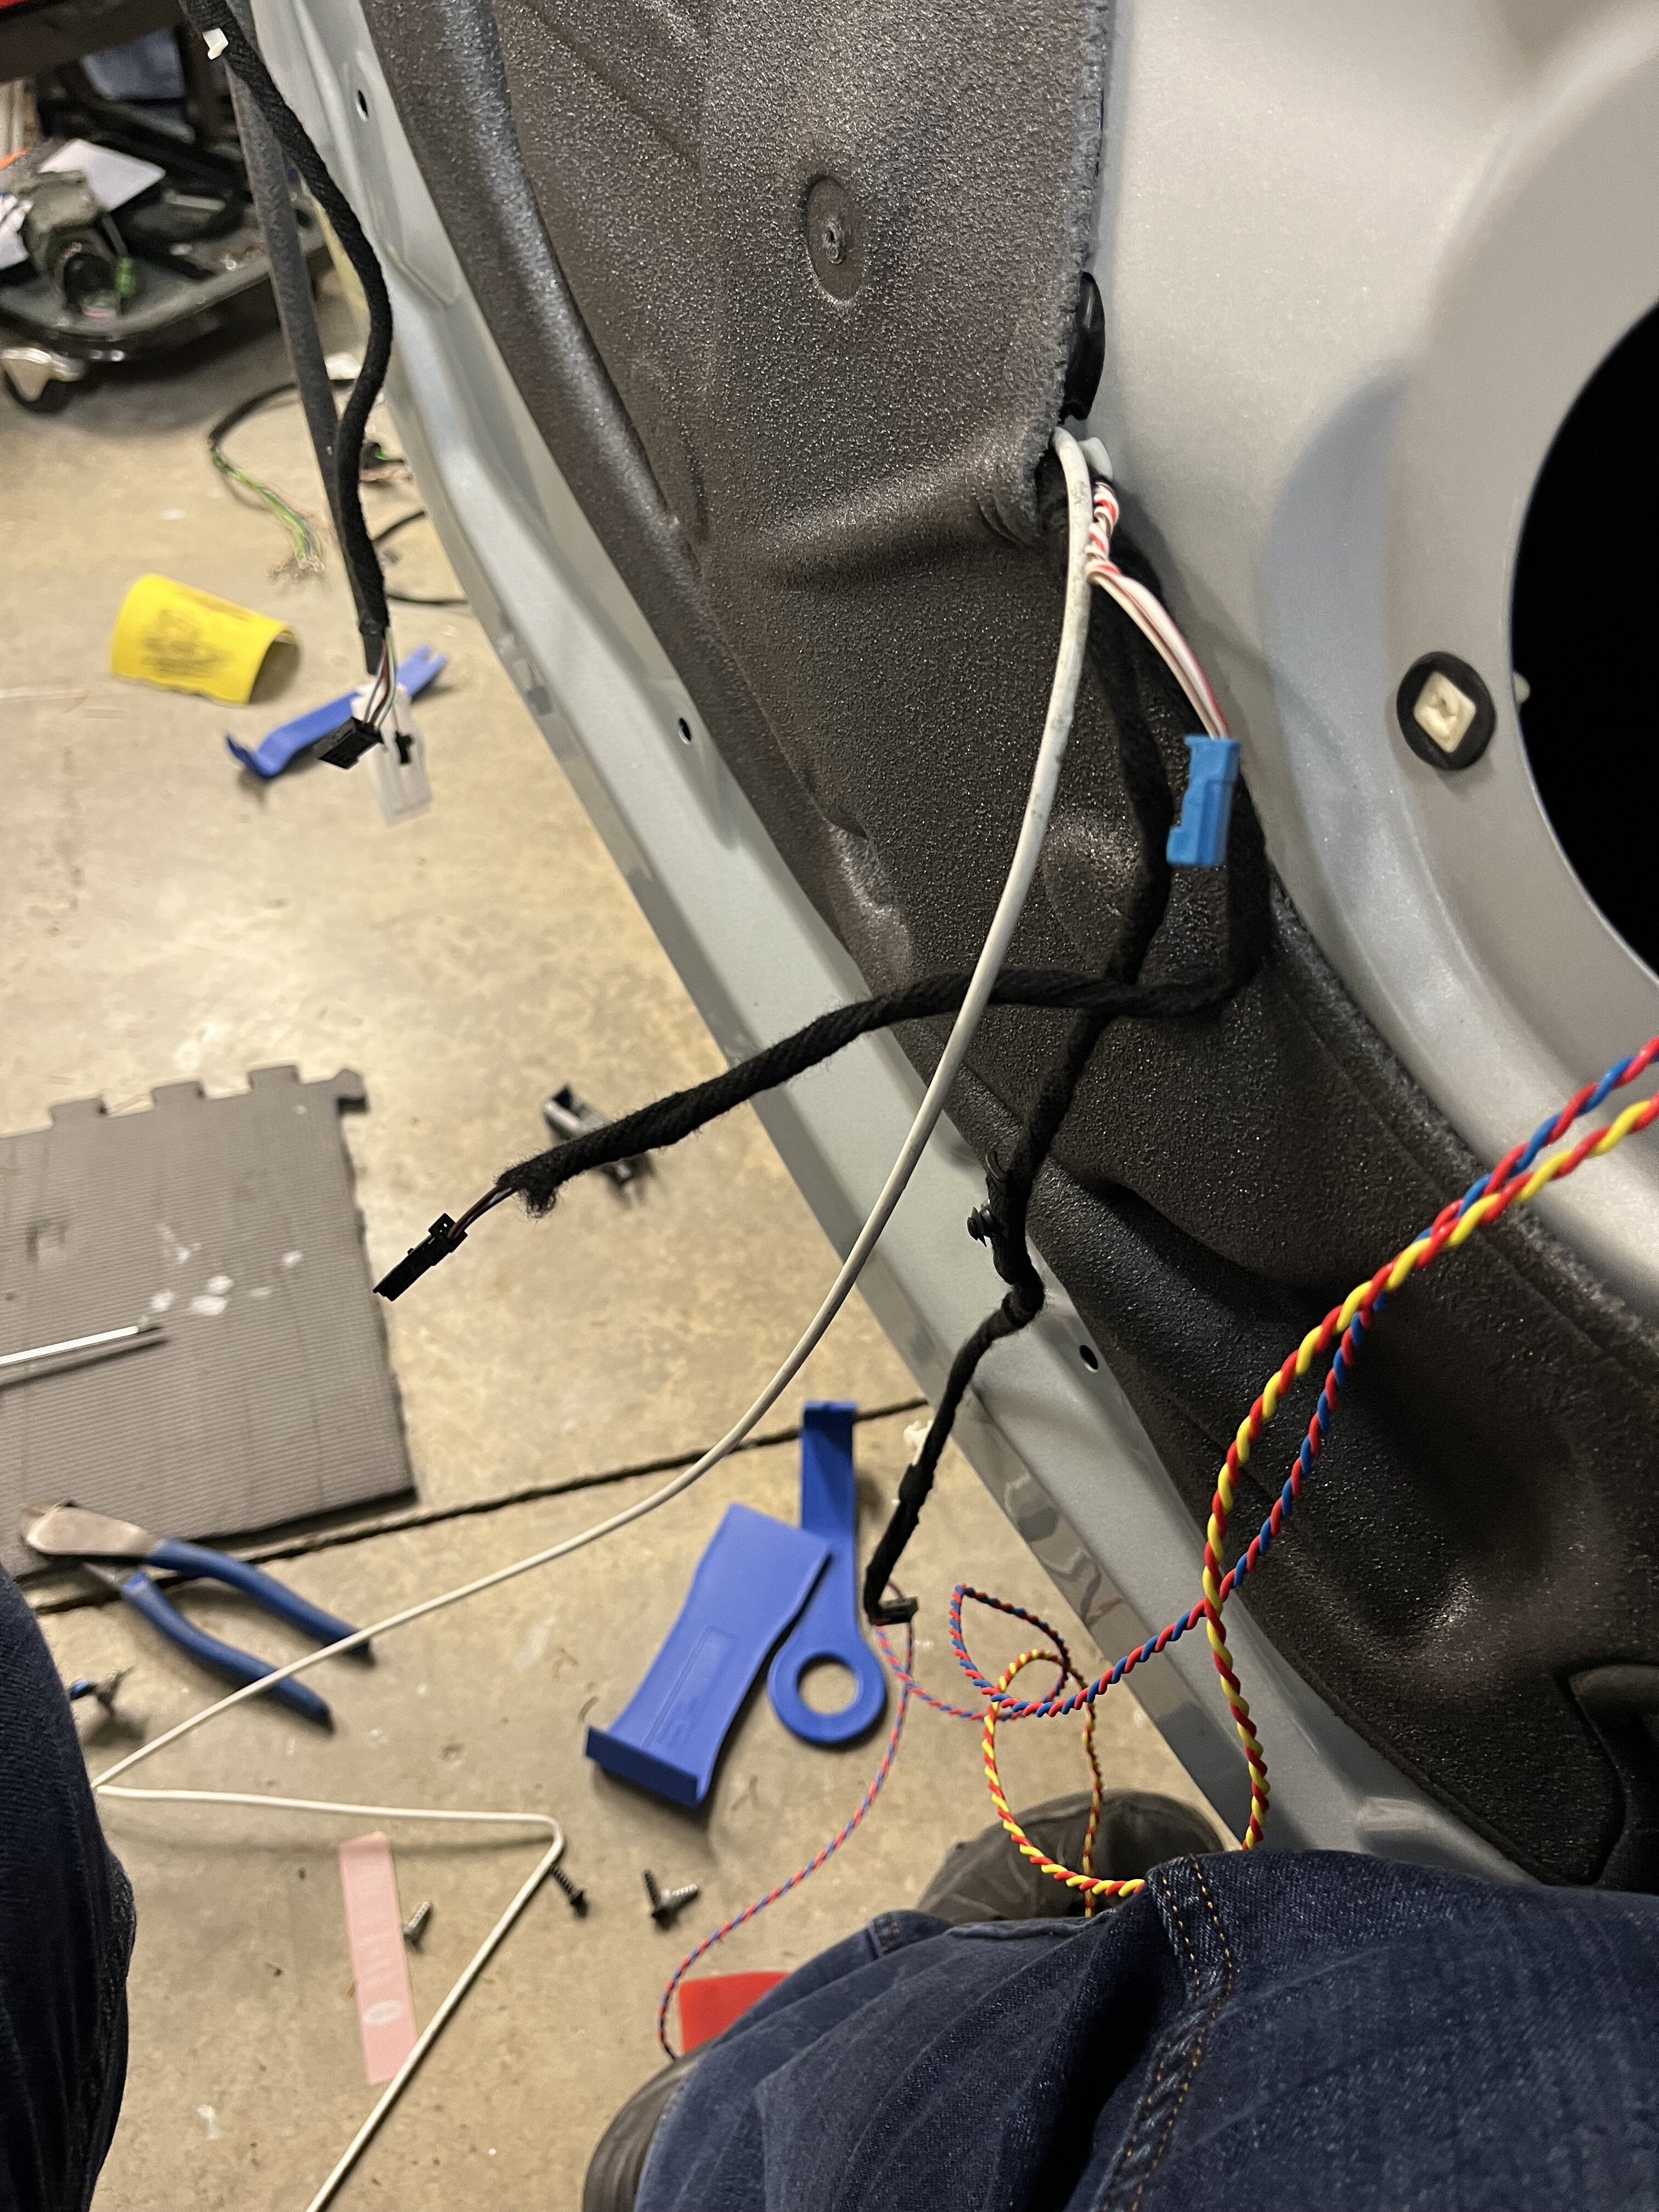
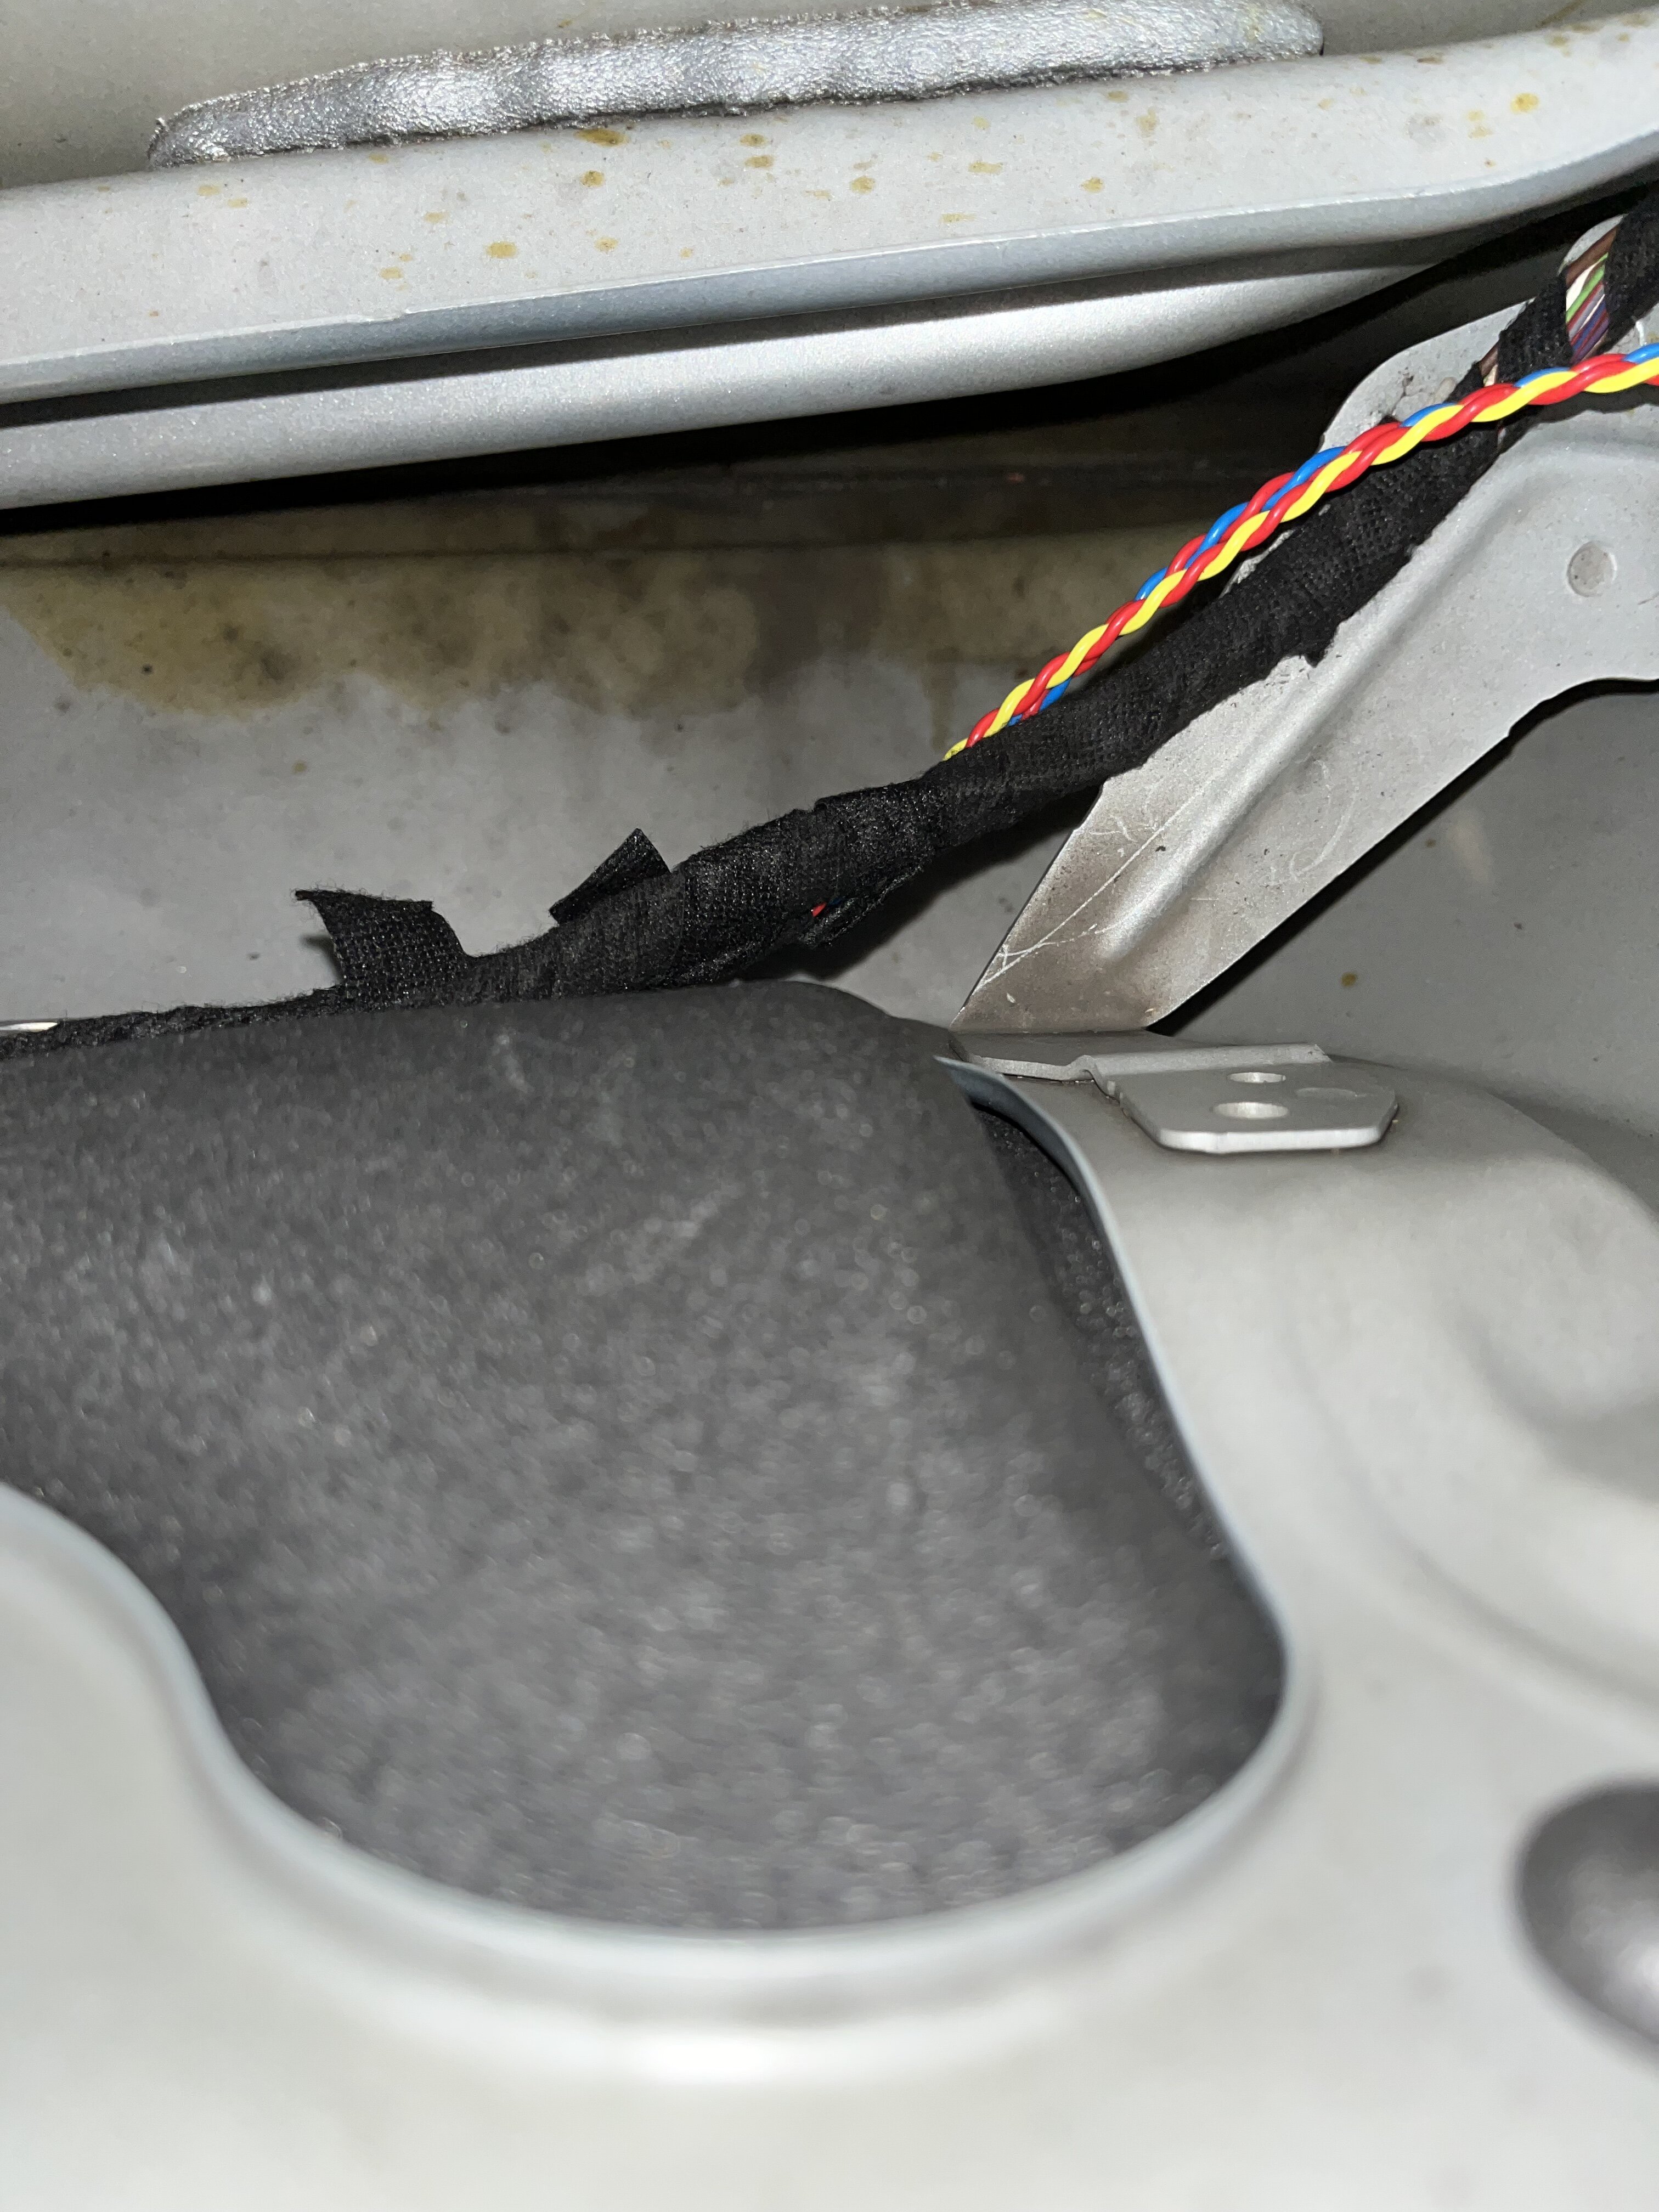
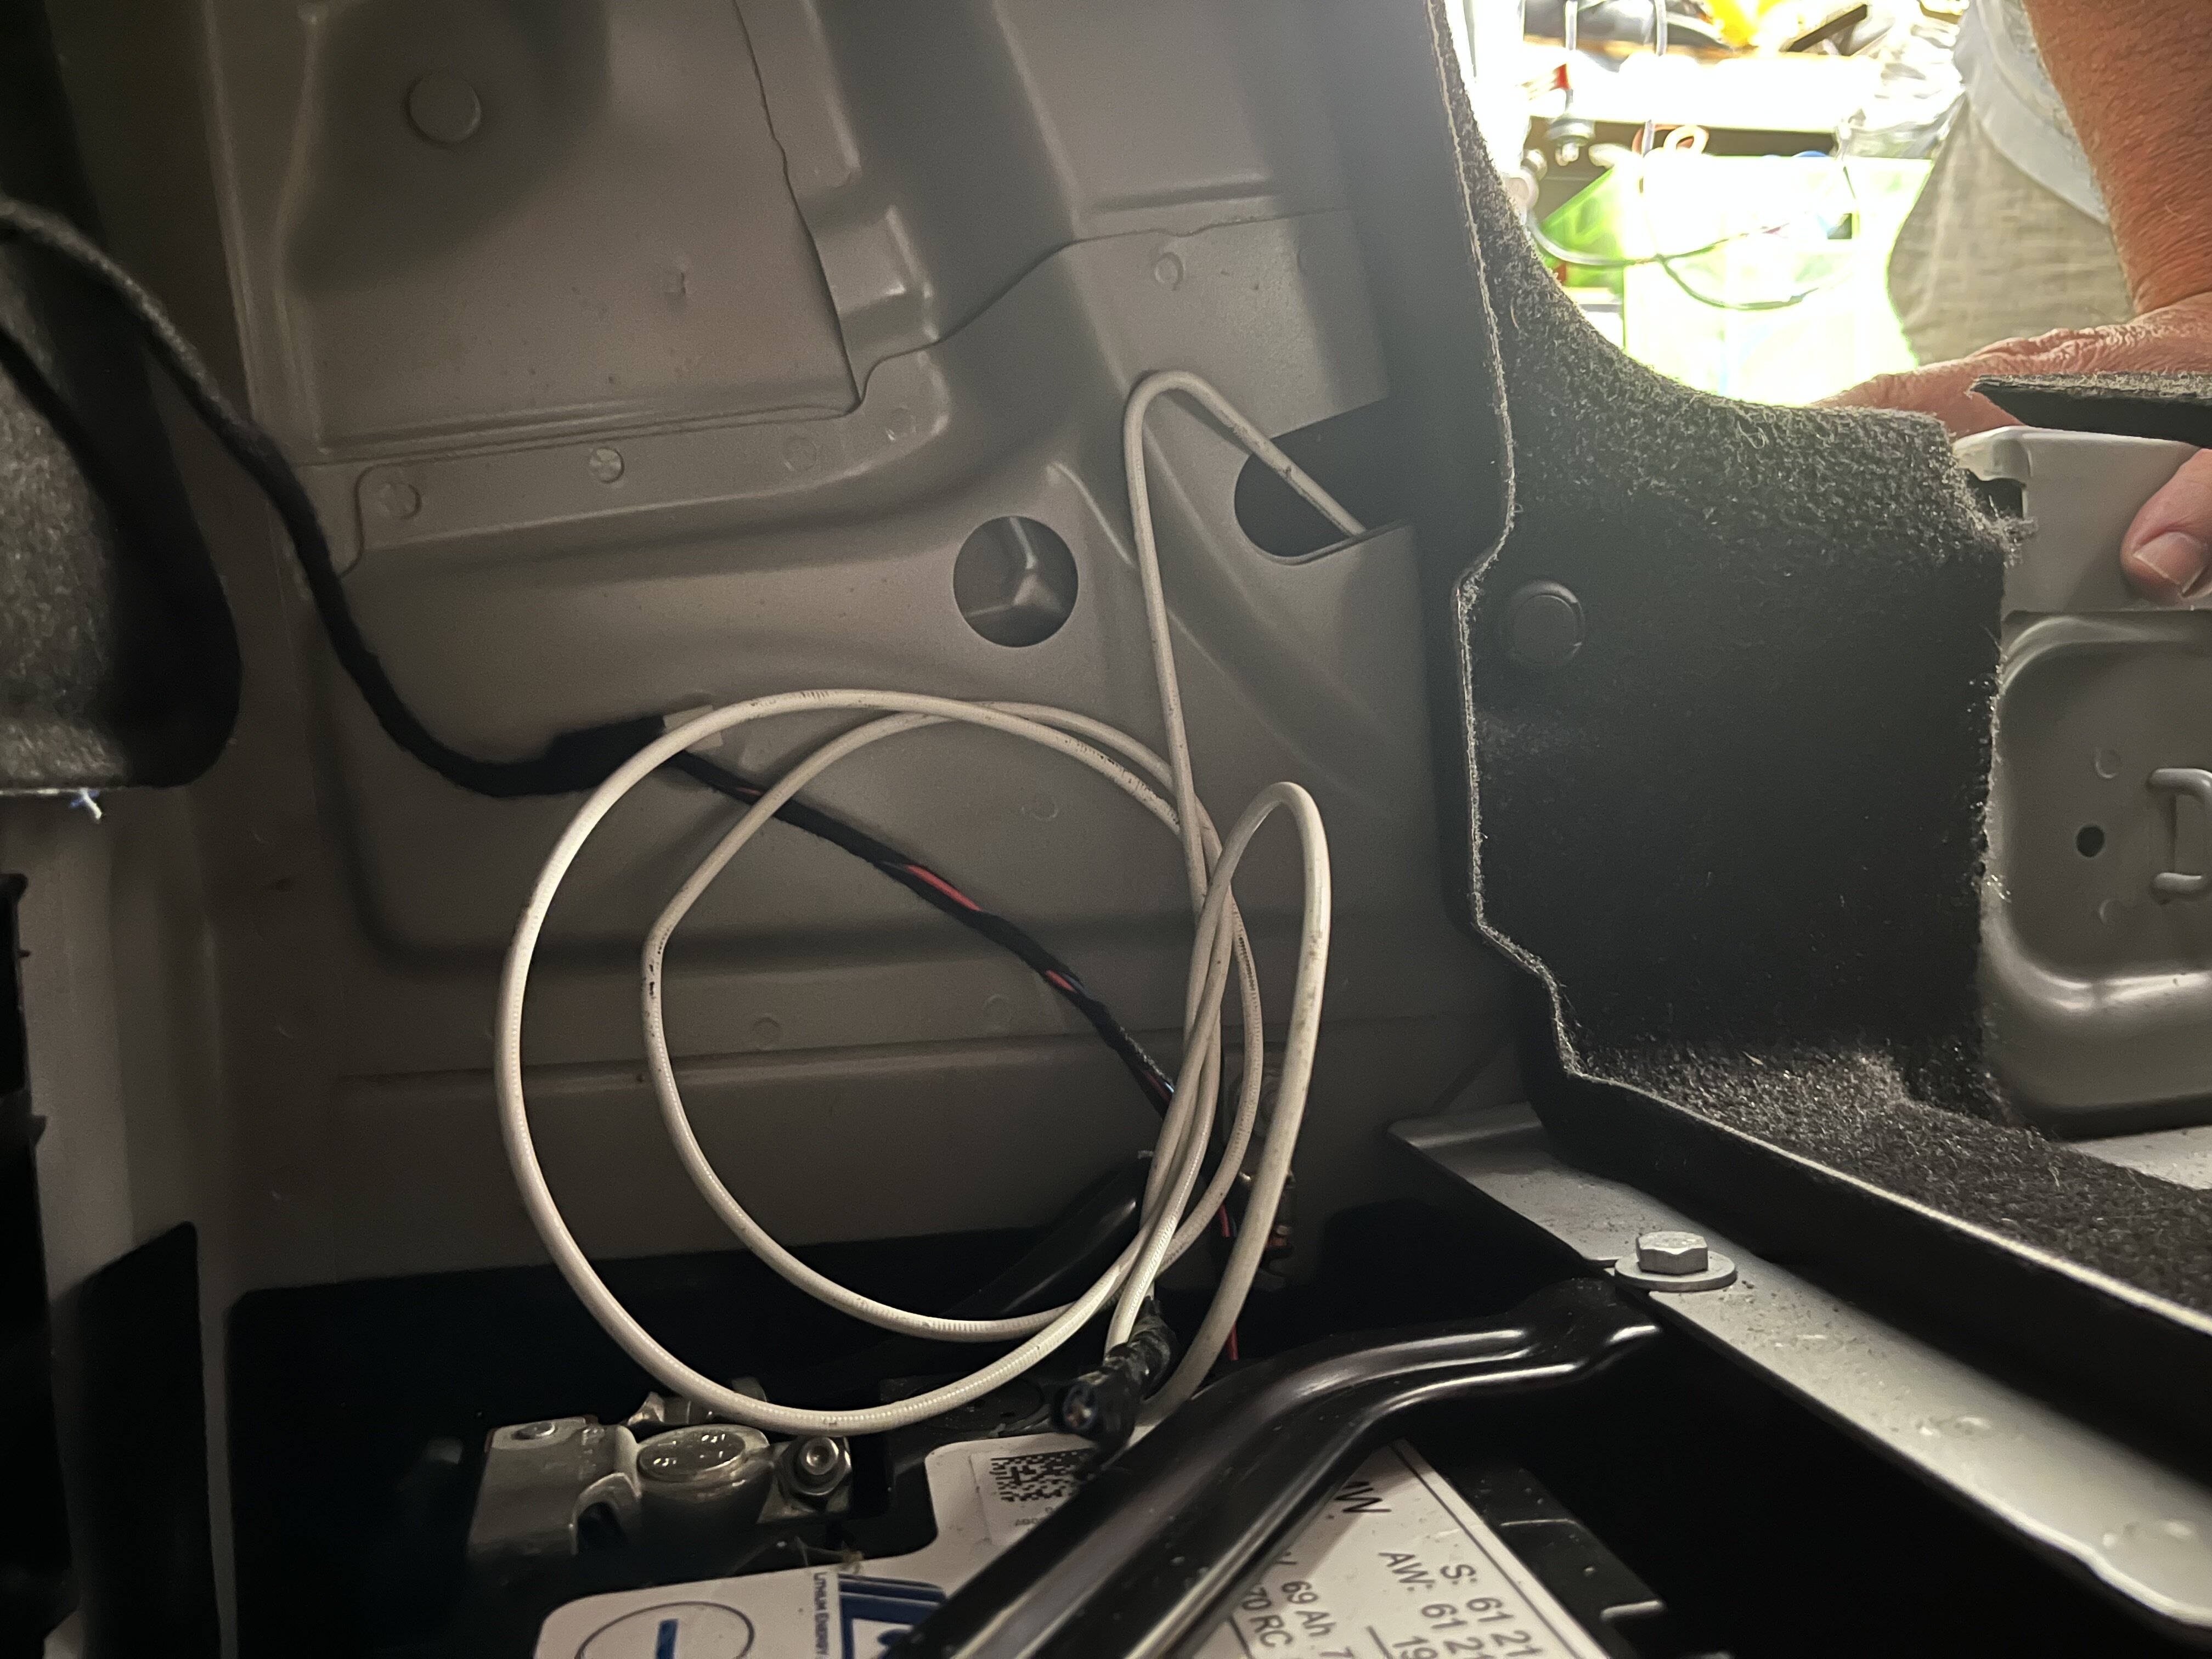
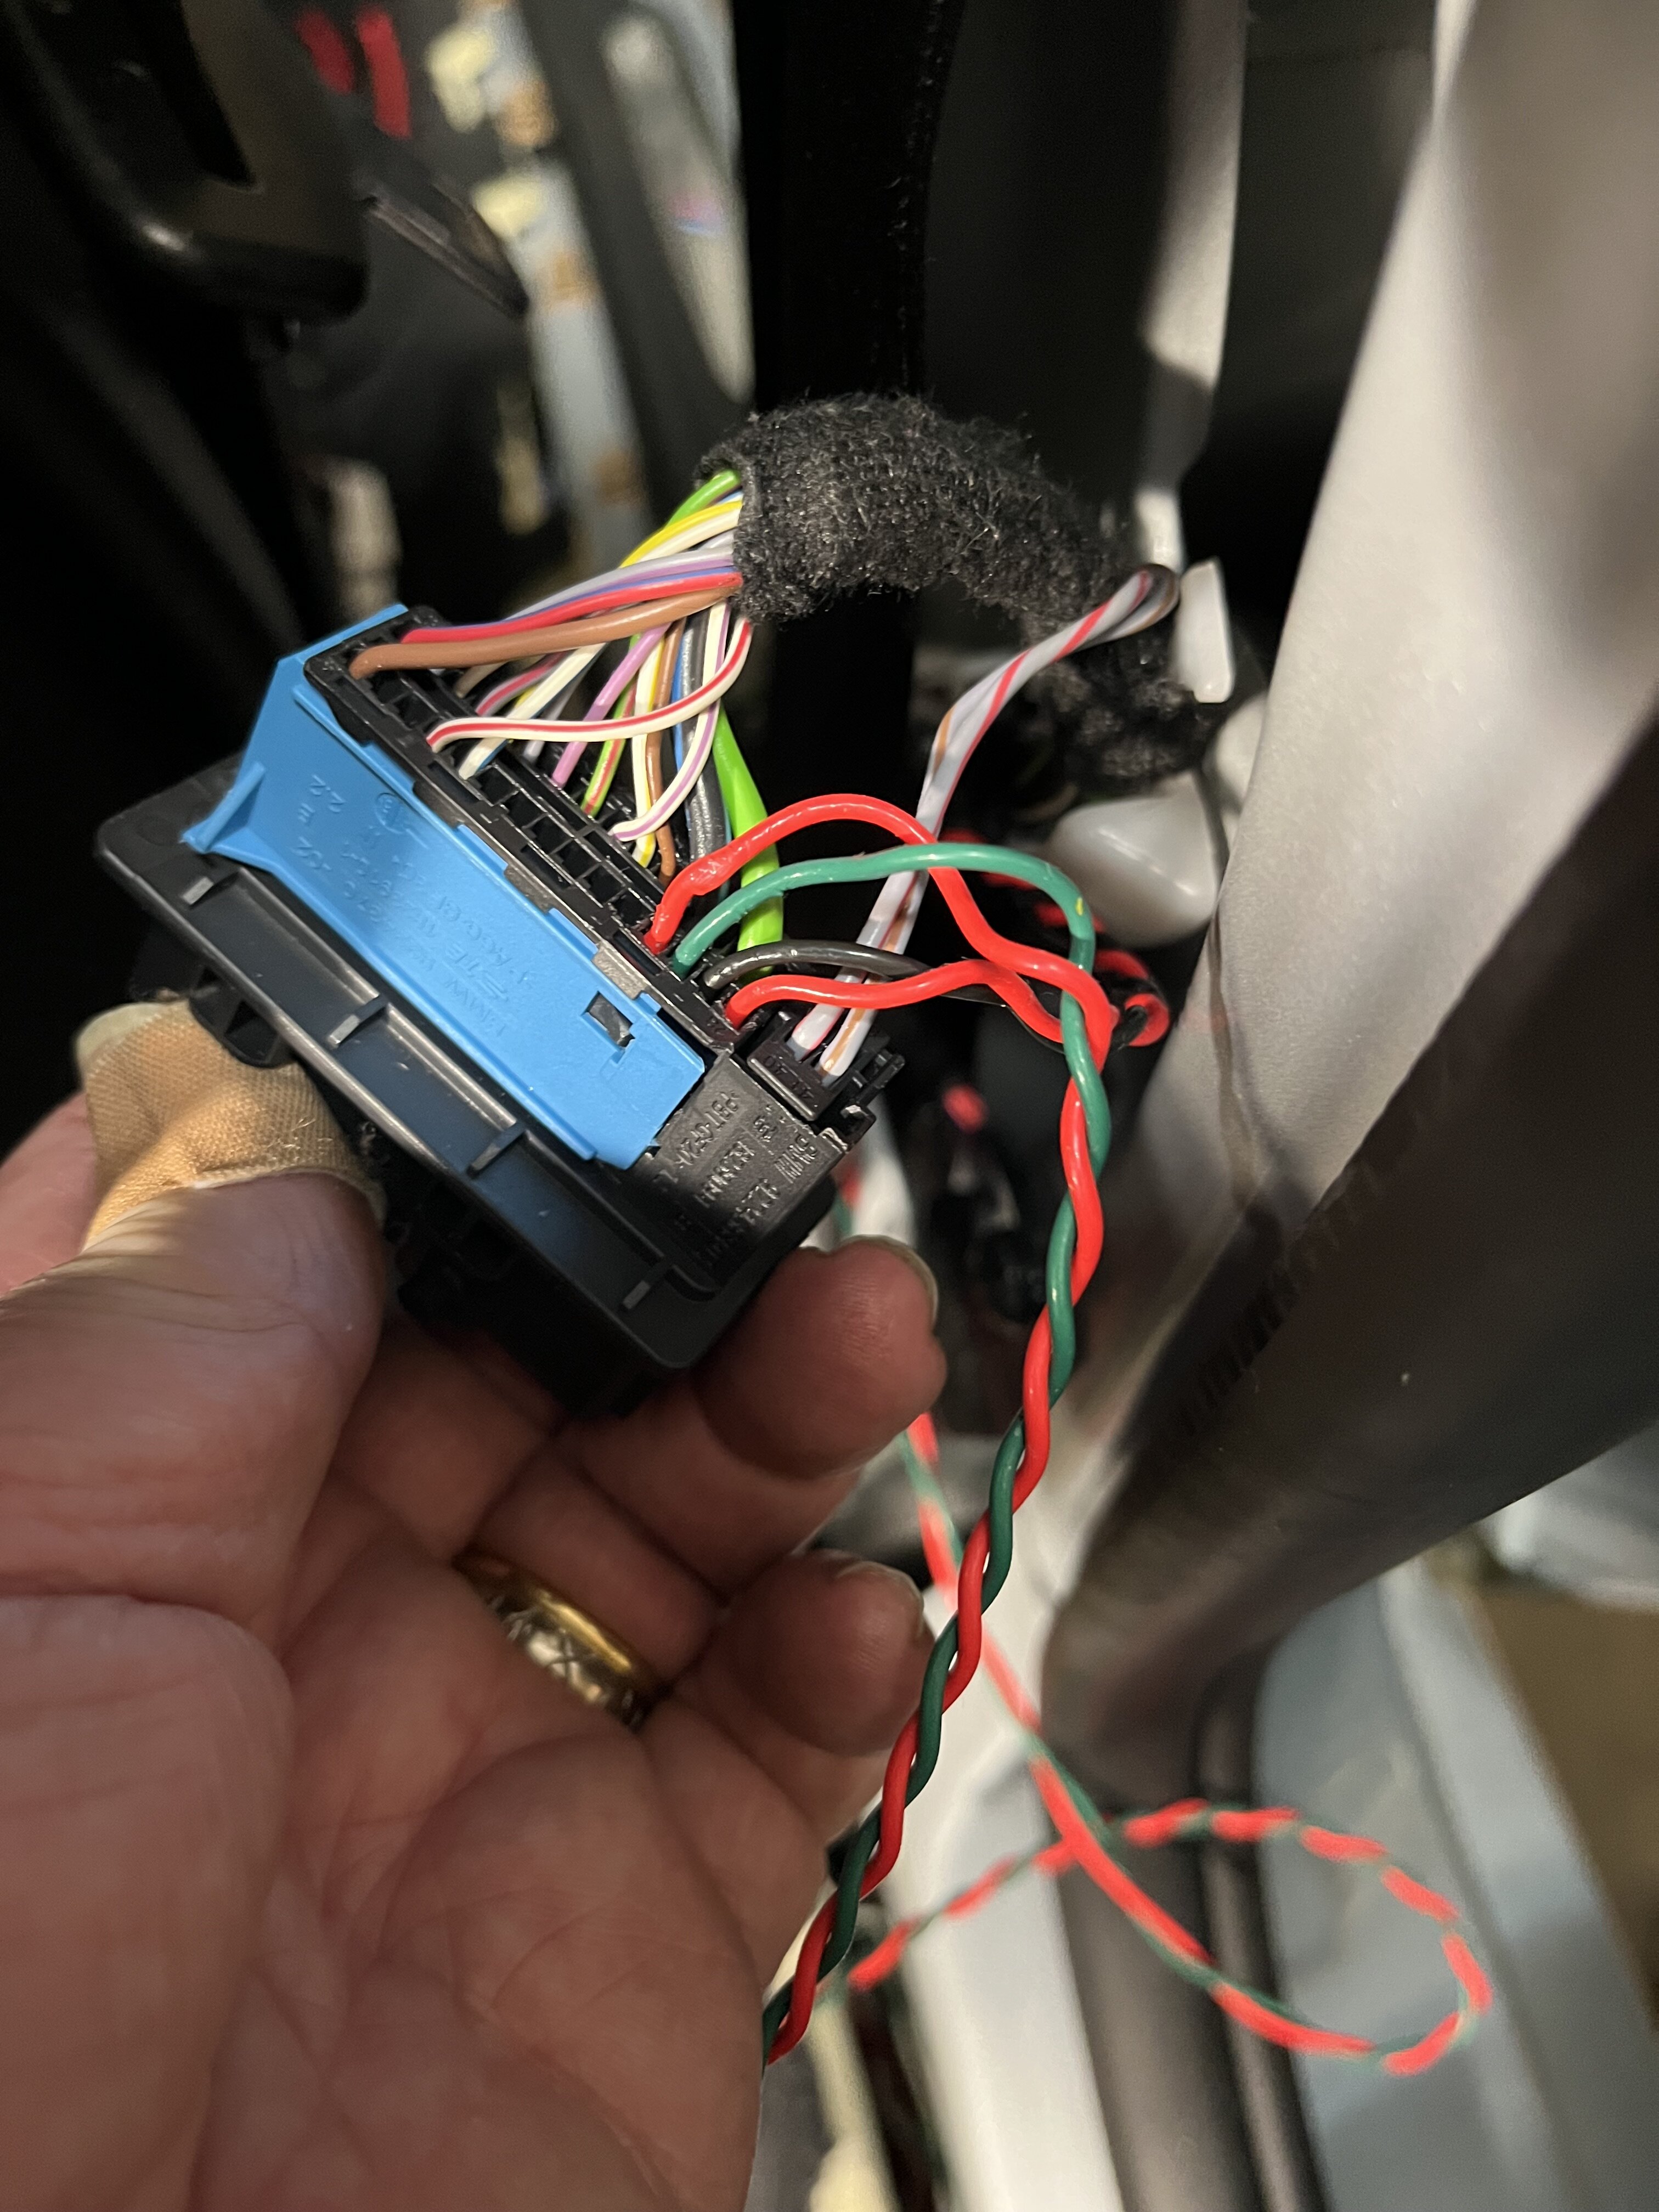
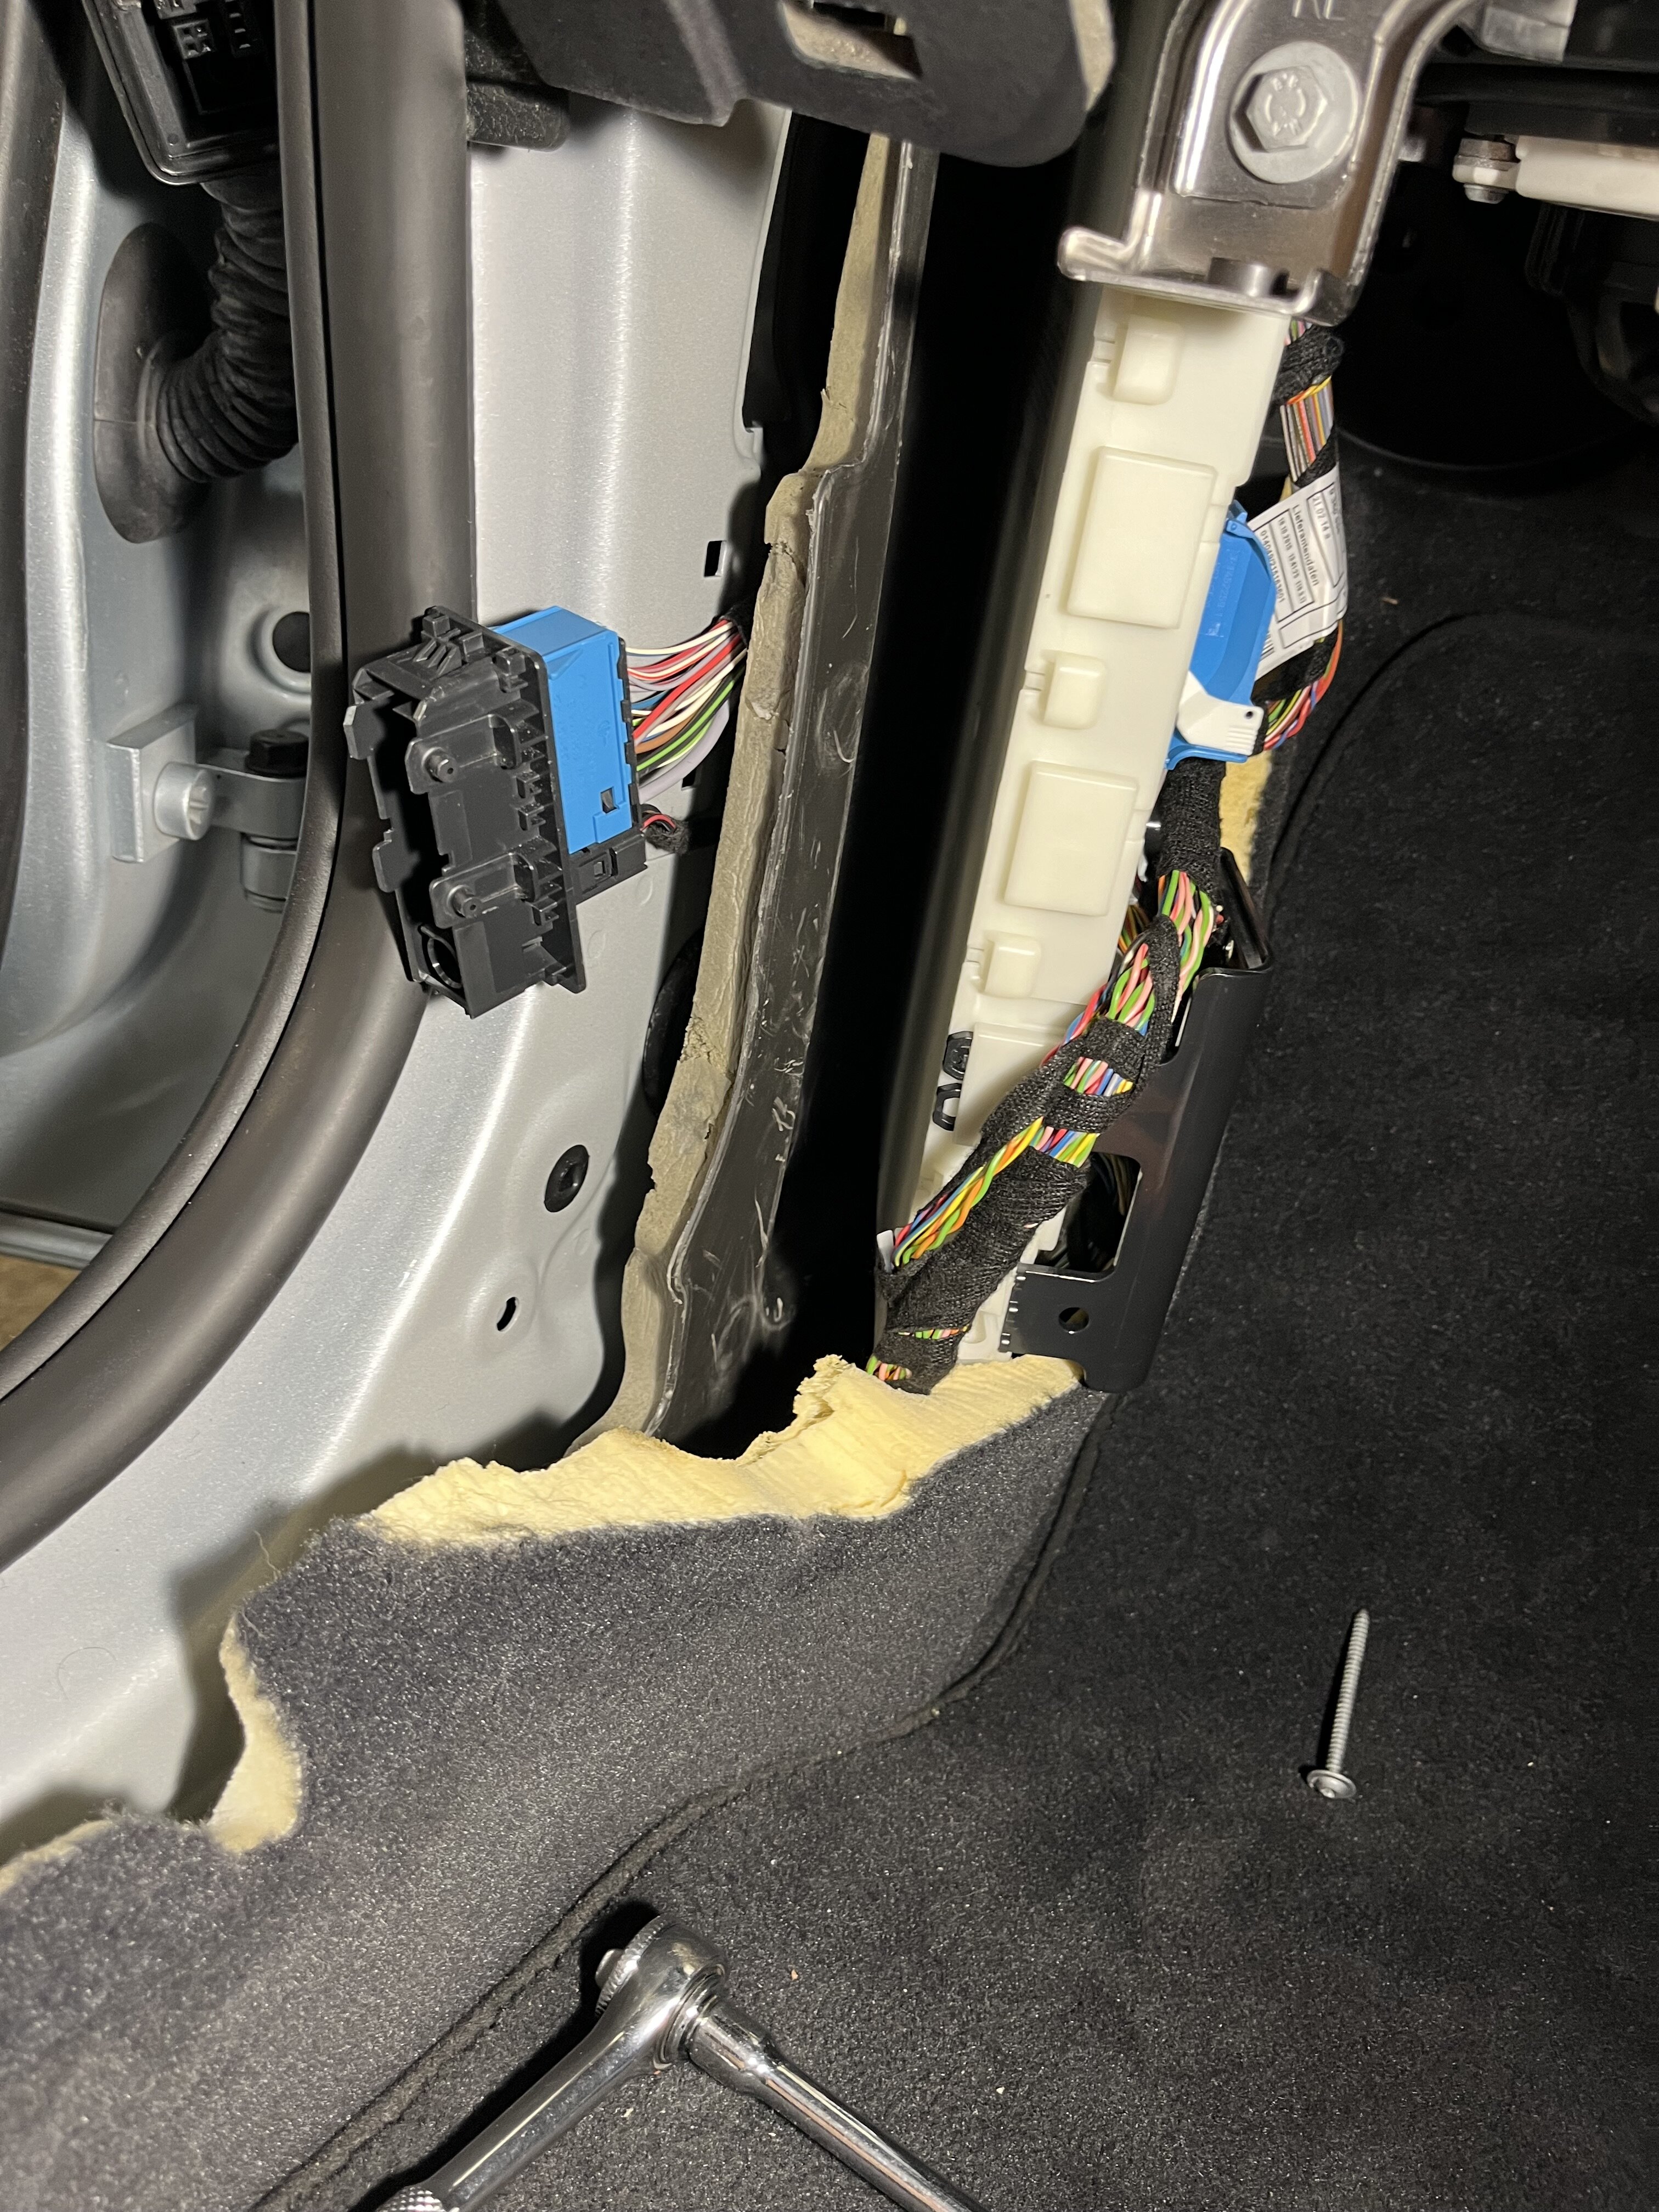
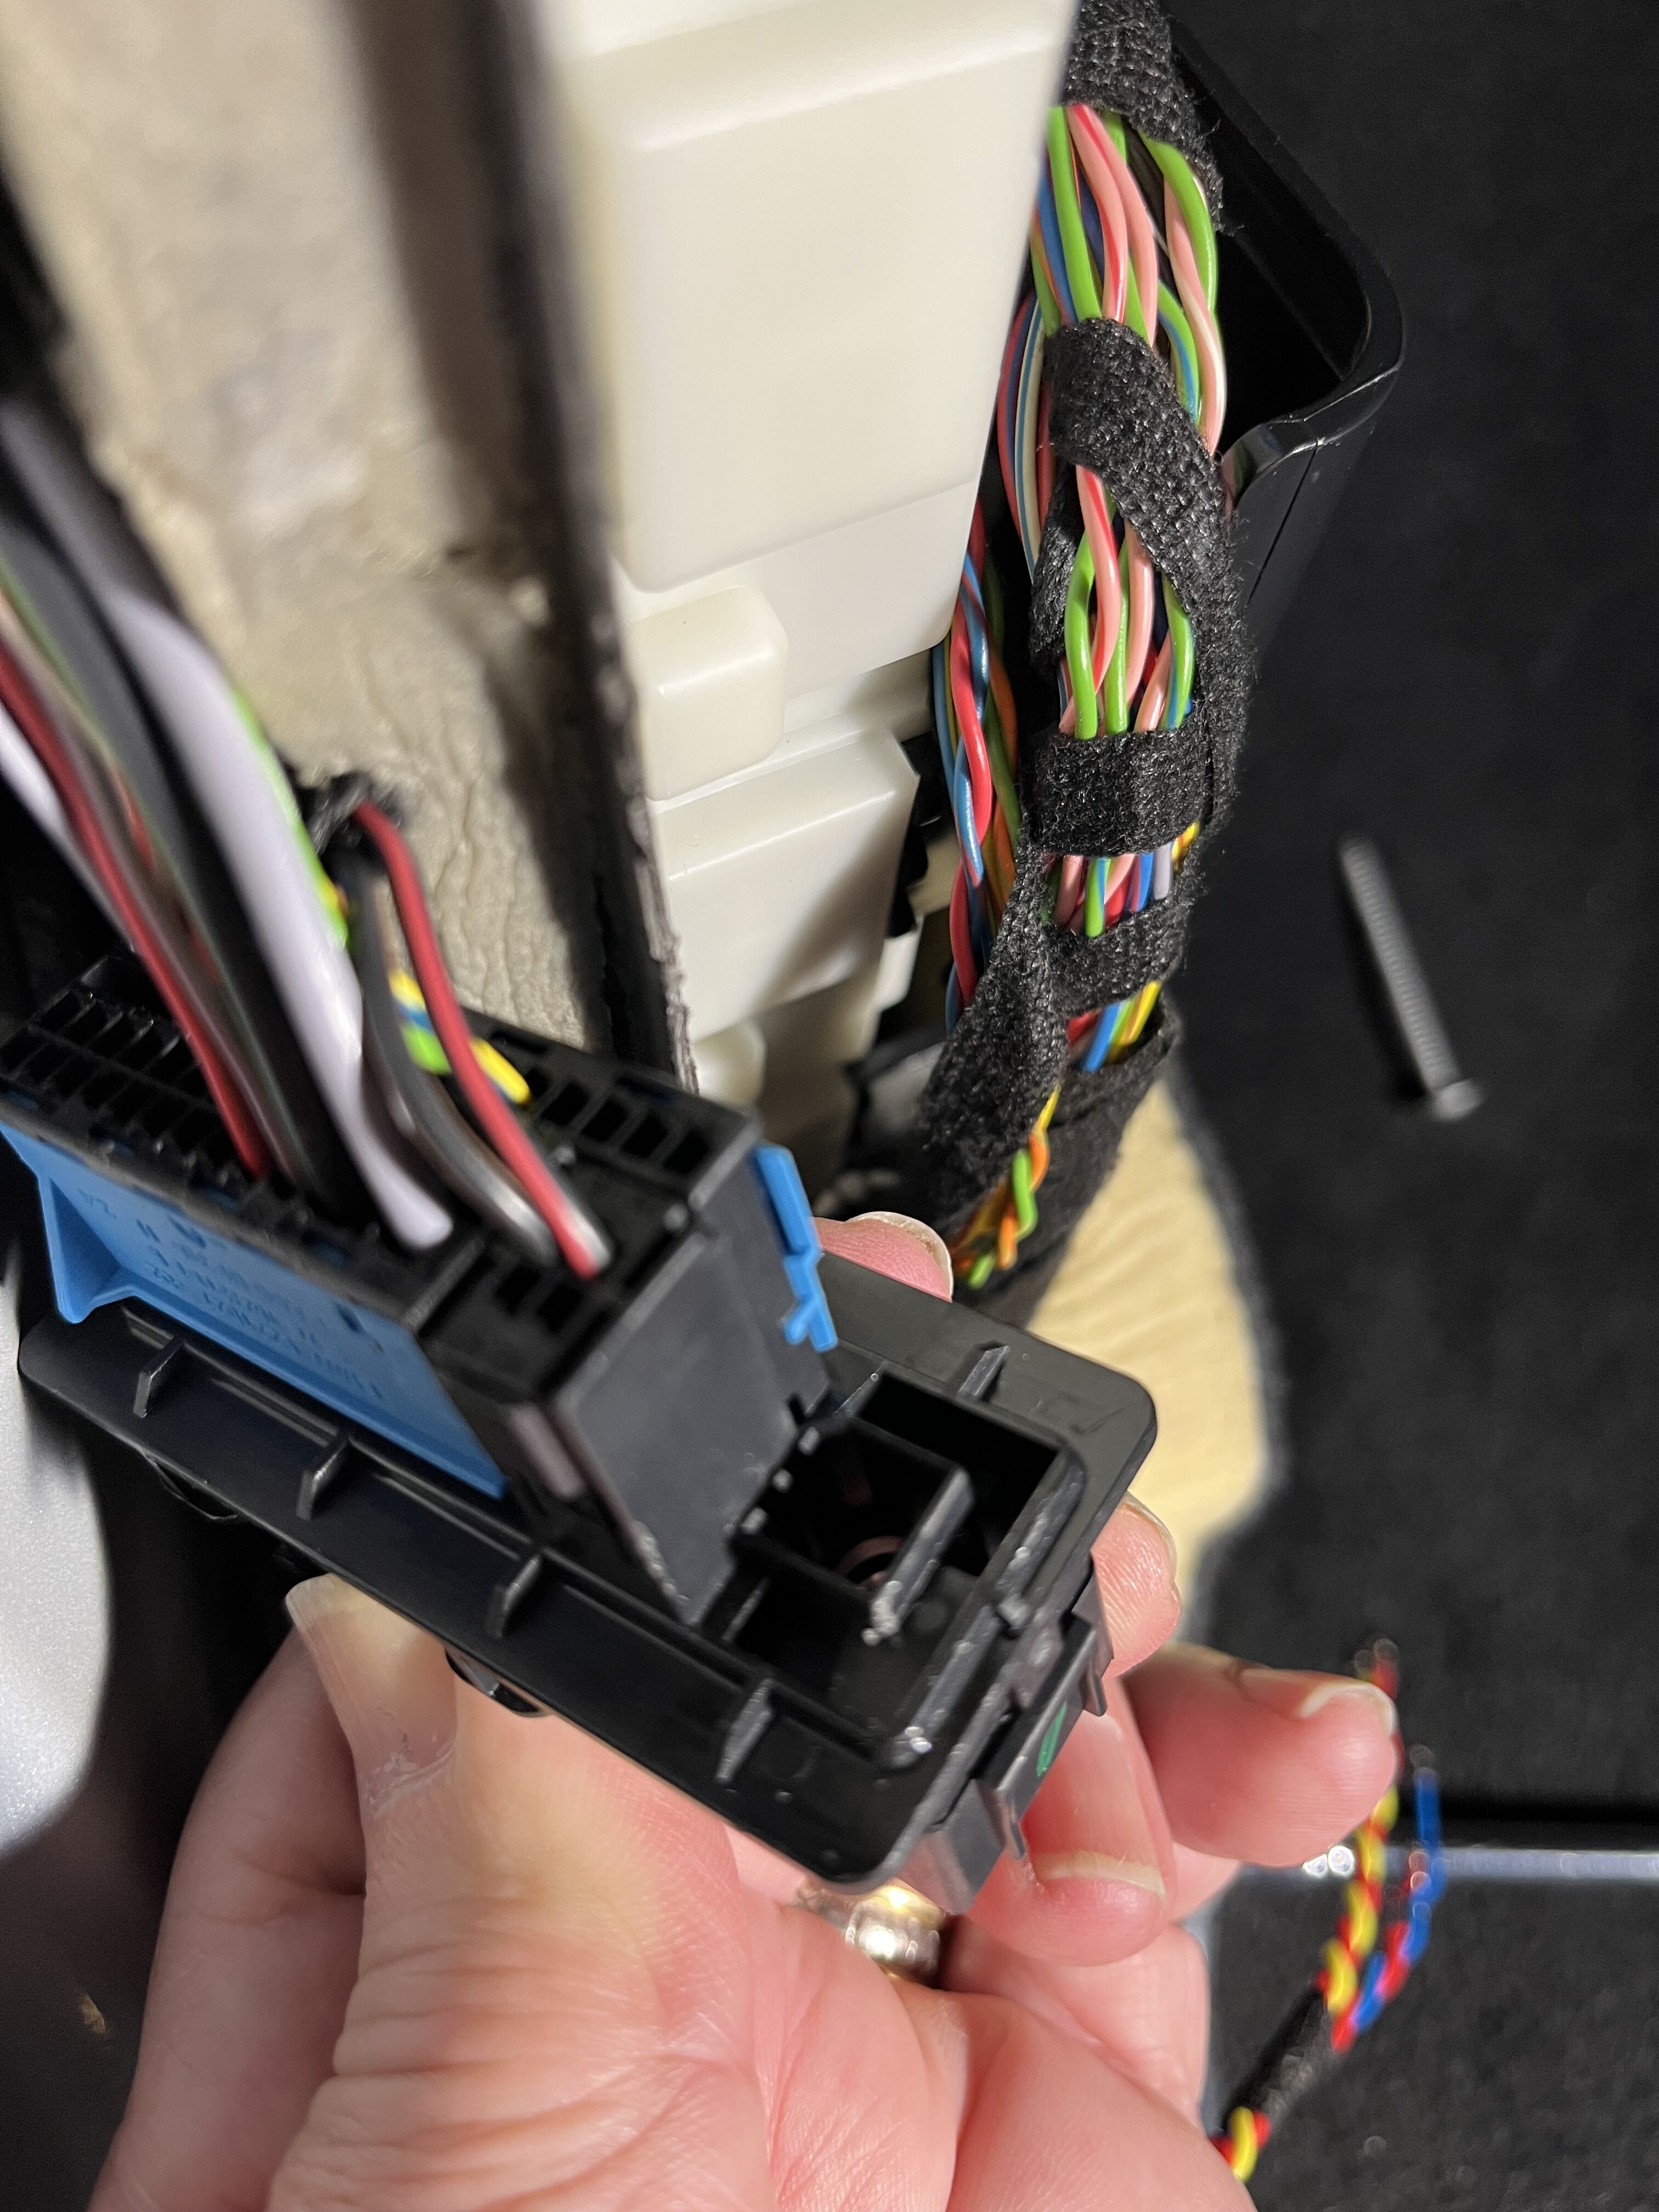
First task was to run 4 wires into the door for tweeter and midbass. The rear door speakers are being run in a passive state and have mounted the crossovers in the boot . Simple task of pulling up tab on door connector and adding socket pins to spare positions on connector. Then routing cable via factory door loom path and feeding into membrane using curtain wire as a trace wire. Bit of Tessa tape to secure to existing harness via mid bass speaker hole. Sometimes smaller hands and lack of biceps is a plus 😀


-
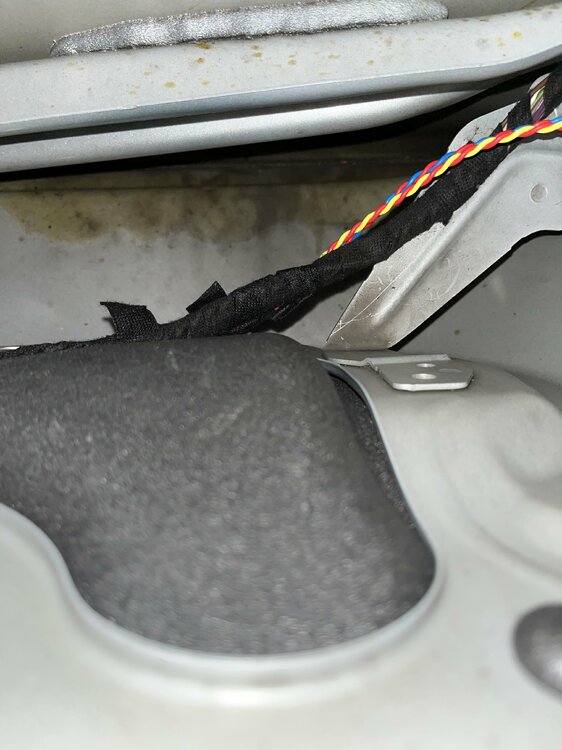
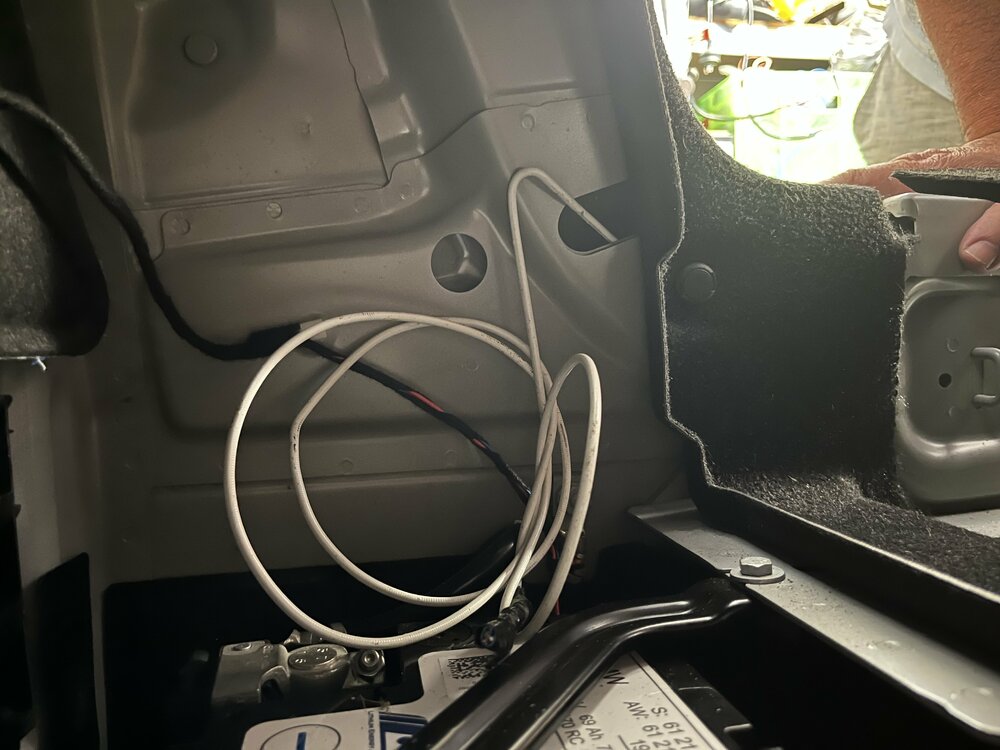
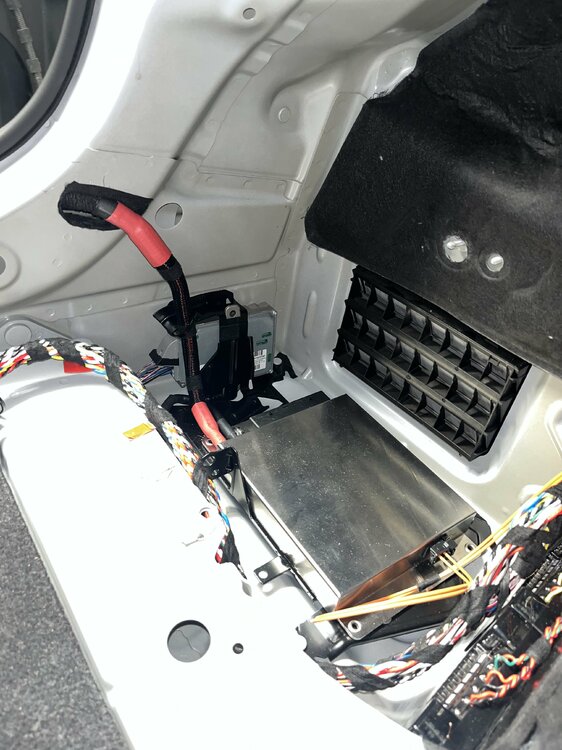
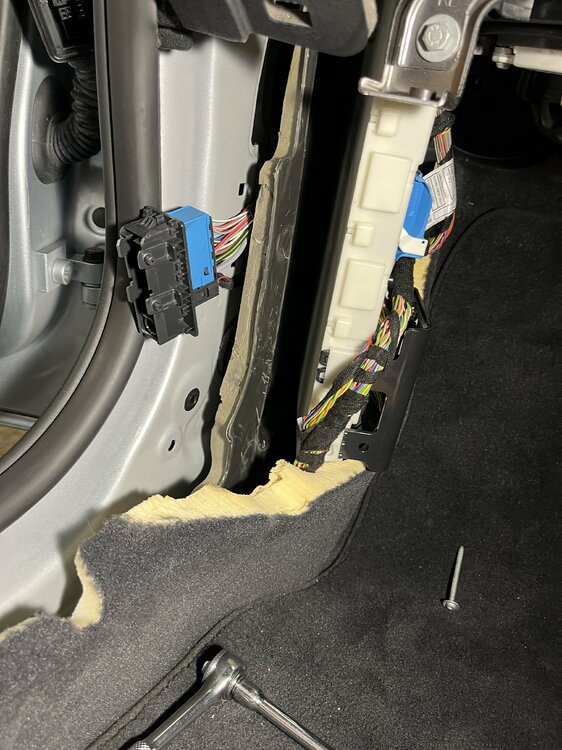
Used curtain wire as a pilot to pull the power wire through back pannel. Cable was wrapped with a protective outer cable and then Tessa tape so it shouldn’t rattle.
-
Power wire for the AMP is straightforward.
On my e46 install do to running A/B amp and a class d sub amp I needed 2 gauge into 2x4 gauge arrangement. Basically a lot of thick cable that could carry 400 amps.
By contrast the Mobridge uses class d tech with variable voltage psu so super efficient. So basically the whole system can be run on either a 6awg cable if cable run is less than 2.3 meters or a part run off 4awg if length from battery is beyond that. Context is keeping voltage drop under 3% for cable run at amplifiers maximum power output.
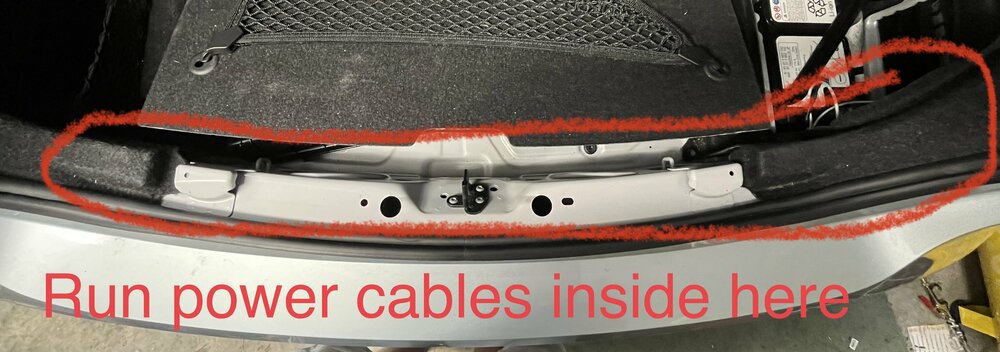
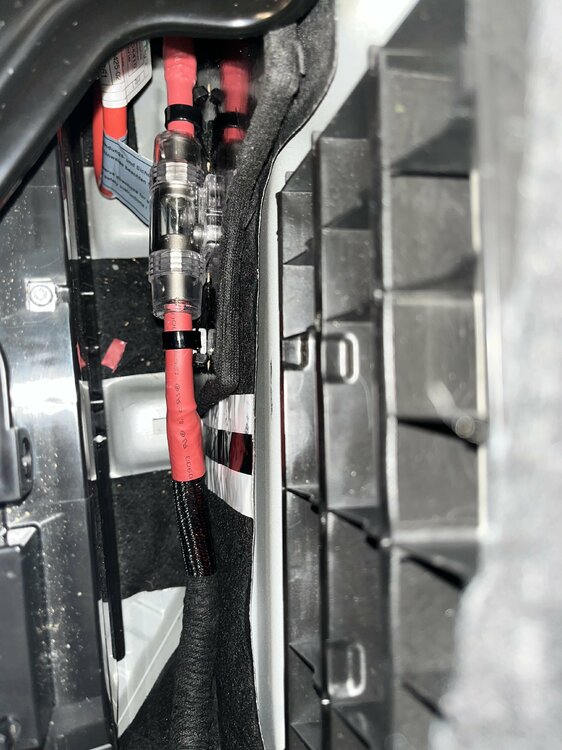
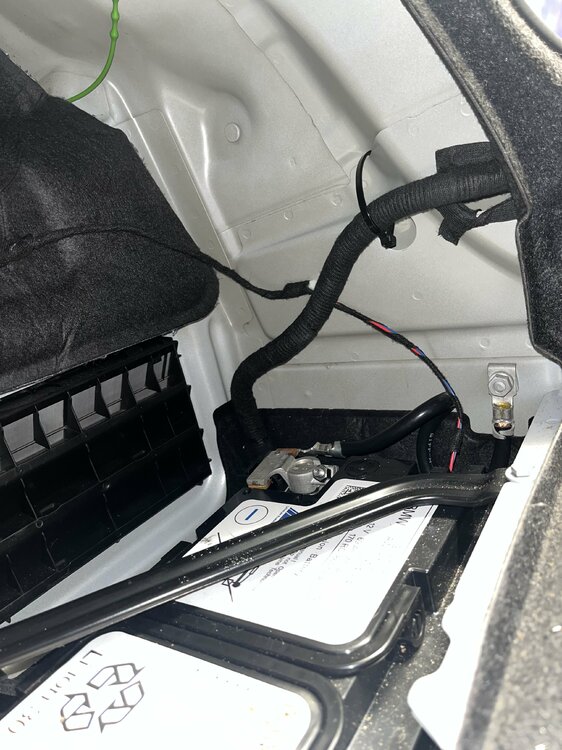
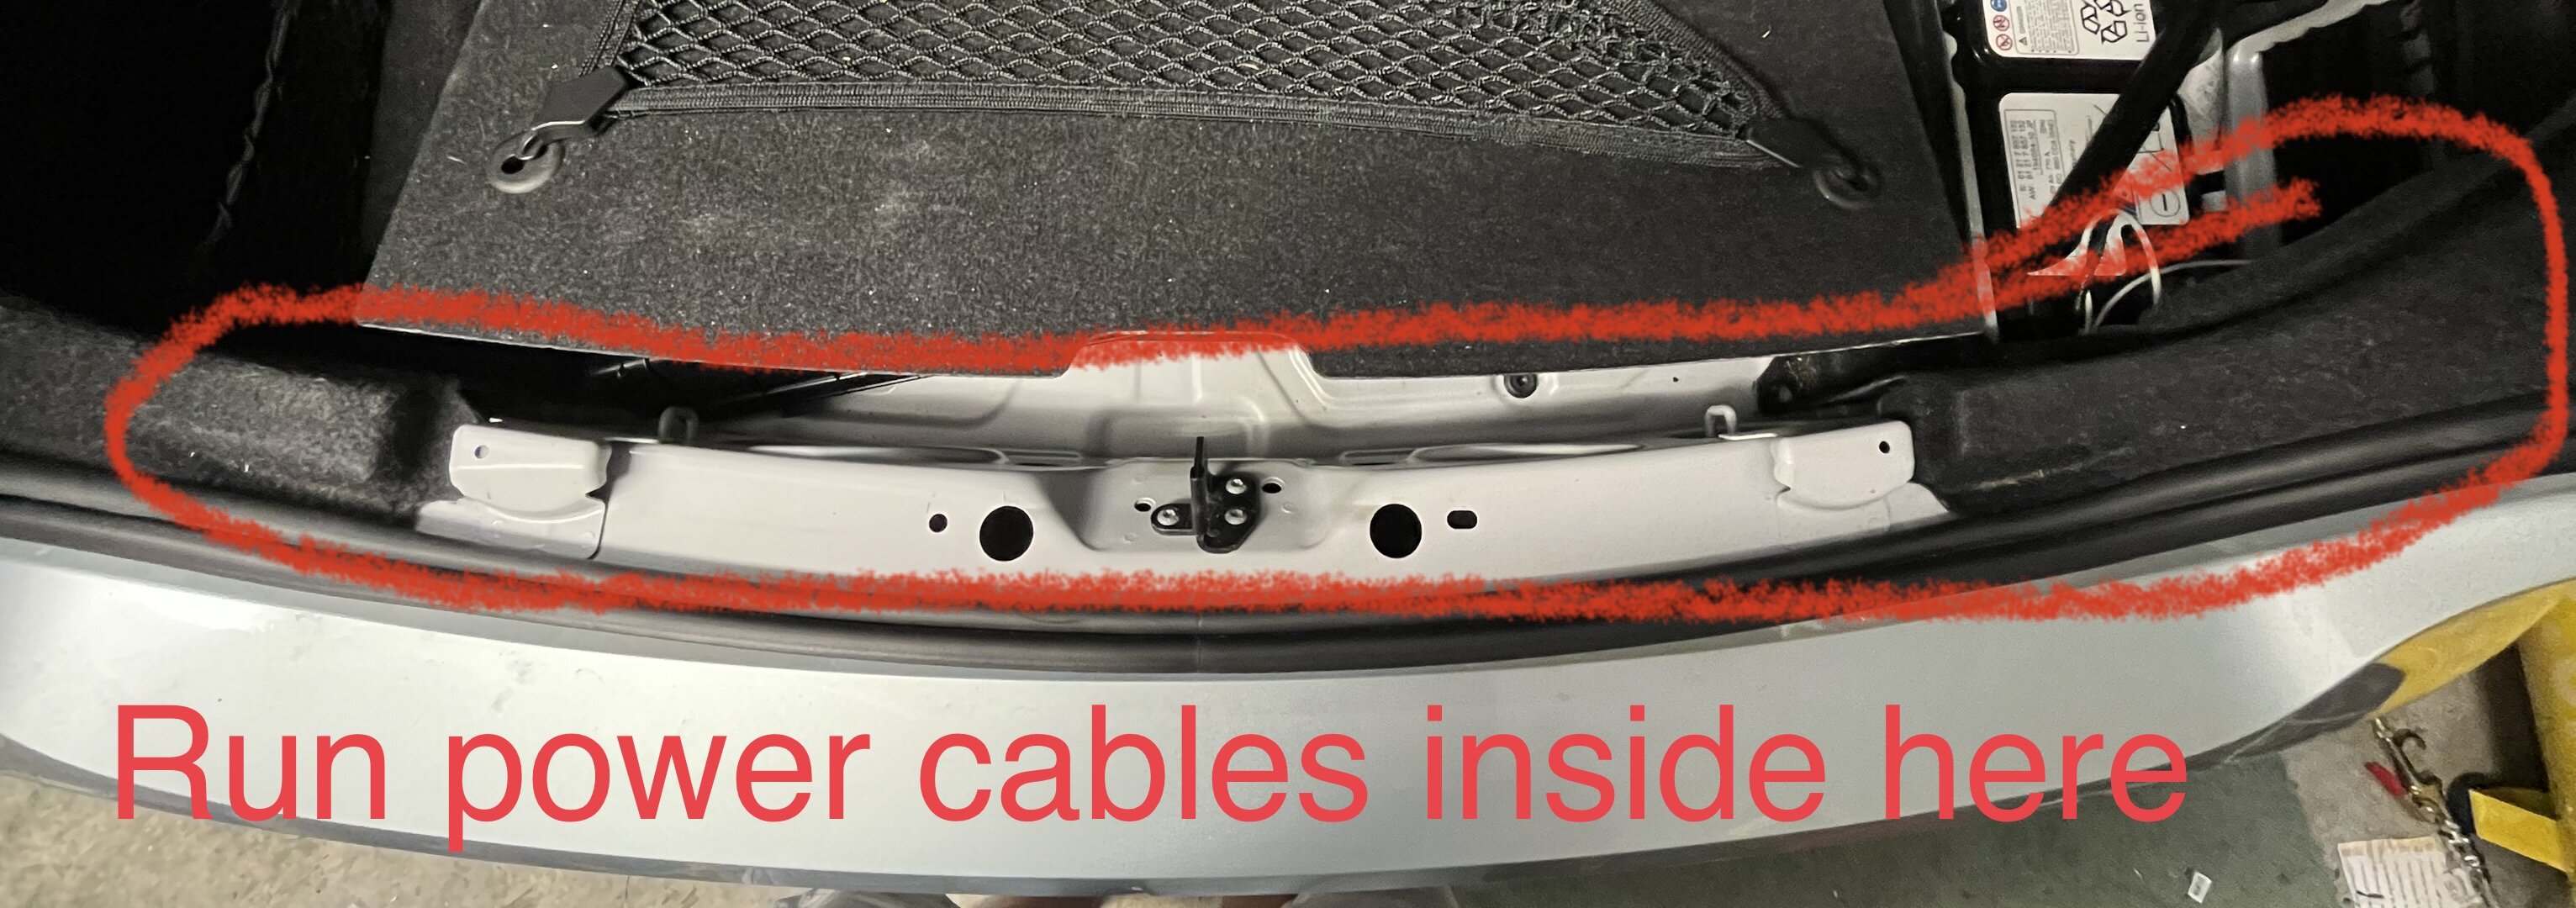
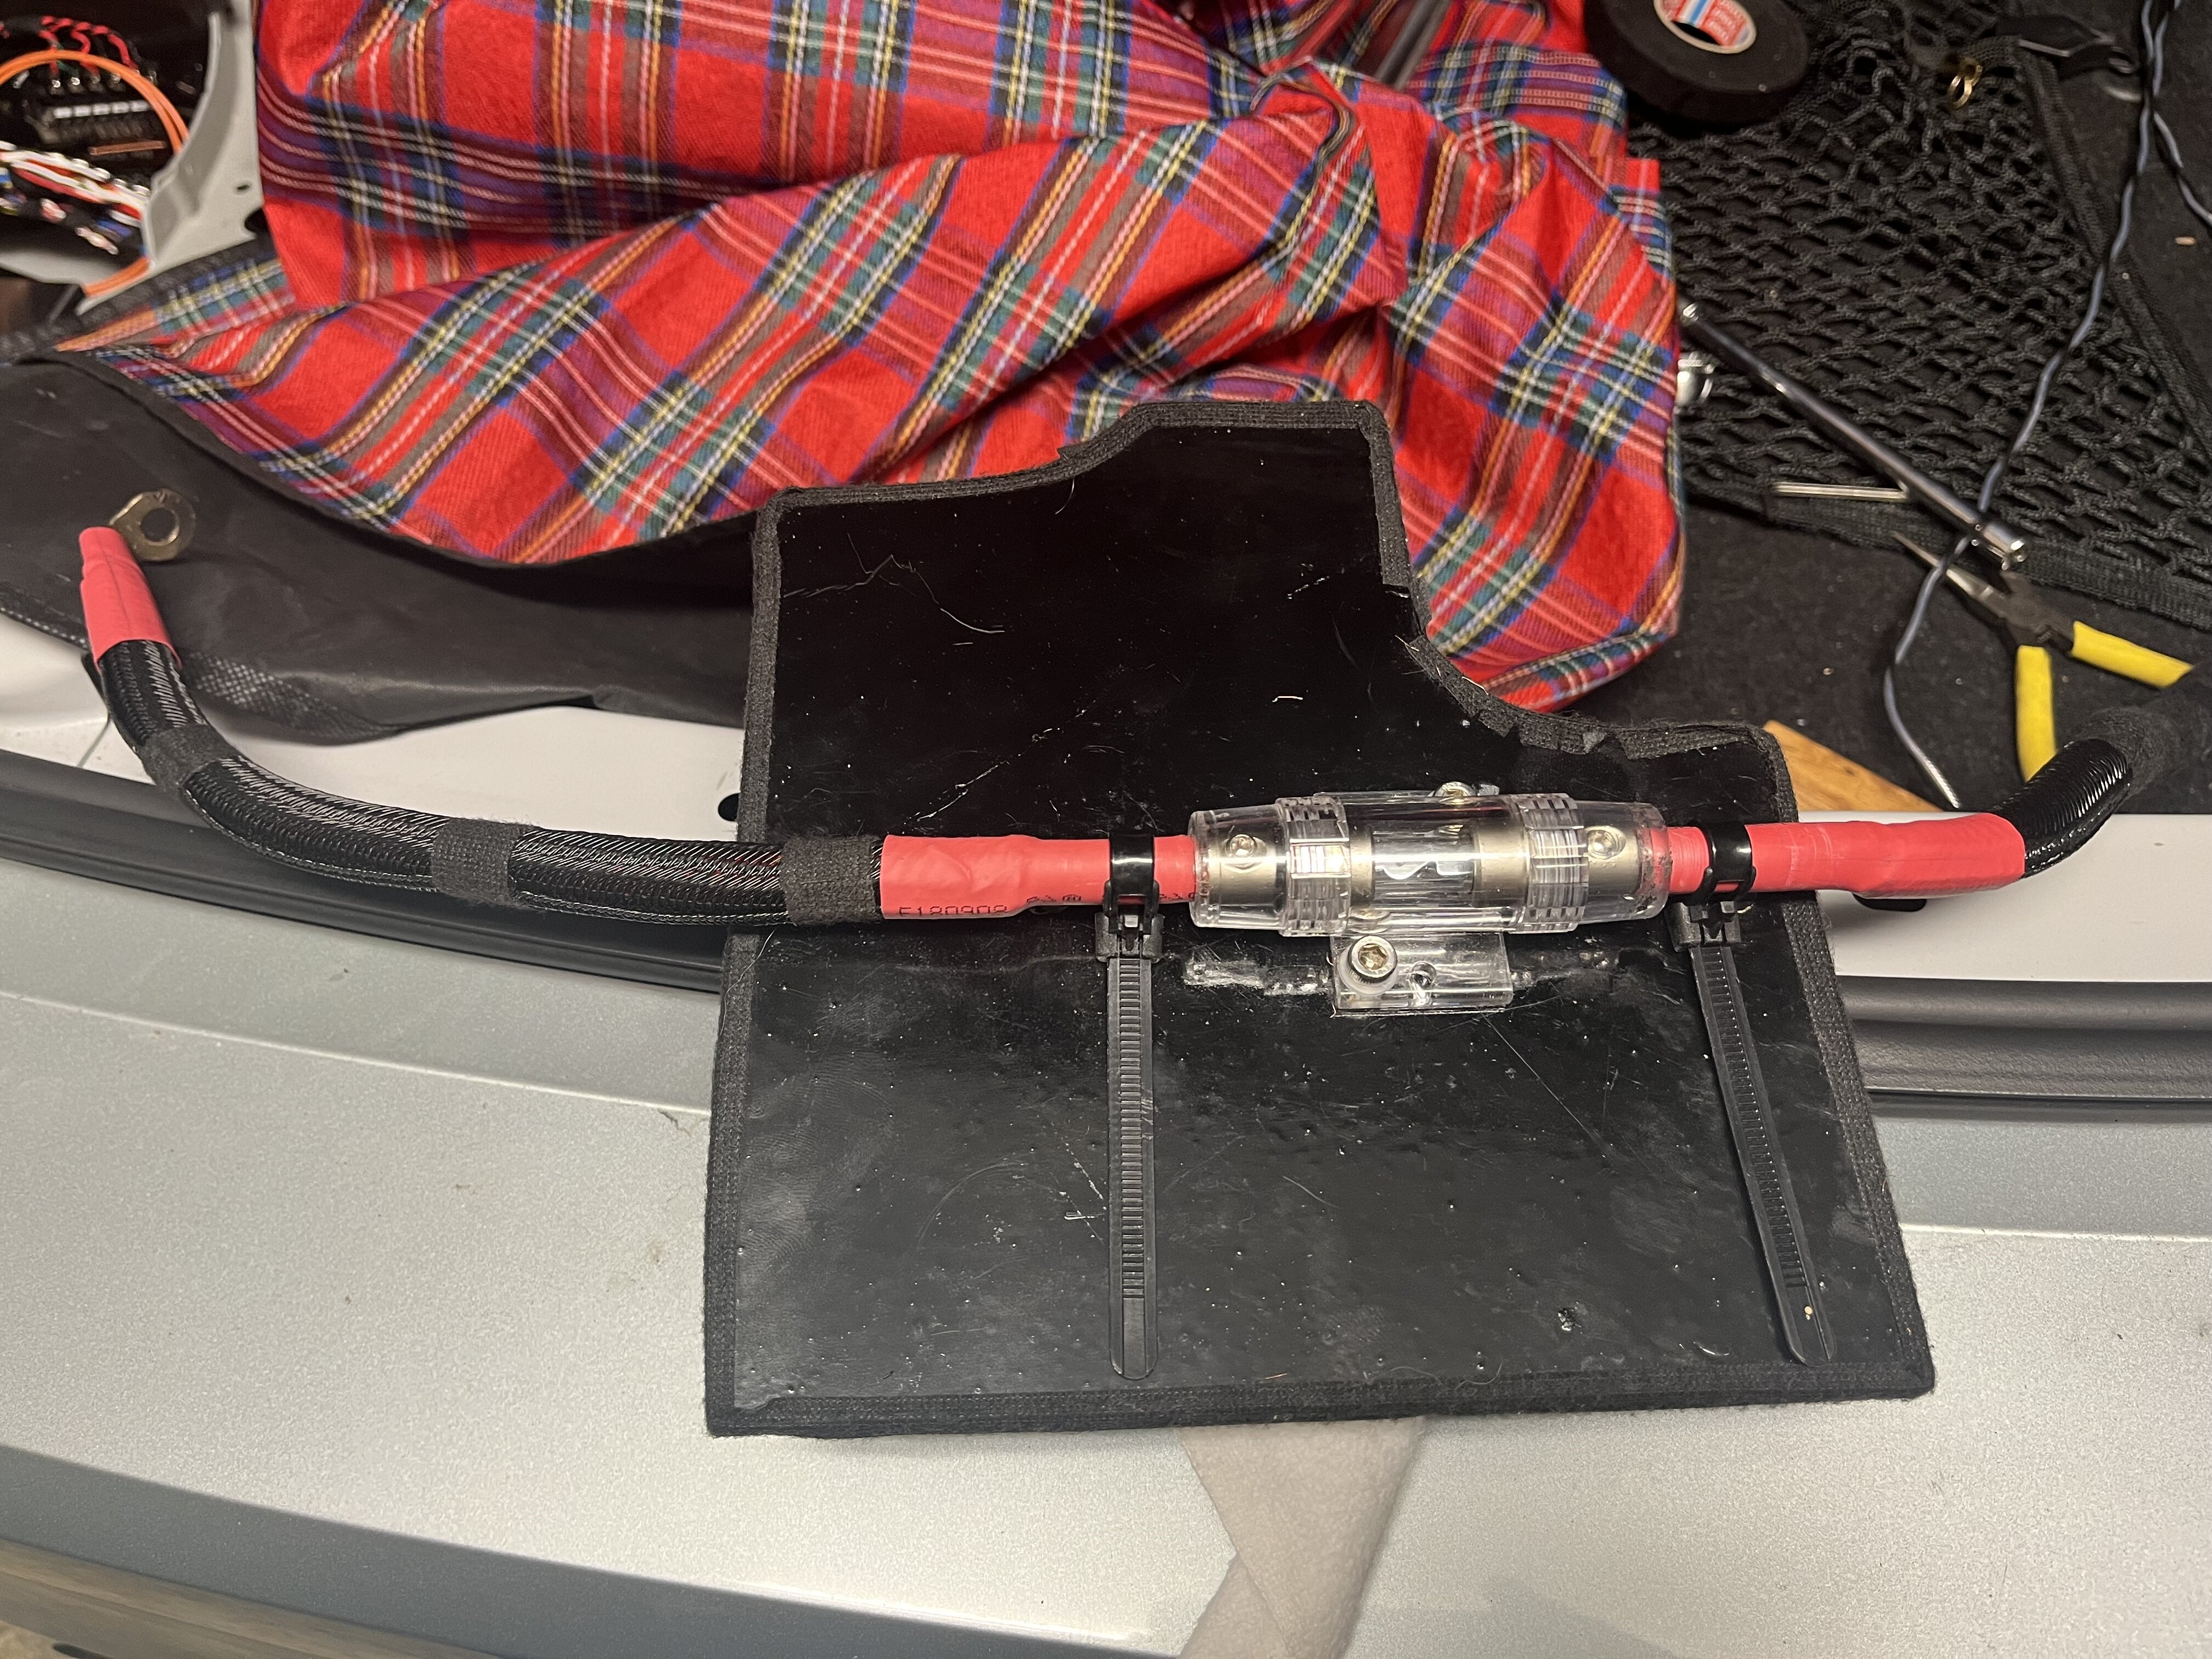
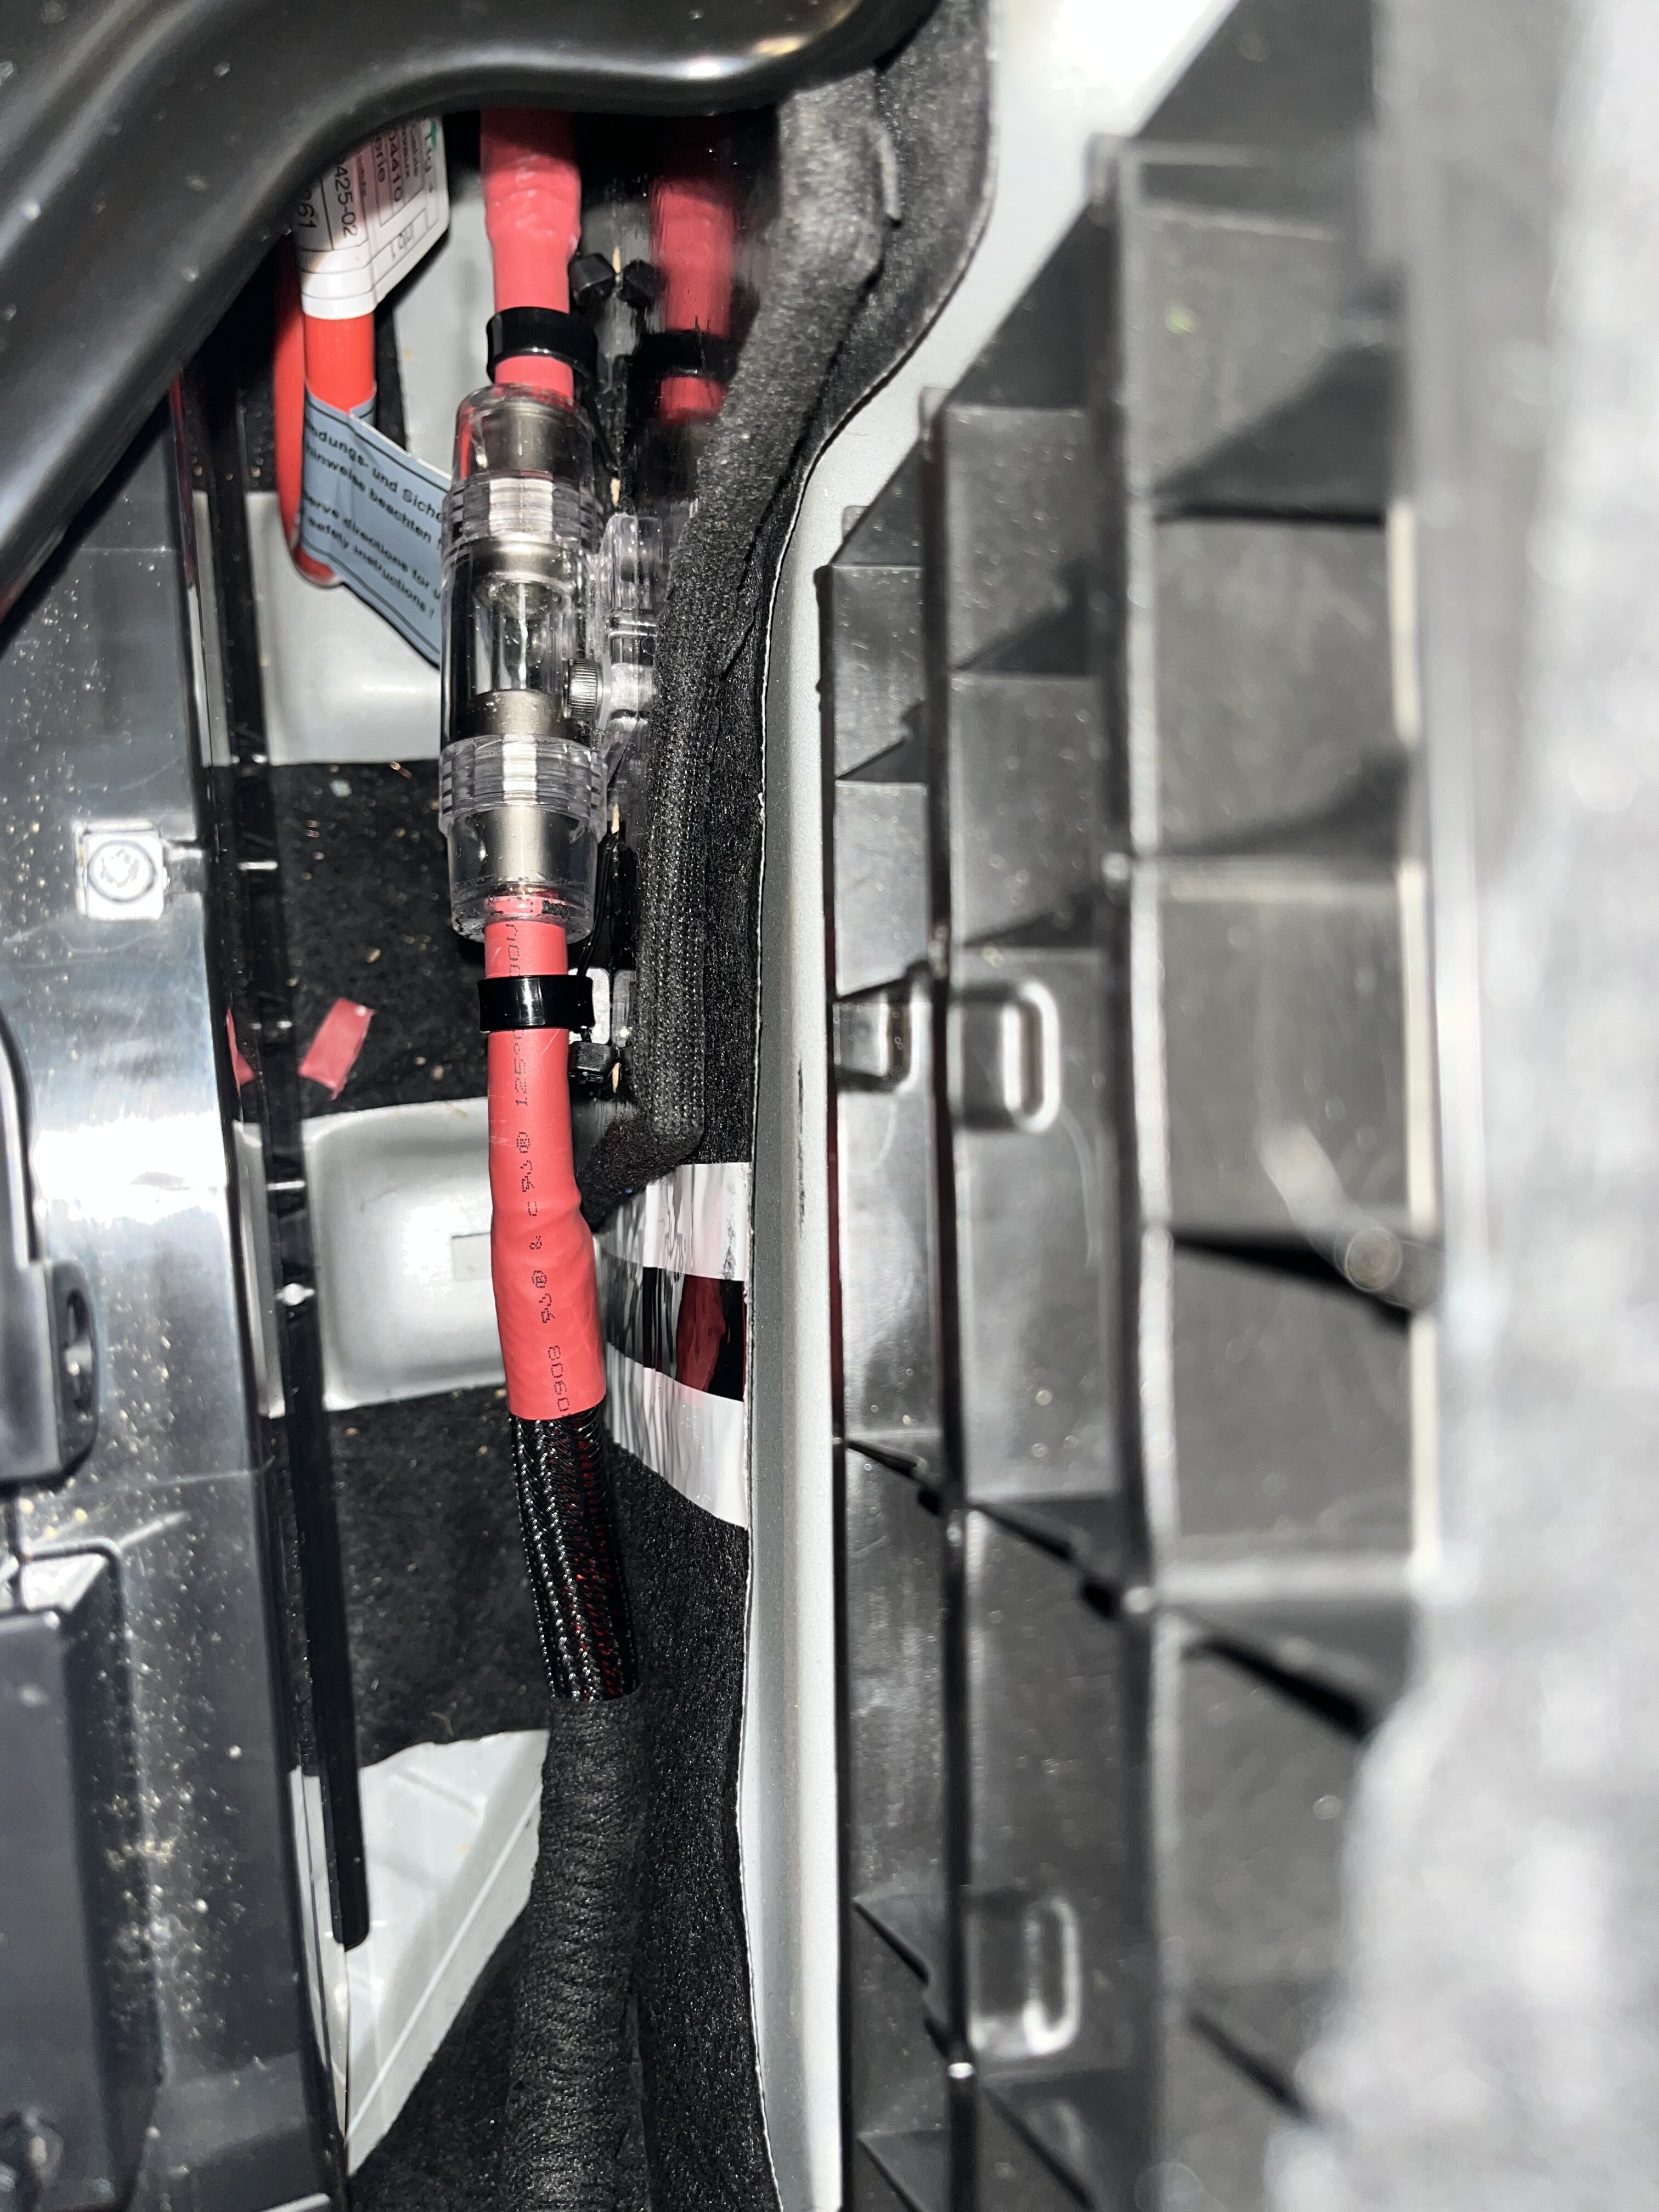
I was undecided on cable run path. Across rear boot panel is short enough and run via rear seat path is more like 3.5m. In the end I decided to go back boot pannel and reuse a section of 4awg from my e46 install which I’d warped in a plastic protective out sheathing. Also used a nylon wrap at either end of the cables to ensure cable insulation has plenty of protection. What to ensure of zero chance of the cable shorting on anything post install or car maintenance items such as battery replacement.
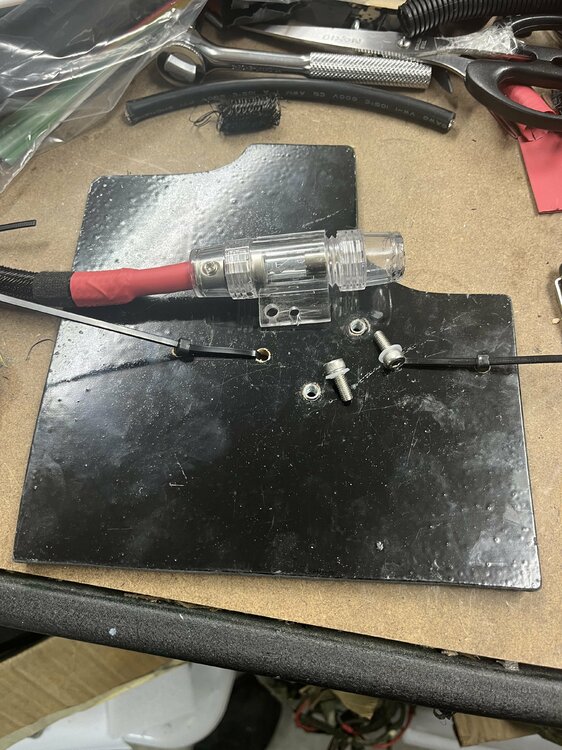
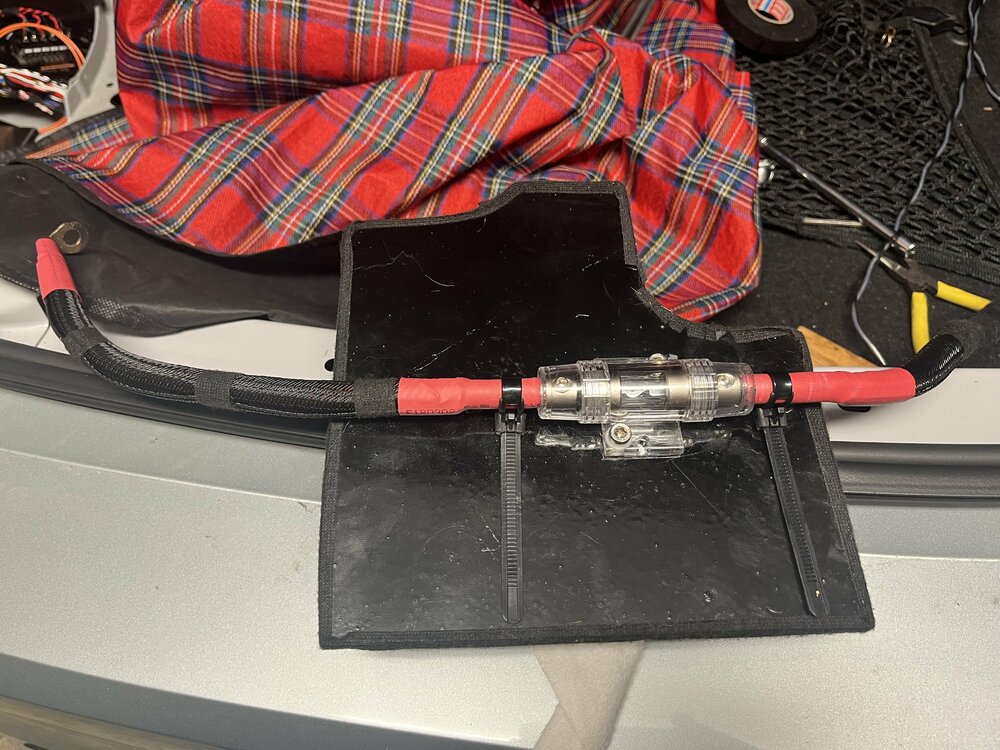
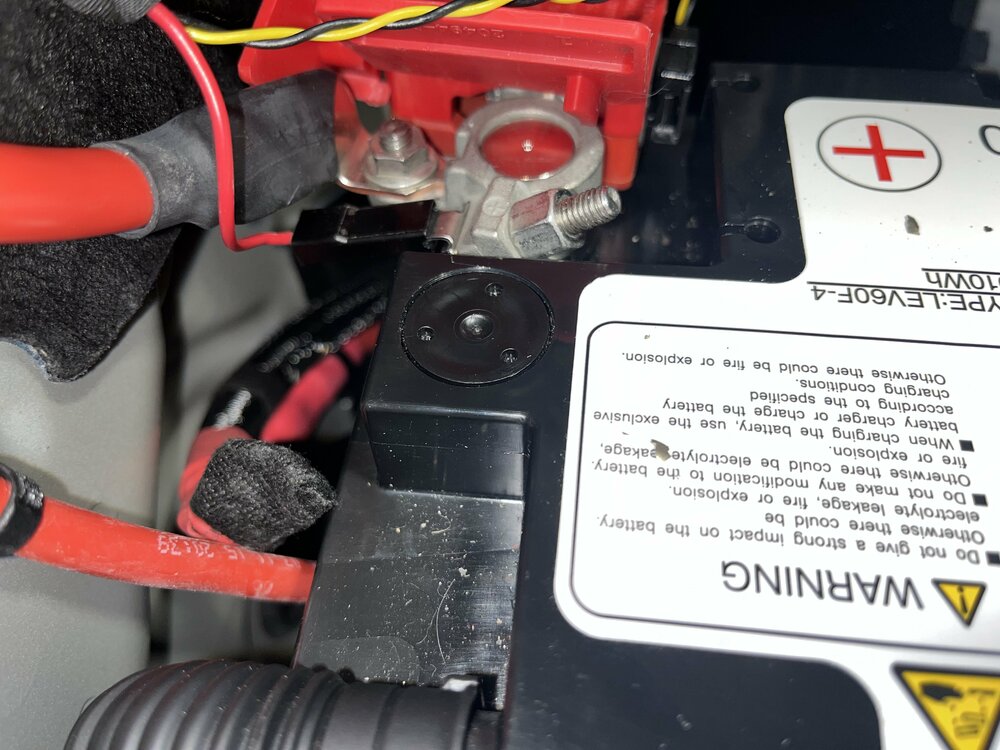
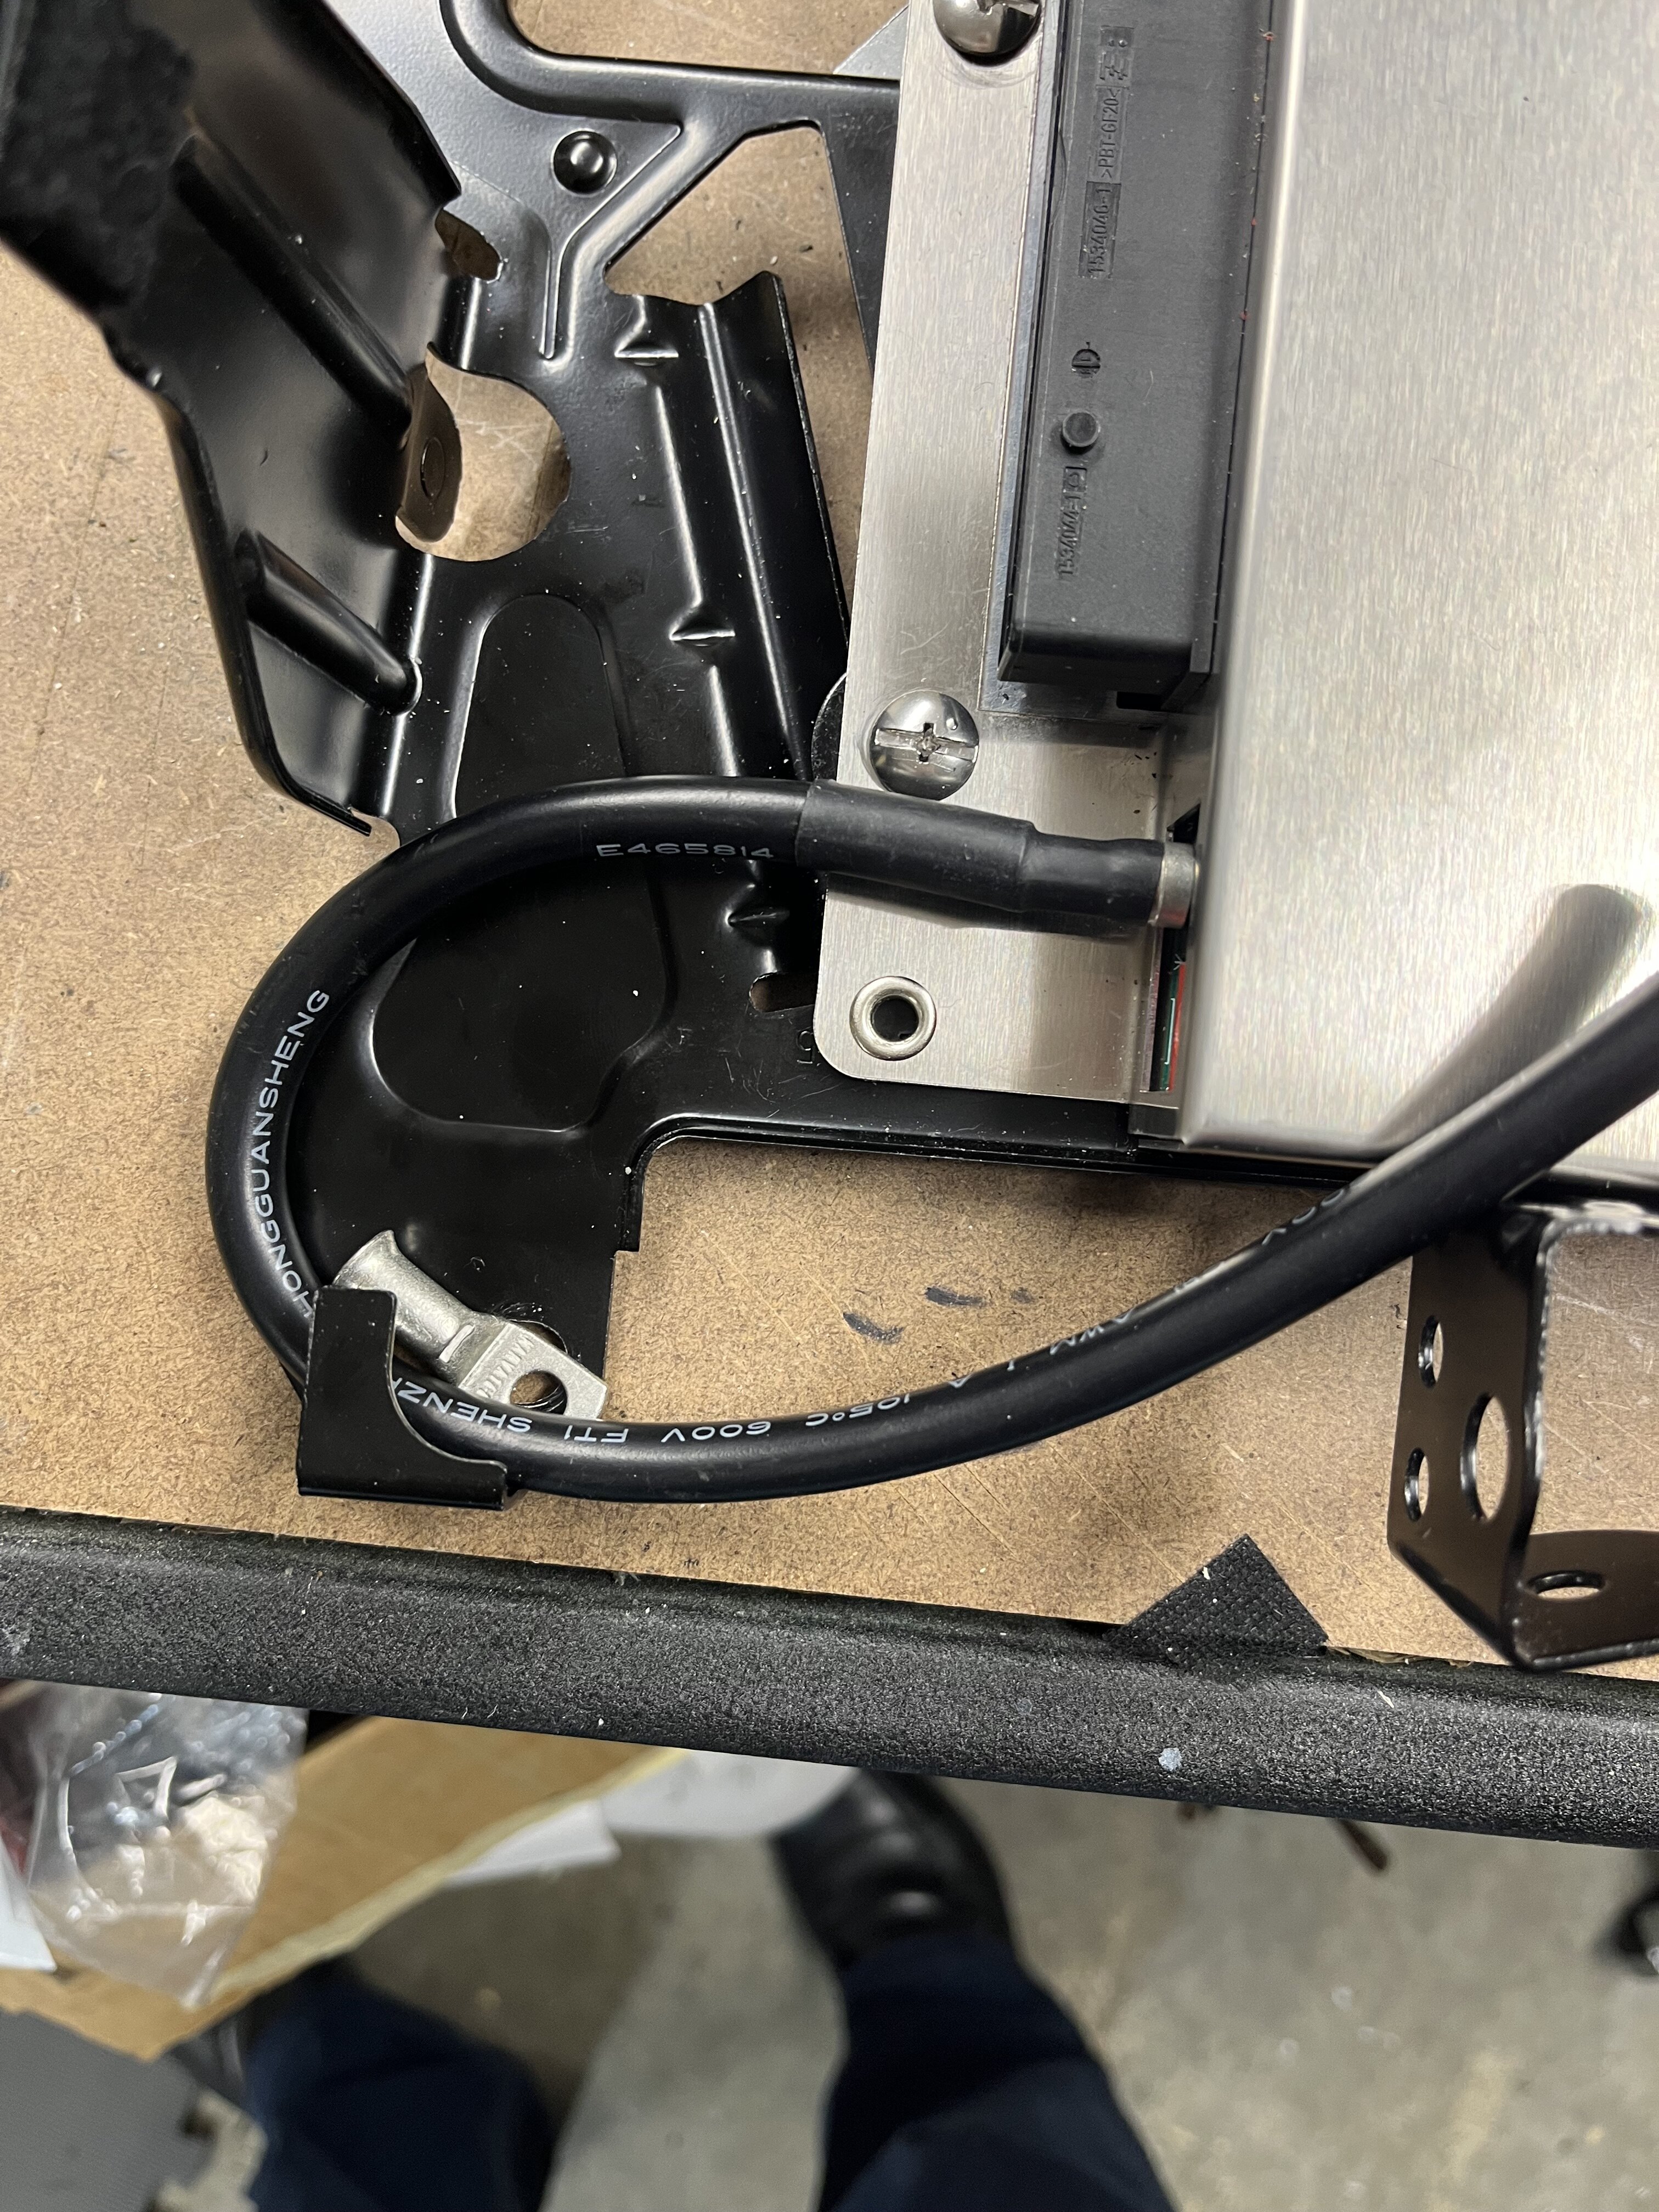
Made a mdf mount for the fuse which is held in by the battery hold down bracket and routed cable in a manner to positive terminal that won’t interfere with IBS function that disconnects engine power in the event of a major accident. Routed cable in a manner that replacement of battery is ray and nothing needs moving out of way.
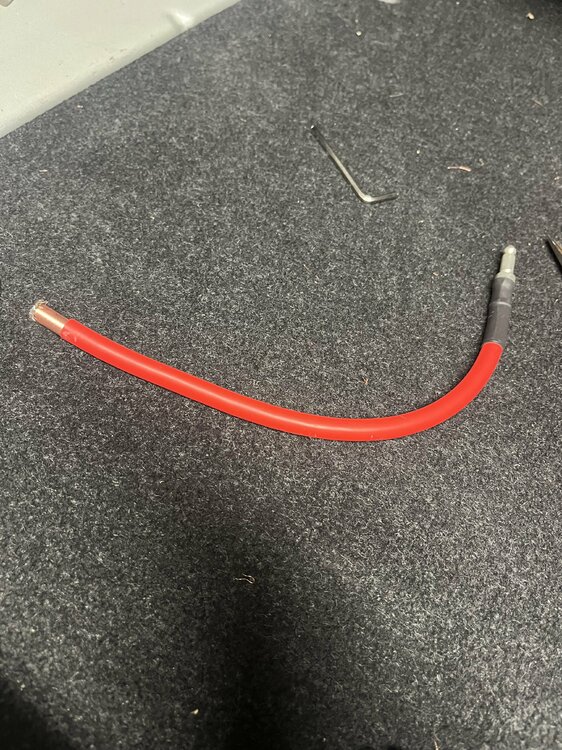
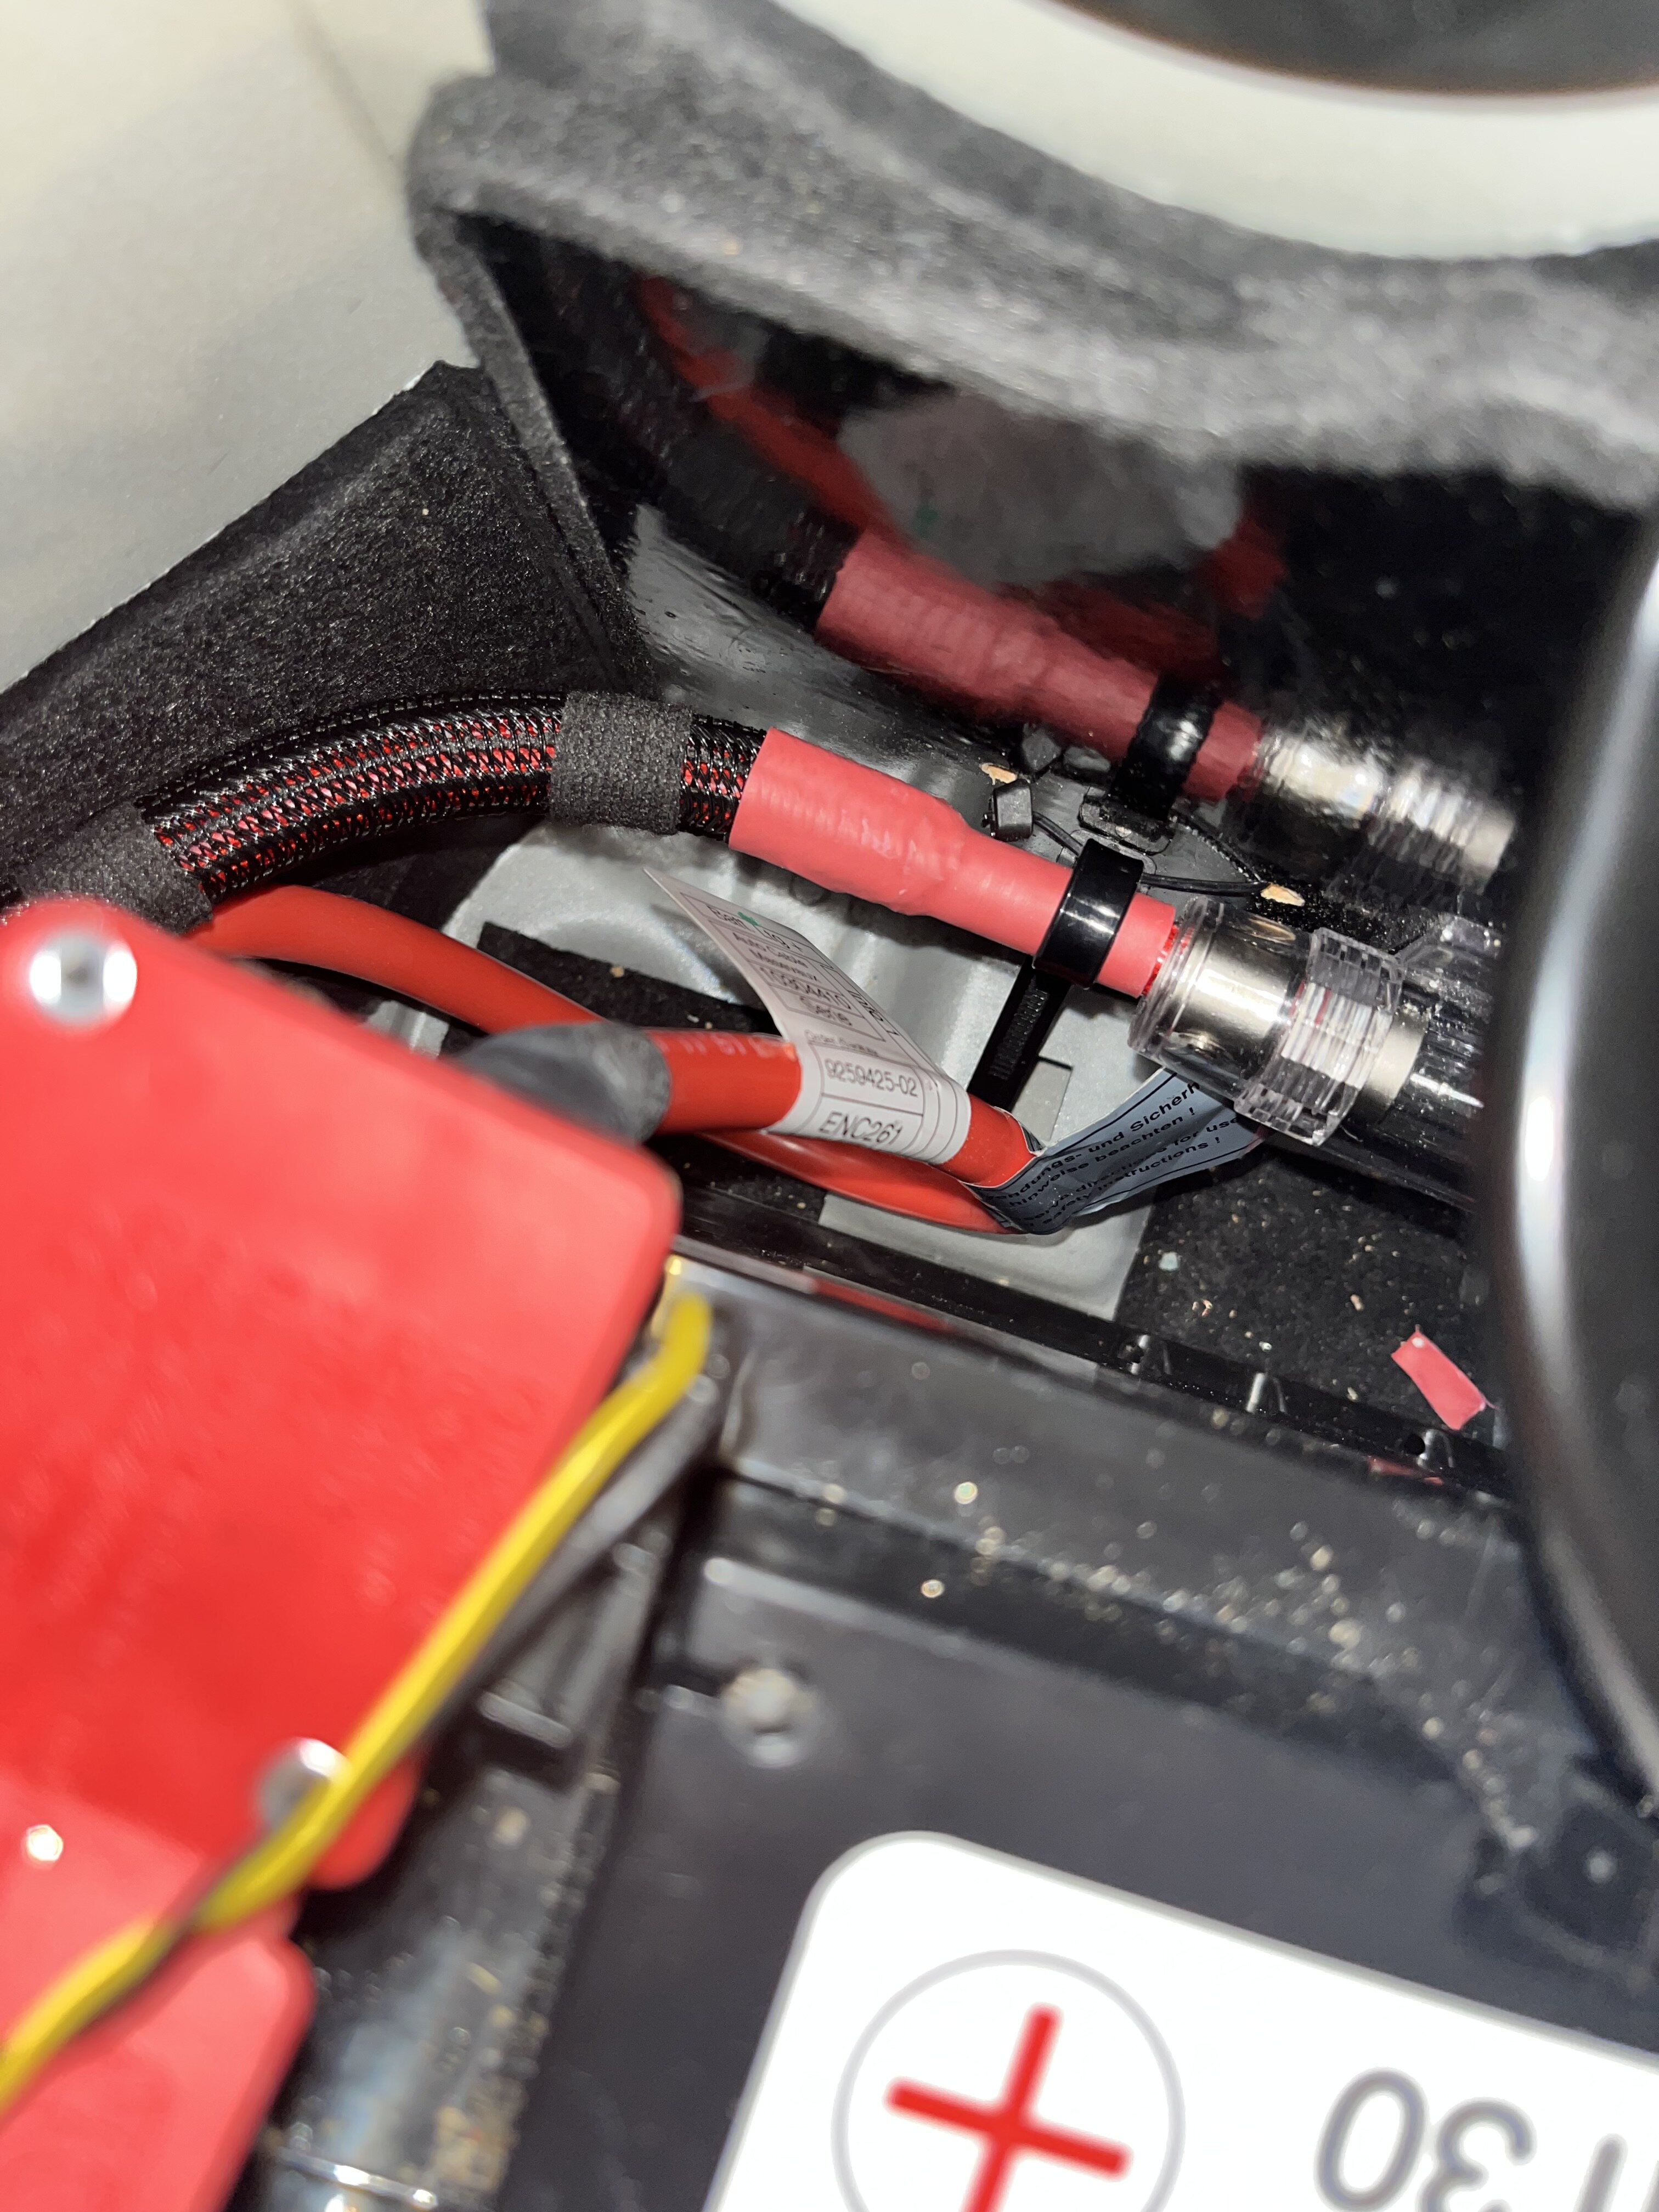
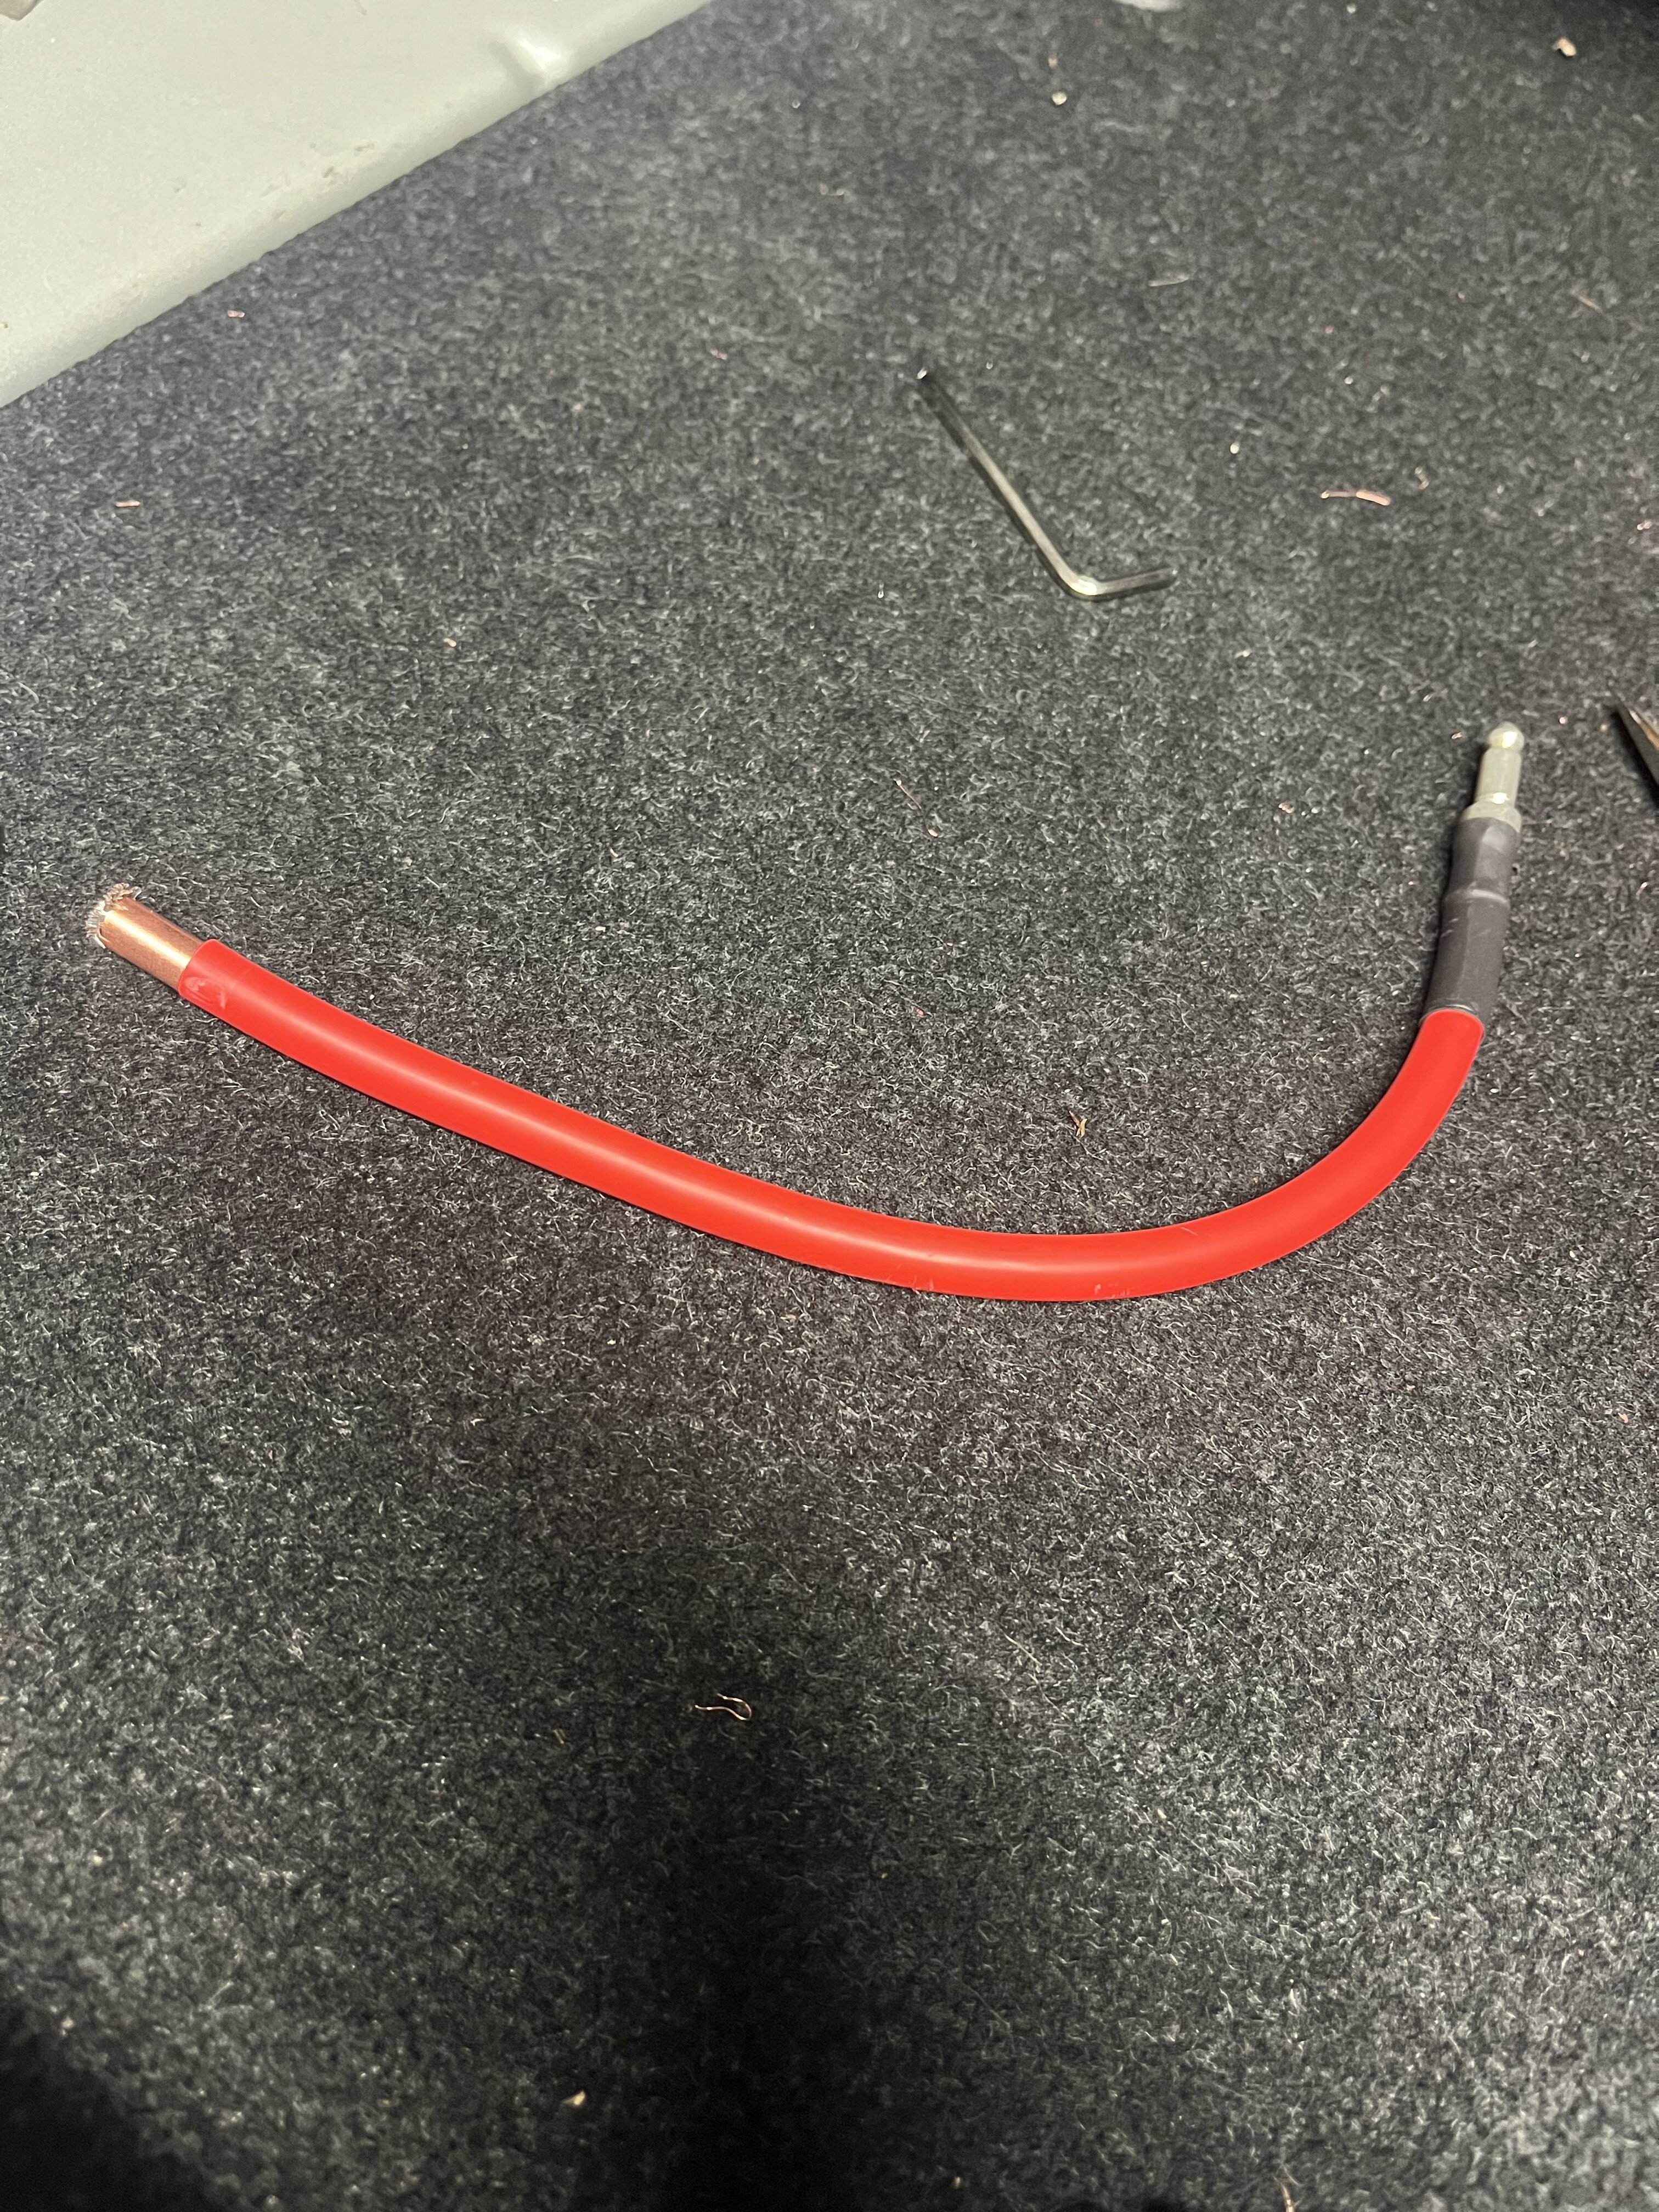
Earthing the Amp was straightforward. The factory amp bracket has m10 mounting stud in the same manner as the body earthing points. So just cut the Mobridge earth lead to length and terminated it with a 16mm2 6.4mm hole crimp lug.
Used a 4 awg joiner on the positive Mobridge lead and added a Cooper ferrule to ensure maximum contact area with hex screw down style joiner.


-
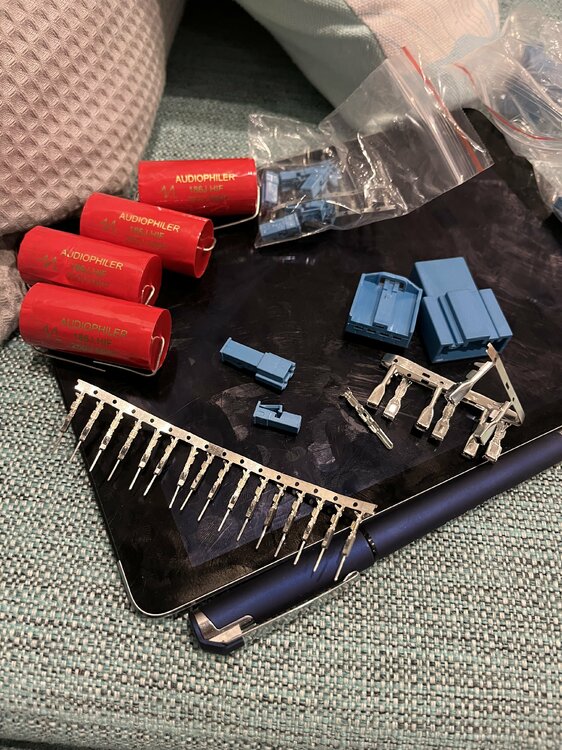
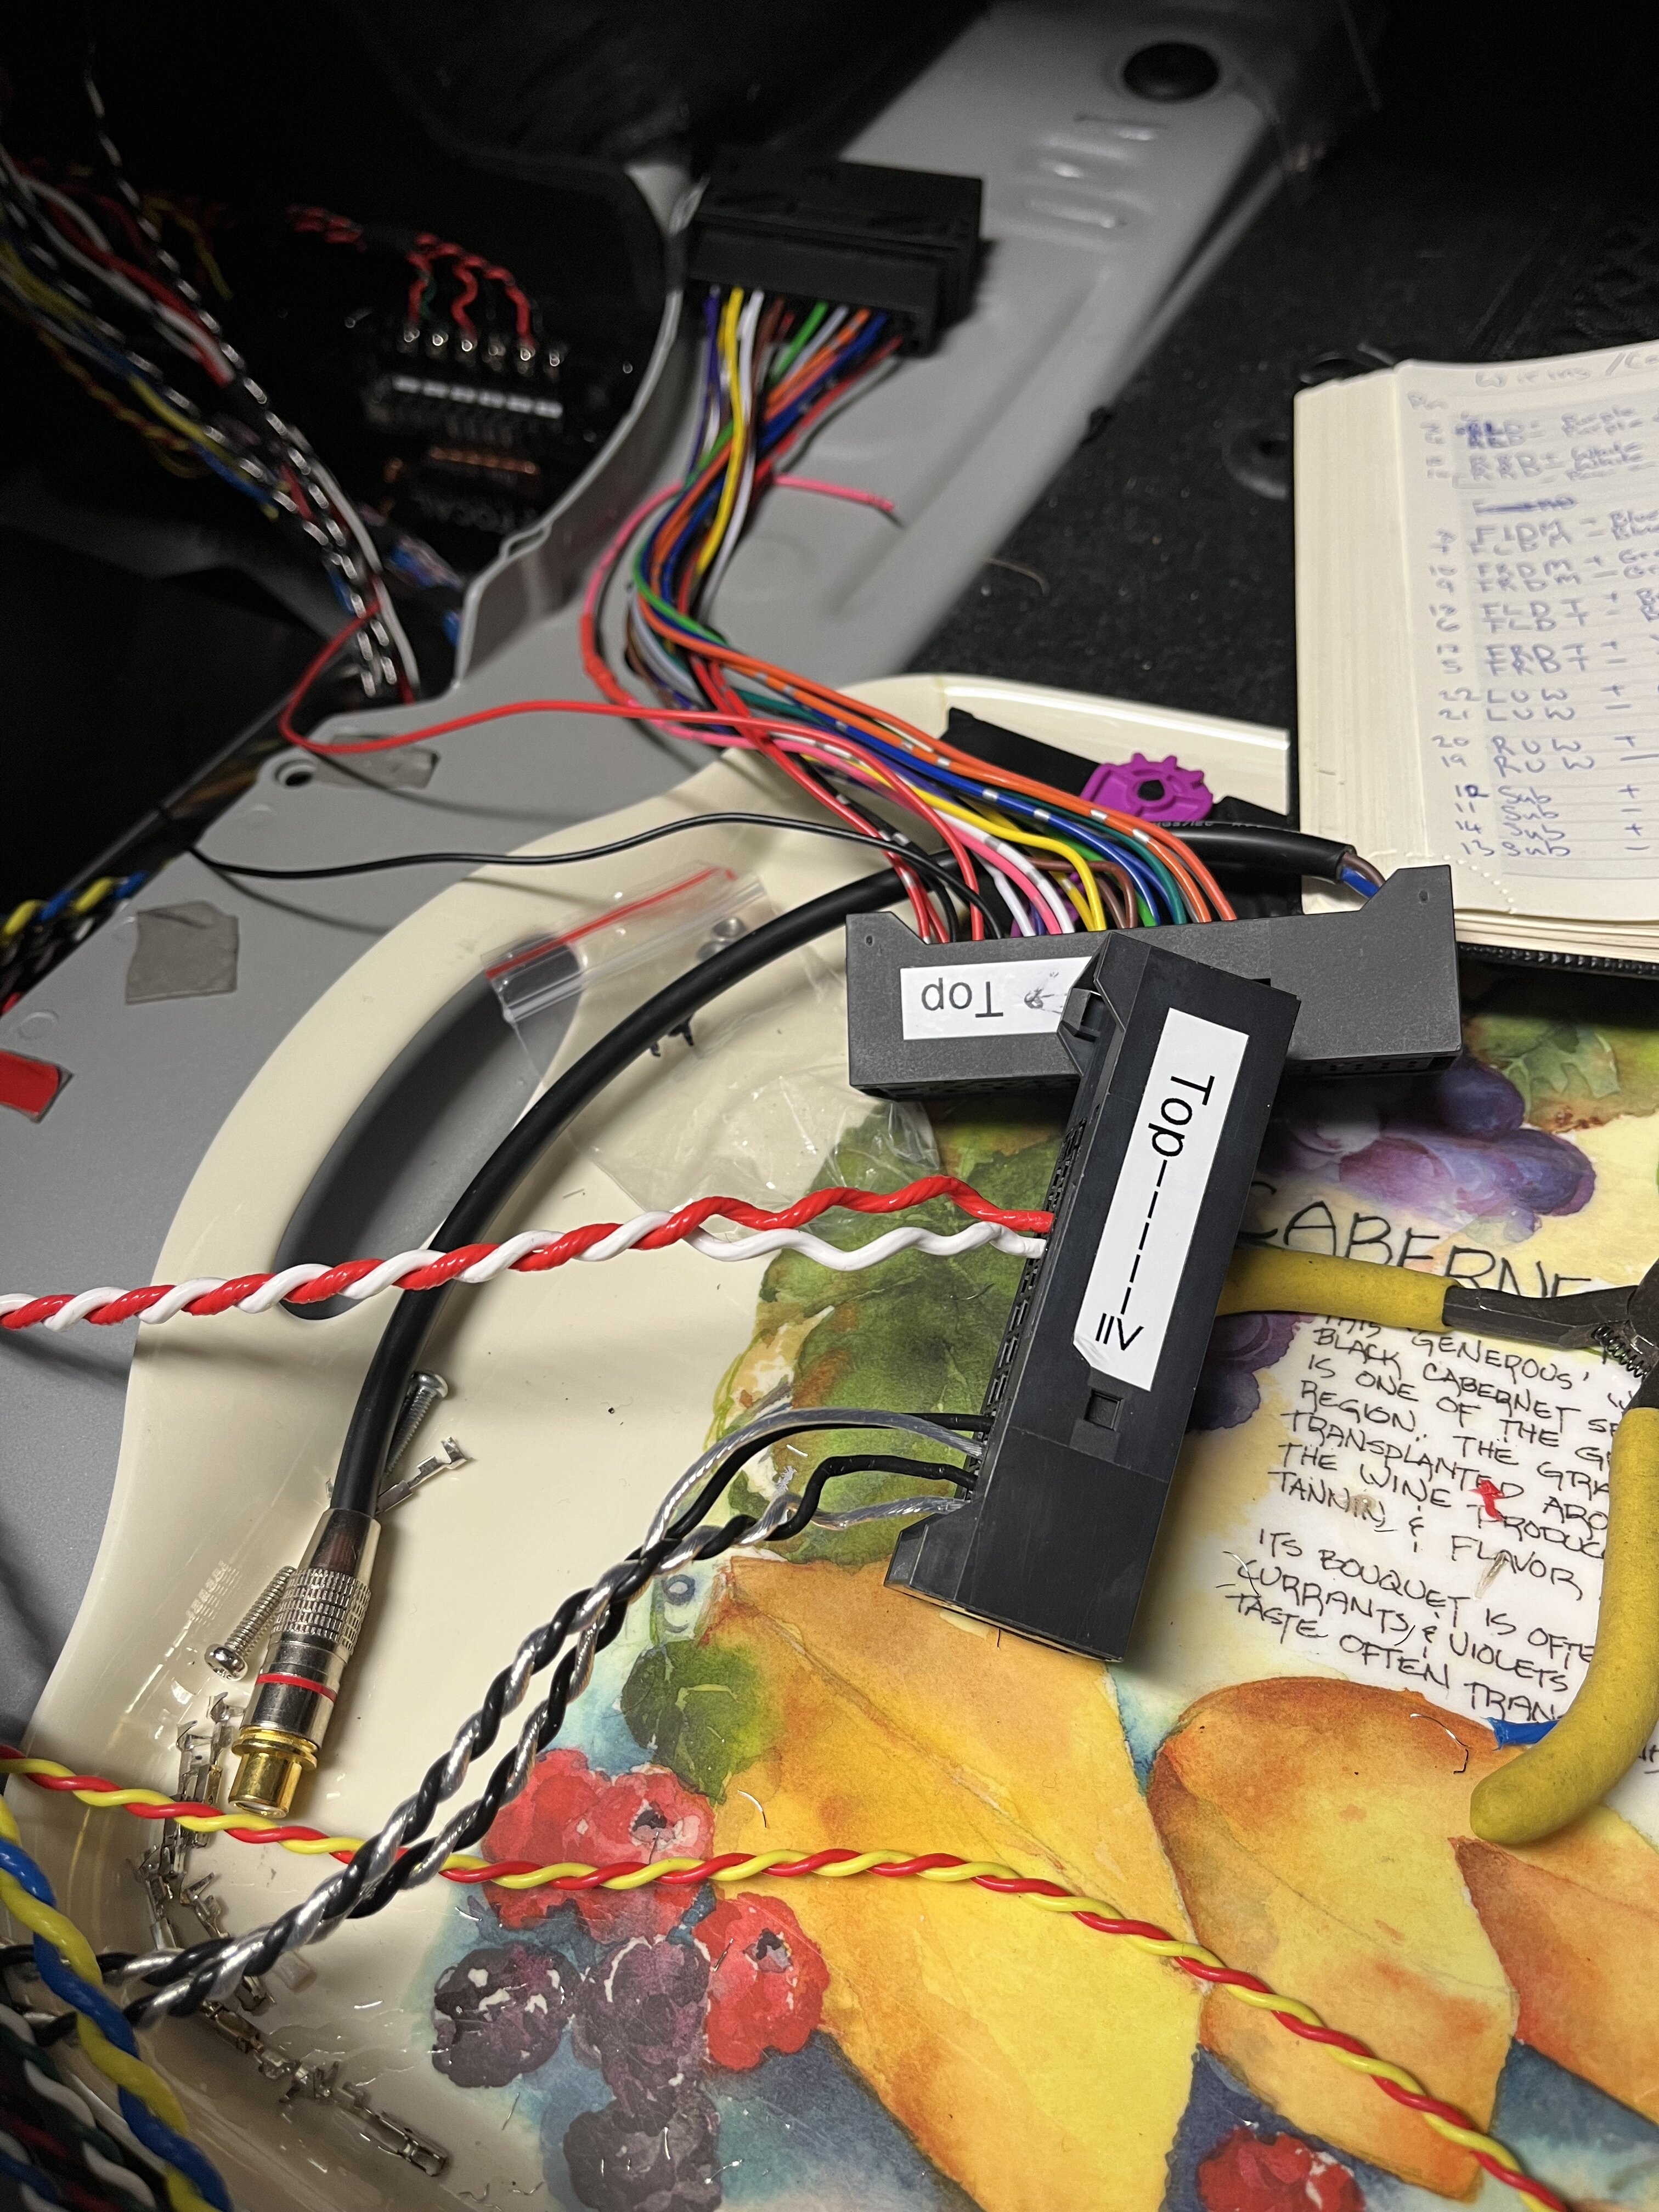
I decided to terminate the custom speaker loom directly onto a Mobridge TE / Tyco connector. These are similar to the 32 pin connector connector used in Porche / Audi audio systems.
There is nothing wrong with the Mobridge options with either a spice harness or a Mobridge to BMW Harman Kardon 20 pin patch cable. But since I didn’t have HK loom ( mine had an ASD used as a amp ) I’d have to crimp wires anyway.. If doing a Mobridge system the it can alsway be argumented with Technic PNP cable options depending on what’s is needed on a BMW install. Technic have a range of cable options.
The connector uses amp / te MCP 1.5k and 2.8k crimp sockets. The majority of the speaker pins will take up to 1.5mm2 cable and obviously the smaller 0.85mm2 cable that is used for door speakers . For the subwoofer output the amp runs two pair of speaker wire. For this run I’m using a 2 ohm sub so elected to run two pairs of 1.5mm2 cable. For the underseat woofers I’d run 2.5mm2 which is what BMW do. But in hindsight I should have run 1.5mm2 cable. For those connections I trimmed back the wire a bit so the would crimp onto the MCP 2.5 crimp connectors. With the new harness connector I decided not to also add the rca and power outputs to my loom. 400 rms is more than enough on bass these days so don’t need to supplement badd any further .


-
Most of the nav and internal lighting controls are using ibus for communication and your theory about activity on the bus is likely cause.
The bus is a very low speed serial asynchronous system that works in a party line style so each element will try transmitting and will back off if something else transmitting and try again.
With nav coder watch the activity on the bus and see if any device nodes are continuing transmitting. Also check for devices like aftermarket Bluetooth audio gateways as some of those can cause issues ( often a power reset will help ) . Also need to check that no one before your ownership has tapped it for a power source
If your getting corruption a way to check is via navcoder on one of the modules. Bluetooth module is ideal if you have one. You’ll see random characters rather than pairing PIN number.
The ibus wire colour is primary white with yellow.
-
The e46 siren / tilt sensor / bonnet switch are the same. Only difference is the interior ultrasound sensor is different on convertible. Mirror isn’t really needed , but it does have the alarm on flashing led.
Only other difference is the colour of the interior ultrasound sensor cover. This one is a new Motorsport coloured one.
I did intend to put this into my Japan import e46 m3. But traded it last year.
-
Bump, still have alarm components for e46 for sale.
-
Welcome , the C1 is certainly a rare car !
Any pictures of some of the BMWs you’ve owned ?
-
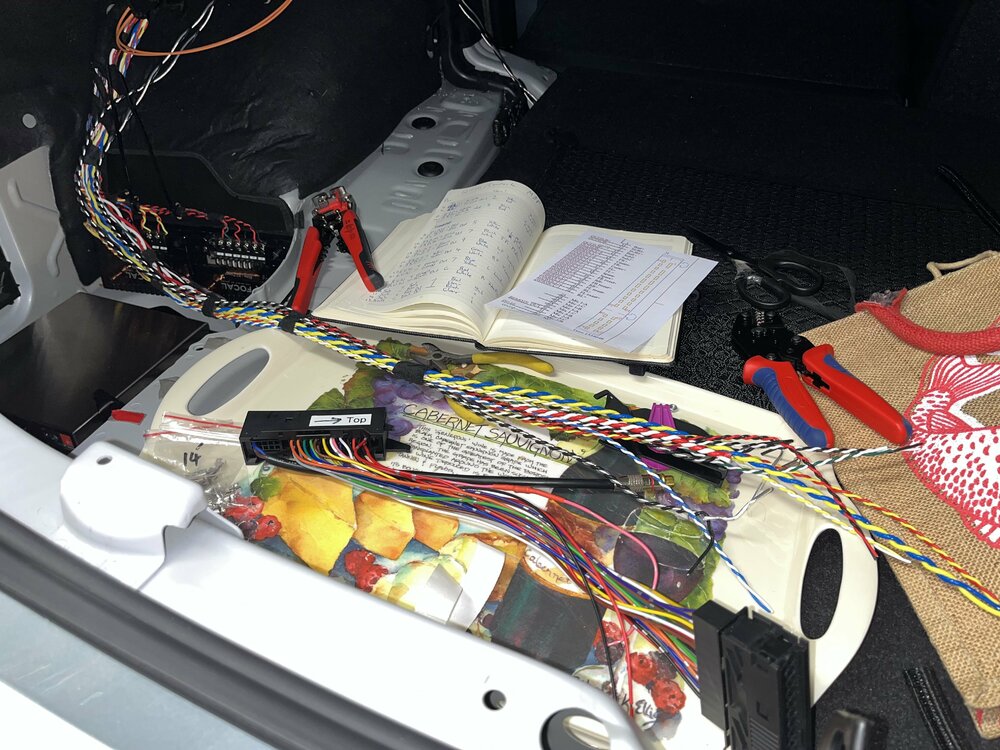
Also spent time in the boot.
Front doors are running active so tweeter and door midbass so get a channel each.
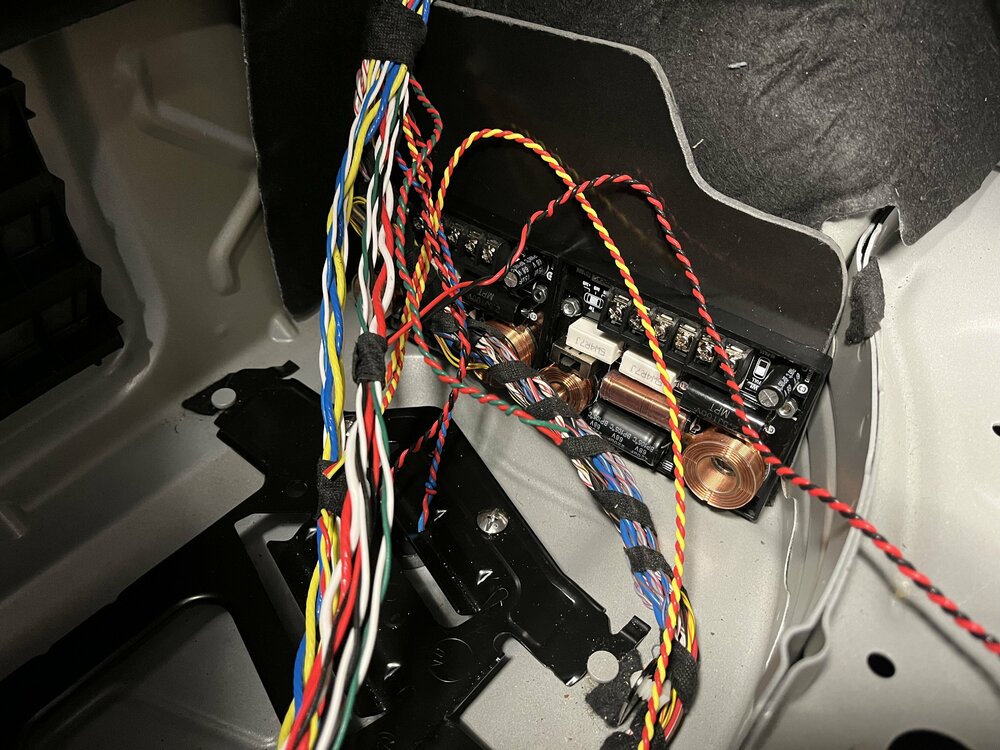
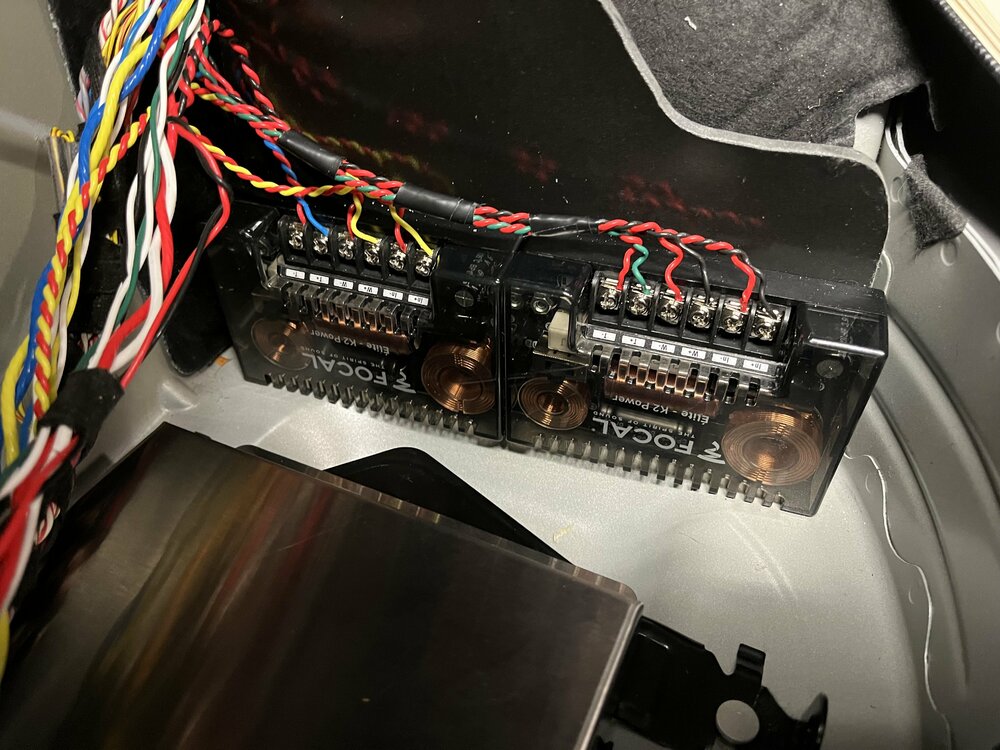
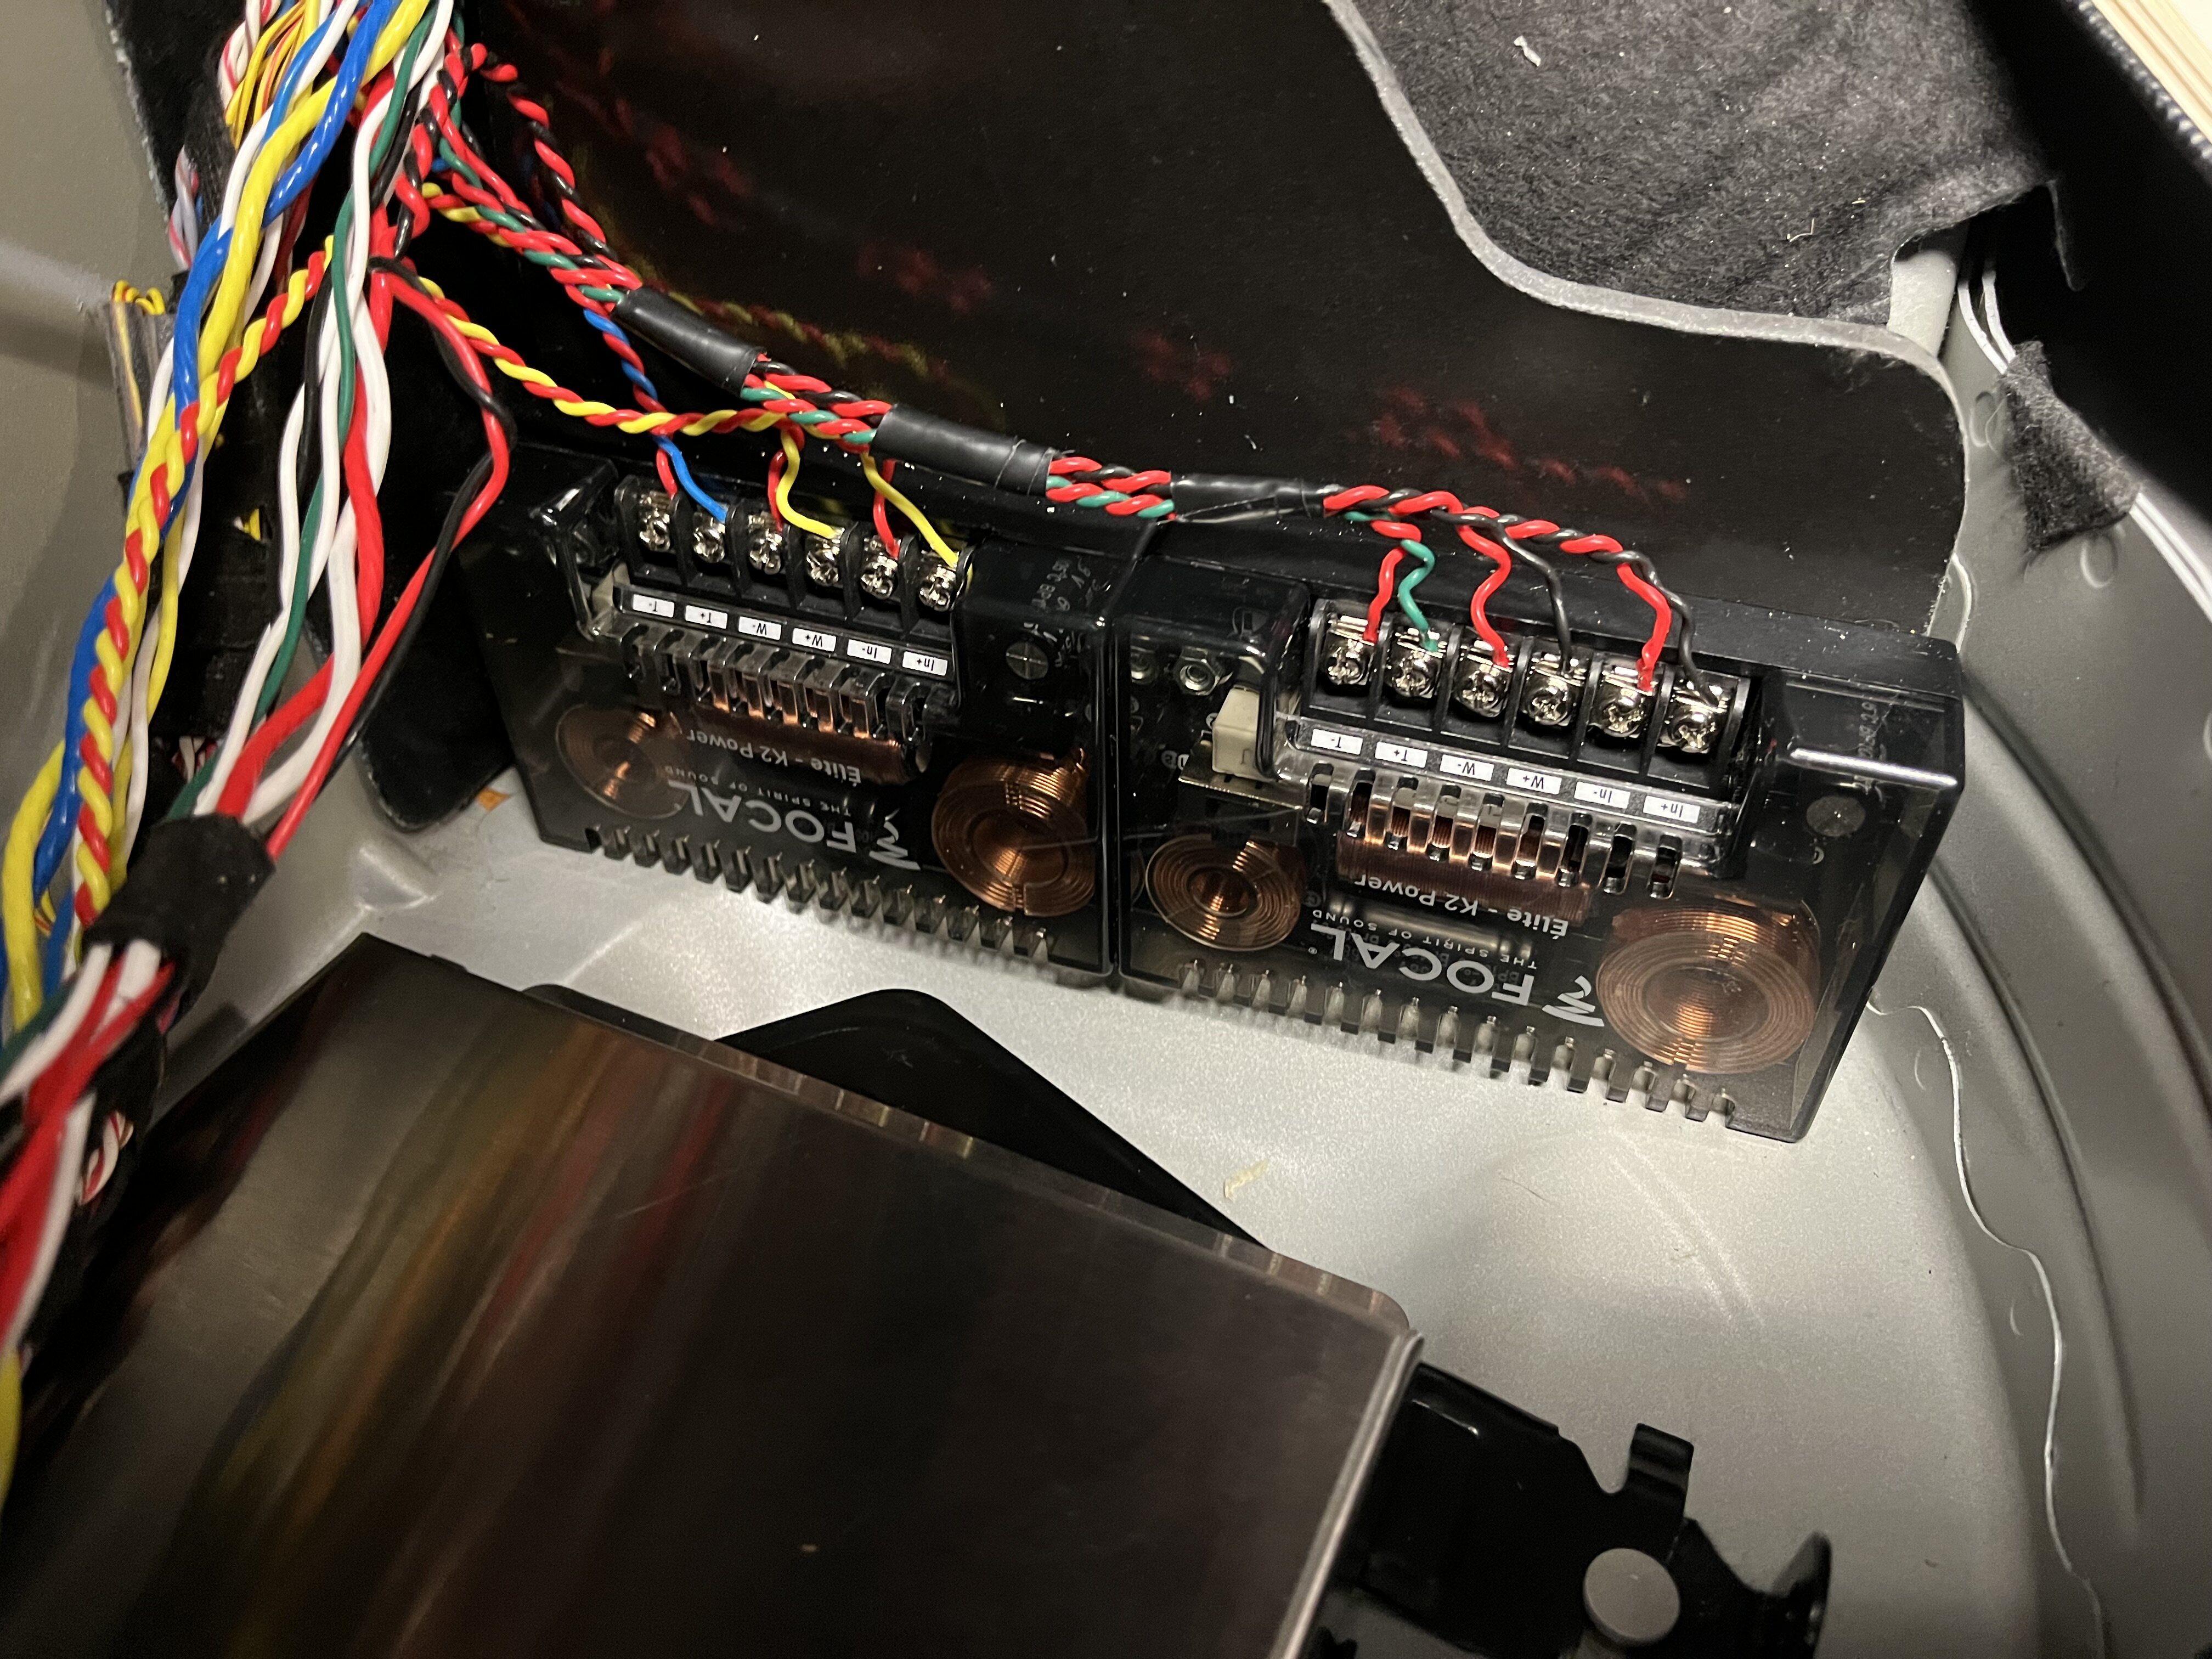
Rear doors are mainly going to be used for rear fill or turn up a bit when passengers in the rear. So these are running passive crossovers. They might have fitted in the rear door card but learnings from my e46 m3 stereo was that hot glue and 3m tape only held for a few years ( although the crossover in that build were massive ! )
This time I thought I’d mount them into the boot. To be honest they are mounted a bit to close together with the coil spacing but mounting them vertically would inhibit airflow to amp. Each rear door has two sets of wiring for tweeter and mid bass. Cross overs have been set with 0 gain on tweeter settings and full range on midbass. Will use Mobridge to set high pass of 150hz instead .

-
-
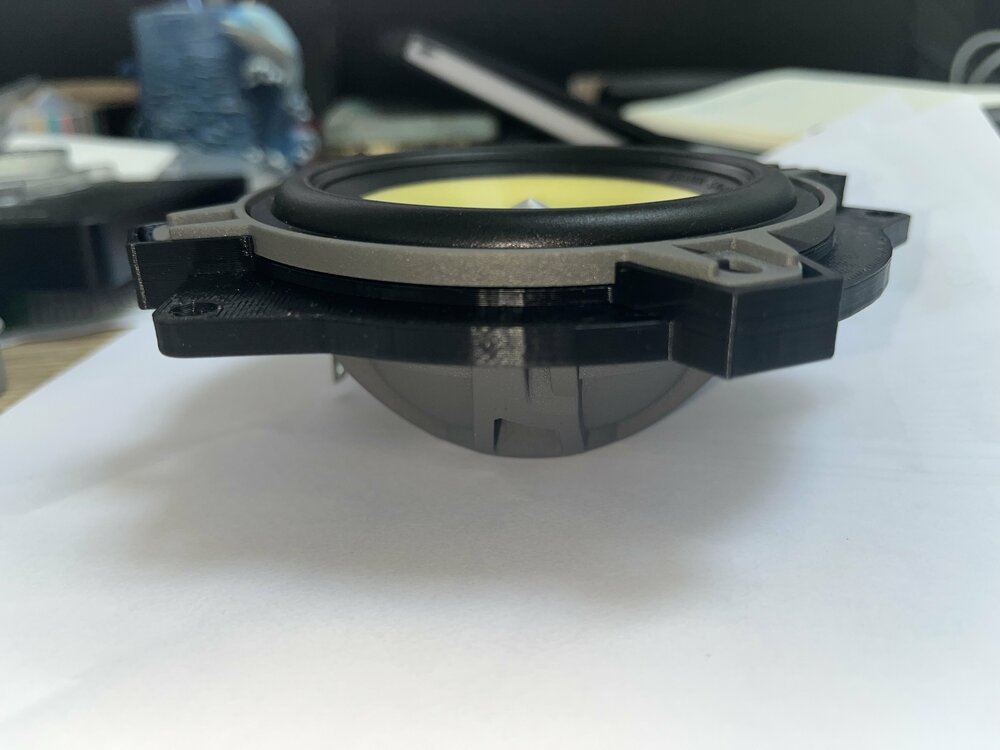
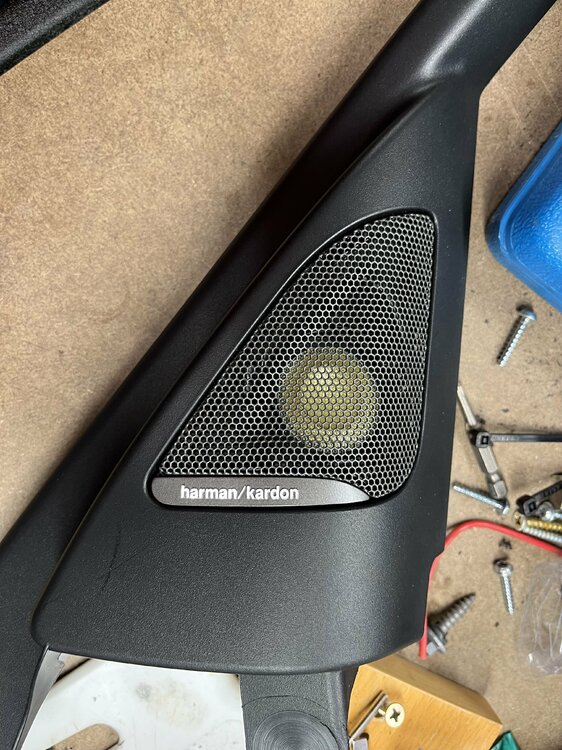
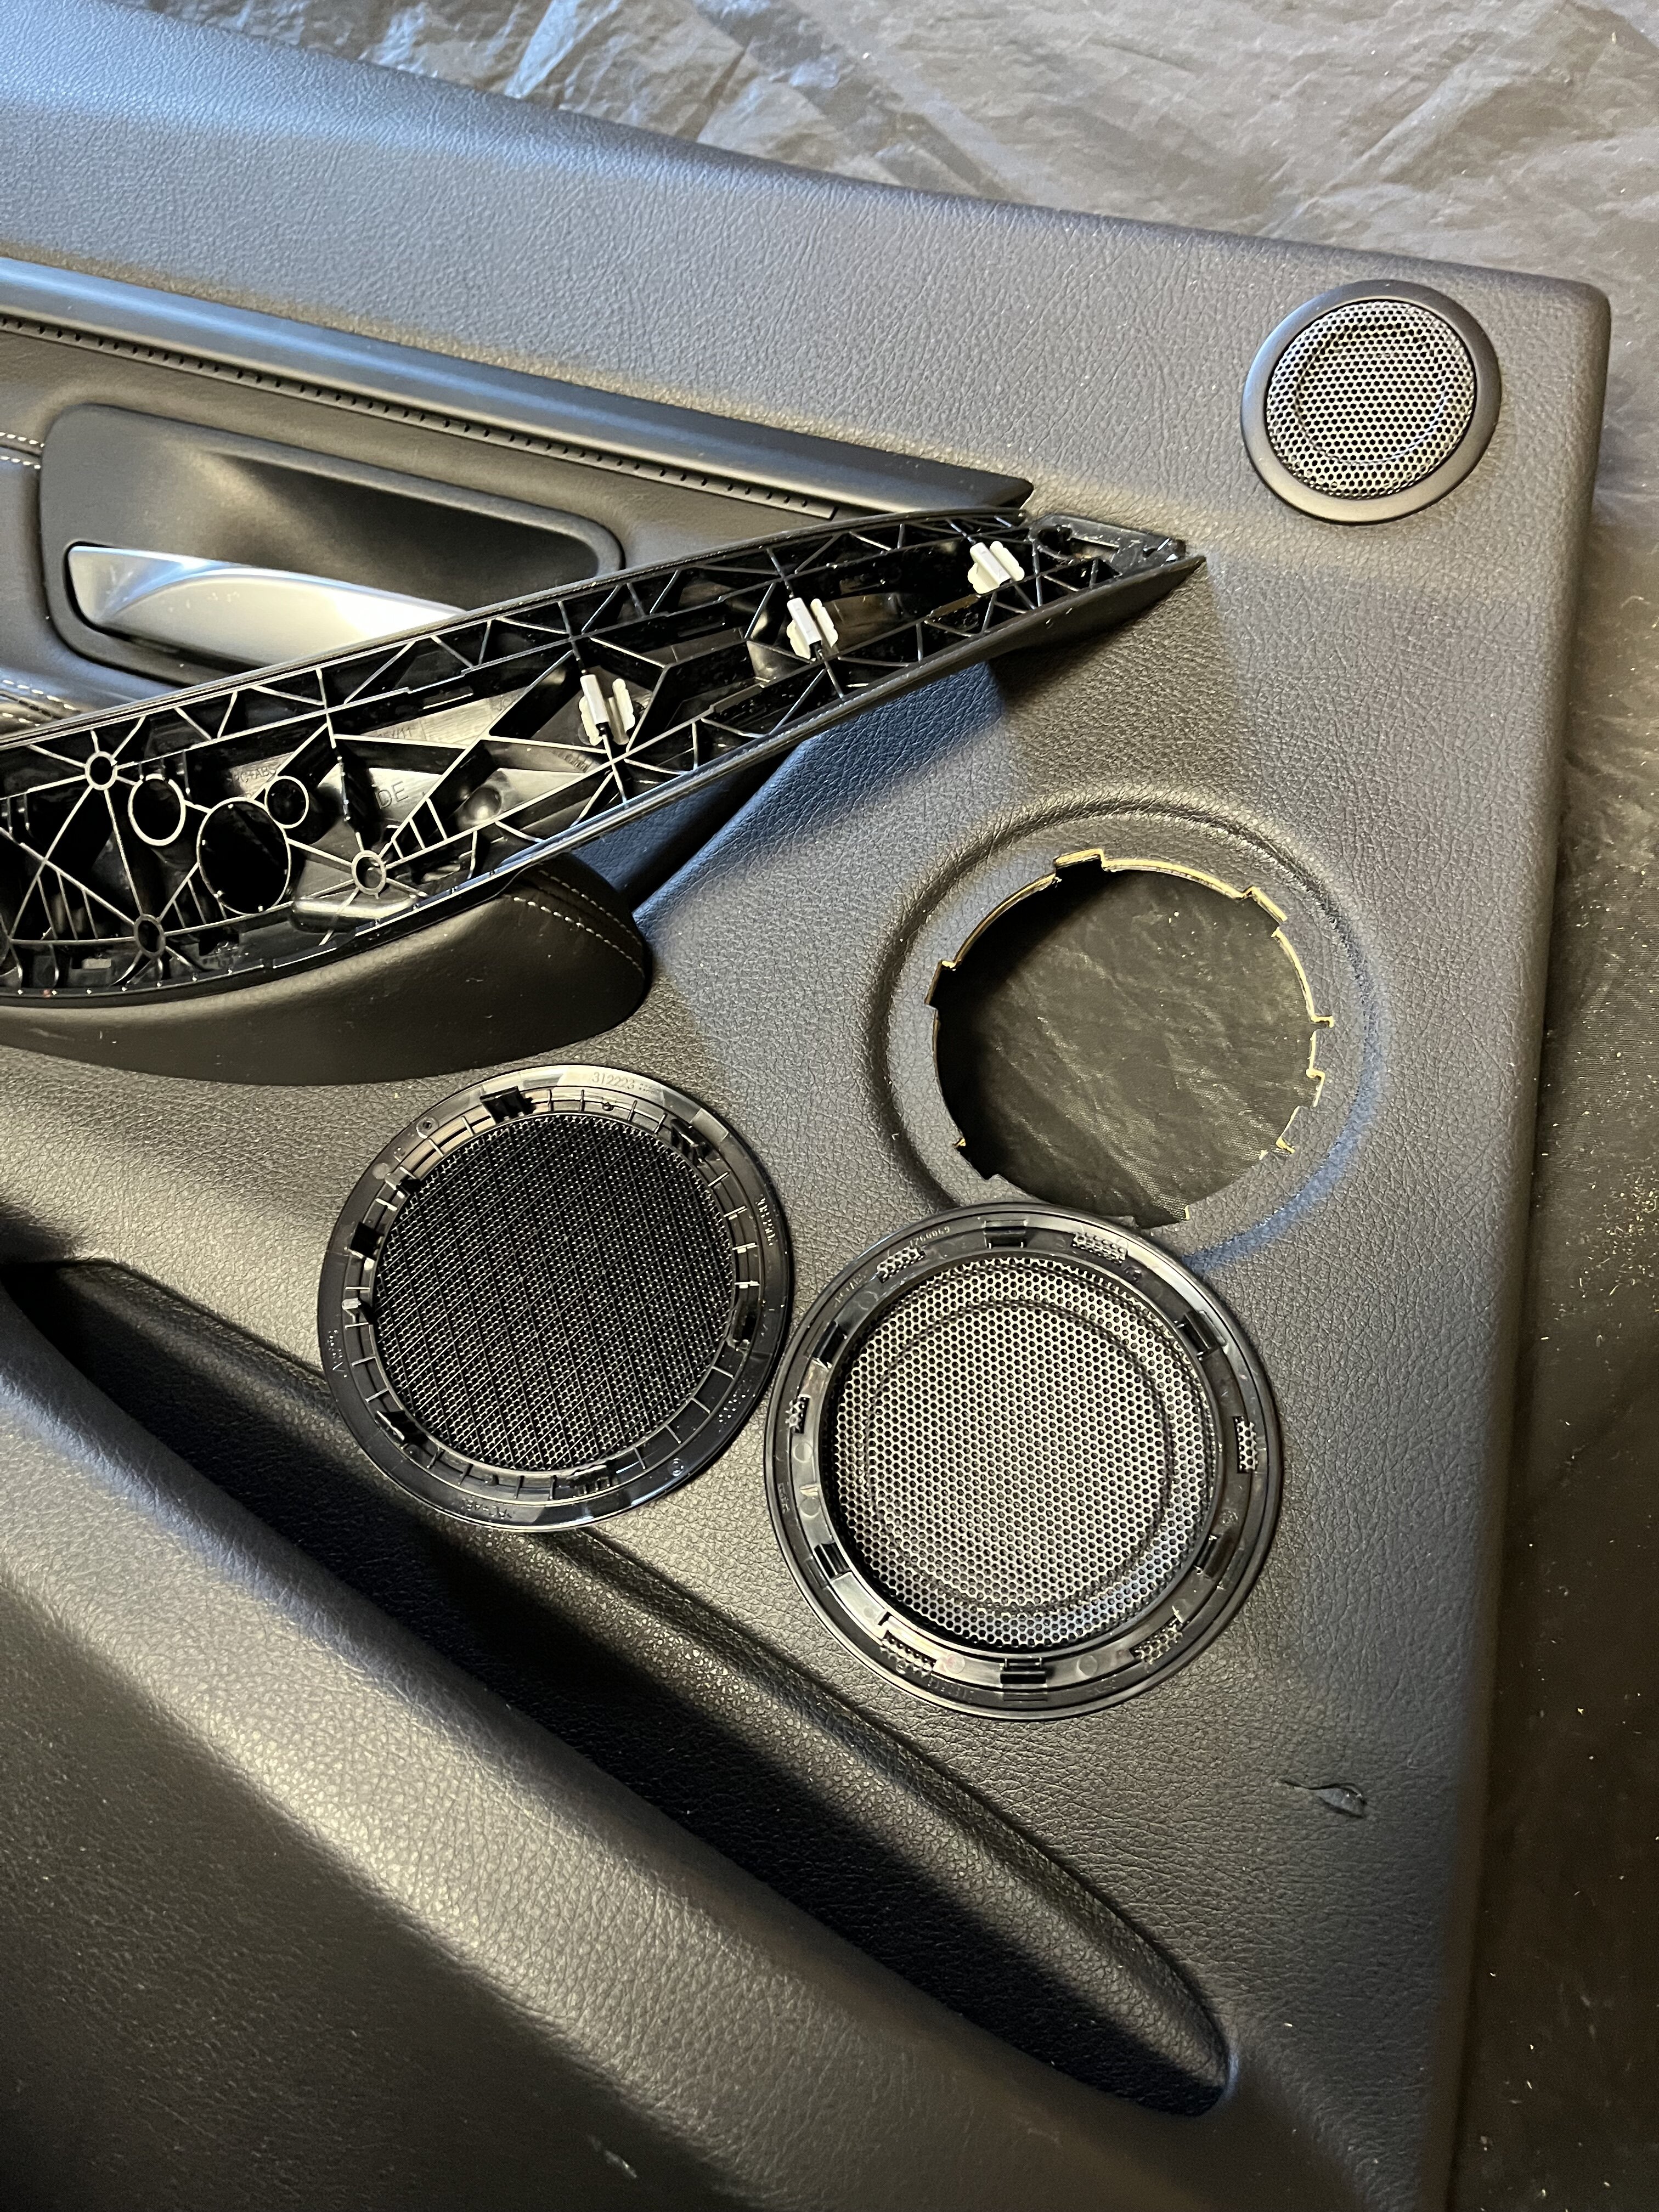
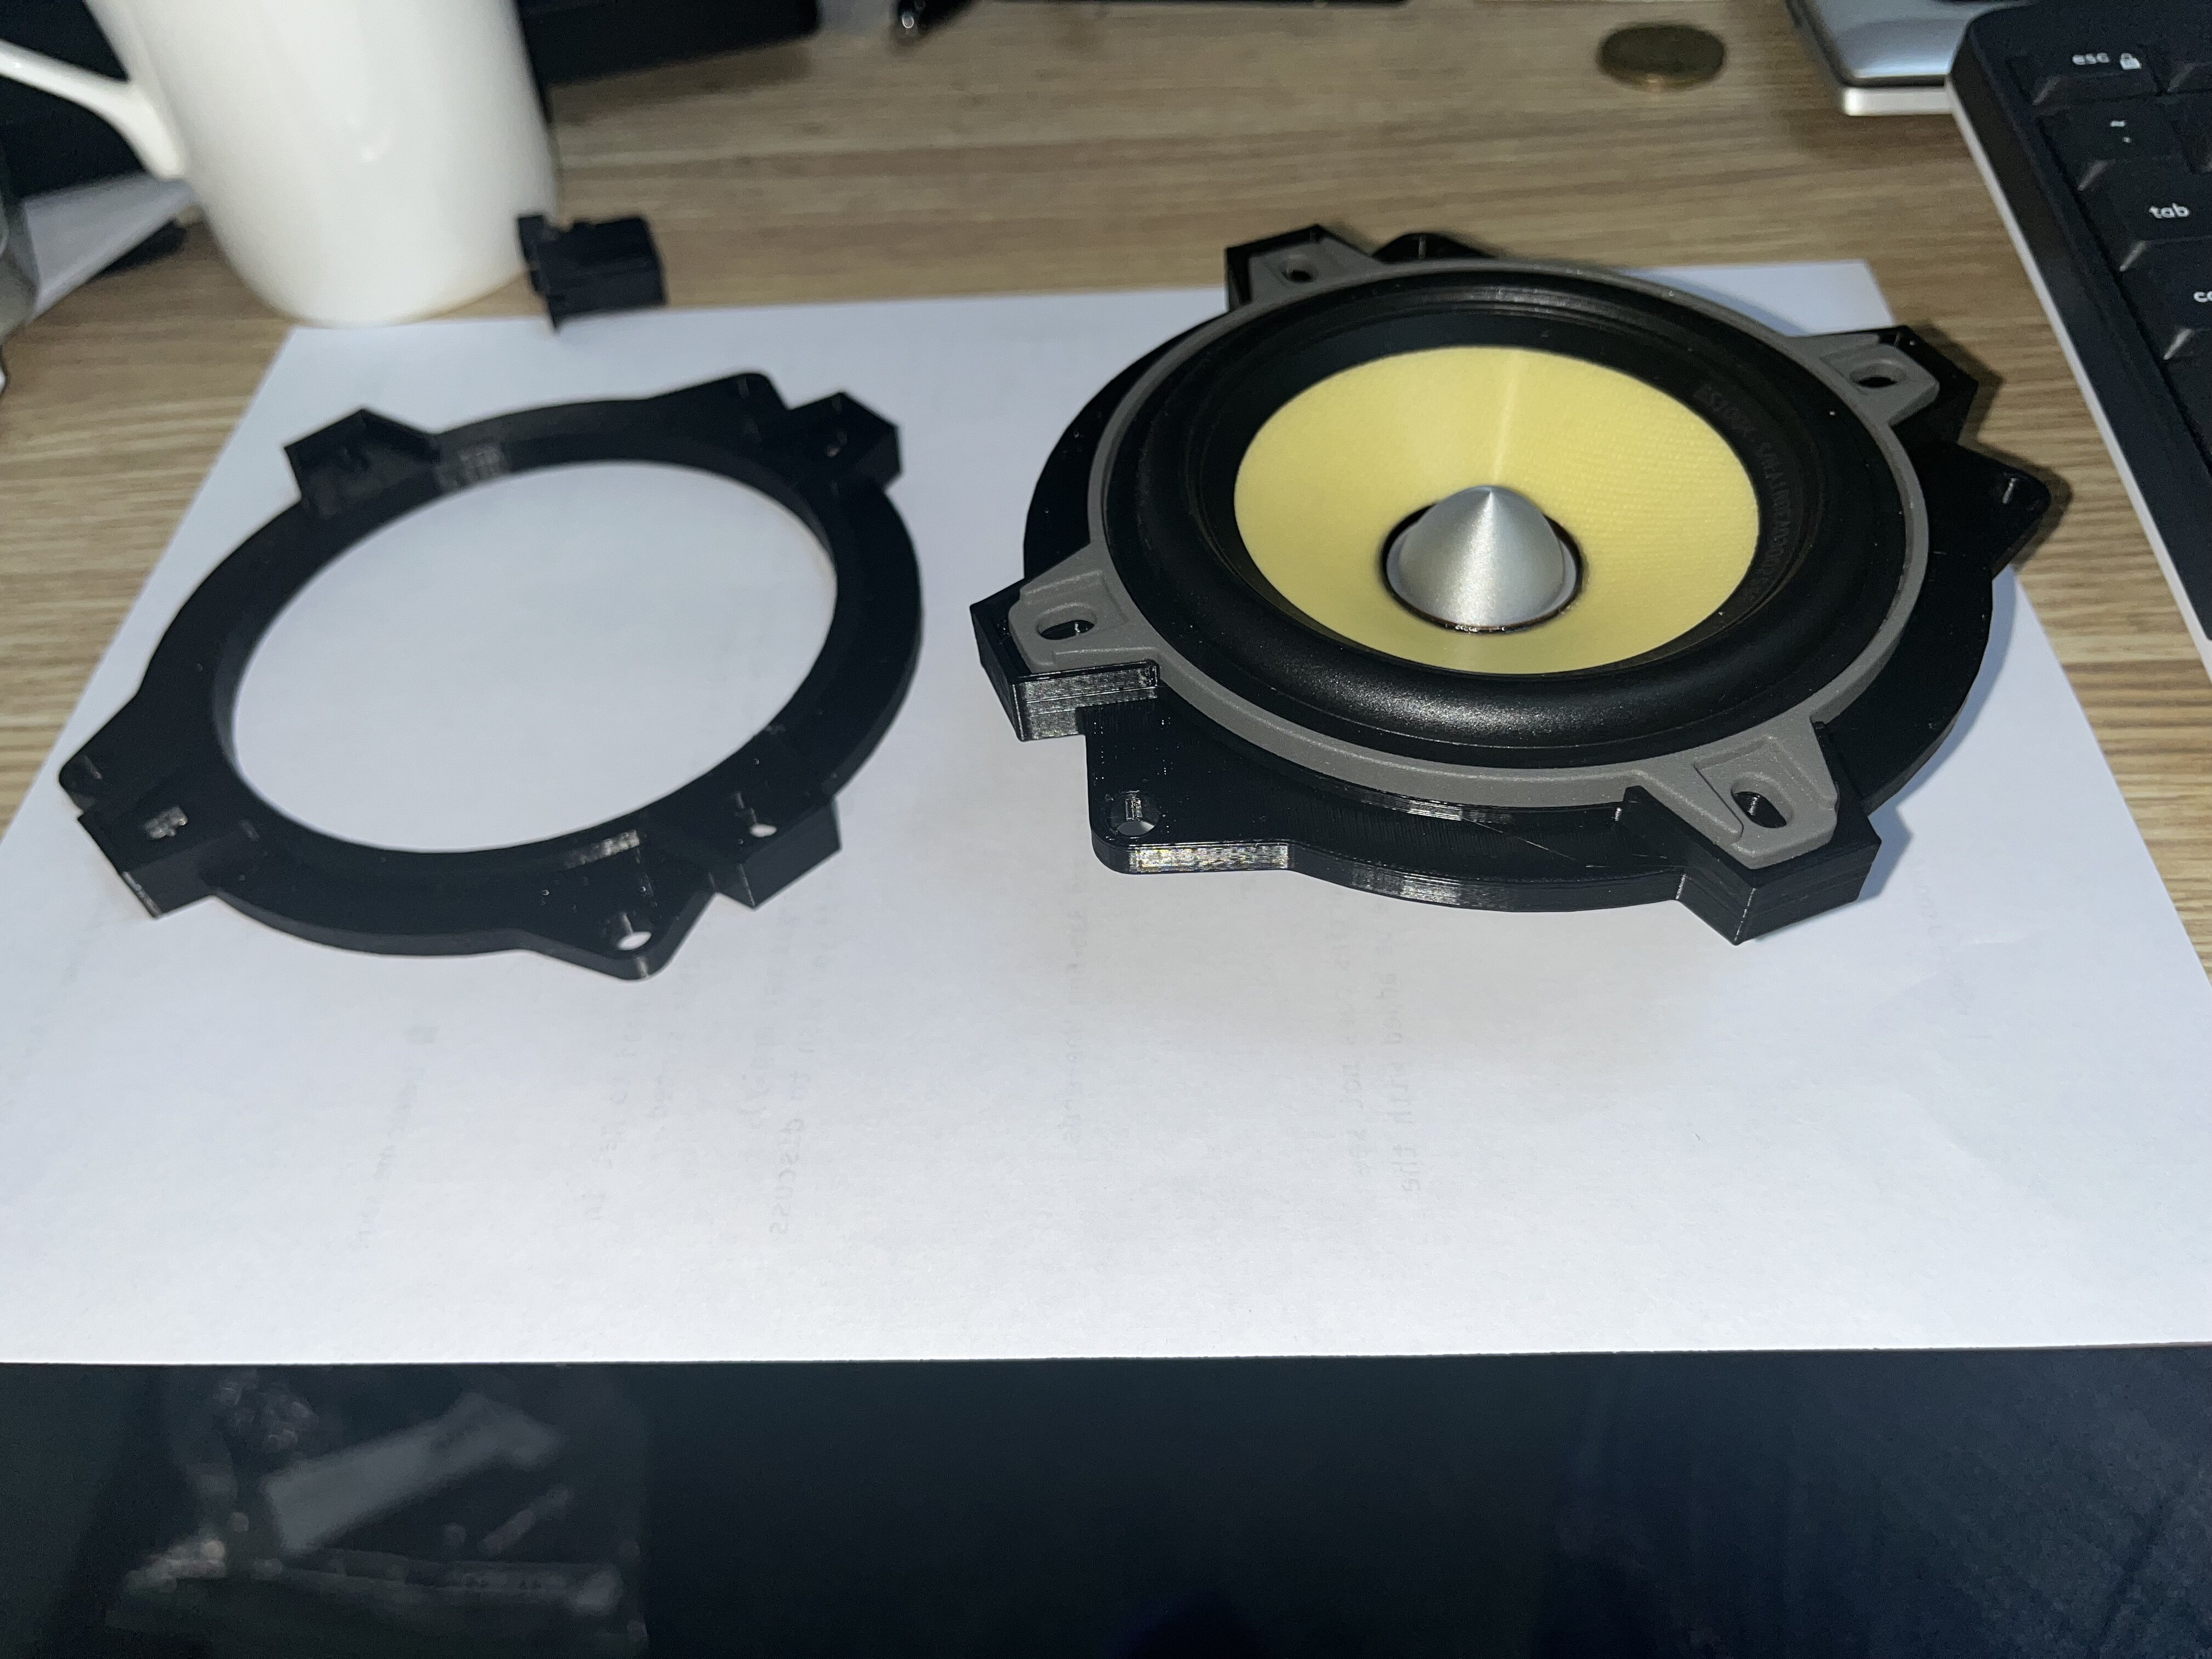
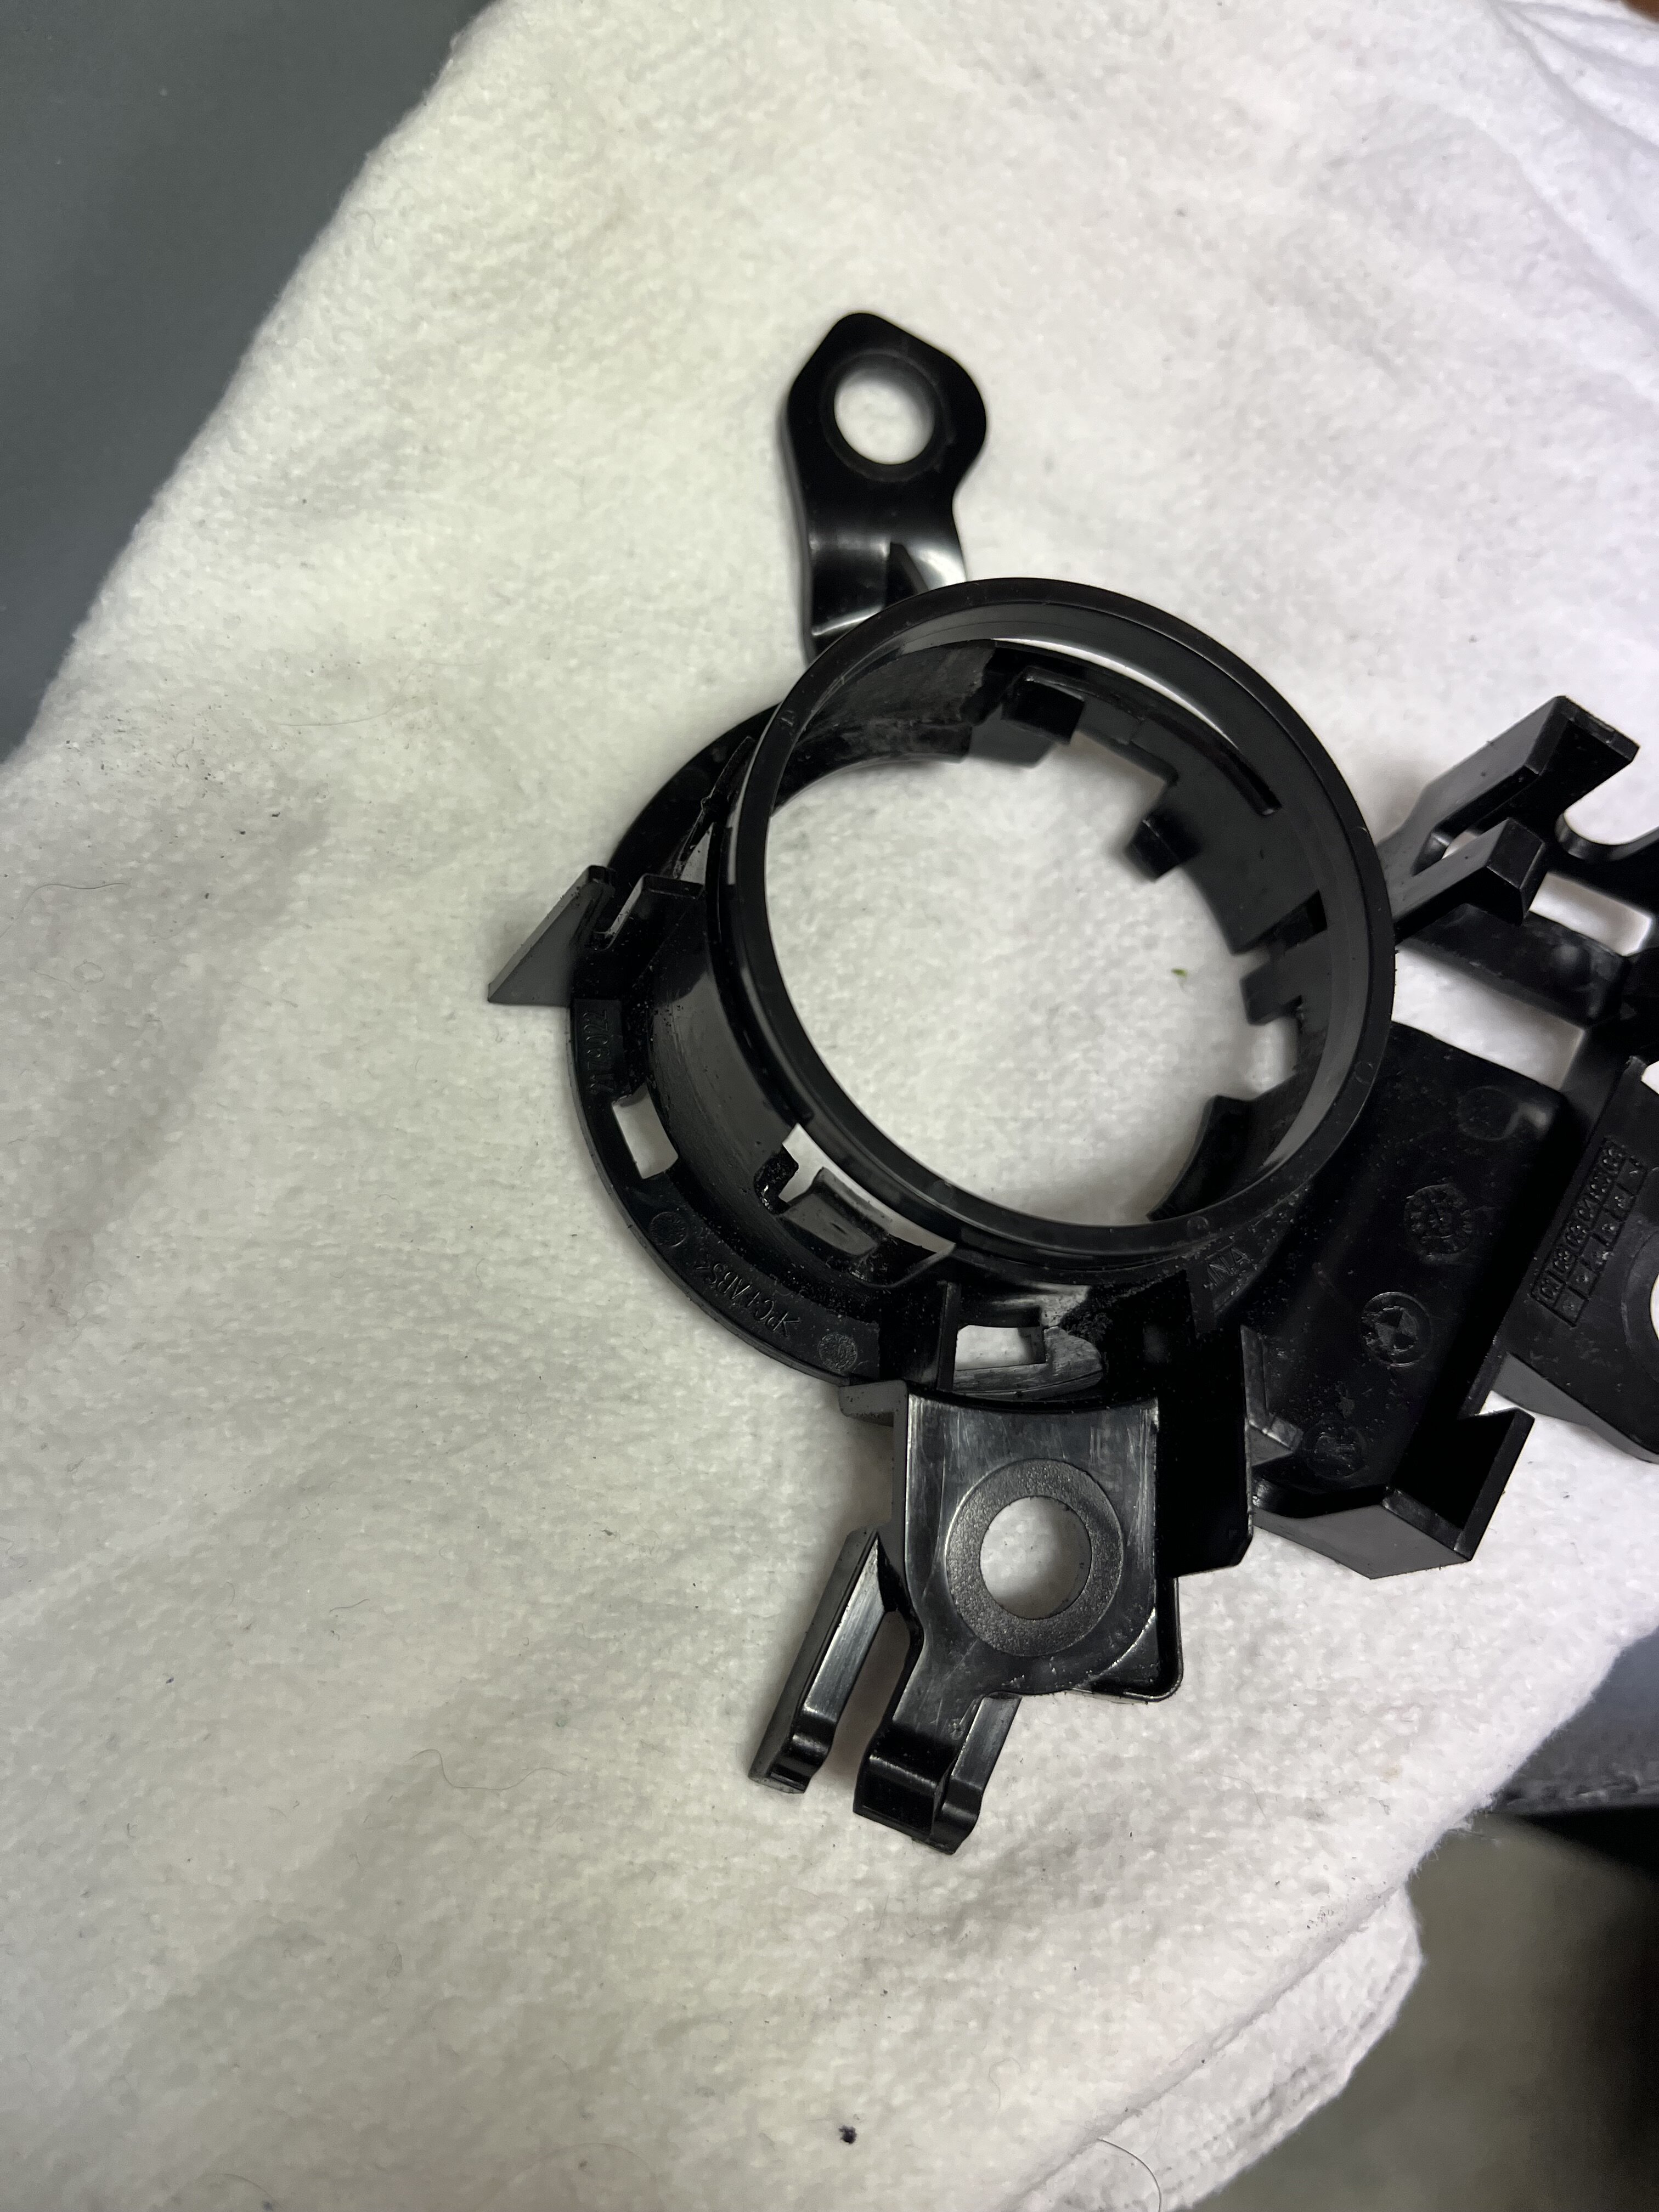
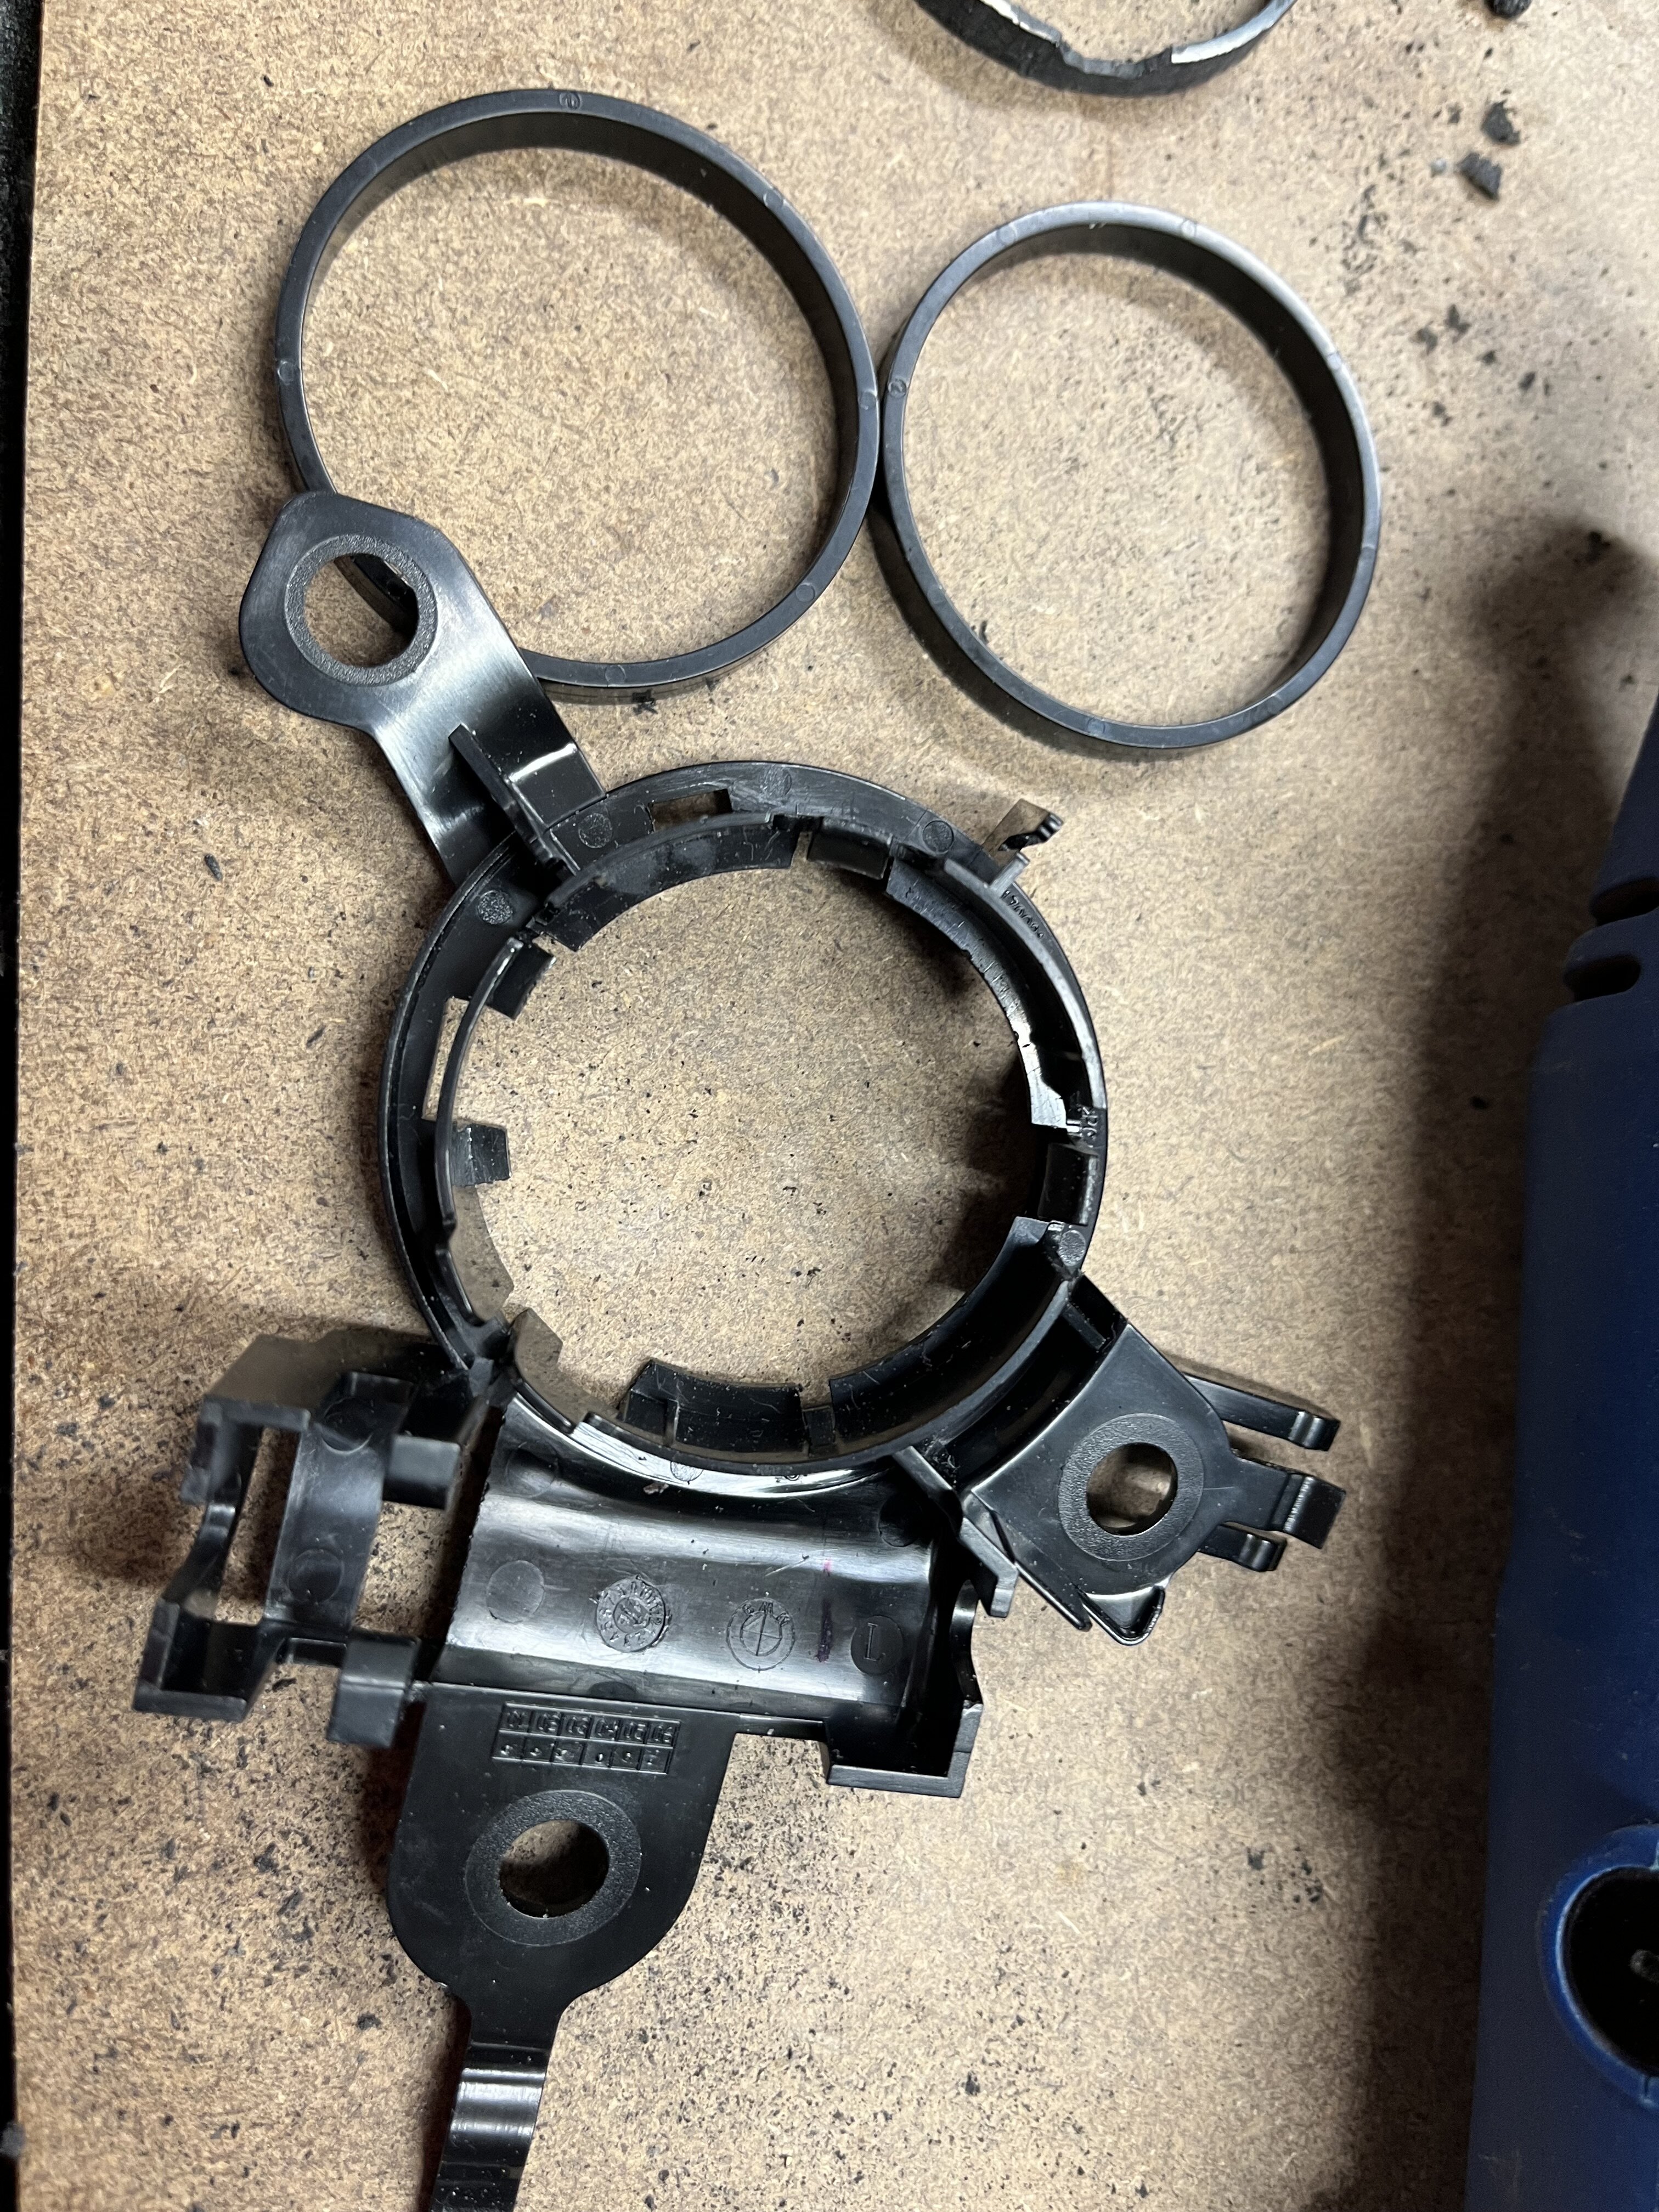
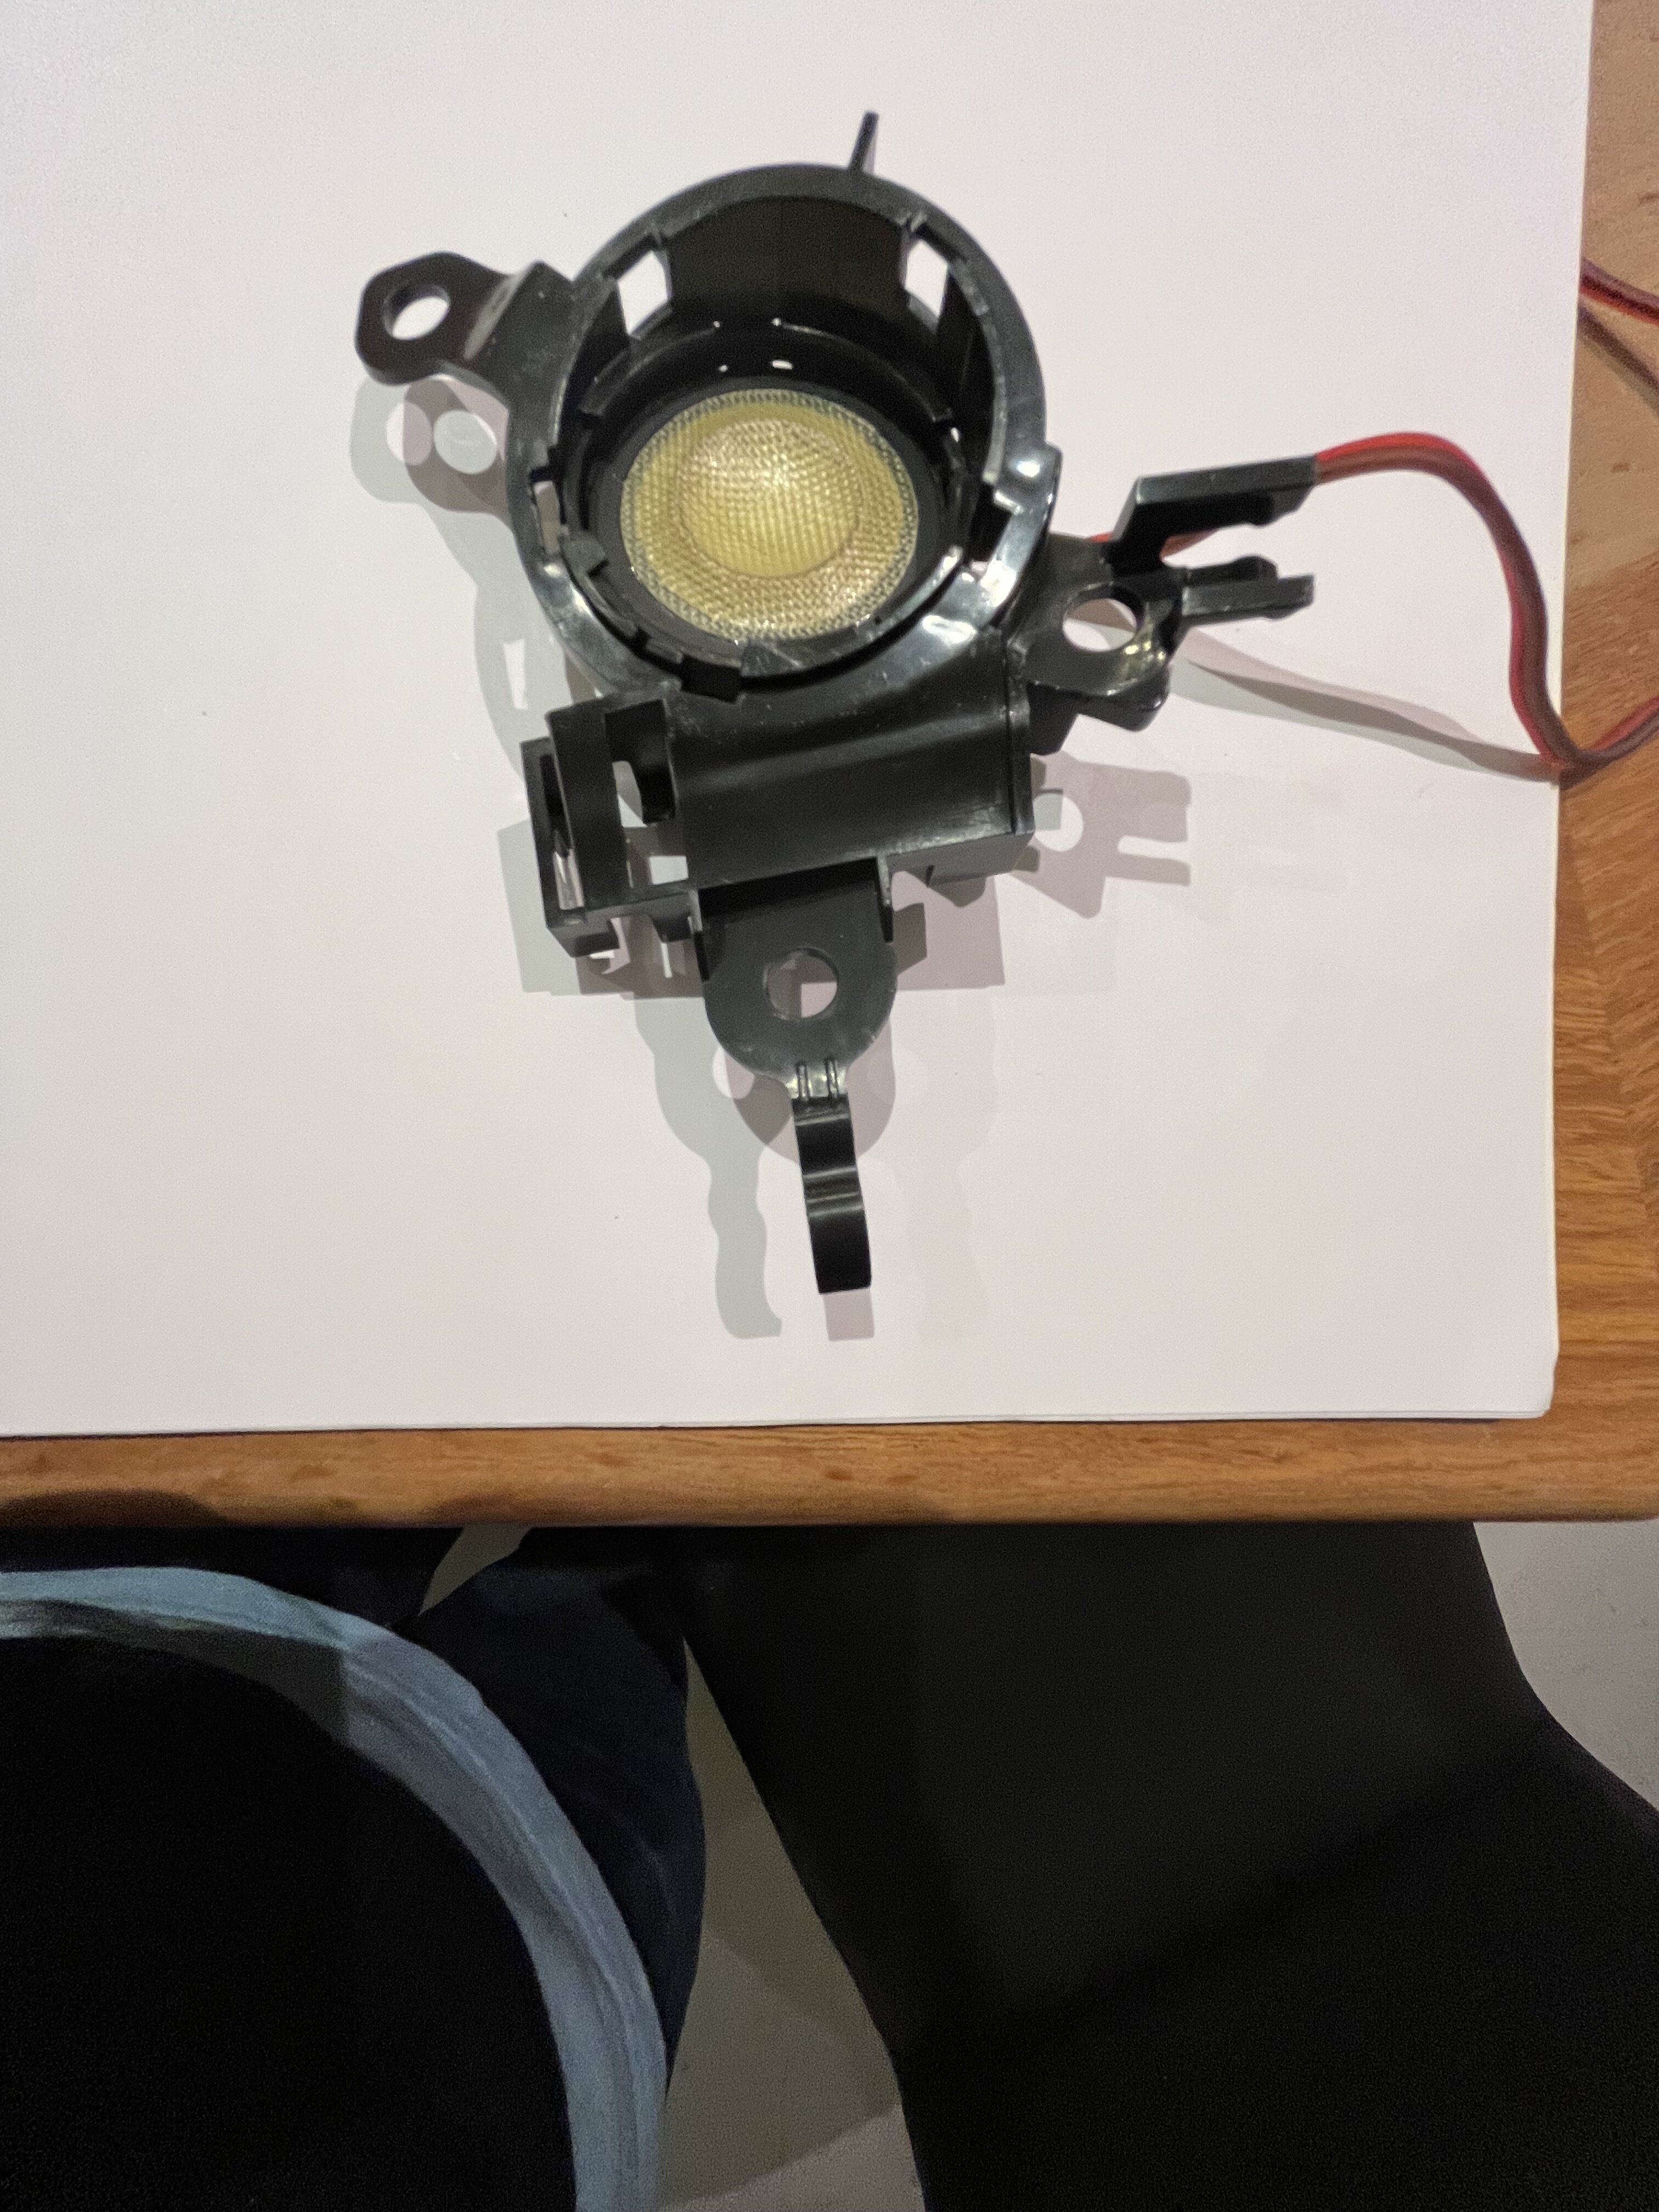
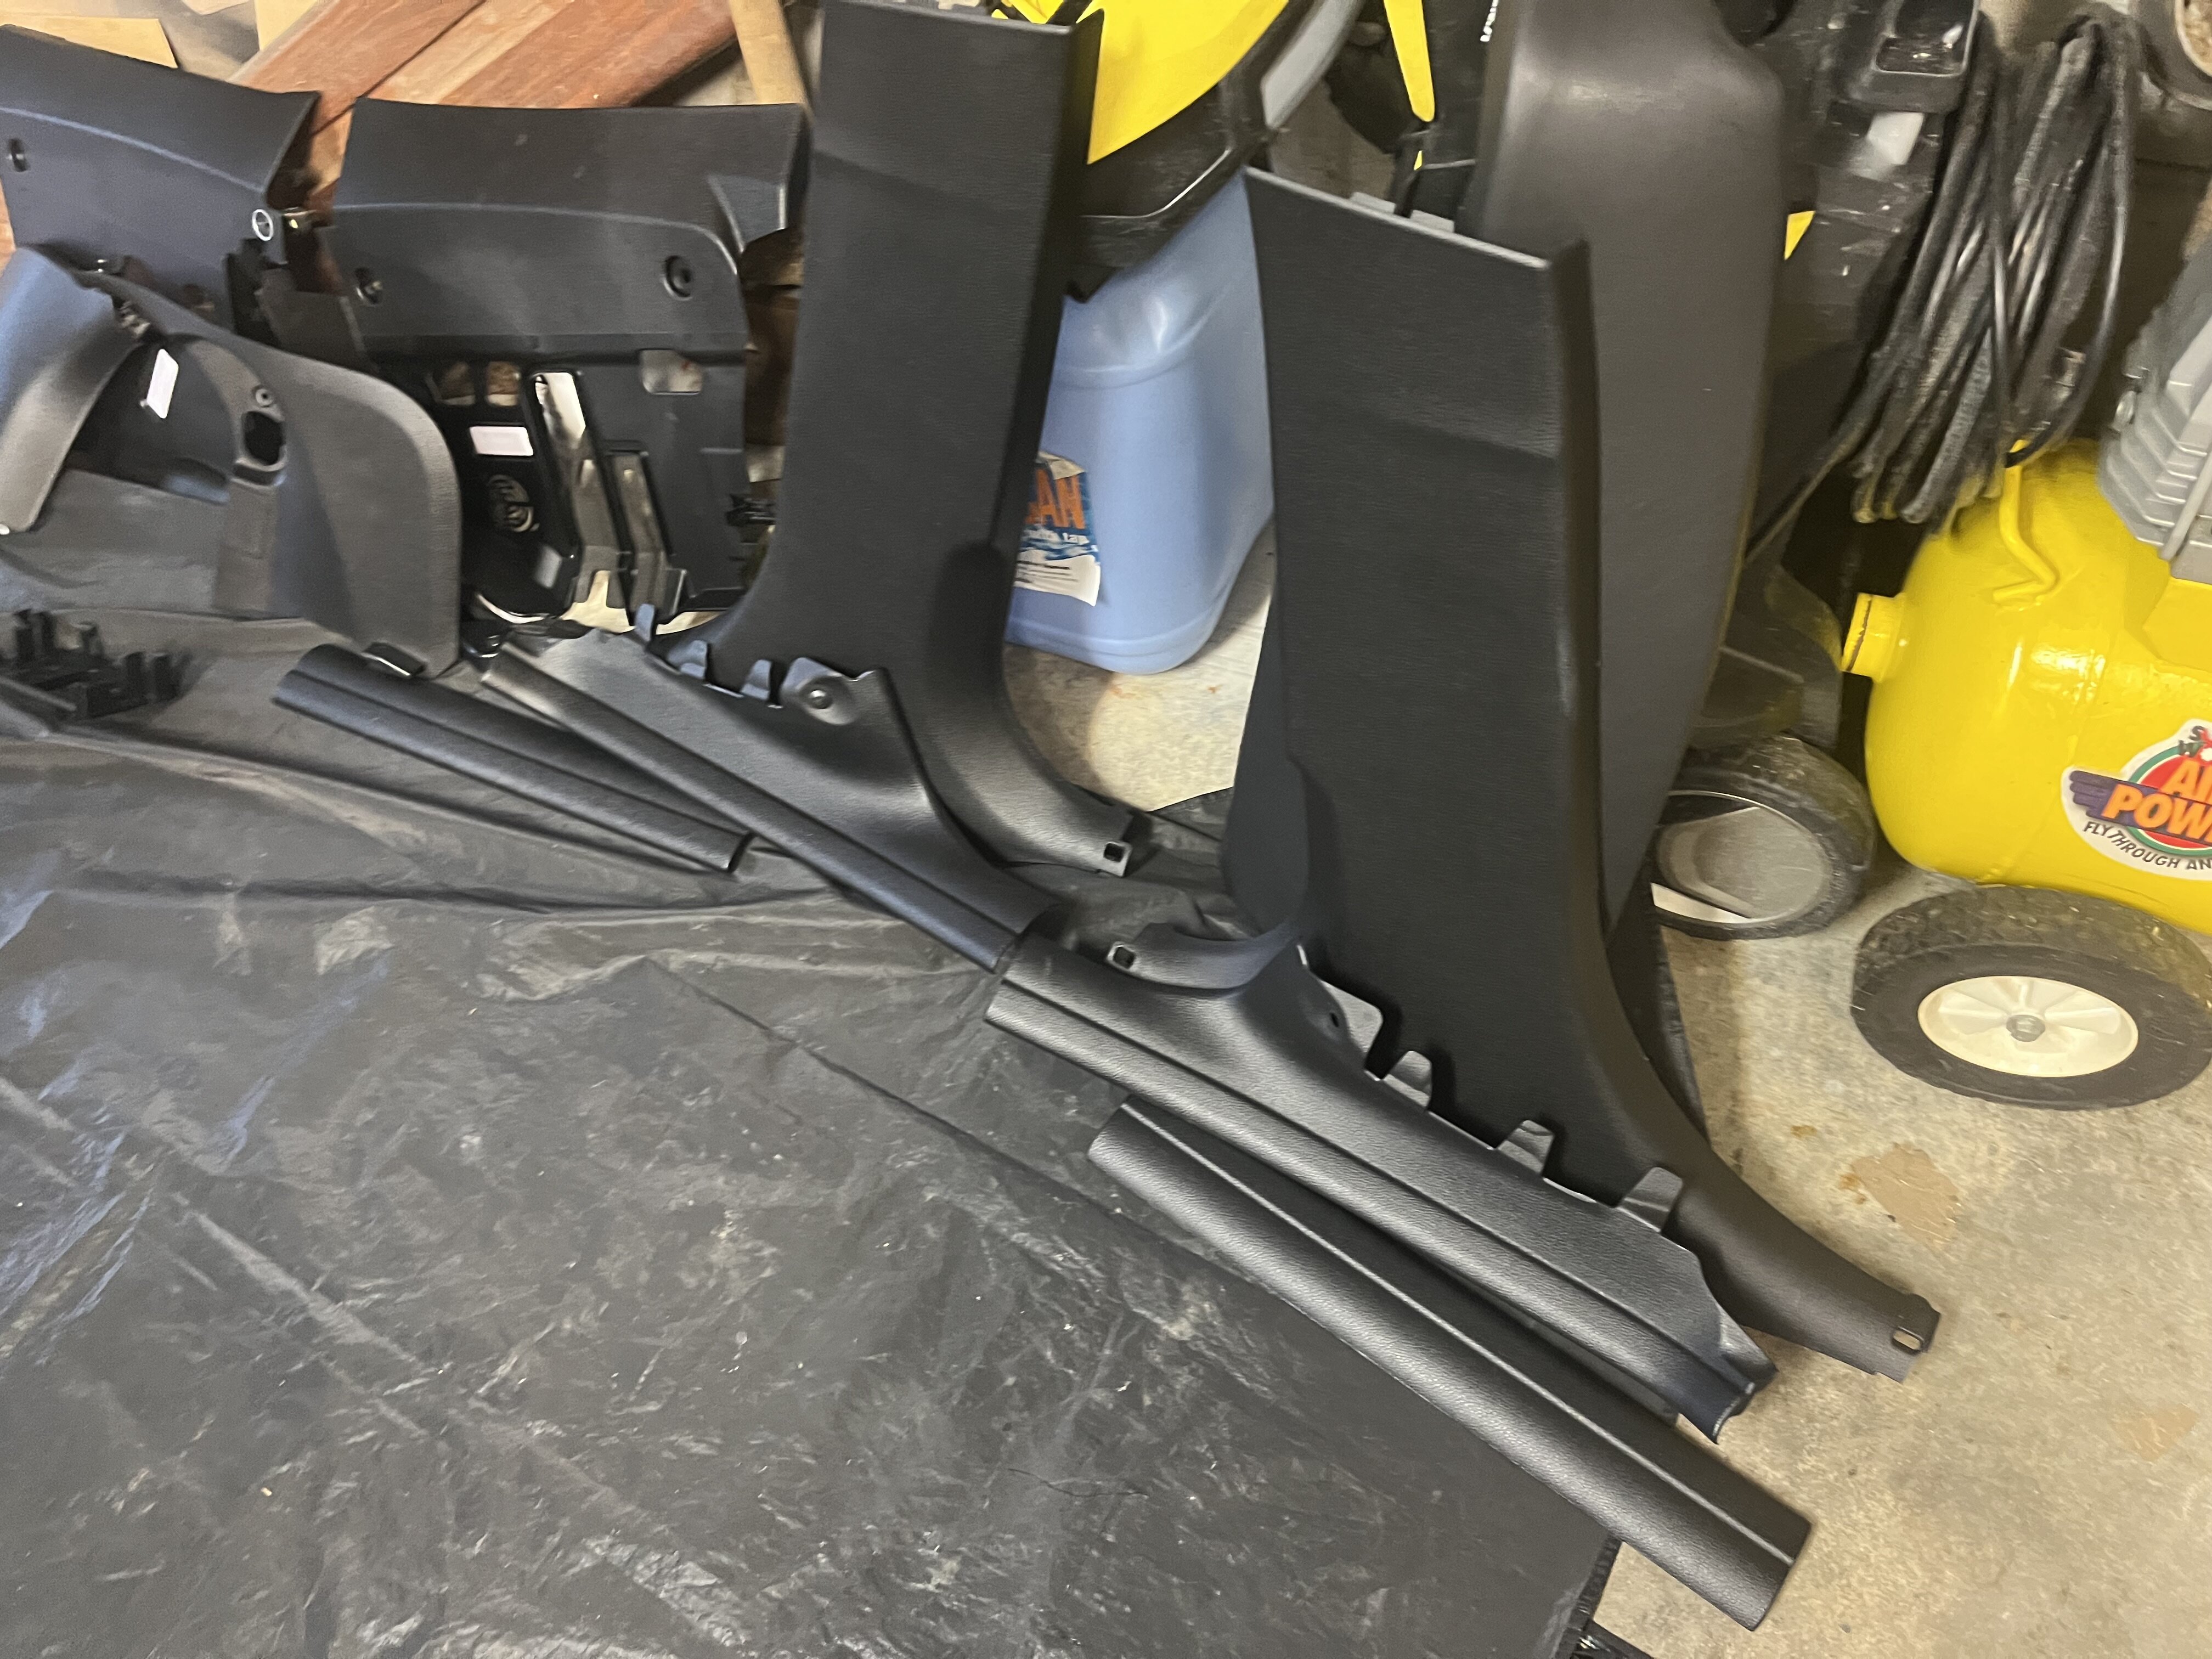
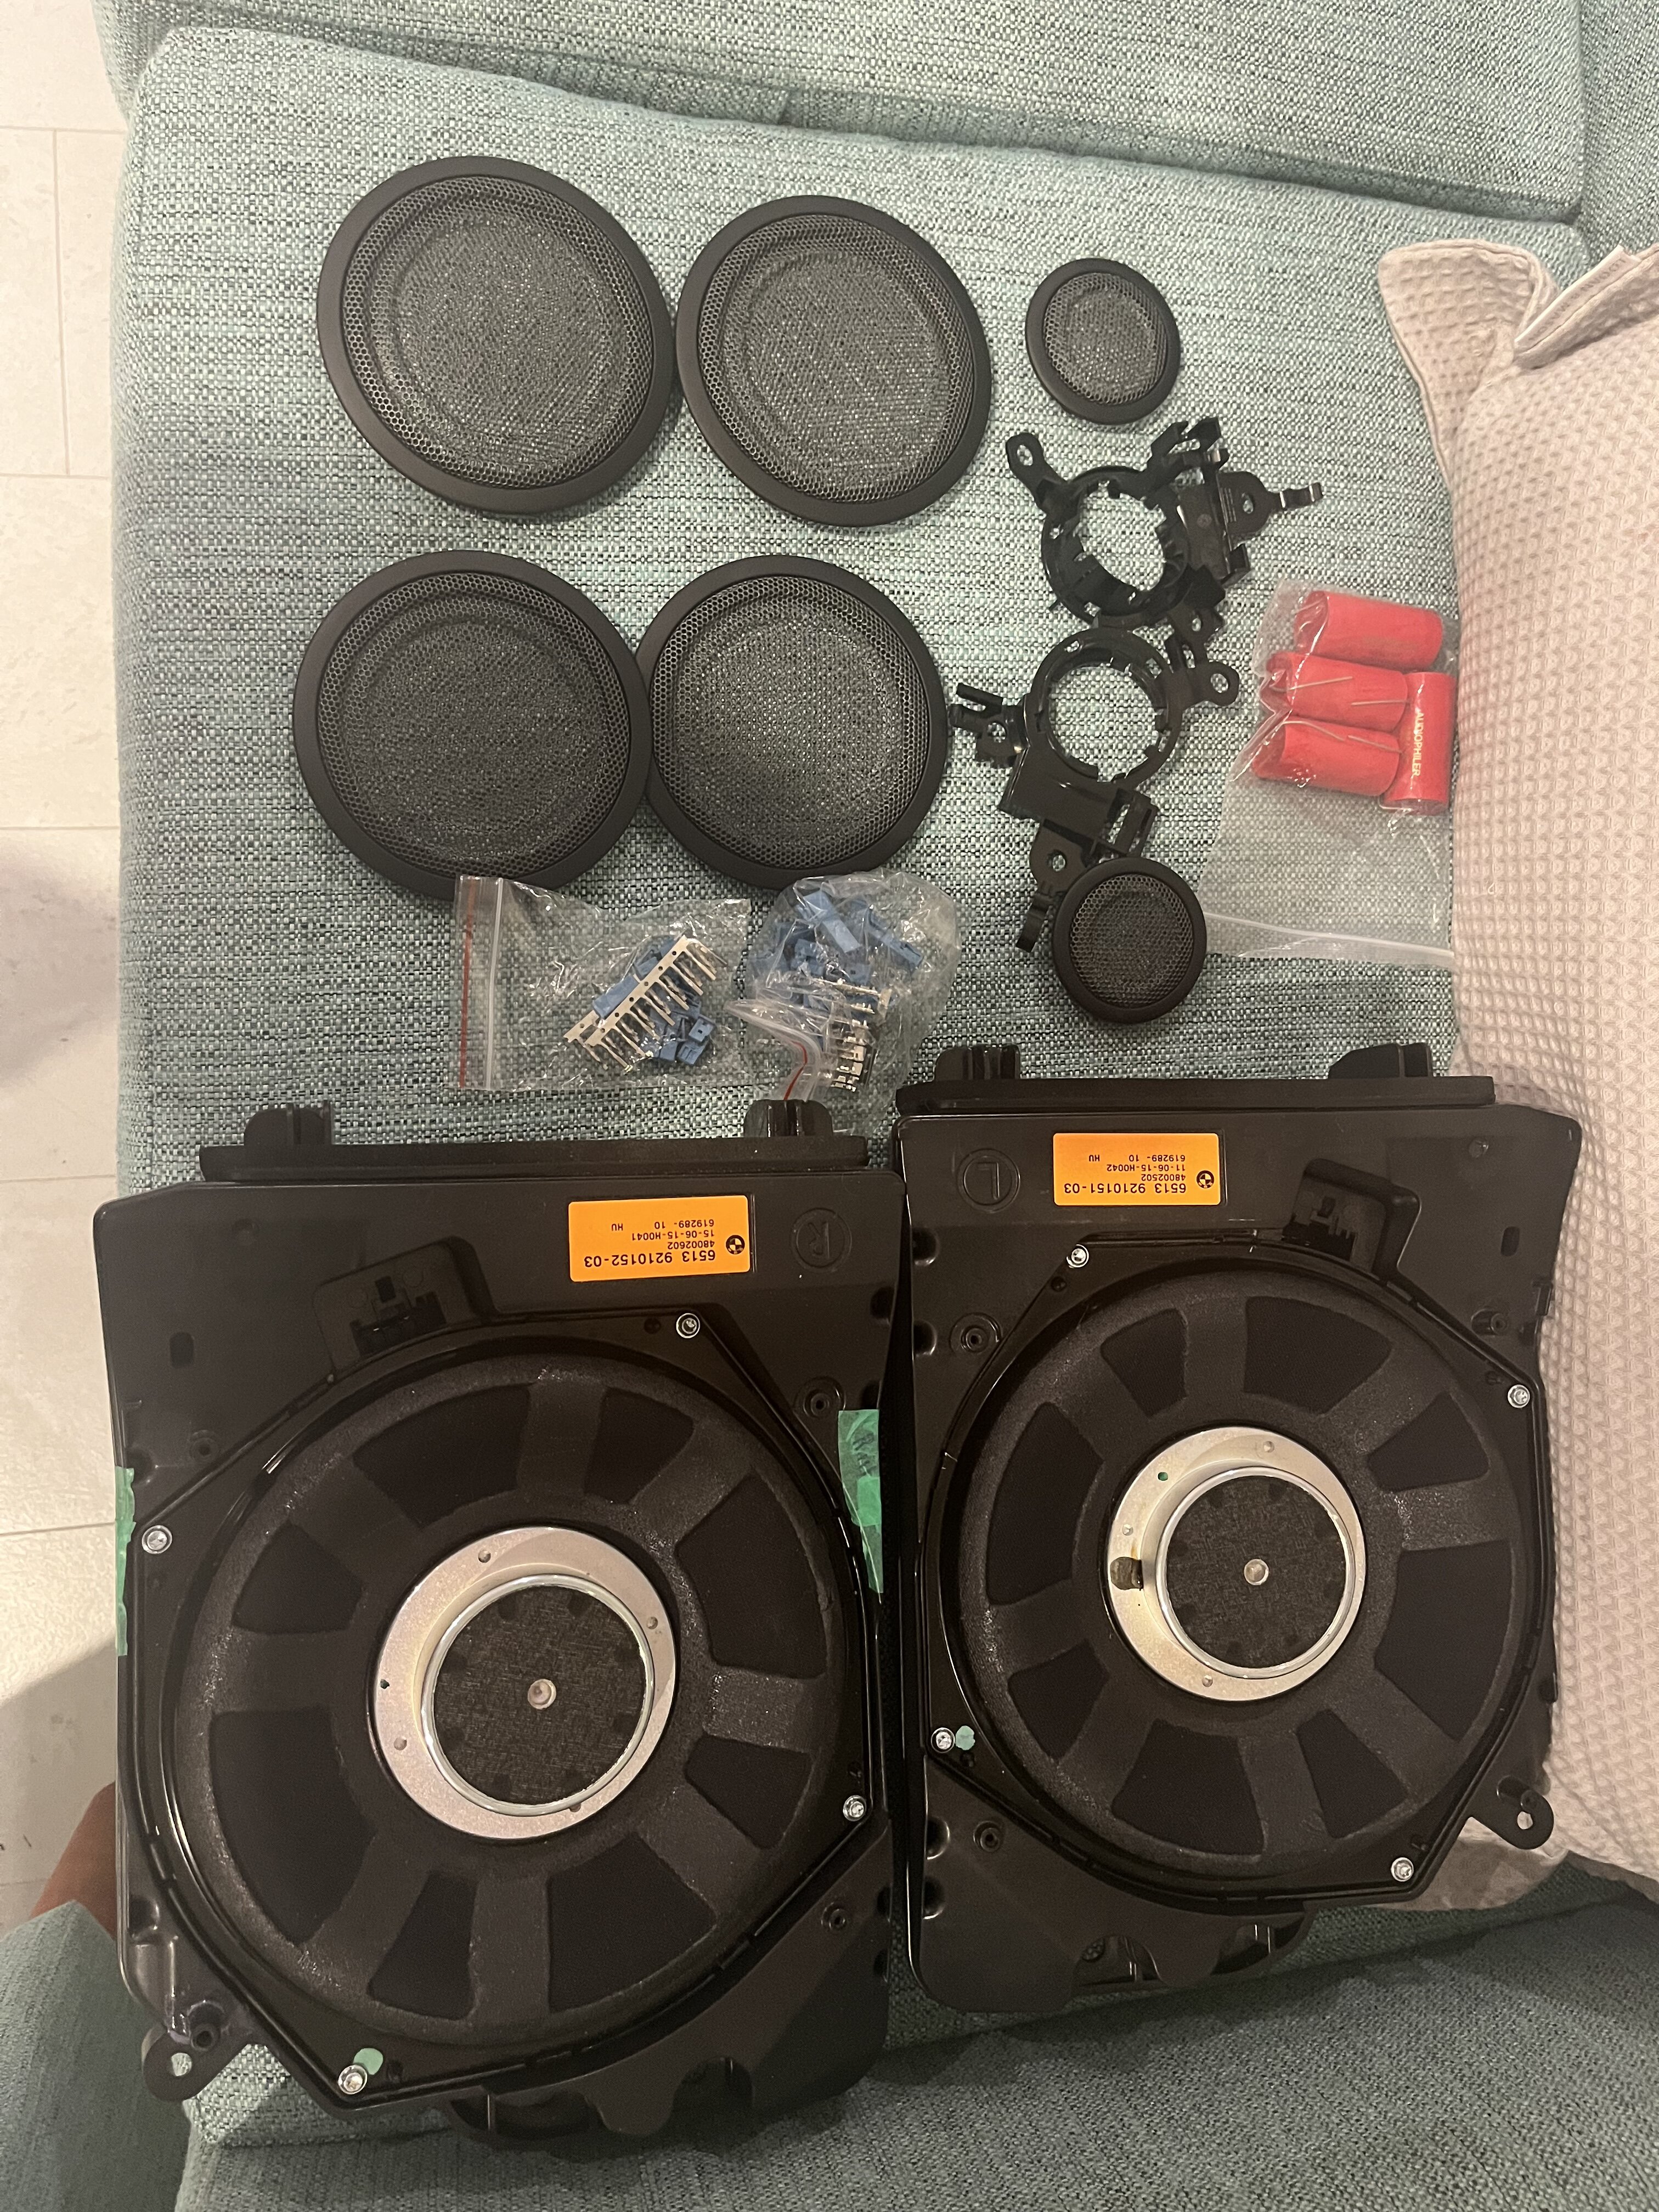
All adaptors have arrived. The door midbass adapters are really well made.
The tweeter mounting rings were good but needs modification for rear f30 / f80 tweeter mounts. The front ones also would have need some tweaking .
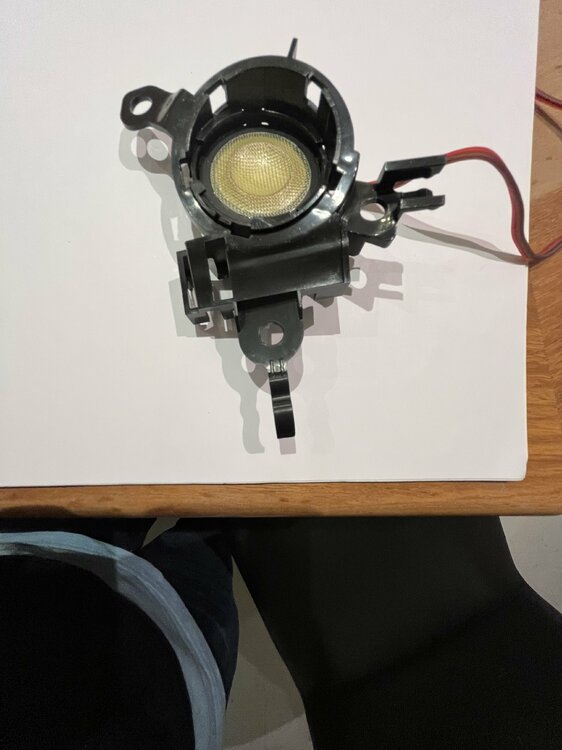
The focal tweetes cone with some mounting collars , but are 1 mm to wide and 2mm too deep for the BMW HK tweater mounts.
I used a demel and took 1mm of each focal mounting collar and took 2 mm of the hieght at the clip points. The BMW brackets also needed some guides removed.
Once done the collars clipped into the brackets and then the tweeters press fitted the collars.


-
They look great, better than any aftermarket adapters I’ve seen for e46. Really like how you’ve done the tweeter adapter to fit into factory mount points in door card.
I used 316i blanking plates on my e46 and a 52mm holesaw . Didn’t look that flash !
-
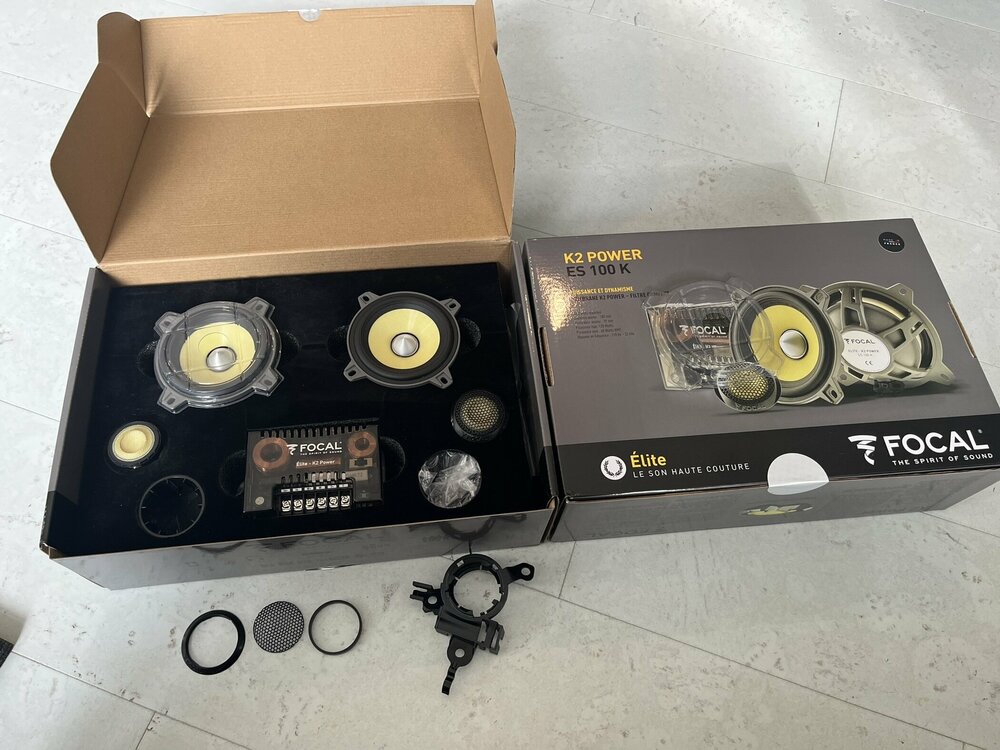
Door speakers have arrived , change of focal dealer meant that NZ stock needed replenishment, apparently they had ordered a few containers worth.
Looked into getting a 3D printer for making adapters for tweeter to fit into Harman Kardon mounts and door spacers . But took an easier route and brought some already made. The rings are via one supplier and door mounts via another both UK based.
Easier than using hot glue to mount tweeters and using router to make spacers.
Door adapter
https://streetwise3d.com/products/bmw-focal-es100k-speaker-adaptors-pair
Tweeter rings to fit in Harmon Kardon / Hifi tweeter mounts
https://www.ebay.co.uk/itm/173714926626
-
2
-
-
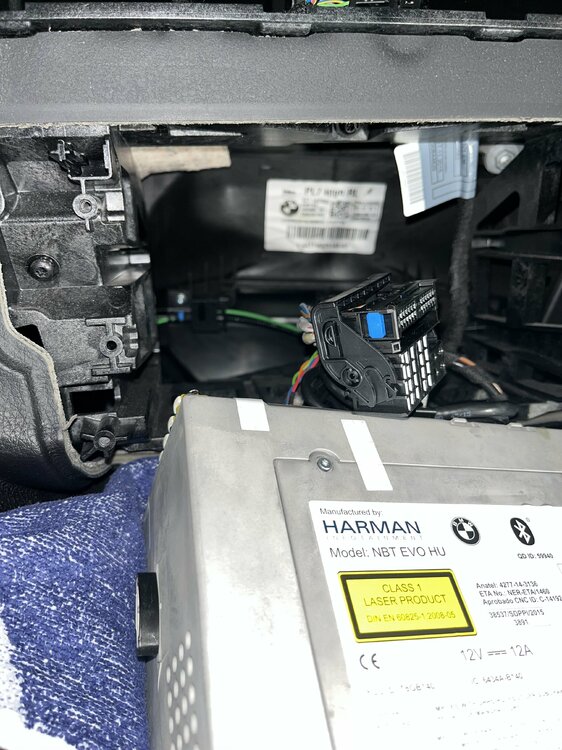
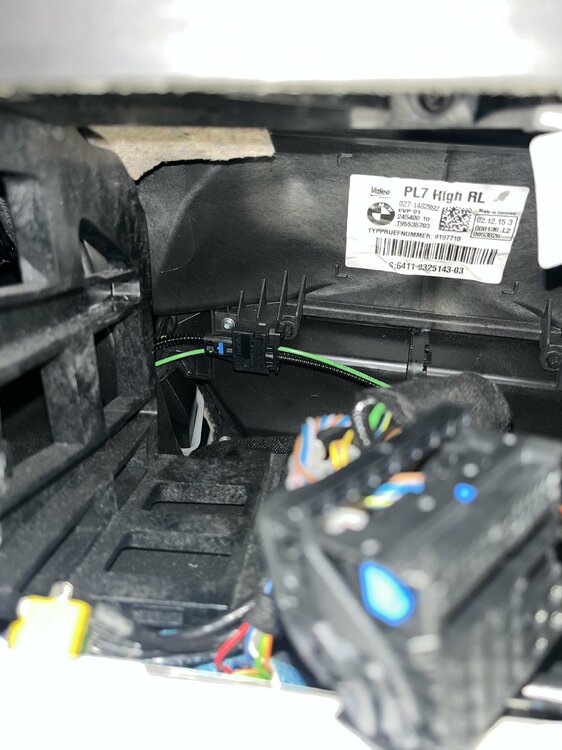
And behind idrive, Green cable is only Most cable in NTB EVo with base audio. Will put in Y adapter to link to new Most Amp cable.
-
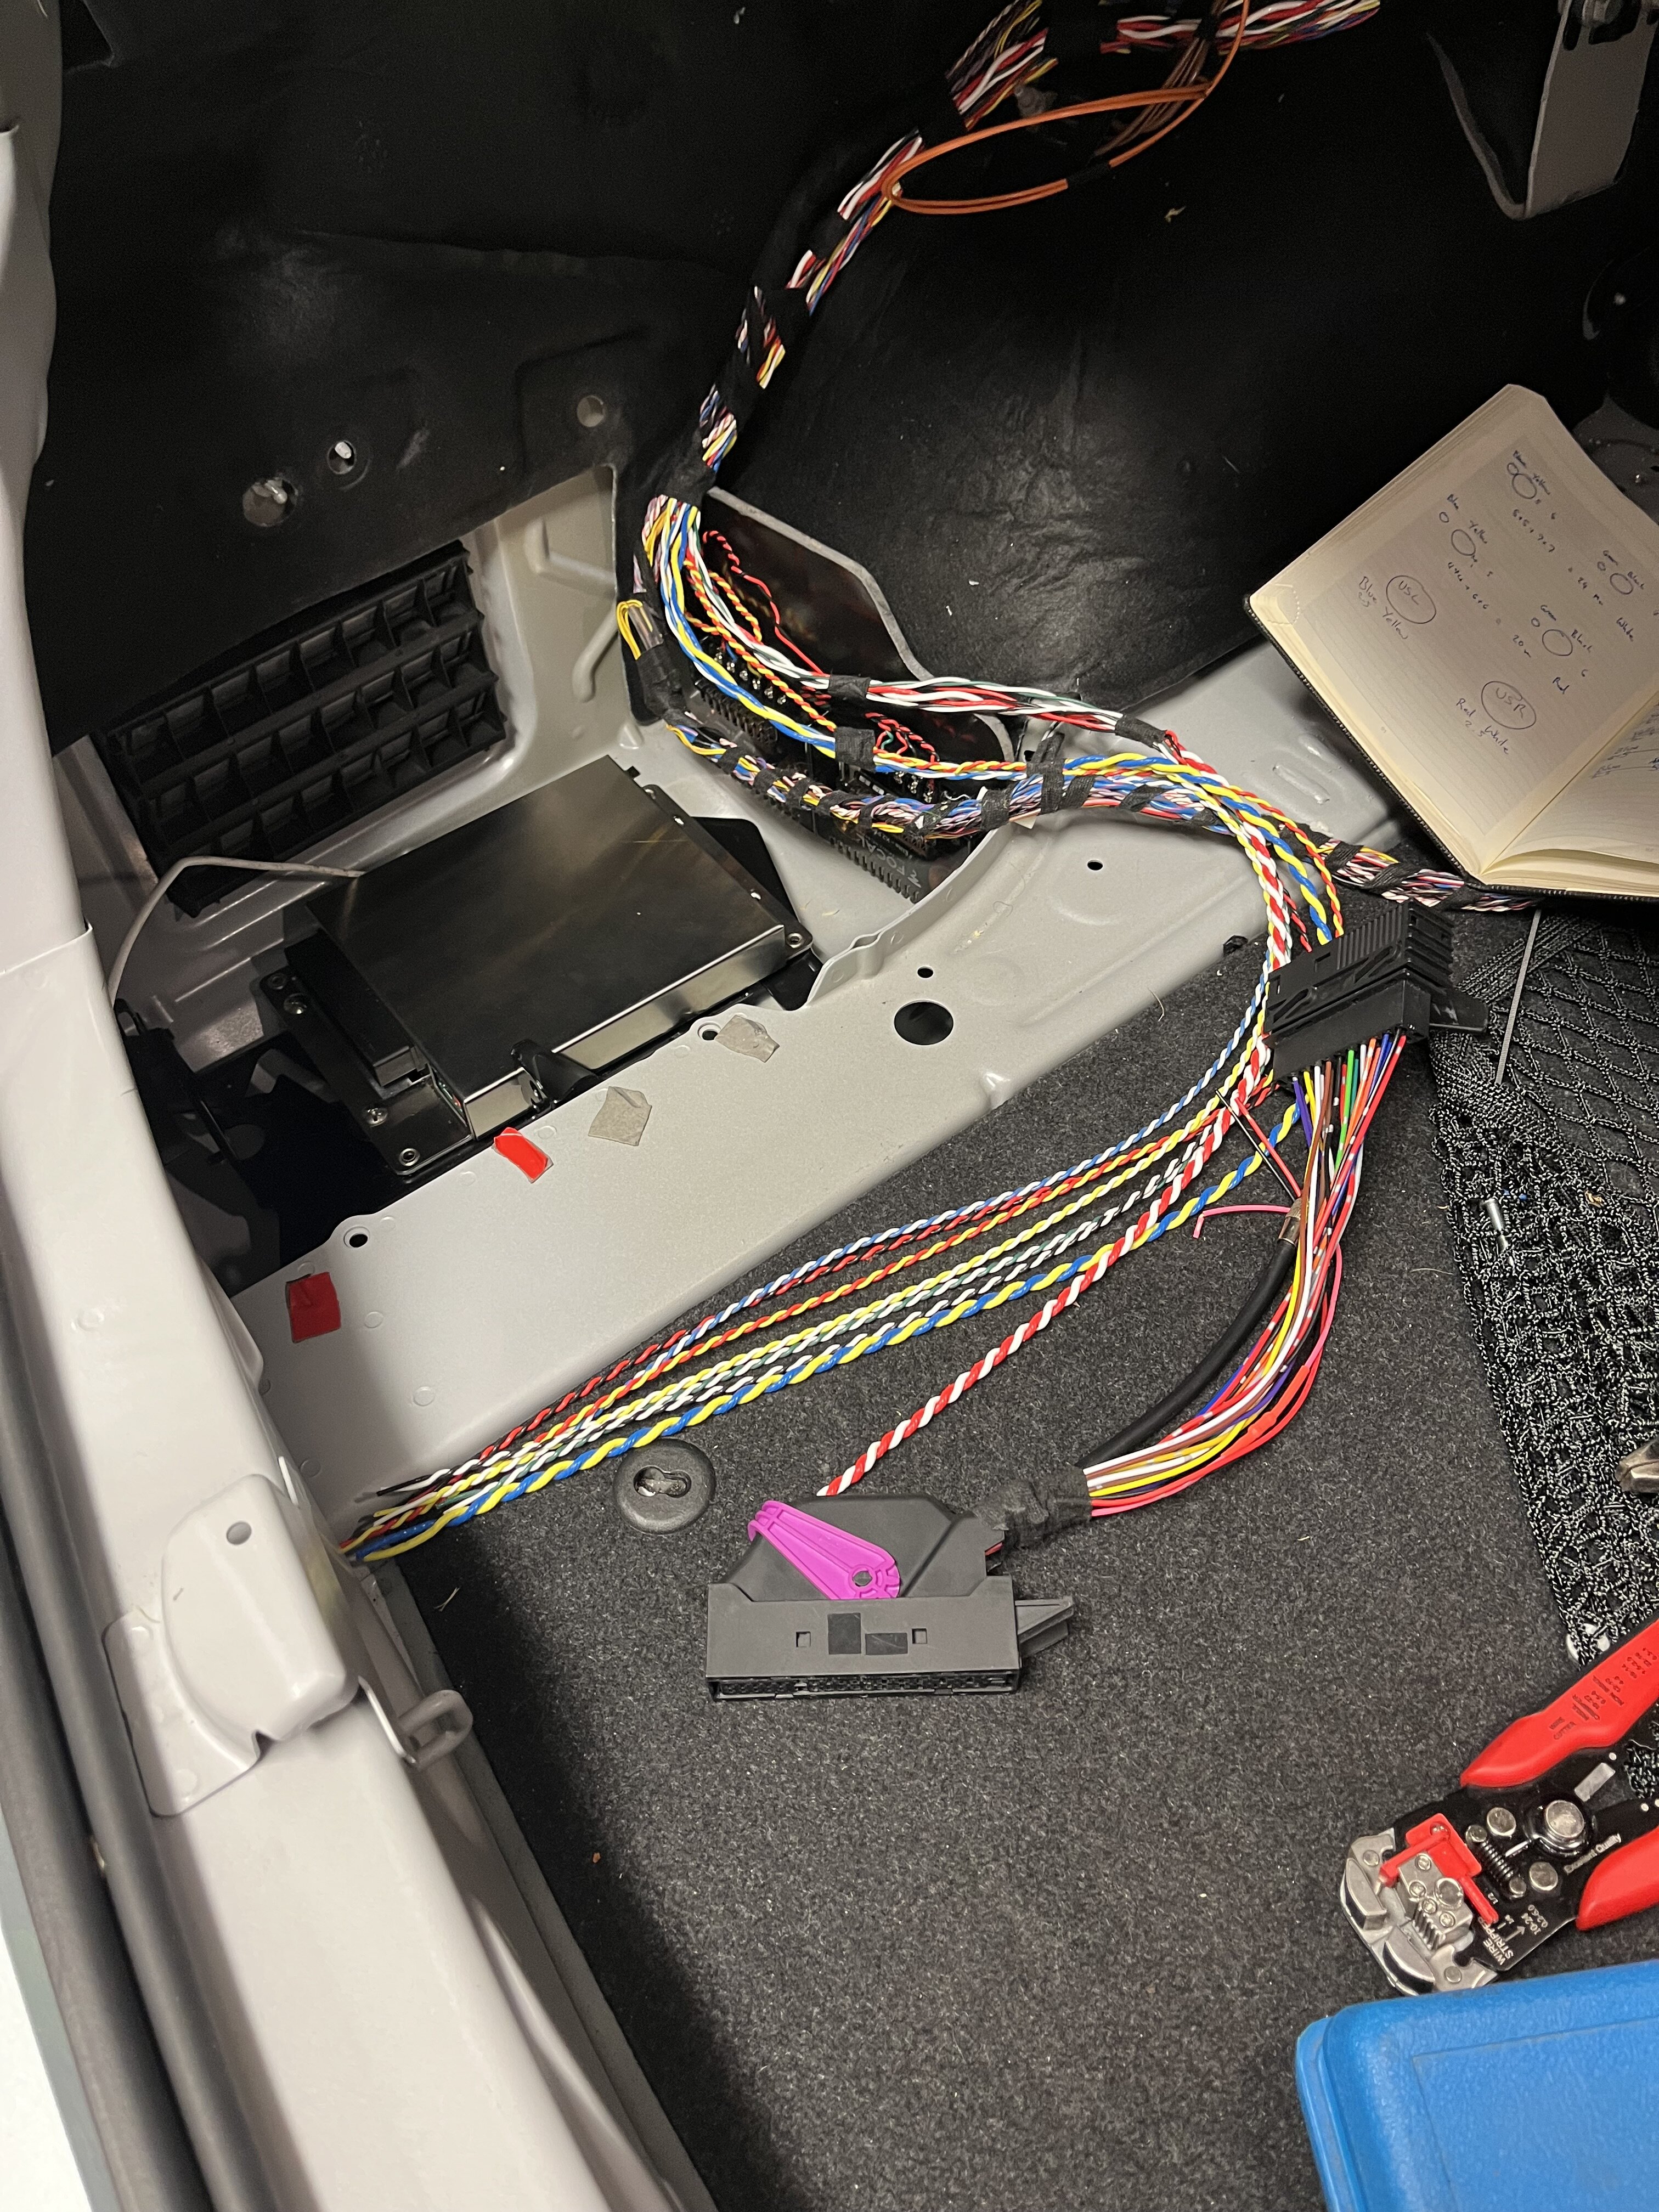
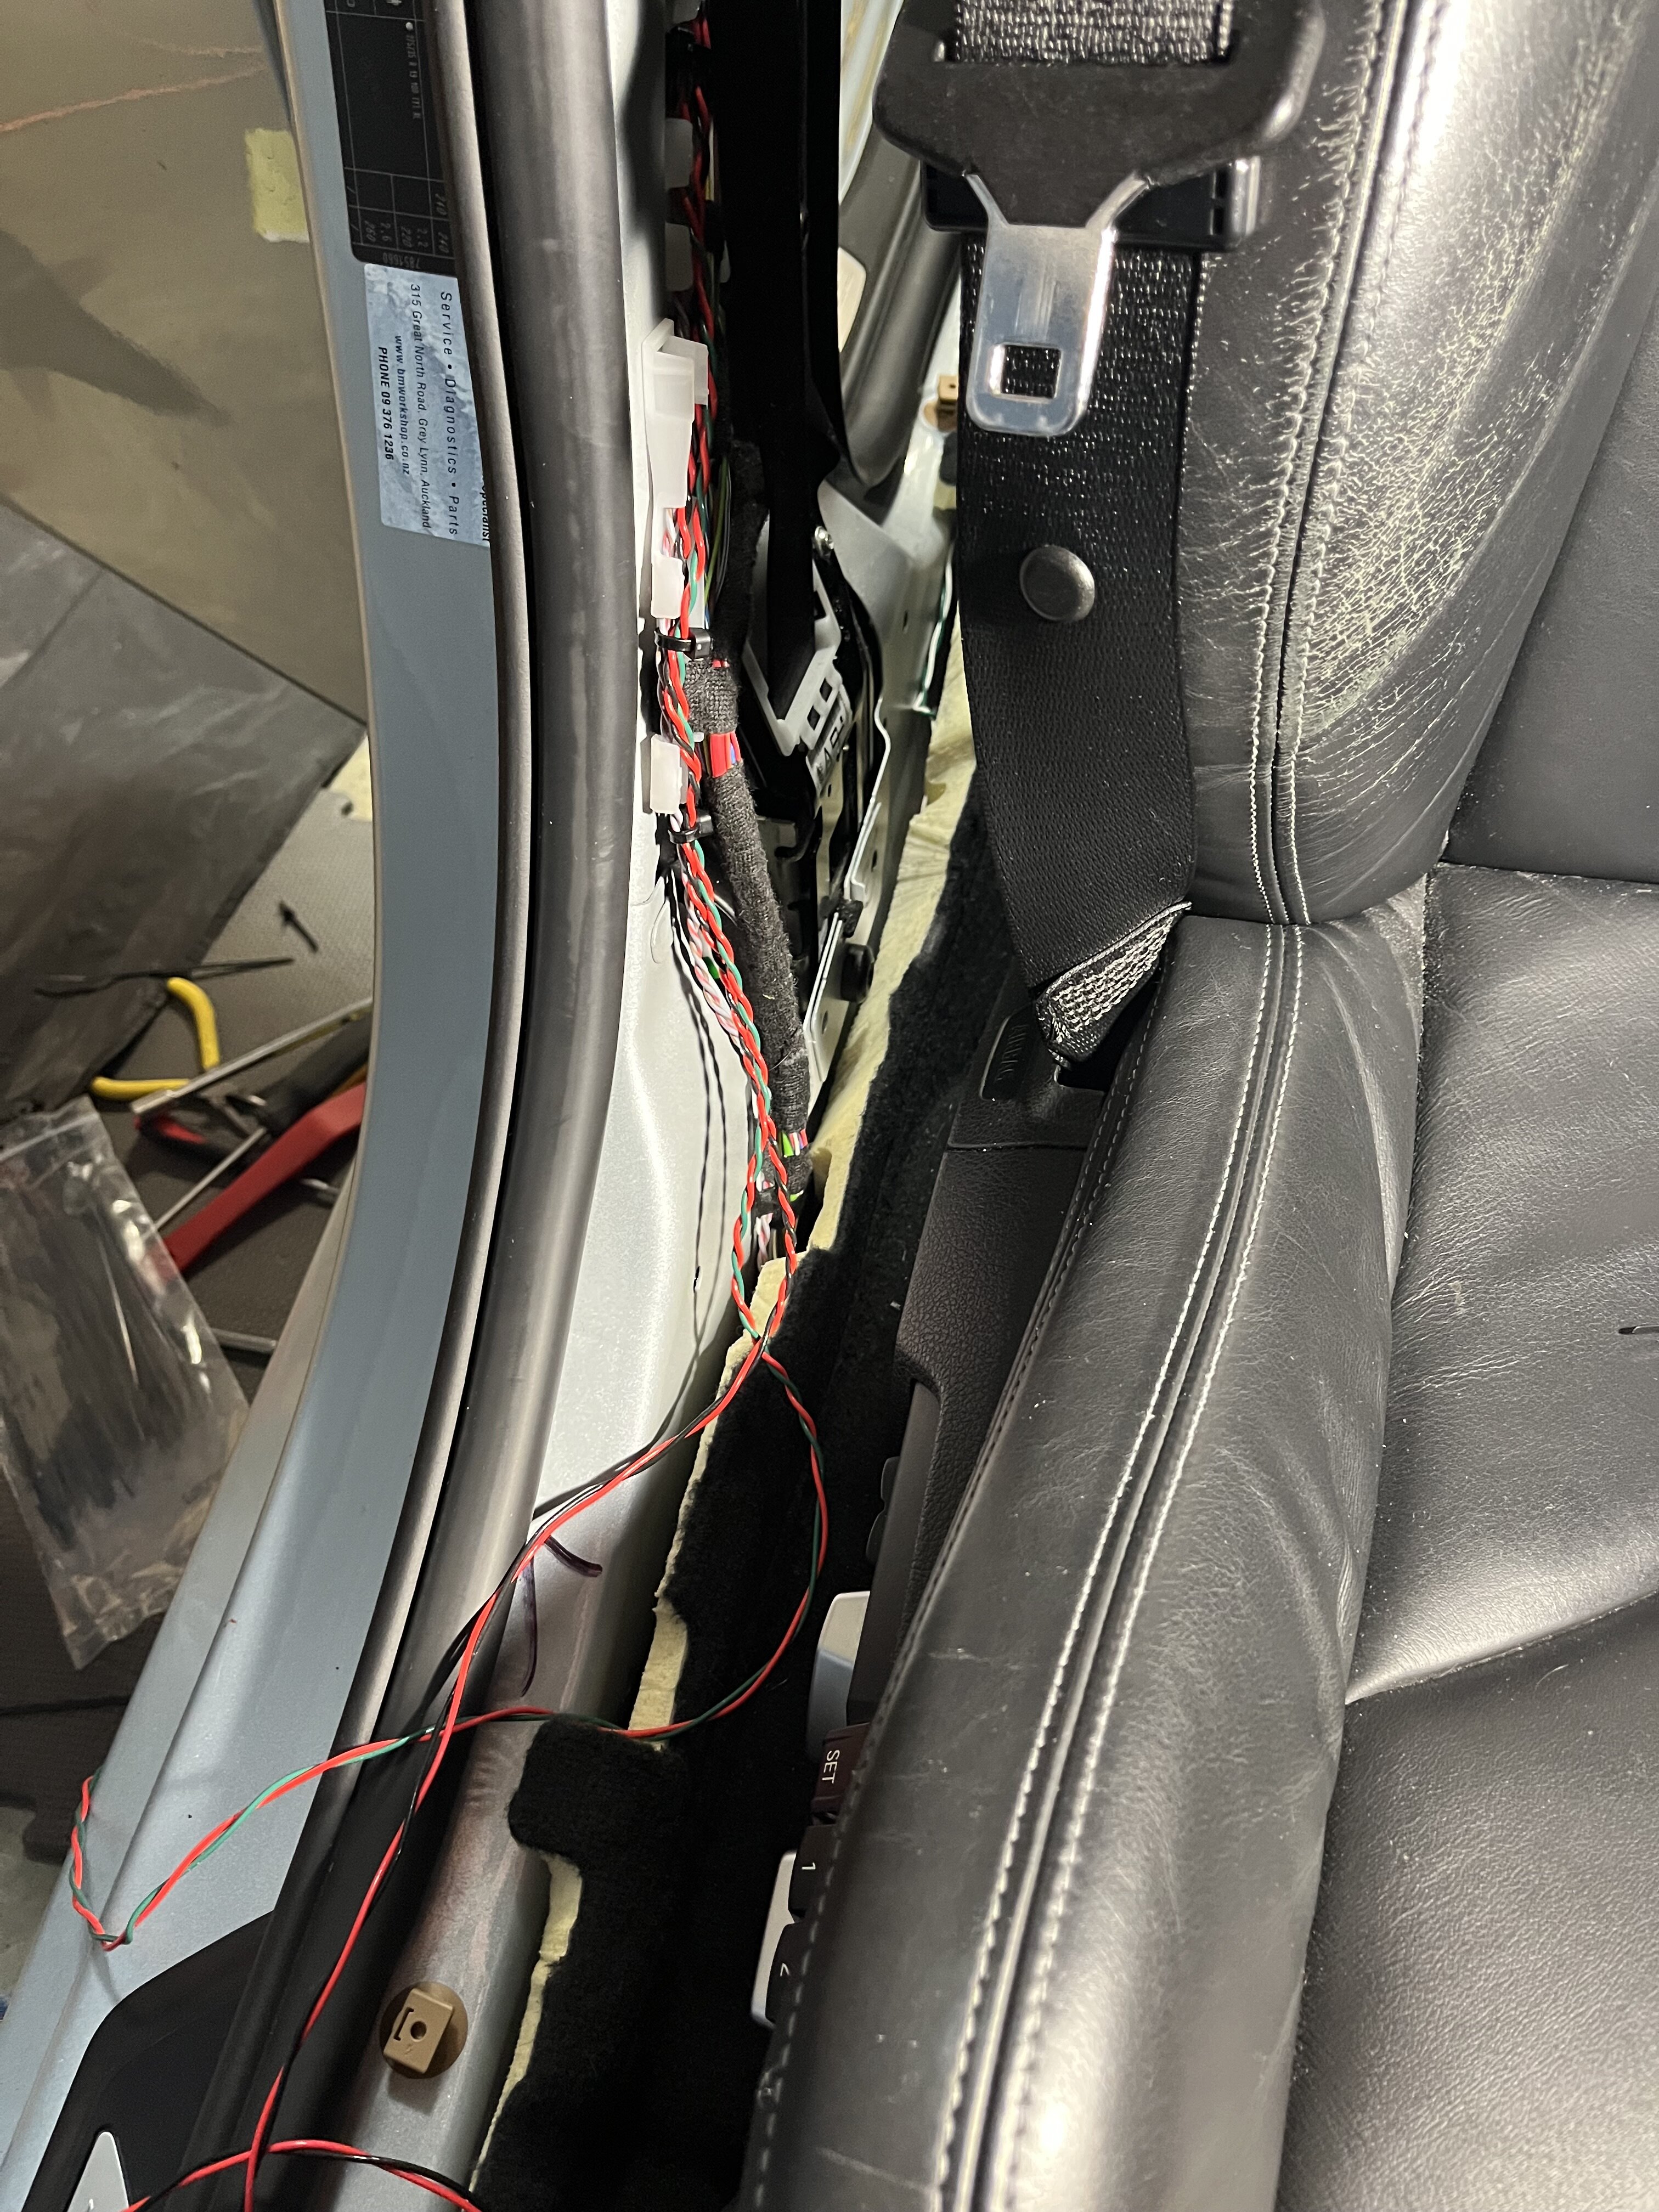
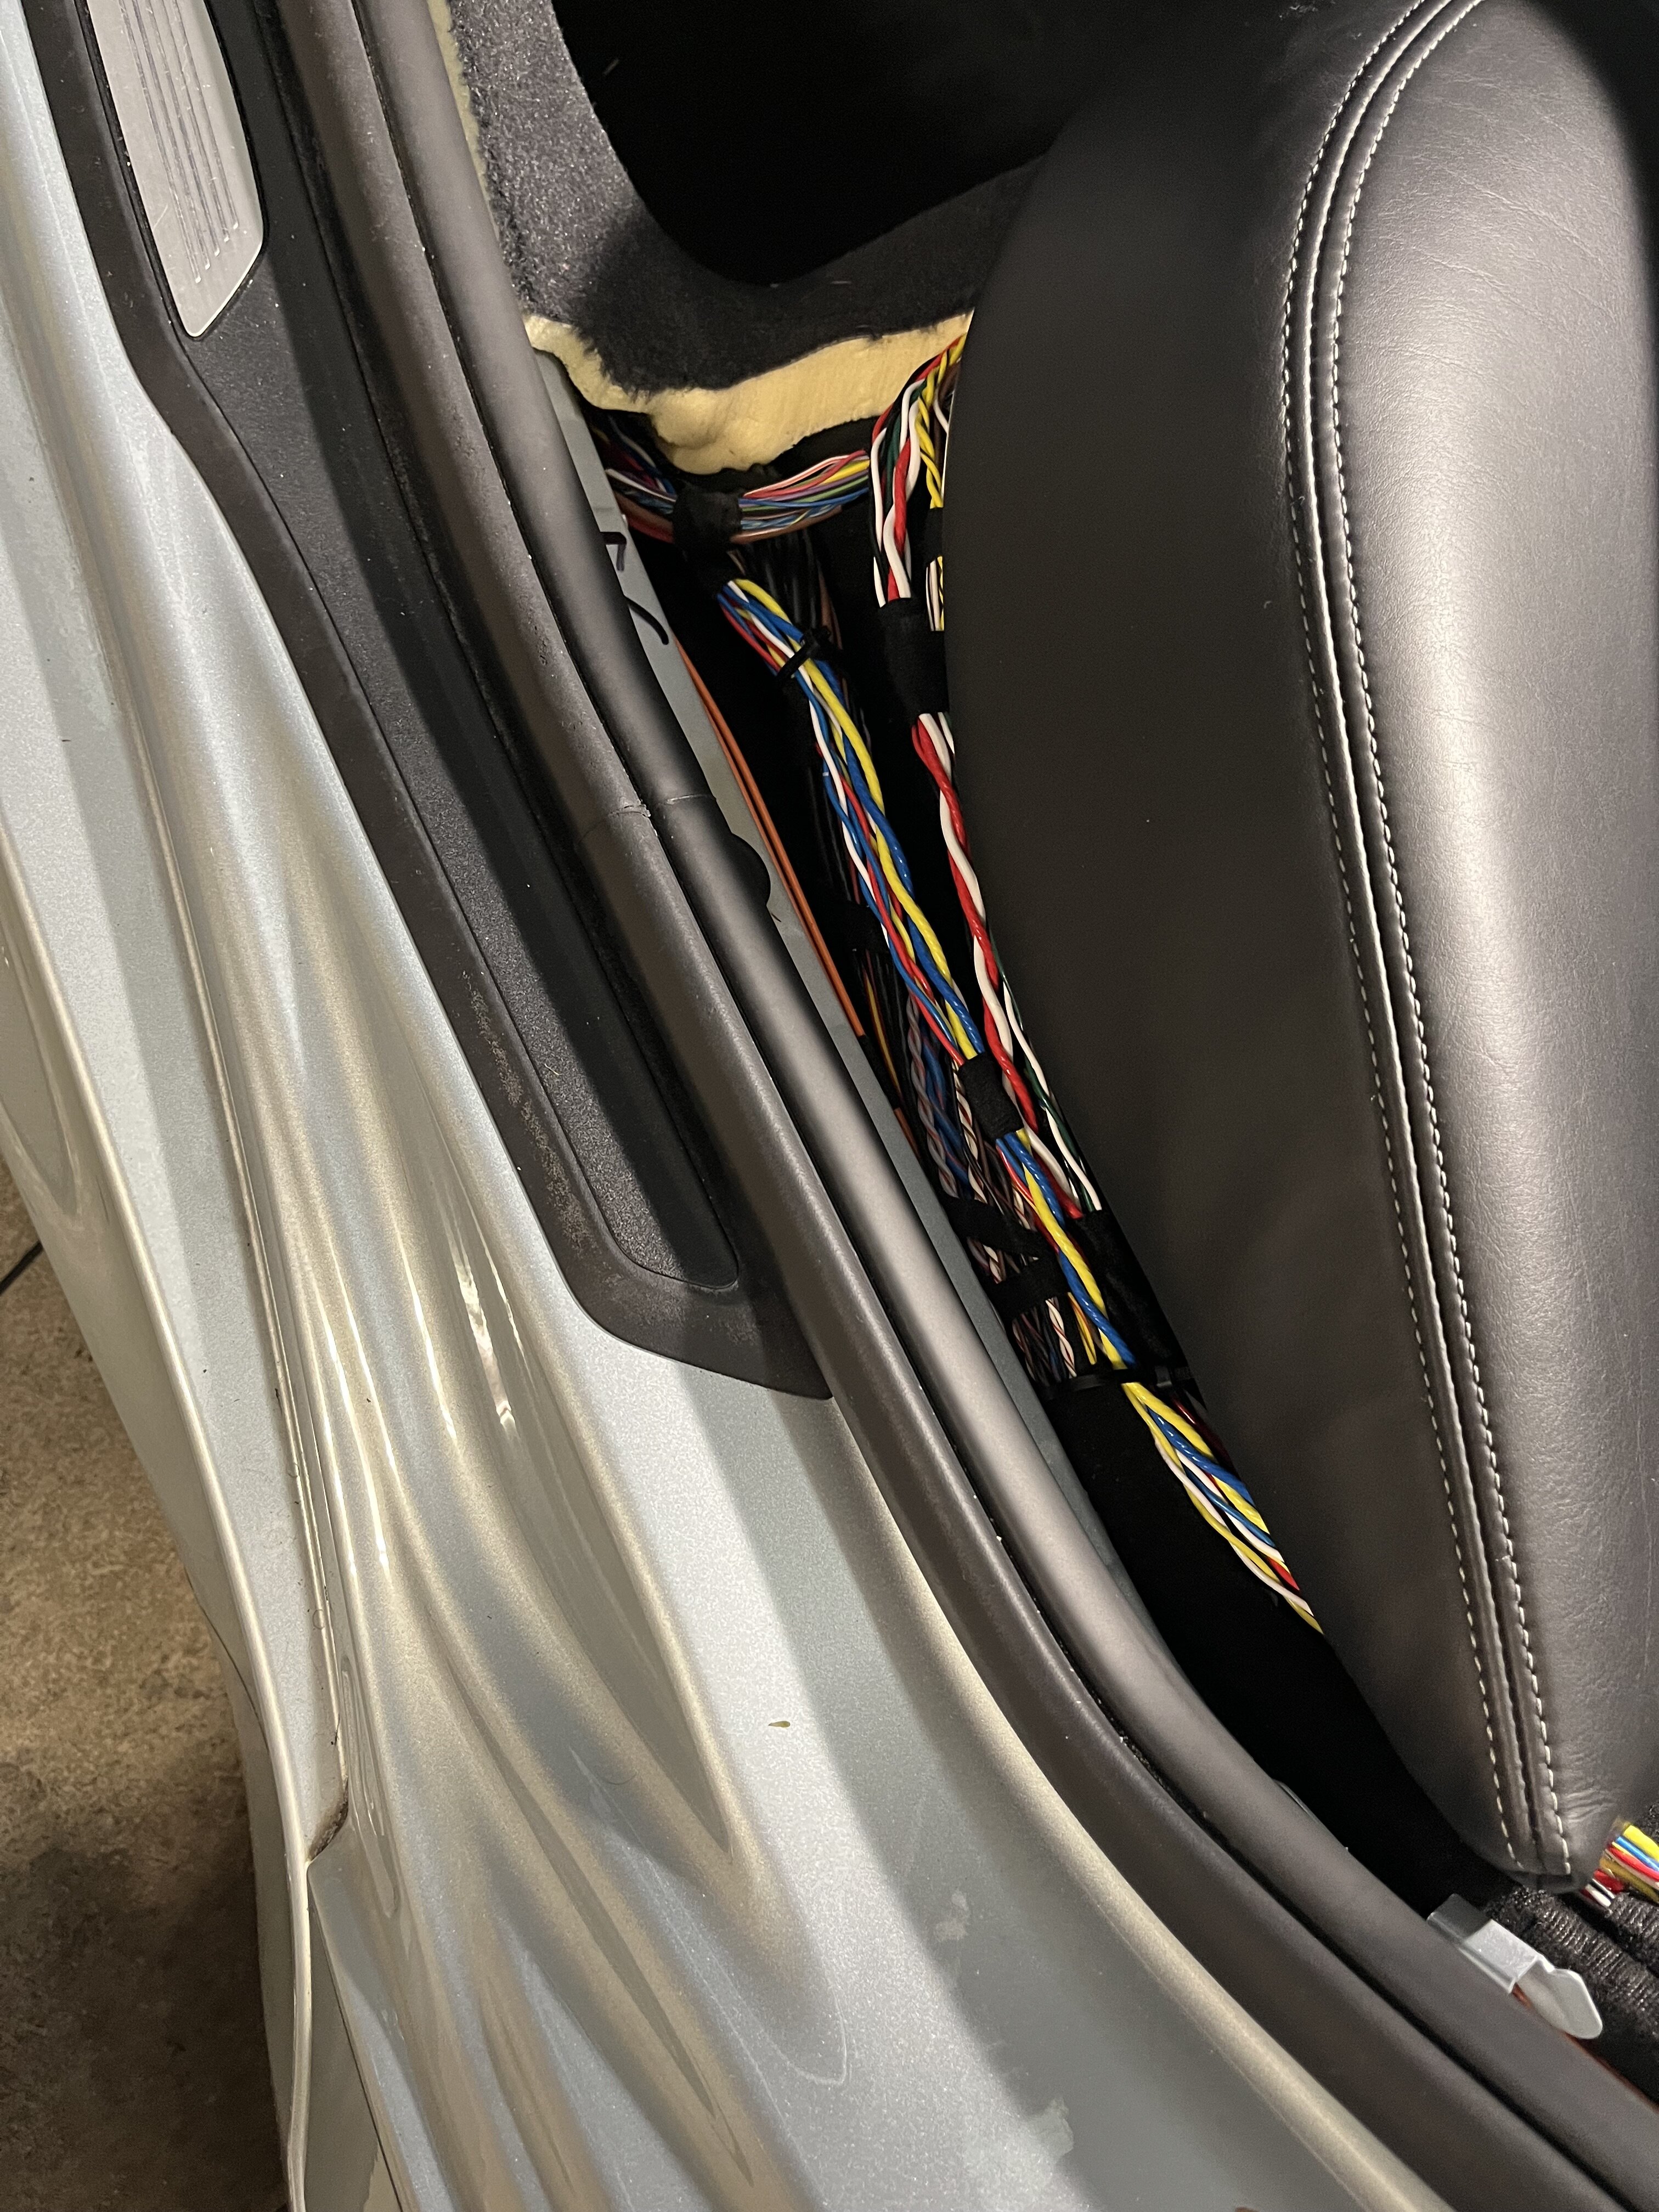
Over weekend completed installing cabin speaker wiring. Two pairs of speaker wire to each door connector for tweeter and door mid bass. Another pair to each underseat woofer position. F80 reasonably straight forward to run wires down either side. Getting to front connectors a bit more involved. The FEM modules covers passenger side and DAB tuner covers driver side. Due care required to move modules out of way for access to connectors. Install also reinforced using nothing larger that 18 awg / 0.85mm2 thin walled cable. Anything larger and it would be problematic fitting connector pins.
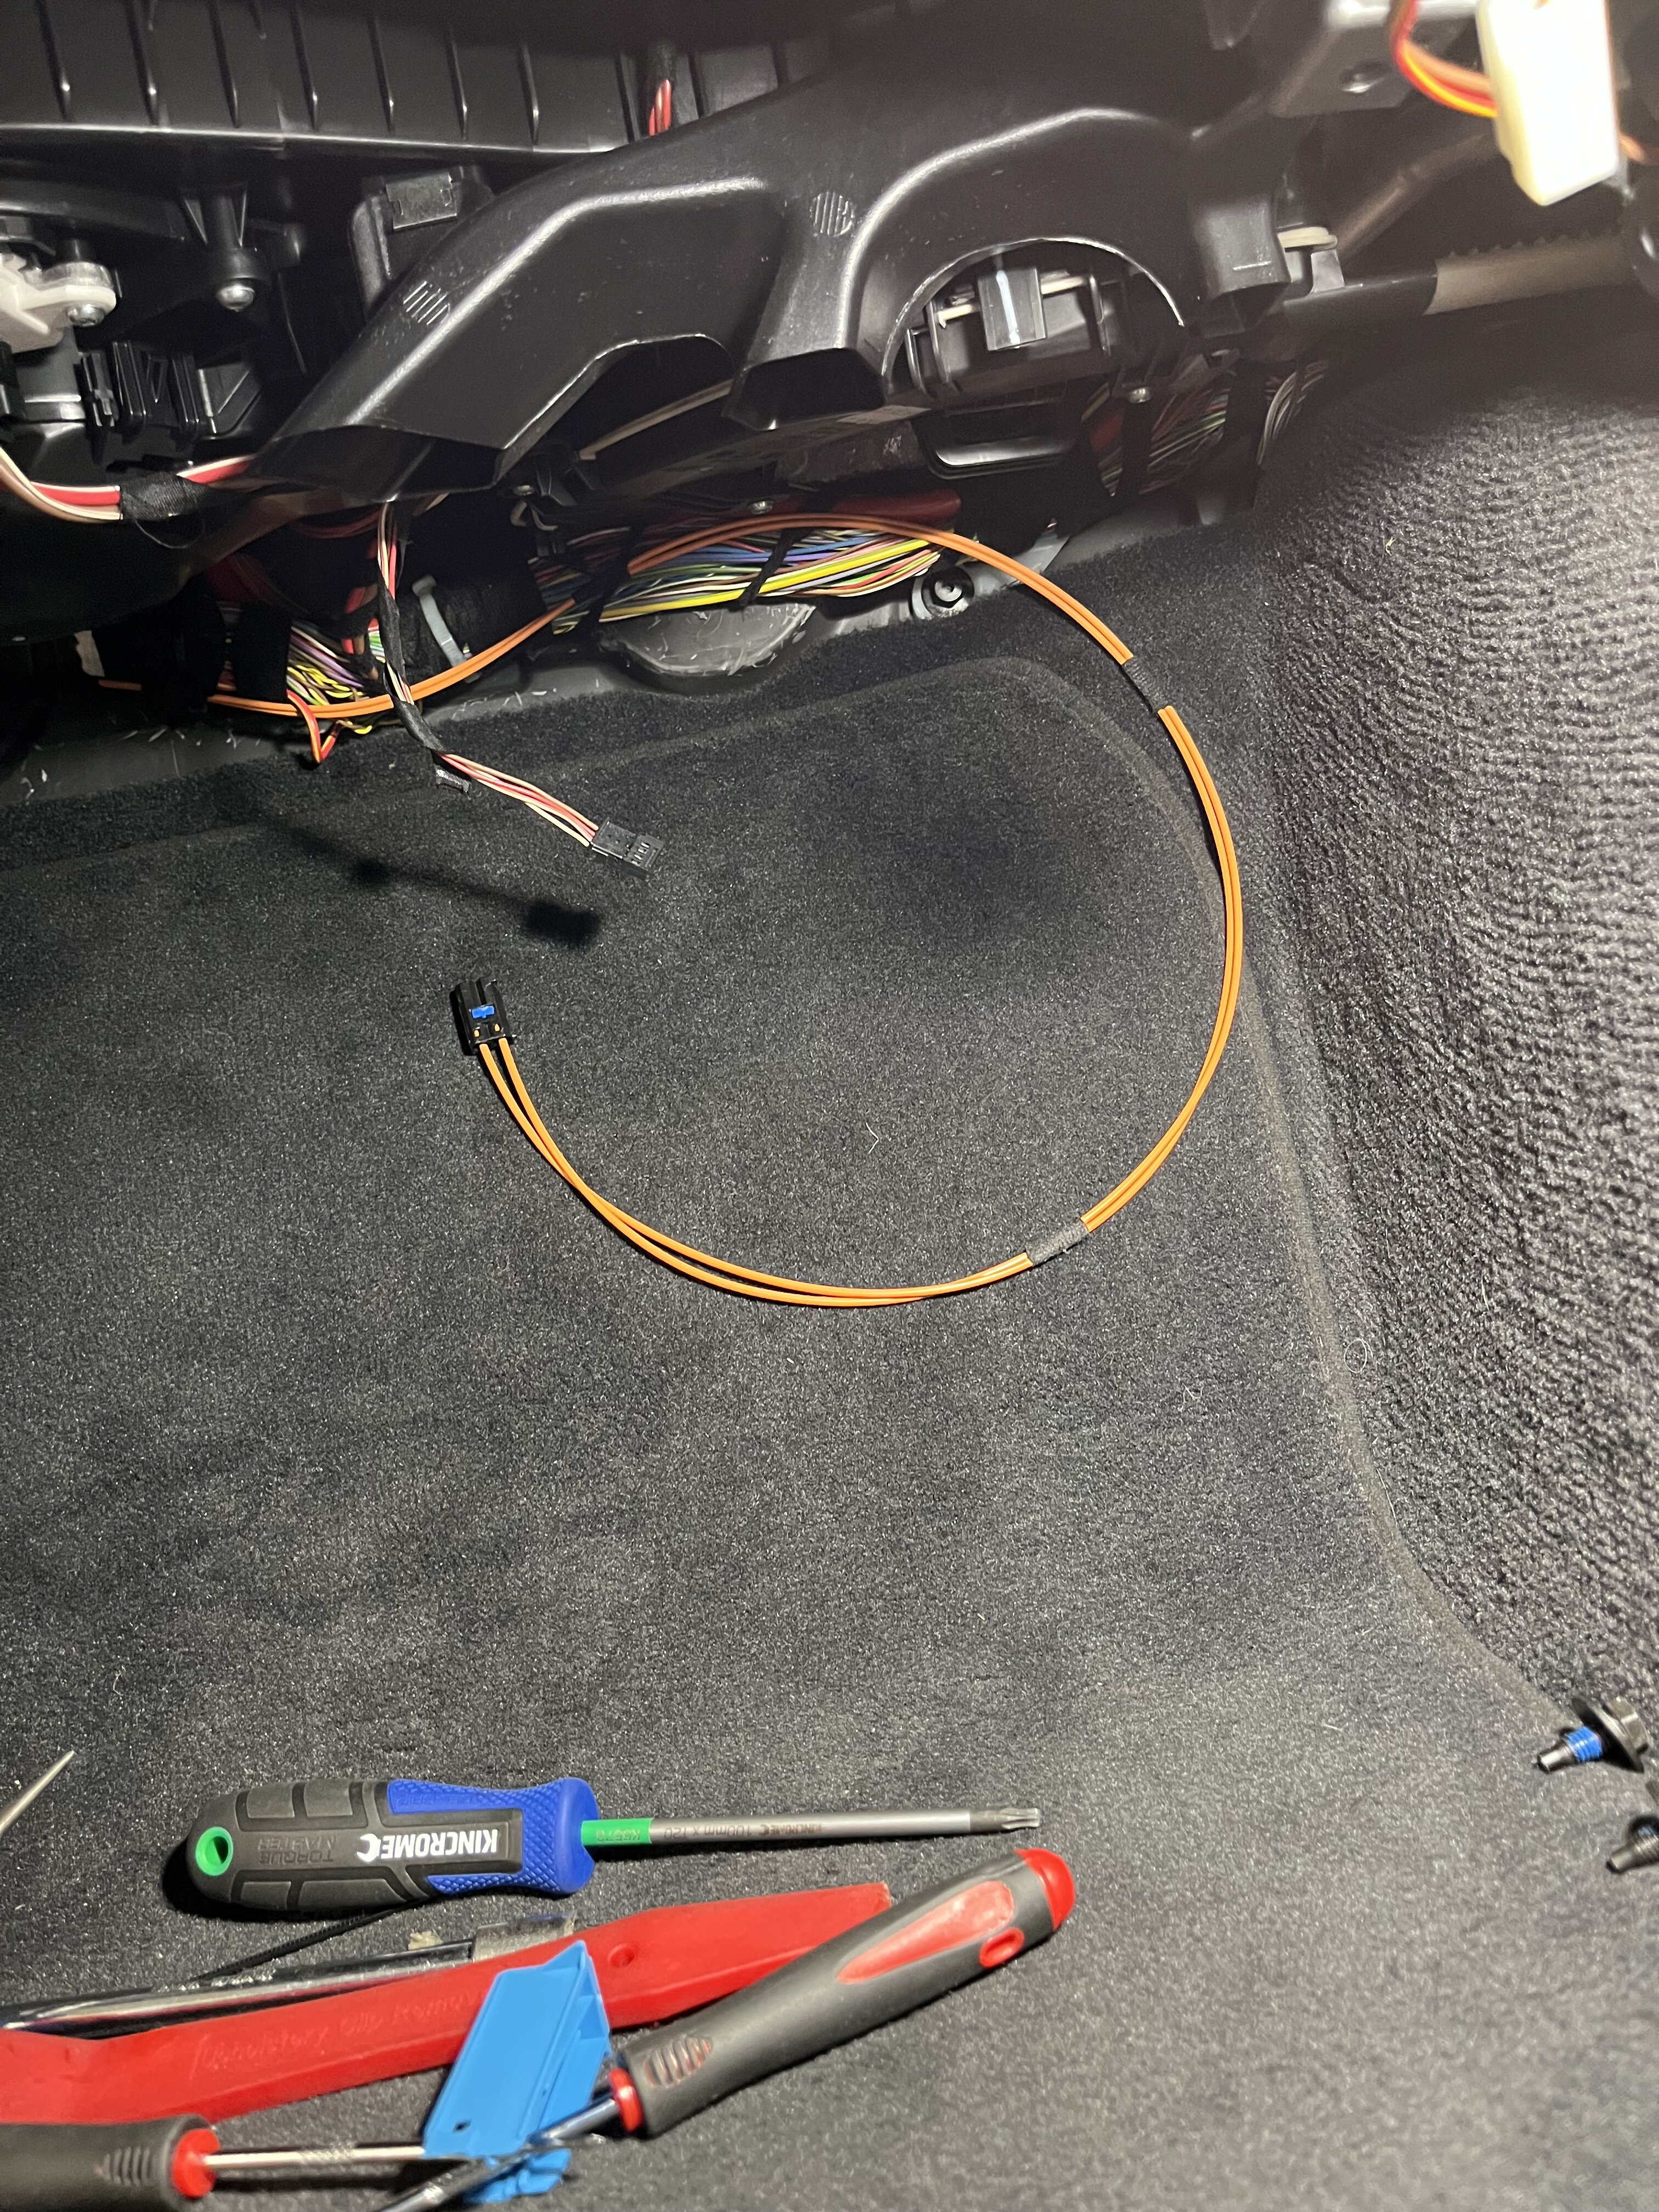
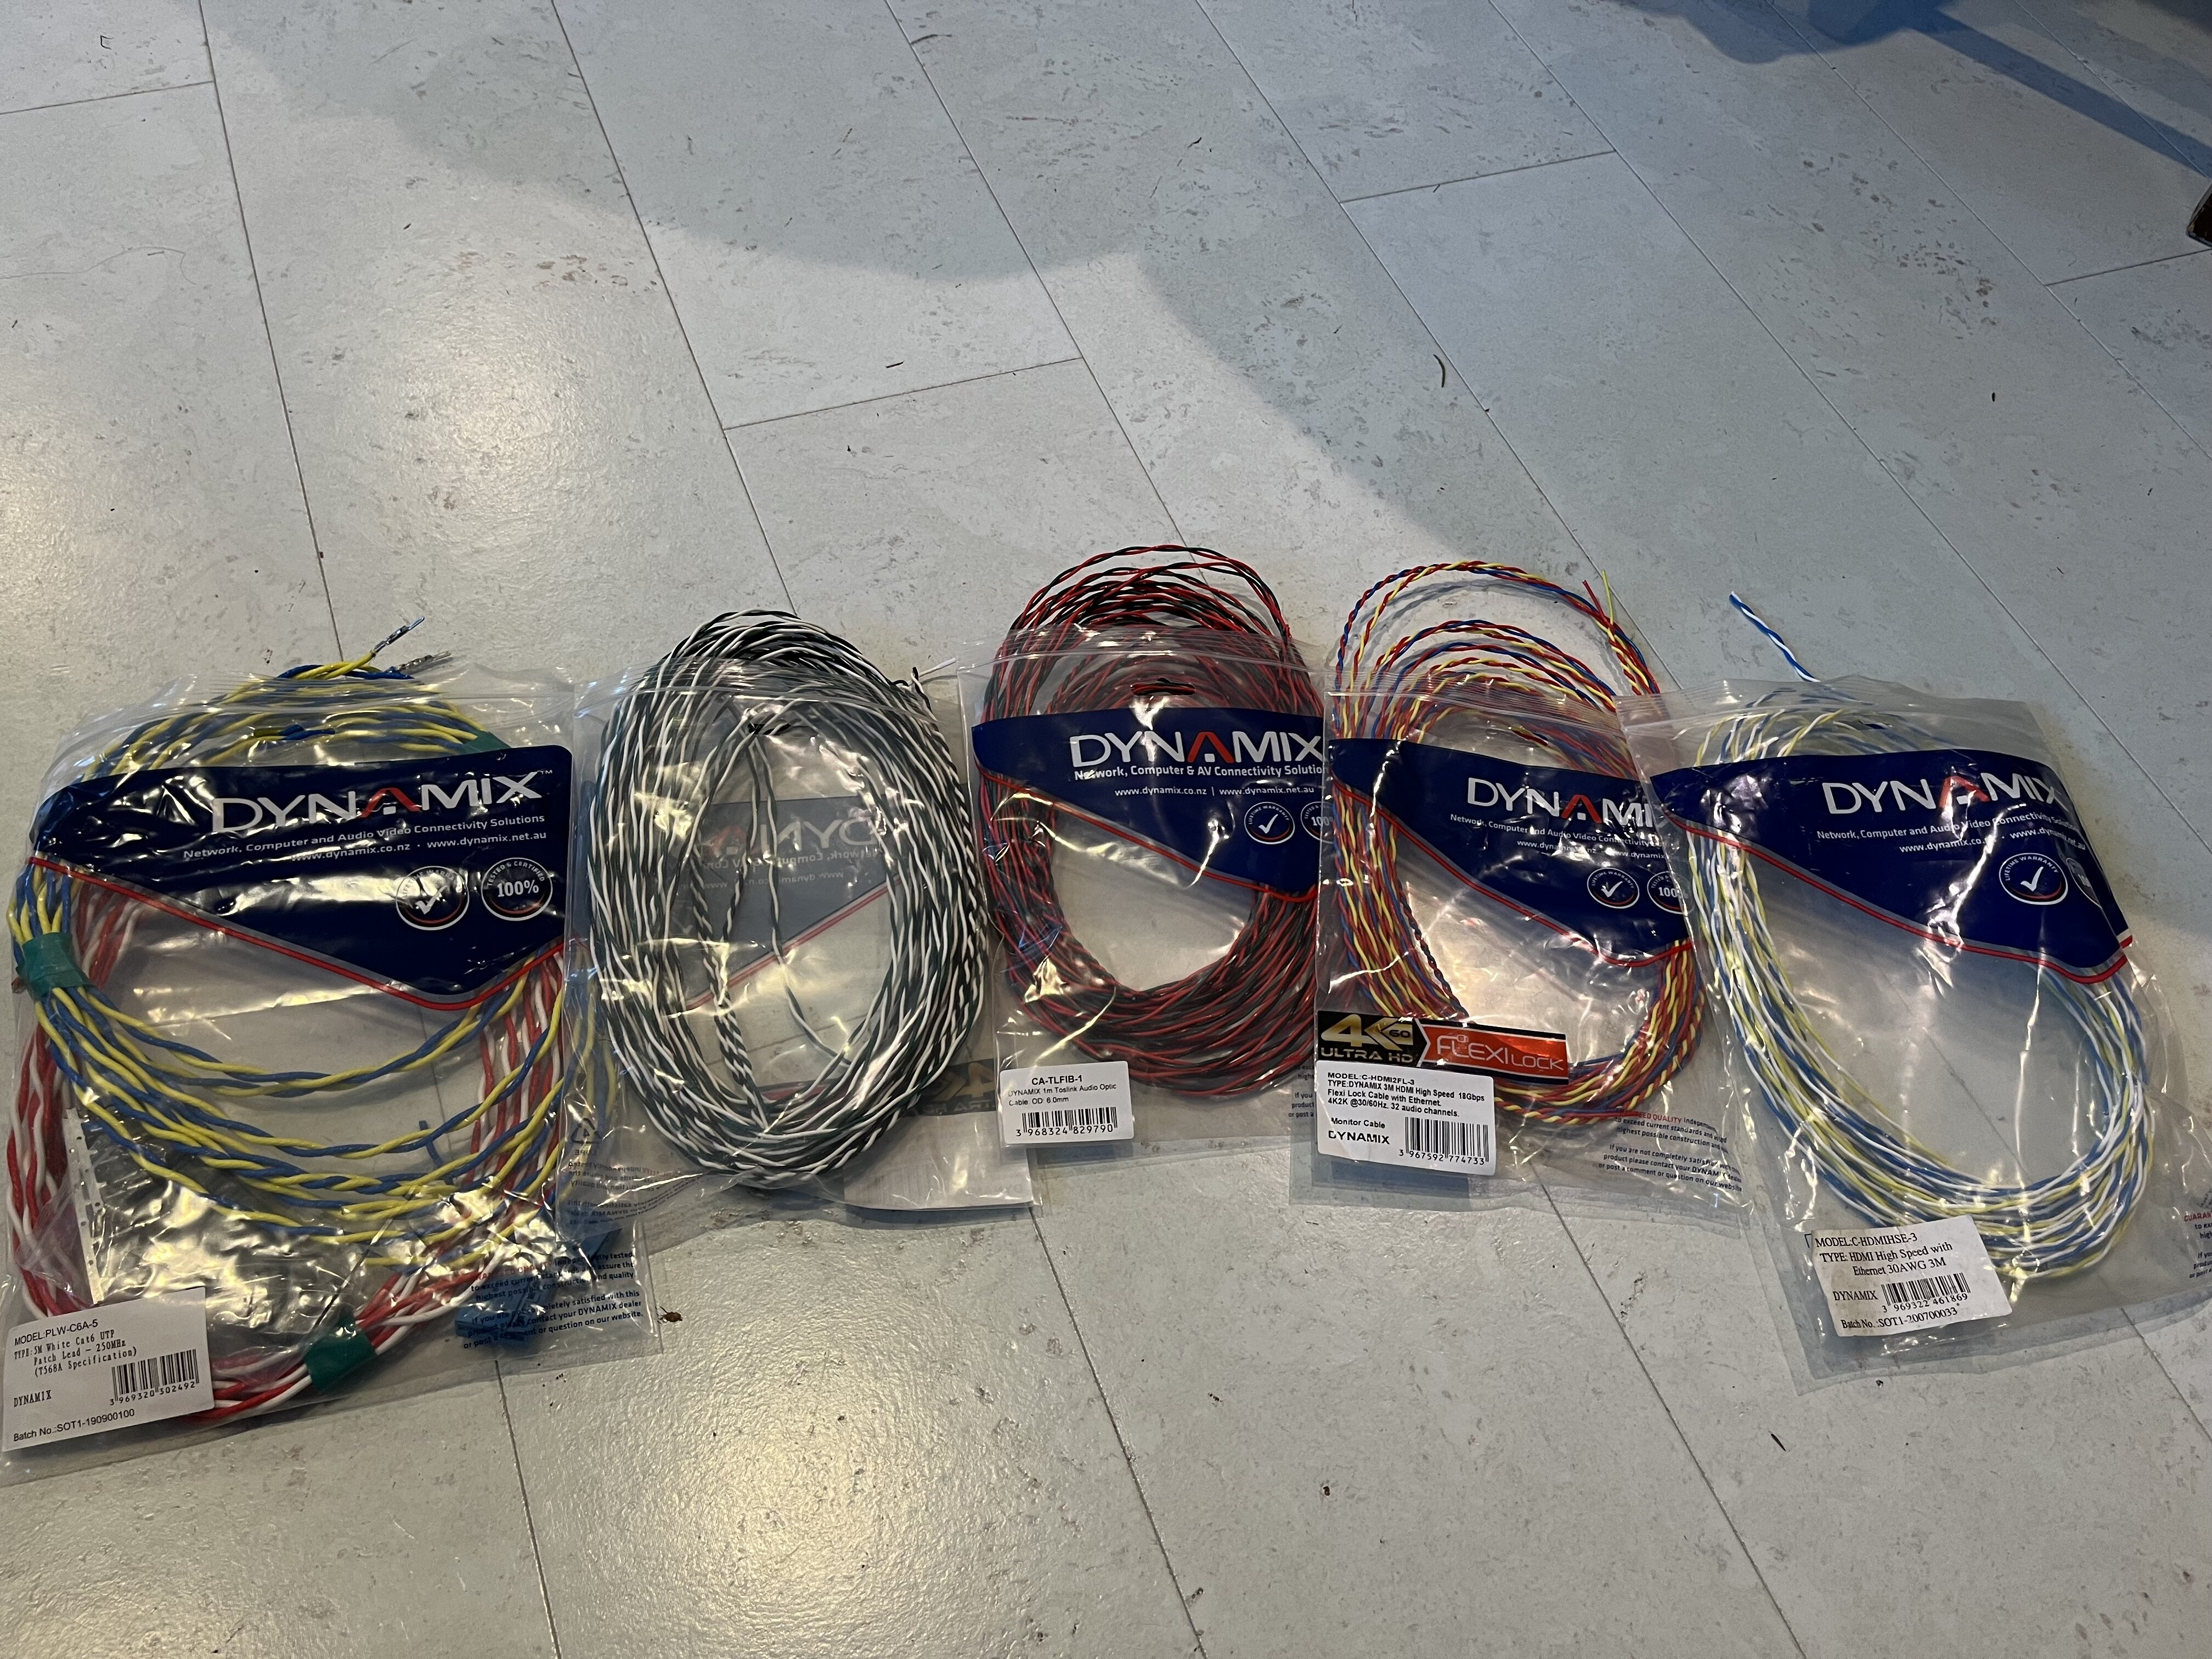
Running the Amplifier Most cable to IDrive was via left side and firewall took time. Used Tesa tape rather than cable ties to secure as fibre easy to break and doesn’t like tight radius. Routed it underneath looms so no chance of pinching or pressure. 5 metre length was just enough at either end.
When taking idrive out I wasn’t expecting to see an Most connection. But despite base audio the F80 LCI uses Most audio between cluster and idrive. Now need a Most Y cable to create a fibre ring between idrive - cluster - Mobridge Amp.
Added a wifi antenna to the idrive unit. NTB Evo 4.1 doesn’t use wifi but seeing posts of software upgrades for 6.1 on the older units to enable car play etc. Possible future coding option but does render factory navigation inoperable.
Learnings from the weekend is I need to chunk this down to 1 or 2 hour work bundles for health reasons. Super tired but did enjoy doing it.


-
1
-
-
Is Mike on here ?
Previous owner of green machine . Looks great in the flesh
-
I’d double check the connector pins on the quadlock connector into the amp looking for corrosion. It wouldn’t hurt to give them a spay with silicone based electrical spray.
The other cause if you have the factory nav version is the tuner connector. It’s actually has connectors in one. The two input connectors clip into tho the main connector and can become unseated by pervious owners. Have a close look at the connector and ensure that they are seated correctly and one of the pins are bent.
It could be the same for the head unit connector if you have the basic cd version. I didn’t know either way as I haven’t had that version in an e46.
One issue with e46 speakers over time is that they use foam surrounds which get brittle and start falling apart. I don’t think it’s your issue as they normally crackle on bass lines when they are break up. Surrounds can be refoamed but better to replace them at that point.
-
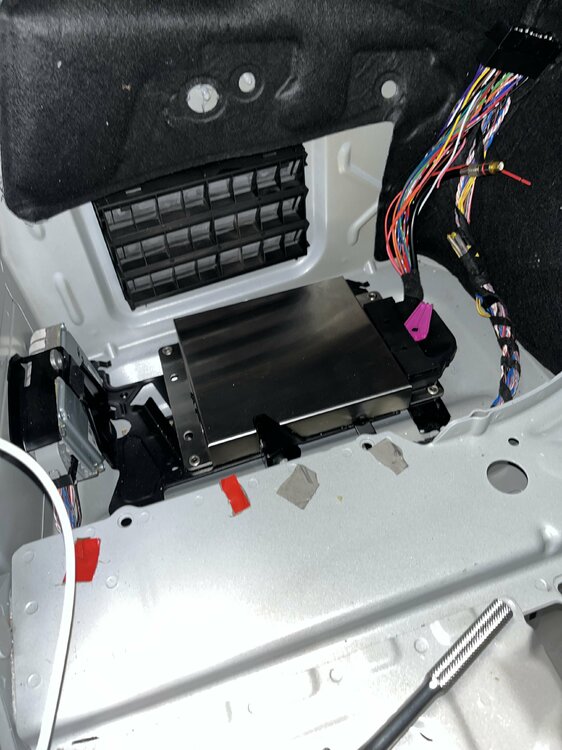
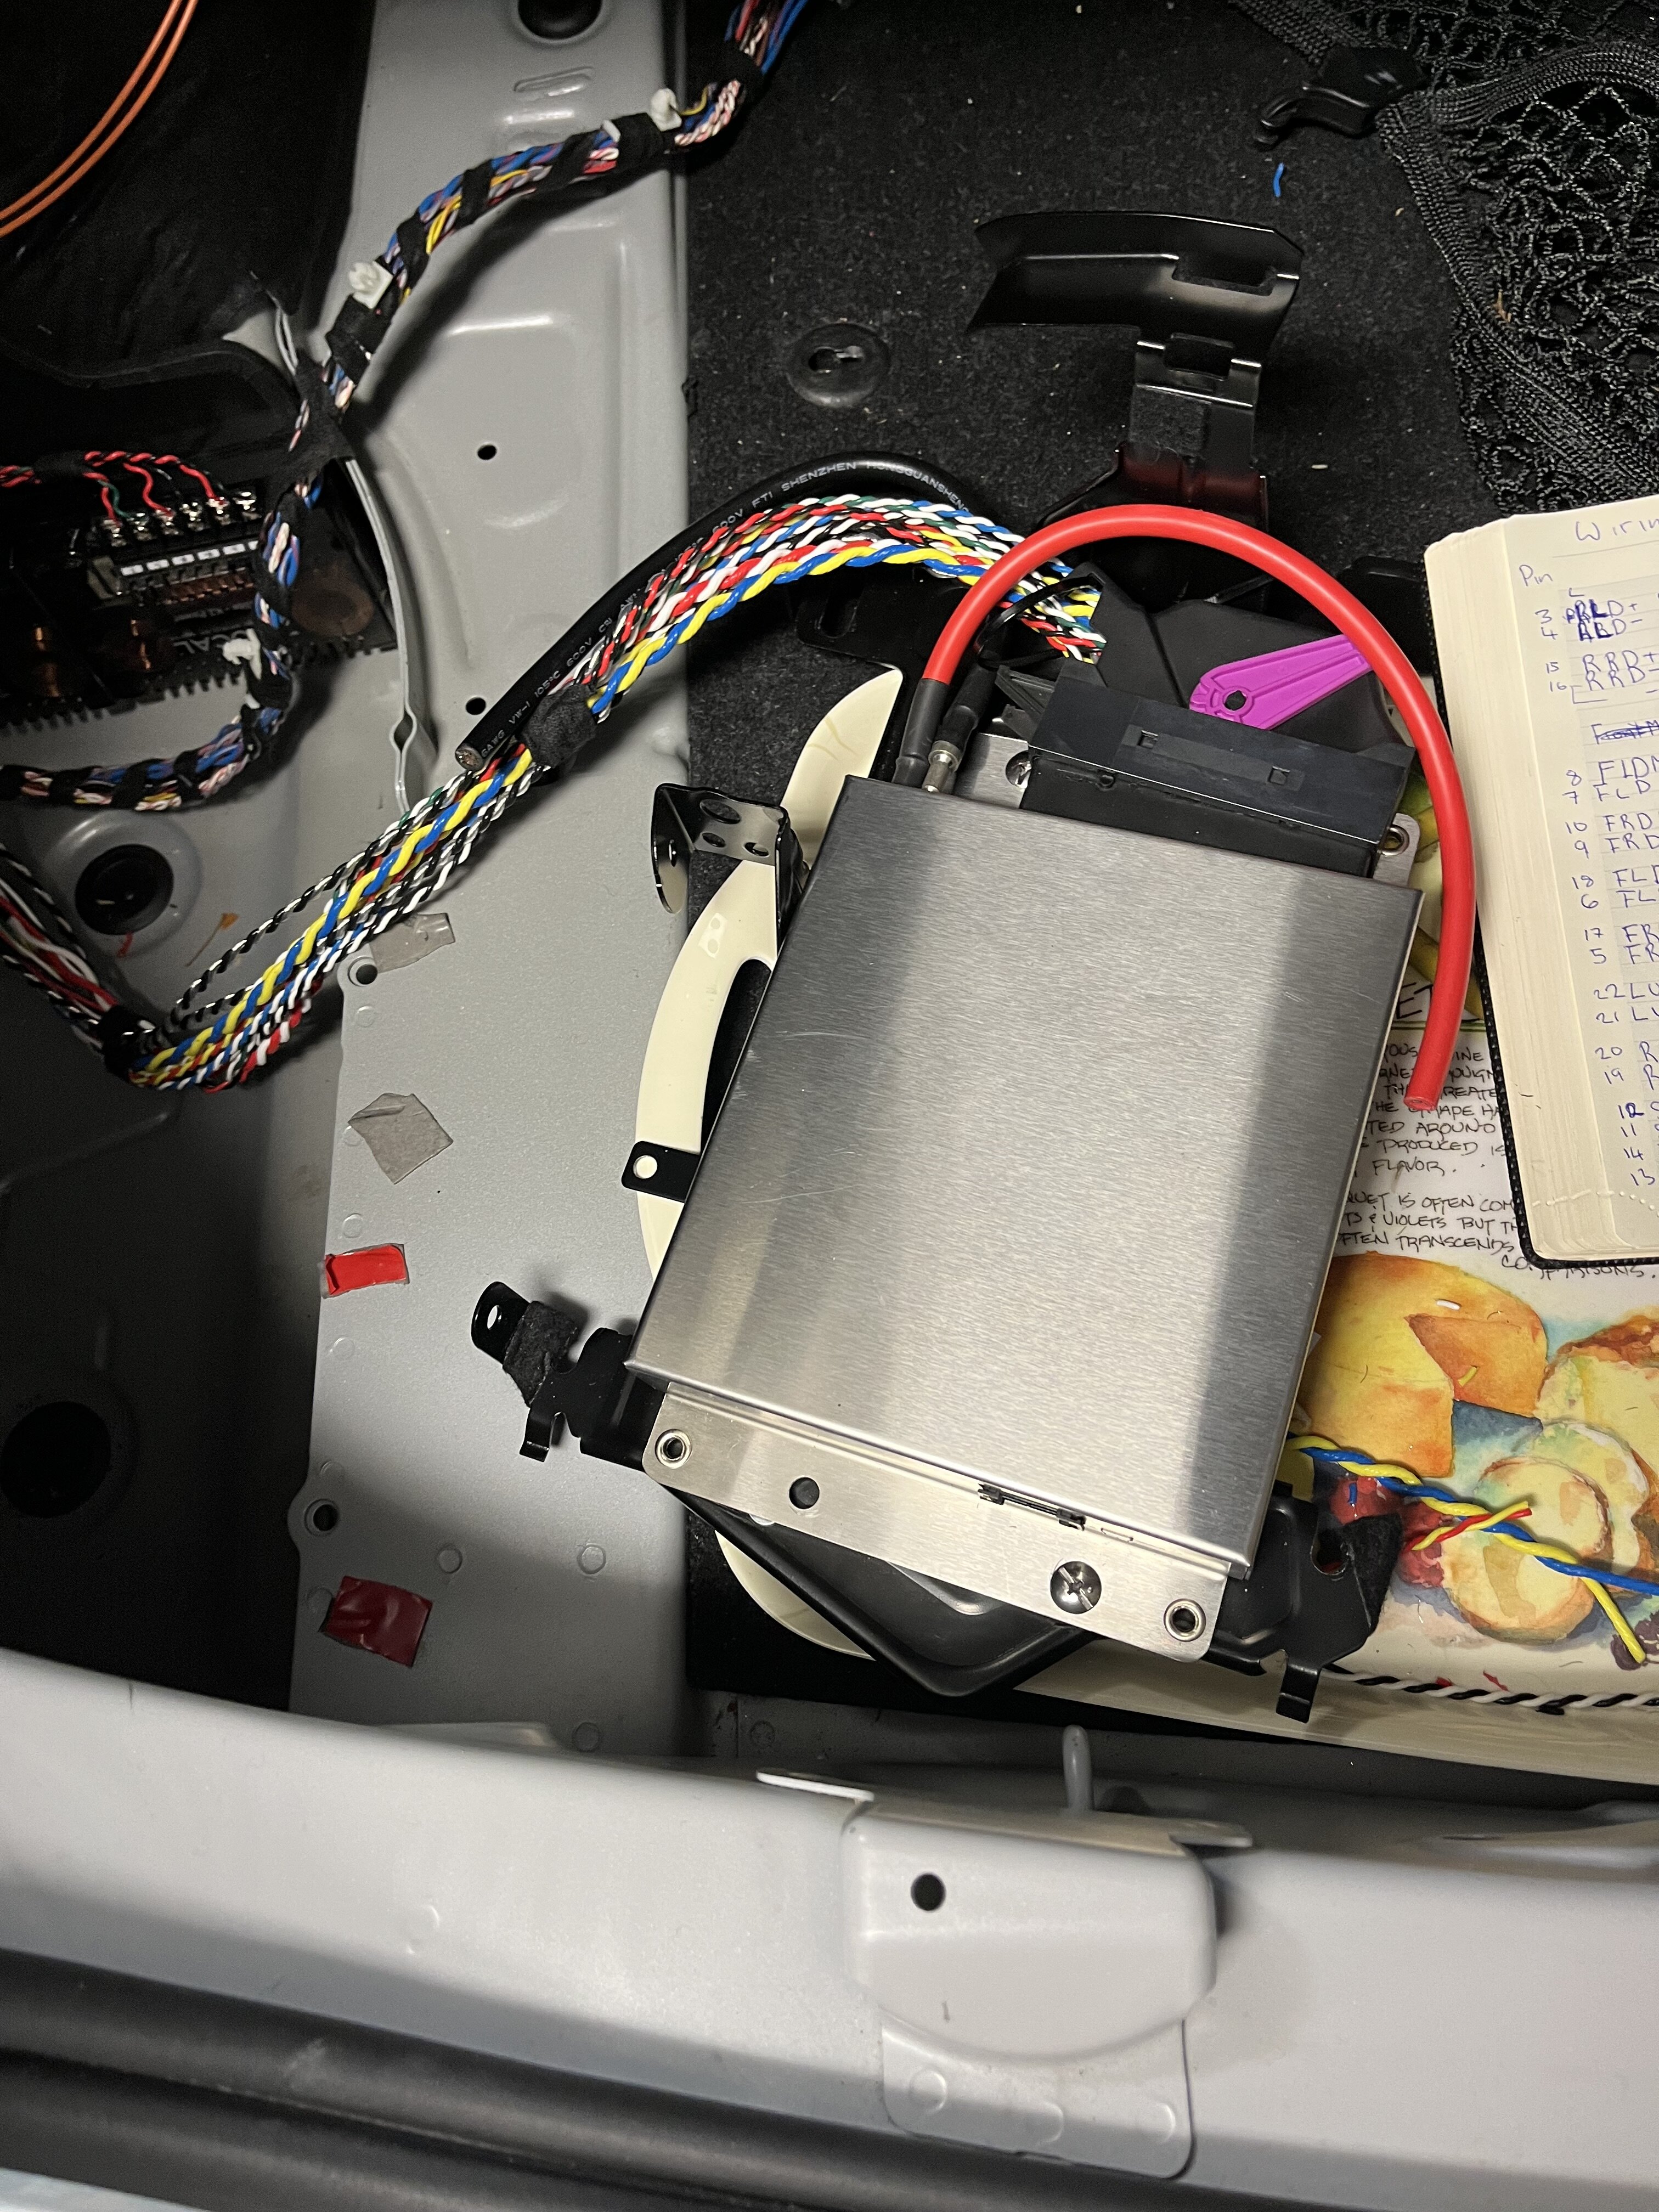
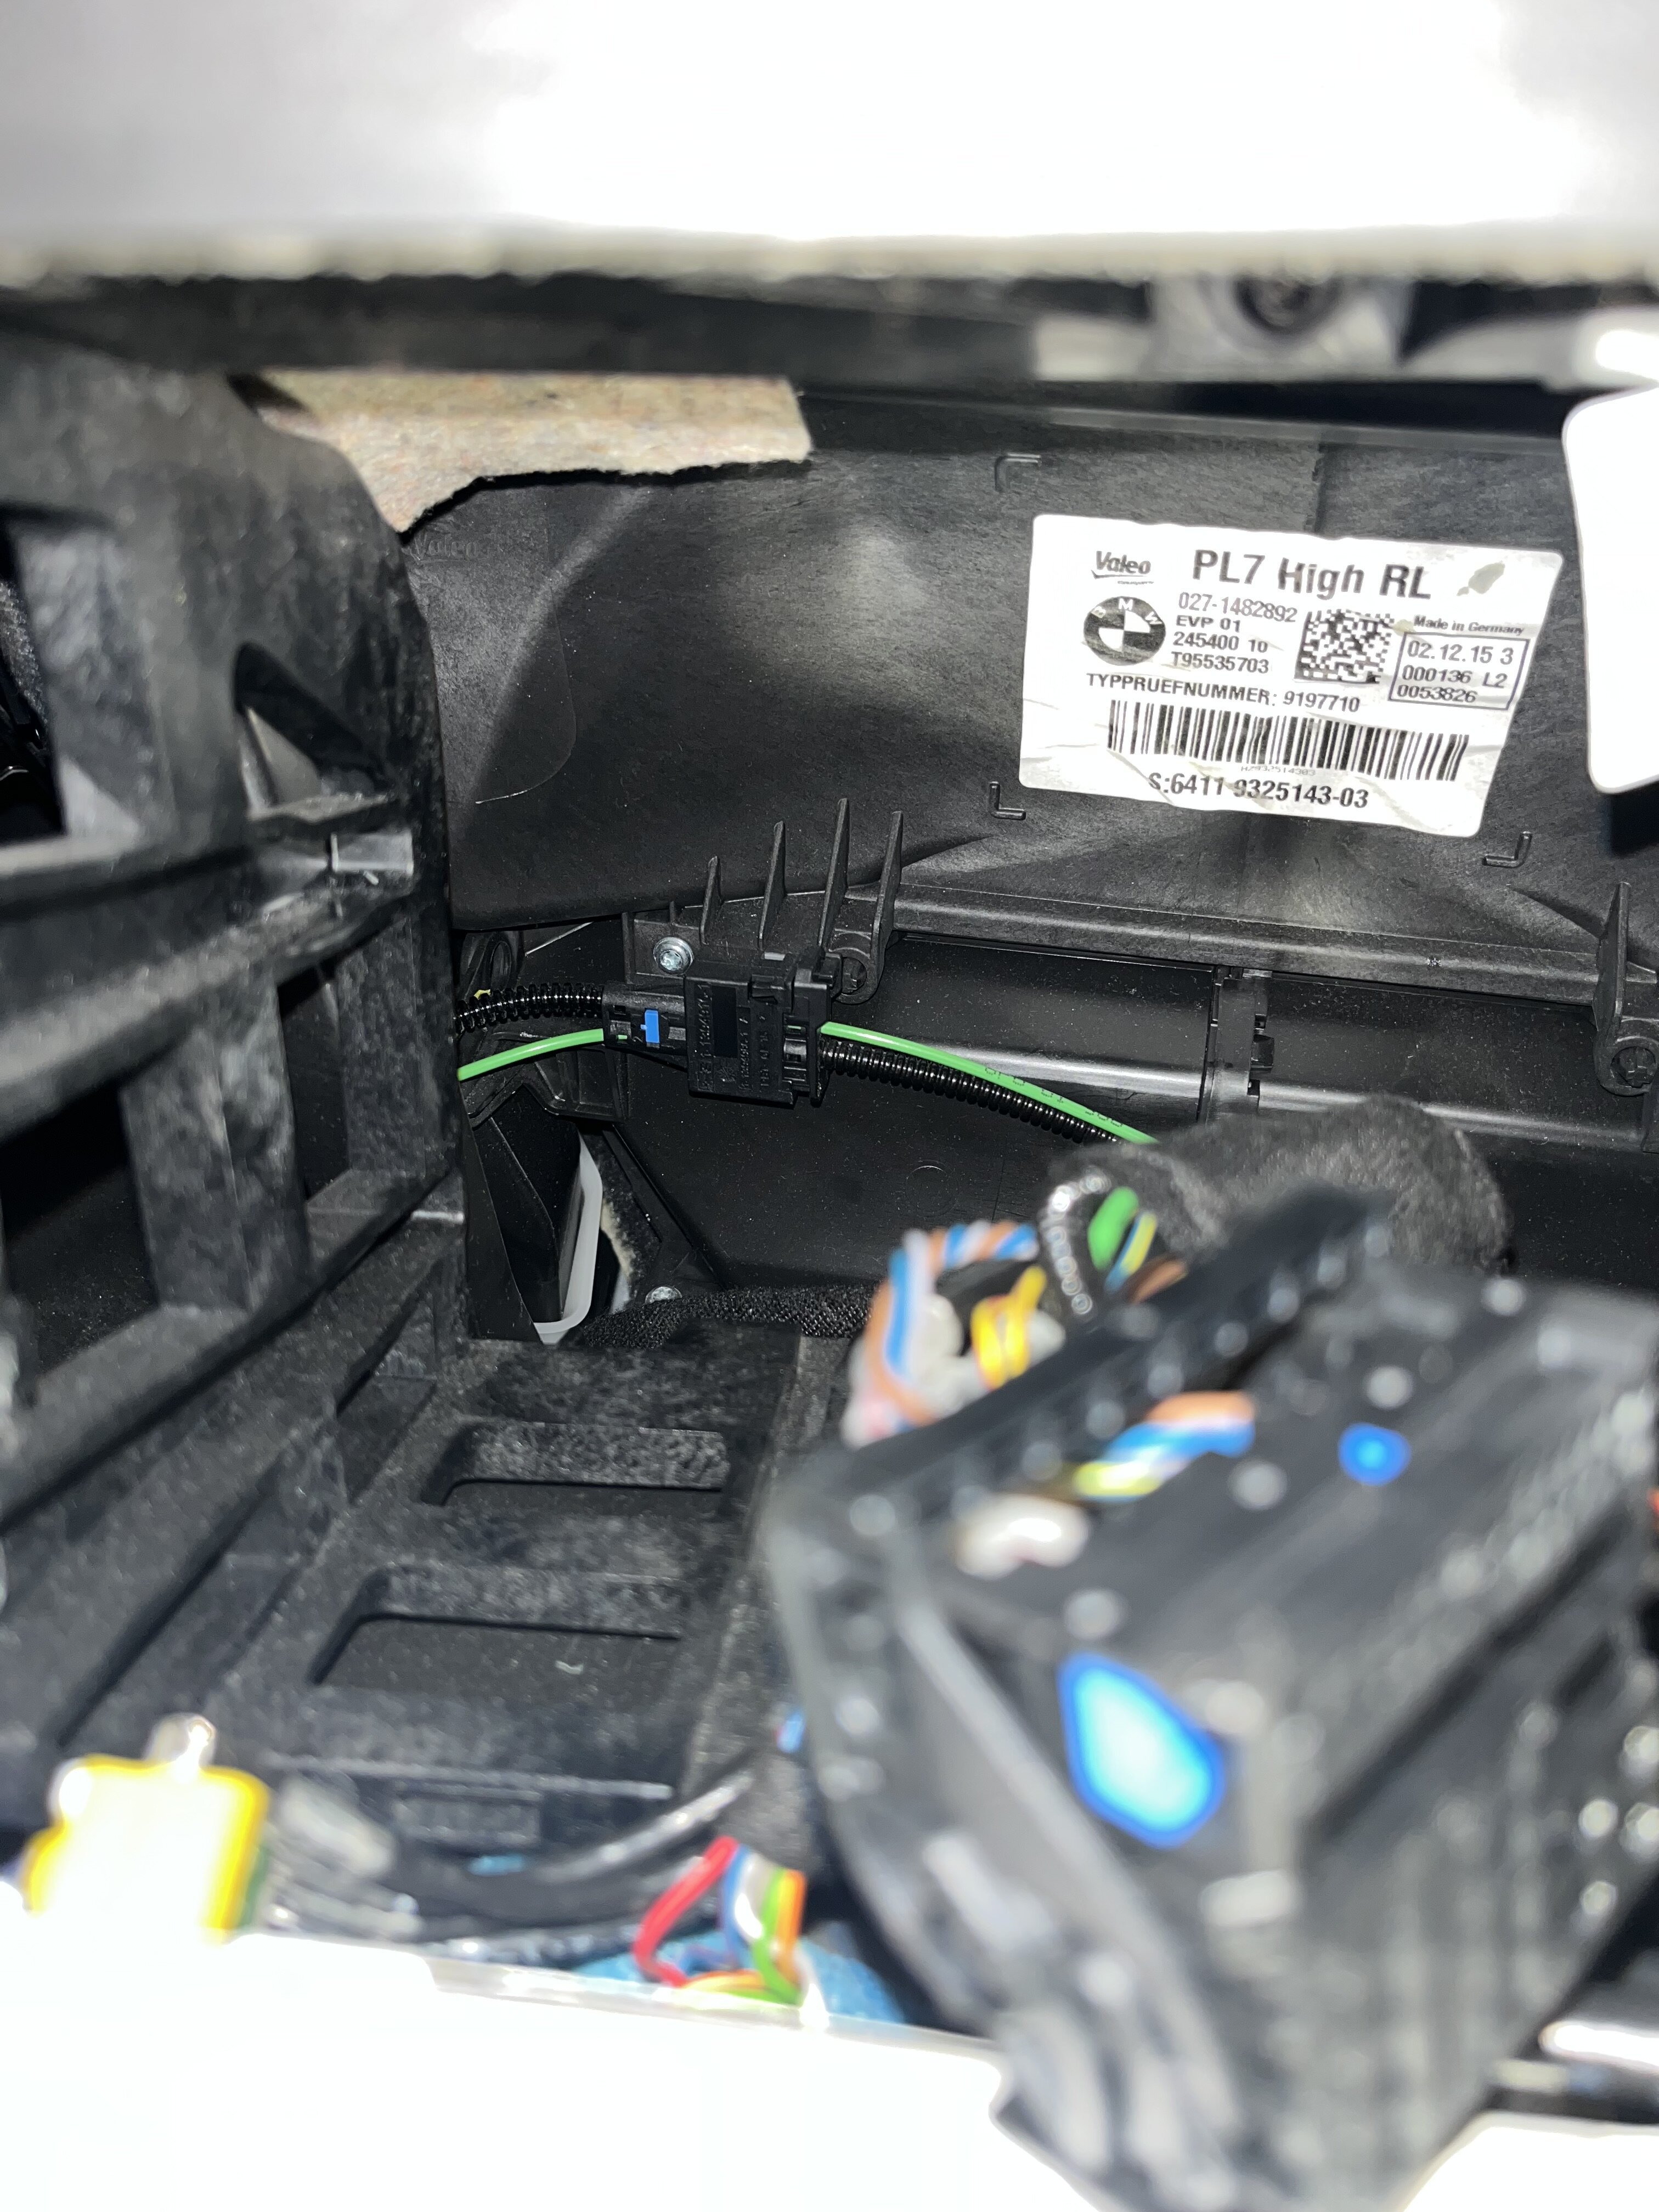
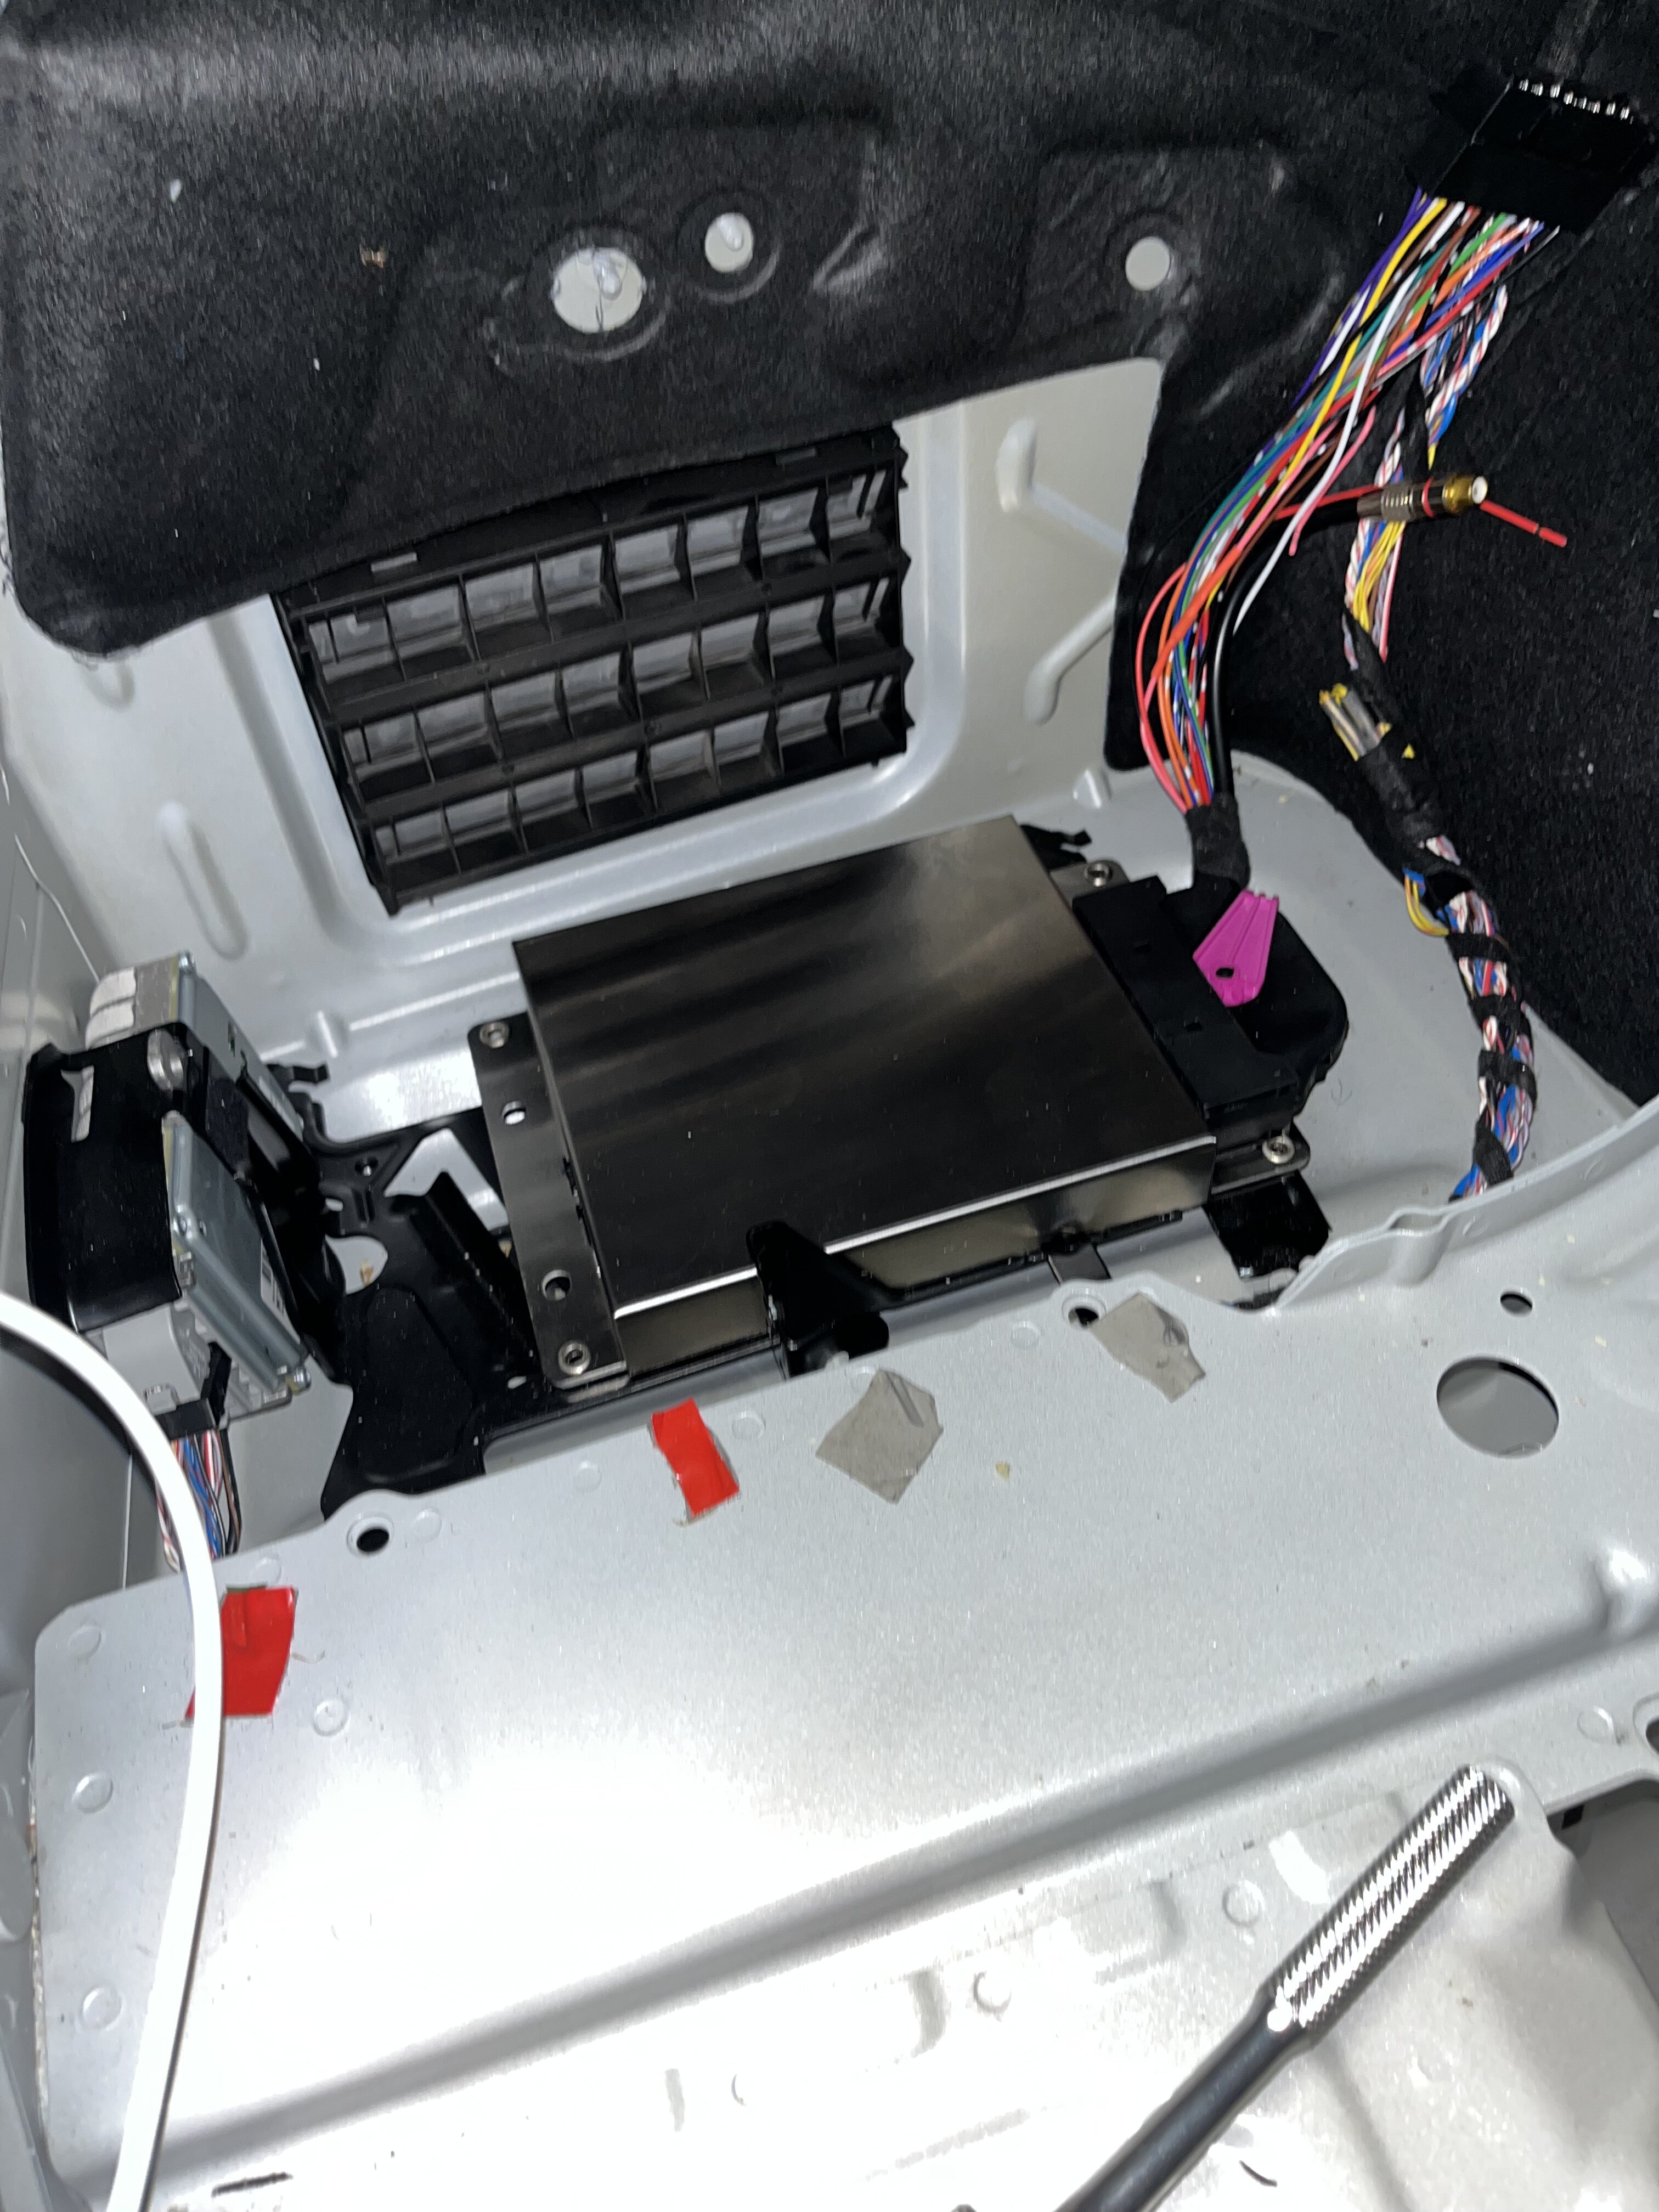
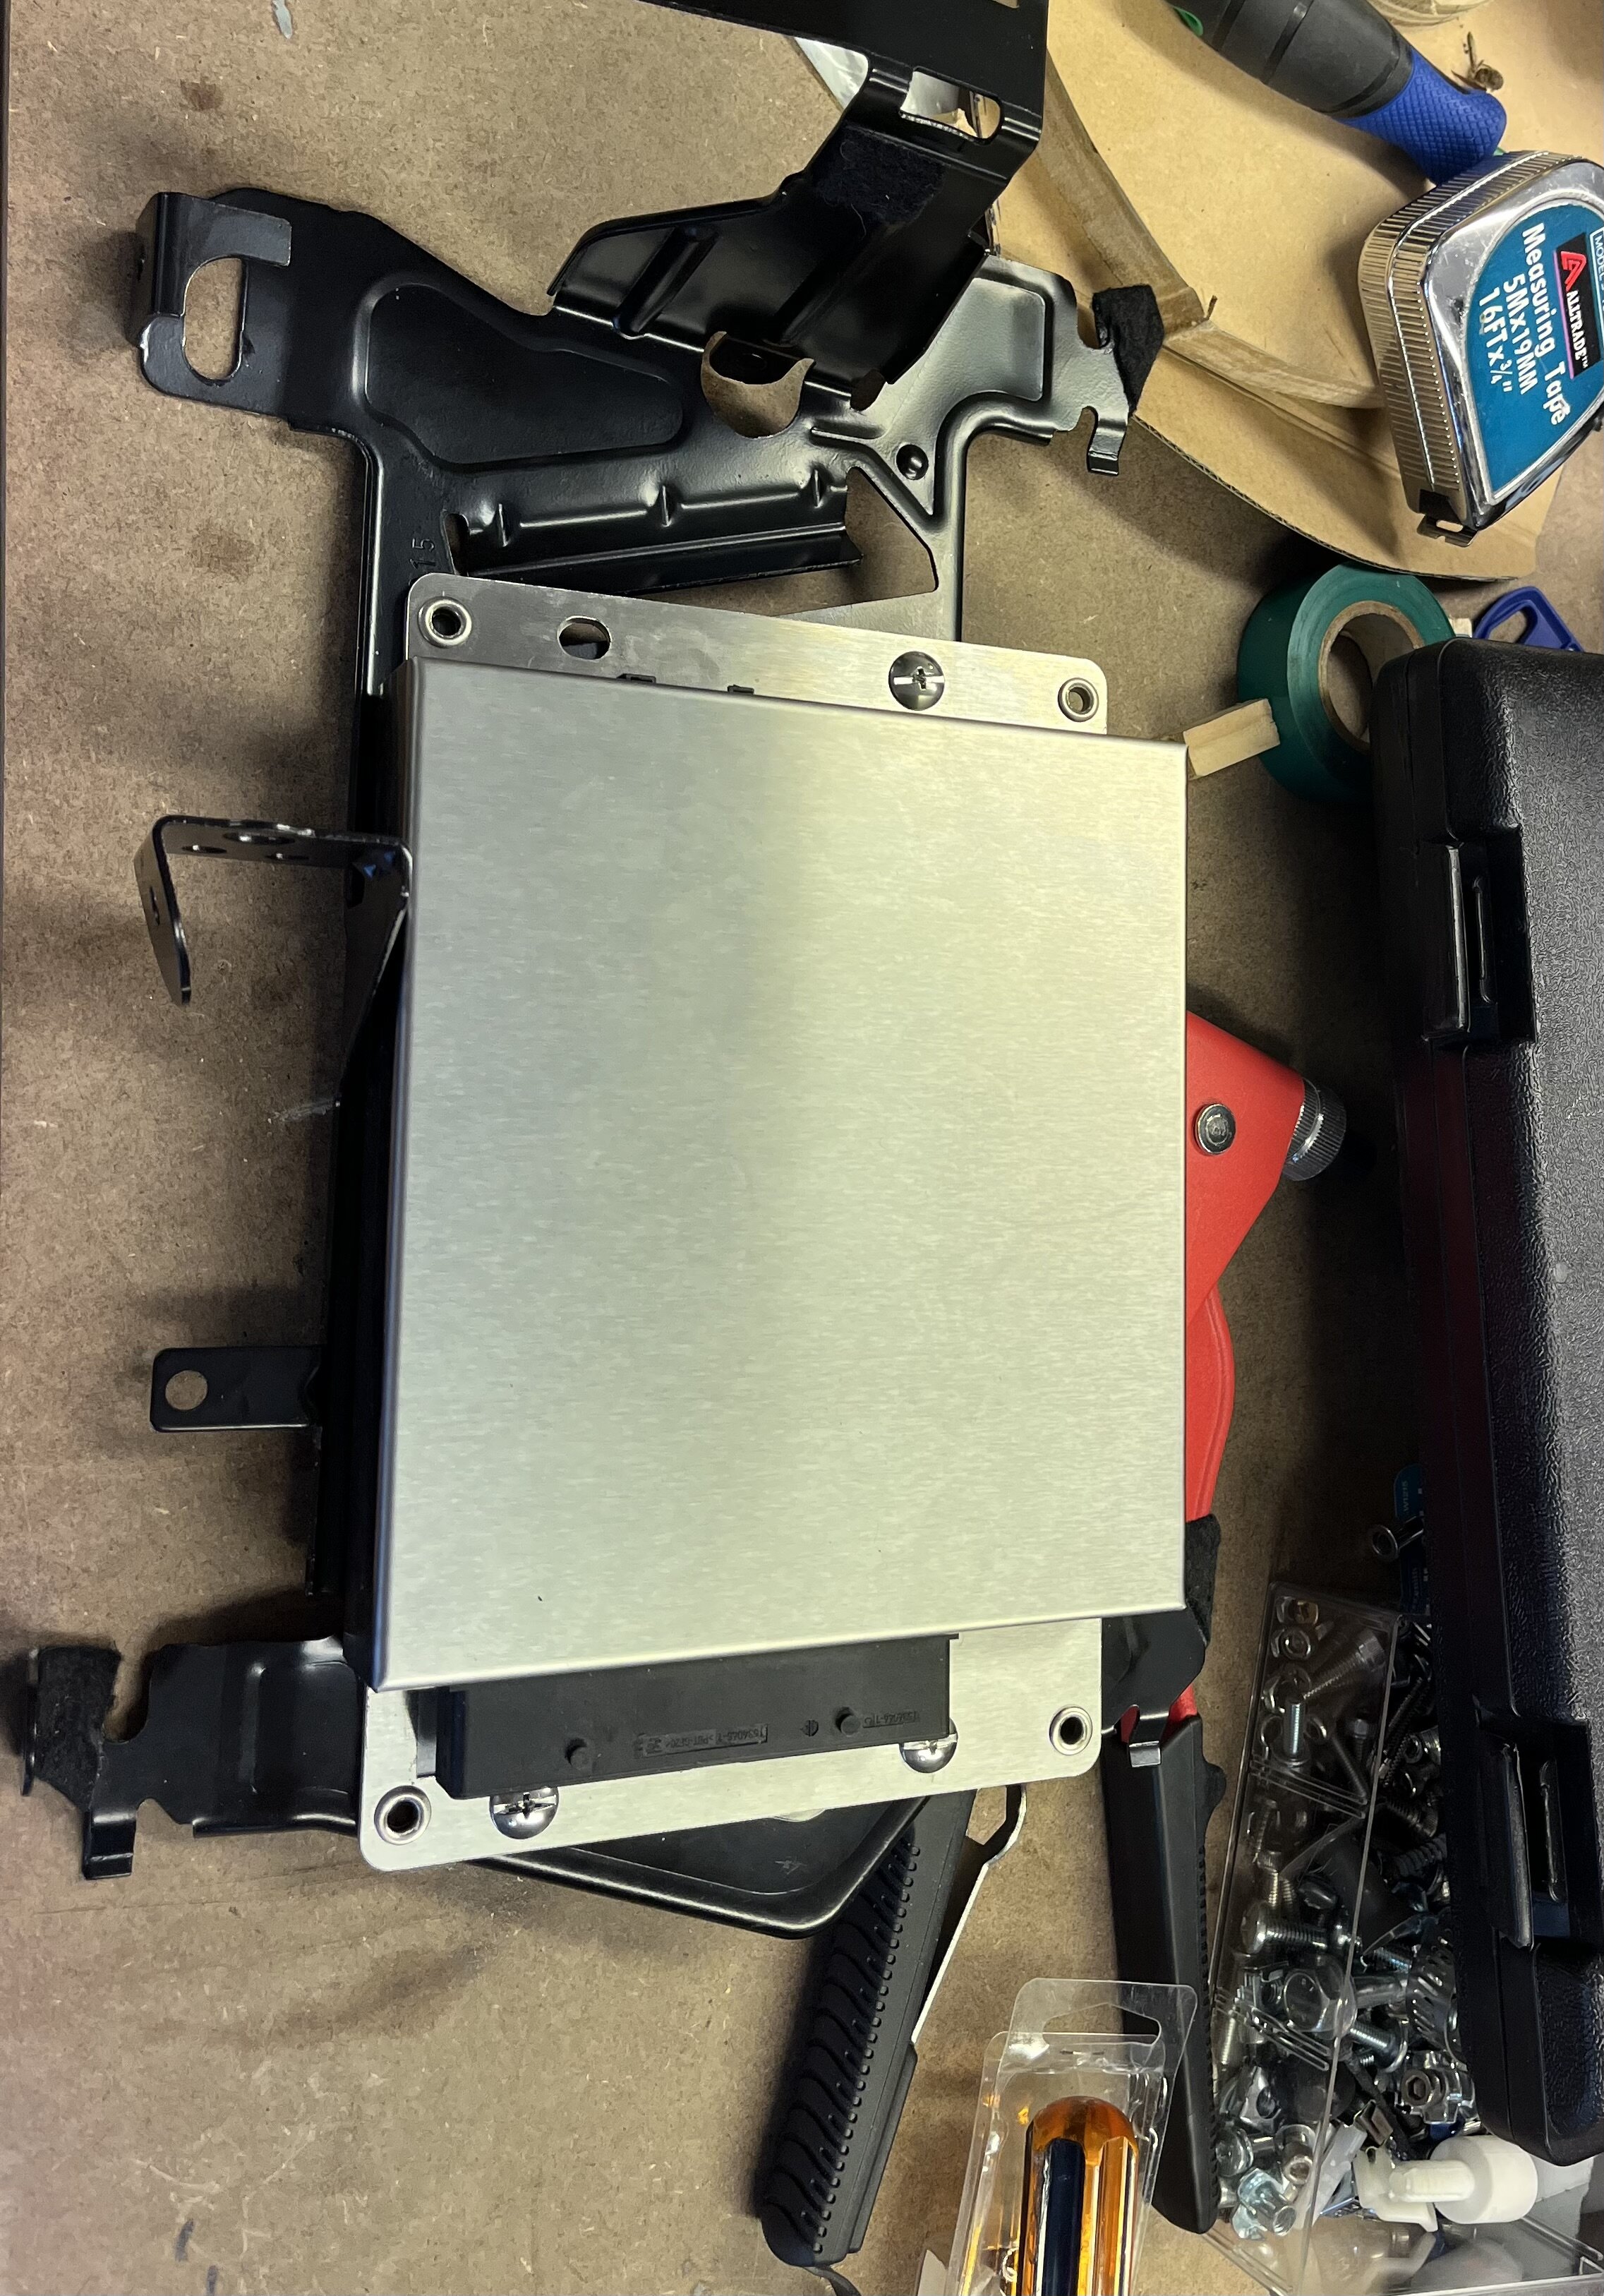
Mobridge amp/ arrived. Nice compact unit. Amazing that it can deliver 1.1kw RMS has a 10 channel DSP and can replace my previous 2 amp 1 dsp solution yet is about the size of an A5 diary. It easily fits into the factory amp location.
BMW version came with AMP connector to Karman Kardon 20 pin patch cable , 2 6awg quick connect power patch leads and a 1 Meter Most fibre patch cable. Patch cable also has RCA out which can be configured as a center channel or sub output along with a remote on wire.
I don’t intend to add a subwoofer amp as the unit has a bridged output channel that delivers 400rms into 2 ohms. That’s roughly high 120s DB on the sub so beyond my volume requirements.
For the install you just augment the amp power with a 6-4 gauge power feed from the battery and add a similar cable for earth. The unit gets it’s power on signal from the digital Most connection from the IDrive.
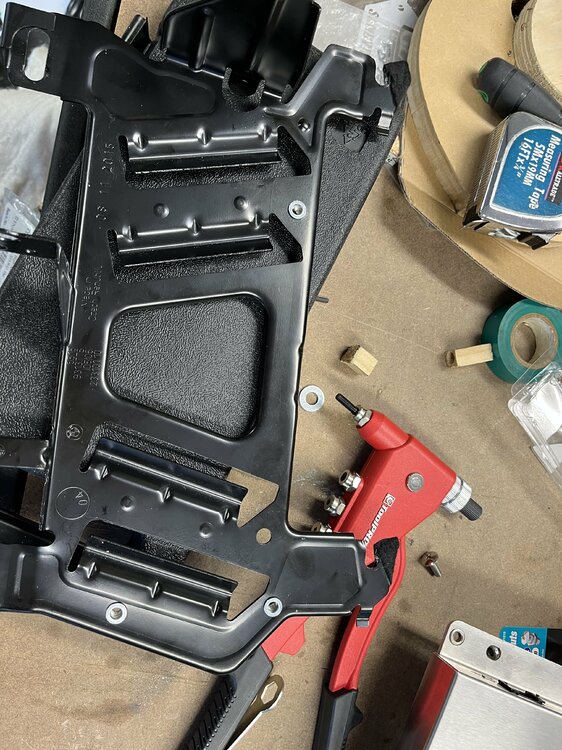
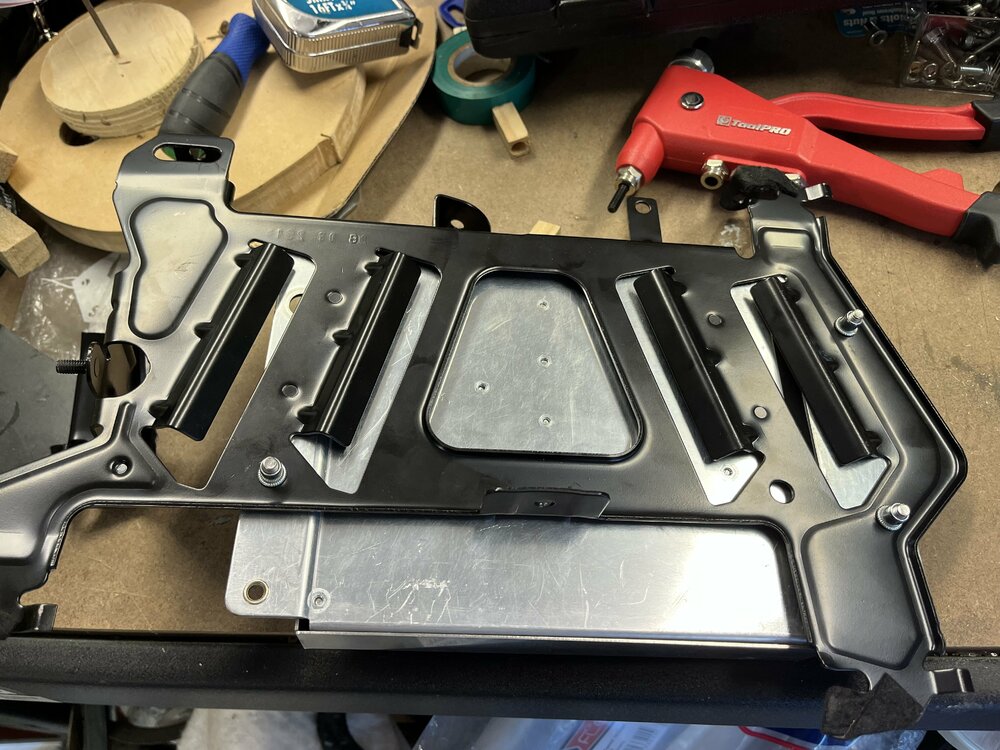
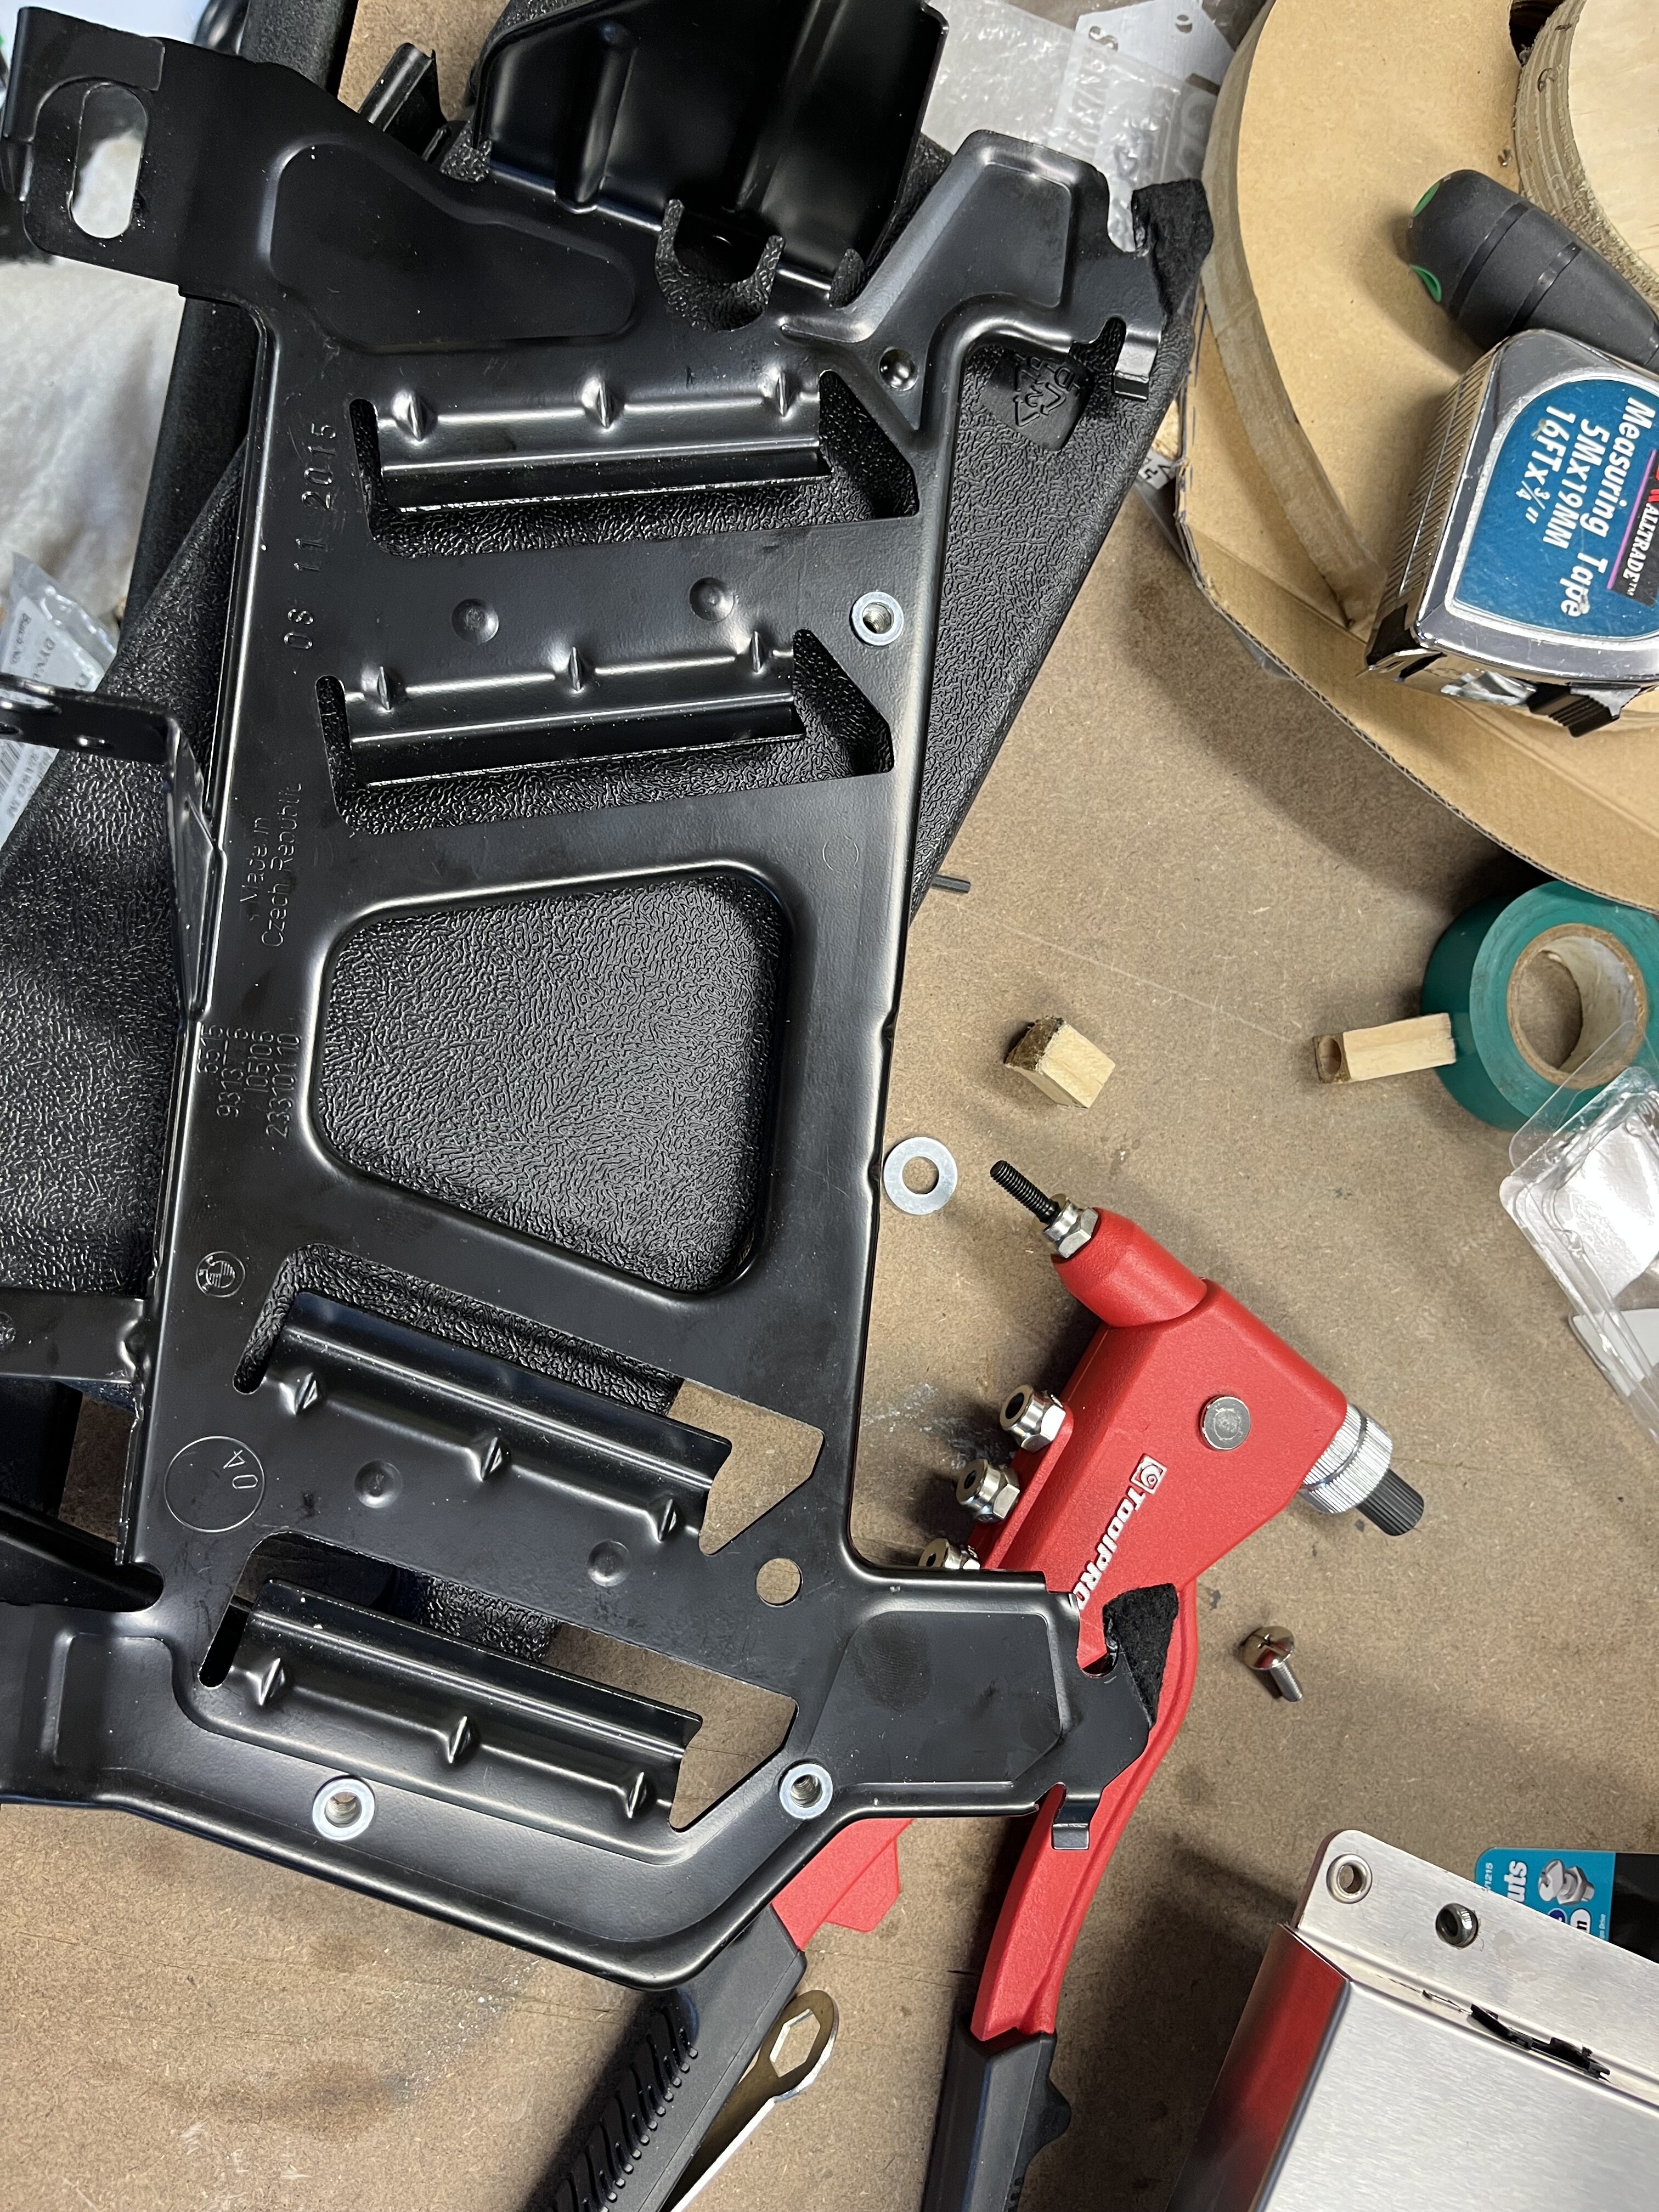
For my install the current base install uses the Active Sound Design module as a 4 channel amp. It uses the same bracket as the hifi option amp. I added some m5 rivnuts and mounted the Mobridge to the factory bracket. The factory bracket is of a good design and allows passive airflow to the underside of the amp. I’m not expecting the amp to get hot due to its Class D output stages and variable voltage power supply. Basically more output, less heat with these amps. Unlike earlier class D amps the distortion levels are really low. Expecting good results audio quality wise.
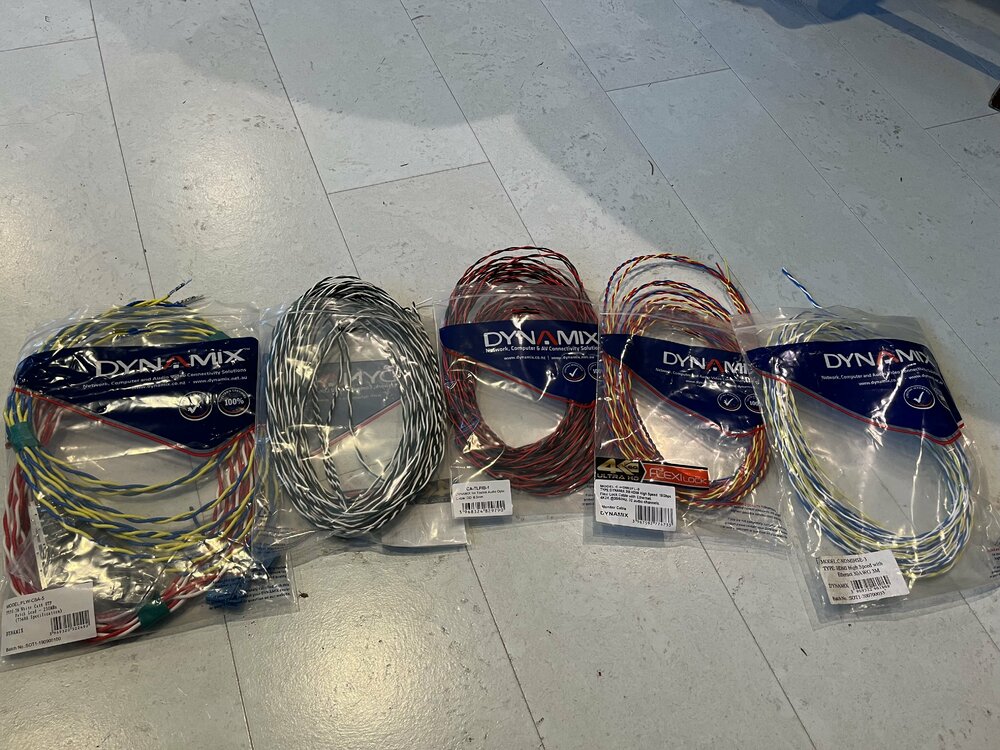
Also spent a couple of hours twisting the silver tinned wire which will be used to connect the speakers to the amp. In a typical install you’d normally just augment the existing BMW speaker wire, However, I’m building a parallel loom that will utilize spare positions on factory door connectors. Very easy to return everything to stock at later date. Using 18 gauge to door speakers as this is the maximum wire size for the door contact pins. Wire is good for more than 225 watts as 4 ohms so more that enough for the 60rms / 130 peak focal speakers and amp channels
Ran out of energy at this point. Going forward break the install in to a series of 1 – 2 hour work streams which I think I can manage to do the install work. It's a bitch getting older 🙂

-
Noico is another.
But you do need to watch the glues used especially when sticking to hot inverted panels and some have an ongoing smell which happened to a colleagues audio build and his car still smells on hot days a couple of years after the install ( can’t remember the brand sorry )
Go over to diymoblieaudio.com and have a look at the CLD reviews. Some people have gone to great lengths to test the stuff.
Personally I’d use Dynamat again for the glues used and no issues years after
-
 1
1
-
-
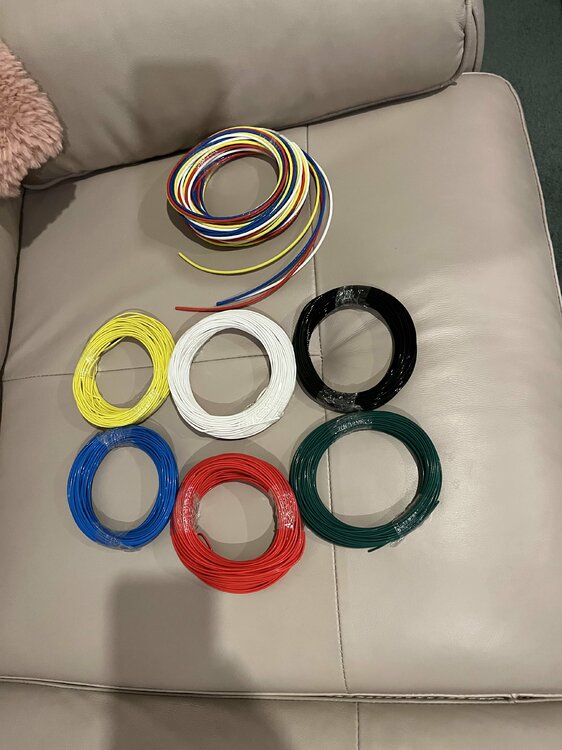
Orders for hardware arrived
Tweeter mounts for inside of rear doors
In door speaker connectors
MQS pins and sockets for door connectors for new looms ( 0.75mm2 / 18 gauage wire versions )
Underseat woofer plugs with pins to accept 2.5mm /13 gauge wire ( Standard bmw size and massively over specified )
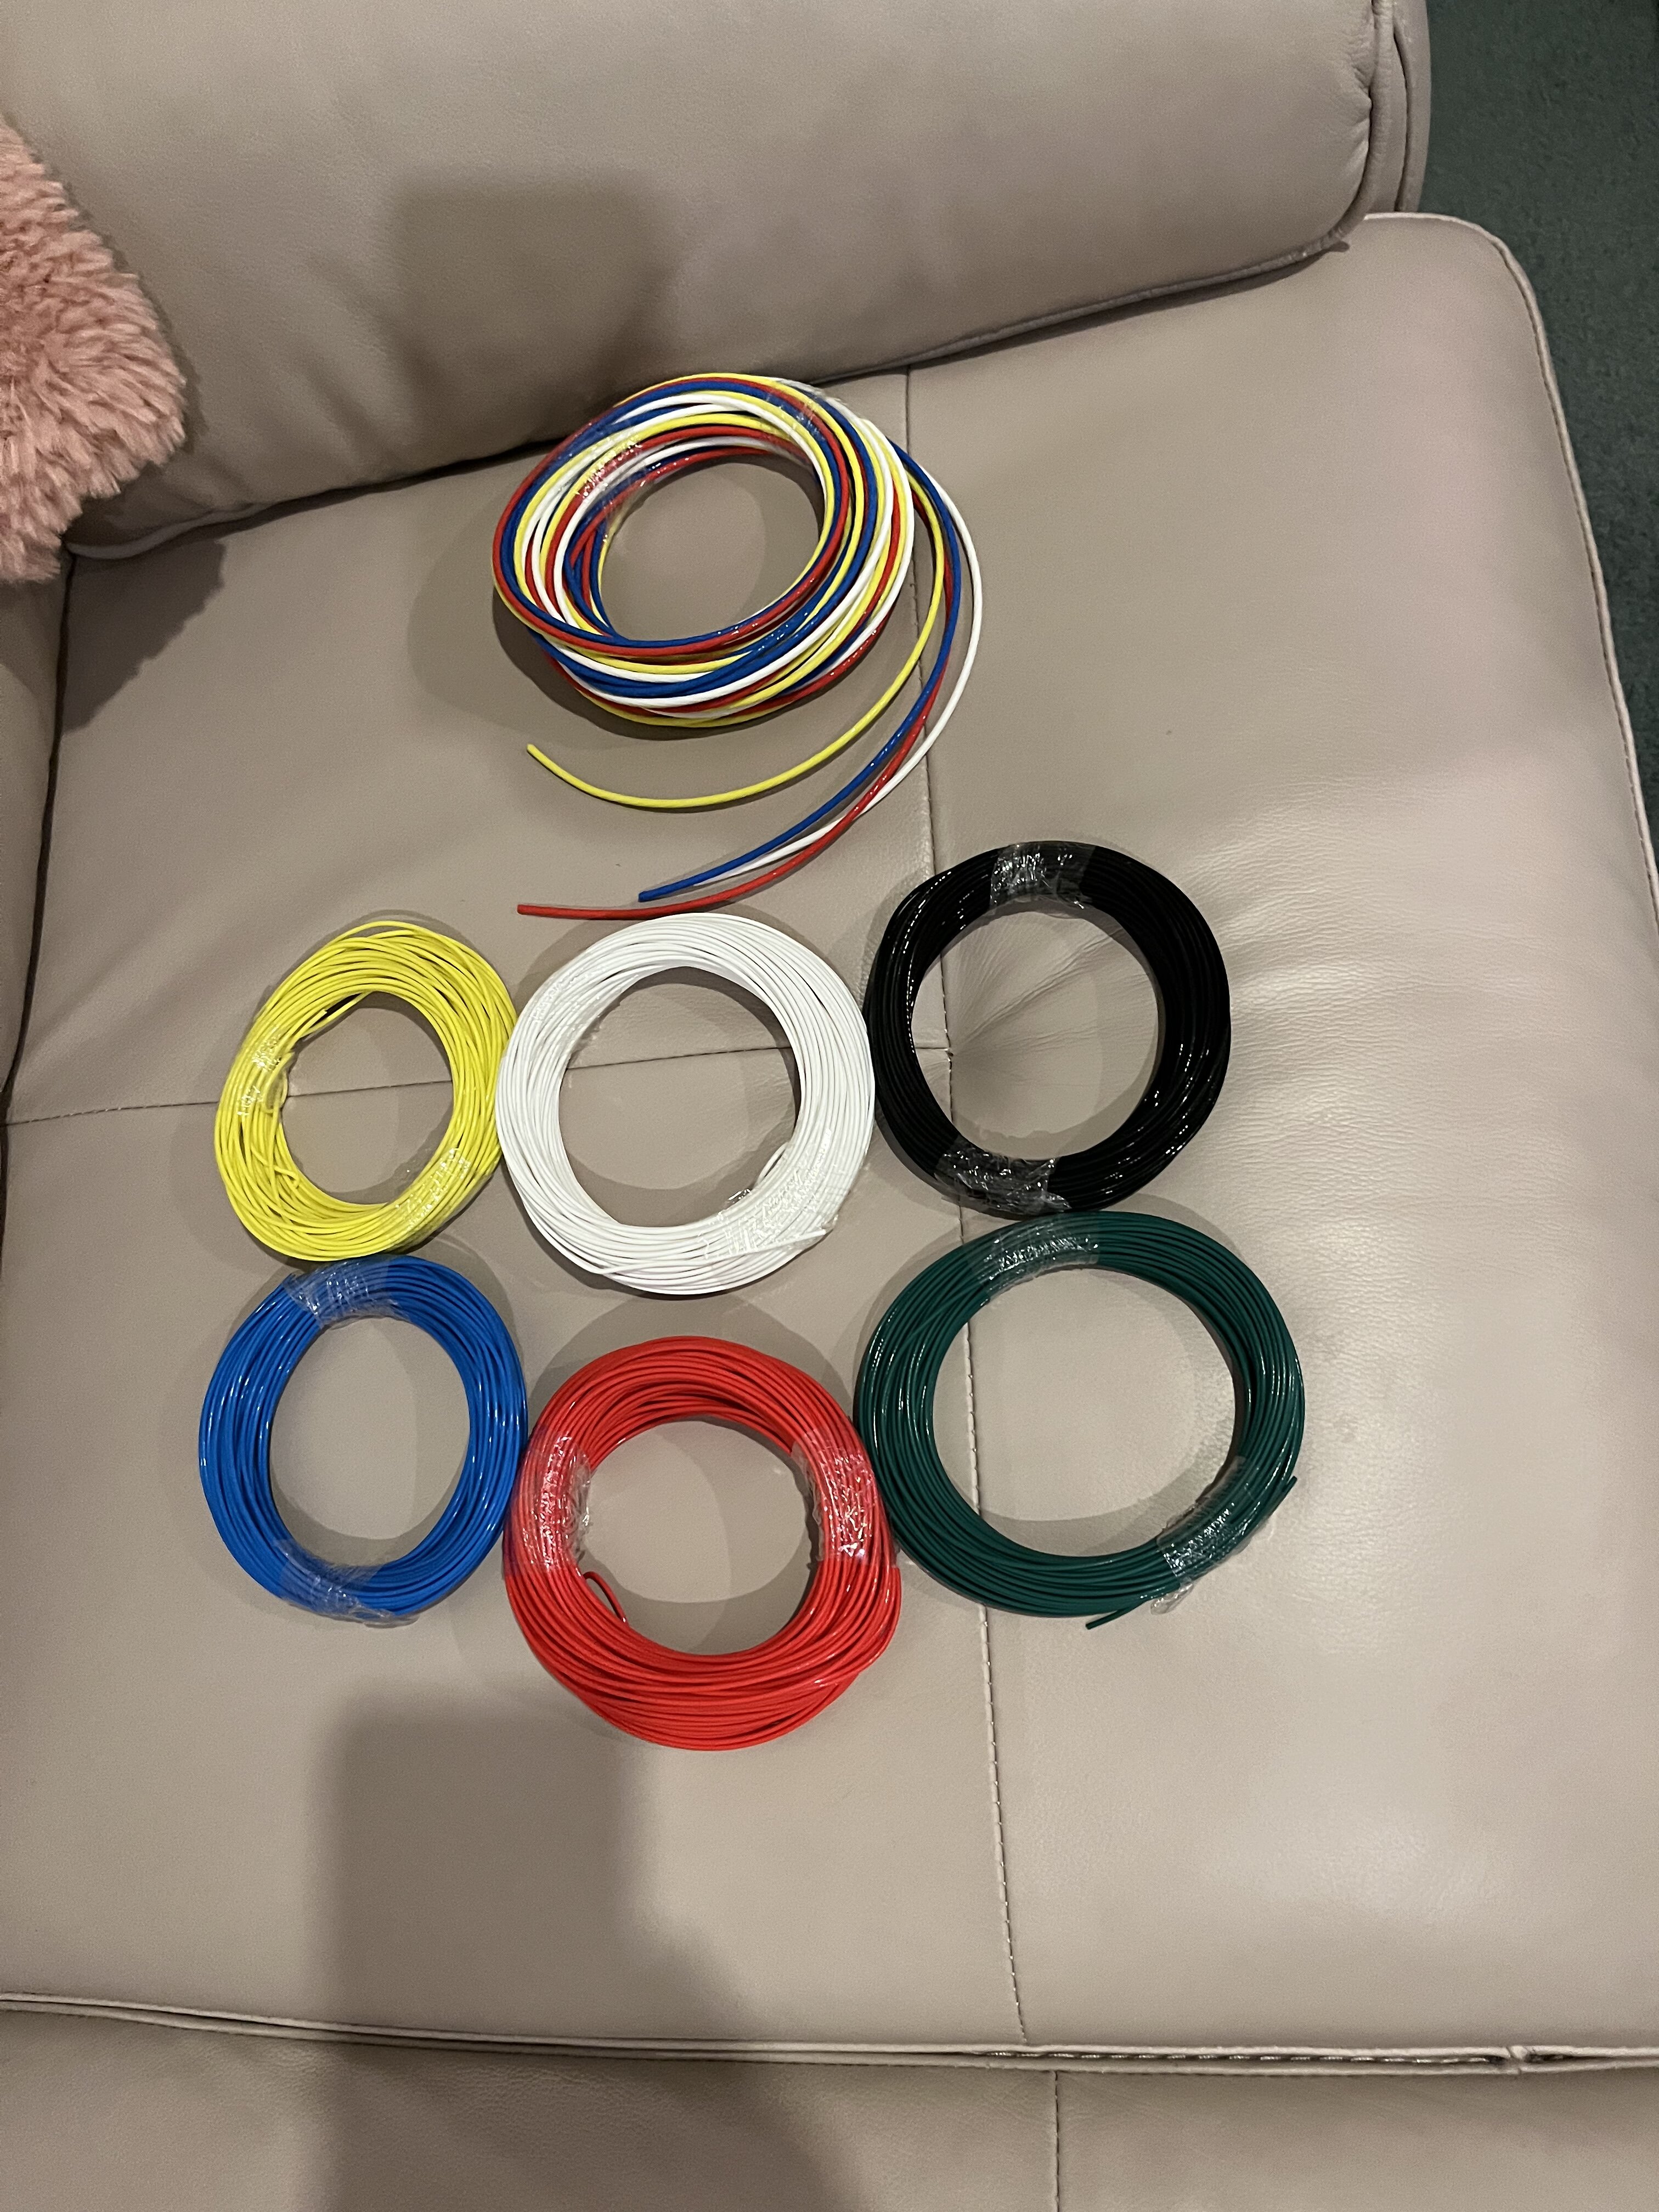
120 meters of single 0.75mm2 cable ( door speakers )
40 meters of single 2.5mm2 cable.
Was trying to get AVSS wire which is high temp thin walled insulated copper cable made for wiring looms .
Settled on some esoteric wire that is oxygen free high grade copper plated in silver. It also runs thin walled teflon so rated to 150c . Ideally headroom for a car where the interior gets hot in the sun. I doubt I’ll be able to hear any difference between silver tinned and copper cable. But not much of a price difference between it and AVSS.
18 uf capacitors
These are for bass blockers for tweeters that will be running active . I should have possibly used higher capacitance value for the 4 ohm tweeters which will run from 3500 hz. Should have used a value an octave down from this point , but read some bad advice for using a blocking capacitor that is twice the value of the FS or resonance of the tweeter.
Will explain this a bit later when I do the house curves for each speaker.

-
2
-
-
I remember that the 1.9 litre version that I hired had a square setup with 4x225s back in 1999.
Larger engined versions like the 3.0 had a staggered setup. I won a long weekend in one a couple years later.
Rear rims should have size stamped on them on the inner spoke area. 7.5 will be 225 8.5 will be 245
-
1
-
-
Thanks Olaf
The es100ks can be got for about $750 per pair at the moment. They jump to 900 -1000 on some of the NZ retailers at times. Not sure why. Focal also have a inside series for BMW as well ,around that $550 mark for components that bolt straight in and use factory connectors. Otherwise there is quite a few drop in solutions from other vendors.
Interesting enough underseat woofers replacement seems to be varied in opinions. Some say the drop in replacements aren’t nessacary an upgrade if you have HK drivers as quite efficient and good in midbass region. Really undecided what to do. I tried to model up Stereo Intergity new TM8 but with the f80s shallow enclosure and low seat rail clearance was too marginal. Might be an option for the X3 ?Ideally need to model some driver behaviours based on TS parameters. Sounds like the BMW enclosure and vent into side sill equals a .6 cubic foot leaky sealed enclosure so a good sized area for a 200mm speaker.
-
1
-
-
Have ordered a Mobridge Most25 8.1.1 Amplifier
https://mobridge.us/product/mobridge-most25-amp/
This is a single box solution that contains 9 amplifier channels and DSP. It behaves in the same manner as the BMW Harman Kardon digital amplifier but has substantially more power. It’s also power efficient. Has some really nice features such as 10 channel DSP for time alignment and frequency controls on each amplifier.
From an IDrive point of view Mobridge have coded the amplifier to be fully controlled by the IDrive. It supports all audio Sinks so you still get 4 channel PDC in surround, front audio for nav and telephone audio plus usual idrive music options.etc. All the factory sound controls functions work such as fader and equaliser. The two factory audio presets map to Morbridge DSP maps which is handy as I’ll be able to run 2 different Tuning curves so one for driver position and one tune for when passengers in the car.
With the amp being MOST based music is fully digital from the idrive system. So Basically DDA in the audio path. Great for reducing system noise.
Amp / DSP will be configured in the following way. Power is peak rating at 4 ohms
Channel 1&2 Front L / R tweeters 150 watts x2
3500hz to 20;000hz
Channel 3&4 Front Door L /R Mid bass 150 watts x2
150/200 hz to 3500hz
Channel 5&6 rear door components running passive crossovers
150/200 hz to 20,000 hz
Channel 7/8 underseat woofers 300 watts x 2 ( running 8 inch HK 7 ohm speakers so 150 watts expected )
70-150/200hZ
Channel 9 Boot subwoofer 2 ohm 800 watt.
20-70hz
-
3
-


F80 M3 Base audio system upgrade
in Audio & In Car Entertainment
Posted · Edited by Neal · Report reply
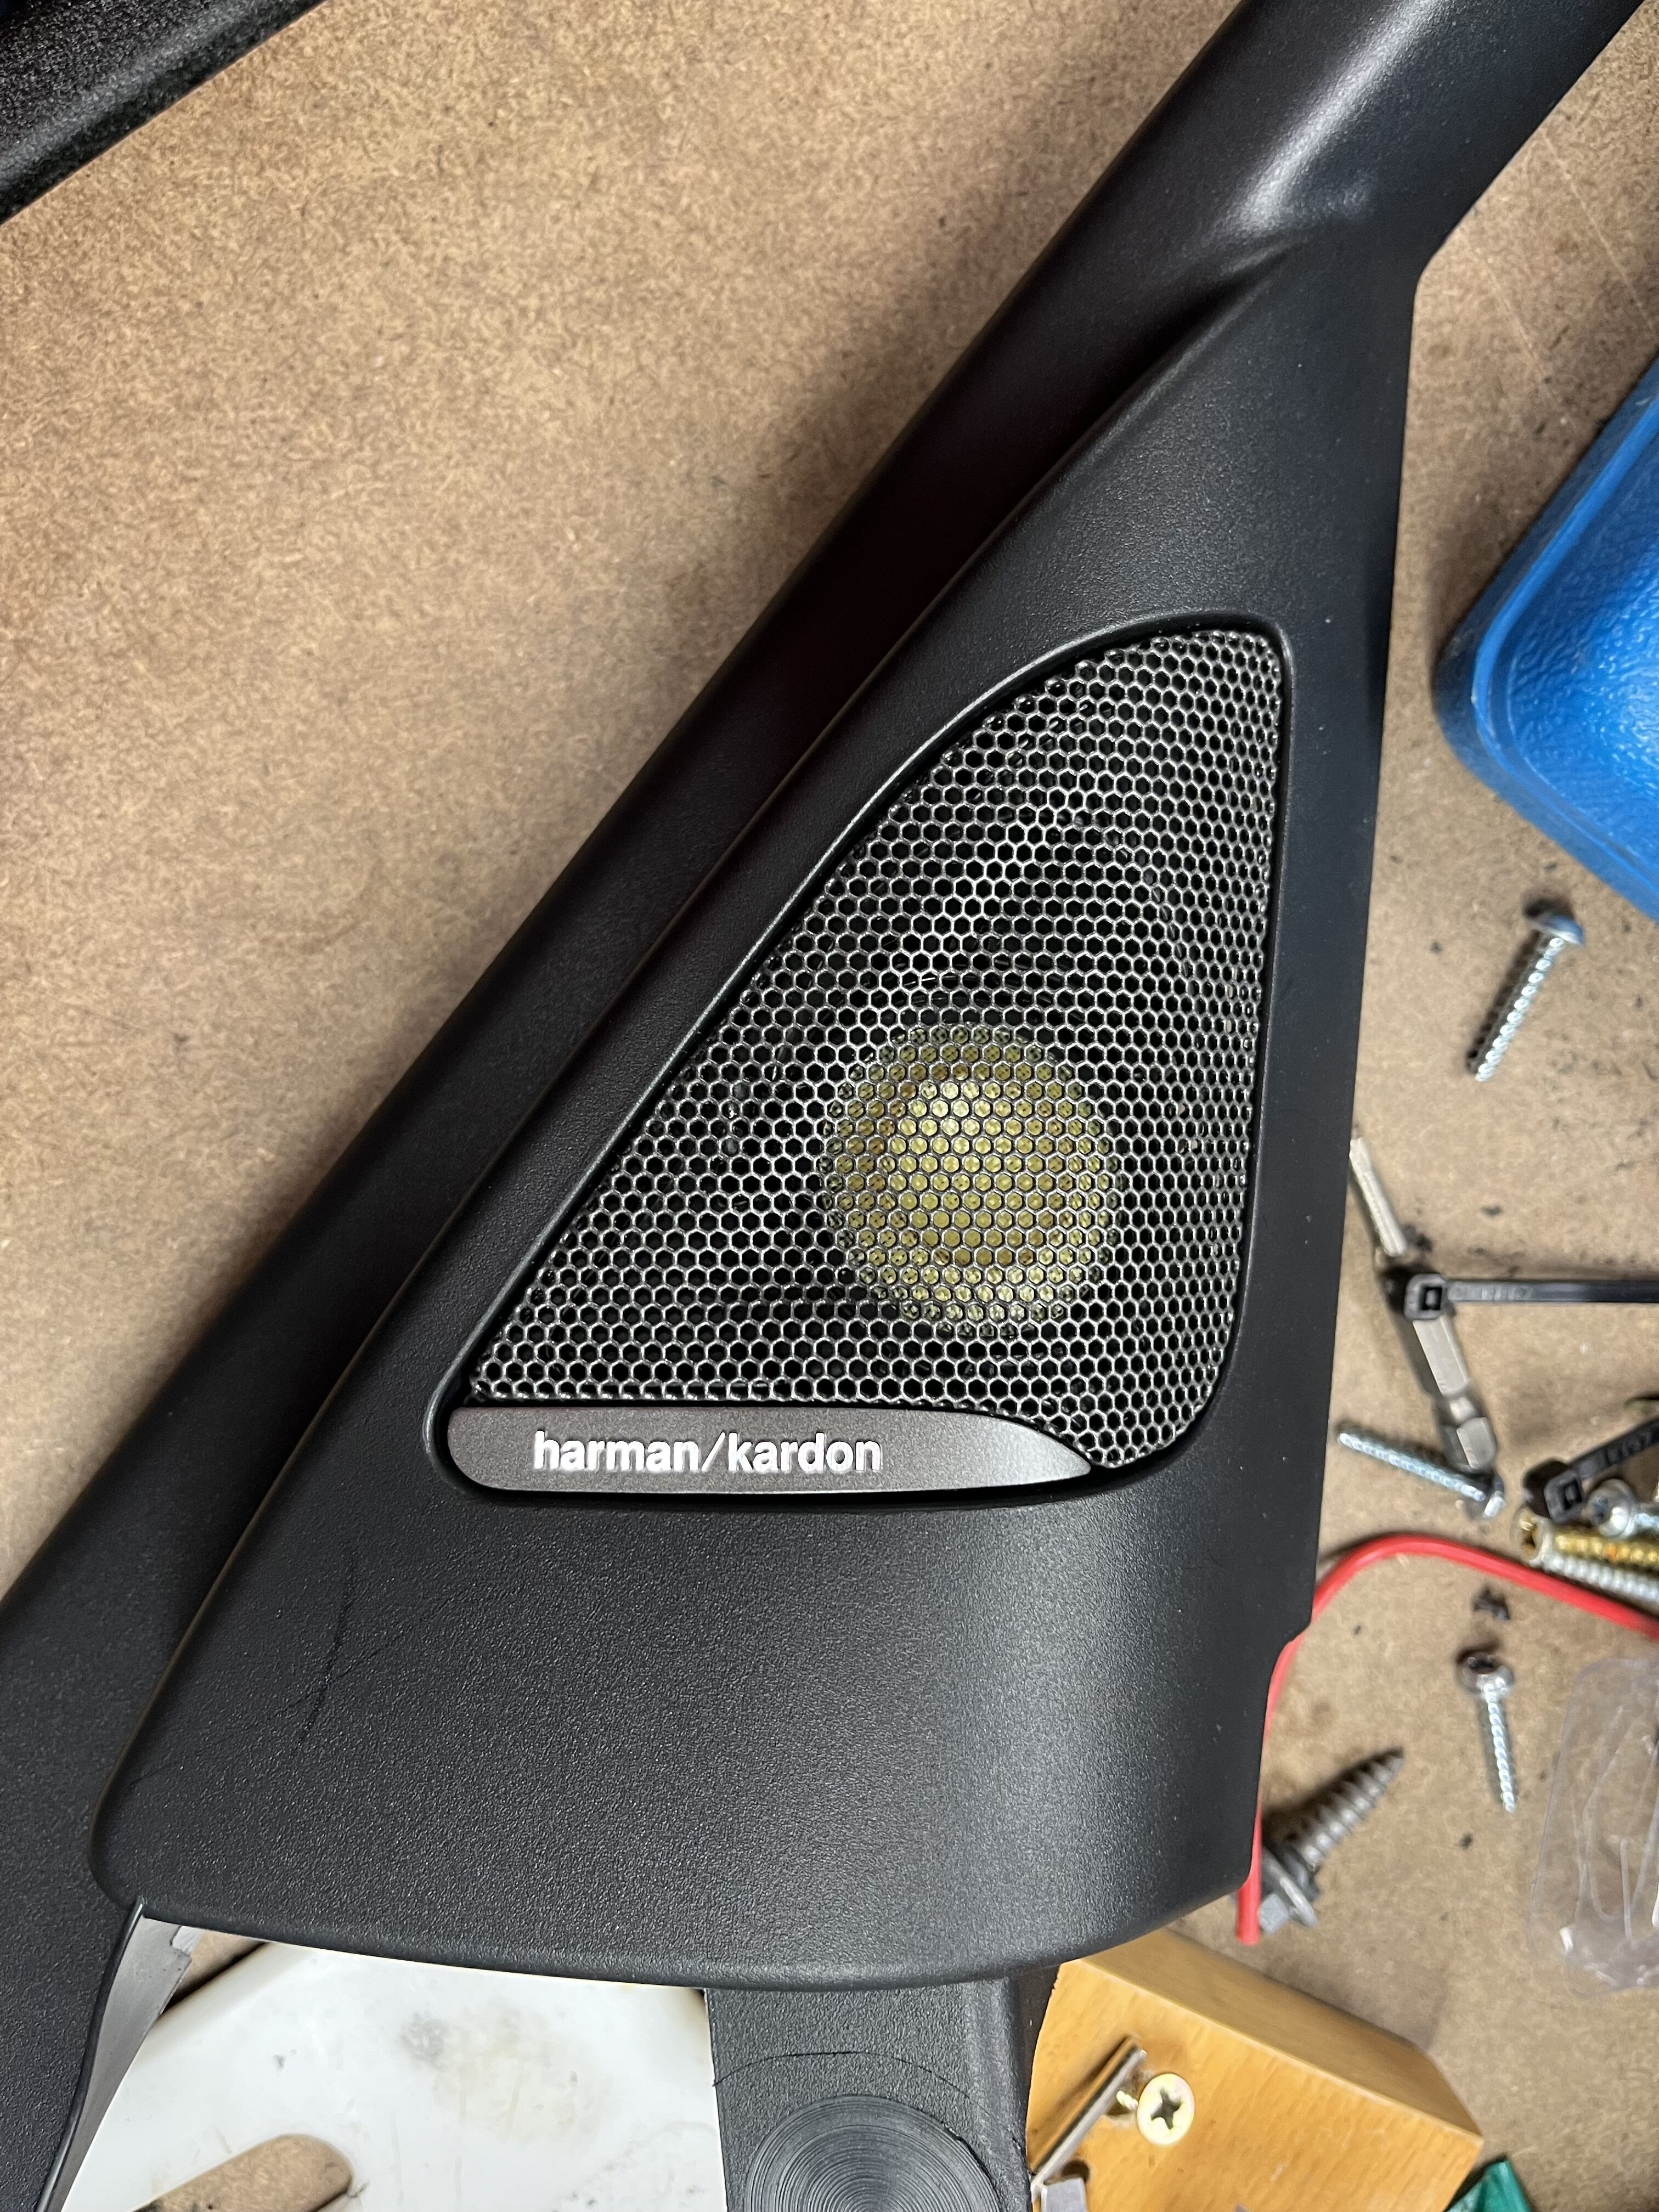
Next was mounting speaker and sound deadening. With the focal es100k series a speaker adaptor is required. With mounting speakers or speaker rings onto a metal surface you want a form of isolation between speaker and metal otherwise you get a ringing effect or distortion of the music. The 3d printed adaptors came with a weather seal that followed curve nicely. Created a gap for speaker wire and used crimp terminals on wire ends.
For the door deadening I used Dynamat which just happened to be on special at Repco. I went with a 5 sheet system so one for each door and half each around the underseat woofers. Nice thing about dynamat is that it’s odourless so the car doesn’t smell like a shoe factory post install.
Only covered the metal parts around the speaker mount area and put the majority on the door card. A quick knock test and the door metal was a bit quieter and the door card was really good.
Obviously full treatment of inner door and replacement of door membrane would yield better results but not prepared to go that far.
One door down , three to go.