BreakMyWindow 1870 Report post Posted October 26, 2022 points to evidence of some gorilla using a BFH in the past to try and separate the Balljoint. Quote Share this post Link to post Share on other sites
hunter 402 Report post Posted October 26, 2022 On 10/24/2022 at 1:36 PM, Eagle said: No one wrecking any on tm, facebook etc? I guess try Nick Weitz tomorrow but yeah Auckland will have plenty. Nick doesn’t have any either. There is one locally here in hams on TM. just saw a response from the seller. might go check it out this week. Quote Share this post Link to post Share on other sites
hunter 402 Report post Posted October 26, 2022 40 minutes ago, BreakMyWindow said: points to evidence of some gorilla using a BFH in the past to try and separate the Balljoint. Yes. I’d like to take a ballpoint separator to their squishy bits as a lesson on the right tool 😆 1 Quote Share this post Link to post Share on other sites
Eagle 1519 Report post Posted October 26, 2022 3 hours ago, hunter said: Nick doesn’t have any either. There is one locally here in hams on TM. just saw a response from the seller. might go check it out this week. Guy wrecking one or two on fb marketplace also. He's in in Cambridge https://www.facebook.com/marketplace/item/865003874429258/?hoisted=false&ref=search&referral_code=null&referral_story_type=post&tracking=browse_serp%3A200565c2-efb5-4ba7-9dee-0fcfeccc58ed 1 Quote Share this post Link to post Share on other sites
hunter 402 Report post Posted November 3, 2022 (edited) Big week for the car this week with a new wheel carrier, right lower control arm, rear carrier ball joint and integral links and Vanos oil line. Turns out my clicking was actually coming from 2 (TWO!) busted sleeves in the carrier. one on the lower control arm and one on the Thrust arm. massive thanks to @Eagle for the installation help. some other niggles have presented themselves such as the DISA needs a rebuild and worn sway bar bushings. Parts on order! in other project new, I have all the bits for my headlight rebuild on the Xenon’s, just need some free time to do it. Edited November 4, 2022 by hunter 3 Quote Share this post Link to post Share on other sites
hunter 402 Report post Posted November 10, 2022 (edited) Having alignment issues. Left is out whilst right is now in spec. Went to get the car aligned this today. To make sure steering was straight after the work above. worth noting that In my ownership I’ve never had an alignment go well first time. There’s always been corrections that need doing to ensure the steering wheel is “straight” on the road. in this instance It was noted by Coombes that the front shocks weren’t installed properly as they were out of rotation (how it was described to me)and needed to be set right before the alignment could be done. This was done and the car aligned. Now the left remains out of spec. Possibly due to “something bent “ FML. 🤦♂️ the left has more camber than the right hand front Advice from the tech is it’s possibly something at the top of the strut (strut top, replaced last year) or perhaps the wheel carrier, causing this or even the shock itself (also replaced last year) I haven’t had any accidents I’m With no real way of telling what could be wrong im left with the proposition of replacing more bits. It’s stressing me out tbh. Any advice or experience would be appreciated. I’ll upload the alignment sheets a bit later. Edited November 10, 2022 by hunter New alignment sheet. Quote Share this post Link to post Share on other sites
Eagle 1519 Report post Posted November 10, 2022 55 minutes ago, hunter said: It’s stressing me out tbh. Any advice or experience would be appreciated. I’ll upload the alignment sheets a bit later. Dont worry about it man, im sure its fine. Did they bang out the front camber pins to get some adjustment? Probably not. They were still installed when i worked on the car. I had a look at the front struts and they appeared fine to my memory, the L and R letters were aligned with the slots. One of the side of has a stupid BMW sticker plastered over the strut label with the L\R alignment marks, but you can still just see it. Maybe the other side was mixed up but you can have to look yourself to confirm or i can check it again if you like, maybe they are wrong about them being out of rotation, wouldn't surprise me. Yeah please post the alignment sheet Quote Share this post Link to post Share on other sites
hunter 402 Report post Posted November 10, 2022 (edited) 19 minutes ago, Eagle said: Dont worry about it man, im sure its fine. Did they bang out the front camber pins to get some adjustment? Probably not. They were still installed when i worked on the car. I had a look at the front struts and they appeared fine to my memory, the L and R letters were aligned with the slots. One of the side of has a stupid BMW sticker plastered over the strut label with the L\R alignment marks, but you can still just see it. Maybe the other side was mixed up but you can have to look yourself to confirm or i can check it again if you like, maybe they are wrong about them being out of rotation, wouldn't surprise me. Yeah please post the alignment sheet Yeah I mentioned it’s been looked at by someone in the know recently but they said they were wonky so I had them adjust it. wasn’t mentioned if the camber pins have been touched. concern now is the report above says it’s different left to right. So not happy about that and now being able to adjust it other than putting the right side back out of spec. But then atleast it would equal. Edited November 10, 2022 by hunter Quote Share this post Link to post Share on other sites
Eagle 1519 Report post Posted November 10, 2022 14 minutes ago, hunter said: Yeah I mentioned it’s been looked at by someone in the know recently but they said they were wonky so I had them adjust it. RH side maybe not have been mm perfectly centered but certainly visible via the slot and other side appeared the same to me, not going to change anyway. Yeah that camber is out a fair bit more than i expected. Yeah adjustment is very little on E39 iirc like .20' so probably not going to help in this case sorry. Has it always had alignment issues\steering issues since you bought it? Have you kept any older alignment sheets like before all the suspension work? I keep them for this reasons like this Quote Share this post Link to post Share on other sites
hunter 402 Report post Posted November 10, 2022 (edited) Yeah mate. It’s always been off spec one way or another. Here is an old sheet from after new suspension install. Last November. But they’ve always made a good job of makin it even in the past. Might be worth replacing the steering knuckle on the left too as the main areas mentioned in what could be wrong was knuckle, too hat , shock Edited November 10, 2022 by hunter Quote Share this post Link to post Share on other sites
Eagle 1519 Report post Posted November 10, 2022 Looking at that sheet: Yeah camber is technically out of spec but realistically not an excessive amount plus its even, almost looks like its been modified to a give close neg camber reading on both sides. Would be nice to have one before new part install then you'd know for sure, but comparing the two sheets i think we should do the L\H knuckle also as you suggested. I think the strut and mount are most likely ok. Quote Share this post Link to post Share on other sites
hunter 402 Report post Posted November 10, 2022 15 hours ago, Eagle said: Has it always had alignment issues\steering issues since you bought it? Have you kept any older alignment sheets like before all the suspension work? I keep them for this reasons like this Digging out my service history today, there were no alignment records provided prior to my ownership, had asked Coombes too, none there.... Quote Share this post Link to post Share on other sites
hunter 402 Report post Posted November 12, 2022 (edited) took the opportunity today while the family was out of the house to rebuild the flappy and "getting louder" DISA valve using the German Auto Solution (GAS) rebuild kit. This has some advertised design improvements of the aged OEM unit, so will see how it performs. The process was easy due to detailed (47 steps) instructions on the GAS website, hardest bit was cleaning the old seal out of the base of the unit. Edited November 12, 2022 by hunter Quote Share this post Link to post Share on other sites
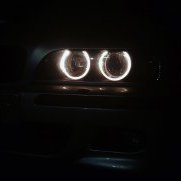
hunter 402 Report post Posted November 13, 2022 Xenon light project kickoff today. Separation aided by Vidal Sassoon. 1 Quote Share this post Link to post Share on other sites
hunter 402 Report post Posted November 17, 2022 (edited) Great day today, with a new Left-hand steering knuckle upfront the car is aligned to Spec again. probably the first time since I've had it (3 years) that has it been this "true". Big thanks again to @Eagle for the mechanical assist. The car is also sporting new sway bar bishes and brake lines. Few more maintenance items to replace before a big south island trip next year as well as completing the Xenon project Edited November 17, 2022 by hunter 2 Quote Share this post Link to post Share on other sites
hunter 402 Report post Posted November 27, 2022 (edited) Sunday garage session. Completed my xenon rebuild today. Light two was a bit more work as I had to replace one of the xenon reflectors. These aren’t available new but managed to get a second hand one from BM WORLD LTD the spare light put up a fight when I came to dismantle it. Being a 06/2001 build it uses epoxy rather than butyl to bind the lens to the body. Out came the power tools. Sorted. Refurbished light is all back together (tested at each assembly phase) and now awaiting an appointment to have paint protection film applied. Edited November 27, 2022 by hunter 3 Quote Share this post Link to post Share on other sites
hunter 402 Report post Posted December 13, 2022 (edited) Last week I had the lights protected by Obsessive Car Detailing in Auckland. Great team and you can't see the film unless you're really, really looking. I installed the headlights last Sunday afternoon (11 December) after the 24 hours waiting time for the protectant film to fully set in place. They look amazing both off and on. the Auto levelling works as it should and they are adjusted pretty well but will need some fine-tuning at some stage to ensure the aim is in spec. After a short drive in the rain on Sunday, I noted some very light condensation in the left-hand side. This dissipated pretty quickly but was concerning as it meant the seal wasn't weather-tight. I decided to remove the light, separate it again, and reseal it from scratch. Upon removal, I could see I hadn't been liberal enough with the sealant on this light and it had rolled rather than bulged when I had pushed the lens home. ( I've also read that Xenon and LED units don't get as hot as Halogens, so won't evaporate moisture to the same level. The sealant was heated up in small sections and scraped out using a plastic trim tool. An all-new more liberal bead of sealant was laid in the channel and the light reassembled. The light is back in the car now and working great, fingers are crossed that the condensation doesn't return as I don't fancy pulling it apart again This closes the lighting chapter in project E39. Edited December 13, 2022 by hunter 7 Quote Share this post Link to post Share on other sites
Eagle 1519 Report post Posted December 13, 2022 Yeah they look great Quote Share this post Link to post Share on other sites
hunter 402 Report post Posted December 22, 2022 Reviewing what is left to do on the car to refresh items that haven't been in my care, the main points are; - cooling system (except Radiator, which was replaced 18 months ago) - Vanos service/rebuild (got the big x8r kit) - PCV system - water pump - thermostat - water pump pulley - various temp sensors - related gaskets - fan clutch So as it 'tis the season I've ordered bits or bits have just been delivered for all of the above, thanks Santa 2 Quote Share this post Link to post Share on other sites
hunter 402 Report post Posted January 20, 2023 (edited) Due to time, skill, and wanting to spend time with the family this week while on holiday, Eagle gave me a hand to put the new cooling system in place. Thanks very much again Jarrod car is back and working perfectly. The only gremlins appeared lately is the fan not having reliable electrical supply the seems to be due to some compressed wires in the loom around the headlight. they have like the way they do since I’ve owned the car. This will need further investigation when it’s not so hot, and I can stop sweating into the engine bay to look at it. so, the only thing to do now is to drive the wheels off the car 😎 Edited January 23, 2023 by hunter grammmmar 2 1 Quote Share this post Link to post Share on other sites
Eagle 1519 Report post Posted January 20, 2023 (edited) An actual cooling system refresh - all hoses with new clamps and new fans blades to boot. Ive never replaced so many parts at once. Edited January 20, 2023 by Eagle 5 Quote Share this post Link to post Share on other sites
hunter 402 Report post Posted January 27, 2023 @Eagle this may be why the fan thermostat switch isn’t working. Exposed wires touching each other. Brown n brown with white stripe. Quote Share this post Link to post Share on other sites
hqstu 780 Report post Posted January 27, 2023 Peel back the outer tape etc, splice in new wire etc, check fuses and see what happens… 1 Quote Share this post Link to post Share on other sites
hunter 402 Report post Posted January 28, 2023 (edited) Yeah, it's a process alright. Today's effort is done, need a multimeter to do some testing, will pick one up this week. In other news, my Intensive washer system pump has blown, rust expansion cracking the housing and the rubber hose has been baked into plastic and fallen apart - lol always something. Edited January 28, 2023 by hunter Quote Share this post Link to post Share on other sites
hunter 402 Report post Posted February 12, 2023 A friend has kindly secured a set of E38 illuminates interior door handles for me. They will add a touch of 7 series class to the interior and a reasonably straightforward retrofit. Example, from E39 source, here; https://www.youtube.com/watch?v=9oUFqXCDDGg 1 Quote Share this post Link to post Share on other sites