Jacko 2077 Report post Posted November 30, 2010 (edited) Day 1. Stripped Cleaned up lots of sh*t, gearbox took a few hours, epic rear seal fail, im amazed it was still changing gear due to how rooted the shifter bushings are. Took two hours to get the engine/box and driveshaft out Pressed out and pressed in new control arm balls (which is sh*t scary at some points on a dodgy press - bollocks protection recommended) and got them and the front sub frame back in. Edited November 30, 2010 by Jacko Quote Share this post Link to post Share on other sites
Jacko 2077 Report post Posted December 1, 2010 (edited) Day 2 - Cleaned up engine bay, removed some rust and excess brackets Finished off engine, realised im missing a bold (doh!), Changed all gearbox seals. Had a play with whiteline bars. Havent quite figured out how to get stick bushing etc onto new gearstick (z3), the old gearstick has a circlip to remove and split the stick in half to remove it all, but the Z3 shifter seems to be one peice Decided I might as well change the tierod ends while im at it, gonna drive like a new car by the end of it all Edited December 1, 2010 by Jacko Quote Share this post Link to post Share on other sites
westy 614 Report post Posted December 1, 2010 Lots a work going on here, keep it up. Quote Share this post Link to post Share on other sites
thorburn 120 Report post Posted December 1, 2010 The shifter bushing twists out of its housing. Should be able to pop it in and twist it back up from there Quote Share this post Link to post Share on other sites
Jacko 2077 Report post Posted December 1, 2010 How do I get the upper cup on to the new stick? The old stick splits in two, does the Z3 one split in half in the same way? I cant find a circlip on it too split it like the original, looks to be all molded together with the rubber internals. Theres no way the metal cup that holds the spring/upper bush will go up over the ball from the bottom. Im not following ya sorry. Quote Share this post Link to post Share on other sites
polley 916 Report post Posted December 1, 2010 What size is the bolt? Ive got a box full of m50 bolts sitting around here. Quote Share this post Link to post Share on other sites
Jacko 2077 Report post Posted December 1, 2010 M10-150 I think. Its the big long bugger that goes at the bottom of the alternator with the loose nut on the end. It'd be the longest bolt on the engine by far, I cant find anything in the scratch box long enough. Chur! Quote Share this post Link to post Share on other sites
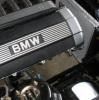
Jacko 2077 Report post Posted December 1, 2010 (edited) BBS - I think you might be thinking late model E30 shift bush, the cup bush thing is one peice. You can see my early style shifter in the photo. Mine has a two peice cup, lower piece slides over the bush in the bottom of the shifter, upper peice has a spring and a metal cup washer, then a locking ring which need to all go down from the top (hence the two peice stick) Maybe I just need to cut em to get em on, or chop and weld the shifter back together Edited December 1, 2010 by Jacko Quote Share this post Link to post Share on other sites
Lucan 196 Report post Posted December 1, 2010 Wish I was organised enough to get work done this fast!! Kudos Quote Share this post Link to post Share on other sites
Forrest 35 Report post Posted December 1, 2010 (edited) From memory, you can and will need to convert it to the G260 gearbox shifter mount in order to get the Z3 shifter to work. Without cutting and welding that is Edited December 1, 2010 by Brams Quote Share this post Link to post Share on other sites
Jacko 2077 Report post Posted December 2, 2010 (edited) Day 3, a few steps forward, a few steps back.... Got the shifter and box finsihed, put a slice in the upper bush to get it on the stick. Feels epic. So much tighter and sharper than it used to be! B23 Flywheel resurfaced and the face machined to clear block. Itsy flywheel for the size of the engine, a 4AGE flywheel is bigger! Took about 5mm of material off the block side of the wheel, which gives about 2mm clearance. Bit of a plastic bead and it is one secksie looking 26 year old flywheel! Got the rear subframe out after lots of swearing, RH CV spline was seized, broke two puller bolts in half trying to get it out, the tension was HUGE! Big ass rattle gun struggling to crank it up enough. Finished up the front suspension, and then happened to glance at the front LH strut. UH OH Spaghetti Oh! Thats a 3"+ crack running around the spring perch. Im sure the only thing holding the perch in one peice is the cone shape! Good excuse to do coil overs now. Decided to get the rust in the car fixed while its in the shop too. The Bill Gets Bigger... And Bigger.... Edited December 2, 2010 by Jacko Quote Share this post Link to post Share on other sites
polley 916 Report post Posted December 2, 2010 Yeah, I just cut the bush on the last PFL shifter aswell. I cant find that alternator bolt around here, Ill have a look at the rest of my parts when I get to hamilton if you want. Quote Share this post Link to post Share on other sites
Jacko 2077 Report post Posted December 2, 2010 Yeh man that'd be good, thanks. Quote Share this post Link to post Share on other sites
Jacko 2077 Report post Posted December 3, 2010 Lots of work, not much progress! Getting the rear subframe bushings out was an ass. Cant set them on fire due to location, so did it the hard way. Bit of a clean up and some paint and theyre ready for new bushes. Got clutch on and gearbox bolted up, only 4 bolts (the big uns) line up between the M20 260 box and M50. Quote Share this post Link to post Share on other sites
Jacko 2077 Report post Posted December 6, 2010 Had an absolute ass of a time getting the trailing arm bushes in. Getting the urethane bushes in is piss easy, but getting the steel centre peice in as well is "problematic" I nearly threw my toys! Dont ask how I eventually did it, as its mongrel as Replaced the two inner CV boots on the new half shafts, they had some signs of cracking and thought might as well do it now. Messy doesnt even begin to cover it! Got the whole rear subframe assembled with the new LSD. Looks mint! Forgot camera though. Very happy all the bushes are finally done now. Its a mare of a job, next time im paying someone to do that sh*t! Courier turned up with 4 new brake rotors, pads, and a set of BC gold coilovers (which actually look pretty good!) Should have the suspension nailed by tommorrow arvo, then the M50 goes in. All going to plan shes on the road this weekend. I hope this M50 is a good un Quote Share this post Link to post Share on other sites
APT 179 Report post Posted December 6, 2010 You wont regret the BC Golds !! Quote Share this post Link to post Share on other sites
Jacko 2077 Report post Posted December 6, 2010 Its gonna be interesting getting the suspension setup right, now that everything is adjustable (incl the rear sway bar) Need a track day Quote Share this post Link to post Share on other sites
Nobimmer 694 Report post Posted December 6, 2010 Nice work mate, completly missed this. Quote Share this post Link to post Share on other sites
Jacko 2077 Report post Posted December 7, 2010 (edited) Rear subframe ready to go back in, stripped the front struts ready for welding. Installed the clio booster, was piss easy to tweak it to fit the E30 master cylinder. Took a 1/4" drill bit, cut it down to the right length as a spacer (needs about 20mm to sit nicely in the master cylinder), ground a concave in one end, and convex in the other, sits in beaut and is nice and tight. Opened up the holes on fork to accept the E30 pin and bobs your uncle. Bolts in perfect with a slight tweak to the brake lines to line them up again. Edited December 7, 2010 by Jacko Quote Share this post Link to post Share on other sites
dubman 39 Report post Posted December 7, 2010 Nice work with the bushes, looking awesome. Quote Share this post Link to post Share on other sites
Jacko 2077 Report post Posted December 7, 2010 Feels WAY tighter than the original bushes. My trailing arm bushes were OKish, the main subframe ones were split in two though. Looking forward to seeing how it drives Car had a weird knock from the rear left around a RH corner when you jumped on the gas, I never found it, but im guessing it was the whole rear subframe moving haha! If ya looking for someone to install yours my mate with the workshop in Mt Eden has been watching (and laughing) as I installed mine, so has picked up on the tricks of the E30. He now rekons he could do it all in a couple of hours. I wanna see him do it, so getting him to stick to the few hour quote would be quite comical Quote Share this post Link to post Share on other sites
Jacko 2077 Report post Posted December 8, 2010 Rear end done, finally. The trick to getting the sway bar bushes in is two vice grips, a small one and a big un, and a prodger to line the bolt holes up. Crank it down as far itll go with the big un, clamp the little one on to hold it it in place, release big un, crank it down again, reclamp little one. Rinse and repeat as necessary while lining the holes up with the prodger until you can get the bolt in. First one took about 45mins to work out how to do it, second one took less than 5. Word to the wise, the diff needs to be out of the picture to get the sway bar in (doh) Unfortunatly one of my front struts weld failed NDT, so redo it and recheck it tommorrow, and then she'll be rolling again. Quote Share this post Link to post Share on other sites
thorburn 120 Report post Posted December 8, 2010 How much does NDT cost? Do you go through ATC Quote Share this post Link to post Share on other sites
APT 179 Report post Posted December 8, 2010 NDT testing can be done through Machine Part Welding in Penrose Quote Share this post Link to post Share on other sites
Jacko 2077 Report post Posted December 8, 2010 (edited) Between $120-170 for magparticle and certification for two struts. SGS in onehunga, they do it while you wait. Edited December 8, 2010 by Jacko Quote Share this post Link to post Share on other sites