Leaderboard


Popular Content
Showing content with the highest reputation on 06/20/20 in all areas
-
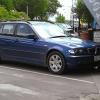
2 pointsFor the follow-up: Elite Detailing on Hania St sorted a quick, high quality and reasonably priced job (pic attached). Would recommend.
-
1 pointP&S must be getting good at doing M3 specs on 130s Ill have the alignment sheet somewhere, will dig it out tomorrow.
-
1 pointThe sheet’s laying in Auckland unfortunately. Car was aligned at P&S auto (great bunch of guys btw) and was very similar to M3 specs as per below. https://www.m3post.com/forums/showthread.php?t=192175
-
1 pointI highly recommend Chris’ suggestion with regards to the M3 alignment; totally transformed the feel of my car (coupled with the control arms). Steering feel and turn in is sublime!
-
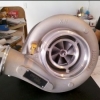
1 pointIt runs on vacuum, so no vacuum (ie engines not running) it'll be open. Common mod is to disconnect it and stick a golf tee in the hole to stop the vacuum leak, makes it sound tougher at low load
-
1 pointFor something that big, you could look into buying an existing shed or warehouse that needs removal, have it deconstructed, have the steel reloacted to your site, engineering, pour slab, re-errect. A friend of mine bought sheds from the airport years ago, cost him a pittance, he and a mate with a hiab truck made short work of it.
-
1 point
-
1 pointStocks trade price list, for Koni stuff especially, is twice the price of what we buy, freight and GST allowance included. Their pricing was pretty smart ten or fifteen years ago, but the advent of more on line choices out of Europe, UK and the USA has worked against them. We prefer Koni to Bilstein on our NZ roads, especially on the BMW and Porsche. All our Demon Tweaks stuff has come via DHL, Schmeidmann and Turners with FedEX.
-
1 pointDate: 18 Jun 2020 Distance: 261xxxkms 1. Replaced Tail Light Seals. Genuine BMW part #63211380419. Precautionary replacement; I've read that these are often the source of leakage into the boot. Given mine are thirty years old, I decided to replace them. Fairly straightforward; 8mm nuts (six of). I cleaned out the aperture, no rust (woohoo!), no evidence of leakage. The old seals were in pretty good condition and flexible, though compressed as you'd expect. I fitted the new seals, and applied a light smear of rubber grease to the mating surface. Job's a good un. Rust-free e30 tail light aperture. phew, relief. The left hand side was the same (more dirt built up), though I forgot to take a picture. A new Seal, in Wellington. Not the 90's pop star, though. (the right hand). A new Seal, in Wellington. Not friends with Trevor Horn, either. (the left hand). View of tail lights showing fixings - bulb carrier removed. Note the six 8mm nuts - and the clamping bracket at the outer edge. The loom and connector un-clip from the tail lights with two squeeze tabs. 2. Radiator Support Panel - surface rust remediation. Light surface rust at the bottom of the radiator support panel had been awaiting my attention. Jon reminded me about it while we had it in the air on Wednesday, and today was the day. A combination of wire brushing and emery paper saw to the prep. Normally I'd use rust converter; time (and low winter temperatures weren't on my side. We used Hammerite rust treatment paint (brushed on), after pre-heating the metal with a heat gun. This stuff works well to stop rust and provide a hard coating. Then an hour later (after more heat-gun to move warm air around and aid drying, I hit it with a coat of Rustolleum all-in-one Satin Black, after pre-warming the can in a water-bath. Another coat (pre-warmed metal) 50 minutes later. An hour later (after some more coaxing with the heat gun), it was pretty-well dried, at least to begin curing. Result. Yecch. Unsightly, though not serious. Prepped for surgery (in truth, this was post-paint). Protection. Though not of the Massive Attack kind. How can I resist? I'll monitor this, to ensure the remediation is solid. I may get some cavity wax (or just fishoilene) and spray it into the inside of the structure. If the external remediation shows any sign of continued rust, I'll re-do it in summer when there's better temperature and more time. A couple of disc rotor backing plates in suspension, today. I also painted the backing plates in preparation for the brake refresh job in a couple of weeks. Degreased, keyed with grey scotch-brite, two coats of Rustoleum all-in-one satin black 50 minutes apart (with some heat gun in-between). 3. General checks: - Rain-X'd the windscreen. Twice. It's going to be a very wet roadie this weekend. Pleased to note that cold starting is much easier with the new CTS from yesterday. Result!
-
1 pointForgot how gorgeous they were!
-
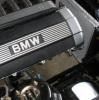
0 pointsUpdate. It dropped a cylinder yesterday completely. No. 3 coil pack died. Luckily I was 1km around the corner from a wrecker that had one. Still running like crap with the same code for the valvetronic motor. Ordered a new motor and gasket kit. 6 new coil packs. And a rocker cover gasket from ECS tuning. All for less than what bmw wanted for just the motor.