Leaderboard


Popular Content
Showing content with the highest reputation on 01/12/24 in Posts
-
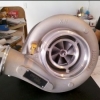
1 pointHARD ENGINE PARTS: EXPANDED HARD ENGINE PART RANGE As you may know, we have been specialising in BMW, Fiat, Alfa Romeo, Lancia and other brands for well over 25+ years, supplying NZ and NZ's premium Engine Rebuilders /Mechanics with premium and OEM hard engine parts for reconditioning, as well as general parts, from complete heads to gaskets and more. With our long-standing connections, we now have an even stronger network of some 60+ European and North American suppliers, rare parts clubs, collectors and manufacturers; if we cannot source these parts, the chances are they are no longer available! For Bimmersport members of course M20, M30 Valves, Rockers etc. have been common sellers. A note to members, also - we now prefer OEM suppliers, over previous Febi/Swag for such components, due to their sizing issues and unreliability. We now have a broader access to a wider range of products, including, but not limited to: -Big End / Conrod Bearing Sets -Cambelt / Timing Sets -Cylinder heads -Gasket Sets (Head and Engine) -Lifters -Main Bearings -Manifolds (Inlet / Exhaust) -Pistons/Ring Sets -Rocker arms -Shims -Water Pumps -Wet Sumps -Valves ...and more!
-
1 pointParking sensors are hard to get here now. The ones on my Merc have been on there at least 10 years now. They are active ones meaning they are always on. The passive or reactive ones last I read were no good. Have a go through youtube and watch some tests. Many barely work especially if placed poorly. Mine are almost on my number plates where most guns will target.
-
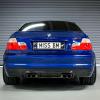
1 pointLads. It’s been a while. 8 years to be precise since owning a BMW that I elected to keep long term as a project car [E46 M3, Topaz Blue] But. V.3 is incoming. And if anyone that followed V.2 thread is still around, you’ll know how these threads turn out 😂 So, here’s to introducing V.3 Miss BM. 2020 M2 Comp, Hockeheim Silver, 12,000kms. After seeing and driving a 2016 M2 OG when launched, I knew then this wee machine would act as the true successor to the E46 M3, but due to my inability to win the lotto in a timely manner, it meant waiting around for an update (comp) and prices to drop. I will say they’ve held their value rather well over the last wee while… Have already gone into overdrive with ordering snazzy bits for the “pretty” factor, and of course sorting an exhaust… which should be done this week. Have opted for a Single Midpipe custom fabrication job by the team @ Hi-Power Performance/Fueled by Fab. Similar concept to the AA Single, but with more play in removing that twin turbo rasp… Eibach Pro-Kits arrive tomorrow - on the fence on lowering after an awkward scrape already just leaving the local sushi stop. and given the MISSBM plate has been inactive since 2016, it meant promptly ordering a Black/Silver to keep with the moving trends - arrives tomorrow but the OG is on for the interim. I’ve absolutely trawled the F87 forums but felt posting here was a bit more local and nostalgic 🤗
-
1 pointNZ BMW club. More of a family picnic type meet up rather than a drive by the looks for it.
-
1 pointSold Le Mans Blue Excellent condition LCI Manual 130i 102000km $12500 Quad Arqray exhaust E82 front bumper retrofit
-
1 pointI've got all of the OEM audio pulled out of mine, you're welcome to the stacker if it's useful to you. Worked fine 👍
-
1 pointGot 50% of the glossy trim on, great for showing people what a difference it makes lol. Getting the trim off the parts car was actually pretty easy, even that last panel that is known to be a pain. On my car however that part that Sreten in his E46 series struggled with had me struggling as well. I Got it off but the trim piece was a mangled mess at the end of it, I'm glad the glossy ones came off easily. I'll do the rest when I am back in Queenstown. Pretty big improvement though even people who haven't noticed any of the other things I did seem to think the glossy looks a lot better. Anyway got it all packed up and drove to Wellington yesterday, then ferry back to the south today. Wagon utility coming into it's own here.
-
1 pointNot going to lie, That comment along with your ones on the turners Facebook post honestly seem to be nothing but trying to scare people off so they don't bid against you... even if it fetched 20k (which is what I would say it will fetch roughly and wouldn't at all be surprised it it does), looking at what they have been listed for it would still be well worth it. Taking it for a $70 wheel alignment is not going to tell you much as it would greatly depend where (unlikely) it was bent. and the only way to do this *properly* is tramming it or getting a 3d chassis measure (needed as part for the repair certification process anyway). you can see pretty clearly, that the hit has gone all but straight in above the bumper and has just dragged the radiator supports back. the whole "write off" persona in this country is completely floored as a "write off" has nothing to do with what the actual damage is and is solely reliant on values. for someone who has a front clip floating about (seems to be alot floating around after seeing this) this is a dead easy repair. with the correct procedures in place (hence repair certification), even if you had to put a rail in it it is absolutely achievable and still worthwhile. In the situation of the above car, it likely isn't even a value issue. it's more likely an issue of available parts.... And before anyone jumps, We deal with repair certifiers on a daily basis putting insurance write offs back on the road. From small side swipes, to replacing complete chassis rails to chassis and body swaps TLDR.... if the new owner parts it out... they need their head checked
-
1 pointWhen I bought my car in 2015 the auto-dimming mirror glass in the rear view mirror had already failed. For the last 8 years I've been driving the car around with no auto-dimming and a big bubble in the mirror. Because I like to address things promptly I recently ordered a replacement electrochromic mirror glass unit. There are a couple of vendors who specifically supply these, I believe that MirrorJohn is the most well known. My research also brought up some discussion that the unit that these vendors sell is the same thing as is available for significantly less from the likes of AliExpress. I decided to take a punt and ordered from AliExpress. A week or so later this showed up: It looked the part. I did notice that the two layers of the glass were slightly offset and initially thought this was due to poor assembly. In actual fact it is intentional and is how the positive and negative rails are exposed and attached. The last few days I have gotten around to doing the replacement. It's a fairly easy process so long as you are careful and take your time. I wrote a DIY guide for another forum that covers the entire process which you can find here: DIY Guide - E46 M3 - Interior - Replace Electrochromic Mirror Glass Removing the mirror from the car is easy, removing the front bezel less so. The bezel is held on with a series of little plastic clips. With the plastic having become fragile over time, and BMW not designing the unit to be taken apart, the clips have a tendency to break. With the unit disassembled it's then just a case of removing the PCB bracket from the old mirror glass: And then preparing it for affixing to the new mirror. The existing writeups on replacing the mirror glass are then very light on this next key step which is to affix the PCB bracket to the new mirror. It's important to get this right so that the forward facing light dependent resistor is aligned correctly. I solved this by essentially reassembling the unit with the PCB in place. I then clipped the bracket to the PCB and used the front bezel to help align the mirror. Then it was just back to reassembly. As I mentioned I broke some of the clips when disassembling (this seems as though it's pretty inevitable). MirrorJohn's advice is to glue the bezel back on, but I didn't like that suggestion as it would stop me from opening up the mirror again in the future. So I decided to come up with something better. I used some brass pins from a 2.54mm PCB header and heated them up and embedded them into the stubs of the broken clips. I then used Araldite to secure them in place. This worked beautifully and the bezel clips securely in place. Very happy with the end result. The rest of the mirror reassembly is straightforward and in no time I had it back in the car. The auto dimming feature is really cool - the AliExpress unit seems to work well (not that I can talk to longevity) - I'm glad I didn't fork out more than twice as much for what certainly appears to be the same thing!
-
1 pointAnd now for today's edition of @Karter16's Random Side-Quests. On my to do list is the radio/nav. I've spent a lot of times working through various options and they all make me sad to some degree as there just aren't any options out there that give me the combination of OE-like and modern functionality that I'm looking for. The current trend in the E46 M3 world seems to be towards minimalism which is fine, but for practicality reasons I want to swap to a touchscreen nav setup that I can run CarPlay on etc. Ideally this looks OE-like, however having said that I'm not a fan of the dated "screen with buttons around it" arrangement that the original E46 nav had. Times have moved on with technology and it's unnecessarily pokey (in my opinion). That said I don't particularly want a big slab of a tablet stuck on the dash either. I'm currently tilting towards something like this Xtrons unit: This in itself makes me sad, as I would like to steer well away from the cheap electronics, but that said none of the main manufacturer's offerings enthuse me either. I'm inclined at this point to give the Xtrons a go. If it's rubbish/not reliable then I'll try something else instead. I'm technically competent so don't mind some effort to get things working well, I just need them to be reliable once I've got them setup... Anyway, back to my morning cup of coffee quest... Regardless of what option I go with, I want to make it feel as OE as possible. One aspect of that is replicating the original boot/splash screen used on the OE Nav. Now of course the OE Nav is more than 20 years old at this point and the original image is low resolution: I had a decent search on trusty google but was unable to locate a high-res reproduction of this image, so I decided to make my own. I actually used Figma to do this, which is a bit of a random choice, but I'm very familiar with it and its capabilities are more than sufficient for this project. Secondly Figma is a vector image tool, so what I'm producing here is a vector-based image which I can then use to output whatever resolution I like with no loss of image quality. Upscaling images by hand, especially graphics/text is part math and part subjective tweaking. To start with I take the source image, resize it to a suitable scale to work with on the canvas (I chose 1280w, large enough to see detail, without being too large and unwieldy). I then started overlaying the text and graphic components. When doing text I tend to use a contrasting colour so that I can get the sizing, etc. approximately right and see what I'm doing: Often the challenge can be working out exactly what font has been used. BMW made this nice and easy for me in this instance as they use their own "BMW Helvetica" font for everything 🙂 Once I figured out the exact size to set the font to, which is trial and error, I was then able to roughly put in the bars with the linear fades on each side. Getting the proportions of the fade right is again just trial and error and viewing at different zoom levels to judge what's right. I squared everything up and had an image that looked pretty much like the original, but higher quality. The next step is make sure it replicates the original as closely as possible which is a lot of tweaking and pixel shuffling. I find that the best way to do this is to take the image you've just produced and output it at the same resolution as your original image. This gave the the following: Looks pretty good huh! Actually when we look at the original and the reproduction side by side (repro on top, original on bottom) we can see I haven't quite got it right. In the reproduction the BMW text is slightly to the right. This is because I centred the text in the image between the fade bars which I made of equal width on both sides. Doing that on the face of it makes sense, but there's a good reason why BMW tweaked it slightly. If we look at this side by side (repro on top, original on bottom): We can see that BMW actually made the fade bars on the right hand side slightly wider than those on the left, this is to account for the fact that only the top right edge of the W extends fully to the right of the bounding box for the text, whereas the B on the other side is hard up against it. Although in my image the text is dead centre and everything is symmetrical, the perception to the eye is that there is more whitespace (or blackspace in this case) after the W than there is before the B. To account for this BMW actually made the fade bars on the right hand side come across to the left just a little bit. So let's adjust it: Getting closer, just a bit more to go: Now we're looking pretty good! It was a number of iterations to get to this point, but now things are looking pretty similar between the two. I'm happy with this now. All of that work means that I how have a fairly faithful, high res, reproduction of the original image ready to go for when I need it. This is pretty niche so I can't imagine anyone else really having any use for this, but if you do you're more than welcome - SVG and PNG downloads below 🙂 SVG E46 BMW Nav Splash Screen Vector.svg 1280w png 2560w png