Leaderboard


Popular Content
Showing content with the highest reputation on 03/21/17 in all areas
-
3 pointsUpdate #12 Couple of weeks since I last updated here! After epoxying the plates and waiting for them to set they looked like this: Notice how the epoxy has turned purple now that it's set! Cool visual indicator... Really pleased with how the epoxy process has gone. We got good beads around the edges of the plates, without too much excessive spill, meaning we got the quantity of epoxy about right. With the epoxy set, we next cleaned up the plates and excess epoxy with the die grinder, cleaned the surface with acetone, and then undercoated the bare metal surfaces with PA10. Once the PA10 undercoat layers were done, we seam sealed all the edges. This left things looking like this: I won't claim to have done the world's most professional job with the seam sealer, the finish isn't perfect, but it is completely functional. :thumbsup2: With the seam sealer drying, we moved on to pressing the new bushings back into everything. :taser: First up was the subframe. We used my friend's 6 ton press to press the subframe bushes - given it fit in the press. We used a turned brass puck to spread the load across the surface of the bushing. And hey presto! In short order, the subframe looked like this: :thumbsup2: The front diff bushing was a PITA. Used the same process as getting it out. Took ages. Glad I don't have to do it again for a long time. :raspberry: We did the upper control arms in the press as well - all pretty straightforward, and with the trailing arms we did the bushes and the ball joints using the threaded-rod approach. They all went pretty smoothly - no major issues. Didn't get photos of everything, but here are the trailing arms: And here's the subframe, with upper and (new) lower control arms reattached: It's all coming together :parrot: During the week, Dad got some colour-matched top coat for the now reinforced RACP mounts. Here's the end result - very pleased indeed with how it's turned out. It was a process that I wasn't planning on having to go through, but having done it I can say it went much smoother and easier than I was anticipating, and I'm really happy with the end result. There's a couple of touch ups still to do with the top coat, but really pleased with how it's looking. Then there was last weekend. Putting the fuel tank back in. It was a comedy of errors and circumstances (I didn't see it as a comedy at the time :facepalm:). Steps to repeat our experience on Saturday. Decide to put fuel tank back in car. Observe that the hose clamps you have on order for the fuel tank haven't arrived. Decide to go to automotive store to get short length of hose to replace the piece you had to cut to get it off, and hose clamps. Get to automotive store and discover entire retail area is closed due to power cut. Drive through terrible traffic (because of the power cut no traffic lights are working) to another automotive store. They didn't have what you wanted anyway. Go to racing supplies store who very kindly give you the piece of hose you need for free. Go to marine store who have hose clamps. Go home. Discover that BMW didn't note on the technical diagram that one hose clamp is smaller than the rest -_-. Go back to Marine store. Go home. Get fuel tank under car and start hooking everything up. Notice that a piece of hot weld has bounced across the garage and landed on fuel return pipe. Note that fuel pipe has hole in it. Decide that today was not the day for fuel tank installation. Give up. TL;DR: Sometimes it's better to just stay in bed. On the plus side, that's the biggest problem we've had this entire project. Dad picked up a 6x1 joiner on Monday, and hey presto, fixed. We'll wrap it in foam before reinstallation so it's not vibrating about. And here's a couple of pics of the fuel tank before the attempted installation, along with the replacement piece of hose. During the week Dad also assembled the rear brake callipers: Parts ready to assemble: Piston, seal and dust boot installed: Ready to install guide bushes: Guide bushes installed: So definitely getting there. This coming weekend will be fuel tank installation :shifty: and reassembly of the rear end. Meaning that the weekend after we'll be onto disassembly of the front end. :parrot:
-
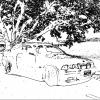
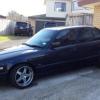
2 pointsSo here are some shots of me mucking around with the front. I wanted to change the slightly 'got hit in the back of the neck bulging eyes look" of the original. I also really like the old Jensen Interceptor, old Aston 70's look, old Celica and Avenger for that matter I guess. So I took off the front bumper cover and bumper itself. I did some other cutting, grinding and welding stuff that...lets not talk about that. I removed the std indicators. I moved the light units apart AND back, with a meccano set sort of philosophy. The lights are now where I wish the to be. Oh I also like Camaro's...I mean who...nevermind, so I bought a 1967 Camaro lower valance and the lower side valances as well. Many swear words and the the worse birdsh*t welding you ever did see happened. Some bits of metal from up the road. Some fibreglass and stuff and after many moons I got it where I kinda wanted it. I wanted lower indicators and saw these 63 Falcon jobbies, so did a bunch of electrical things and more grinding and cutting and measuring. The bumper is 'pointier' than how is should be (Camaros are almost flat in front compared to this) but was necessary to have it fit right, and its wide as a house. The lower side valance's didn't fit well at all, and I could have almost done these from nothing. I had to make the bonnet pointy too to mimic the bottom so go some more steel, and fibreglass and bog, and just did a quick paint job. No point being foose cause I still have lots to do and may as well do it proper once I have done all the mods. So the lights work, the guys gave it a wof and I was rapt! I still have to do a custom grille and the sides on the original fenders still have their natural arc...which I will do next and tidy it up so it looks...not so rough! Sometimes I think I shoulda just left it, and then I think nah, no one will have another E34 like mine, and I think it will look ok to me anyway once I am done. The E30 grilles that cover the headlights will be the beginning of the new grille I hope, but still not sure how or if the kidneys will look, but I think the kidneys will be monsterous to work...but hey I will see once I have time to do some calculations. I want them 'floating' so watch this space.
-
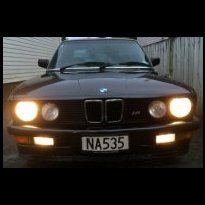
2 pointsHi Olaf Just read your post, Sorry I was the one who brought the 535D Touring in question Had looked at it a couple of time and decided to finally take the plunge -Terry
-
2 points
-
1 pointHello - My names Dan. I'm from Wellington. And while I don't quite own a BMW yet, I'm on the hunt! I've been lurking around the forums for a bit, so I thought I better sign up and introduce myself. Anyway, hopefully one day I can fully join the ranks. In the mean time I'm enjoying checking out some of the awesome projects you have underway. Cheers Dan
-
1 pointeasy enough to remove and see if they are broken , quite common
-
1 pointThats impressive. I'm all for doing something unique.
-
1 pointI managed to get away with 4 tokens - $8.00. 1:30 per token is a bit of a sh*t. 1:45 would be fairer, without being over-generous. I sprayed my wheels first while I waited - before driving in - and scrubbed them with my Auto Glym Wheel Brush, then did pre-soak, high pressure soap, foaming brush, then high pressure wash. Take your own towel or chamois (I forgot). My wheels aren't looking flash; usually rinsing plenty with clear water before the cleaner dries gives me a good result. Given it's a site that's bashed by the predominant northerly, some days of the week it'll be a real sh*t in there! EDIT: overall I get a much better result at home, but it takes four-five times longer.
-
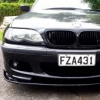
1 pointtoday was BMW action day for me. e46: was in at Page European to resolve an odd rattle at around 3000rpm. Turns out it was the bushes where the airbox mounts to the inner guard. handbrake adjusted. And it's going back in next week for the diff mounts. e60: washed it. used that new SmartWash in Newtown. Seemed okay for a quick wash when you're in a hurry, probably a little better than my other fallback, the touchless carwashes they run at Caltex stations. other than that, waiting on suspension (OEM) parts...
-
1 pointHutt City European in the Hutt and Page European in town are both good. I take my M3 and the Audi Q7 to either of them.
-
1 pointMarch update More photos Oil catch can installed. Many thanks to Aronn Also noticed 90% of texted from previous posts are missing.
-
1 pointWell done on the purchase Pete, anything I cant or don't want to do, I take to Peter at Motordrome in Cuba Street, he is a qualified BMW Technician & used to work at Shellys when I was there Barry
-
1 pointGood to see you're making progress here and there
-
1 pointSorry about the pictures not sure what happened there heres a few different ones