Leaderboard


Popular Content
Showing content with the highest reputation on 12/15/23 in Posts
-
3 pointsI'd like to see red light cameras rather than speed cameras. Not sure what its like in other parts of the country but here in Christchurch, its a plague
-
2 pointsIt's my personal mission to get out of the blocks hard and fast on green lights and simultaneously get on the horn for those dirt bag light runners 👮♂️👍
-
2 pointsFellas can we stop doing this?
-
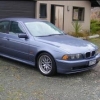
2 points09 Dec 2023. 187879kms I'd dusted off the e60 about a month ago, took it for a run to north wellington to give her a quick bath, and charge the battery. Certainly sparkled up, though wasn't so happy running (I am wondering if that was the fuel stabiliser it was taking exception to?). I knew we had a remaining code to address - for the variable intake manifold. The actuator is at the back of the manifold, and up against the firewall. New intake manifold gaskets, and a replacement Intake actuator were the order of the day. 1. Intake Manifold Actuator Replaced Begley Motor Works performed their magic, replacing the intake manifold actuator, 90km road test, it was running beautifully. I collected the car and had a very smooth trip back to Wellington. Man this car is good on the open road! I wondered what to do with it next? Didn't take long to figure that one out - I took it on a BMW Car Club run over to Cape Paliser and back. It ran beautifully there and back... after lunch it threw a CEL, and had some minor misfire. The CEL cleared itself next day, and car running brilliantly. I've checked the codes and cleared them (one thousand thank yous mate - you know who you are)... and the car is fabulous. A wash tomorrow and it's up for sale. Sad to see it go, though weighing up the cost of the garage I rent for it, and the use it gets, it'll be seeking a new loving home.
-
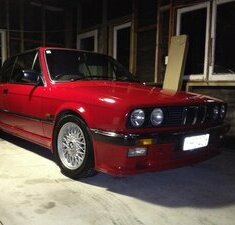
2 pointsDate: 11-13 Dec 2023 Distance: 209359 kms 1. Headlamp Lens Replacement My lenses were looking pretty average. I scored some from @Autoglym ex pick-a-part (thanks man!) with very nice lenses. I cleaned them up and got new seals. Jon did the rest - made one great out of two, where wiring was aging or plastic fatigued from years in the sun. Fig 1: at 21.5 years old and a number of polishes/restoration wipes, better to replace. Surprisingly still passing VTNZ WoF. Impaired vision, IMHO. Fig 2: 21.5 year old Xenon choke wiring. Beware! Fig 3: After. Much better night vision. Oooh as I said vision, twice... how about a musical interlude? 2. Brakes New flexi-hoses front and rear. Front calipers sandblasted and painted, new pistons, seals, slider pins, boots. Full brake fluid flush. The old pistons were pitted. It's stopping much more nicely now, I think more of the stopping was acheived from the back! Fig 4: a dirty ol' front e46 325i caliper Fig 5: Sandblasted, painted, ready to re-kit with new pistons and seals. 3. Diff Diff service. Turns out the diff is a little tired (crownwheel and pinion) so looking for replacement 3.46 e46 medium case. Cleaned, replaced output seals (pinion seal okay), reassembled with new drain/fill plugs, BMW sealant, and Diff Oil. New main bush. Remember folks, you'll want front header-to-exhaust manifold gaskets (2), four exhaust bolts, and four exhaust nuts for this job, as you need to drop the exhaust. Fig 6: Genuine BMW rear cover sealant, Input and output seals, Diff Mount Bushing, Fill and Drain plugs, Exhaust Bolt, Nuts, Gaskets. Fig 7: Before Fig 8: "Good Bush" Fig 9: Ahh, on it's way back together. Jon also drilled out a broken bolt, helicoiled and found a replacement bolt for Diff Heatshield. 4. Transmission Oil Pan Bolt Replaced a quick fix bolt with a genuine ZF bolt, so now all ship-shape and Bristol fashion. During Trans service back in January, we’d spotted a couple of dodgy ones left behind by a previous Te Aro workshop that will not be named… Exceptional Service at Begley Motor Works, Marton. Service photo credits: Jon Begley (many thanks for the re-use mate). We've had this e46 11 years 9 months, and she's humming. I have a list of items for preventative maintenance that we'll tackle in the new year. Looking at the diff photos, it's time I spent a little time beneath it with PPE, wire brush, rust converter and epoxy rust-seal paint, before those scabs of surface rust around the subframe get out of hand.
-
1 pointAnd now for today's edition of @Karter16's Random Side-Quests. On my to do list is the radio/nav. I've spent a lot of times working through various options and they all make me sad to some degree as there just aren't any options out there that give me the combination of OE-like and modern functionality that I'm looking for. The current trend in the E46 M3 world seems to be towards minimalism which is fine, but for practicality reasons I want to swap to a touchscreen nav setup that I can run CarPlay on etc. Ideally this looks OE-like, however having said that I'm not a fan of the dated "screen with buttons around it" arrangement that the original E46 nav had. Times have moved on with technology and it's unnecessarily pokey (in my opinion). That said I don't particularly want a big slab of a tablet stuck on the dash either. I'm currently tilting towards something like this Xtrons unit: This in itself makes me sad, as I would like to steer well away from the cheap electronics, but that said none of the main manufacturer's offerings enthuse me either. I'm inclined at this point to give the Xtrons a go. If it's rubbish/not reliable then I'll try something else instead. I'm technically competent so don't mind some effort to get things working well, I just need them to be reliable once I've got them setup... Anyway, back to my morning cup of coffee quest... Regardless of what option I go with, I want to make it feel as OE as possible. One aspect of that is replicating the original boot/splash screen used on the OE Nav. Now of course the OE Nav is more than 20 years old at this point and the original image is low resolution: I had a decent search on trusty google but was unable to locate a high-res reproduction of this image, so I decided to make my own. I actually used Figma to do this, which is a bit of a random choice, but I'm very familiar with it and its capabilities are more than sufficient for this project. Secondly Figma is a vector image tool, so what I'm producing here is a vector-based image which I can then use to output whatever resolution I like with no loss of image quality. Upscaling images by hand, especially graphics/text is part math and part subjective tweaking. To start with I take the source image, resize it to a suitable scale to work with on the canvas (I chose 1280w, large enough to see detail, without being too large and unwieldy). I then started overlaying the text and graphic components. When doing text I tend to use a contrasting colour so that I can get the sizing, etc. approximately right and see what I'm doing: Often the challenge can be working out exactly what font has been used. BMW made this nice and easy for me in this instance as they use their own "BMW Helvetica" font for everything 🙂 Once I figured out the exact size to set the font to, which is trial and error, I was then able to roughly put in the bars with the linear fades on each side. Getting the proportions of the fade right is again just trial and error and viewing at different zoom levels to judge what's right. I squared everything up and had an image that looked pretty much like the original, but higher quality. The next step is make sure it replicates the original as closely as possible which is a lot of tweaking and pixel shuffling. I find that the best way to do this is to take the image you've just produced and output it at the same resolution as your original image. This gave the the following: Looks pretty good huh! Actually when we look at the original and the reproduction side by side (repro on top, original on bottom) we can see I haven't quite got it right. In the reproduction the BMW text is slightly to the right. This is because I centred the text in the image between the fade bars which I made of equal width on both sides. Doing that on the face of it makes sense, but there's a good reason why BMW tweaked it slightly. If we look at this side by side (repro on top, original on bottom): We can see that BMW actually made the fade bars on the right hand side slightly wider than those on the left, this is to account for the fact that only the top right edge of the W extends fully to the right of the bounding box for the text, whereas the B on the other side is hard up against it. Although in my image the text is dead centre and everything is symmetrical, the perception to the eye is that there is more whitespace (or blackspace in this case) after the W than there is before the B. To account for this BMW actually made the fade bars on the right hand side come across to the left just a little bit. So let's adjust it: Getting closer, just a bit more to go: Now we're looking pretty good! It was a number of iterations to get to this point, but now things are looking pretty similar between the two. I'm happy with this now. All of that work means that I how have a fairly faithful, high res, reproduction of the original image ready to go for when I need it. This is pretty niche so I can't imagine anyone else really having any use for this, but if you do you're more than welcome - SVG and PNG downloads below 🙂 SVG E46 BMW Nav Splash Screen Vector.svg 1280w png 2560w png
-
1 pointI launch this POS at them: OK... "Launch" might be a bit strong... but it sure scares people when it's converting petrol into noise and aimed directly at them 🤣
-
1 pointPretty sure they’ve dropped the price substantially, I think it was $8.5-9.5k.
-
1 pointall depends on your use case, and how much you're willing to forgive Wolfsberg for intentionally misleading and gassing humans... 😎 They're both a nice drive. Your $6k discount is directly attributable to Dieselgate!
-
1 pointhttps://x.com/BoostedBoiKyle/status/1733188049750626669?s=20
-
1 pointWhat about this? https://www.trademe.co.nz/a/motors/cars/mercedes-benz/c-220/listing/4457291713
-
1 pointInsufficiently soft target.
-
1 pointQuick mid-week update - As I mentioned in my last update I haven't yet routed the wiring for the mirror controls to the centre console location. The reason for this is that I don't want to have to cut/hack into my wiring harness for a modification that I may feel differently about in the future. So that I can avoid cutting or tapping into the existing wiring I ordered some connectors so that I can make a harness extension that connects to the OE plug sited in the drivers door. These connectors arrived today: Now that I have these I can install an extension from the centre console to the door and put these connectors on each end and just plug it all together without any damage to the main harness 😎
-
1 pointSold again haha
-
1 pointYeah it's pretty stupid ey. Took me a while to put 2 & 2 together but if the bolts start to protrude at 6 turns in then even with longer bolts you won't get more than 6 turns of thread engagement. OE hubs so this is how it would have rolled out of the factory. Good enough for BMW but not for cert, apparently. But I'll keep my mouth shut on that one.
-
1 pointMy order from EMIAuto arrived earlier in the week after a bit of a delay at Customs (turns out if you read the invoice properly and pay the correct amount it tends to speed things along). The most exciting thing in this package is the sound insulation for under the rear seat. As I mentioned previously this is a newer item that at some point BMW has used to replace the original butyl item that came from the factory. I've been looking forward to receiving this to see what it's like and to check fitment. It does not disappoint! It's a nicely made piece, it's a soft felt on the outside with firmer layers inside to hold the shape, with the sound material in the core. I haven't got the scales out yet but its weight feels to align with what RealOEM quote. As you can see in the photo it comes with cutout flaps for accessing the fuel pumps. Nicely the cutouts aren't quite complete so there's some little tabs that hold it all in one piece, that you can easily cut with a knife if you need to access the fuel pumps. I haven't done a full fitting yet, but I did have time the other day to do a quick check, and it looks to fit well. The only thing I wasn't able to completely validate without removing the rear seats completely was whether the isofix fittings fit through the existing cutouts. I'll check this when I have some time to get everything out of the rear bench. The other exciting parts of the package were the bits and pieces that I needed to install the CSL centre console that picked up a couple of months ago. I had some time yesterday in between renovations and plastering and got to work removing the existing centre console. Step 1 being to remove the driver's seat. Removing the centre console is straightforward, you just have to remove enough of the trim pieces and inserts to get to the screws holding the rear of the console down. My console had, at some point, been leather wrapped, and whoever did it actually did a nice job of it, it looks and feels good and is much better that what I imagine the soft-touch plastic would look like by now. The flip side to this is that some of the inserts were a bit difficult to remove due to the extra thickness of the leather. On the inside of the console there is also a fair amount of over-spray of the adhesive that they used to affix the leather (not that this affects the end result). Once the gear selector trim is lifted and unscrewed as well, lifting up the handbrake boot means you can then remove the trim at the back of the console and then lift the whole thing up and over the arm rest. This then means you can access the bolts for the arm rest. Once the three bolts are removed (being careful not to lose the metal collars which are loose) the arm rest can be removed. I took this opportunity to then give the whole thing a good vacuum. The module resting on the carpet is the "genuine bluetooth module" which, given I don't use it, I took the opportunity to remove it and wrap up it, and the connector for the rear ashtray light in the soft wrap that the phone wiring is wrapped in. At the same time I installed the new bracket for the CSL/arm rest delete console. With this done I was able to get on to the exciting bit of fitting the console! Prior to this, and not photographed, I took the mirror control and hazard light switch units and spent some time going over them with some wet cotton buds to clean them up and get all the dust and grime out of them that tends to accumulate over time. The other thing that I needed to do as part of fitting the console was make some space for the depth of the hazard light switch by depressing the carpet underneath it. If you don't do this the carpet will offer too much resistance and pop the hazard light switch back out again. With the console in place the next thing was to replace the gear selector trim with the new titan shadow trim I ordered. The car was originally spec'd with this, and at some point it has been replaced with silver trim, which is in excellent condition and very nice, but I wanted to go back to the original colour. While I was doing this I gave the window controls the same cotton bud treatment. It was at this juncture that I discovered that what I thought was a spec of cola on one of the buttons does in fact appear to be collateral damage from when the contents of the rear view mirror leaked out (prior to my ownership). This is a shame as it is corrosive and can't be cleaned off the switch, so I'll need to order a replacement. Fortunately it has only affected one of the two switch units. Once that was done I was able to reinstall the trim. Almost done! Last thing for the console was the installation of the new boot. This is straightforward, just use the factory procedure of cable tying it on and then fit it in place! The last work for the day was to replace the 3 other dash trim pieces. This is easy if you have a set of trim removal tools and in no time I was done and had the driver's seat back in. I'm very happy with the end result. The CSL console very much suits the seats. I have a couple of things left to do to finish that particular project entirely. 1: The mirror control switch currently isn't wired in. With everything that I do with this car I want to make it easily reversible (why I don't know as I intend to keep the car for a long time) so rather than just hacking the existing wiring I'm working on building an extension harness to extend the wiring from it's current location in the driver's door back to the centre console. I wanted to actually move the console and check the mirror control switch before I ordered the parts for this side quest. 2: I need to order some foam-backed 9002 Alcantara to manufacture a copy of the OE tray-insert in the centre console (since these are NLA). Speaking of NLA, the titan shadow trim I ordered was manufactured in late 2004! Which is interesting and really highlights that with these cars now being 20 years old, when the spare parts run out a lot of these sorts of projects are going to become astronomically more difficult. Anyway, a good little project for a Saturday. When I get the time, Christmas probably, I'll get into the next steps on sorting out the rear seat!
-
1 point