
Herbmiester
-
Content Count
1858 -
Joined
-
Last visited
-
Days Won
26
Everything posted by Herbmiester
-
Ron the fact is they aren't but they use forced induction so it's a moot point. And as for sound the M4 is widely panned for having a crap sounding exhaust note, they even pipe it through the speakers to try and enhance it while the Camaro is praised for sounding great. Your swimming against the tide yet again Ron.
-
Yet again Ron this was the question and the answer yet again is yes because it increases the KW/KG ratio so any engine that increases the first and does not increase the latter can be considered a performance engine, why because it increases performance, sorry Ron I am trying to make this simple for you. I find your statement about the E36 not being interesting when you own one rather contrary. It's a very well regarded chassis and with a jump from 190 to 400 Hp I would think that would make it very interesting indeed. I certainly thought so when I drove it. BTW M50 198 kg M52 177 LS1 181 Kg. The V8 sits further back in the chassis help front to rear balance. So why is an engine that is as light as the engine it replaces but doubles the horsepower not a performance engine? You're not the only one here who has driven fast cars Ron, but I suspect your scope is limited if you haven't spent time with one of the modern big CC NA engines. It's not the same as an Alfa let me tell you that much.
-
Drive an LS powered E36 and you will understand. KW/KG is the real measure.
-
Yes Re003s again. straight up its a good tyre and then you look what price you can get them for and it's a no brainer. sold in the US as the firestone firehawk. very good reviews.
-
E46 316Ti to 330ti swap , shopping trolly to track car :)
Herbmiester replied to BM WORLD's topic in Projects
Great stuff thanks for posting. -
No photos sorry but did see a new M2 and a Ferrari 458 not sure which variant. Both in Upper Hutt, Bogans with money.
-
They certainly do retain their value, especially the sporty ones.
-
Yep I almost regret putting my 330ci up for sale such a good car. I am starting to find the love for my E92 but its not the advancement over the E46 I thought it would be.
-
Actually no. Only a few really high performance engines mostly from the elite manufacturers can make power at or past 8000 RPM.That trend is now over the high revving NA engine is in decline. Forced induction is taking over. Yes Ron we know you dont like the LS too few valves and made in the wrong country but when an LS engine (Read Camaro) can hang with an M4 and a Camaro Z28 can lap Willow Springs quicker than a Nissan GTR then I fail to see how the engine is past the use by date. Car designers call it packaging and the LS packages very very well. Anyway it would seem that screaming NA engines are the ones that are past their use by date. BMW has abandoned them and even Honda has finally given in to Turbocharging, Audi are persevering with the V10 but these are hardly everyday engines. Looks like high revving NA engines are actually the ones past their use by date, Now I dont say that with any glee as I appreciate the sound they make and the engineering involved. The S54 would still be one of my favourite engines right up there with the 4 inch bore alloy LS engines.
-
Sure but why not have the best of both worlds, an LS screaming at 6700 RPM while still giving massive amounts of torque. Just look at BMW the evolution from M50 to M54 was all about torque. Vanos is a torque increasing technology. BTW I dont know how many VTEC engined Hondas I have beaten at the traffic light drag strip because they take to long to get into the groove.
-
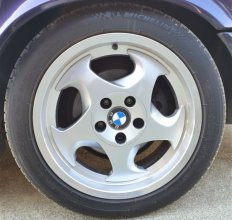
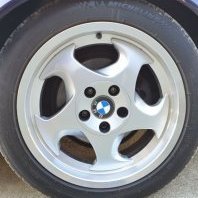
Rear is the same -1 mm as factory but is closer to the shock as its a 9 inch rim as opposed to an 8.5. May run a spacer to get it out a bit. Don't know much about spacers but 5mm would seem to do it. I could run a 265 rear but as I have some good 255's I will just stick with them. The 225 on the back looks crap I agree and makes it hard to get a real idea. The alloys themself I like though.
-
Yes torque is what road cars need, always has been. As to KW/L yes it does indicate engine efficiency but not necessarily fuel economy, which by the way was not originally part of this discussion. I will say though HP/L in an NA engine is as much an indication as to how high an engine can rev, more revs more power but less driveability. In a road car gearing and low RPM torque have just as much if not more of a bearing. That said the Chevrolet Camaro with its 6.2L engine gets marginally better economy than a BMW M4 and it weighs 80kg more that the M4 and makes more power and torque. Performance wise they are almost identical.
-
Actually Ron I think my dissertation answers the original question correctly.
-
I find the hp/L a bit of a of red herring especially in road cars. A performance car by default is all about power to weight. (Ignoring chassis for the sake of this discussion). So this is really only relevant if you are racing in a class that has a cc restriction. A performance engine could be considered any engine that elevates your cars performance without unduly affecting the weight? Better power to weight yes sure I'll take that If you pull up to the traffic light drag strip give it a go and lose, do you say to your mate "yes well I won because I make more HP per litre than him"? No I dont think so. The measure should be HP per KG and HP per external volume. The classic NA engine for me is the GM LS series, specifically the alloy block versions. They are compact engines so if the measure was hp per cc of external volume they beat the Euro V8s. The BMW's have more HP per litre but not necessarily more HP. What about HP per kg? Again the OHV LS engines do very well here? What About torque per kg. Hard for a smaller NA engine to win that race. The OHV design will reach its limitation when it comes to revs. 7000 is an upper limit for sure while a OHC design can add 1000-1500 rpm to that level and continue making power. The reality is that in road cars that RPM difference is more like 500 rpm. BMW made a 5l V10 that made 500 HP, GM made a 7lt V8 that did the same. The GM engine is smaller and lighter. (65-75lbs) with a lower centre of gravity. So I think that HP in itself can be the measure and as for turbos well that changes everything. There is a saying in sales; "We buy on emotion and justify with logic" Never is this truer than when arguing about engines. Armour bolted on flame proof suit fitted.
-
Soo pretty......
-
My e92 just stared doing that as well and both my keys no longer work as remotes but will start the car.
-
My E46 330ci. Why because all the bits the fail have been replaced.
-
I admire your work on this It is a cool project but I still cant get over that an M60 makes 160kw and 290nm. While an M54 is 170/300. Still I guess you could always drop in a 4l at some stage. All that said I would have liked my dad to make me a v8 e46.
-
Just landed a set of Stoptech Street Performance pads from BuyBrakes.com landed in NZ for $160. Good reviews with a bit more temperature resistance than the very good Hawk HPS pads. Downside is they dust so weekly cleaning is supposedly a must.
-
I Have a 330ci and with good pads and rotors the car stops very well indeed. Bigger brakes than on a V8 commodore pre 2005 or sam year Falcon so can't see a problem.
-
Get an E46 with all the ancillaries replaced. I learnt this the hard way. Apart from upgrades to suspension. I did the following. Vanos rebuilt with Besian kit.Vanos oil feed line replaced.PCV System including hoses completely replaced.Rocker Cover gasket replaced.Oil Level Sensor replaced.M Sport Steering wheel,Bluetooth Head Unit.Idle air control Valve service.DISA Valve repaired.New Alternator.New Water Pump and hoses.Front Control arm bushes (Poly)Rear Control arm bushes (Poly)Strut tower reinforcement plates.Rear Shock reinforcement plates. Transmission serviced, flushed and new filter. Hawk performance brake pads.Slotted and dimpled rotors (Near new) Braided brake lines. New Radiator overflow bottle and sensor.Aircon regassed.
-
225 front and 255 back are factory and M3 runs 235 and 265. So no issues.
-
Yes will get some 255 or 265 for the rear.
-
My 335i currently has these 17 inch style 188s and I have a set of Style 350 (18) that I picked up cheaply. The rear style 350 has a 225 on it instead of a 255 so looks a bit wrong but what do you guys think? By the way the offsets are pretty good. Front is out 4mm and closer by 9mm the rear is in by 1mm and closer by 13mm. I may run a 5mm spacer on the rear yet.
-
I would say the seat of the pant accelerometer says the RS6 is not much slower than a 2011 GTR I drove recently. Off the line the GTR is brutal but once you get going the RS6 is massive.
