Leaderboard
Popular Content
Showing content with the highest reputation on 06/09/24 in all areas
-
2 pointsEmbarked on a bit of an experiment this afternoon. The SMG shifter on my car is actually in pretty great condition considering it's nearly 20 years old. Aside from needing a clean really the only wear/damage on it is the emblem has bubbled as they tend to do, the pads and the chrome are otherwise in excellent condition. BMW do not sell the emblem separately, and although you can get replicas off eBay, they are poor quality (essentially printed with a dome on top) and don't replicate the 3D chrome embossing, etc. that the original does. I thought therefore that I would pull the knob apart and see if I could work out a way to repair it. If I fail then I can just go ahead with the original plan to buy a new one. If I succeed I'll probably still buy a new one anyway and put it on the shelf for the future, but I can then continue using my existing one. Removing the knob from the shifter was actually easier than I was expecting. A moderate amount of force and off it came. You can see the bubbled emblem in this photo (although if you own an SMG you probably already know what I'm talking about). I then carefully levered off the emblem. Because it had already bubbled it split from the backing as you'd expect. The backing of the dome is a foamy sticky substance which pulled off in one go. With the dome off the rest of the knob can be disassembled. Once in pieces I carefully cleaned everything up (vinegar and water on the chrome to clean on any staining, and then warm soapy water for a general clean and to clean the pads). I then turned my attention to the emblem. The chrome embossing is essentially milled/cast in relief on the underside of the dome, and then chrome plated. The flat back of the dome then affixes to the black background which also has the coloured M stripes on it. My intention in attempting repair is to paint on the M stripes, and then paint the entire rear surface of the dome black. The finished item can then be reaffixed to the knob. Why paint? It's going to be the only way to get a perfect bond to the dome. Otherwise without this it's still going to look like there's an air bubble in there. I am not going to attempt the painting myself, rather I am going to get my brother (who has been expertly painting very tiny things for a long time) to give it a go - if he can't do it I certainly wouldn't be able to. But before it can be painted I needed to clean up the dome. I very carefully wet sanded the back surface of the dome with 2000 grit sandpaper. It can't be seen in the photos but where the coloured M stripes go you can actually see on the surface of the dome where the colours lay. I was very careful to not sand this area, in order to retain this as it may be useful for my brother when it comes to applying the colour. I'll get the dome to him next weekend for him to have a go. The nice thing is that if anything doesn't go to plan it can just be sanded off and attempted again. In the meantime here's a photo of the rest of the knob all cleaned up and ready to go. The pads in particular look so nice now they're back to a lovely matte black.
-
2 pointsWas mentioned before, I still like it: RODBRG - a playful reference to rod bearings...
-
2 pointsTook this on to Hampton Downs a few weeks back to support the Porsche Club track day. A foggy morning presented an excellent opportunity for some cool pics.
-
1 pointThat's nice pulsed MIG welding on the jungle gym by the looks, pretty rad !!
-
1 pointI see this most mornings, person did a good job, it is done just right.
-
1 pointHonestly, it's been 10 months since that f'ing taxi backed into it and the paint disaster kicked off, so I have not really felt like taking beauty shots. But here are a couple more:
-
1 point
-
1 pointGood question - I always use Apple Maps through CarPlay so hadn’t checked. I rebooted the unit and by the time I got into GPs tester it was locked on at 5m accuracy so seems fast. Note that signal strength is average as I just have the gps aerial inside the dash. re reverse sensors - I don’t have them hooked in currently, will likely get the iBus app at some point and do it that way.
-
1 pointHi all, We're in the realms of looking to build a shed in the future. I've watched a plethora of YT videos on builds, but unfortunately they're usually from abroad. Does anyone know of any "build" threads in this forum or another? Or willing to share their builds/experiences? Any YT channels that could scratch my itch? Our ideal build would be a 3-car garage with generous room around the circumference to not ding doors etc. Bit of space for shelving and a work bench. Over-the-top lighting for paint correction and late nights. Would be great to have a self contained sleepout at the end too for family member to come stay and have their own space. Pictures of the pipedream attached.
-
1 pointPleasant surprise this morning - look what arrived! The box it arrived in was a bit beaten up, but when opening up you can see that the sharp corners are well-wrapped in bubble wrap to protect whatever else it comes into contact with 😂 Marin offers powder-coating as well, but after discussing with him I opted to get it unfinished and powder-coat locally, as a painted item requires much more packaging to protect it and pushes it into a more expensive shipping category. I was a bit surprised when I first opened it to see that the brace doesn't have the extra cross member between the strut towers, but looking back on my comms with Marin when I actually placed the order I was not clear on the matter. Secondly, now that I've seen this in person I can say that that additional cross member would be entirely unnecessary anyway. The photos (especially the ones online) really do not give a good sense of just how solid this thing is. I'm glad that it turned out this way as not having that cross member means more available boot space for any odd-shaped objects. I'm very happy with the build quality of this and just how solid it is in person. I'm looking forward to getting it powder coated and ordering the other bits and pieces I need to get this installed.
-
1 pointThis is my one. It is smaller than I wanted. But post covid prices were insane. I actually wanted another bay the same size. The far left bay is my workshop. Center is bike and car parking. Right has a four post hoist so I can park two cars. On the outside to one side will go a large carport. It's lined with 21mm ply and the floor is painted with aircraft hanger paint. Lots of things I would do differently. Will probably install a 2 post hoist in the middle at some stage. And maybe a wash bay in front as I hate washing cars on gravel. I thought about a sleepout off the side. But you really need to fit it out really well for them not to be noisy and cold. The fit out is expensive if you are not able to do it yourself. Heating / Cooling, ventilation for the garage side. Sealing the gaps. Electrical, internet (they act like a big Faraday Cage). Oh. And Do Not get skylights that are not UV proof. Mine were meant to be and are not at all. They are terrible in the summer. If you get good lights you don't need stupid skylights. I hate them. Edit: Play all the companies off against each other. They are all starting to claw for business after being lazy for the last 4 years. They all source their kits from the same places.
-
1 point
-
1 pointMounting Brackets for the Rotisserie. One last cradle startup, next time she's going in. 20240528_115927.mp4
-
1 point
-
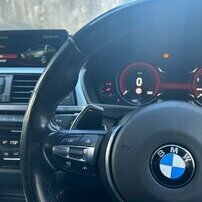
1 pointHello everyone, I'm excited to join this community of BMW enthusiasts! After an unfortunate incident where my 2012 535i Active Hybrid (N55 Engine, F10) was written off, I spent a considerable amount of time researching BMW's engines to find a reliable and budget-friendly option. I decided on the B48 engine near 250HP, and I'm thrilled to share that I've just purchased a 2018 430i with 100,000KM on the odometer. It's NZ new with a full service history, recently fitted with new Zeta tires and M brakes this year. I'm the third owner of this beauty. it has WB6 digital clock with it! I've already scheduled some maintenance work to ensure it stays in top condition: Injector cleaning Vent pipe replacement (proactive change due to common failures around this mileage) Spark plug replacement Air filter change These services are booked for next week at a BMW workshop. The costs quoted were: Injector cleaning: $28 + GST Vent pipe change: $165 + GST Spark plug change: $218 + GST Air filter: $88 + GST I'm eager to learn more about maintaining this model. Any advice on specific parts that should be regularly checked or replaced would be greatly appreciated. Looking forward to engaging with you all and gaining insights into the best practices for keeping my 430i in prime condition. Cheers!
-
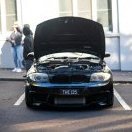
1 pointBeen a minute... very busy time. Engine is back in the car, everything is connected back up. Cut and welded the chargepipe and throttle body for a wiggins style clamp, bonnet latch got zinc coated and a few other bits and pieces tidied up. Downpipes are back in also, very painful job, o2 sensors back in and new exhaust is almost finished. Full stainless 3inch exhaust from the downpipes back, with a single adrenalin r louvre baffle resonator. All thats left now is the oil cooler setup, parts are on the way, fresh aeroflow oil coolers and all teflon line and fittings. Also will be putting in a check valve and a tee to allow for an accusump to be fitted at a later stage. Parts should arrive soon and then it will be ready to be fired up and dyno tuned. Will try and keep this updated more often.

