
Cammsport
-
Content Count
537 -
Joined
-
Last visited
-
Days Won
8
Posts posted by Cammsport
-
-
10 minutes ago, Olaf said:? yeah, my declared plan is M42, but I do have a good mate in my ear suggesting M50 or M52... I'm nearly at the end of my list, and wishing good fortune on this M40!
Yea to be honest M42 is very is OEM+. I was on the fence for a very long time. Next time you're silly enough to come to Auckland, have a drive of my M52.
-
 1
1
-
-
Hey @Olaf... my 316i had the same ill-fated lifter noise and look what happened. Giz a yell when you need a hand ?
-
 1
1
-
-
*cough* 24 valve swap *cough* ?
-
Those seats look so good! Do you have a link for the kit?
-
1
-
-
How'd you choose the colour? Have you managed to find a colour code for the original silver? Nice work.
-
1
-
-
Can I take you up on that offer @Jacko? I have an E91 that I'd love to code in the retrofitted bluetooth gear and have a play with other bits and pieces.
-
Great Success! Certifier was really happy with car and has passed it. Only had a couple of comments, one being that the ride is terrible. I couldn't agree with him more, the springs that were supplied have a spring rate 11kg/mm... That's a stupid amount and would ideally be ~7-8kg/mm. I went with a particular supplier of XYZ suspension after seeing reviews of how good this company was with setting up the spring rates for the E30. After the drama with this supplier of having the perches and springs rub and write off the tyres, waiting literally 7 months to receive a valid NDT report and now this, I might try to find another party that could supply me with the springs that are suitable.
Secondly, the MAF support bracket. I had gashed up a bracket in the shed just to get through the cert process. I managed to convince him of my elaborate plans of boring out an E34 (similar to below) or E36 airbox to make a discrete cold air box. This way I'll retain the OE look of the engine compartment, which as this project has progressed, has become quite important.
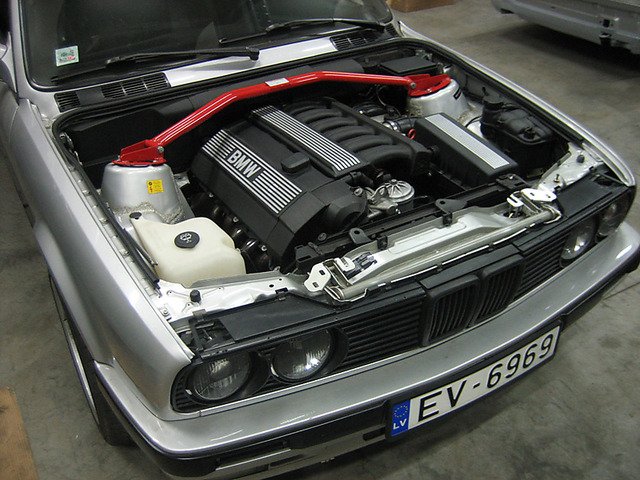
Massive relief as most of you on here know. Cert can be pretty stressful as the huge anomaly is the certifier themselves and the way certain things are interpreted. I've heard of people having to weld in the aluminium spacers on the power steering rack conversions, having to have engineers reports for suspension geometry, having to install 2x driveshaft hoops vs 1 etc so I feel I got off pretty lightly. My best advice (@Kobra) would be to have a talk to your chosen certifier and make sure you're on the same page and that you know exactly what he wants to see. An awesome site is the LVVTA Forum. The professionals there were answering my pesty questions within 24 hrs.
So where to from here? Approached Wife on selling to fund my dream. Swift negative. Means I get to enjoy the work I've done now that its road legal I guess. I'll keep posting random updates for sure. But mainly...
- Replace leaky heater core
- Find suitable front springs with the correct spring rate
- Skid plate to prevent the sump from accumulating more scrapes
- I'd love to find some sport seats in terrible condition and reupholster
- Colour match basketweaves to centre caps
- Paint? Not very motivated after the work involved on Dad's ute ?
- Wife mentioned retrofitting aircon. Not happening.
- Radiator research, basically see whats the biggest OE radiator that fits
- Figure a way to use the OE oil cooler I've found. Preferably S52 oil filter housing
- Intake
✌️
-
4
-
Certification recheck day! I'll either be crying into my pillow tonight or cracking into a bottle of something in celebration.
Something for everyone at the certifiers.
-
5
-
-
Depends what you're after but the b20 will still be heaps of fun. Have you owned e30s before? Are you in Auckland? HUNT for rust. 9/10 there'll be some hiding somewhere, whether the current owner knows it or not. Mechanical swapping of components can be done by anyone but rust/panel/paint work requires more skill and patience or money.
-
2
-
-
I think it'd probably be more effective to find a set in good condition. I know that Nick Weitz and Brent Aitkenhead usually have this sort of thing in hand. Most likely black leather too.
-
I honestly don't have faith in the system to make it worth the time. I won an auction on TM a couple years ago for a red E36 coupe with red interior. I was so stoked and had started the transport admin etc. Seller got back to me a week later and said he'd decided to sell to someone else. I made contact with small claims and TM, both said I hadn't suffered any real loss. Basically tough luck. I was gutted.
-
1
-
-
If it's the SE I'm thinking about, I'd run with that. It has more value than a swapped 320i. I actually made a meme today for the e30 page that is rather topical.

-
 4
4
-
-
To keep the certifier happy, I went ahead and wrapped the exhaust manifolds with "titanium lava" wraps. Will hopefully give some relief from heat in the engine bay.
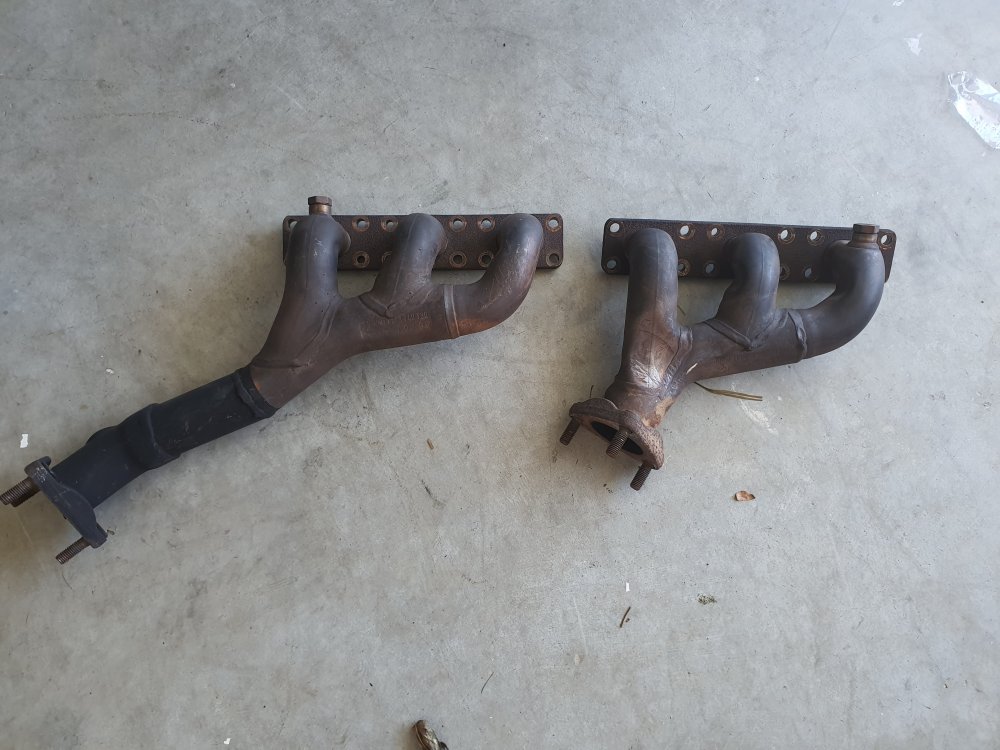
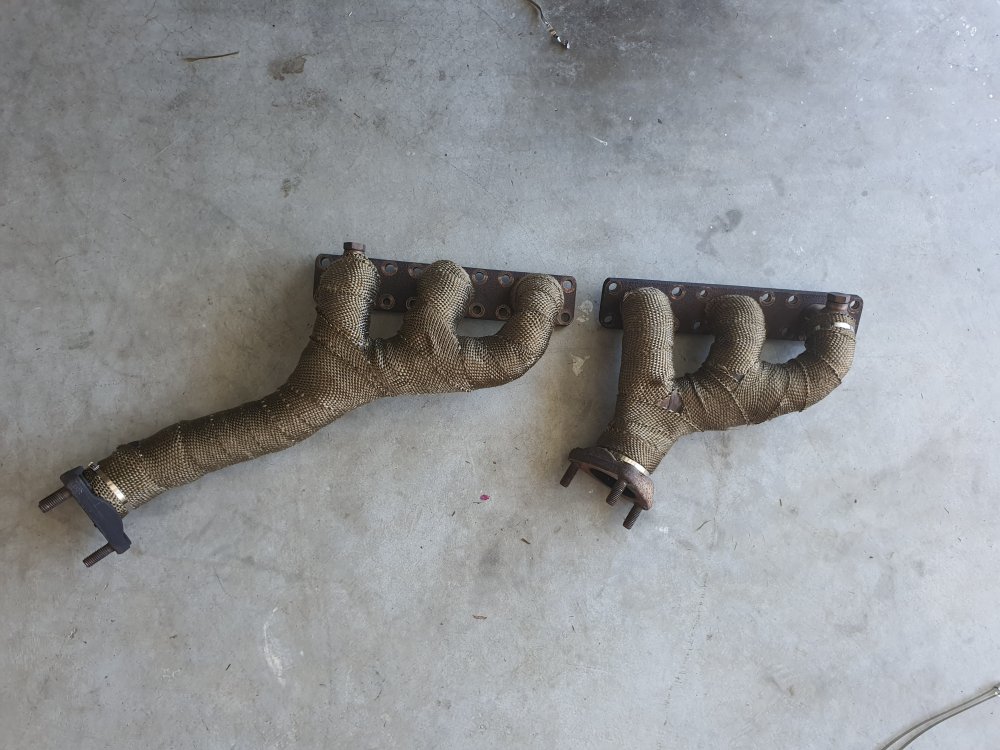
Fiddly job so I thought I'd give a couple of pointers. Start from the left hand cylinders and end the wraps on the collector portion. This allows you to do the cylinder furthest from the exhaust flange in one foul swoop, containing the ends of the previous wrapped lengths (hard to explain but hopefully that makes sense?). This stuff frays viciously, put a bit of tape on the end when your working with it. Trial wrap the portion you want to do, before you cut the length of wrap. The amount required is deceiving. Used plastic zip ties to initially hold the wrap in place so you don't waste the metal zip ties if you have to do it again. Pull the wrap as tight as possible through the whole process, this makes it look alot cleaner and will hopefully prevent it unwrapping in the future. You can get the metal zip ties super tight buy grabbing the tails with needle nose pliers and rolling the pliers to strain the tie. WEAR GLOVES. I know the fiberglass wraps are super itchy, unsure about this particular material but I didn't want to risk it. That's about all there is to it. Pain of a job but I reckon it looks good.
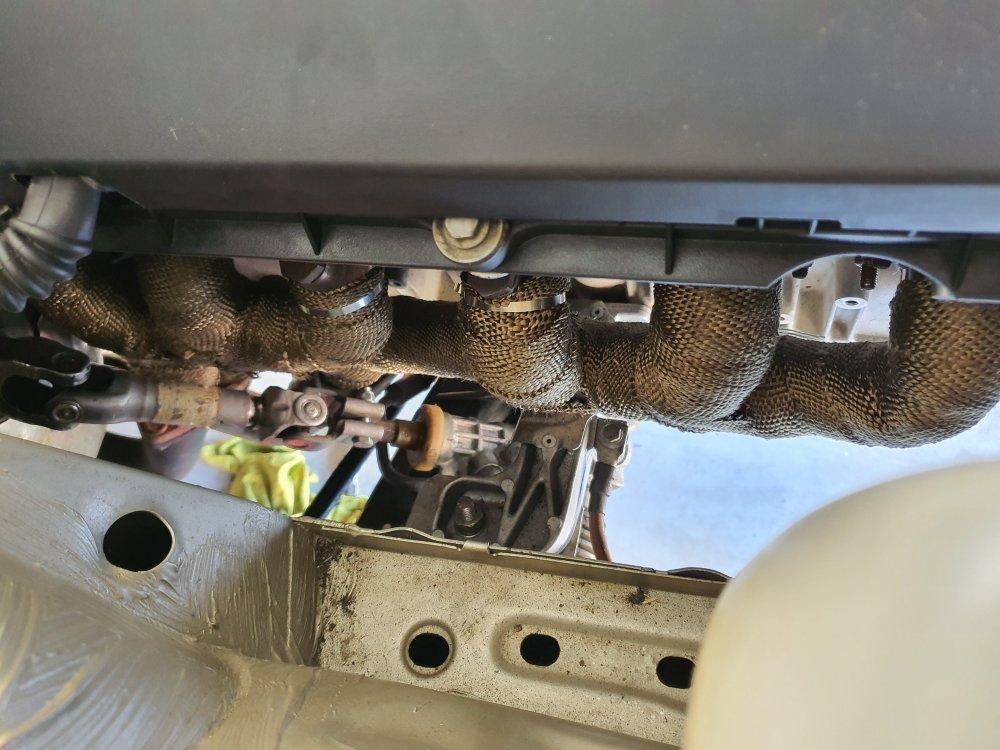
I read alot about exhausts etc rusting out underneath the wraps either due to the heat cycling and/or moisture held by the wrap. This apparently happens to the cheaper manifolds. I guess time will tell how it holds up, I'll get a very audible alarm if the manifolds do rust out ?
-
2
-
-
To bring the MotoMeter speedometer into alignment, first remove the cluster. I won't go into huge detail on this as there's already a heap of good write ups, skip down to the picture of the speedo removed to get straight into it. Remove the lower kick panel. Reach behind the dash and unwind too aluminum knobs, that'll let you remove a black access panel that sits below the cluster. Remove the two upper screws that secure the cluster brackets to the dash (there may be some lower screws to remove, if so I must've left them off last time I was in there for the coding plug). Now be super gentle with the cluster brackets. Pull them down slightly to jiggle the cluster forwards. Slide the cluster forwards toward the steering wheel until you can see the white and blue plugs at the rear of the cluster. Flick the black retaining clips up and jiggle the plugs off. This will give you more room to bring the cluster right up against your steering wheel. Now just slide the cluster to your left, towards the radio. The cluster should be free! Place the cluster face down on a bench and remove the 9 brass coloured screws on the back. 8 around the circumference and 1 in the middle. You'll be able to remove the blue section from the front of the cluster. Now put your misses red nail polish on the needles ?. You'll see another 4 brass screws on the blue section, directly behind the speedo gauge, remove these. The gauge will come free from the cluster assembly. Look for the potentiometer on the side of the speedo gauge.
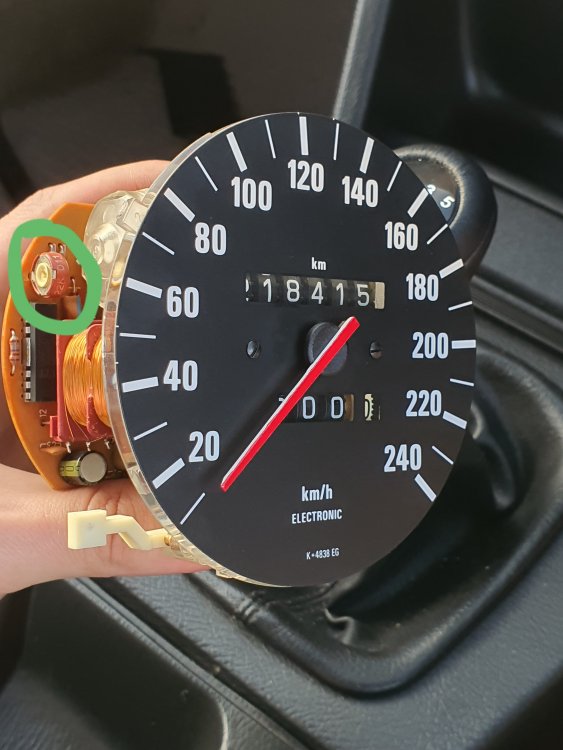
Total range of the pot is about 270 degrees. Turning it clockwise will reduce the speedo reading. Anti clockwise will increase the speedo reading.
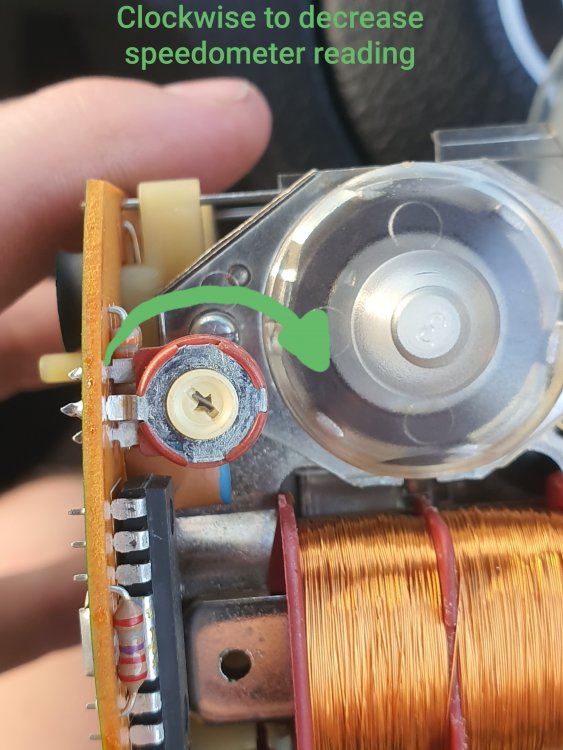
It's hard to tell, but I reckon turning it about 30 degrees reduced the speed from 120 km/h to 100 km/h. It was a lot of trial and error, making an adjustment, driving using a GPS speed app, making another adjustment. You could alternatively drill an access hole in the blue cover which would let you leave the speedo IN the the cluster assembly to make the adjustments to the pot. The rules in NZ are that your speedo can read +10%/-0%. Either way I'd try dial it in as close as to possible to your actual speed to prevent unnecessary kilometers being added to your beast!
-
1
-
2
-
-
3 hours ago, Olaf said:Oh you’re just teasing me now! ?You’ve already got the 16” multi piece wheels lurking, haven’t you?
Sold the BBS RS 15" 3 piece set that I had to a guy with a 2002. Unsure if he's on here or not. I just wasn't happy with the deep dish vs small diameter on the E30.
-
1
-
-
5 hours ago, BMTHUG said:Dude which cert guy are you using ? I am going to be certing my vert soon with Ground control coilovers and I have a cert guy I've used for certing client's e30s before. if you get stuck please give me a yell. I have alignment guys on hand etc for pre cert alignment that will set your car up correctly for cert
'v
Man I wish I knew this before ? Finally finished the car (cert wise) tonight. Have a weird knock coming from the front right so I'll have to Jack it back up and see what I've left loose. Will make an update with tips and tricks on manifold wrapping and speedo calls etc when I find the time.
-
1
-
-
On 11/2/2019 at 6:32 PM, Olaf said:one day... your wheels shall be mine! ? (there shall be cash involved, of course).
Now that I have caps, I'm beginning to be more fond of them Olaf hahaha. Wouldn't say no to a set of 16" multipiece wheels though ?
-
On 10/19/2019 at 9:58 PM, modz said:5 Stud conversion
Using E36 318ti rear (complete arms, hubs, brakes) and E36 328i front hubs with E30 arms plus SRS / GreshM offset solid bushes. I have most of these parts, but I'm sure you've all seen what hubs look like.
More on this post once I have started the actual work...
Really interested to see how the hub sits. Damn good thread!
-
1
-
-
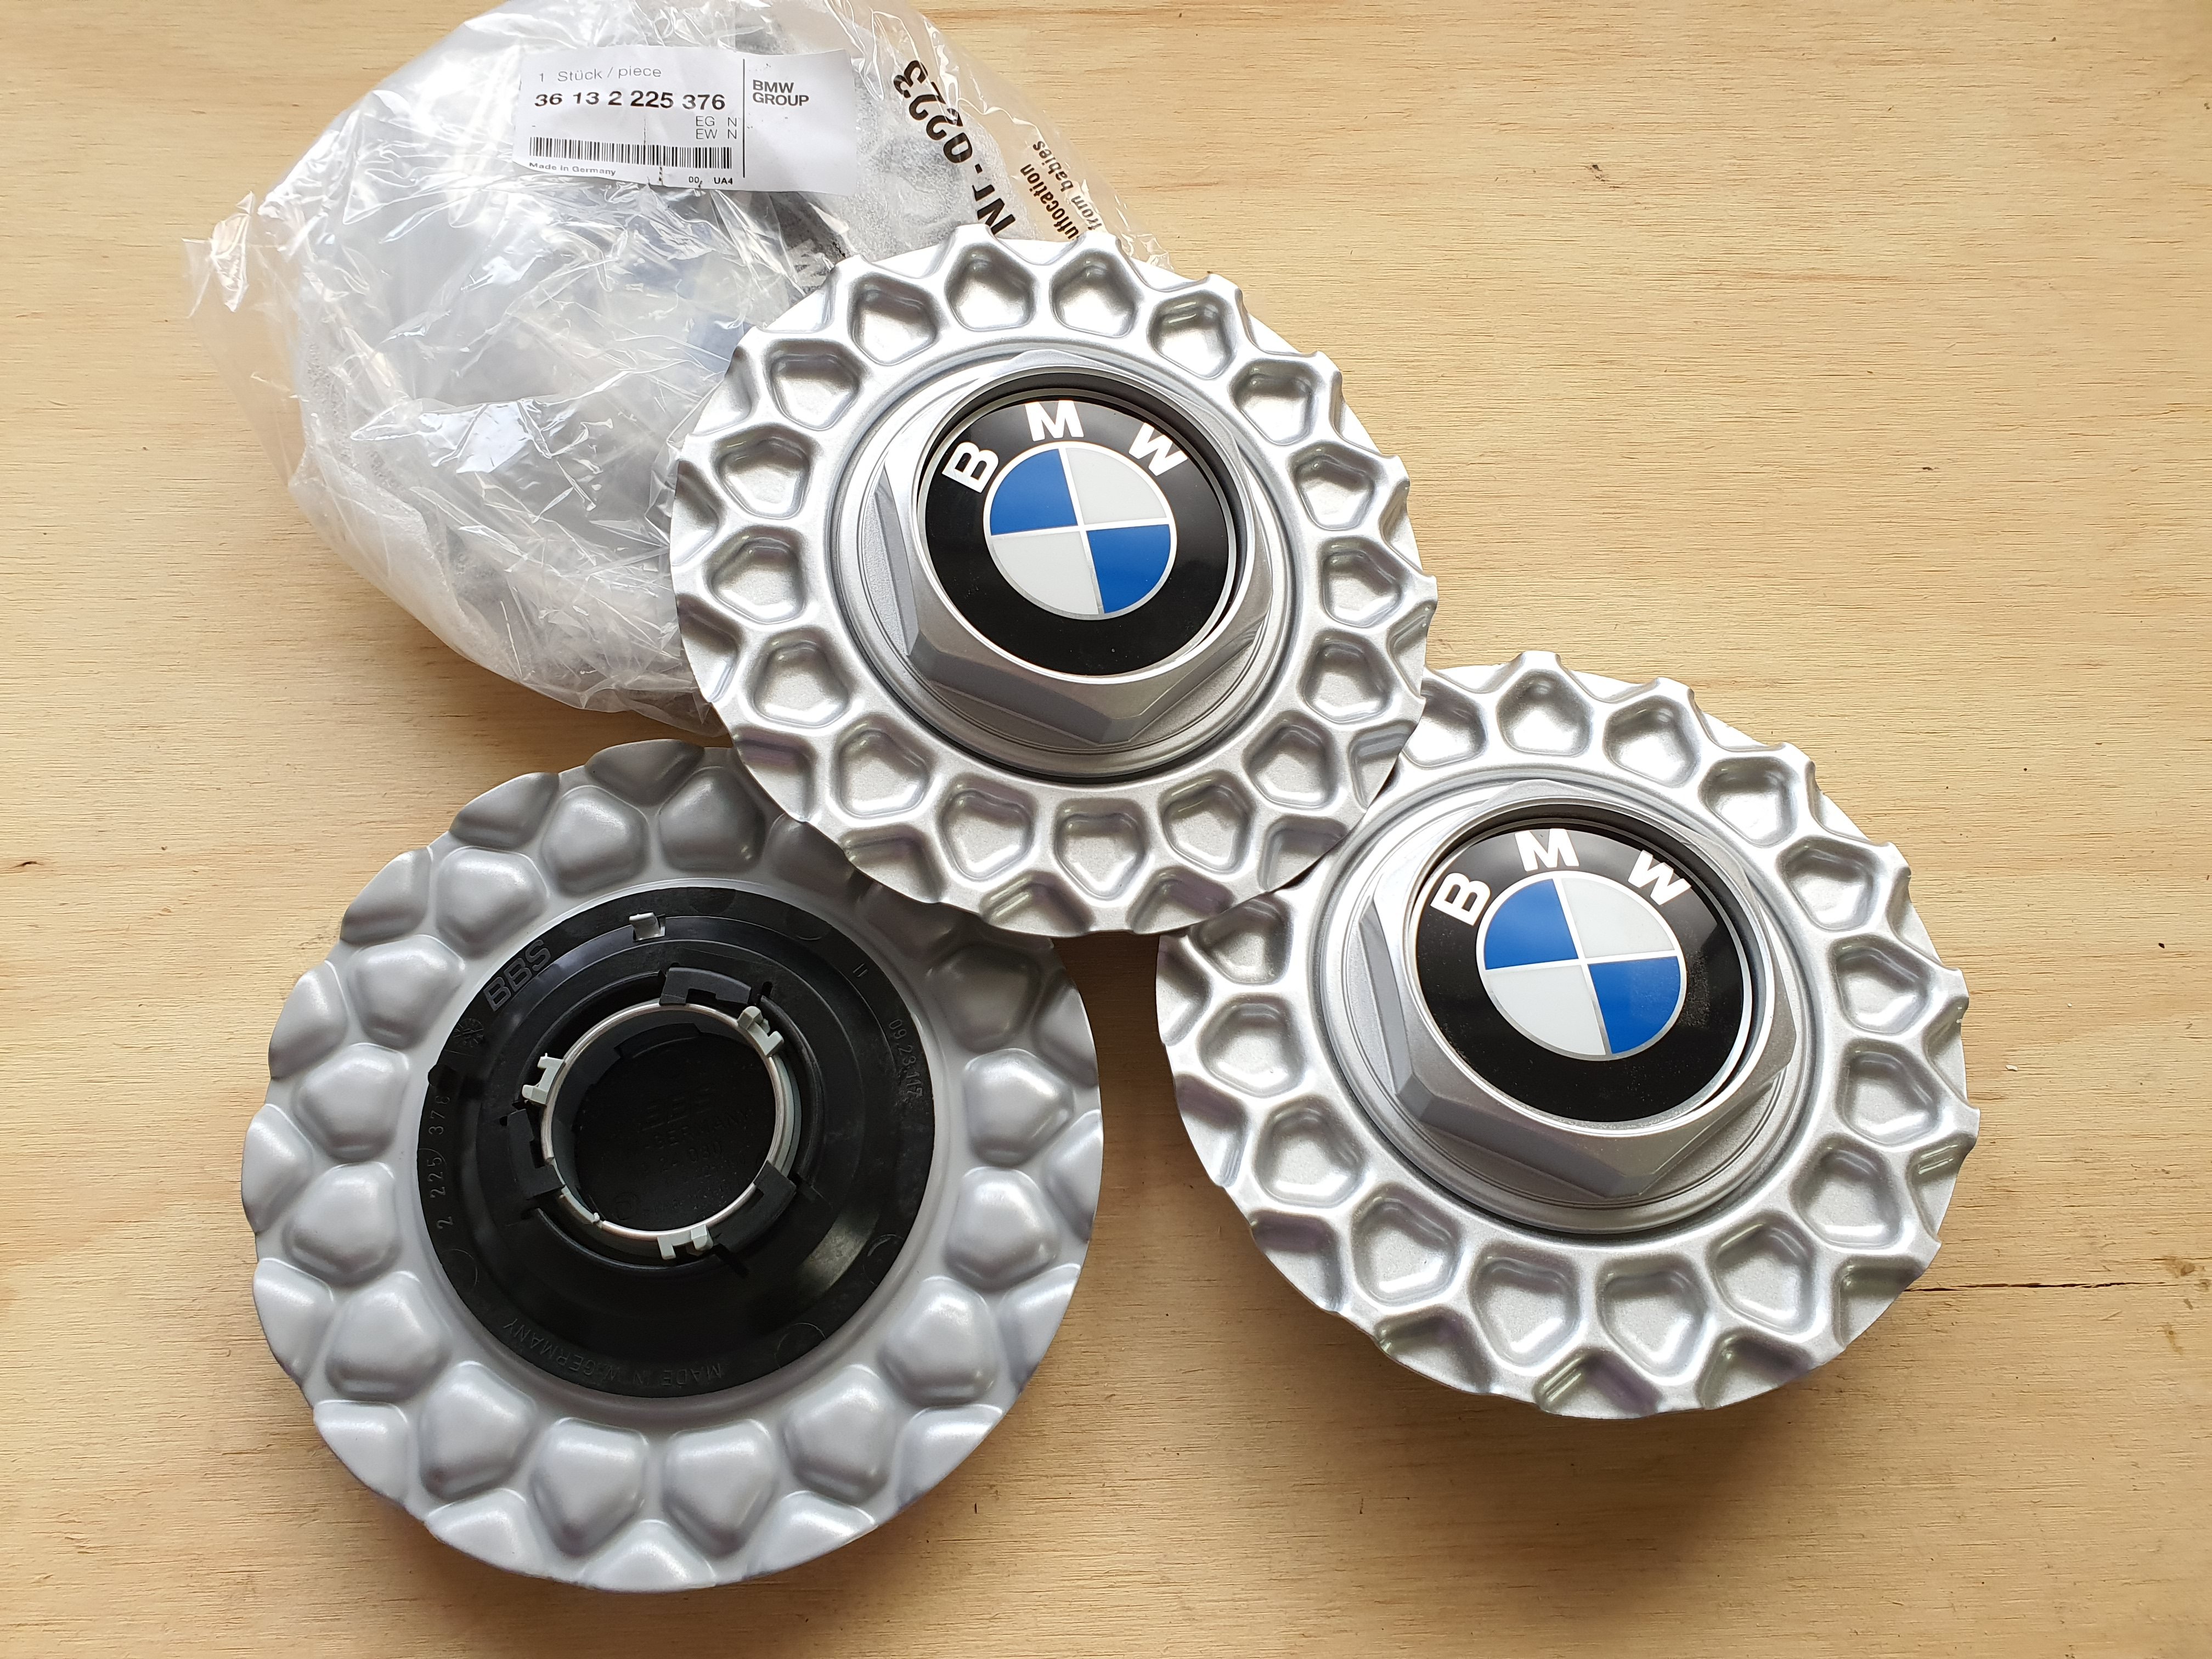
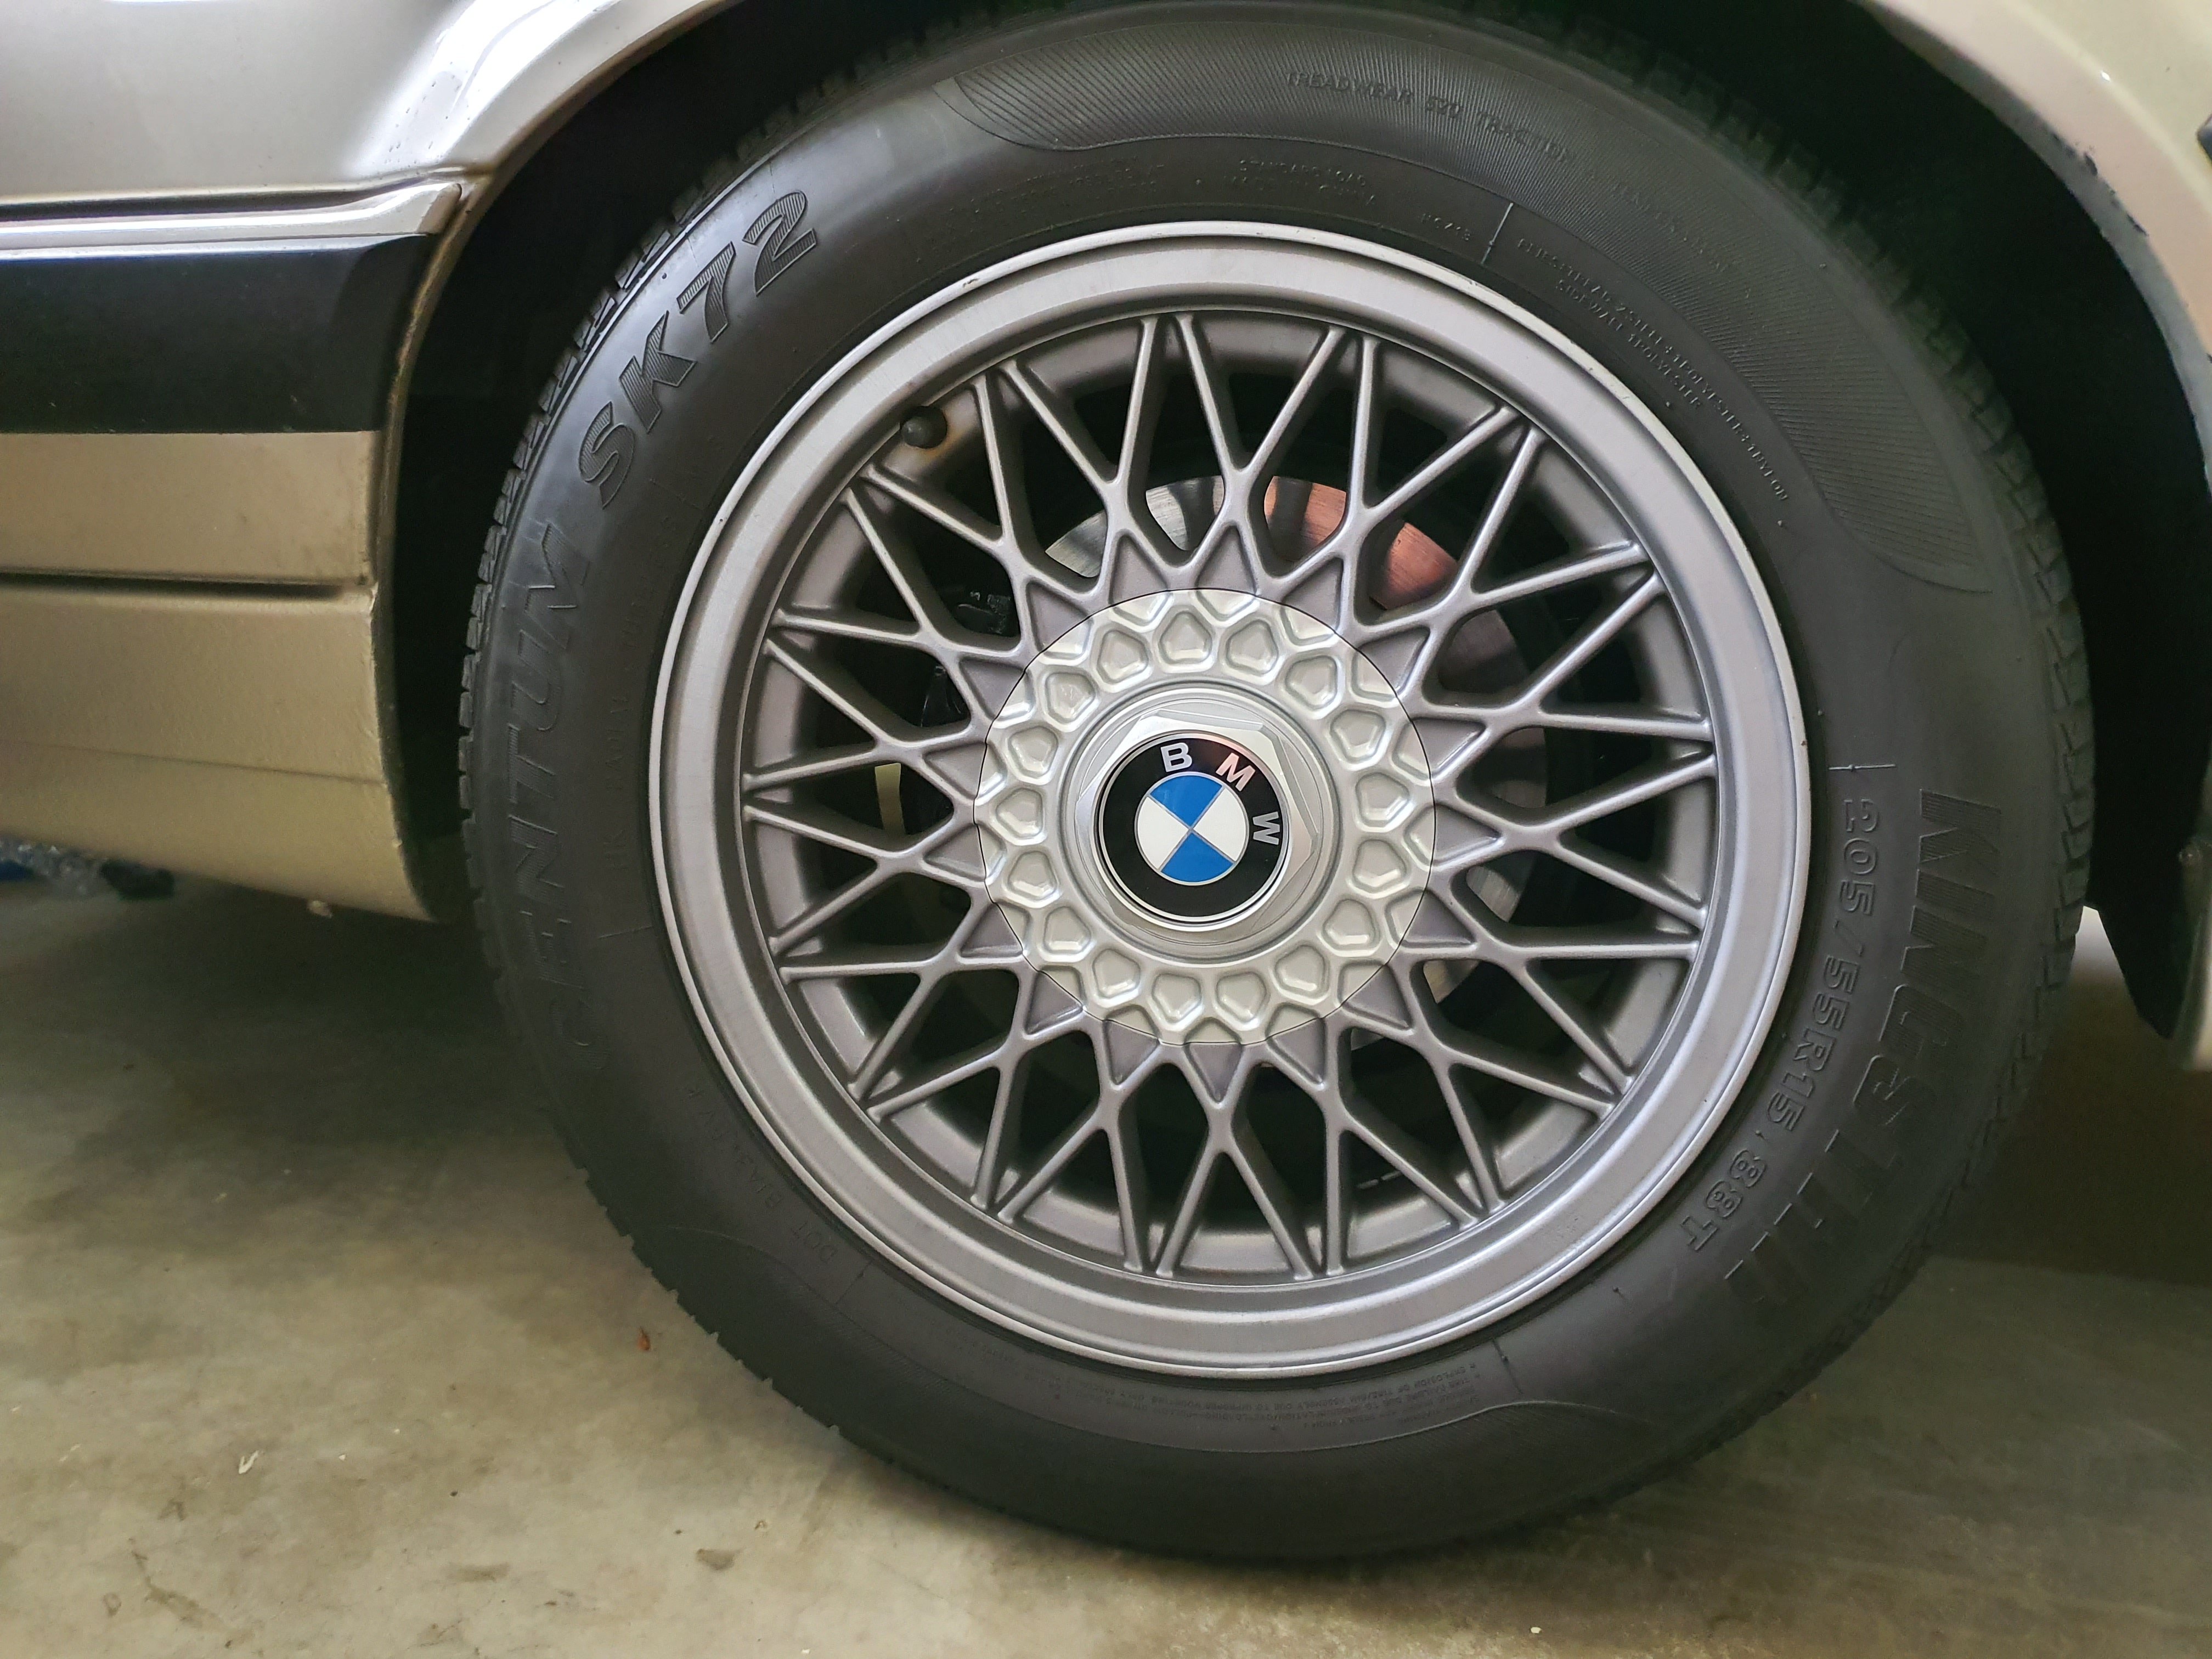
Finally an E30 update, albeit small. Huge battle with the suspension company. My certifier picked up on the fact that the pictures in the report weren't of my setup. So they sent through a report without pictures, obviously my certifier wasn't happy with that. Literally 2 months later I have a valid report. Now just plodding my way through the rest of the defects.
On a happier note! Traded all non-vital organs for these beautiful items.

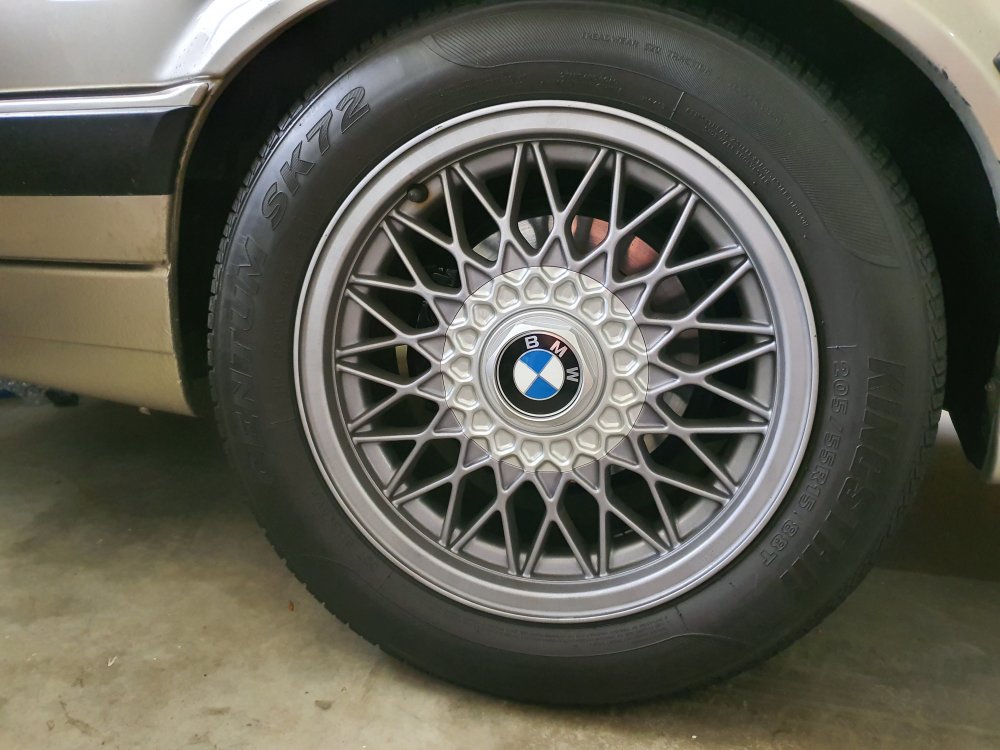
Wheel colour is different but I plan to fix that up by matching the centre cap colour. Apparently there's limited stock worldwide, figured I might as well nab them now.
-
4
-
-
On 10/31/2019 at 1:44 PM, ctho said:^I just sold that touring a couple weeks ago for 10k.
Where did you have it listed? I would've definitely had a nosey.
-
-
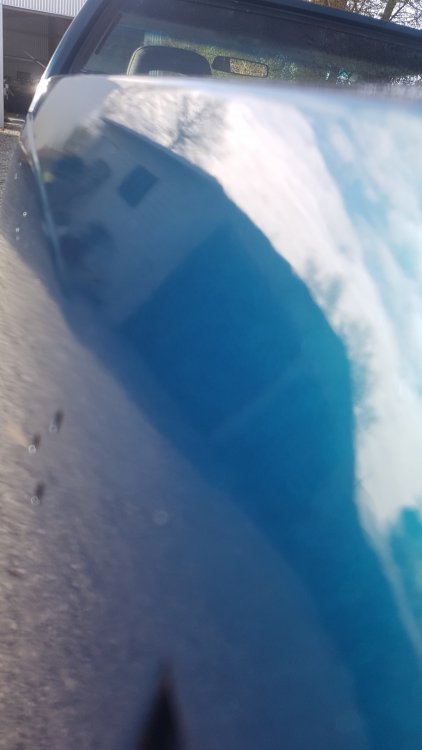
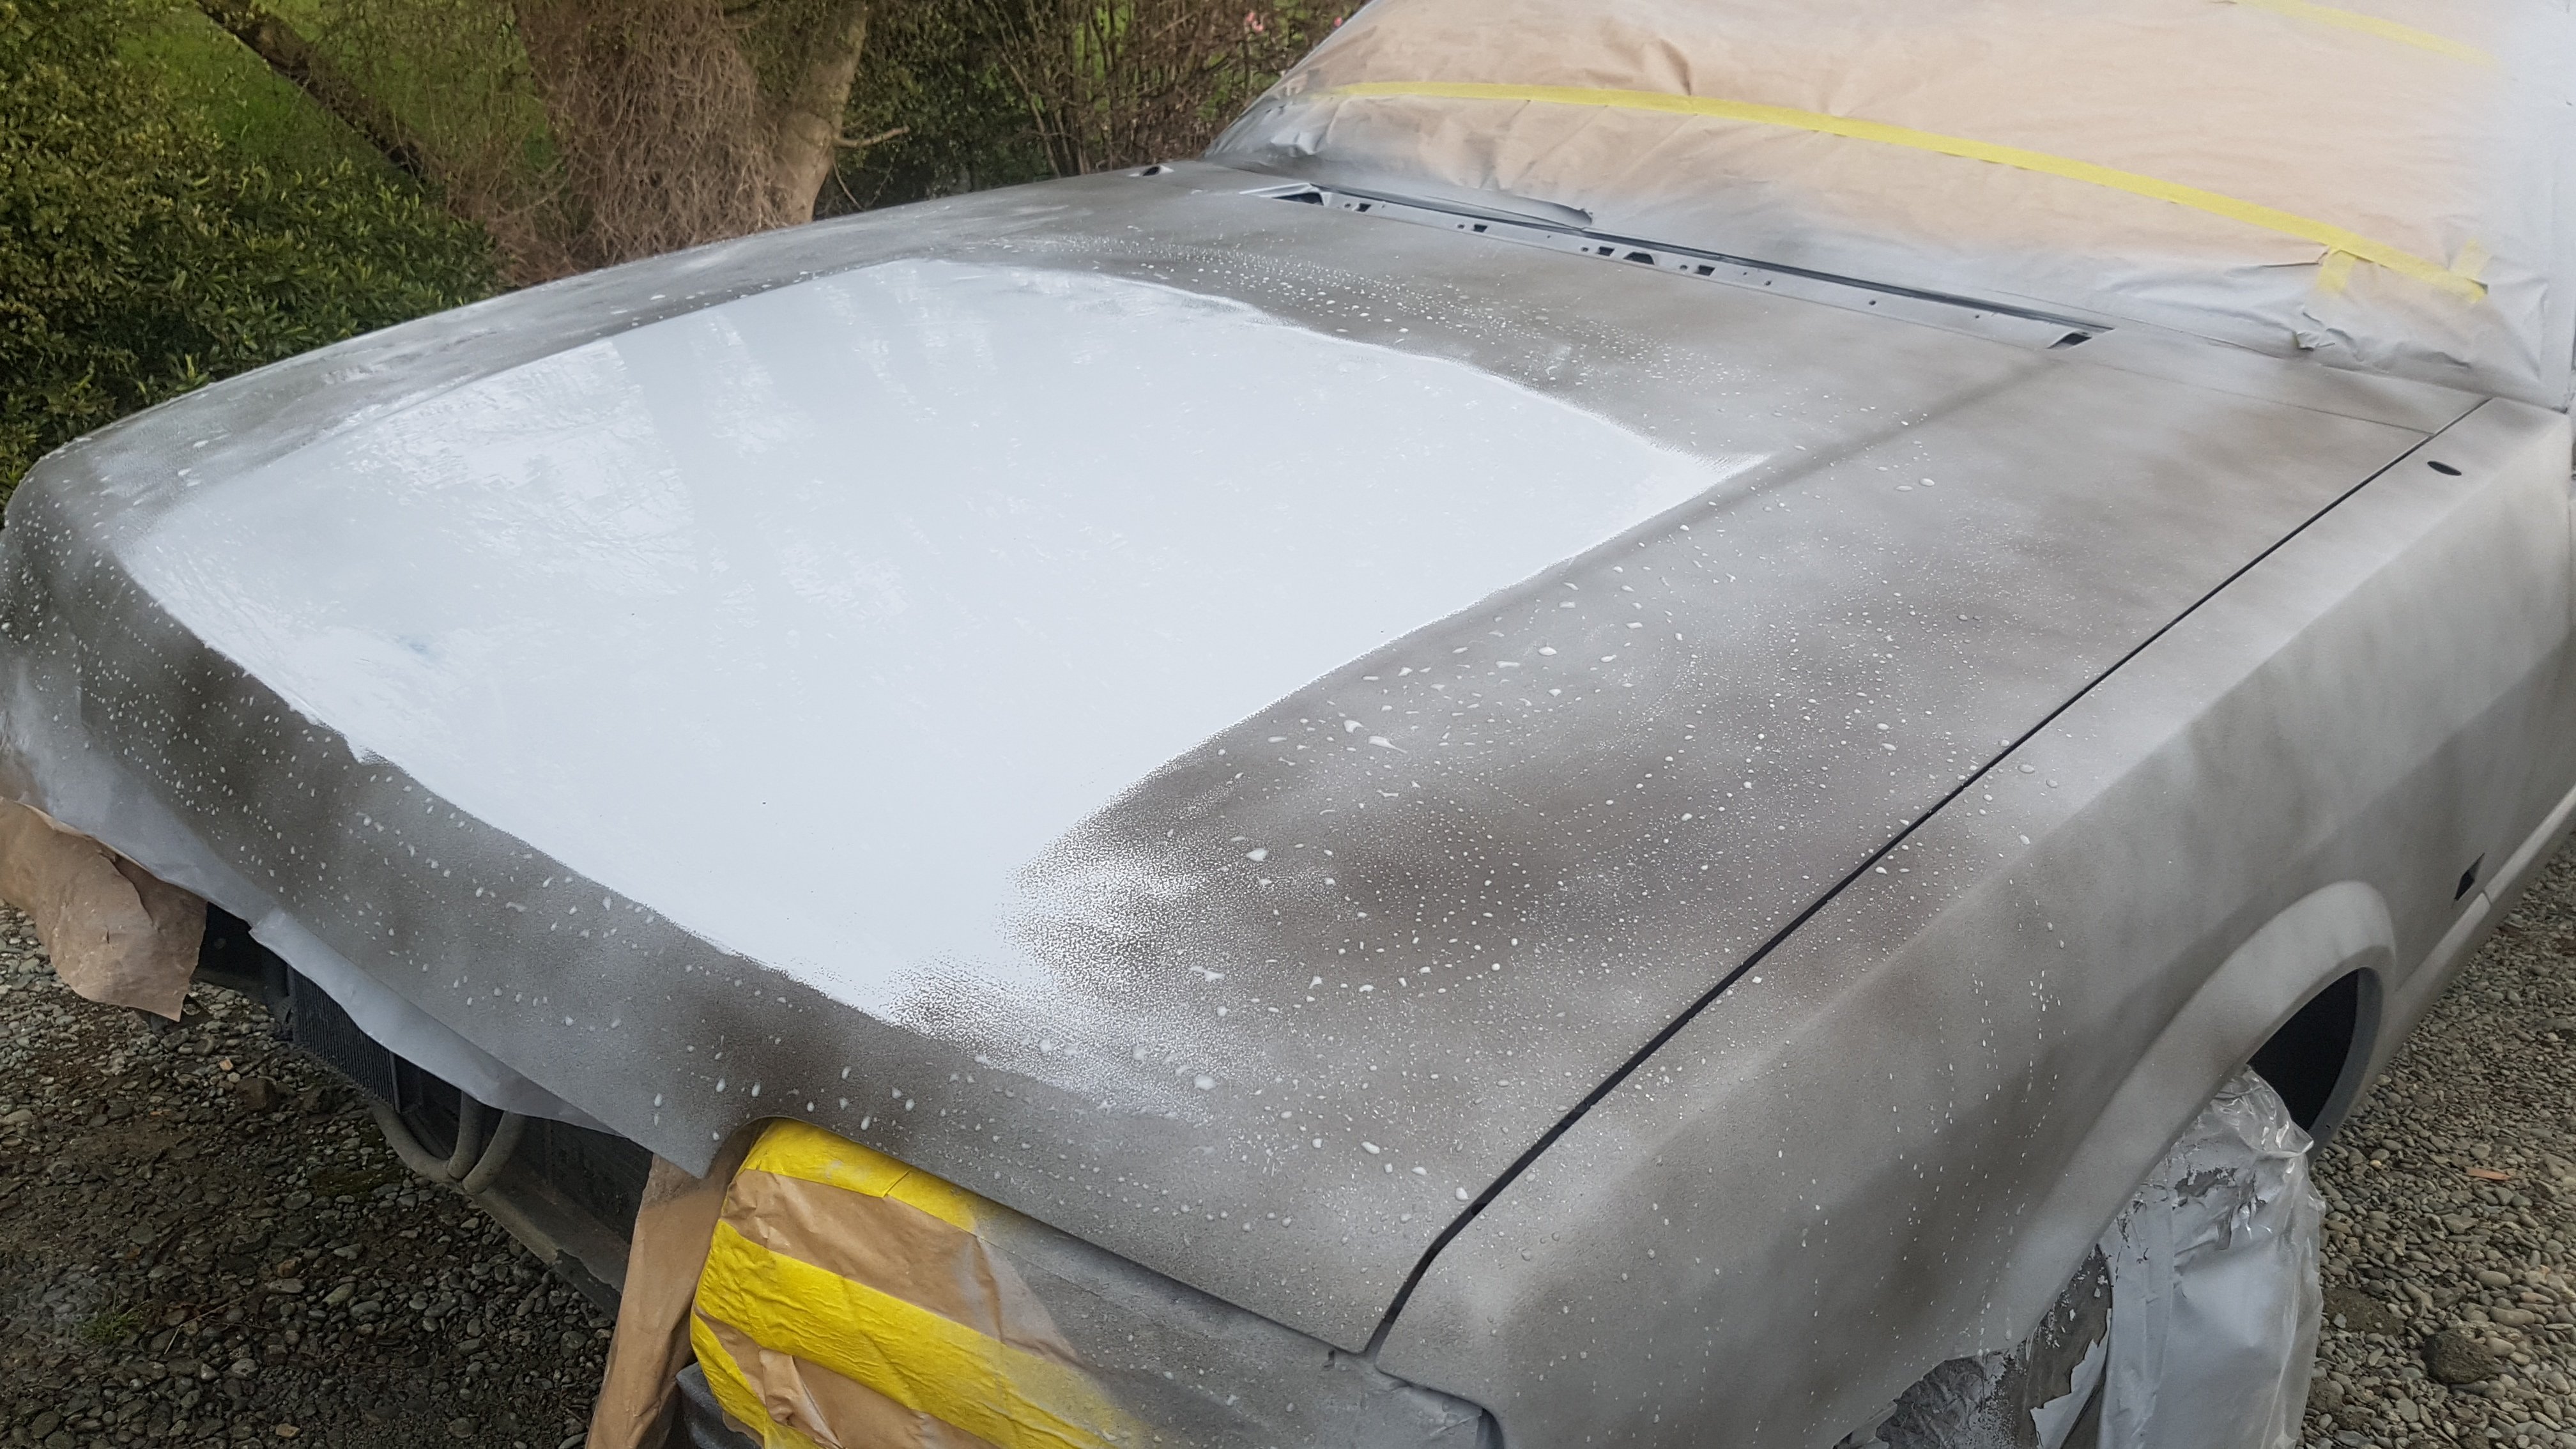
Yea gave it the hap-hazard dusting for the mettalic but can't have given it enough. Lessons learnt that's for sure.
-
Cheers @andrewm, I'll pass that onto dad. I noticed today before we flew back to Auckland that the paint had some streakyness to it which is bloody gutting. Not really obvious but if you stand in the right spot and the sun is hitting it square on you can see what looks like shadowing. We laughed when he was quoted $7k for a professional paint job, but after the past few days we have a new found appreciation for panel beaters and painters.
-
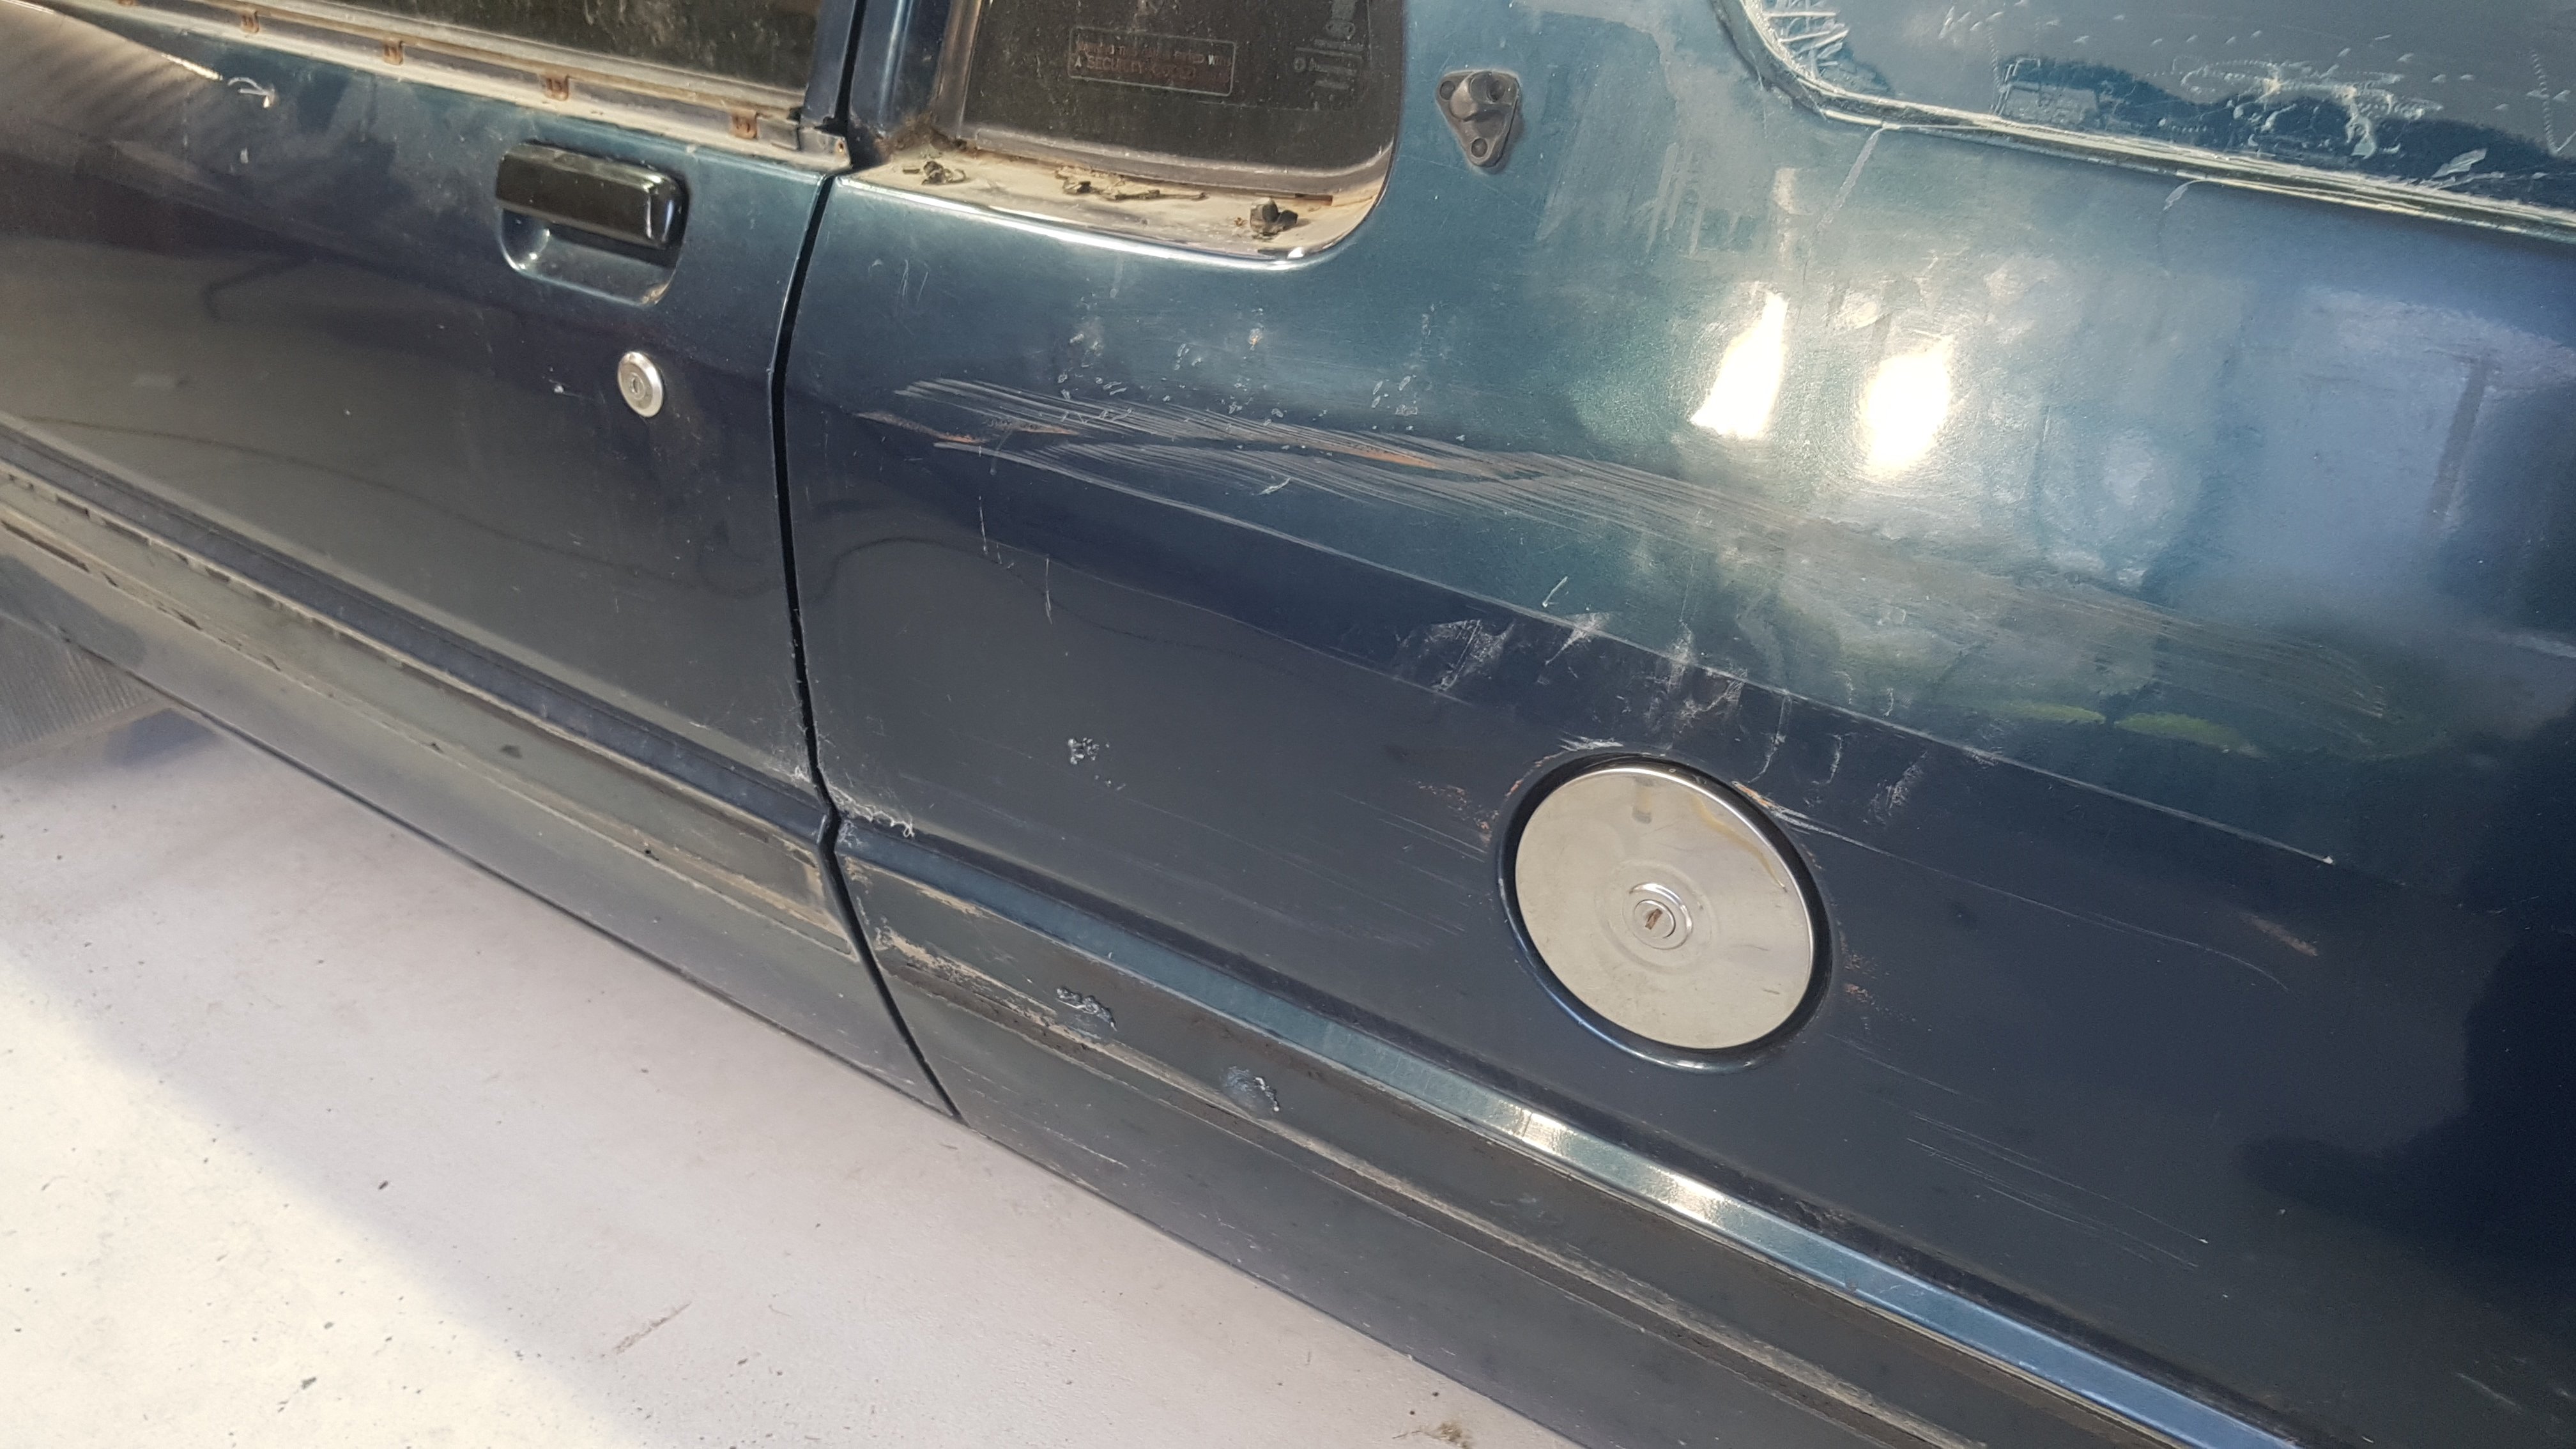
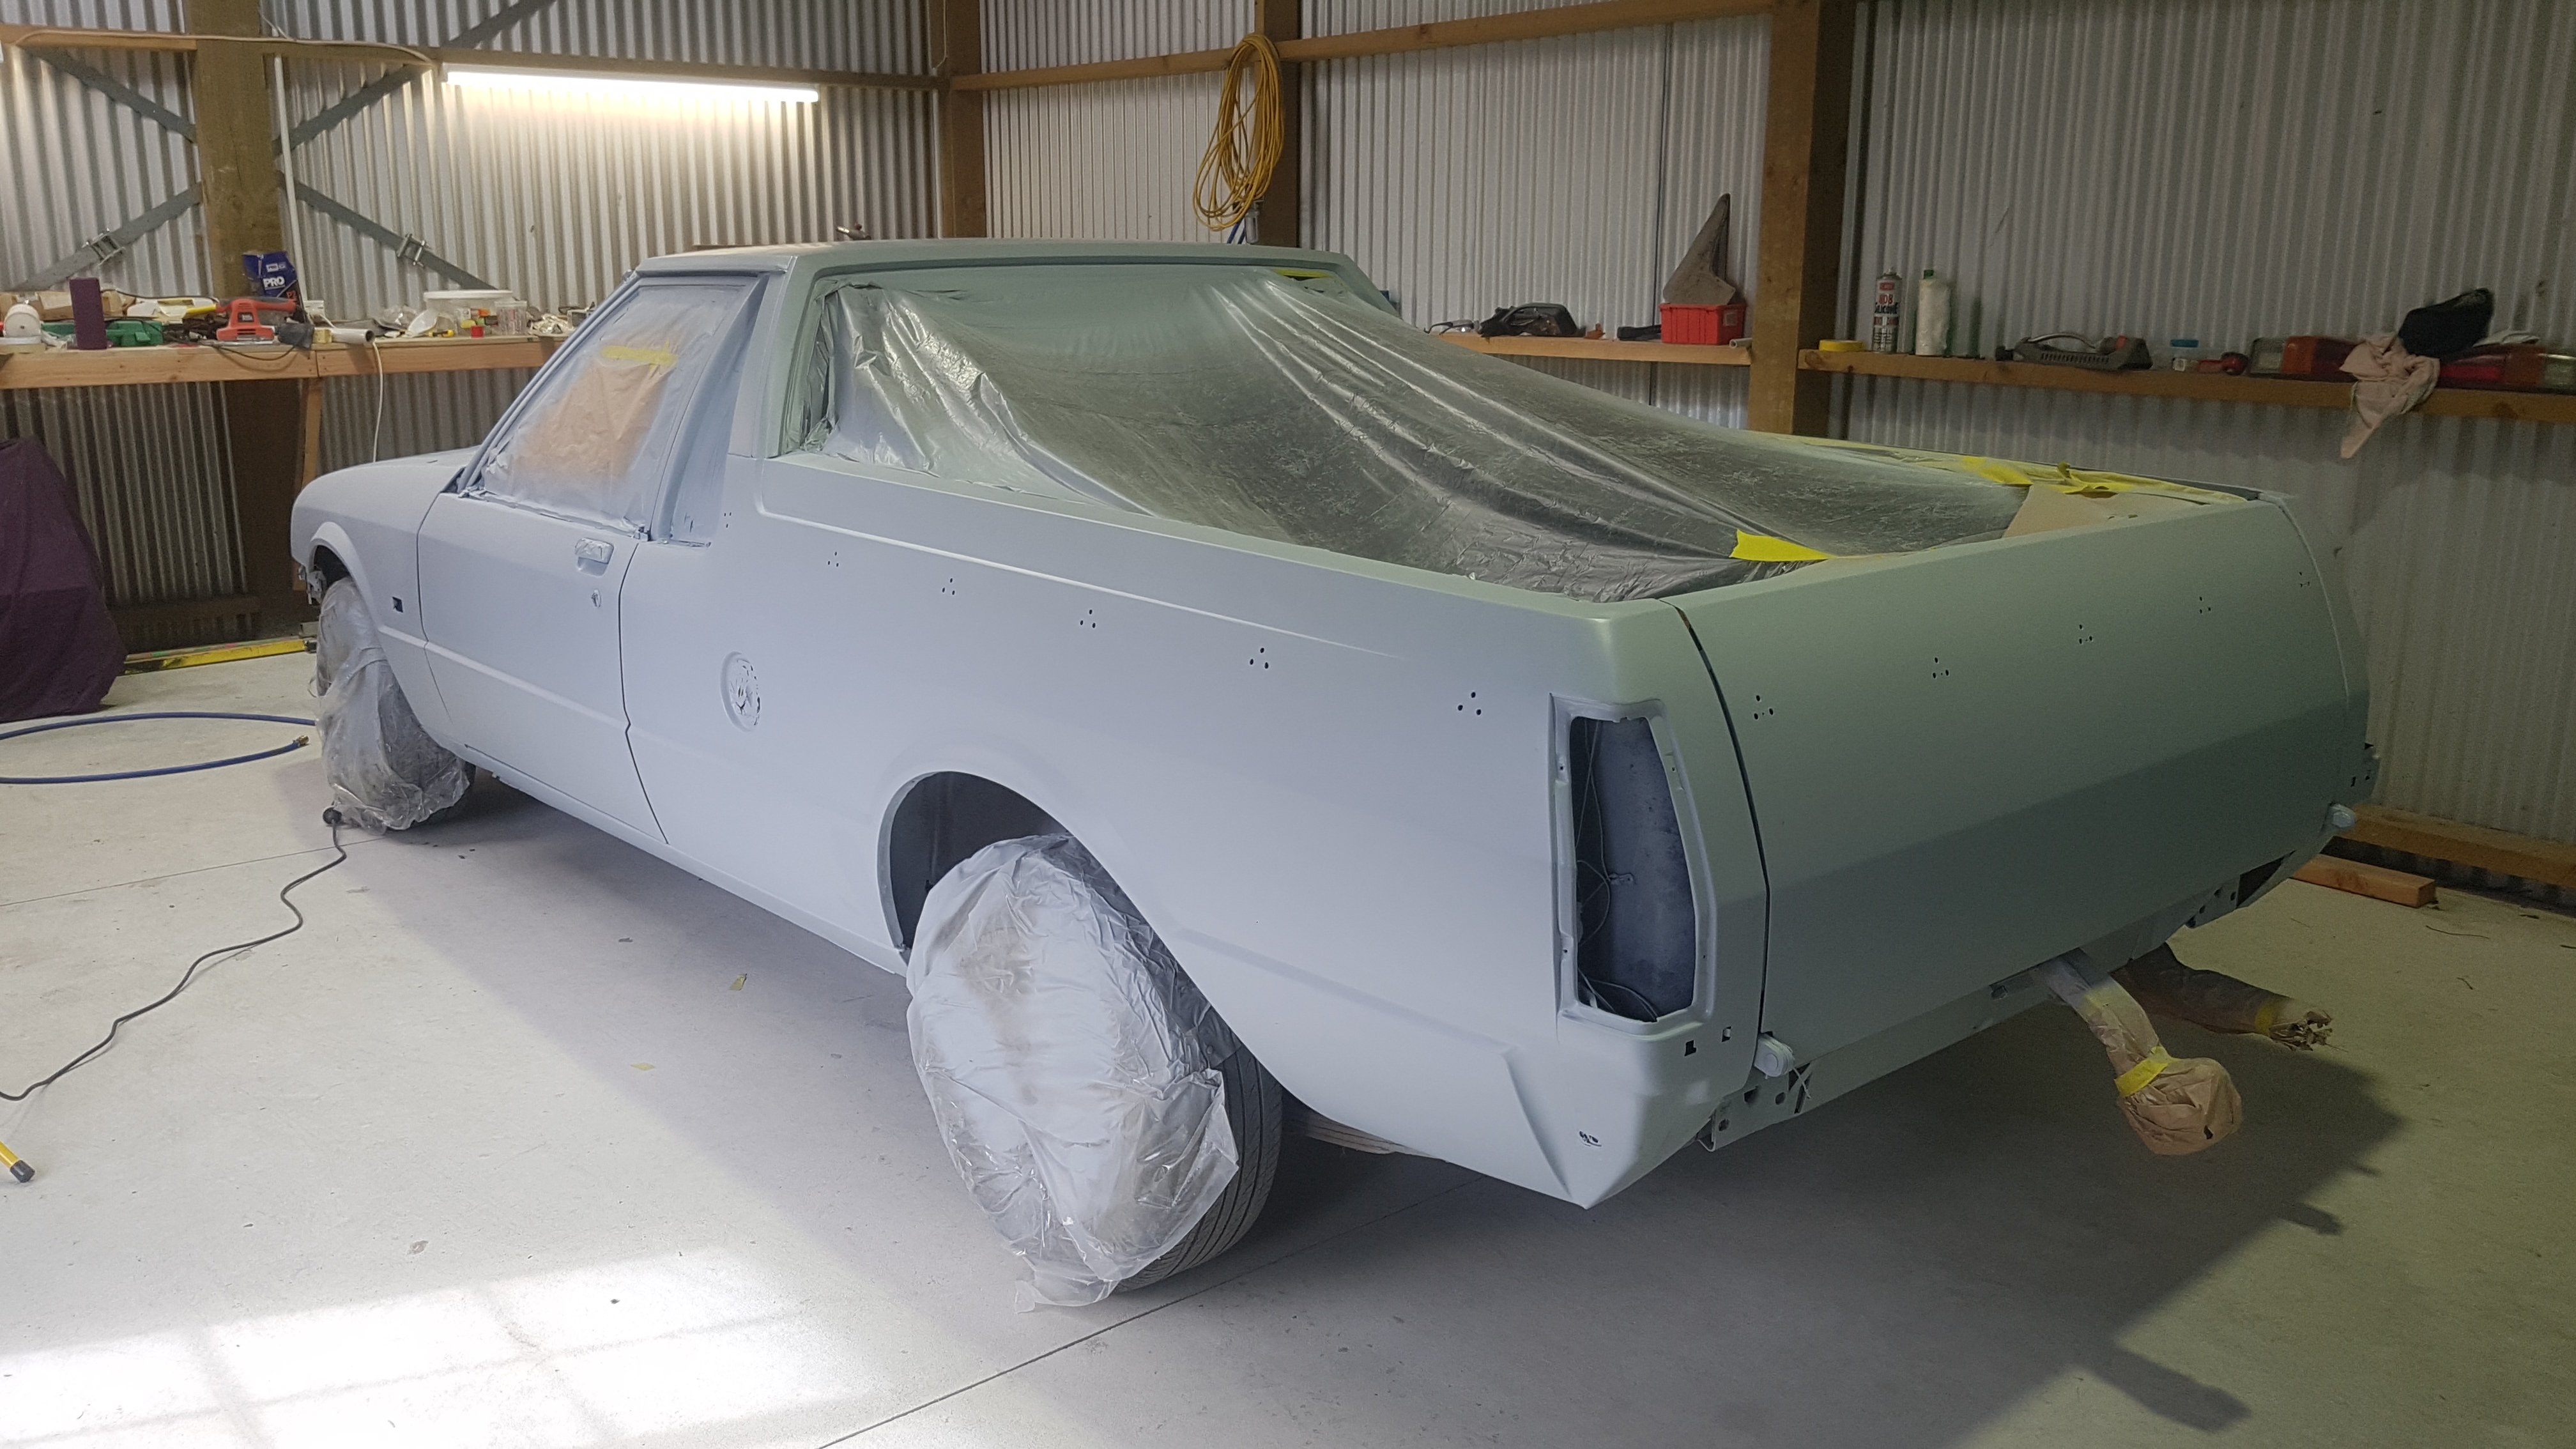
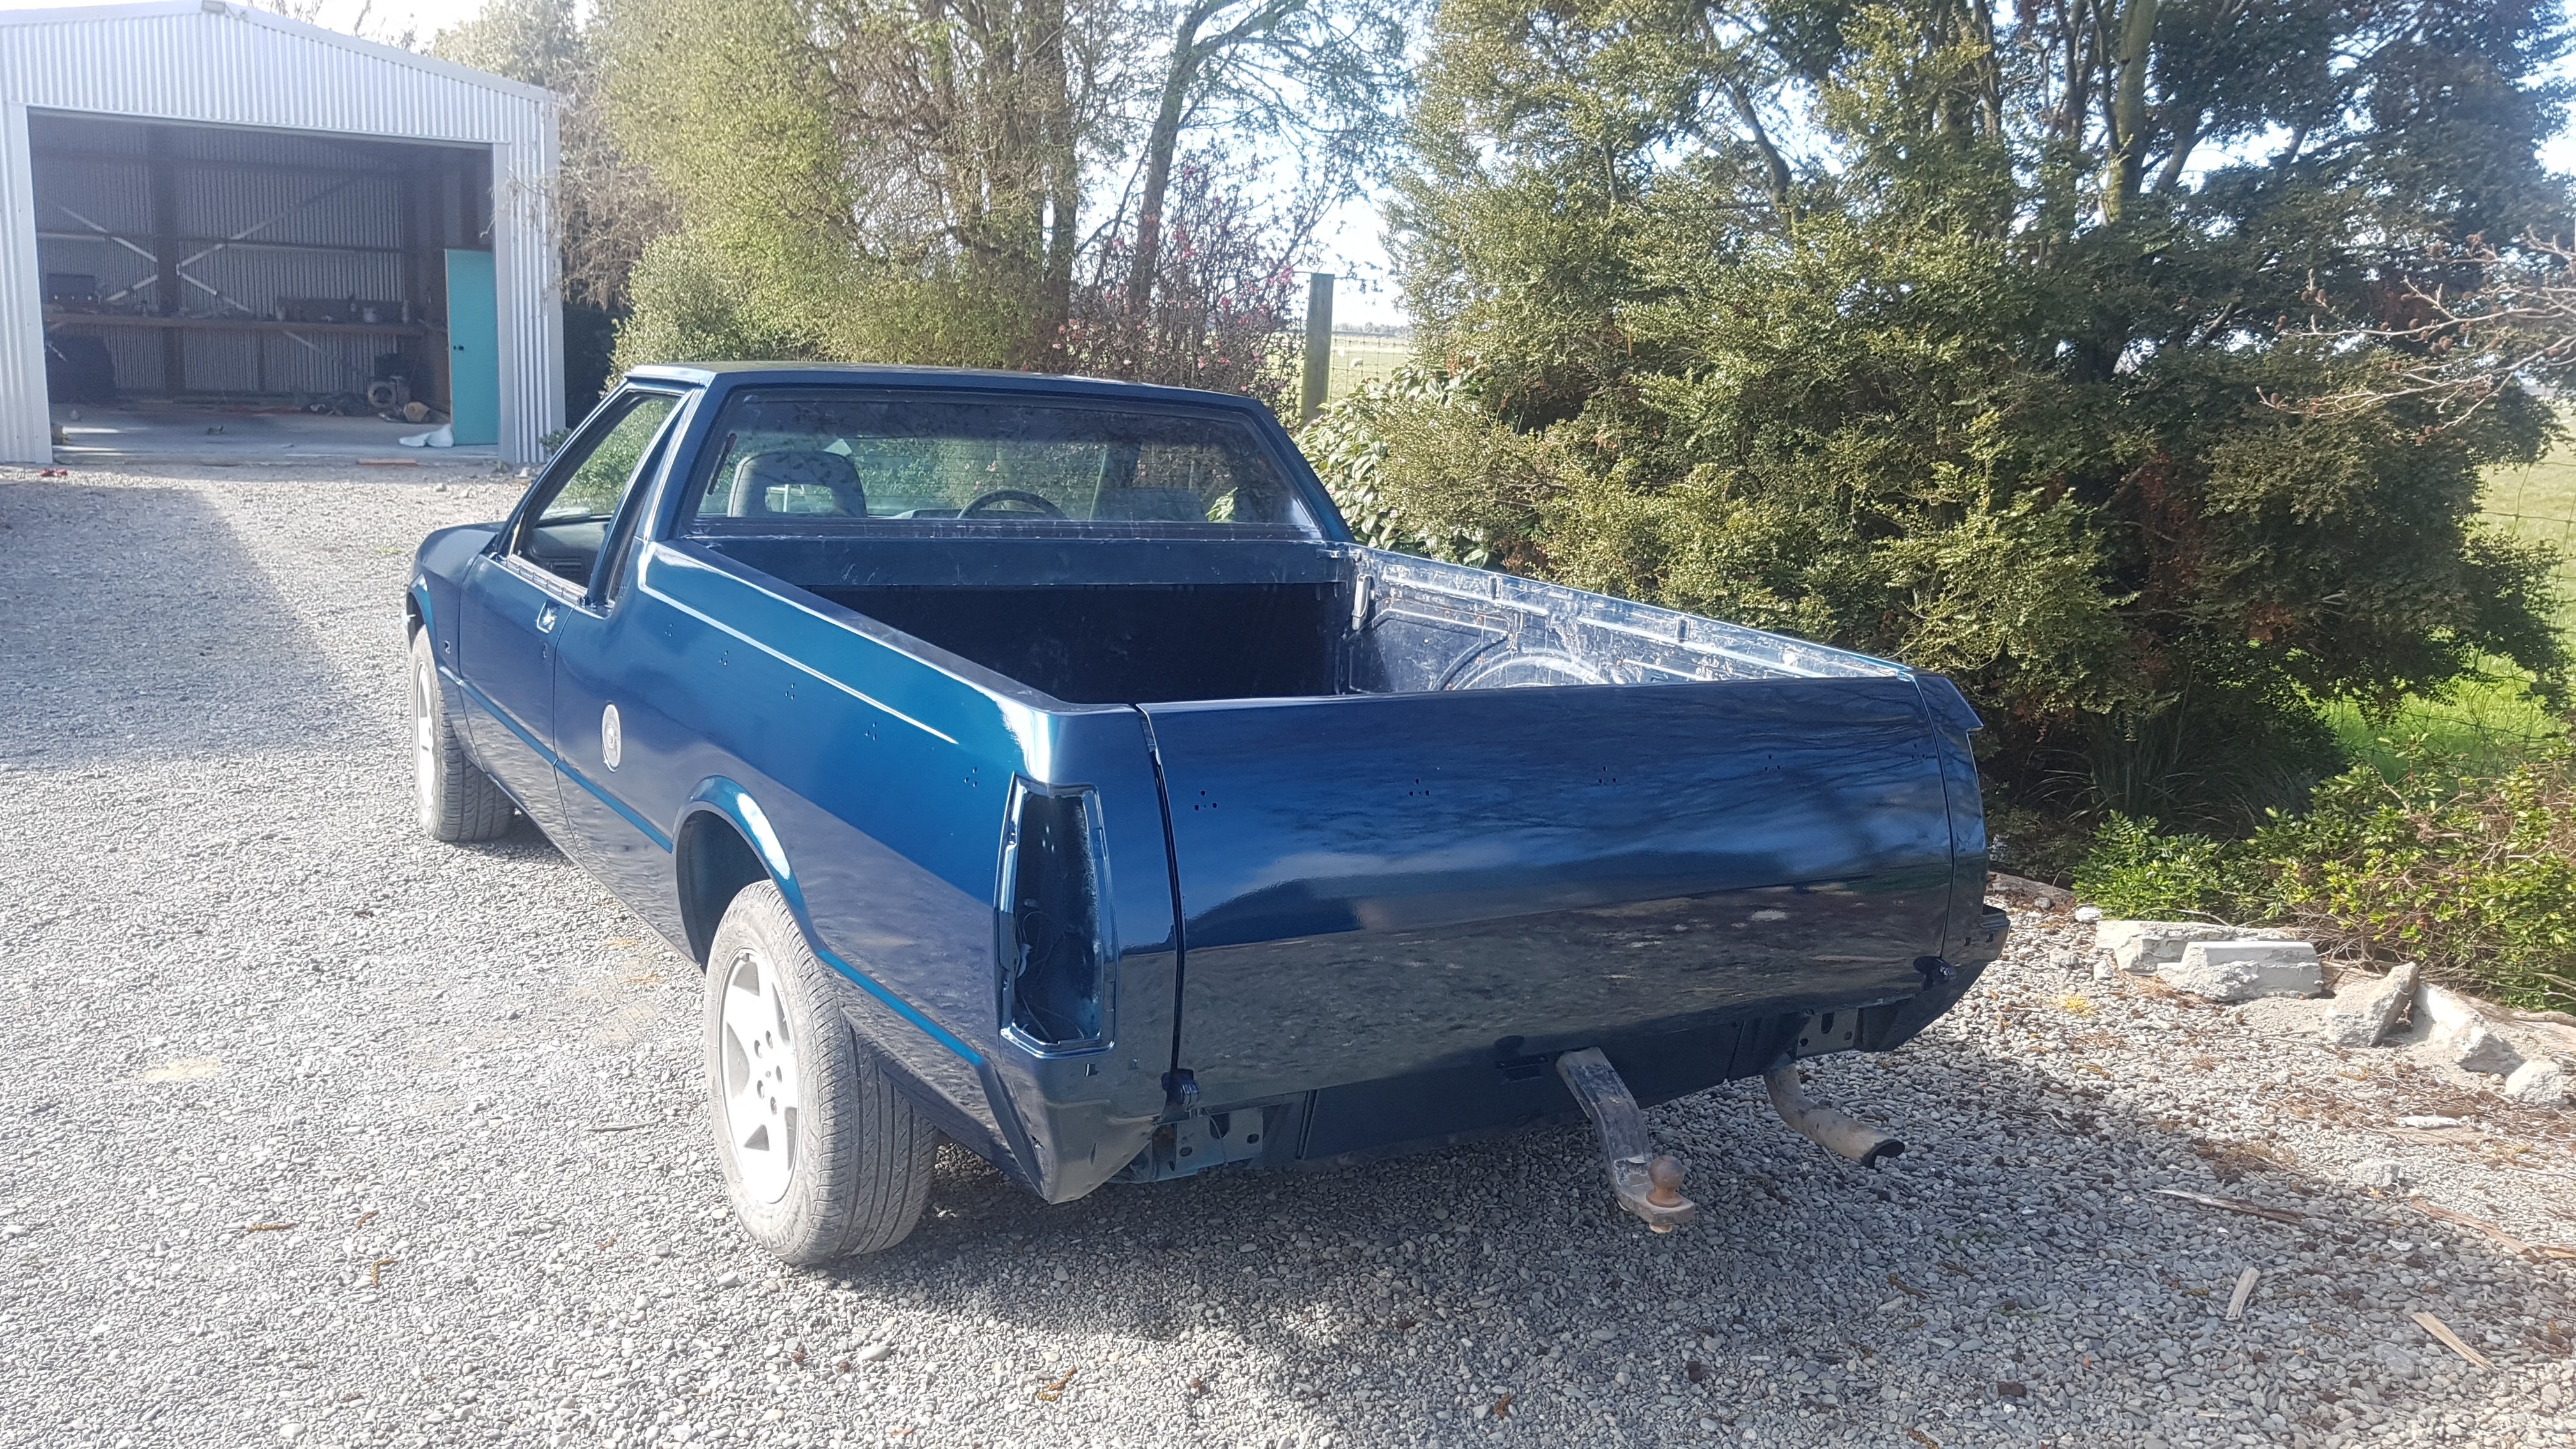
Instead of being the responsible car owner I'm not, the e30 has once again been put on the back burner. This time for my old mans XG Ford Falcon. He had a run in with a shipping container down the side of the Ute and the general paint was worse for wear. We thought we'd have a crack at it giving it a cosmetic birthday.

A few DAYS of battling, using multiple pieces of 4"x2" as precision tools, tapping, beating and caressing.
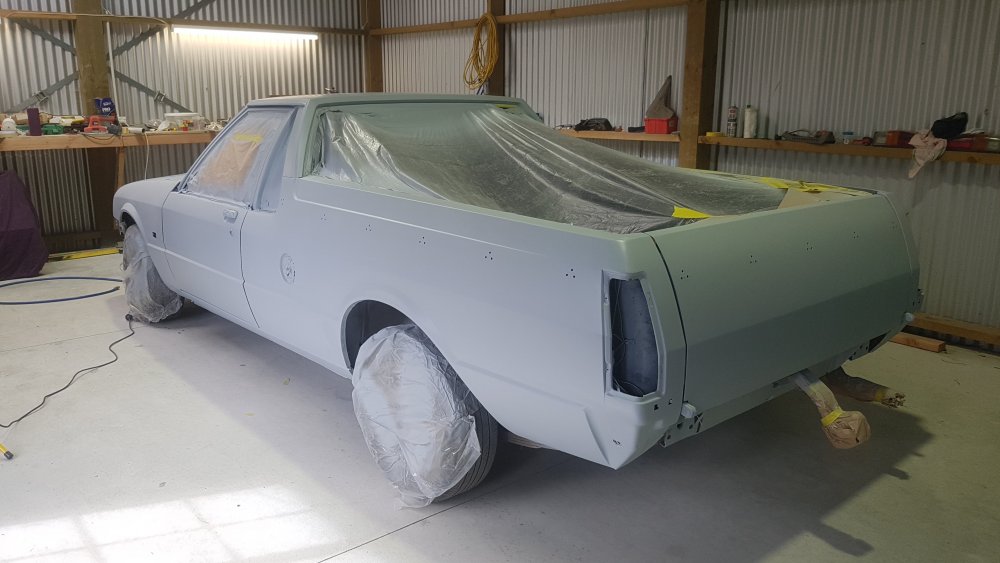
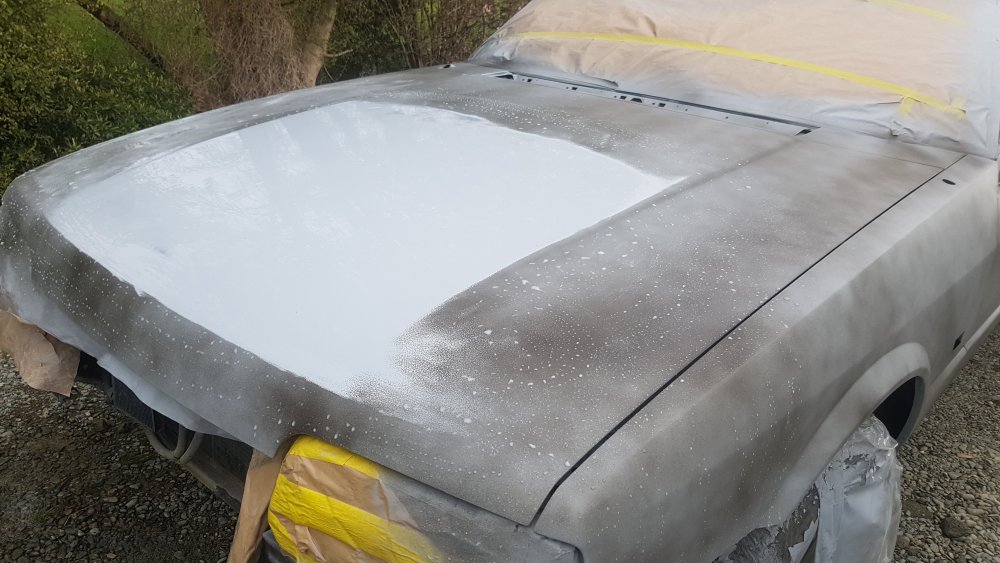
We were left with something that I'm happy, but on the same page, not happy with. Used PPG paints and the best gear (Sata guns and an industrial compressor) but had to battle cooler weather (Southland), bugs and general dust & debris. Hopefully something some experimenting with sandpaper, razor blades and detailing will fix. Overall, it's better than before.


I will not be touching my E30 with sandpaper. Ever ?
-
1
-


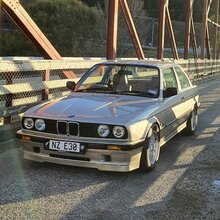
E30 Bronzit Coupe Project
in Projects
Posted · Report reply
Cheers @WYZEUP! You were a help re cert process a couple months back when I messaged you.
Still have the WOF to get when the cert plate arrives, and one of the things I failed a WOF on was headlight direction. Thought I'd show a wee before and after/how-to on the process. Firstly, remove the 2 screw from the grille along with the 3 clips on top.
Then I removed the 3 screws holding the headlight assembly to the car, along with the 3 very brittle plugs at the rear.
You'll be left with something very mad max looking after you also remove the clips from the kidneys.
My WOF guy didn't want to touch the headlight adjusters as they were seized up and didn't want to risk breaking them. A couple squirts of silicone penetrant and a wriggle of the adjuster with pliers on the metal free'd them up good as gold.
Also took off the headlight metal surrounds to remove the light surface rust and give them a quick paint. Only paint I had lying around was Arctissilber from the E36 ? But it actually looks really nice. Job done. Had a quick line up of the headlights on the garage door but now that the adjusters move freely under finger tips, I'll let him use his reflector to dial it in.
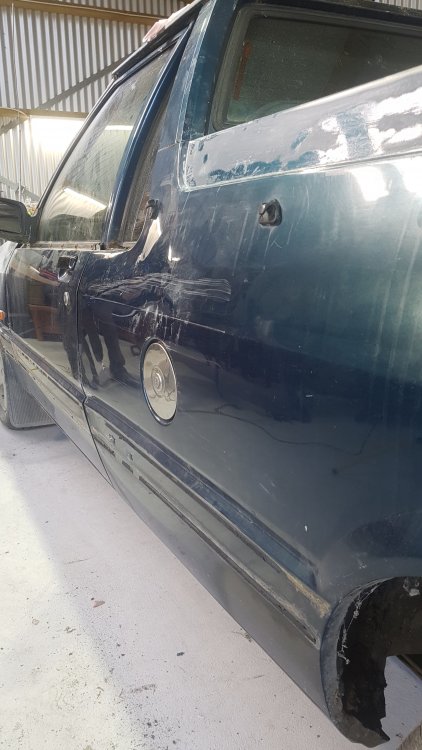
A keen eye will notice I've removed the IS lip. This lip is less prone to driveway scrapes when toing and froing from WOF/CERT etc.