Leaderboard
Popular Content
Showing content with the highest reputation on 12/22/24 in Posts
-
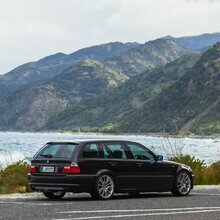
4 pointsThere’s been a few E39’s posted up for sale lately in various colours and more importantly condition . Pricing varied and the example at Archibald’s in ChCh just recently sold and boomeranged its way back to Whangarei . So with this said I thought I’d do a show n tell on my example . I’ve owned the car twice . I should have never sold it some 13 years earlier , but I got a knock to the head and went down the Porsche route for many years . Anyway coming to my senses I had the opportunity several years ago to purchase ‘ol blue back. I’m really a purist at heart however the car has morphed into essentially what is a NZ version of a Dinan stage 2 car . To the uninitiated it looks stock which I really like . It performs very well , sounds epic and has been maintained to a very high standard . Mileage is circa 117,000 kms from new . It’s an NZ new car , built April 2002 and delivered through McMillans in July same year . Cheers .
-
3 pointsE46 'vert front underbrace, a part i didn't know i wanted until i spotted it, always annoyed me the most E46's dont have a factory jack pad. This vert brace is reinforced\heavier than your std one and namely has a suitable round dimple\hole to mount my own pad on into. I used a X8R E46 jacking pad reduced to a round press fit and some Sikaflex for insurance, the E46 M3 jacking pad may also work?. Such a great QoL improvement that i wish i had done ages ago.
-
2 pointsYesterday afternoon I conditioned the intake boots and clamped them to the airbox. The tool for the Oetiker clamps works out at about $100NZD however you approach it so I saved $85 dollars by using the dremel to modify some standard $15 SuperCheapAuto clamp pliers. This worked very nicely - I'll paint the pliers so they don't rust and they can go in the toolbox for next time. I also installed 2x new rubber isolators - Being 20 years old the rubber in the current ones is probably soft and perishing. Plans for between now and whenever the dipstick tube turns up is to remove the LHS radiator cowl shield in preparation for installing the airbox. Yesterday I also took the car for a drive and logged the relevant variables with TestO to get a baseline capture before I go making any changes to the car. I want to make sure I'm as prepared as I can be for moving across to the 0401 program. To that end I will also be doing another full review of each change I've made to the partial as part of v1 of my tune. It's been long enough now since I did it that I should be able to do a good review of it and make sure I haven't made any mistakes.
-
2 pointsLPSR purple tag - The used one he send me had a preload issue so he gave me a discount on a new rack with his rebuilt one. CMP front brace - Was debating whether to install it but ive never used the fold down seats since owning the car so i figured why not. Haven't really pushed it hard since installing as i need a alignment but it appear to give at least a subtle improvement in rear end feel. Meyle HD bushings - Only found out recently looking in the Bentley manual that there is a distance spec for these to be fitted (~289mm +\-1mm from inner ball joint to rubber bushing). Mine had been re-used which wasn't ideal and weren't pressed on near enough. I made a similar tool to proper ones to ensure i got them on properly this time around. Ive always felt the car wasn't as stable and lacked steering feel it should have and this was very likely the main cause. Even with the wheel alignment off its day and night especially combined with the above tweaks.
-
1 pointI don't have any metrics to back up its effectiveness but for that kind of money I reckon you might as well, can't see how it would hurt. Install is 2 minutes, no logos on it so blends right in without looking tacky and does its job with no fuss. Marginal gains and all that. Might grab some next time I'm there if it's cheap enough. In this instance it turned out my issue was the new washer reservoir cap not having a vent opening and nothing to do with the fluid or the washer jets themselves, funnily enough. Was a classic case of if it ain't broken...
-
1 pointAfter donating a Dinan CAI to @Vass we had to figure out what parts they used for their additional cold air source since they dont sell them easy. I know Dinan use alot of OE parts for their mods so i eventually closed in on the likely parts. A quick confirmation with Vass concluded they were indeed E39 6 cylinder airbox boots\grommets. I decided to semi mod mine to re-create theirs after i found some suitable pipe from NZ safety. An additional cold air source cant hurt and im not exactly sure why BMW did not source it from there like the M3 etc, possibly a space or cost issue. Pictures basically explain it, grommet pops out the airbox so its easily removable from the car. As far as temperature goes i didn't do enough logging in varying circumstances to say whether i has a measurable reduction, it wasnt apparent in normal highway driving with a 20 degree air temp and 30-35 IAT with both setups. For what its worth IAT temp reading was only ~5 degrees hotter than ambient air temperature with this installed once you pushed a bit past stuff the license speeds.
-
1 pointAround the same time last year i did a 4 runs with Draggy out of interest, so id thought a do a few more under similar conditions. @Harper mentioned NPD100 so thought id give it a go instead of the Gull 98 in previous runs. Other changes with these runs are the TMS O\D pulleys, wheels\tyres, M52 manifold, cleaner engine and launching in 'M-track mode(thought had DSC disabled for some reason). Previous 0-100 was 6.59s and 14.8s 1\4. No doubt there is 6.XX and 14.XX with improvements and more runs, but at least its in lower end of the spec range now.
-
1 pointI was just catching up on your build thread - wow! Wondering - would you recommend the Bevinsee intake? I found them on Aliexpress for under 50 clams, and I figure if it helps with intake temps in the summer at slower speeds, that wouldn't be a bad thing... Re BMW-safe windscreen washer fluid, I just buy the BMW stuff - a couple of dozen bottles at a time. It's cheap enough, does the job. The Liqui Moly stuff is also good though more expensive by a good 30%. HTH
-
1 pointWas previously owned by one of the Kiwi face group members. An early LCI vehicle that has comfort seats and chrome door trim and wood interior trim. Was owned by a Wellingtonian who flipped it, and shortly after arrived in Canterbury for sale. Not sure about the mechanical history. At that mileage I would expect that it has had, or will require a ‘to do list.’ Like the now- sold and previously discussed Lemans blue example that was being marketed in Cch recently, this M5 weirdly was once equipped with a tow-bar.
-
1 pointFinally made it to my summer break! Did a quick fitment check of the airbox, filter and Haimus snorkel to make sure I don't get any surprises during install. I've noted others have found the hose attachments to be tight so am prepared that I might need to do some adjustments there like heinzboehmer did to get them to click in correctly. The CSL dipstick tube is finally with the local courier for delivery, more than 6 months after I ordered it, so should get it in the next few days. The only other thing I'm waiting on is the silver replacement screws for the two halves of the airbox, but they aren't a blocker given I can use the ones the airbox came with and swap out easily later.
-
1 pointblocked skuttle panel drains,(leaves etc) then floods through the air intake for the blower fan runs down through the blower fan straight over the fuse box and body modules also if window regs are not working and door card membranes ripped
-
1 point
-
1 pointHaven't seen an update on the ol' compact in a while. Guessing you've gotten it all certified by now? Ohh damn, I do remember reading that thread a while ago but wasn't considering using it at the time so my brain didn't retain any specifics. N-methyl aniline seems to be the problematic substance, supposedly causing carbon deposits and swelling of rubber seals. There's this disclaimer on the NPD website claiming discoloration of plastics to be the main side effect (if exposed to UV light). Had a skim through the BP 98 datasheet and sure enough it doesn't have it as an ingredient. NPD 100 BP 98 No idea if any of that other stuff is good or not. Would have assumed there's be lawsuits piling up if engines were exploding left and right. Then again that disclaimer is probably enough to shield them from liability. That thread probably deserves a revival. It's been 3 years since its introduction to the NI, assuming there's a good number of people out there using it in BMW's, keen to hear of any actual long term, real world repercussions. FWIW, we've exclusively used NPD 100 in our Subaru rally car for a good few years now without any issues... But then again it only ever sees off road use, has a metal fuel tank and the engine is dyno tuned specifically for use with that fuel so not really applicable to the use case at hand.
-
1 pointA short lesson in "if it ain't broke, don't fix it." Ordered in a pair of new washer nozzles. Being the fancy heated type they weren't exactly cheap for what they are - around $40 each. With the shipment nearly at my door, only then did I think to look up how common a problem this is and stumbled upon this thread, which immediately made me feel like an utter dumbass. A wee while ago I threw on a new washer reservoir cap, not because of it having anything wrong with it, rather just a visual thing. Didn't think to notice it at the time, but unlike the old one, the replacement was completely solid and didn't come with a vent opening. The fluid would heat up in the engine bay, pressure would build up and without a vent opening the only way out would be for it to push its way out through the nozzles. Physics, duh... Took the cap off, drilled a 1mm hole through the middle of it, problem solved. Threw the new nozzles on too since they were already here. Packed the order out with more unnecessary stuff to justify the shipping costs somehow, anything relatively cheap that I could think of really. Got a new fuel tank vent valve (just because I had an issue with the car stalling that once a while ago), a new expansion tank cap (started weeping occasionally) and a fuel filler cap (seal was starting to crack).
-
1 pointOn the "performance" side of things, I committed blatant sacrilege by throwing on some intake mods. First was a Bevinsee intake air scoop off Aliexpress. Wouldn't usually go for such things but it looked tidy, all black, no logos and supposedly helps with intake air flow and reduces intake temperatures by a few degrees so was worth a shot for the low price. The second was a Dinan airbox. I've heard of them mentioned over on the E46 fanatics forums, supposedly being one of the few intake mods that are somewhat of an improvement on the stock setup. I'd never be able to justify the price of it though so never crossed my mind actually getting one. I happened to be chatting to @Eagle one day when he mentioned coming into possession of one as a bundle deal on his recent purchase. He didn't feel like using it himself so kindly passed it on. Absolute legend. It's essentially just a different lid for the bottom part of a stock intake with a bigger filter fitted inside. Originally would have come with extra tubing which taps into the brake duct and drills into the bottom of the airbox, adding a third source of airflow. Unfortunately it didn't have that tubing intact but it's something I can just whip up as a DIY at a later point. The filter is an odd shape but the filter elements themselves look identical to the washable K&N filters. Supposedly these aren't washable and need to be replaced every 1-2 years. Unfortunately, replacement filters are stupid expensive, are out of stock in most places and the few places that do stock them don't ship to NZ. I dug around the forums a bit and found reports of people washing and oiling them with K&N kits for years without trouble though so that's what I did. Having taken it on one proper drive so far, the sucky noises do sound more pronounced, which isn't something I ever felt the need for but nice to have I guess. Whether it does anything beyond that in terms of performance, who knows. Does look cool though. I did discover a few new issues on the first drive post paint correction. The first one being a massive puddle that started forming right after parking up. The mind straight away jumped to the worst case scenario. Luckily, it needn't have. Windshield washer fluid. I had just refilled the reservoir as well. Didn't seem to leak when stationary but once the engine gets warm the fluid bubbling up and pissing out straight out the nozzles. Real weird one. Having talked to @Eagle about it he mentioned there's certain brands of washer fluid that are known to wear out the seals in the nozzles. Pretty annoying but what can you do. Will throw a pair of new nozzles onto my next order and will do some research on BMW-safe washer fluids. The second issue could also have been more serious but ended up being a simple solution. I'd intermittently get a trifecta of ABS-brake lights pop up on the dash, maybe once or twice a year. Usually happened after the car had been on jack stands so I didn't think much of it. You'd restart the car and the issue would stay away for another number of months. This time around in the span of 2 days and 200-something km's it must have happened a good 25 times. Something more serious was at play. Got so annoying I ended up killing the engine without stopping and restarting again on longer straights. Initially thought it must be a bad wheel speed sensor - some of the last components I've yet to replace - but having checked live data mid drive they were all returning the same numbers. Dug a bit into the engine bay having gotten home and discovered the positive terminal next to the ABS unit heavily oxidised and looking yucky. Cleaned it up with some wire brushes and contact cleaner, another 200km later and the issue is yet to return. Great success.
-
1 pointThe shadowline trims that go around the windows were looking real tired. The finish is somehow different to the vertical pilar trims, they were heavily oxidized and no amount of cutting, polishing or even wet sanding seemed to do much to improve the look. Ended up giving up and passing them on to professionals to get properly repainted. Ended up at Evan's Colour Works in Sydenham. The turnaround was quick, the price reasonable and the finish was mostly good, although did have quite a few dust bits stuck under the paint and a couple of runs. Ended up leaving one piece to get resprayed but the rest came out decent enough with a quick polish. Will have to get some 'after' shots later on. The roof rails were also pretty bad, with paint bubbling up and peeling off in a few places, as well the 3D printed plugs needing filling in. The finish was satin black so I felt more confident in taking these on as a DIY. I epoxied the plugs securely in place, carefully masked off the rubber seals, filled in the gaps around the plastic plugs and sanded down all the rough bits. I used 1 coat of etch primer followed by 2 3 coats of flat black enamel. Turned out mostly fine but I did a pretty poor job of filling in around the plugs so was left with a few craters. The spray nozzle was also pretty poor so ended up with a few drips here and there. Will sand it down at some point, fill in the imperfections properly and give it another few coats, whenever I've got some surplus motivation. I had epoxied one of the taillights back together a few years ago. Mucking around this time I noticed the other one coming apart at the seams as well so it also got the epoxy treatment. Whilst I was at it I also gave all 4 rear lights a cut and polish. Came out really nice, getting rid of the swirl marks and the yellow haze from the clear bits. Photo of a before and after of the inner lights below, no points for guessing which one is which. Finished them off with all new bulbs throughout and chrome bulbs for the indicators which made a surprisingly noticeable difference. Ohh, and I ended up swapping out for a slim black plate as well. Don't care much for personalised plates and wouldn't be able to justify the price of one, but for $200 I do love the stealthier look. Plus, it'll pay for itself if it does a good job of confusing a speed camera or two... Did get a new standard issue combination though, as a symbolic start of a new chapter if you will. Naturally, the plate holder plinths got trimmed down to size once again. Also, took off the towbar for now. Looked way too rusty for my liking so will give it a lick of paint before throwing it back in. Hoping to come across a towing module soon so I can wire that in at the same time. Another small tidy up mission were the rear arch liners. When having the rear guards rolled, the fella doing the job took a good few chunks out of them in quite a crude manner. Fair enough they're the part that rubs against the wheel as much as the guard lip itself but he took away way too big a piece either side, leaving a gaping hole for road dirt to get flung into against the chassis and inside the bumper cover. Not a big deal but has bugged me ever since. I picked up a pair of tidy ones and cut away the protruding parts in a more conservative manner. Then gave the bits some Carpro Perl treatment (the bumper and door trims got the same) and threw them in. Can now sleep a bit easier at night.
-
1 pointLong overdue update. After being in various states of disassembly even since before the dyno day back in June, she's finally back in one piece and looking better than ever. As these things tend to do, a little pain correction snowballed into a full blown detailing mission spanning a good 5 months. No panel was left untouched by the end of it. Started running out of the Koch Chemie heavy cut compound I had so switched over to the Autostolz offerings halfway through. After the heavy cut, finishing polish and touching up and deeper scratches and rock chips, each panel got 2 coats of Chemical Guys Blacklight glaze, followed by 2 coats of Menzerna liquid carnuba wax and topped off with Fireball Pirouette spray SiO2 sealant. All 4 doors got taken apart down to bare shells & wiring, installed sound deadening, door lock and window mechanisms checked over and relubed, rubber seals treated with Gummi Pfedge and vertical pillar shadowline trims cut & polished. All the window tints were looking real tired, either from shoddy quality or purely due to age so off they came with the help of my tiny steam cleaner. The door ones were the easiest to do whilst the windows were out of the car. I rushed a bit on the first one and did the whole window on one refill, which left behind quite a bit of residue that was a pain to scrub off. From there on I slowed it down, only gently pulling on the film whilst dousing it with steam at the base. The average window now took 3 refills but now only left behind very minimal glue residue. The rear window alone took over an hour of mucking about and about 8 refills, dragging the job well into the night. Well worth the effort though. I then gave the windows a quick polish with Meguiar's glass polish and a special glass pad. Didn't do much on the deeper scratches but helped get rid of stubborn water marks and old gunk from the edges of the windows where they sit against the seals. One annoying bit I ended up abandoning were the seals around the rear door back windows. They were badly perished on both sides so I got replacement ones a while back. They come in one piece as a surround for the whole window. With the doors apart did it became apparent that there's really no simple way of replacing the surround without butchering it. The bottom bit is too wide to slide in between the door shell and the window so would need to be cut off or trimmed down. The whole thing also seemed to be held in place with whatever sealant was used for the window. I didn't want to risk ripping some of it out and compromising the weather tight seal so reluctantly abandoned the mission for now. With the windows back in, I buttoned the doors up with "new" vapour barriers. 3 of the 4 original ones were ripped and torn to various degrees so I scavenged good condition ones from good ol' Pick-A-Part, carefully peeling them off the doors leaving all the butyl attached to the foam. Walked away with a full set of 4 for a whopping $5. I gradually heated the butyl up with a heat gun as I went around the door and stuck it down with a sound deadening roller, making sure it's nice and secure all around. Good as new.
-
1 point
-
1 pointPlenty of people go to Timaru to avoid the dealing with the Christchurch fellas. There is a new guy starting up in Rolleston I saw on the December newsletter but not sure how long until he is up and running fulltime.
-
1 pointYeah already gone, dropped it off at Pick-A-Part on Wednesday. Hardly anything useful left on it, managed to keep hold of the wheels as well. Rims were well kerbed up and tyres were shot but will try my hand at restoring those at some point.
-
1 pointJust before Christmas I suddenly remembered Barbara wasn't the only BMW I owned... I bought a green 320i parts car well over a year ago and it had been sitting in my mate's paddock ever since. Out of sight, out of mind so I managed to completely forget it existed until finally getting around to putting it out of its misery over the break. Whilst scavenging for parts, I decided to also try my hand at some jobs that I hadn't done before, from smaller stuff like taking off door handles to removing the heater core and the front carpet without cutting it. Naturally, things escalated and I embarked on a learning exercise of removing all of the body loom in one piece - from the boot to the headlights and everything inbetween. I've got a weird idea of "fun"... Anyway, I've not got all the spare bolts, nuts, clips, grommets and brackets I could ever need, as well as snagging a few more bits for ol' Barbara. The rubber surround on the driver's door was ripped and perished in a few places, something I didn't notice straight away but had been annoying me ever since I did. Brand new ones cost stupid money and most used ones will be similarly shagged by this point. Unsurprisingly, the driver's side one on the parts car was no different, but the passenger door one, obviously not getting as much use, was in much better nick. Luckily, both front ones are the same so fit perfectly. Another surprising find was the rear seat sound deadening. The one I had was long perished and only had a few random chunks left of it in a few places. The one in the parts car though - immaculate, all in one piece, no rips or cracks, the fuel pump cutout tabs still intact, as if the rear seat had never been lifted. Gave it a quick wipe and threw it in. Doubt it will make any sort of noticeable difference but does look legit. For the time being anyway.
-
1 pointJust thought I would post this up for all you DIYers. I compiled this a little while ago. It doesnt cover everthing, however it may help someone out there. Diagnostic Overvue I have compiled this overvue to help DIY repairers and Profesional people alike. The diagnosing of repairs can vary dependant on the actual fault, however this is a procedure that most should follow. In most cases specialist equipment is required and most DIY people don't have access to this type of equipment. It is also likely in most cases that professional help would be needed to sort out problems. This overvue can be used on any vehicle…not just BMW's. Not much can be decifered on pre '88 vehicles without the 20 pin diagnostic plug, without the use of a scope and gas analyser, dependant on what the fault is. After '88 things get a little better untill you get to about '93 and then things get better and continue to get better as time goes on. Generally there is not much that the average person can do when a fault occurs, apart from open the bonnet and check for the obvious, broken induction & vaccum hoses, spark plug leads, fuel leaks, loose connections etc. etc. All fuel injected vehicles rely on manifold vacuum as a source for DME function. Regardless of it being MAP, AFM or MAF sensored. Therefore, manifold vacuum is critical for the engine to function properly. Air leaks from hoses, gaskets, crankcase ventilator valves, tight tappets and burnt valves will effect the manifold vacuum, which inturn creates a problem for the whole system. The first thing to do when approaching a problem, is look for the obvious, and try and think if there is any relation to what has happened when you last drove it ie: did you just fill your car with petrol (diesel ???) sounds stupid… but it does happen. Did you drive through a 500mm puddle at speed ?? Things like that, because they could have a bearing on what you need to look for. I grill customers all the time. This helps me help them. If the car stopped while driving it generally is a fuel problem, crankshaft speed sensor or a cambelt. If the car has an irregular driving fault, diagnosis of the problem should be approached in this manor: First do an under bonnet check of all induction hoses, vaccum hoses and check crankcase vacuum by checking how much suction there is when you release the oil filler cap. If vacuum is excessive, it will be a crankcase ventilator valve problem. Check the obvious, spark plugs, leads, distributor cap, rotor etc etc If there is nothing obvious, I would then get it scanned before fiddling. ( Fiddlers are our biggest enemy) Check engine compression If compression is not within 5% check valve clearances Compression should be a minimum of 11 bar Check for spark at the spark plug Then check for spark at the coil (coils) Fuel pressure 2.5 bar with vacuum 3 bar with no vacuum Flow is also critical, you can have pressure without flow Check injector pulse signal On all injectors Manifold vacuum Minimum of 16 and stable If manifold vacuum is not correct then check: Check for air leaks A can of engine start can help find leaks Cylinder leak test All cylinders should be within 95% and should not vary by more than 5% Check camshaft timing Should not change on chain driven engines under normal conditions unless this fault has occurred since work has been done on the engine Make sure TDC mark on front pulley is actually TDC Confirm with flywheel lock tool or a piece of wire down the spark plug hole. Especially with front pulley crankshaft sensors In most cases the above checks cannot be done by the average DIY'er because you wont have the tools or the knowledge to use them I might add also that some so called professionals don't either These above checks are basic for any engine , Timing, Compression, Spark, Vacuum & Fuel. However it must all come together at the right time. SCANNING First I'd just like to say that a scanner is just a very useful tool. Some are good, some arent so good. Some are better on Japanese cars, some are better on Euro cars. This isn't going to be a scan tool buyers guide, however I will say that scan tools are friggen useless, unless you have the mechanical understanding and a brain. You will also need precise vehicle data to make accurate assessment of the data your reading. You will also need to understand what you are reading and relate that data to the driveability fault you are dealing with. Putting it into perspective, I repair doctors cars because they can't fix their cars. Put me into a doctors surgery with all the necessary tools and data, could I repair you ?? I think not.. A lot comes down to training and experience. That’s why there are good and not so good technicians out there. Most fault codes relate to actual sensor faults. ie: Camshaft position sensor Crankshaft position sensor Camshaft position sensor (inlet) Camshaft position sensor (outlet) However, some fault codes are the result of something else wrong, causing a fault code to come up from a sensor that actually is doing it's job properly, but has gone out of scale (trim). Air mass sensors are a prime example of this occurance. An air mass sensor will not normally come up as a fault code unless it fails completely, and the car won't go. If it is reading incorrectly and out of scale, you will get an oxy sensor fault code relating to fuel trim limit reached. Driving the car with the scanner using live data will confirm this. Blocked cats will give you the same problem because the engine can't breath, so will collapsed crankcase ventilator valves and broken induction hoses. Most of these faults will register an oxy sensor trim fault. Oxygen Sensor (Heater coil) would either be the relay or the oxygen sensor itself Engine missfire cyl (1-6) can be many things Igntion coil missfire cyl(1-6) is normally a spark plug, faulty coil or wiring fault Combustion missfire cyl(1-6) on M52tu & M54 engines normally indicates hydraulic lifter fault Again, live data must be checked, particularly engine dynamic balance. Measured differently on most scanners. Remember this is only an overvue. Most individual engine models have their own idiosyncrasies and I can't cover everything on here. However, this should help or give you some idea of what is involved in checking faults PLEASE BE AWARE.. OUR BIGGEST ENEMIES ARE "FIDDLERS" Never fiddle, or replace anything unless you have properly diagnosed the fault first. You will waste money and time. If you don't have the ability or access to the right equipment, consult a professional.

