Leaderboard

Popular Content
Showing content with the highest reputation on 08/19/17 in all areas
-
4 pointsCleaned, checked, honed and painted M20 block ready for rebuild
-
4 pointsI would strongly suggest that you spend your money wisely and get a PPI carried out first and then cost what may actually need to be done. There may be quite alot more that needs to be done on a 26 year old E30. And I did get your email. I would need to see the vehicle before giving you an estimate on cost and unfortunately we don't fit parts supplied unless by arrangement.
-
3 pointsSo after my grief with the N46 in my 318i I decided to turn it into a project car. The car is a 2004 318i auto msport wagon with 130,xxx kms. It will be getting a m62b44 non vanos v8 m62b46 v8 with a m122 supercharger It will be mated to a 420g 6 speed manual, and a m3 rear end. I'll also be upgrading suspension and brakes, and setting the car up for flex fuel to run e85. Cosmetically it will get some upgrades, but nothing too over the top. The goals for this project are; #Do as much myself as possible. #No compromises except on budget. #Make something unique. #Learn as much as I can in the process. So lets get started - heres the car; First job was to completely strip the exterior of the car. Everything came out, engine, trans, suspension, subframes, fuel tank, even the fuel lines and brake lines. Up on stands and ready to do some work With everything out I set to work cleaning the underbody. This took ages because I'm a perfectionist. I used degreaser and a waterblaster, and eventually degreaser with a rag to get the real stubborn areas. There was no damage to the underbody but because I'm increasing the power output I wanted to strengthen it. I made strengthening plates out of 2mm steel. A huge thank you to forum member @Karter16 who posted me paper templates to make them from. I bought myself a cheap gasless mig welder and taught myself to weld. This enabled me to make plates like the one below. There are 6 plates in total, 2 for the front subframe mounts, 2 for the rear subframe mounts, and two which are like spacers. Welding is really difficult, but I managed to weld in all 4 of the subframe plates. First I used a grinder with a flap disc and a drill with a wire brush, to get the places to be strengthened back to bare metal, then I coated the area with weld through primer. I coated the back of the plates in weld through primer also and then I welded in the plates. Then I used the grinder to grind the welds back. I then coated the bare metal with crc rust converter primer to protect it - I really like this product. https://www.crc.co.nz/Rust-Converter/6895-2548b7ca-2a00-4114-b2e1-17eb0e6a576b/ Then I used a Vht top coat, followed by seam sealer, and finally Septone stone shield rubberised coating. I coated the whole cleaned underbody in Septone stone shield. Its black, but looks green in the photo for some reason. The side skirts were removed to clean and paint behind and then reinstalled with new clips from Schmiedmann. The inner arches were cleaned and painted, and the cleaned plastic pieces were reinstalled. The cleaning process takes ages. Inner arches before cleaning and painting; And after; While all this was going on I was accumulating parts. All suspension and brake parts I sandblasted in my mates sandblaster. This took many days, and would have been more cost effective paying a professional, but I want to do as much myself as possible. Then they were expertly powdercoated by forum member @aja540i who really does a nice job. Here is a pic of the before and after the sandblasting; And a pic of the same part powdercoated and assembled;
-
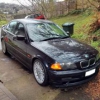
2 pointsI recently purchased @Aphexic's E39 540i. Overall it's in pretty good condition, with a tonne of service history dating back to 2009. This thing has had some money spent on it over the years. The car has just ticked over 200,000 km's. Here's some photos of it in it's new home. Things I'm intending to do as time and money allows: OEM Msport style 66 wheels (hurry up and post them @oldskool ? ) New tires: Potenza RE003 235/45/R17 Front and RE050A 255/40/R17 on the rear. Bulbs: Angel eye bulbs and H7 low beam bulbs Thermostat and coolant. Has had cooling system overhaul at 180,000 but thermostat seems to be all over the shop. Chain guides and timing chain + waterpump. Thrust arm bushings - has a strong vibration around 90+ km/h MAF - randomly when stopping at an intersection or lights it stalls and today it was hunting like it had a vacuume leak but then later on it idles perfectly. Tow bar Drivers door seal new water jet hoses
-
1 pointCompleted up
-
1 pointI tried ebay, but not ebay Aus! $80au shipping and same price as the US online crowds so $1200NZD all up. Done.
-
1 pointThey do and you can, or try and find them on eBay Aus and pay 1/3 of the price they charge.
-
1 pointUPDATE. The other part of the strengthening on the rear of the e46 is the pockets in the boot. There are three spot welds on each side that are the start of the problems, and are not strong enough on their own. Access panels were cut out, and the three spot welds had the little piece that separates them cut back ready for welding. Then the whole area was welded. After that I made panels to patch up the holes. These were welded in, had weld through primer on both sides, then vht top coat, and seam sealer. Now I can start putting things back in. The brake lines and fuel lines were cleaned with degreaser, and wax and grease remover, and put back in with the cleaned brackets. The brackets I soaked overnight in simple green concentrate, then cleaned and finally buffed them on the polishing wheel. They came out pretty good considering just how mucky they were beforehand. And installed; The plan is to use an m3 rear end to utilise the large case LSD and larger axles, in preparation for more power. I got a m3 subframe for cheap and sandblasted and painted it after I had taken all the old bushes out. Then it was a case of installing all new bushes. I used all new rubber bushes for the subframe. I will be using a mix of stock rubber and powerflex bushings on the car as I want performance but not too harsh a ride. Heres a bushing going in with my homemade bushing press; I got a good deal on a m3 diff and axles. The axles were not very old but got a clean, polish and fresh coat of paint anyway. I was really happy how they came out. The diff was sandblasted in prep for paint. This turned out to be a terrible idea as sand made its way into the diff. I disassembled the diff and took it to Kayne Barrie to be rebuilt - the guy is a genius. Seeing as it was being rebuilt, I got him to change the ratio, seeing as a torquey V8 will be pushing it now. I went from a 3.62 to 3.23 which will be good for cruising. I hand polished the aluminium diff cover as it couldn't be sand blasted. This took absolutely ages. Here it is before; And how it looked after I had polished it and painted it a high quality clear, and then assembled back on the diff; Then it was installed in the subframe with powerflex bushings. And yes I painted the bolts black lol.
-
1 pointI guess you can maybe hope for some good speed camera footage heading into wellington then!
-
1 pointUnfortunately / fortunately it was more of a sprint home as I had to work the next day at 7AM. I left Glenfield around 8:30PM and got home to Wellington about 3:30AM @325_driver
-
1 pointDude here compares em directly, Ive used the Polish brand strongflex in the past, OK material but some of the design was just dumb.
-
1 pointIt looks bad in the pictures, but its totally stable in real life. When I'm under the car I have a stack of tyres under there too as an extra precaution. I'm pretty good on safety.
-
1 pointWashed the e46 and I'm currently in the middle of swapping the e28 fuel filter and putting the exhaust back on. As you can see it was definitely due for a change.
-
1 pointGave the E36 the first clean in ~1year cut/polished bonnet/boot lid oil/filter change
-
1 pointWill be good to see this finished. Careful on the jack stands, it looks like unstable to me! Wouldn't take much of a bump moving the engine in for it to fall off..
-
1 pointLove the idea. Fitup and design of the reinforcement plates looks good. I don't think the cheap gasless mig is doing you any favors though. What are your plans for the flex fuel? Gates barricade hose or Teflon braid? I went with gates. So far I'm really happy with it. Using it with an push lock fittings is a real bitch Which ecu are you going to run? I can recommend the deustchworks fuel pumps. Can't even tell I've got an aftermarket pump.
-
1 pointWhat makes you say they're the best? When I was looking for subframe bushings for my 335i they were the best price but i struggled to find any reviews or info about their hardness compared to other bushings. So I just bought AKG subframe bushings from the US instead... Just buy them from the US, will probably cost you half as much as buying local... Also look at Powerflex. Or from Aus while you're there, should fit in your luggage
-
1 pointtidy work, Nathan! Subscribed. Looking forward to seeing this thread develop. I'm picking it's a retrospective, that we're catching up with where you've gotten to?
-
1 pointI have a pile of stuff in a store and forward in the US coming this way shorty. how heavy are them bushings? You're welcome to piggyback on my order. Pm of keen.
-
1 pointnice work, Greg! I'll award you the 'best of both worlds' prize!
-
1 pointA great read Greg... I think the Avalanches (and their lesser siblings) are underrated and great value for people who want a mix of grunt, comfort, and space - they're getting pretty cheap too. If you can find a good one!