Leaderboard


Popular Content
Showing content with the highest reputation on 09/05/23 in all areas
-
5 pointsYep - it’s currently on a truck to the South Island. Pick it up Thursday.
-
3 pointsJust widening my net on this. Have had it on Trademe for some time now and I am getting bored. 2009 Maserati Granturismo S 4.7. Big ticket items taken care of (Clutch, variators). Mechanically pretty reliable cars. There's a couple of minor things that the new owner might like to look at, mainly a few bits of sticky interior left, and a couple of switch modules. Looking for offers over $40000, which is pretty much bottom of the market for GranTurismos, and certainly the cheapest 4.7 by a long way. https://www.trademe.co.nz/a/motors/cars/maserati/granturismo/listing/4285901138
-
2 pointsI overtook on the side of the motorway the other weekend. By the time I exited SH1 at the next off ramp I could no longer see one car behind me. Rumor has it, people are people still stuck behind the two cars doing 95kph in the 110 zone. On a side note, the side of SH1 is no rougher nore bumpier than SH1. Recommended as second passing lane A++.
-
1 pointReceiving beer for fathers day enabling me to have a beer every night after work this week. Spring temperatures. No need for a jacket walking to work today. Sun up earlier meaning waking to light and birds. General vibe at this time of the year.
-
1 pointRare picture of mine together and clean -
-
1 pointAhhh yes - these are going to look fantastic and with the PS5s should transform the car!
-
1 pointWas there also and was near the vicinity when the crash happened! Remember the screeching, bang, then the smoke! Ran closer and recall the crowd just stunned to silence about what they had just witnessed. Absolute miracle that both drivers walked away. This is the same race/year that a wheel came off a car, bounced over the perimeter safety fence and landed on a car parked on Jervious quay, if i can recall.
-
1 pointIt was an absolute mess, I remember seeing it live! John Sax was never the same after the crash.
-
1 point
-
1 pointIs this "news"? Not sure, mods can move as required. Many of you might have one of these, they've been kicking around since 2017. I'm sure the risk is low, and it's only certain models, but it may concern you.
-
1 pointCredit: RS65 photos.
-
1 pointAnd here is the money shot video folks ... no exhaust and a F1 'idle' to sort but no fundamental problems !! 2 years on stands and we are super close to being back on the road. I can almost taste the fossil fueled fun 😆
-
1 pointSuch progress ... much gains ... wow. Not many images but a lot of small items but important jobs sorted in the last few days due to the time pressure of hosting a party for the hopeful first starting 😅 Made a wacky steam generator which I will use to help shape my intake tube pool noodles with PVC electrical conduit ... another side project of significance !! Pretty tricky welding the super thin stainless complete with somebody elses left over food stains !! Made the required plate with new outlets for the heater and coolant bypass hose. Had to get to one tricky location to shrink down one of my fancy hose clips so made a heat gun attachment, got the job done !! Then onto the main event ... got the wheels on and the car lowered down for the first time in over 2 years !!! Looks so much better with a wash and not being up on the stands.
-
1 pointYes I'd like to replace with something less ... woody. Hopefully I can start to look at some of the cosmetic bits once its mobile !! I was thinking the other day, once its on the road again it will look EXACTLY like it did when I brought it 2 years ago 😂 Some additional bits to report on today after getting my laser cutting back. As per usual I'll let the pictures do the talking. Dry sump guide washer to keep the belt where it should be along with the slightly modded pump bracket in the back ground: Power steering cooler mounted up all cosy ... happy to supply the DXF for cutting this bracket if anybody wants to use the same Chase Bays cooler: Blanking plate for the exposed section of the transmission: Oh yes and did my daily postage tracking review to discover the new Nismo gear knob was apparently sitting in my letter box or garden ... and sure enough there it was !! Looks really good in the car, harsh lighting not doing it any favors here. Fits nicely with the theme of subtle nods to the VQ beneath
-
1 pointOh, also got a letter for my drivers side airbag recall ... can't wait to take it in to BMW for that 😅 Need to setup some hidden cameras !!
-
1 pointAdded a cone to the main exhaust collector to get from the 2.25" secondaries to the single 3" exhaust. Having to weld without purge gas from here so I can try and avoid another bottle fill which I won't use all of. No pics at the moment but also will be working on the header secondaries ... looking like the first start will be with a full exhaust which is disappointing Was hoping it would be headers only Also have the rear muffler roughly in place so I can start working out how I will mount it ... should look pretty boss I think !!
-
1 pointDown to the final prototype for the transmission mount ... its been an on again off again piece of work but will be great to have it finalised !! Printing the remaining parts tonight as the printer is not big enough to do it in one shot. I'll be trying to get everything sorted for a single order at the laser cutters so that will involve two pieces for the trans mount in steel, cover for the exposed flywheel on the trans in aluminium and some plywood templates for the new garage entry profile which the concrete lads will use. <-- This could well be another thread in itself 🤣 Went on a bit of an archaeological dig to see how thick my garage slab is ... about 130mm it turns out. Looks like they put the mesh under the concrete which is hopefully the case across the entire thing as it will make life a lot easier for the demo !! Basic story here is that my garage entrance is too steep for the E46 or my Odyssey to get in / out so I'm going to cut away about 1.8m inside and outside of the garage doors then contour it in a nice smooth radius which will be car friendly ... insane right
-
1 pointHeaps of room in there for a couple of snails!
-
1 pointMy brain explodes in awe every time I check the progress on this thread. Seriously, seriously impressive stuff. Nuclear physics level sh*t.
-
1 pointJust read through the whole thread with great interest. Truly amazing attention to detail. The amount of time and effort that's gone in is mind boggling. One to keep an eye on. Well done sir 👍
-
1 pointStill here ... still doing headers pretty much, will be half way through the finish welding tonight and completed the most difficult side of the engine. Did something fun today also and added the elusive 337 Ci boot badges Other pic shows what I've been doing to bridge some of the gap left in the donut sections ... those things have been such a nightmare 😕 Really could use some thin strip stainless ... could make some but yeeaaaa. Also had a hose fitting burst in the garage, super lucky is just blasted straight down from the roof and just splashed over everything.
-
1 pointGot the heat shields glass bead blasted to give them a freshen up and applied some VHT high temp silver ... they look fairly good now and a lot cheaper than replacements Finish welded the first header tube ... got some distorsion issues to take care of unfortunately 😕 Will have to experiment a bit with the subsequent tubes to try and minimise, else all of the hard work making them accurate for the collectors is out the window. And some clearances to the engine and trans might also be compromised which would be a real ball ache.
-
1 pointA milestone today, one side of the headers completely tacked up and ready for finish welding !! So much work ... can't wait until they are completely done. Onto some pics ... pretty self explanatory, the first is all of the pieces for the last tube on this side.
-
1 pointYea that was my first thought also, i have an external gauge that i could tap into the signal for and use the Arduino to drive the gauge 🤔Would like to have maybe crank case vacuum also to monitor the dry sump setup but hopefully won't need that through it being an open breathing design. @Michael. It certainly was for me using stainless. Primarily the donuts went from over $200 NZD each to $68 AUD and all of the other bends were cheaper also. Freight was just under $200 AUD and I luckily managed to dodge GST etc when it came in. The other big plus was they did a wider range of bends so I didn't have to get custom work done locally (more expensive) ... I needed some 15deg bends for the collectors and these were a standard stocked item.
-
1 pointA loose wiring plan is taking shape, turns out there is a lovely big removable port hole from engine bay electronics box to the cabin !! Rugged plan (likely my initial one) is to just stuff it all through said hole. Ideally I'd tackle making a new loom and terminate into a nice bulkhead connector where the LHD steering wheel would come through. Then in this magical future state I'd also locate the dry sump oil reservoir where the electronics box currently is. In any case there is a path forward to get mobile without too much drama.
-
1 pointI made one set for my Civic SiR back in errrr probably 2001 ? Not quite at the same level as this setup however ... it was more vice and hacksaw hah.
-
1 pointDang, I adore this attention to detail. Have you done any work similar to this type of manifold design and construction? Seems like it's not your first time.
-
1 pointFriggin awesome thread!
-
1 pointOne side of the headers are completely mocked up now, managed to get the lengths the same to less than half a mm which is a good result. Modeled them up so I have a long term record but will need some tweaking due to errors introduced going from plastic to digital. Will likely build off the glued up plastic tubes making jigs to support the tubes at key locations.
-
1 pointSo the blue pool vacuum hose turned out to be more useful as a play thing for the kids than to model up my new headers, just not flexible enough when you actually get it in place etc. All this time I had been trying to model the headers nicely at low cost but it seems those desires are mutually exclusive !! What I really wanted to use originally was the modelling kits from Ice Engine Works (https://www.icengineworks.com/) but they are just so dang expensive for a one off 😕 Take a look at their site if you have no idea what I'm babbling about and its instantly visible what an awesome approach and system this is where you want to know exactly how your headers will be built, the length and clearances etc. I figured I could design and 3D print my own version along the same concept and which match the locally available mandrel bend radius's (the US based ice kit centre line radius bends are not available here). With the price of 3D printers now it will be way cheaper, hopefully a good result and can also then use it for prototyping other items and making odd widgets as needed Onto some pics of where things are at ... made a bunch of prototypes and (semi) perfected some settings that give a nice result. This is how they will clip together, will be various length straight sections along with bend segments (doing 30 degree and 80mm CLR at the mo). The final prototype which seems to work pretty well and looks fairly good to boot !! Printer is hard at work while I sleep making 7 more bends ... hoping it does not look like a spaghetti blob monster when I wake up
-
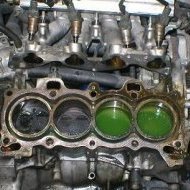
1 pointSome really fun work lately with basic assembly of some major pieces to get things looking like a car again. Installed the flywheel and clutch, funnily enough these were one of the first things purchased almost a year ago now !! Pulled the front struts apart to give everything a good clean and install new bump stops / dust boots. Unfortunately the left side is completely rooted but will get the car mobile for the time being, will not go through certification and WOF however so will likely have to do something suspension wise later on. Lower control arms with new Powerflex bushes installed, 330 knuckles and guard liners cleaned / painted along with the wheel wells. Just a fun shot of the under body with new oil pan installed. The next and probably most involved part of the build has slowly begun ... making the headers !! Designed up the flanges and had them laser cut however will probably change approach here and go with completely individual tubes / mini flanges to allow them to be 'threaded' into position into the car and fixed into a slip joint collector ... or something Got some pool vacuum hose I will be using to mock things up roughly, will probably get a bunch of profiles laser cut at the proposed mandrel bend radius to support the pool hose in place then fill with some sort of expanding rigid foam. Looking pretty cool now, side skirts back on ... FINALLY installed the front EBC rotors !!! Could not help myself mocking up the interior a little bit and I'm loving the low key look it should have !!