Leaderboard


Popular Content
Showing content with the highest reputation on 07/28/24 in all areas
-
3 pointsSo Grey Thunder has been languishing in the garage for a couple of years... I've pulled it out infrequently to run it up to temp, give it a splash of sunshine, a gentle wipe-over with detailing mist when the dustcover comes off. It's dry and undercover, just waiting for it's time for the project to re-commence. I've been picking away at the parts list. Bits sourced and added to the stash: Brand new Mahle/Behr heater matrix to replace the used one we put in back in 2019. Luckily I took a pic of the part number at the time! Internal plastic weathershielding for behind the door panels. Sourced all the seals & bearings, (pinion and output), to rebuild the 4.10 small case diff for the M42 swap. I already have a diff housing gasket, drain and fill plugs, and a Coreteco diff mount (my last - they're no longer made - I think the only aftermarket one that's sold now that's similar to OEM is the Moog item). Sourced all cooling system hoses for the M42B18 (not just the big ones, all the ancilliaries too) Spare e30 window winder (can't believe they've nearly doubled in price since I last bought one) - now USD61.99 New DME and Fuel Pump relays Got a Barina/Corsa steering linkage - still needs to visit a driveshaft specialist. New e46 rack inners, to replace the used ones and go with the new e36 outers on the Purple Tag rack. Antother rack bellows kit to replace the ones I used on my e46. I finally put a BMW Car Club sticker on it. Next steps... it's time to get out the Right Hand Drive 318iS loom and clean it, perhaps replace the tessa tape. Certainly clean all of the contacts. And I'll clean off the 4.10 diff and take it up to Begley Motor Works for a rebuild in a month or so. Blue Thunder on Ori Bay - winter 2023?
-
2 pointsHELLBM is another wrecker one who have those sort of parts Rockauto also add GST unlike the others. They usually only good for a single or a few smaller parts on OE branded stuff, their shipping prices are all over the place are rarely end up cheaper than the others.
-
1 pointDealers can be reasonably priced for quite a few genuine parts. Ive bought a quite a few bits of RHD specfic stuff and trim bits which ended up being cheaper than Schmiedmann. They just dont seem to stock that much of the older stuff anymore but maybe E90's fair better. If you ordering a whole bunch of stuff already then may as well replace oil pan ones which should be cheap. I probably wouldnt bother with the subframe ones myself but depends on the cost of them and were you are ordering from.
-
1 pointNice one! Is the use of an actual flame critical or would a heat gun work just as well?
-
1 pointIf ordering from spareto who are by far the fastest with the cheapest shipping. Then make sure your orders are under $1000nzd including shipping for each order. This way you will avoid GST and hundreds of dollars of customs fees. Use realoem.com to find the correct part numbers.
-
1 pointThere was also a heap of room to mount crossovers if you go passive. This was my e46 coupe door. I just used double sided tap and hot glue. The crossovers I used where massive, largest car audio ones I've seen so heaps of depth in there
-
1 pointJust some ideas for you Speakers There a number of STL files available for e46 midbass adapters so you may find something already done that you can download and print SLT files for e46 , I came across heaps when looking for F30 adaptors. You have a couple of choices mounting wise . IB where the speaker uses the Door as a baffle , door needs a hole cut if you up for that. It will extend the low end from the 6.5s . Will get them into mid sub bass frequencies BMW door card mount, works out to be a semi-sealed enclosure , there might be around 5 - 6 litres of air space which is a bit small for a 6.5 , can give tighter upper mid bass , but will roll off the bass quicker from around 80 hz. If going active , I would recommend running a bass blocker capacitor just to keep the tweeter safe from amp pops or tuning mistakes, You'll appreciate they are easy to blow with 20 watts or more with low frequencies. Something like one of these each side in series with the positive terminal 22 uf capacitor , will drop -6db / octave from 1800 hz . High even to add protection , but low enough not to interfere with the HU crossover. ( I'm guessing somewhere between 3000 - 4000 hz for tweeter ) AMP / TA , I do like your option of running active stage for a couple of reasons. The headunit may have a better crossover in it's preamp that the Alpine passive covers. Having TA on front stage more important than rear from a drivers seat perspective You may end up fading the image to have a front bias so rear speakers will only need a watt or two of power , HU will be fine for that. Battery gauge , there is a wire size calculator in the spreadsheet below. But amp looks to be 8 gauge . Short distance so you won't need 6. Jaycar sells by the meter For the front speakers however , the tweeter and midbass distances may end up being quite close in distance length , In which case there maybe little gain in fine tuning front image TA between mids and tweeters , so passive becomes effective as you only need offset the drives side with some extra delay. Head unit EQ & TA 13 bands is quite useful , Can get you closer to target curves of your choice. TA can be done in two ways , Via distance , ( Good start ) or using Impulse ( more accurate ) When done it helps level front image above bonnet. I can help you measure this , Can bring Mic and laptop so can use REW to measure both the Car response to the speakers and impulse tune TA. Very good spreadsheet Here The spreadsheet can be used to load into REW app and then it's quite straight forward to tune the 13 bands to it. On the target curves something like a Harman / JBL target curve would be a good place to start . Has a bass rise and a treble fall. Sounds more Hifi ish to me when engine / road noise is competing with bass frequencies. Door connectors Caution as door wiring airbag goes via them. The usual disconnect battery before working around them goes without saying. Also stops the airbag light on dash coming on and needed a reset via usual BMW programing tools. Straight forward to take out, easy to take out kick pannels Connector parts by pulling connect tab The audio / speaker connector clips out on one side of the connector , was able to leave it inside door wire garter on my install rather than chopping it off Other side doesn't clip out , But the plastic is soft , used stanley knife to cut through the speaker section of the connector, Again didn't chop it With running speaker wire through the connectors / door wiring garter / door I used curtain wire as a pilot and taped the speaker wire to it Pictures
-
1 pointI took a small, and carefully controlled amount of flame to the buttons on the front seat belt latches today. First up - please note that this process works to remove white oxidation and restore the red colour, but it will not work if the surface of the plastic has degraded too far. do not do this if you have any breakdown of the surface of the button. To begin with I carefully cleaned the surface of the button. If you're going to heat up the surface of the plastic you do NOT want any dirt, skin oils, grime, etc. to be on the button. To ensure that I cleaned this well I used a small piece of magic eraser (note that magic eraser is abrasive and wouldn't normally be recommended on car surfaces, however in this case because we're effectively resurfacing the button the slight abrasion doesn't matter and helps make sure that all the dirt is removed). For the cleaning step I used the magic eraser with warm water with dish soap in it and gave the button a good scrub (be careful to not let water get down into the latch), making sure I worked carefully around the raised "PRESS" letters. I then rinsed off the remaining soap with several rounds of clean water, before carefully drying the button with paper towel. I then left it a few minutes to ensure all moisture on the surface of the button had evaporated. Next step is to carefully use aluminium foil to shield the rest of the latch. I was very careful to make sure that the foil wasn't touching the button surface as we don't want to be accidentally bonding things to other things that they shouldn't be. I then used a towel to shield the wider area. This resulted in something that looked like this: The next step is to apply the fire. Firstly, ensure that you take all normal precautions around the use of fire. Secondly, make sure that your fire is clean burning. I used one of these because no matter how long I had a go at a piece of tin foil I could not get it to leave any carbon residue. If your preferred fire source leaves any carbon residue (black soot) at all, do not use it. I did not take photos of applying the fire. My advice is to go slow and carefully get closer with the flame jet until you see the surface change. I made sure to keep the jet moving the entire time and I took several breaks to ensure that I didn't get any part of the surface too hot. You do not want to end up applying too much heat in one place for too long and causing bubbling or smoking, you want just enough for as short a time as possible to get the surface to glass up. By being careful and going slow I was able to get a perfect result with no mistakes, it's a straightforward process so long as you carefully prepare and take your time. Hopefully it goes without saying to not touch the button or the foil for some minutes until the plastic has cooled. I'm very happy with the end result: And the passenger side: I don't need to do the rear seats as they already look perfect, so this job is done!
-
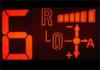
1 pointMmm, heated steering wheel for these cold mornings! Yes I am officially a soft JAFA now.
-
1 point
-
1 pointRant...
-
1 point
-
1 pointhttps://www.alibaba.com/product-detail/91mm-Stroke-Billet-Cranks-for-BMW_60570500544.html what could go wrong?
-
0 pointsUnfortunately came off 2nd best with an altercation with an i20 😬 Was 2 minutes after its first wash in 3 months too. Only took me 44 years for my first fender bender. Car actually drove a few km home seemingly OK (just felt like the wheel was knocked out of alignment) until I had to reverse it.