Leaderboard


Popular Content
Showing content with the highest reputation on 04/03/25 in all areas
-
6 points9 weeks later, brace off... went for a drive. Now a few months of physio
-
4 pointsThe towbar saga. One feature that the car came with was a folding electric towbar which seems a bit excessive and sure has some 'wank factor'. However, being able to fold the towbar away at the click of a button is quite handy. It tucks away completely and has no impact on the look of the car when not in use. The only gripe I have with the towbar is the complete lack of a feature we use quite commonly in NZ, a 1-5/8" towball. Quite infuriating because you only ever find that out as you go to hook up a trailer. I should've thought about it really, being a euro of course its going to have a 50mm towball. Eitherway it needs to be fixed. I had two options to start with, either take a grinder to it, using a whole bunch of templates, measuring and loads of patience. Or, pay someone to machine it down for me. The first option really is a sh*t idea, however this appealed to the side of me that really doesn't like paying for the services of other people when I know I could have a go at it myself. The cost of machining is around ~$500, which isn't too bad in the scheme of things, still hurts though. The other issue with these two options is that I would still be stuck with only one of the two towball options (although 50mm is uncommon it still pops up just enough to be annoyed you don't have both options). I removed the towbar from the car and had a good clean behind the bumper while I was there, this car used to live up a gravel driveway so everything has a dusty coating. I removed the electric actuator and unbolted the ball and arm from the bar. I knew this was going to be a longer process so I put the bumper back on and left it for a few weeks, which I'm glad I did. I was yarning away to my mate Tony who came up with the idea of using a "convert a ball" style setup. Its essentially a 1" spigot which the balls slot onto and a pin slides across to lock it into place. This is the perfect solution as it is much easier to create a cylinder with a grinder than it is to make a sphere, and it also means I'll have both towball options. I borrowed Tony's towball setup off his Audi and I got to work modifying mine. My plan of attack was as follows: mark a centreline on the ball and slice off a plane parallel to that, with a flat surface I then create an opposing plane on the otherside of the ball. With some flat surfaces to work with I can chop it back into a square section. At this point it would be wise to drill the cross pin hole. Chopping off the corners until a 32 sided shape remains gives an approximate cylinder with hopefully a diameter of ~25.60mm. Then rounding it out would make it into a circle and taking just slightly more off would bring it down to 25.40mm in diameter. To get all this done I used a hacksaw, angle grinder with a 60grit sanding disk, some emery cloth and a file to remove material, for measurement: a digital caliper, ruler, various markers and a decent eye. After a solid few afternoons slaving away I ended up with a pretty decent result. The fit is better than the "convert a ball" spigot so pretty stoked with that. The next three afternoons involved me absolutely wasting my time while I tried to figure out why the mechanism wouldn't release when clicking the button. Turns out you have to reset the actuator by holding down the button for 5 seconds. Got there in the end. While I was at it I lubed up the swing mechanism with some fresh grease and replaced the grade 8.8 mounting bolts for peace of mind. Overall a successful project, glad to have it sorted.
-
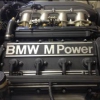
4 pointsHaving given up on finding a reasonably priced EV / Hybrid that wasn't completely thrashed I changed tack and found this : A phone call on Saturday, a one way ticket to Wellington on Sunday and 8 hours later it was home. Please ignore the headlight fluid, I topped that up after finding the rubber boot lying in the engine bay. For the $4k I spent on this I'm very happy, other than needing a service and fixing some of the vacuum lines that have perished it's in great shape for a 19 year old car. Being a 2 door, it just feels stupidly small and with the remap that a previous owner had done it's plenty fast enough - according to my OBDlink it's turned up from 8psi to 25psi of peak boost. Best of all it's a manual, so I get to row through the gears.
-
2 pointswhat a great solution, and looks very tidy. I reckon these electric swinging towballs are an epic feature.
-
1 pointI recently had fully lined up a good E30 Alpina in the UK to import, and a donor car here for parts or shell. Then my father passed away unexpectedly and with that upheaval the big project wasn't a good idea, so I grabbed a local 1987 M325, with a few things that need ironing out. Stumbling idle. The car idles at a steady speed wherever set, but has a distinct stumble/misfire. No issues apparent at speed but it may be masked at those revs. Idles as if it has a lumpy cam. Valve clearances have been done Spark plugs replaced dizzy cap checked/cleaned- was new 10,000km ago injectors were apparently serviced and found to be clogged or grubby, fuel filter has been changed, presumable after that. All injectors are actuating. Vacuum leaks checked to a simple level, intake boot appears new as do various other parts. AFM has no flat spots and tests with steadily increasing resistance. Spark is apparent at all plugs Car has the two crank sensors on the bellhousing, an unexpected hall sensor on the harmonic balancer with cable up to the OBD plug(smooth rimmed balancer, where is the sensor picking a signal from?) and a sensor on one spark plug lead plugged to nowhere, I presume for facelift cars with newer motronic. That is really my core interest. The metallic rattle from under the car could be an undisclosed lightened flywheel, a crappy input shaft bearing, throwout bearing or clutch springs, or simply the effect of a misfiring idle on those components. Am happy to have them all replaced. Could the ECU (Motronic 1.0) cause this, even though the car basically runs well and there is no major misfire? Could the coil cause it? I'd not imagine it could being as it generally gets spark to where it needs to go. Thanks Nathan
-
1 pointA couple of years ago I saw a little white 2004 E46 316ti for sale on the side of the road near where I live. Asking $2500. But it had some panel scrapes down the left door & 3/4 panel, although not too obvious at a casual glance. After a test drive in the hills nearby, I offered $2000 and drove it home. A few days/weeks later I noticed puffs of smoke when driving around town. Sometimes quite a lot. One time waiting at the lights outside a packed Sprig & Fern it tried to lay down a smokescreen. Checking later I found the oil filler cap full of creamy gunk. I thought I'd blown a head gasket. A bit later the starter motor failed completely close to home. It was off the road for a few weeks as I sought instructions to take it out, and had to order some torx ring spanners from overseas to get the top bolt out. $400 for a new starter, and $100 for a new CCV valve with insulated hoses, I eventually got back on the road. $300 for a couple of new tyres, new WoF, and I was back on the road. The transmission is a bit of a reluctant up-shifter, and sometimes goes into diagnostic mode on cold mornings. I ordered a transmission filter from Latvia or somewhere, but it arrived with a damaged gasket. Got a refund without sending it back, and ordered another one from Aus. Got the Caltex oil waiting for me to feel in the mood for getting dirty. In the meantime I've got quite a nice little non-smoking motorcar. Not much poke, but heeeeaps of fun on a winding road like the Takaka Hill... A couple of days ago I saw a little silver 2006 E91 325i for sale on the side of the road near where I live. Asking $3000. But it had a slight ding in the driver's door and a couple of very minor defects, although not too obvious at a casual glance. After a test drive in the hills nearby, I offered $2600 and drove it home. Sh*t I hope it goes better this time...
-
1 pointDidn’t know they made such a thing. https://www.trademe.co.nz/a/motors/cars/bmw/435d/listing/5249973777
-
1 pointProbably a stupid question, but which spoiler goes on that boot lid? My e30 has the exact same holes, so may be easiest to just cover them with a spoiler
-
1 point
-
1 pointTest drove a couple of these before settling for my Swift Sport. The GTI felt real nice and torquey, real fun to drive being a manual and would no doubt blow the Swift out the water performance wise. I absolutely loved the GTI Recaros too, incredibly comfortable but the rest of the interior was what did it for me. Whilst the Polos were seemingly the nicer places to be in, both examples I viewed were really ragged on the inside despite being otherwise quite well looked after - sagging headliners, scratched up and cracked bits of dash, buttons worn and peeling, sagging door card fabrics... All seemed like typical faults, the interiors just didn't appear to hold up to wear & tear all that well, which I felt like would have been too annoying to live with long term. Whilst the Swift was all bare bones & hard plastic on the inside, you could barely find any wear at all, apart from a worn seat bolster. Funnily enough, my Swift Sport also came with factory Recaros so at least it's even on the seat front.
-
1 pointLove a VOLVO! Great stuff, looks awesome. I often find myself checking trademe for V70R estates 🙂
-
1 pointSome interior pics! It's a nice place to be for sure. Lots of buttons! Someone borrowed it yesterday and left the dirty floor mat 😒 R-Design interior trim, wheel, seats and other bits like special stitching. Has the latest version of Sensus, Volvos own OS entertainment system. Volvo now uses Android on the newer cars. Car was manufactured in 2014 and is the facelift model, but has the mini 2015.5 "face-lift" interior kit and trim.
-
1 pointThis one is pretty rough, and appears to have been dicked with a bit, judging by the springs in the boot, and it's a repo! https://www.turners.co.nz/Damaged-Vehicles/Damaged-Cars-for-Sale/bmw/320ise/26607615 An SE is always nice. There seems to be a lot of manual SE models. Dad had a 325i SE manual for 18 years. Plus a 320i is a waste of time as an auto. slowest and hungriest of them all.
-
1 pointReplacement bonnet got given the same treatment as the rest of car. Before After
-
1 pointHi All - have had this car for about 3 years, installed Apple Car play - been a good reliable motor while we've had it, gets about 850k-900km on a single tank and the interior is in impeccable condition. Has good set of M sport 19" alloys (rear 275 and front 245 R19s). Has done 162,000kms todate, will come with upto date WOF and some RUC. Looking for $12k but negotiable. TradeMe Listing here: https://www.trademe.co.nz/a/motors/cars/bmw/listing/5239680245?bof=AXrgU19j
-
1 pointyep i did this - steering wheel and clock spring are the same. my car is auto though, so i also retro fitted the E46 M3 SMG paddle wheel and got those paddles working too The loom is slightly different in wiring color only, you can't get the E39 one for reasonable money. the E46 one is cheaper, and you just have to work out the wiring mapping for the colors. See attached BMW tech article and my mapping i used to map E46 to E39 colors You will need to splice into the LCM. Cruise & MFSW retrofit (1).pdf
-
1 point
-
1 pointHere is a longer update from the last month so... The first point on my agenda was tearing into the engine bay to wrap my head around it, I've read and watched plenty online about these but nothing beats the real mccoy. From what I've read the things I wanted to check are: the turbo oiling system and the vacuum system. Checking how bad the CBU and oil in the intake was also on my list. After pulling the engine cover, airbox and ducting it was pretty easy to inspect the turbo oiling system. It looks like the line from the engine to the distro block and the line from the distro block to the hp turbo have been replaced with AN line equivelants, just the lp turbo oem line remains, it looks a bit weepy around the rubber hose and seems to be leaking as the undertray has a decent puddle in it under the turbos, more on this later. Getting further into it, pulling off the cowling, strut braces and rear engine cover there is easy access to all the intake manifold bolts. A few connectors, intake hose and nuts and bolts and the intake was off. Surprisingly the CBU isn't too bad, much better than I was expecting, definitely still in need of a good clean. Looks like there is plenty of oil getting throught the manifold seals and leaking down onto the engine, rocker cover gasket needs replacement too. A catchcan system is definitely on the cards to reduce the amount of oil getting through to the intake. After putting it all back together this wrapped up the first little dive into the engine bay. Another important item on the list was sorting out the paddle shifters. Who in their right mind decided that pulling on either would upshift and pushing on either would downshift? Anyways, simple fix, airbag out, swap some pins over and leave some disconnected. Now the left is downshift and right is upshift with pushing on the paddles not doing anything. Onto the next saga, the turbo feed line. After some time I decided to look back into the oil leak on the exhaust side as I had cleaned the undertray and a large puddle had formed after only a week of driving. It looked like it was coming from the lp turbo oil feed line banjo where it connects to the distro block. After attempting to tighten this slightly I had that dreaded feeling of it getting loose again. It looks like whoever was here last had overtightened the banjo and stripped the thread in the distro block (it is only aluminium after all). There was lots of back and forth on this one before Dad and I reached the conclusion of cutting down the distro block to reveal the undamaged threads further down the block. The block was carefully chopped 5mm shorter with a hacksaw and was flattened smooth with a file mounted in the vice. The threads were then cleaned up with M10x1.0 tap and bottom tap (shoutout to Tony for lending and delivering these). Some new copper crush washers (suprisingly Mitre10 pulled through on these, at the end of the hardware aisle is a whole bunch of interesting hardware in draws, a good one to keep in mind) and everything was back together. After a week of driving it looks like the leak is sorted and the puddle hasn't returned yet. After the last issue where the distro block had to be shortened the oil line down to the lp turbo was now slightly stretched and under some load so I ordered the fittings to replace it with AN straight away. Whitbread performance does aftermarket oil lines for the 335D so I copied their line routing and setup. Was pretty straightforward with some -3 PTFE line, 45deg -3 fittings and two -3 to washer seal adapters, one m10 and one m12. Although probably unnecessary I added some heat sleeving as it gets pretty hot on this side of the engine.
-
1 pointAs predicted, the day I took the ‘vert for the WoF it was pissing down! I had forgotten how much “fun” it is to drive a classic car in the wet. And to cap it all off, failed the WoF has the bump stops had completely disintegrated. Luckily they were in stock in NZ at the BMW parts warehouse, so both have been fitted. Off for the re-check tomorrow morning, hoping to pass so I can take her to the E30 meet up on Sunday. Chances of it raining anyone..???
-
1 pointEven with the non matching panels it looks so good on the Alpina rims