Leaderboard
Popular Content
Showing content with the highest reputation on 02/28/22 in all areas
-
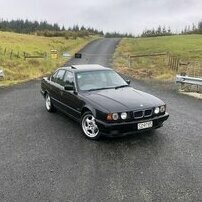
8 pointsGave the paint a going over with the Meguiar's DA microfiber system. Stopped using foam pads after i tried this as i found it delivers good results for minimal time and outlay. No swirls or holograms so maybe someone has cleaned well over the years or corrected it in the past? @hqstu ?. Got most of the light scratching out leaving some the time consuming deeper ones alone. With thinner clear and stone chips present in certain areas i dont think its worth the risk given the light blue hides defects very good. Ride height has increased a little with the new parts but im a fan of factory lowered height. Yet it scrap it in all the typical situations after a few 100 k's so should limit any bumper damage.
-
2 points@Kees Ahhh good man, was looking for this post to see if it was the same car. To be fair its an absolute Peach, but these dealers must know the kind of Anoraks who are into these cars are very aware of particular examples? Maybe its just the E28 Market? The dude who bought @BMTHUG's E28 a few weeks back is trying to flick it for twice the price now too.
-
2 pointsSo I have completed the power distribution as far as the new fuse block and relays go ... only waiting on some smaller 18ga terminals for the 12 way distribution block mounted on the underside to finish up everything that hangs off the ECM relay. Not sure if I mentioned previously, but the aim of this setup is to: Separate the BMW / car side almost entirely from the Nissan engine side. There are some interactions left over like gas pedal, fuel pump signal, starter signal and stop light. Ensure the engine harness can simply be unplugged from here and the ECU(s) in order to be removed. In the factory situation there is the 'IPDM' (Intelligent Power Distribution Module). Next up have to mount the attachment block to the car and complete the engine harness side of the wiring connection !! Exciting Spoke to my certifier today also and he gave the green light for my transmission cross member with integrated driveshaft loop so thats a win ... can start back on that. As well as the dry sump pump final mounting design as the new crank mandrel also arrived. ps: Relay bases I got are incompatible with the relays so have wired them direct for now. They may stay this way for ever unless the terminals decide to fall over after some heat cycles !
-
2 pointsSports. 👍 Edit: this is worth a read, at least the first and last few pages, if you want more detail: https://www.babybmw.net/forum/viewtopic.php?f=20&t=80208
-
2 pointsJust noticed its been re-listed at a dealer with a near 30K premium (when you factor in how much the dealer probably scored it for)! Bet the old seller isn't impressed with the price hike in such a short time! https://www.trademe.co.nz/a/motors/cars/bmw/535i/listing/3490135906?bof=23xD4yaJ
-
1 pointbmw bump stops front 31336767333 bmw bump stops rear x2 33536767335 or bmw performance bump stops rear x2 33536788905 I ordered mine from demontweeks and schmiedmann due to in stock levels. Ended up paying more for shipping but otherwise you can get it from 1 place for cheaper shipping but longer wait times
-
1 pointThe BMW 1939 327/28 Roadster had the first triple carbs on any BMW, So Alpina is a little late on the scene. Bet the Alpina went like stink though.
-
1 pointThis is what I ended up getting which is basically the equivalent to stock msport front left strut 31316786019 Bilstein B4S BLS22-144256 front right strut 31316786020 Bilstein B4S BLS22-144270 rear shocks x2 33526771559 Bilstein B4S BLS19-144238
-
1 point^ Ive seen quite a few 130s with style 193s to know that it does work I will report back after front shocks replacement
-
1 point
-
1 pointYou could soak those flanges in something like Evaporust, and then paint them. Might be easier than trying to get a wire brush into the crevices. I wouldnt bother stripping the diff down myself, its easy enough to wire brush the housing and paint it. You could remove the rear cover and check the condition inside.
-
1 pointI have really enjoyed Frank Stephensons channel on YouTube, more of a design perspective than just a practical car review. https://youtube.com/c/FrankStephensondesign
-
1 pointAll back together and driving good. Back end is noticeably tighter with the new\improved rubber subframe bushings, possibly with the reinforcements helping with some additional rigidity.
-
1 point2k primer, urethane seam sealed and base to blend into the existing paint. Messed up sealer, applied way too much and it started to cure much quicker than i expected with this heat. Subframe etc covered most of it up anyway.
-
1 pointGreat work Jared !! It is disappointing re the slave cylinder. I could provide some "feedback" to supplier if required. This ultra rare car is really getting serious attention - and one to watch...
-
1 pointRevealed a hairline crack on the subframe floor awhile ago whilst cleaning (the usual L\H crease). I was planning on dropping the subframe anyway so went ahead. Luckily it didn't appear to be any additional failed welds or cracks, but Redish V3 plates will be going in anyway once Fedex Australia sorts their sh*t out. New subframe bushings and inner control arm bushings done whilst its out. Inspected the clutch\flywheel. Very little wear so must of been replaced not too long ago. Re-used the flywheel and installed a new clutch kit. New winner for the hardest job on this car. Not something you ever want to do on axle stands with standard floor jack with a cramped transmission tunnel to boot. Unfortunately the refurbished slave cylinder was weeping, probably due contaminated fluid from wear given the marks in the cylinder. Seal still looked ok so honed the better spare cylinder swapped it over and bled it. Appears to be holding for now but will refurbish the old one again for insurance. Cleaned all the solenoids, drained all the fluid and flushed some new stuff thru using the pump so hopefully cleared it out. Driveshaft nose bushing, Meyle HD flex disc and Febi center support done. FAG front wheel bearings, replacement rack and new Meyle HD control arms also done while everything is apart. Just need to do install rear wheel bearings, put everything back together and parts cannon along with the operator can retire for awhile.
-
1 pointFinished off the rear suspension - Trialing a set of TRW rear shocks which are suppose to be Msport equivalents (Sachs don't make any now days). RTABS + limiters - old bushings weren't as bad as i expected but are '02 labeled so probably the originals. Front struts done - old ones were completely gone as expected, the weight of a 19mm 1\2" impact socket would compress the piston to near bottom. I only noticed one of the strut towers was mushroomed upon strut removal, likely caused by worn struts and mounts combined with pot holes. Have hammered it flat and will be putting in some reinforcement plates before re-installing.



.thumb.jpg.04807d42ad69838062fa7df5f4a7a884.jpg)