Leaderboard
Popular Content
Showing content with the highest reputation on 02/26/19 in Posts
-
2 pointsNegatory. Did not know this was a thing. Means it's only $6178 more expensive ?
-
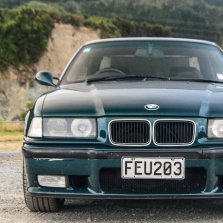
1 pointThought i would post up some photos, of a run-about car i've been tidying up Not a BMW though, however i did get some BMW floor mats for it Body was in rough shape - scratches everywhere, scuffs and dings, photos hide it well - paint ok, but not black enough for my liking Interior horrible Stripped it out, went to town with the rug doctor, dyed carpet a darker colour Chucked it back together - got some BMW floor mats Popped the headgasket somehow, lol Completely rebuilt head The sanding begins for full-respray Begun painting - didn't bother masking the wheels up since i'm sanding them all back later and going gunmetal Found a another #$#$# ding lol Now for some real HP improvements - painting the engine, metallic red with silver raised lettering Total budget including the car, rebuilding the head, and complete respray under $3500
-
1 pointAnd in today’s news, this: ... I’ve never had a car that someone liked enough to try to buy! Think I’ll dust off my sheepskin coat, put on my best Arthur Daley, and see if he’d like to buy a classic 855-T5 instead ?
-
1 pointSeeing if i can free up a bit of extra cash for a house deposit. 20k in hand will help more than having to pay the high interest rate on the high lvr lending. Definitely its not because the car loses value i am well aware of that but if i need to cash out then better sooner than later.
-
1 pointTurned a pheasant into an amazing golden feathered firework on Old Taupo Road. Poooompaaah! Also.. Old Taupo Road
-
1 point
-
1 pointProgress on the BMW is slow. Unfortunately I fix one thing, and in the process find something else that is broken and needs more parts ordered. The idle was still rough and it bothered me. It's not like I don't enjoy the sound of a nice lumpy cam, but the car shouldn't idle like that, so something was wrong. I ran through the diagnostics in the BMW diagnostic software, DIS, and the only thing that came back as "unusual" was the idle valve reading (0 kg/h) According to this, the idle valve is shut, and not passing any air, yet it is still idling. It should be between 8 and 18 kg/h, not zero. As it states, if the reading is below 10, check for unmetered air. Unmetered air is any air that enters the intake after the airflow meter, so it's not measured by the airflow meter. This is usually caused by loose hose clamps, cracks in hoses/pipes, or a failure in the Crank Case Ventilation system (CCV). I had previously cleaned and checked the idle valve, so I knew that moved freely, and I could get the idle valve reading to change by opening and closing the throttle, so obviously the valve operates, it's just not "needed" at idle. The obvious points in the intake to look at are the intake piping and elbow between the airflow meter and the plenum. The elbow especially is prone to cracking, but after a thorough check my intake piping and elbow were fine. So the next thing was to remove the whole intake again, replace all the CCV parts/hoses, vacuum lines and O-Rings and see if that fixes it. I noticed last time I had the intake off that the CCV was looking rather ugly, with a coating of old oil on it. I did check and tighten the hoses, but that obviously didn't make a difference. You can see it tucked behind the idle valve It's a bit grotty. Ignore the buggered knock sensor in the background. It's not throwing a code, but is on the list of things to replace once I sort the idle issue. I pulled the idle valve and CCV out I had ordered a bunch of parts for this job, so set about replacing the ICV piping and CCV. On the bench the CCV was looking pretty average All the hoses had gone very soft, but none of them had cracks or holes in them. This big top hose in particular felt like it was made of jelly in one bend Here is the new CCV oil separator with the new hoses. I replaced all of them, including the hose to the sump (not in the photo) Both hoses on the idle valve had also softened a bit, but were in useable shape. Unfortunately I missed ordering the hose on the left in the photo, so had to reuse the one on there, but it was in good condition anyway. One of the hoses has this weird metal plug in it. Not sure what it's normally for, maybe something emissions related? When I fit the replacement hose, I put a small clamp on that plug too, just to be sure it wasn't leaking Everything under here was original, as shown by the date stamps The other thing I needed to replace, to see if it helps the idle, are the o-rings on the inlet trumpets. The old ones were flat, and as hard as plastic I found it very hard to find information on these o-rings, so had to order from BMW instead of using generic ones of the correct size. So, here are the sizes for future reference. 52mm OD 2mm thick The profile difference new to old is quite different. The old ones were so hard one snapped like plastic when I removed it Much better. I slathered them in rubber grease to help installation. No photo of it, but the Fuel Pressure Regulator vacuum hose got replaced too. That is in one heck of a nasty place to get to! It wasn't cracked, but was hard and would've failed eventually. Since the intake was all apart, one thing I wanted to try was to smoke test the throttles/vacuum manifold and see if there were any leaks post throttle. Since the previous owner had these off the head, I had my suspicions that maybe there was a leak there. There was certainly some precedence for them doing it wrong... I read on another forum about smoke testing using a small container (jar in this case), some incense, and hose. Light the incense (I used cones as they are smaller and fit better in the jar), blow it out so it smokes, pop it in the jar, wait for it to fill the jar with smoke and then with one hose leading to the intake, blow into the other hose. This blows the smoke into the intake, and if it finds a way out, it'll be obvious where it's leaking from I ran it into the brake booster hose. This connects to the vacuum manifold which then connects post throttles I can confirm there are no leaks post throttles now, which is good. I haven't tested with the plenum and intake piping in place yet, but I'll do that next time I have the MAF (airflow meter) out. If it's all sealed, there should be zero smoke escaping. With the intake off I took this chance to replace the starter motor, since it hides under the intake, and was intermittently not starting the car. I will have another post on that job though. It was not fun. After replacing the starter motor I refitted the CCV assembly, ICV, and then the intake assembly with the new o-rings. It was looking like an engine again, finally. One last thing to replace was the fan clutch. The one on the car was locking when cold, causing the engine to run cooler than desired, and making a hell of a racket. I finally gave in and purchased a proper 32mm fan clutch spanner off Trademe. This made the job too easy, and I now wonder why I never got one earlier. The old clutch had a date stamp in 2011, so obviously it had been replaced, but didn't last long. It seemed to be a decent OEM brand; Horton, which is apparently a Sachs original unit. My replacement I picked carefully. There are a lot of knock off clutches around which don't operate correctly, so after much research I went with the tried and true Hella/BEHR unit. This is widely regarded as one of the best ones to buy. It also has the proper bimetallic strip on the front, unlike the knock offs which usually have a spiral. It wasn't cheap, so it better be good! So after all that work, what are the results? Good news, the fan clutch works perfectly. Bad news, the idle is still lumpy. Strangely, the car runs and drives like a bat outta hell, and pulls very hard, but it just wont idle smoothly. I need to run the DIS test again to see if the idle valve is working properly or not now, and I also need to smoke test the whole intake. At this point though I have decided that I'm just going to drive and enjoy the car, without worrying too much about the idle. I want to check the valve clearances in the future, as I doubt they have been done, but I'll leave that for future Me to sort out.
-
1 point@Olaf - great thread and detail I think the sport wheel you picked up from the book of faces was from me. Glad it went to a good home. I too have an e30 coupe, in delphin. Build thread to appear shortly Did you convert your struts to 51mm?
-
1 pointA 2009 Alpina B7, Nz new apparently. And for sale? Wheels looked too big and ride height too high. Looked like a roller skate.
-
1 point
-
1 pointThis reminds me. I have some parts I need to get overnight. Murica.
-
1 pointselling my 2000 e53 x5 4.4i 5spd auto black leather tidy body etc been my missus car for last few years 20" staggered alloys (from a 4.6is ) in black or silver options towbar has had various new and reco parts over the years $7500ono 021433600 sorry old pics from when we got it , but looks much the same. has msport steering wheel now and the wheels are black
-
1 pointlater euro spec e28 e24 etc m30b34 had 218hp 310nm 10;1 compression ratio later e34 e32 etc had m30b35 211hp and 305Nm . 9;1 c/r us spec e28 e24 junk had m30b34 with 8;1 compression ratio with about 185hp
-
1 pointAnyway. I don't need one right now, but so i know for future, does anyone have a valve shim tool for S50B30/32?
-
1 point
-
1 point
-
1 point
-
1 pointBmw wanted $1200NZD for transfer case actuator motor, $380US online or the same part using a landrover part number $240US online
-
1 pointGeneral rule - Unless an old BMW its been owned by a true enthusiast (typically one that can do work themselves) its going have lots of issues present.
-
1 pointOkay, it's been a while since my last post, but the car has still been progressing. I left off with the exhaust on the ground waiting for exhaust gaskets, and needing to replace the valve cover gasket. The parts arrived, so I got on with it. With the arrival of the exhaust gaskets for the manifold to center section flanges, I could refit the exhaust. This thing is a damn beast, but with some carefully juggling, wiggling and bolting, I got it back into place. Just as a quick side note, when cleaning up under the car I noted that two of the nuts I removed from the giubo were completely wrong. That wouldn't have helped the balance of the drive shaft. They all got replaced, as they are Distorted Thread locking nuts. The top of them is basically squished and distorted, so when you put new nuts on, they bind on the threads and wont come loose. Reusing them is a no-no, because they will no longer bind like they should. Similar concept to Nyloc nuts, but can handle higher heat. With the underside work done, I could finally refit the wheels with new rubber on them and lower the car down a bit and finish the work inside the car. I needed to refit the clutch pedal, as I had removed it to replace the bushes. I tried some flashy delrin bushes, but unless I removed the whole pedal box and fitted them on the bench, there was no way I could press the bushes on in the car, they were just too tight. Instead I went with a pair of new OEM bushes, slathered in grease. Thanks to the bolt I fitted that was missing from the pedal box, and the new bushes, the clutch pedal feels much better now; it doesn't move off the side, and I don't hit the dead pedal now. The other thing I wanted to do whilst under there was to replace the throttle cable, as my original one was well munted and made the throttle sticky. It was also ugly, and I don't like ugly. Removing the cable was easy enough, once you get the plastic clip out of the firewall (have fun one that one), it was just a case of pulling it through the engine bay and disassembling where it attached to the linkage. This is where it all kinda went wrong, all over one tiny little stupid (but crucial) bit of plastic. As I was attaching the white plastic clip back on the end of the cable so it could attach to the linkage, I dropped it. Of all the places, and things to drop, it was a plastic clip, between the 5th and 6th intake runners. It didn't come out the bottom, and I couldn't go magnet fishing because it was plastic. I tried moving and jiggling things in the area to see if it would drop down, and even lifted the car up and tried to fish around with my hand from underneath to find it. It didn't work, I had only one option left. The whole intake had to come off. Thankfully removing one isn't too hard, and it's something I had done before on my old M3, it's just bit of a prick to get at some of the hoses and bolts. Oh there it is, sitting on the starter motor... This little bastard. I then proceeded to immediately drop it again; onto the floor this time, so until it was ready to go back on, it went into my pocket. Having the intake off did give me a chance to have a quick look around, and give the throttles a quick clean, so it wasn't all bad. Back together it went, and on went the new throttle cable (assembling over a large rag, so I wouldn't drop it again. See, I learn from my mistakes!). Whilst setting up the new cable I encountered two things that made me facepalm. One, the throttle return stop had been mangled, and bent back. This stop is what stops the throttle pedal linkage going back too far when you take your foot off the pedal. If it goes back too far, there will be too much slack in the cable and you will never adjust it out. No prizes for guessing how I found this issue. I bent it back as flat as I could, which made the pedal sit better, and allowed me to correctly adjust the cable. Being bent back was no accident; it took a lot of work to bend it forward again, so I can only suspect it was done intentionally to compensate for the stuffed cable. The second issue, was that the throttle stop was badly adjusted. On my car because the shell was originally auto, instead of a normal solid "stop" under the pedal, I have the kickdown button still. The throttle stop/kickdown button sits behind the pedal and is what stops you putting pedal to the metal, or more accurately, damaging the throttle cable by trying to pull it further than the throttle plate will allow. On the flip side, if it's not adjusted enough, it will stop you getting to Wide Open Throttle (WOT). The whole thing is on a thread and screws into the floor, but does have a locking nut that stops it goes in too far. On my car that locking nut was wound way out, which meant that the stop couldn't be wound in as far as it needed to be, which means by the time the throttle pedal stopped, I was only seeing about 3/4" opening, not WOT. No wonder this car felt slow! I wound the locking nut down, and wound the stop in enough that when the kickdown button (which now does nothing but offer some nice physical feedback through my foot when pressed) is pressed, the throttle is 100% open. With that mess cleared up, I moved out of the interior and into the engine bay for one last job for the day. The valve cover gasket. I noticed it was BADLY leaking down the back corner, so ordered a replacement a while back. I had intended to rebuild the vanos whilst the cover was off, but decided to postpone that (for reasons I will explain in a later post) and just stop it leaking. Replacement is easy; Remove the coils, a whole bunch of bolts, and then the cover itself. When removing the coils, you also need to move the loom out of the way, so I rest that on the strut tower. I didn't notice, or remember, that the coil connectors are actually numbered via a small brown plastic tag on each wire (as seen in the photo), so instead I put a small dot for each coil it went to (1 dot for coil 1, 6 for the 6th coil) with a paint pen. This is the connector for coil 2. The dots are covered by the locking clip when assembled. It never hurts to over mark things before disassembly. And off comes the cover. It takes a lot of wiggling to get the back to clear the cable holder and the rear cam cap, but it does fit. This is the corner that was leaking. The gasket wasnt that old, it must have been replaced when they did the head work, but for whatever reason it just didn't seal here The other leak I had was a bad one into a couple of the spark plug tubes, via the rubber washer on the bolts. I ordered a bunch of these (you need 20x btw, I came up two short). The old ones were hard as rocks and shorter than the new ones I cut them all off the bolts, and pressed the new ones on. I slathered them in red rubber grease, and used a socket and a hammer to press them on. Much quick and easier than doing it by hand. Pop the new rubber washer over the threads, hold the socket on top, and give it a few good whacks with a hammer until it pops over the shoulder. The new gasket was then fitted to the head, with a small amount of sealant in the corners of where it goes over the cam bridge in the front, and then back on the cover went. The bolts were then refitted with the new washers. Now, with the bolts be VERY careful refitting them. They are too easy to pull the threads out of the head if you over torque them. In this case I did them to 8NM working from the middle outwards and all was well On went some new coils, and it looked like an engine again. Some testing shows no signs of leaking anymore, which is good. The clutch pedal and throttle feel much better, with less slack and more immediate response. Unfortunately despite replacing the bushes in the shifter, there is still too much play (although FAR less than before), and it appears to be coming from the joint at the bottom of the shift lever itself, so that will need to be replaced, maybe with a short shifter? The biggest disappointment is that despite replacing the coils and checking the spark plugs, there is still a very noticeable misfire at idle. It sounds like the old girl has some wild lumpy cams. I'm working on this now, so hopefully I can nail it soon.


