Leaderboard


Popular Content
Showing content with the highest reputation on 06/08/19 in Posts
-
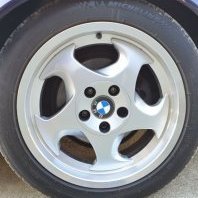
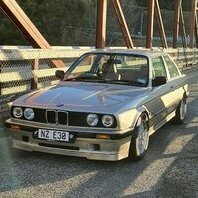
9 pointsCenter caps on.
-
3 pointsNah, it's just people filling in Ron's vacuum.
-
2 pointsUp for sale is my E30 Sedan that I’ve owned for the last 10 years. Paintwork is in immaculate condition, Genuine Sedan Tech 2 kit has been fitted to this car and repainted a few years ago- this body is rust free. It sits on E38 16x8 wheels (all wheels have been repainted recently). Black leather sports and dash is in very good condition. The engine was rebuilt in my ownership (have receipts) using a B27 block, Rebuilt 731 Head using a Genuine 272 Shrick Cam Shaft, 325i intake/injectors throttle body, Stainless Steel Headers & Remus Exhaust. Gearbox has been converted to manual (Getrag 260) with a Z3 Short Shifter. Suspension has been converted to 5stud using the best E36 M3 Evo front hubs and lower control arms, 318ti rear end, Bilstein Shocks all around, AKG bushes & Whiteline Sway bar - this setup making the car a very nice and tight road car. I have meticulously maintained this car in my ownership with countless receipts to be provided to the owner. The car is currently in storage so please give me some notice if you would like to view. Asking Price $12,000 Exterior Genuine Mtech 2 Bodykit 16x8 BBS Wheels Euro plate filler Interior Recaro Sport Leather - Excellent condition Alpina rev counter Alpine Headunit Alpine Front & Rear speakers Hyper Tinted Windows AVS 5 Star Alarm Engine M20B27 Stroker 731 Cylinder Head M20B27 ETA Block Shrick 272 Camshaft S/S headers 2” Twin Exhaust System Remus Muffler Driveline Getrag 260 Gearbox Z3 Short Shifter Suspension AKG 75D Bushes Bilstein Shocks Lowering Springs Whiteline Sway Bar E36 Evo M3 Front Hub E36 Evo M3 LCA E36 Ti Trailing Arms Slotted Front Rotors EBC Brake Pads UUC Braided Brake Lines WOF expires 27/11/19 Rego expires 26/7/19
-
2 pointsIf you haven't already, have a look at the Weekends With Moose series on the Speed Academy Youtube channel. They are doing an E36 M3 Euro project, and one of the episodes focuses on the sump. The standard sump looks to have good baffles anyway, but an upgrade to a 3.2 dual pickup pump and sump would be better if you were on the track.
-
2 pointsWee spoiler until I write the next chapter (flash forward to June '19). BBS RC090 17"x8" et20 with polished barrels. Playing with ideas at the moment. Not yet 5x120 as I'm still deciding what to do.
-
2 pointsHmmm do I or don’t I ???
-
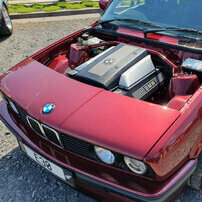
2 pointsCooling was a big concern as I'd be removing the viscous fan from the front of the engine. I trial fitted a few radiators but ended up settling (if i recall correctly) on a ti Radiator. It fit nicely ion the front and kept the bay looking clean without the need for a remote expansion bottle. Its also slightly taller than stock so should provide a tad more cooling. This setup has been working well on the open road and in traffic, however it is something I'd like to do more research on before this car sees a track. Probably E36 M3 evo radiator. I bought a generic SPAL fan and wired that to a 80/88 degree temp switch on the radiator and also to a manual bypass switch so I could have the option of having it run full time (wiring carried out by another AV mate, Cheers Howie). The plumbing was a bit of whatever I had lying around. It was a mix of the E36 hose from the donor car and a 90 degree tube from super cheap to go from the upper radiator point to the thermostat housing. This also something I'm not the most happy with and will get looked at in the future. After that I added the OEM blue coolant and bled it through, following the procedure multiple times. I was extra cautious at this stage as I really couldn't be bothered pulling the motor back out . One of the biggest and most expected headaches was getting it to start. Overall I think I was hung up at this point for probably over a month. I was adamant It had to be a stray wire that I cut or a bad connection somewhere. I spent many a night with a multimeter following the wires from the pins on the DME to its destination. Everything seemed fine but still no luck. The fuel pump would prime but that was about it. At the time I was in the Air Force which is a mint place to be if you happen to have a project car. I had already had the metal shop weld the shifter linkages, the crud bay media blast the BBS RS, the paint shop painted the BBS RS and now, an Avionics mate give the DME a look over to see if I had fried anything. It all came back OK. It had to be the dodgy EWS rigged up with the key zip tied to the transponder etc. I asked on here and luckily @Kobra came to the rescue. I shipped the DME down to Christchurch to have the EWS removed via his bench rig. When I received the DME back in the mail, I was absolutely fizzing. Slapped in the ECU and we had lift off... (AUG 2017) First Start Second Start First Drive I found a reputable place in Takapuna to do the exhaust work so it would be a little less obnoxious. Probably my biggest regret with the swap as it was easily the most expensive part at around $1200 and not what I want. At the time I was just keen to get the car home but in hind sight I should have got a quote which would've have stopped the price hiking up and also should have refused to pay until I got what I had said. That being said, the car sounds and performs well, it's just not the best. I'm fussy (which is why I do all my own maintenance I guess). The car then basically was ignored For awhile. I left the Air Force for greener pastures, which also meant relocating to a house with a single garage. Which would have been fine, but with all the other car stuff I had hoarded, there wasn't enough space for fiddlin'. But there was a silver lining to it all. My new landlord just happened to be a panel beater before he was a teacher and also a lover of E30s. I mentioned to him in passing that I'd love to paint the bumpers to imitate the IS/SE look. He was dead set he was going to paint them. They came out so mint and had completely changed the look of the car. We also painted the rear lower apron too. It looked so much cleaner. This definitely wasn't the car I had started with. A quick polish and wax to try make the most of the ageing paint helped. The above pic is a bit of a spoiler alert into the next purchase. The RS's weren't quite built up yet and the bottle caps were, well.. meh. I found some tired 15" x 7" et20 Euroweaves and refurbed them. Still haven't found centre caps One of the biggest motivators for getting the car looking spic was the fact that our wedding day was coming up (might be confusing if I've mentioned a "wife" in previous posts. Same girl just retrospectively writing ). We decided to go with E30s from the E30 Car Club. Admittedly we wanted something else ( even emailed RWB NZ ) but we had left it too late sussing other parts out. We had a mad rush to finish the RSs and try sort the ride height out. Shameless scenic wheel pic. The current suspension made the wide but short RSs look very weird but I hadn't settled on what suspension I want to go with long term. So out came some OEM springs, guard roller, heat gun, beers and the makita one-ways (thanks Hammy). Not my proudest moment but somehow the big day was only two days away and it needed more low. After all it was only temporary. Finally the car was ready. ish. I still wasn't stoked with how it looked. Mostly due the tyres only being 15" and the offset I was trying to achieve. Also the front couldn't go any lower with the sump sitting 2" off the ground. Then the big day. Mandah and Daniel brought their Mtech 2s whilst we used AutoStances E28 as the bridal car (just happens to be for sale here). Perhaps I should have said pic heavy at the start of this thread? Couldn't have been happier with how the cars turned out in the end. Was a mint day! Post wedding, we had a new goal... A bigger garage.
-
1 pointFinally finished fitting all new suspension arms to the front of the M5, took it on the motorway for a test run, had a mild panic attack, went home, tightened the wheel bolts properly, went for another test run, all good!
-
1 pointCar is now sold, onto the next project...
-
1 pointUpgrade to a 3.2 Evo sump / S54 sump and oil pump. Buy these beforehand and get the pump rebuilt. Don't bother with baffles as KwS says, the factory ones are more than enough. Focus on what causes oil nut failure - stretched and worn chain / sprocket. Failure on S50x parts aren't as common as the M50x pumps either. Would also recommend bottom end bearings if you're going to be removing the subframe, and paying someone to install everything/ do the bearings at the same time. Have recently got a quote for a S50B32 bottom end refresh and it's come to $1700 incl GST total, that's parts and labour inclusive.
-
1 pointM760Li was the fastest accelerating production BMW of all time.
-
1 pointSo today I ran some errands. Bought rubber grease from BNT, more abrasives from Bunnings. and some other stuff. As it wasn't raining, I took Grey Thunder. After chilling a little this afternoon, I got stuck into it in the workshop. I was initially doing the tubes with the flap disc, and the cast iron with wire brush on the drill. It was slow going. After about 30 mins, I figured I needed something faster. It was time to try: The Cup Brush on my angle grinder. I just have a baby grinder, Black and Decker. A present from a friend years ago for helping him out with computer probs. When I'm buying my own kit I usually buy Bosch Blue, De Walt etc. I find the 'pro' tools have more power, more torque, do the job faster. I've been pretty impressed with this little grinder. I think going to the cup brush reduced time to complete by 2/3! So I've bare-metaled both front strut housings, and brushed on rust converter. As you can see above, the brush cup is pretty much shagged. And above: the beauty of CRC brush-on Rust Converter. Yeah I've left the cups on as I don't have a 3-jaw puller. Hints. Eg, if you're going to do this: - the cup brush produces little metal arrows that'll go through 3 layers of clothing and nick your skin. Overalls are a good idea, or better still, a leather metalworkers apron if you have one. - Make sure you use full PPE. This is not a rehearsal! I used 3M respirator with 2297 particulate filters; De Walt safety goggles, Peltor H7F Class 5 earmuffs (Ear Defenders, if you're from Blighty); and Welding Gauntlets. In case I slipped with the grinder, to protect my hands and wrists. We might not be doing this for a living, but the damage occurs just as quickly, and a trip to After Hours med centre or A&E to get stitched up or your eyes operated on is much more costly than some saftety gear! - Buy 2 cup brushes, you might go through one and not be finished. They're not expensive. 20 or 22mm spanner to tighten the 'Brumby' (from Bunnings) quick release into your grinder. Oh, and here's some pics of the rotor shields that I primed this morning before errands. Tomorrow I'll be painting.
-
1 point
-
1 pointVery tidy man. Nice work.
-
1 point@Olaf I'm half convinced I need to 5 lug swap to get the wheels I want, so the 15" weaves will probably be for sale sometime this year.
-
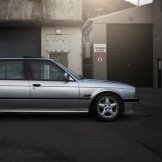
1 pointAre you sure that's not an E23 touring?
-
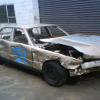
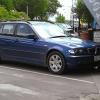
1 point120i 2010 N43 engine 6spd auto pre damage pics
-
1 pointThe day finally came where I pulled the trigger on ruining a stock 316i coupe. Things went fairly smoothly with the engine and gearbox pulled as one unit, this seems to be the best method. Without a leveller i was forced to dodgily use a chain and screwdriver to slide links through the engine crane to change angle. Would definitely recommend using a load leveller. And then the reverse but alot more hands and shoe horns in the mix. Overall its a pretty easy fit but I was concerned with scratching the car or the freshly painted sump. Again, tried and true method is the engine and gearbox together. I used the aluminium E36 arms paired with the rubber green mounts form an E34, can be had pretty cheap from Ebay (part number 11 81 1 132 793). MAKE SURE YOU PUT THE ENG MOUNT STUD THROUGH THE OUT CROSSMEMBER HOLE. I didnt and it caused alot of hassle. I originally thought the mounts I had bought were the wrong ones, but it turns out the studs on either side of the mount are offset. Duh. All the gearbox rubber mounts and crosssbrace were the pre-existing ones. Luckily the E30 has a sliding rail type setup on the body for the gearbox mounts allowing a longer eng/gb to be mounted easily. (MARCH 2017) Once it was in and all mounted up I could see there would be a few issues. My stock shifter arms(#1 & #11) were too long. I couldn't for the love of money find any G260/6 cyl shifter linkages (apparently these work) so i went with plan B and had my ones shortened by 65mm. Keeping in mind #1 is cast aluminium, this might not be the easiest option for people. Alternatively you can buy hard mount kits for the upper part of the gearshift and do away with #1. Next on the hit list was the lack of clearance between the exhaust manifold, steering column and subframe. I cut and welded the rear bank exhaust manifold when the exhaust was made. But the manifold still hit the column (especially under load as i found out later on the first drive). I thought I could massage the manifold with a hammer and remove the rubber vibe dampener from the column. Nope. The easiest solution that i had seen was joining parts of a Holden Barina column to make a hybrid one with the E30. Pretty painful and fiddly process. Basically you use the E30's upper UJ portion as it fits the shaft coming from your steering wheel. And you use the shaft and lower UJ from the Barina. The stakes need to removed from around the bearing caps, then you just twist/hammer/throw the shaft (mindful you don't drop out any of the needle bearings) until you get the end result... Note that this only works with a power steering rack as the have longer input shafts. Which is a nice segway onto the next bit of fiddling. I opted to go for the power steering option for a) to fit the modded shaft b) wife hated how hard it was to turn with wide wheels The rack I decided to go with was the Z3. It had good reviews online and also had the smallest ratio lock to lock at 2.7 turns. This requires a spacer to be fitted as the mounts on the Z3 rack a shorter in dimension than the E30 oem rack. The spacer needs to be OD 25mm, ID 10mm with a thickness of 14mm. Thanks Matt. It all mounts up pretty smoothly. I used E36 P/S reservoir (bolts to LH eng mount arm), E36 P/S lines (slight bending required), M52 P/S pump (theres two different kinds with a flat pulley or a dished pulley) and the recommended ATF fluid. Id also get new crush washers for the banjo bolts too. That sucked. Once it was in i used E36 inner and outer rod ends as they're ever so slightly beefier than the e30 ones and easier to adjust. One thing that I DIDN'T have interference problems with, was the brake booster due it being the Clio one
-
1 pointReplaced the rear springs with the H&R OE Sports. The 25 year old spring pads were definitely at the end of their usefulness. Released the anti-roll bar hangers in order to allow the lower control arm maximum drop and using a lever easily removed old springs/pads and installed the new. Had planned to replace arb links but was struggling to slide the new one onto the bar (same part numbers). Will get some rubber grease and have another go.. Plan next is to drop the front subframe to install the engine mount reinforcement plates and replace front springs and pads. Thinking while subframe is out I should 1. Have subframe stripped and powder coated. and should I 2. Drop sump and wire the oil pump nut 3. Clean up the sump and install a baffle. I may do only the occasional track day so this maybe overkill. Thoughts and anything else I should consider?
-
1 pointSo after languishing for 6 months my 335i burst into life with the first push of the starter button. My DME had blown 2 of Mosfets that control the injectors. At first I thought it was the coils as I had one die last year so I replaced them all but the problem persisted. The error code 30BB sugested the Mosfets so I ordered some ex the USA and finally found a guy who could replace them. Its not a job for amateurs but GP electronics in Lower Hutt did it and no issues. After reading all about it I decided to replace all six Mosfets just in case. Now all I have to do is use a full tanks worth of 6 month old 98 octane. I also replaced the battery as the BMW original was 12 years old and wouldn't hold a charge any more. Welcome back baby I've missed you.
-
1 pointthat's 'unique'. what on earth is going on with the infotainment / gearlever though?
-
1 pointNice car, but maybe i expected more. Its a bit rough these days, all that work and they can't even paint the inside of the fuel flap!
-
1 pointYep haha F10 ? cant stay away from the 5ers
-
1 point
-
1 point
-
1 pointSimply couldn’t resist doing this to it. It’s like dailying a CSL
-
1 pointAll of it. Please don't think 'I'm not breaking new ground here, it's been done before'... Your style is informative and entertaining; leave nothing out.
-
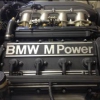
1 pointCollecting the E36 was the first drama in this project. We made the drive from West Auckland to Tauranga one Sunday morning to drive the car back. I figured if I could somehow get some fluid into the transmission, that it'd spring back to life and i'd be driving back to Auckland under its own steam, much to the horror of the people i bought it off. No cigar. Stuffed around for ages driving the car up onto a curb to get under and try and force feed it the ATF fluid. It wasn't going in. About 5 hours had gone by and my GF and our friend who had come along for a "quick" roadie was starting to get over it. Pressure was on. I still had 1st, 2nd & 3rd gear available in the blue E36. Traffic was light so i thought I'd try and limp it home. Again, no cigar in sight. Car was revving higher than i was happy with and i could see the temp gauge was more inclined to lean to the right. We made the decision to leave it at a random gas station and head home. The following day I drove to work, put in leave, picked up a ute and trailer and headed back down to Tauranga with the ever patient GF. All loaded up we headed back to Auckland. CIGAR. I quickly started to pull the E36 apart to see the condition of the cams as an indication of oil changes. The engine showed some varnishing and the coolant system seemed to have been topped up with a lot of hard water in its time. At this stage I still had an ear to the ground to see if a better motor would pop up but there wasn't really anything available. Being a running car, I was able to check the compression of all the cylinders. It was all even and within factory specs so I was happy. Work began on pulling it all apart, selling bits I didn't need to fund the project whilst still tinkering away on the E30 that was still my DD. My search for rust on the old girl had luckily been coming up empty apart from a little bit around the trunk seal. That only required a wire brush, some rust converter, paint and a new seal. I continued to remove the grime that had built up over the past 26ish years. Parts started to pour in from Pelican Parts and FCP Euro. I purchased any seal that was a worry on the M52 as I wasn't keen on pulling it out of the E30 in the future. Crank seals, oil filter housing seals, vanos hose, cooler thermostat from factory, metal impeller water pump, new radiator, electric fan, valve cover seals, filters etc. The E36s engine and ancillaries were all disconnected from the body and was ready to be pulled out. This was made much easier by the fact that the radiator support can be removed (a few bolts and two spot welds from memory). The engine lifter was able to slot in and take the weight of the motor with ease. Seals fitted and motor tidied up. Was starting to look like a tidy package suitable for the E30.