Leaderboard


Popular Content
Showing content with the highest reputation on 09/01/20 in all areas
-
4 pointsHaving worked on scenario modelling using software and databases that cost ~>100 million to setup and rent supercomputer time to process, I just cringe whenever I read things like the police media release ' going 10km/h slower in a crash reduces risk of fatality by x %' so we are just going to cut the 10km/h tolerance. Nothing works like that in the real world and often you get the opposite effect. Some things I would expect to see if this was properly considered, each may have only a fractional input but together could have the opposite effect. - physical factors including complacency effect or drowsiness -Increased risk taking to overtake - Increased road rage - increased speed differential between hoons and general population - increased time spent looking at speedo and not the road -worsening skills of drivers as speed limits reduce -cheaper tires bought as people no longer see less value in high performance tires - older drivers continuing to drive longer (feeling less pressure to keep up speed)
-
4 pointsMan I wish I was worried about 96 in a 100 which utopia do you live in lol. I wish people would manage more than 80-85 in a 100.
-
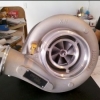
3 pointsAnother thing that has bothered me since I got the Mini, was the horrible wind noise from the passengers window at speed. It needed fixing. At about 100kph, or lower if there was a decent crosswind, the passengers side door glass would emit a rather annoying sound. Obviously on a 700km or so trip home on the open road this started to get rather tiresome, but thankfully it wasn't there all the time, and you could drive around it to a degree by raising or lowering speed. The window was operating correctly, including the auto drop on the door opening, but still, there was a noise. A decent inspection, and comparison of the window to the drivers side one that didn't make a noise showed that the front of the door glass was sitting a couple of cm lower than it should be. Instead of seating up in the seal above the glass, it sat a good distance below it. That'd be a good place to start. Adjustment of the window glass sounds like a real pain, but in reality its a lot easier than expected. From what I had read, I thought that removing the door card to do the adjustment was the easiest way, but after failing to remove the door arm pad and access one of the door card screws (I swear someone has glued the pad to the door, it doesn't budge no matter how much I press the clip to release it) I tried another way. The official BMW way is to remove the waist moulding on the outside of the door and use a special tool to rotate the adjusters. Now, I don't have the tool (looks kinda like a C tool for adjusting platform adjustable suspension), but had heard you could use a screwdriver. Sure enough, I removed the trim with the window up and was greeted by the sight of the two adjuster wheels, right up in easy access. The adjuster is a large nut that secures the glass to the regulator, as seen in this photo Using a narrow flat blade and a hammer I tapped the adjuster around. Lefty loosey, righty tighty. With both adjusters slightly looser, but not loose enough that the glass moves around freely, I gave the front of the glass a yank upwards. This pulled the glass up slightly, whilst leaving the rear more or less where it was. After a few trials and tests, moving the glass up and down until it was just right, I used my hammer and screwdriver to tighten the adjuster wheels again. I got the glass so it sits firmly into the seal front to back, and still operates correctly. There is now no gap around the glass. There is a proper adjustment spec for this, which I think is measured with the glass at "open drop" but the door held closed against the latch, and should be 5mm from the lip of the window seal to the top edge of the glass. There are more details on other sites about this, but I chose to go with sight and feel instead, as it's an old car now and everything is getting a little more worn out that when it was new. You can see from the dirt mark that was previously behind the seal how far up the front of the glass has come The rear is about the same as it was You could previously see the top of the glass here, now it sits in the seal I gave the glass a thorough clean inside and out, and under the trim, and reassembled. A quick drive down the open road was promising, with no wind noise, but it was an intermittent issue so will need to do more testing, but I'm fairly sure that is what the issue was.
-
3 pointsGot the replacement master. Put that in. Swapped over to a Competition Clutch and light flywheel (7.5kg) (pedal is very heavy). -Can't say I recommend for daily use, but I got it for a good price, and it does the job. Fixed the boot locking issue, turns out it was a wire so worn it had split in 2 -Common enough issue, but and not where I thought it would split -Recommend to anyone who has E36 central locking boot issues, to fully peel back the loom cover on both ends and get a decent look at all the wires underneath to spot any potential issues. -Soldered that back together, and now I have central locking again Replaced one of the tyres, as I had an interesting wear mix, 2x 5mm, 1x 8mm, 1x 2mm. And replaced the windscreen... (Make sure you put down a towel or something when you try to remove wiper arms, otherwise they can cause a nice chip, which then spreads into a crack across the entire windscreen) Went in and got a wof, and so she's all road legal. Until I noticed that one of the park lights was out the following day Next on the list, replace the faulty camshaft sensor, and hopefully that fixes the intermittent idle issue. I would normally point the blame at a vacuum leak, but I just replaced all the hoses and gaskets on the intake, so I have my doubts. If the camshaft sensor doesn't resolve the issue. Time to build a smoke tester I think.
-
3 pointsWell I just got told by the Mrs that the spoiler makes it look like a Swift
-
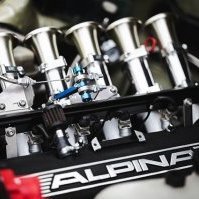
3 pointsI have too many already! And the temptation of an Alpine White manual with a CF airbox might be too much!
-
2 pointsI picked one of these up the other day and can confirm it's legit. CTEK MSX5.0 (5A) normally $190-$250 (Repco Link) Currently available for $139 including accessories (Repco Link) I don't think you'll get a better bargain than that for a CTEK, my M3 loves me for it because of the really low amperage maintenance mode. For those wondering, 5A is fine for even a quite large vehicle battery.
-
2 pointsBest way to fight these sort of issues is for people to dispute the infringement and go to court, courts will get overwhelmed quick if enough people do it then they likely be forced to backtrack.
-
2 pointsBit of progress this week! Rear end painted up Car off to panelbeaters tomorrow, was very rusty along boot seal lip so new panel will sort it all Done the dentent shift pin rebuild in the weekend, what a fun job that is..... Have an online order on its way with front and rear seals etc for the motor to swap in and hopefully get the sump and gearbox on in next few weeks
-
2 pointsPretty sure all e39 M5 worldwide do not have break ducks (sorry I just had to do that...)
-
1 pointIn the For Sale forum Kelvin, not on Trade Me.
-
1 pointFinally, It looks like I might be coming to the end of fixing the previous owners neglect and bodges. When I first got the car and drove it home it shook like crazy under any acceleration. This turned out to mostly be the coil, leads and plugs that had done their dash. Once they were replaced the shaking got a lot better, except under a couple of conditions. The worst was when I'd pull out, foot flat, to pass another car around a bend. The whole car would vibrate, but this time there was no loss of power and the engine was pulling hard. It was something else, and I had my suspicions. One of the items on the PPI was the "RH Inner CV boot coming off". The previous owner took this as the need to replace the clamp on the boot, which he did before I collected the car. I noticed when I had the front subframe off that it was covered in grease, and the clamp the previous owner had fitted to the boot wasn't a CV boot clamp (a narrow thin metal strap) but instead a standard hose clamp. I guess it was working as the boot was still there, but everything in the vicinity was greasy. I decided to remove the hose clamp and fit a proper clamp, but thought I should check inside the CV joint and see how much grease was in it first. I slid the boot back, and nothing. A small smear of grease on the tripod, but otherwise it was running dry. The cup also appeared to show signs of discolouration from heat. Bollocks. Holding the inner CV cup in one hand, and twisting the axle or outer CV resulted in a defined click and visible movement in the inner CV. Double Bollocks. CVs do not like to run dry. It's the second quickest way to kill them. The first would be to replace the grease with grinding paste. Since I didn't have a spare joint or axle at hand I packed the joint with grease and refit the boot with a proper clamp, just in the hopes it might be a bit better and keep going. It wasn't better, but at least it didn't get worse. Since new inner CV joints aren't available a new RH axle was ordered from RockAuto. The axle arrived the other day and it was time to crack on and replace it. Car went up on Quickjacks, wheel was taken off and then the axle nut threw up the first battle. These are tight, and the staking on the nut needs to be straightened out to help spin it off. After some bashing and rattling, it gave way and we were on a roll. With the nut off I could already tell the splines were free in the hub, not rusted and seized like some. Winning. To get the outer CV out of the hub you will need to swing the hub outwards. To do this the lower ball joint and tie rod end need to be disconnected. This was easy to do since the ball joint was new, and the tie rod end recently disconnected. The PS fan and lower torque mount need to be removed to access the bolts that hold the hanger bearing in place Now the hanger bearing bolts can be attacked. Two are easy to get at (one partly loosened already in photo) with a ratcheting spanner, but the other (LH side of photo) is tucked up behind the axle with limited room. A ratcheting spanner is a must here, and it will eventually come out far enough to remove with your fingertips Next swing the hub outwards and slide the outer CV out of the hub and let it hang freely. Now it's just a case of pulling the shaft out of the gearbox. I gave the hanger bearing a couple of taps with a hammer and the axle slid right on out. No oil came out of the gearbox, but apparently, if the car isn't level it can leak once the shaft is removed. Wiggle the shaft out, spinning the hanger bearing to clear everything it tries to get stuck on Easy. Since the replacement shaft I got is aftermarket and not genuine, the hanger bearing housing will need to be transferred over. To the workbench we go. This housing is held in place with a large internal circlip Awesome, I thought, I can finally use the sweet circlip pliers I bought ages ago. They're rubbish. Too short and too floppy due to their design. Don't bother with interchangeable ones, just get a proper pair of single purpose pliers. Like these, which I had to run out and buy for this job And they worked a treat Before removing the housing I also needed to transfer over the little dust shield, so to stop that being damaged by the housing I used a hammer to carefully tap it off The hammer was once again employed to bash the housing off. It's a bit of a light press fit on the bearing, but will come off with some hitting in various places around the perimeter. Now it was time to build up the new shaft. Mmmmm, shiny. Refit the circlip first. Trust me, its a lot easier than doing it once you have hammered the housing onto the bearing. Then the housing goes on, as does the dust shield. Ensure the circlip is correctly seated in the groove. Its pretty decent quality considering it costs so little. The boots are all soft rubber, the splines are nicely cut, and the CV joints are all nice and tight. There is zero play when twisting the shift, unlike the old one. Refitting is simply a case of carefully slipping it back into place, making sure that the hanger bearing housing is rotated the correct way before slipping the shaft into the box. Ram it home, bolt the bearing into place, slip the outer CV into the hub, and reassemble everything else. The hub nut is about 180nm, so I got my favourite helper down into the garage to sit in the car and stomp on the brakes whilst I swung off the torque wrench. Stake the nut, and that part is done. Before fully reassembling I took the chance to fit a SuperPro insert into the lower torque mount. The mount was new, but it still felt a bit soft to me and there was some thumping when coming on and off the gas, or changing gears. SPF2426K These are just inserts that fill the voids in the standard mount. Easy to fit, just slip them into the mount and refit. The results of the work are all pretty immediate. The axle has completely removed the shuddering when accelerating, it is like a new car. I can push it as hard as I want around corners and nothing. The mount insert is also fairly obvious. The car feels a lot more direct and connected not. The gearshift is tighter, and the thumping has near enough gone. There is some vibration in the cabin at low RPM, but I think that was there beforehand. Well worth it for a simple upgrade. You could probably use it on an old, slightly torn, mount too. I'm very happy to finally be at the end of fixing the issues that the car should not have even had. Now I can enjoy the car without worrying it will shake its self to bits.
-
1 pointAnd you got pinged. ? Sorry. ?
-
1 pointNice progress! While I remember have someone remove and press in a new gearbox seal. It’s a PiTA job.
-
1 pointHaving recently been pinged for 61 in a 50, down a one way street I have to believe this is purely revenue driven. So much so, that where I was pinged is visible from my office, and four days out of five there's a marked car sitting just over a blind crest. It's an area with no schools, no houses, the biggest threat a speeding car would be is to the local rabbit population. I don't have a BMW with cruise control currently, but both Mercs are deadly accurate to what you set it to, both up and down hills. I've independently verified it with GPS, and 104kph is 104kph.
-
1 pointThis is true but being pulled over isn't the problem, it's all the f'ing imbeciles that will use this as a license to travel at 96km/h or 48km/h.
-
1 pointYep. Yep (although this pic is of a PFL but same rules apply).
-
1 pointRear spoiler: no idea sorry and I've looked at a lot trying to find one I like for mine. But that one does look good, it seems to fit really well. Intakes: I know right? Somebody needs to send some intake love my way. ePAS: We're lucky as the Japanese LCI's are all hydro units. The UK guys say the electric ones are vague, some even retrofit HPAS.
-
1 pointSold to a Bimmersporter pending deposit. Deposit received. Sold. ?
-
1 pointSo I did a bit of a blue a while back and it's been bugging me since. I drop a bar on the roof and it creased the roof edge. When I got the dent remover guy in to remove some other minor dents he wasn't able to pull it out as it was on a crease line. So I put a claim in with Classic Cover who approved it and I took it in to Prestige Repairs here in Hamilton. There was a bit of other touching up needed with respraying wing mirrors and boot lid, plus stone chips on the bonnet and few other spots around the car. They ended up have to respray the whole roof and down the A and C pillars to blend it in and came up really well although I did have to take back for a little more buffing which they handled promptly. I'll post some photos when I get a chance and it's not raining.
-
1 point100% Hi temp light and 104k....you've been lucky and had 50k more than many people get out of them. There is an electric water pump test process ...check the procedure for your model but it's roughly like this. This would be conclusive I'd think.
-
1 pointInteresting...what of the DSC fault code? The throttle pot positions can be easily seen with a scan tool, presumably they confirmed the failure rather than just going with the logged fault code? I'd imagine/hope this to be the case if they are recommending a replacement TPS + loom. I don't know the ins and outs of the 5 series but the TPS wiring is typically on one of the DME looms, so quite a few places to run that back to and things to plug into. It's interesting to me that you could have a DSC fault and have to pull over in limp mode and only have a TPS code logged in the DME. These kinds of events usually come with a truck load of logged faults... (Autosure question..... is that excess per 'breakdown' or if you need additional things fixing as the problem is not cured will you need to pay additional excess?)
-
1 pointI've ordered one of these for my M4. Ordered from https://www.android-car-dvd.com/. Initially they said they couldn't ship to NZ but later came back to me saying they could... Will see how it goes. I thought about buying one of those full Android replacement head units as they're a bit more feature packed and would add a touchscreen. But they look like they can be a bigger headache with quirks and bugs. Really I just want to have Google Maps navigation on the iDrive screen, don't care for much else.
-
1 pointI too run a CTEK MXS5.0, f**king brilliant. And as it's close to fathers day, pricing is excellent, as Dave has linked to. Quality unit, almost capable of reincarnation.
-
1 pointThese cars are very power hungry, and not tolerant of a battery anything less than fully grunty. Low battery causes all kinds of unusual faults. There's also the IBS cable which is subject to recall in other markets, but not recognised by BMW New Zealand. The newer IBS cable has some different connectors. I chased a number of shitty faults and no-start conditions, until replacing the IBS cables, and later, the battery (despite it testing fine a few times) with a high capacity unit.
-
1 pointI don't think it's complicated, but like anything valuable or volatile you want to treat it with care and respect.
-
1 pointSolved:
-
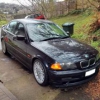
1 pointThe E82 is this vehicle: https://www.pistonheads.com/gassing/topic.asp?t=1310852 Scroll down for the pics. Great car. Currently in the UK. But will arrive here in Oct. As it is now:
-
1 pointGenuine bmw part. ABS plastic All damage has been repaired with epoxy resin. Bumper is strong, straight and would just need prep n painting. Comes with lower grid (have msport style also i’ll throw in), fog lights and trims. One of the fog lights lenses tends to fog up (funny that) but are both genuine bmw items and not the cruddy AliExpress ones. Looking for $300 pickup west Akl.


.thumb.jpg.04807d42ad69838062fa7df5f4a7a884.jpg)