Leaderboard
Popular Content
Showing content with the highest reputation on 08/16/18 in Posts
-
3 pointsSoooo when the f##k are the authorities in this country going to wake up to make insurance compulsory. it only needs to be 3rd party. What gives the right to anyone to bash into someone else & not be responsible!
-
2 pointsIt kind of works in Aussie as they have serious fines, whereas here you get slapped with a wet bus ticket and that culture has stuck. It might work to introduce that here in the long run, but the sector who do not currently comply with the rules arent going to change any time soon. Part of it probably comes with our endless supply of dirt cheap imports, providing cars people cant actually afford at an affordable initial price
-
2 pointsI went from 8 years of e39 540i ownership to one of these. https://www.trademe.co.nz/motors/used-cars/bmw/auction-1725782897.htm?rsqid=2884b66464604e1e9dd678f094e4ffa7
-
2 pointsHey, Kyu, sorry to learn of the accident. Delighted to hear nobody injured. Great to be able to walk away from a stack.
-
2 pointsVoluntary insurance probably works out better for decent drivers. If you want insurance you get it and if some idiot hits you then you can make a claim. The people who want insurance are sharing the risk among themselves. Making insurance compulsory just introduces all the morons into the pool and this makes it more expensive for everyone else on average. With voluntary insurance, all the accidents where two uninsured morons hit each other, or drive off the road by themselves, don't result in any claims (which helps keep premiums down).
-
2 pointsI bet the proportion of the population that do not have any insurance, also struggle with the concept of wof/rego, and will treat "compulsory" insurance the same. I dont disagree with you at all by the way, its the same problem with a bunch of regulation - You end up writing regs for the people that follow them, not the people who just DGAF.
-
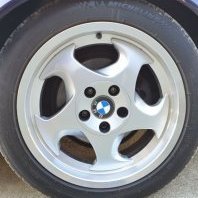
2 pointsi couldnt see the drivers side but i think the rims are all good
-
2 points330i is a long long way away from a 335i when it comes to performance and that is the difference. When the flat peak crowd see that you can get one for 12k and realise how easy it is to up the boost and get 400HP they will be into them. I see the 335i taking a similar path to Supras and GTR's, lower performance BMW's like 330is will suffer the depreciation you have mentioned because in reality they are not very fast.
-
2 pointsSemi related, I was doing a camera test around the house that featured the dogs, but it also shows how much off street parking there is -
-
2 pointsWe can add my experiences to Geoff's... I have tried a few times to use YouShop, and it's invariably been a tortuous and drawn-out, essentially untracked affair. I think I posted details of a couple of attempts on the 'rant' thread? The biggest SNAFU seems to be around customs and clearance which may not be down to YouPost (NZPost). However, there is absolutely no attempt to track a delivery through that process. Typically, NZPost's tracking shows the item to have left the country of origin but nothing more, while the overseas shipper's tracking shows the item to have landed at (Auckland) airport and be awaiting customs clearance. NZPost seem unaware of the package at this stage. Then there is the matter of actual delivery and tracking in NZ. It takes longer to get from Auckland airport to a point of delivery than it takes to get from Nowheresville, USA (for example) to Auckland Airport. Throw in that the tracking doesn't update in NZ and that items are often delivered days before showing as being out for delivery... Whatever you do, do NOT ask for an expedited delivery from an overseas shipper. It is truly a complete waste of time and money.
-
2 pointsI am working in logistics and dealing with freight forwarders on a daily basis and whilst I do agree with some of your comments, I still think that the OP's post is useless because he is taking his 1 experience and telling people "do not use youshop". Freight forwarding in itself when looking at it as a one dimensional operation to move an object from one place to another, is a simple thing. Nothing special. But as a whole operation on a global scale it is certainly not one dimensional nor simple. Sure, the level of service you get may vary depending on the company and level of training and a bunch of other factors. In some cases, it is just a simple thing such as lack of contact information that delays parcels because freight companies dont have a contact number or email to call and ask for payment of tax/gst whatever until you call in with a tracking number. This is because whoever has shipped it has not put in your details in full or you didnt provide it in the first instance. Like I said, there are way too many factors involved that makes or breaks a freight forwarding experience at the consumer level and one story (with hardly any relevant details) doesnt do anything to deter me from using or considering using youshop again. Sure, if more people chime in and have more to say then maybe others who read this can make their own judgement but then again you gotta remember, people jump onto forums and write anything bad or negative based on one experience but rarely do they praise the good and make recommendations in the same caliber.
-
2 pointsI beg to differ, Kyu. Freight forwarding is fairly straightforward, so one should naturally expect a range of service running from ‘good’ to ‘great’. These threads are useful to establish how far outside of that range some of the operators are. Not everyone enjoys my favoured provider, MyUS. I’ve never seen a bad word in print about shipitto. On the other hand, the regularity of people reporting disfavorable - or even plain dreadful - Service from YouShop is impossible to ignore. As you say - know what to expect? In closing, I’d suggest nothing about standard freight forwarding is special, unless there’s exceptional service. ?
-
2 pointsJebus you will argue about anything, won't you Dave? You're getting as bad as Ron these days. You need to chill out a bit eh, can't be good for your blood pressure. That blue one has the rare ///M fabric interior. MUCH better than full leather IMO The yellow one has been through heaps of owners in the past year or two, including iirc Brent. Last i saw it was forsale down here for about 20k before it was stacked. The wheels on the grey one do it no favours, they look so weak on it, and the lowering on the silver one makes it look a bit dumb. The blue one would be my jam.
-
2 pointsThere is a good chance some of the owners dont actually want to sell their M3, and being vague with the TM listing is a good way of buying time while keeping the other half happy!
-
1 pointHere's is a link to Part 1 http://bimmersport.co.nz/topic/43521-m3-evo-32-1997-hackar/ So here's a reminder of what I'm up to Dec 2014 My baby up in the garage on my Christmas present to myself (QuickJack 3500) Motor supported At this point the jobs not done, but thanks to Google and BMW forums thing are moving along. I'm not in a hurry but here's the progress so far. The gearbox is out, Clutch and Flywheel as well. Perfect timing, while I'm at it I'll replace all the gear shifter bushes as well. UUC Stage2 Balanced. Thanks for the advice Josh Can you guess what these are. Big thanks to Rockwell for saving me so close to Christmas Bolt layout and sizes, I spent 3hrs with torch on head, mirror in mouth lying on back towards the rear of the car trying to get the top left bolt out (miss info from net on size) The 14mm at 9 o'clock was pain 5 shops and I couldn't find a wobble head to work. Had to really lower the engine even more. Looking up her skirt Secondary air pump oil leak (gone now) Rod bearings replaced and ARP bolts installed, the old shells had approx 100k on them but looked fine. Dismantled the oil pump, no sign off wear. Don't forget to pack it full with vaseline so it's primed if you don't it may not pick up the oil in the sump. Remove fuel pump fuse or remove coil pack so the car won't fire/start. Starting the car for the first time was the most terrifying part, turn the car over for 5-7 seconds approx 6-10 times and breath again when you see the oil pressure get to a safe level.(remembering I have an oil pressure gauge installed) Lower chain tensioner wear, decided while it's open I'll replace it. while waiting for the new part to arrive. I grabbed front and rear reinforcement plate kits I had and welded them in. Below the old and the new, as well as the tool I made for removing and installing the clip shown. A piece of flat bar, shaped as you see to remove, slotted on top to install second picture down. On the net the DIYs say that the front cover has to be removed. I did mine from underneath, it is tight up there. Here's the trick the metal springs/lever is actually two levers separate them and have a look. Put it back together, but. Leave the low one out 60% but so it's still under the other. Install the bracket on the pin and manipulate/slide the upper lever into place. Once the upper lever is in place you just have to push the second lever up and it's guided into place by the first lever............... The will make sense I promise Feb 2015 Dual pickup fuel pumps, along the lines of the Pumpkin setup. This pump sit in the passenger side tank with the engine return feeding into the filter. This pump then feeds fuel to the engine pickup pump sump. Finished product, does it work as of 2017 I haven't had a chance to see. Just some notes after multiple attempts at trying to get the fuel gauge to work constantly I gave up. It works most of the time, but now I also use the trip meter as a back up. Brought a 20 ton press New Ball joints for my front control arm, they deserve them after 170km Nov 2015 235 x 40 x 17 R888 (god I love the smell of new rubber) Jan 2016 Made myself a String Alignment Box, why New Tie Rods Digital C/C Gauge w AccuLevel™ and Quick Set™ LW Adapter Bottom line ..... if I had a pit it would be great, my car is to low for me to adjust the toe without jacking. Easier just to take it to an Alignment shop. Jun 2016 After my weak performances at Hampton Downs in Jan & Feb driver training, I gave up trying to diagnose the problem. Booked into Gavin's he's the man, he did his magic and now we've cracked the 200 (ye baby) 2017 update got a chance to get back on HD now because of conditions no lap records were set but, I ran out of 3rd gear leading up to the big sweeper and changed into 4th only a quarter of the way up the hill on the front straight. But interestingly still only managed 193km at end of the front straight taken from GPS (speedo read 200km) Package from Ground Control, upgraded to adjustable Race inserts and a pair of adjustable rear control arms. Now you know why, both the front and rear passenger side shocks were leaking During the changeover I found this a small crack, I believe it is from me adjusting the camber and with the camber plate sitting on that weld it gave way. I've ground down the weld, but I wasn't allowed to do the repair welding as the expert didn't trust me. I found my old tower reinforcement plates and modified them to allow for full camber adjustment. Why didnt do this previously I don't know Aug 2017 RallyRoad front strut bar and rear end Black Powerflex bushes. RallyRoad strut bar installed not the 5 min job I thought. Needed to order the special nuts and had to trim them as they sat proud. (sorry the part # for the nuts is missing forum change platforms and lost most of my writeups) Rear end removed, time to install the Powerflex Black Bushes 9 Tried the drilling out.............smelly and messy Went back to the 20 ton press, gave up the first time because of some of the fun angles and packing I tried seemed dangerous. Second time was just as scary, I hid round the corner a few times. When fitting the GC adjustable control arms, I needed to adjust both the lower bush and the control arm opening so it didn't bind. Replaced my boot loom, don't remember what I had in the write up sorry. Thanks to Dave (M3AN) as I said to you didn't need to provide me with a new loom but it is appreciated. Sep 2016 I know it's not Christmas or did it just come early. But these were listed on Trademe for the second time this time I had to have them. Recaro CS Sportsters full leather, heat........................ Weight saving only 12kgs total As these are not standard BMW E36 M3 seats here in NZ you need to get any modification Certified, including my rear adjustable control arms. The first certifier I went to was a total num nuts. His requirements, required me sending numerous emails to recaro germany, spending days fabbing up slider releases (which I got to work) But I was still 15mm short of exist distance on the drivers side and germany wasn't helping with the other request removal of airbags. In the end I rang Wellington spoke to LVVTA, then went to another certifier all the above was a waste of time and stress. If it doesn't sound right just call Wellington it's worth it. Just for the record no 95% of aftermarket seat mounts/sliders are not certified, which means you cannot mount your safety belts to them. All modifications Certified, I got my little piece of paper and cert plaque riveted in my engine bay Below give you an idea of what's required, you will need to go to LVV site download the H template and instructions to work out your individual seat belt receiver location and height. Lower/Upper Plates were from Auckland Seat Belts, in Glenfield. They sell them as a kit. Needed a spacer H points marked Airbag occupancy light removal: no dash light, air bags are always active. March 2017 During regular maintenance back 2016, I came across some oil in my Plenum. So for Christmas I got a ECS oil catch can So decided to remove the plenum, check the throttle butterflies and install the ECS oil catch. (You may also notice the Power pulleys from ECS as well, but they manufactured for TMS which don't fit Euros. Well the power steering does and is now fitted.) On inspection 1-2-3 were dirty but 4-5-6 butterflies were a real mess. Throttle body cleaner and toothbrush to the rescue. The vanish in 4-5-6 was impossible to remove. Location of catch can I cleaned the IRV and oil separator, replacing the hose # 5 as it was very mushy. As you can see I have left the OS in place and have just added the catch can inline. Routing the hoses was fun setting the hose clips, so they didn't rub or impede putting the plenum back on took a couple of tries. This was a resolute of plastic fatigue not a hose clip for a coolant hose on the back of the plenum and me having too much spinach. Many thanks to Aronn for sending up his spare. Means I'm driving my baby 7 days early. Installed, will update after a few Kms, late April update I have not removed the lower canister, but after approx 700ks and a driver training day there is no sign of oil on the dipstick. At the last monthly coffee meet, I mentioned to the guys that even though I loved the sound of my car. I was driving like a nanny because it drew to much attention. Here's my first attempt, start with the tail pipe got some silencer packing cut it to fit the inside made a cage and slipped it in. I couldn't get the cage to fold nicely around the ends so just cut out a panel and fitted it in. Result: did take the edge of the exhaust tone. UPDATE..... April 2017 driver training, blow the cage and packing out of the tail pipe Next idea, now I know that Scorpion exhausts are guaranteed for life but mines dated 23-99 so I thought maybe the silencer/sound packing had maybe disintegrated. I did some research ordered 3 x Acousta-Fil Boa bags from GB @ $18 each NZ, $100 with delivery.(once again NZ company did themselves out of a sale $69 a bag) A bag of 35mm stainless steel plugs and borrowed a mini camera. Here's where I'm going in I couldn't believe how much packing I got out, took a couple of hours. I had to make up some hook tools. So much for the silencer packing being disintegrated Used all three bags, inserted the plug with some high temperature silicone. June Was looking at CAE & RTD shifters online a month ago. Then blow me down a RTD was put up for sale on here... Couldn't help myself. Spent some time trying to contact the manufacturer. So I could buy the RTD DSSR ,spoke with John he recommended just going with UUC. Installing was a PITA only because I know better than most (right) and installed both pieces with the exhaust and drive shaft still in place. It's tight under there and the tolerances are also amazing. I needed to remove the gear selector input shaft joint and sand the bush slightly to get fit the DSSR to fit. Reinstalled the DSSR, then spent a couple of hours trying to get the DSSR and RTD lower arm to match up for the connecting pin I could get it within 1.5mm I ended up making a temp pin approx 0.5 smaller with the leading edge chamfered. Got it back together went for a drive but got the first base location wrong couldn't get into 2,4,6th. The bolt on the hazard light end of the base only just catches the base plate. The OEM knob sits slightly skewed to the left. Time for a drive up around the bays, interesting totally different from standard very precise you need to shift quickly when I shifted at a leisurely pace I'd get lost Drivers training in 2 weeks need to work on the muscle memory till then Driver training after a dozen emergency braking exercises I once again lost 2nd, 4th and 6th gear. On inspection I cannot tell if the units base has moved. I'm guessing as the fixing locations are maxed out, once things hot up it moves outside of useable tolerance. July Keeping to my philosophy of there must be an easier way............... e.g. not removing exhaust, driveshaft etc to remove shifter Tools I adapted to reach nuts from inside the cabin. With the base in place. Marks on tunnel not centred misaligned offset to the left I forgot to take photos, one day. So the plan was as above extend both top slots and angle them slightly to centre base, just slotted them as above. Didn't extend the sides but extended the rear nose (now a closed in slot) and have had washers and nut bases welded together to reinforce the tunnel sheet metal. Upsized the nuts and bolts to from 6mm to 8mm. Also made reassembly from inside the cabin a breeze. I have only cruised around Devo, but changing gear, finding gears is much easier. But won't know if the reason I did this works till some spirited driving is done. (see update below) Dec 2017 Coolant flush and new thermostat. 29th Dec driver training. Good stuff first, RTD shifter is superb. I love it . As always 1st session was just a shake down, second session pushed a little harder 1.19:5 but then sad to say only lasted 1/4 of the 3rd session before this happened Damaged my radiator, rad shroud, fan and oil cooler lines. Waiting now on parts These arrived today Vibra-Technics BMW362MX Removed Poly Engine mounts Well a picture or two are worth a thousand words: No heat shield to speak of (top right), the poor old passengers side bolt & plate have moved under the strain. New parts in waiting, over the top heat shield for drivers side engine mount. Think I'm going to have to strap it in place. Feb 2018 Installed finally, engine mounts, uprated heat shield drivers side, oil cooler pipes(4wk wait) radiator including mounts, vent pipe, fan and shroud. As a precaution after the failure of the engine mounts, I loosened the gearbox cross member and gearbox mounts and re-adjusted them. May New Crankshaft sensor August Driver training on Sat 11th at Hampton Downs was existing to say the least. New Best Lap 1.17.65 On the next lap this happened at the turn in of Turn 4, poor RacingBrake.com couldn't handle it. The RacingBrake front rotor exploded. So after contacting RacingBrake.com again, I received no reassurances from RB as to the quality of their product. Hell, they didn't even reply to my requested for an invoice for Oil and Dust seal kits so I could recondition my calipers. October 2018 So the quest began, as my existing calipers and brackets fit my wheels. The need to buy a full new front BBK wasn't a requirement, I only needed to decide on the rotor size (existing 328x28) and buy new hats. I've decided to go with APRacing CP3580-2900, 330x28. As always buying from oversea looked good, but shipping, gst and the exchange rate bumped the price up considerably. So I approached Aaron from Race Brakes NZ and the prices was competitive. ( update ) After receiving the hats, I received a VAT refund. So if you minus VAT of the rotor price/costs. Importing would have cheaper. The hats were going to be a one off and there would be a min of 6 weeks wait if I was lucky. So I contacted AP in Britain, they recommended BG Developments in the UK who said they should be shipped in 2-3 weeks. (Took 3 1/2 wks) I wanted my car back on the road, so even though it was more expensive, I put time over cost. . Old Rotor and hat ........6.4 Kgs (a side) AP Rotor and hat .........6.7 Kgs Also replaced the front brake lines. Reconditioning my front calipers myself didn't work out 1 piston on the passenger side leaked, 2 on the drivers side. Advanced Seals and SVS in Albany are making up a new full set of Dust and Pressure seals. Nov 2018 I installed both sets of seals only to find that the dust seals lip was to thick so I couldn't insert the pistons. All sorted. Full fluid change, diff, gearbox and engine. Feb 2019 Replaced my twin coby SLC10 with SLC16 approx 6 decibels quieter. March Tried and failed to de-stress my front rotors at 11.00pm on the Northern motorway doing a dozen 100kmh to 50kmh hard braking trying to get the rotors to 435F or 225C De-stressed my front rotors at Pukie on the 9th, Purple steering rack installed (thanks Dave M3an) New PS Reservoir, (looking forward to putting it in ) as I'm replacing my rear SS brake lines decided to renew the caliper bush guides as well. Changing my silver pedal set to black June Driver Training Hampton Downs, the new rack was nice it was also nice to complete just about a full day. Fuel starvation raised it head again during the last session (Turn 1 & 2) approx 20 litres still left in the tank. New time 1.17.165 July Driver Training Hampton Downs, only change replaced my front pads Hawk DTC 70 with DTC 60 New time 1.17.01 (I'm back ) August 2019 Custom J Hook Machined Reyland Motorsport 7.2kg each, E36 hats but E46 diameter. September 2019 A set of Aluminium doors (Thanks to M3an for the heads up) Aluminium Door 13.3kgs with Window regulator attached. New Fuel flap, clips and fasteners. Turtle Laboratories door card repair brackets Oct 28 As you can see from the timeline there has been some delays. I started on the passengers door swapping over the internals, adjusted the door alignment and window. Tried to install the weather strip clamps, first problem steel doors are 2mm thick, Alloy doors 3mm. Thanks to M3an, Dave used his vin in Realoem and found an extra part number. During this time I start dismantling the Driver door only to find, when my drivers door window was replaced the repairer had rounded the two countersunk screws that hold the glass to the rear track slide. The the door handle chassis had broken in the usual places and the door handle cover had been glued in place.......... So a second lot of parts were required and received. Missing from the photo is the new drivers side door handle. As for re-installing everything: I needed extra shims for the hinges, I found that because of the extra thickness of the alloy panels, I had to file down the door handle pin body location so the clip would slid onto the pin. Also the door handle cover top claws needed a light file to widen the opening. Below Steel v Alloy door clamp (Part # 51418187492) Nov So I received some advice about installing the door bump strips. Unlike steel doors where you just line the clips with the holes and whack them with the ball of your palm, with alloy doors you need to support the skin from the inside (so you don't install the door cards) and of course the skin is slightly thicker than steel. Well what I thought would be a 15min job took a bit longeeeeer. She who must be obeyed was not impressed. As we struggled with the last clip on each end of the doors. I tried supporting, but the internal frame shape...., grabbing them with pliers and melting a hole, threading a wire and pulling, removing the condom to no avail. Here's how I got it to fitted, install the green plug and also install the condoms and white clips in the holes at each end of the doors. Let's revise this, worked on one door the other had popped out overnight. What a Btch, broke 4 new clips had to use 1 of my old ones on the drive side below the door handle it was a PITA. But finally got it.(Famous last words) Install the rest of the clips onto the Bump Strip as normal. Get your helper with the hole support, ( I used a 13mm socket on a 200mm extension). Start from the middle and work your way out to the ends, using the ball of your palm. Dec 2019 Christmas Present (couple of days late) Porsche 996 Rear Calipers off a 2001 Porsche Carrera 911 Jan Sanded 200 and 400 grit then Masked Finished with VHT caliper paint, Gloss Black and Gloss Clear 3 coats of each Helpful Hints, Painting, don't get to excited/heavy with the last coat. I did Black x3 the same for Clear coats. Have some clear coat runs. I replace the piston seals after painting, as it turned out my masking was good. So doing the change pre-painting would have been more relaxing. I did bake them in the BBQ for an hour at 90-100c Make a jig as in the photo this allows one side to full eject but still hold pressure, flip it over and it holds your loose pistons in place and rejects the other side. Remove jig pistons pull out by hand. I found it easier to leave the dust boots in place, they pop off when using the jig. Jig 25mm thick x127 long x 50mm. Recesses 4mm and 6mm Update: Porsche 996 rear brakes Jan 18 2019 Had drivers training on Saturday at Hampton Downs, giving the new rear calipers a good shake down. Average time was down 2sec. Data showed braking forces peaked at -1.06g which matched earlier visits. My 888s felt very slippery, they have passed their best and I was a bit cautious, braking earlier for the corners. (Data shows everything) Not sure the caliper colour or the decal will ever be the same The J hooks were brutal, brake dust like I haven't seen before. She who must be obeyed is not happy with the state of the driveway. After washing the rims. Had a slight lip on the top of the ( D737-7606) pads, it may change once the paint and clear coat wear off the mounting pins. The 996 caliper, pad setup makes it a breeze changing pads in and out. Lov it. April 11 2020 I did a search of my garage and found 2 sets of Bushes for the pedal supporting bracket. On inspection of my clutch and brake pedals, only the brake pedal had any play (sideways movement) The removal of the pedal arms is well covered on the net, so we'll skip that. I removed the clutch pedal and installed the bronze bushes, then removed the brake pedal. Here's what I found So I have to make a Brake master cylinder and pin connection, brake switch trigger bracket bush. Now known as a BMC PC BSTB bush. I started with a 35mm length of 13mm OD, 11mm ID copper pipe, the pin is 10mm OD. The brake arm hole is approx 11mm. I started by cutting along the length of pipe with a hacksaw then compressing it in a vice, followed by another run though with the hacksaw blade and compressing it again in the vice. This made the outside diameter very close to a perfect fit, I touch-up the outside with sand paper to get it perfect. I then cut the pipe to 15mm in length and tapped into place with a dead hammer I then run a 10mm drill bit down through the inside of the bush (pipe), it was a perfect fit for the connection pin I fitted a M10 nylon washer to each end of my bush Lubed the bush with anti-seize Installed Delrin bushes. Reinstalled the brake pedal, no play in either pedal. Fitted new black pedal set. All's good in my world so far Old/new CD43
-
1 pointIf it became a rort for two underwriters as you say, a third and fourth would enter the market, increasing competion and lowering prices. That's what this is about, right? Price vs Cost. The Cost to the community of these uninsured asshats is far greater than panel damage. EDIT: and if the true cost of owning a motor car keeps an uninsured asshat off the road, I'm happy to pay more for my insurance!
-
1 pointThis. Make insurance compulsory (and it's no coincidence that the biggest campaigners for that are the insurance companies) and the premiums will go up. All the 'competition will make the market stable' claims will mean nothing - exactly this has happened in the UK. New drivers may spend as little as £500 to buy a car, and face £2500-3500 in annual insurance premiums. At present, the voluntary nature of insurance in NZ means that you buy insurance to cover yourself. Make insurance compulsory, and you're buying it to cover everyone else.
-
1 pointI think third party insurance should be lumped together with car rego. I wouldnt mind paying more than $80 a year for rego which makes it way too easy for people to put cars on the road.
-
1 pointOh man that sucks... glad no injury was involved! Let's look on the bright side, one less E9x 320i on the roads? Now for the first question on everyone's lips- did that rim survive???
-
1 pointHey Team long time no post sorry for lack of updates as life gets away on me, but still have been doing things just not worth posting up. Hopefully this will be enough to tick you guys over, again nothing major. Thanks Francois yeah i also can't wait to fit that charger to the awesome touring. so managed to put the hoist together wasn't too hard to be honest. Took the covers off and have repainted them in a hammer finish greyish colour. was intending to use the heads for the m60b44 swap but realize the motor is a m60b30 so won't be using that motor now. used the brake duct scoops from the parts car and did some cut and fitting to get them on the sedans front bumper and managed to score these puppies for a rainy day Will be hoping to bring more updates as i start taking apart the sedan car and dropping the motor and box out. Thanks
-
1 pointThats exactly what they did to me, two shipments seperated by a few days they combined them and then I had to pay GST. W*nkers.
-
1 pointNah, I paid 15k, for my 335i and I still see sub 100k cars for over that. 335i is close to the bottom of the depreciation cycle.
-
1 pointYes, when I took out the cover originally. I have classic cover. Every now and then I review and increase the agreed value. As long as it is in line with the market and nothing outrageous, they will generally accept without much fuss. They will request a new set of pictures every time you do, so they can see the condition of the car.
-
1 point
-
1 pointNathan it has happened before to RB and other manufacturers, but my rotors looked in great condition So after I sent RB, as much info and photos as I could and offered to send higher resolution photos if required This is an excerpt from Racingbrakes response "To assure driving safety, track racing should not be rely on "track miles" or number of events, rather it's the driver's responsibility to have the brake inspected "prior" and "after" each event, and periodic replacement on pad and disc is recommended before a potential brake failure can occur" I replied with The info I provided, total miles, total track time etc The photos are (worth a thousand words) of, Ring condition and thickness, pad condition, Hat temperature and failure areas etc The links to my build threads was to show you how anal, I am with my cars maintenance and performance . All the above was provided to you to help analyze what went wrong. With the idea that I would receive a logical explanation as to why this happened and some reassurance going forward that it was safe to use your produce again. The best response I got was from a M3Cutters member Iain, His comment was that I had put approx 35 trackday heat cycles through the rotors, which I hadn't thought of. I worked out that I have done 7 trackdays, approx 5 sessions a day, so between 745-600 km.
-
1 point
-
1 pointIf it suits I am looking to rent out two rooms at the moment - https://www.trademe.co.nz/Browse/Listing.aspx?id=1732712766 and because no one cares normally, here are two bonus content pictures. My coms cabinet and shed.
-
1 point
-
1 point
-
1 point
-
1 pointMy bar and wiring kit may be coming up for sale in the near future if you are interested. The tongue i've got is the inch an seven eigths size, but you can buy a 50mm version for it if that's what you need.
-
1 pointNice. Love a Techwan, IMHO Tech I > Tech II. Car has a couple of non-standard parts, but listing says he has the spoiler, wheels, etc. to put it back to factory standard so that's no big problem. Would love to add a Tech I 325i to my garage, but no room at the inn, bugger.
-
1 pointFair enough, I usually end up paying a guy for most of my stuff as well. No shame there.
-
1 pointAnother in the theme of 70's Concept Cars, check out all this goodness of the decade of decadence... More info and pictures in this article here... https://www.motor1.com/photo/3173468/1972-bmw-turbo-concept1972-bmw-turbo-concept/
-
1 pointthe interior on the blue one is nice, have seen it in real life and its special indeed. The black one would have been nice too but the welds on the subframe cracks look weak. the lowered grey one I think looks nice to me but also dont like the lowering on it. factory height is best.
-
1 point
-
1 point
-
1 pointQuibble, quibble, quibble. You should hop over to the Facebook market place, you’ll have a field day!
-
1 pointThese kinds of posts are pointless because each case is special and it certainly isnt going to be enough to deter anyone to use it. Just use with caution and know what to expect. I personally had a bad experience with youshop as they (without my knowledge or approval) combined two shipments from the same supplier that I ordered on two separate days one for myself one for a friend and they taxed me on the total value despite both orders being under threshhold if calculated individually. On the flipside, I know another who has saved hundreds of dollars on multiple small shipments costing only $10 to land with youshop rather than the usual $40-50 on UPS etc. Would I use youshop again? yes, I would. But it would totally depend on the value of goods, supplier, urgency, and other factor before I decide so.
-
1 point
-
1 point2013 M3 PURE FIVE YEAR OWNERSHIP Stumbled across this post and figured I could add my two cents worth. Took delivery of my new M3 Pure, one of twenty, in 2013 and sold it a short while ago to avoid Phil Goff's tax. In deference to Tom, who obviously knows these cars well and much better than I do, I've made a couple of further observations of my own after running the car for 5 years. First, the good stuff, the engine... It can well pull the skin of a milk pudding and make a decent noise doing it in pretty damn fine comfort. Some reviews bagged the stereo, can't imagine why, never used it when driving and it seemed perfectly good at standstill. Honestly, if you rate this car on the stereo, you've got the wrong end of the stick completely and should get a Toyota Camry. It's certainly a smart looking vehicle without being too ostentatious or blingy, so you won't feel overly self-conscious driving around in it, although it's pretty intimidating at full noise. Seats four comfortably with a pretty generous boot too, skis through the middle of the back seats, which can fold down completely as well, so it will take lots of gear. Now some of the Ok stuff. The DCT does a wicked gear change, you couldn't do a manual change quicker, however it does clonk quite a lot along with the rear end (never bothered me, the manual refers to it), particularly at low speeds (e.g. intersections and parking manoeuvrers). After discovering the little rocker switch below the shift selector wasn't the stereo speaker balance, I always put it on 3 bars around town for pleasant tractability. Sure, it used gas, however I managed much better than Tom with 10litres/100Km on a 4,700km (ave 75km/h) trip around the South Island. Overall, I still got around 11.5 including city driving over 5 years and, believe me, it got the occasional caning. Besides, the entire thrill of this car is booting it from standstill and out of corners, not the theoretical top speed. Incidentally, trick for new players, the speedo goes in 20k increments to 120k, then 30k to 150/180 where you can find yourself in a remarkably short space of time! Tom's gas consumption might come from permanently using "M" mode, which has those funky gear change lights etc., but I found it mostly just used more gas and turned the steering leaden. I only used it on special occasions and on deserted roads, so not much, three bars was usually fine. Drivers who don’t bother manually changing down to overtake (i.e. most of us) will discover the DCT takes slightly longer to change than you would like, often causing a slightly alarming torque lurch when it does. For best results, change down yourself, but then you have to decide whether to indicate or not, so do what all euro drivers do and flick the wipers on instead. Finally, the bad stuff, the engine... this really is the worst thing about this car. The conspiracy theorists (American of course) have it that these engines are preprogramed to self-destruct within hours of coming out of warranty. Well, I can vouch for the fact that that is pretty much when the engine in my car started making disturbing noises, which got progressively worse over the next eighteen months. No problem, got a FIVE year extended warranty, haven’t I..? Well, it is a problem actually, because unless the thing actually blows up... they ain't going to fix it. Oh, they tried and tried for months with it in their workshop to fix it, but to no avail. I think the final conclusion, based on the combined wisdom of all the experts, was that it must be my fault... so take your car and sod off..! So, I did and, like Tom, I got rid of it. I totally echo Tom's sentiments upon trading in his M3 V8..!
-
1 pointThe only way to get your oil temp lower is a bigger or extra oil cooler. I have tried the BMS valve all it does is open earlier its not fix for multiple laps on track days.
-
1 point
-
1 pointIs it true you own, or have owned, one set of every style BMW wheel ever manufactured?
-
1 pointWell as per the picture above, my sump is not *quite* like the one in your pic. But the second hole on mine (the one with the 10 mm hex) looks remarkably like your Plug F. So as an update, I took that plug out. I was a bit unsure about it at first as some ATF came out when I first took it out, so I screwed it back in straight away for fear of losing even more fluid. But it turned out to be just a few drops left from after I had drained it via the other plug D. Anyways I tried my Plan A, which was to fill the Tomato Sauce bottle (with nozzle), then jam the nylex tube on the nozzle [see pic] Then push the tube up into Plug F, making sure it has some 'curl' on it, so it loops over. Then invert the bottle and squeeze. A couple of times you need to gently pull the nylex off the nozzle to allow some air back into the bottle. It only took about 1.5 litres so I might need to run it through the gears then top it up some more.
-
1 pointPoke a hole in the lid of the ATF container and poke a 2-3 meter bit of hose through the hole (make the fit as tight as possible). Poke the hose in till it touches the bottom of the container. Poke another small hole in the top of the container somewhere and pressurise it with an air compressor, magically ATF will come out the end of the hose. Don't apply too much pressure or you and your garage and everything else around it will wear it. Best to do it with an air duster and just pulse the trigger. you only need a little bit of pressure to get the fluid pumping. If you manage to blow the container up you're an idiot and shouldnt be allowed under a car and make sure you post some photos so we can laugh. While filling be ready to pull the hose out of the ATF fluid to stop the flow. Pretty rangi but its heaps faster than a syringe.
-
1 pointYour Jatco transmission needs G3 full synthetic. I would also suggest you replace the filter and pan gasket as well. After removing the filter, let it drain for at least half an hour to get most of the oil out of the torque convertor and valve body. You will need between 4 & 6 litres and a hand pump to put it in the gearbox. After filling it (while the car is running) run it through the gears and recheck level. Then road test and recheck level. The process is best done on a hoist or on 4 axle stands
-
0 pointsRemember to buy full cover insurance guys! We only had 3rd party cover with AA insurance. My dads car (whilst driven by my gf with my parents) was hit by a young kid with his 1 month old E90 320i starting his new job and no insurance. My old man in the photo clearly not too happy.. Luckily no one was hurt. Now I gotta see what to do with the car
-
0 pointsToday, Thursday morning on the cycle path under the Mangere Bridge
-
0 pointsWell guys Driver training on Sat 11th at Hampton Downs was existing to say the least. (More photo on my project page)


