Leaderboard
Popular Content
Showing content with the highest reputation on 07/01/19 in all areas
-
8 pointsTrademe. What a steaming turd it's become. It was bad when I left NZ a few years back. And now that I am back it is so much worse. It is just littered with overseas sellers peddling their utter trash products. We have no way of rating the products. Just the seller. Of which nobody bothers to do. If you are going to allow all this sh*t on the site they need to change to a Amazon style rating system. We need product reviews and ratings. 5000+ 5 star seller ratings doesn't help me see if the product I am buying from them is junk.
-
3 points
-
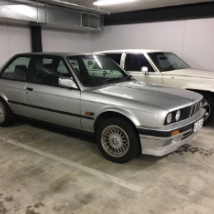
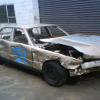
2 pointsA few pics of the latest addition for those that are interested. Carjam tells me it's done around 137k, was originally NZ New and has had a few owners over the years. I picked it up off a guy after it had been sitting in his shed for 10 years or so, it came with another parts car that may or may not be too far gone to restore, but we will see. I haven't confirmed numbers yet but believed to be the matching numbers original motor. Body is straight with one small dent in the front right guard, and one small patch of rust in the boot - not a hard fix. The rest is just surface rust. Drives seat definitely need recovered but everything else appears in good condition. It has no brakes or exhaust as yet, again not hard to sort these out. And will need tyres, some lights replaced etc. But all in all hoping this won't take long to sort out and be another classic to be enjoyed on the weekends. Now just need to build my f$%#*@g workshop to store all these toys in hahaha
-
2 points
-
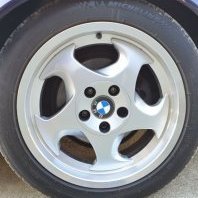
2 pointsAfter a bit of luck I managed to score some genuine BBS RX206 18" Wheels that just need a bit of curb rash sorted out They not bolted up just yet, but they are going to look mint going to fix all curb rash, and re-paint them - I plan on going gunmetal on them Like this colour
-
2 points
-
2 pointsI would agree with going with OEM genuine wheels whenever possible if not go for a reputable brand wheel. as reference I am running a set of square BBS 18x8.5 ET38 but with 225 40 front and 255 35 rear tyres (yes, i know, staggered tyres on a sqaure wheel, but it does fit well) they are a lightweight forged wheel and weigh next to nothing compared to aftermarket cast alloy wheels or even genuine oem wheels. I would wait and see if any good deals pop up, you can find some good secondhand options from time to time, dont pay $1500-2000 especially for aftermarket wheels, thats just silly. there are plenty of people running conservative set up's that dont require guard rolling or stretching tyres. you are lucky because the e92 335i has a huge huge community and hundreds of thousands of people fitting wheels all the time.
-
2 points
-
1 pointFinally installed the Bilstein B12 kit today. It's dropped the front by 50mm and rear by 10mm so the car is much better balanced in looks. Before, at the front, there was about a 40mm gap from the top of the tyre to the guard, now it's 10mm up inside. The rear was previously flush with the guard and now it's also 10mm inside. Wheel alignment tomorrow... The ride is actually nicer too - softer on the bumps but stiffer in corners. I didn't think the B12 kit lowered the front by as much as it has. Maybe because mine's a 92 coupe with the 1st gen front struts which have different top hats - might be taller. My diff has also given up (I think that's what it is). That will also get changed tomorrow. Will be changing from 3.07 to 3.46 because I'm not happy with the gear change points with the 3.07. It's great to be able to do 100 in 2nd but it puts normal driving shift points at the wrong speeds for most corners.
-
1 pointMine’s “30mm Lower” thats low enough for me! I didn’t set out to lower, just wanted more rate and something that would match the Konis. It has scraped in a minor fashion over one hump at a carpark entry, in 400-odd kms. That’s enough hassle for me. Sump guard in my future.
-
1 pointit is level now, although saying that I wouldn't have gone as low as it is now in an ideal world, I'm green as grass when it comes to lowering so know next to nothing about what stuff to get, it would be 10mm higher all round if I had to do it again (get tiresome catching the front lip a few times every week) yours looks about perfect I reckon
-
1 pointWhy not stay with a standard setup and invest the cash in the best tyres you can afford? Then front arms and LSD. After all my research that's probably where I will end up. I do have a 9 inch wide rear so could fit a 265.
-
1 pointHad a little fun in the paddock on Friday night with an E36 sedan, ran into a small cooling problem (surprise surprise) and slightly overheated it. Think I need to replace the fan belt then should be good to go a bit longer. Or can anyone else suggest what else could have caused the temp gauge to rise so high?
-
1 pointI dont think the X5 is isn't bad per say just different as intended The E60 is done in objectively terrible taste, it's clearly been given the Ford\Holden rice treatment but nothing he's done even remotely works on that BMW. It's truly is an excellent example of whats required to make a BMW harder to sell in a market where they are a dime a dozen. He'll probably realize this and remove most of the tack eventually when it doesn't sell.
-
1 pointPerhaps it’s the camera angle - looks lower in the rear now? here’s mine on H&R Sport Springs
-
1 pointGave it a full clean, shampoo vaccumed the carpet and took to the wheels with some scotch brite and handy andy. Given it some life, might even hit it with some 2000grit, meguiars polish and wax it now trying to sort some wheels - all though those stock standard ones don't look too bad all cleaned up might make the stock ones plasti-dip black in the mean time or something
-
1 pointGood thing you drive an M5 so it doesn't happen often......?
-
1 pointLol,BMW. Every time I hear the ding for reserve fuel I have a minor episode. BMW PTSD.
-
1 pointAaaaaaand... it’s finally here! Now I have to do without it for another couple days while it gets ceramic treated ? Interestingly, I was convinced it was coming with run-flats - all the marketing guff mentioned RF’s and the sales guy reckoned they fitted Pirelli P-Zeros. But the actual car arrived with Michelin Pilot Super Sport’s. I’m not complaining. ?♂️
-
1 point
-
1 pointOEM mount - 82279413886 OEM extinguisher - 72600000335 But I think the mount locks you into the OEM extinguisher and, unlike the E36 version, I don't think the E46 mount comes with a strap which I think (?) is required for motorsport use. Installation on the passenger seat mount nuts is convenient but pretty useless if you can't reach it with a harness done up. Aftermarket bolted to the far side transmission tunnel is probably ideal.
-
1 pointHi - I bought one for my e46 M3 from KAP Industries in Australia: https://kap.industries/product/bmw-e46/ Took about 10 days to arrive - fitted perfectly, and is nice and sturdy. Much better than the temporary one that I "fabricated" out of a $5 piece of aluminium bar from Mitre 10! Cheers Paul
-
1 pointRight, well a few evenings spent on the car, and then today being Saturday just a wee bit more. Front jacked up in the air, to remove the lower steering linkage. Didnt take any pics of this sorry. Has a lot of play in one of the two universals so it is out so i can rebuild it. got it half out and realised it is a wierd universal i havent seen before, and i havent had expereince rebuilding one before. When you do an M52 swap, or indeed any motorswap, its necessary part of the conversion on a Right hand drive car. typically you would also convert to an E36 or E46 steering rack too. What i usually do is remove and drop it all off an Howatt Engineering in Naenae to do, so i havent had experience doing it. still deciding if i tackle it or find a shop to do it. Remove the right front wheel as it has a puncture in it. Jack up the rear, move the left rear wheel to the right front. Temp bolt on right front to the left rear. Lower Jack. Get front off Jack stands and onto the two good tyres, jack up the back, and remove both rear wheels. the right rear, and the left rear (which was the right front) both have punctures / slow leaks, so those into the 500 to get sorted out. Start on removing the Subframe. Right off the bat, i knew this was going to offer up some surprises. subframe removal on an E30 is usually a piece of piss. 1,5 hour job max. I was advised by a local "buddy" (canadian for m9) to start on the rustiest stuff first so you know how your day is going to go, and also buy a flame torch, it will be your new best friend, so i brought a propane torch, (quite right in hind sight, awesome tool. no pics of it but you will probably see it in the back ground of the below picks) right then, crack off the subframe main bolts then. the 22s came off easy, to get to the 8mm allan bolts for the support i needed to half remove the side skirt. and bam, just like that, 5 minutes in, first problem. on the left hand side, one bolt completely snapped off (prior), on the right hand side, both had gone, so bracket offering no support at all. Okay, no problem, i can order that. removed the brackets so i had them on hand for ordering (there are two types so good to make sure you get the right ones, and then just put a few threads onto the 22 and gently loosened the subframe so i knew it would come away. cool. Move on to the exhaust which comes off easily, then remove heat shielding and then the drive shaft bolts. i wasnt really thinking, this stuff should be easy since the car has had an engine conversion, so not 30 years old, none the less, needed to be done. next step, remove the lower shock bolts. easy enough, but found the right rear shock is totally blown. i have never seen a shock with zero resistance before until now so thats up for replacement. and then disconnect sway bar, and then remove the spring. Here is the the bad news... spring on the left comes out just like normal. one on the right falls out, with the upper locating pin still in the spring. wtf. look a bit more carefully and what do we have here. picks taking after probing about with a screw driver. whats worse is there is f**king gorilla foam in there so someone knew it was there and did a bodgy... not happy, but such is life. fortunately the body seems to be alright, but the lower piece is no longer avalable from BMW. i did actually think about using the head from a jack as a replacement, as it would be a perfect shape..... Move on to loosening the diff mount. at first i was like wtf somone has put an imperial bolt in... never mind, some of the bolt head crumbled away, turns out it was a 19 all along... also loosened the brake lines and ABS sensors (yes it has ABS, the E30 was the second BMW to have ABS after the E28 5 series), and was happy the assembly was ready to come out. In the shower cleaning up i realised i forgot the hand brake cable so will do that when i get back to it. Right off topic for a bit, but what i been up to none the less. (goes back to E30 soon!!) next day, decided i better work on the Cinquecento since i did say i would do it while missus is away. It hasnt locked since she got it , that was a door card off and a tiny black clip that wasnt seated right, and back on and good to go. and onto replacing the rear brake pads. "babe my car is making a bit of a grinding noise in the back recently" take it to work and barely got out of the street before i knew the brake pads had all they had to give taken and then some..... have you ever seen brakes so smol?? realised the 500 was the same bolt pattern and center bore very close as the E30 so why not chuck them on for a nosey...... Local constabulary dropped by for a yarn. they either drive Ford Expeditions (think Escalade or Suburban size), or they ride Harleys. and they are called the OPP here. every time i hear that i cant help but think of the irony since OPP also means Other peoples property in the rap song from like the 90s, which of course gets in my head every time. Strawberry then got a detail down at work. in the back ground is the CN tower, and the yellow building is the pub i sometimes go to after work. and yes going off topic so will come back to what you came here for lol. We are up to today now. Subframe removed. Crusty old bushings. nasty, Now normally you would press these out properly. I do have the proper BMW in my garage, but thats 14,000km away and cost about $450 or so to buy. since i expect this to be the only time i do this job, i decided to do it the Hori way. its pretty well documented that this way works, and i had everything i needed already to try it so thought why not. FIRE I would imagine this would work for many of you guys so i will detail the process. 1/ Turn on Rock Music 2/ Grab a can of low rent beer, or something someone else has left in your fridge. 3/ Soak bushes in WD40. 4/ Make sure your partner is not home, and if pre planned, buy her some new oven trays because you will be using two of hers. 5/ aim gas torch at bushes. how long it takes them to start going depends on your flame. mine took a good 2 or 3 minutes of heat before they would stay alight on thier own. keep the loose stuff clear by flicking it out onto the tray. remember, the objective isnt to burn every last bit of rubber, just to remove the bush. When they start popping and crackling, they are hot enough to keep going on thier own. Once they are lit, have some of the beer. Man has created Fire. after your second one is lit, go back to the first, you will find the center part has melted enough you can clear out and knock out the center with a screw driver or some such. bear in mind that the flame will increase at this point as a lot more rubber is exposed to oxygen. the center piece that falls out onto your tray you can put out using some of your rubbish beer. Eventually the outer race or whatever its called for a bushing cannot withhold gravity and will fall out by itself, giving you a nice empty housing (well after you clean up the last little bits) On to the control arm bushings. basically the same process although they are only an inner and rubber with no outer on an E30. they will start spewing themselves out, three of mine spat the center out by themselves, one needed a bit of persuasion. next step is let them cool. its probably lunch time by now anyway. then press in your new bushings. on an E30, the subframe bushings do not go in all the way to the collar. they are only supposed to go as far as the top of the housing is level with the top of the rubber part of the bush. in hind sight the photo i took isnt the best, but if you look at 4 o clock in the photo you will see its level. 2 oclock is still down as its got an indicator on it. this means there will be a 10 mm or so gap at the bottom. you will find that they wont want to go any further as they flare. Originally, this was designed so it could be leveled in situ, but even BMW removed that from the service advisory, the part was never updated. as a side note, if you were to do poly bushings, they do not have this gap, so you MUST fit E36 compact lower braces (the rusty brackets i mentioned above) which are stepped rather than flat. trailing arms arent complicated at all, if you have a brain. One of the great things about Canada is that the weather and the seasons are very decisive. if it snows, it snows. if its sunny, its 30 degrees (as it was this morning). and if it suddenly gets cold and there is a clap of thunder, you have about 20 minutes to pack your sh*t up and get inside before god turns on the hose. so quickly threw the subframe back together with the new bushes, packed up and got my ass inside. I was intending to take photos of the assembly together, and also one showing the trailing arm bushes . VERY IMPORTANT to just do one or two threads on the trailing arms to the subframe so they are very obviously loose. this is because they must only be tightened when the suspension is loaded. This applys to all BMWs, and most probably all cars in general. this also applys to contral arm bushings in many models. I will try to remember to take pictures tomorrow. and then a pic of me when i saw myself in the mirror. LOL i guess it was all that black smoke!!!! 'til next time
-
1 pointI did them ~5 years apart, would be way cheaper doing it at once of course. Work was done by Hell BM. (Auckland).
-
1 pointIf your're going to do RACP work, get the top beam kit too. It's now been shown that plates only shift the load and you will end up with more cracking in different locations.

