
BreakMyWindow
-
Content Count
2608 -
Joined
-
Last visited
-
Days Won
93
Everything posted by BreakMyWindow
-
Yeah I could see it owing a fussy owner 20k once everything has been sorted out incl transmission.
-
Land Yacht now sold. Was a cool project and I’m really happy with its transformation. Thanks for watching.
-
Now sold.
-
Sold pending payment.
-
A house upgrade.
-
Why don’t you try selling them then instead of having a whinge about being called out for sh*t stirring. Subtle enough?
-
Fabric BMW part #51922698028
-
Thread cleaned up. Let's keep it on topic. GLWS ?
-
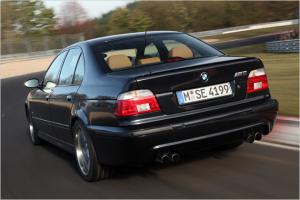
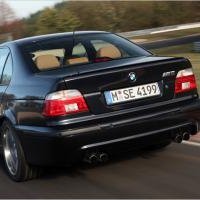
2001 BMW 530i touring in Titan Silver Metallic. 292,xxx kms. 1 year wof done in May. Rego expires October. This has been a restoration project for me and the time has come to let a new owner enjoy this modern classic. A pretty extensive maintenance regime has been undertaken... Suspension wise I have fitted new shocks, Front springs, ball joints and control arms. The rear subframe bushes (common issue on e39 touring) have also recently been replaced with more durable solid rubber. She now handles and rides superbly. New rear discs and pads along with hoses and fresh brake fluid. M54 Engine maintenance is all up to date. Vanos overhauled, complete cooling system overhaul including the 2 plastic pipes under the intake manifold. Valve cover gasket replaced and new plugs. Lots of time and money invested. Not your average e39 that’s well overdue for maintenance. I’m asking $7500. See my project thread for details.
- 6 replies
-
- 10
-

-
Whoops, yeah they were 61usd ea
-
Local i was quoted between 150 and 190 + gst depending on if they needed to be ordered ex Germany. FCP euro were $40usd ea so went with that. No gst to pay either.
-
Sorting out the rear door vapour barriers (VB’s). They started leaking about 3 years ago, but not bad enough to soak the carpet thankfully. Back then i decided to use some butyl mastic in a caulking gun which turned out to be a temporary fix. This attempt I’ve decided to go with the official bmw procedure using new VB’s as the old ones I couldn’t bear cleaning off old butyl. Below is a description of the procedure. So starting with removing the old VB I then heated up and scraped off as much butyl as possible from the inner door panel. Using a rag and some prepsol I managed to fully clean off all the old butyl followed by a wipe down of the contact area with isopropyl. Then apply fresh butyl tape to the VB leaving the wax paper on. Offer it up to the door panel. Peel the wax paper off as you press down until the VB is fully attached to the inner door panel. Heat up the perimeter of the door panel and use a seam roller to press down on the butyl for good adhesion. Instructions say to let the butyl “set” for 5 hours before doing and load tests (i.e leak test, open/closing door). Fingers crossed this is a lasting repair.
-
aw11 appeal is strong
-
Markings on Chassis rails, E90 335i 2011
BreakMyWindow replied to charles28's topic in General Discussion
Yeah i think compliance as i found some markings in my jap import wagon when i pulled the carpet up. -
Does this look a tad overpriced? :o
BreakMyWindow replied to TermiPeteNZ's topic in TradeMe discussions
This was owned by @M5V8 -
I have e39 adhd
-
For 6 cylinder or v8?
-
Good value, does look well worn though with seat bolster wear, scabby wheel bolts n centre covers etc. Probably some other stuff underneath which all reflects the low price. Still love it!
-
New windscreen cowl and replaced the windscreen seal with a new gen bmw one. Wipers got some paint too.
-
Front bumper painted and fitted. Have got new govt issue replacement number plates on order to complete the refresh.
-
That’ll be an extra $100 and I’ll happily oblige.
-
Ultra racing brand. In good nick. $130 Pick up in West Auckland.
-
The land yacht popped its cherry and got a proper old car water leak. Leaves and twigs mushed up blocking the e-box drains leads to water getting in through the firewall. The foam insulation underneath carpet was quite soggy in the footwell area. With a wet vac I extracted about 1l. This could have gone on for a while had the exact same symptoms from the last p-bus wire issue had not came back. I opened up the passenger door loom connection which had moisture, and the foam velcro insulator on the wires was wet which made me take a good look. This is under the e-box in the bulkhead under the cabin filters on passenger side. The visible hole is the ebox drain hole, there’s a rubber tube that locates the e-box to the drain. The bulkhead drains are under the leaves. Getting the e-box out is a shitter job and it won’t even fully come out without disconnecting buried in interior connections. Managed to slide it up on its side to be able to clean up. Hoping the dehumidifier will get some more moisture out and maybe a couple of good days outside with a fan to dry them up.
-
Primed and ready. I’ll be handing this off to a painter to spray the colour and clear. Have smoothed out the texture on the corner strips as i’ll be leaving all the side trims colour coded. Glad that’s done. Adhesion promoter coats. This bumper turns out to be a rep. Made of PP means paint doesn’t stick so well. Initial Priming Bog/sand Bog/sand Bog/sand... Touchups with primer and finished results
-
Lot’s of filling and sanding, nearly ready to prime.

