Leaderboard


Popular Content
Showing content with the highest reputation on 06/18/20 in all areas
-
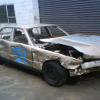
3 pointshttps://www.trademe.co.nz/motors/used-cars/bmw/auction-2668099858.htm?rsqid=46a1c1e3076e401d8a06bf0e71af7e16-003
-
3 pointsDate: 18 Jun 2020 Distance: 261xxxkms 1. Replaced Tail Light Seals. Genuine BMW part #63211380419. Precautionary replacement; I've read that these are often the source of leakage into the boot. Given mine are thirty years old, I decided to replace them. Fairly straightforward; 8mm nuts (six of). I cleaned out the aperture, no rust (woohoo!), no evidence of leakage. The old seals were in pretty good condition and flexible, though compressed as you'd expect. I fitted the new seals, and applied a light smear of rubber grease to the mating surface. Job's a good un. Rust-free e30 tail light aperture. phew, relief. The left hand side was the same (more dirt built up), though I forgot to take a picture. A new Seal, in Wellington. Not the 90's pop star, though. (the right hand). A new Seal, in Wellington. Not friends with Trevor Horn, either. (the left hand). View of tail lights showing fixings - bulb carrier removed. Note the six 8mm nuts - and the clamping bracket at the outer edge. The loom and connector un-clip from the tail lights with two squeeze tabs. 2. Radiator Support Panel - surface rust remediation. Light surface rust at the bottom of the radiator support panel had been awaiting my attention. Jon reminded me about it while we had it in the air on Wednesday, and today was the day. A combination of wire brushing and emery paper saw to the prep. Normally I'd use rust converter; time (and low winter temperatures weren't on my side. We used Hammerite rust treatment paint (brushed on), after pre-heating the metal with a heat gun. This stuff works well to stop rust and provide a hard coating. Then an hour later (after more heat-gun to move warm air around and aid drying, I hit it with a coat of Rustolleum all-in-one Satin Black, after pre-warming the can in a water-bath. Another coat (pre-warmed metal) 50 minutes later. An hour later (after some more coaxing with the heat gun), it was pretty-well dried, at least to begin curing. Result. Yecch. Unsightly, though not serious. Prepped for surgery (in truth, this was post-paint). Protection. Though not of the Massive Attack kind. How can I resist? I'll monitor this, to ensure the remediation is solid. I may get some cavity wax (or just fishoilene) and spray it into the inside of the structure. If the external remediation shows any sign of continued rust, I'll re-do it in summer when there's better temperature and more time. A couple of disc rotor backing plates in suspension, today. I also painted the backing plates in preparation for the brake refresh job in a couple of weeks. Degreased, keyed with grey scotch-brite, two coats of Rustoleum all-in-one satin black 50 minutes apart (with some heat gun in-between). 3. General checks: - Rain-X'd the windscreen. Twice. It's going to be a very wet roadie this weekend. Pleased to note that cold starting is much easier with the new CTS from yesterday. Result!
-
3 pointsPrimed and ready. I’ll be handing this off to a painter to spray the colour and clear. Have smoothed out the texture on the corner strips as i’ll be leaving all the side trims colour coded. Glad that’s done. Adhesion promoter coats. This bumper turns out to be a rep. Made of PP means paint doesn’t stick so well. Initial Priming Bog/sand Bog/sand Bog/sand... Touchups with primer and finished results
-
2 pointsI've got a few of these for sale. Degreased, checked and ready to go. $250 each Pick up Howick Auckland or $20 shipped to non-RD's anywhere in NZ. pm if interested
-
2 pointsLooking at building at shed in the Wellington region, approximately 300m2. Does anyone have any suggestions on who to use or avoid? Doesn’t need to be fancy, something kitset will be fine (though ideally they’ll have to o build it)
-
2 pointsSounds about the right size ratio for a shed! ?
-
2 pointsSorry everyone, I have been a bit slack with responding to messages. I have decided to keep the car. I had an offer of $20k (yes you read that right) on the table but couldn’t let it go. I love driving this car too much. I will be listing an E92 335i shortly.
-
2 pointsNew wing struts ready to go, need to (finally) fit up the GTR vents and new bonnet & bumper. Dusted this car off after a lockdown under cover, drove it in to work & planning next steps for the build. With the rebuilt engine, new diff & drivetrain parts now installed this car 'should' handle a little more power.
-
1 point`01 S54 M Coupe and `00 S50 M Coupe. Buy 1 get 1 free $120000 Contact me for further details.
-
1 pointYes!!! Oh man. I can’t forget the look on the driver of the white E30 we went past. He couldn’t believe his eyes, hahaha. That was a mint day for it too. We should organise a drive to Piha. Perfect roads for these cars. Just gotta watch out for Lycra gang on their Uber expensive carbon bikes. Honestly, Lycra on men should be frowned upon like speedos.
-
1 pointEveryone with a sporty e36 should get one, M3, 328, whatever.
-
1 pointImpressive, and a PS4 as well
-
1 pointWell that was $40 well spent...
-
1 pointHad a new 8x8 Versatile installed at our old place, concluded they spent all their money paying Ritchie to appear in their ads and not on making a decent product.
-
1 pointAt least he makes up for it with a detailed description.....?
-
1 pointI am glad. We should go for a drive again sometime.
-
1 pointPost needs to have photos as per forum rules please.
-
1 pointIf you have an auto shifter, cut the main guts of it out and you're left with a frame to then attach the ebay style boots onto.
-
1 point
-
1 pointI was the second owner of this car.... Loved it to bits back then. Its changed a bit since....
-
1 pointThanks mate. You should come to the BMW meets. Haha, exactly! That’s what I was thinking - what would I replace her with? I have an E30, would love an E24 too. I am gonna take it to a good paint shop and get the bumpers and bonnet sorted. Too many stone chips.
-
1 pointFair enough man, looked awesome at the meet and they are not making them anymore!
-
1 pointYes, plumbing in that vacuum should give you a bit better performance as it will be advancing the ignition timing as the revs increase as is intended on these older "mechanical" type distributors. It won't be heaps of improvement, but possibly enough to notice when driving and not your imagination.
-
1 pointI saw you the other day on Hillside road and literally starting salivating. That car is so beautiful. I would never let it go if I were you.
-
1 pointIt has cream factory cloth interior which I will be swapping out for full leather sports interior and re-trimming at some stage.The interior is pretty clean actually. there is a slight tear on the drivers seat which is very very minor and it has the usual dash cracks but the dash will also receive a re-trim. I am thinking either a cream leather interior or possibly a brown variant. I want to refresh it but keep it period correct. Ultimately I'd love some style 5's as well.
-
1 pointWasnt dyno'd the tune was copied from one that was and then modified to suit. I got it back yesterday and the pinging has been sorted out. So all is well.
-
1 pointHave the 1m bumper finally painted and fitted, has changed the front end!
-
1 pointDemontweeks are extremely slow and useless in responding, from my one and only order with them midway through last year. Took a month to even ship two Bilstein shocks, which were in stock at the time. Had zero response to my communications to them either asking about the order. Finally got an automated email it had shipped and turned up two weeks later. 6 weeks total, for something in stock. Pretty poor. They have pretty cheap prices, but if I was ordering again I'd go elsewhere and pay a little more.
-
1 pointThis is what's claimed for mine.
-
1 point$8-10 a liter is normal price. thats why 320i arent very economical, because they burn more oil than they do petrol
-
1 pointFailed to do an oil change on the 130... lucky I tried to remove the filter cap before I undid the sump plug. Have an oil filter cap strap wrench and still, there's no way that bugger is coming off with just that! Need to put my thinking cap back on. It's not due, just peace of mind. In the process of putting the M3 control arms in so not much wasted time really.
-
1 pointLot’s of filling and sanding, nearly ready to prime.
-
1 pointWe have bought in three or four shipments (big boxes, suspension bits) and have nothing but good reports. BUT this was prior to CVoid19, the last shipment was Dec2019. The pricing on Koni and Eibach and KWV / ST coilover stuff is pretty smart, plus there are GST benefits, all the imports have slipped thru the net GST wise.?
-
1 point130i, I've been convinced. Just enough power to be fun, just enough utility to be practical and basic enough that it won't cost you a bomb to maintain.
-
1 pointjust bought a Malachite Green 535i but this thing is gorgeous man!
-
1 point@M3AN - it is this Narva dual usb port. Got it from Repco (25% off finishing tomorrow). Parts I used: 1 x USB socket and a 1 x female blade insert type connector like this one. As a non-smoker I have no need, or desire, for cig lighters (and ashtrays for that matter!). Since I was at it, I took out the 'butt stubbers' (or whatever they are) out of the ashtrays too. Now they are a bit more practical little hidden storage spaces. And keeps everything factory looking at the same time. Mounting There are two mounting options. I used the socket and ring to fit mine, which gave a better factory look IMO. I discarded the rectangle screw mounting piece. Be aware that clearance beneath the original mounting location is tight but this can be overcome I reckon, with the appropriate connector. These are the steps I took to mounting the socket after removing the trim (which was way to easy!), disconnecting all wiring, taking out the light (which I lose as I had to remove the plastic part it inserts to) and working from a bench ie kitchen table: Remove cig lighter/holder without breaking/damaging any plastic. I took out the light, but I kept the wiring in tact and left it there all taped up and tucked away. You do lose this light when its all done. Cut away the plastic that holds the cylinder and light whilst being very careful not to break any clips and trying to get it flush as possible. I used a mini hacksaw but I guess a dremel tool would work as well. Widen the hole slightly (there is a bit of a 'lip' that I took back the outer circumference edge) in order for the socket to fit snuggly and flushish with the top (it ends up pretty flush). I also evened out the area that I cut out above. I used a dremel tool with a conical sanding bit and took it back slowly whilst test fitting the socket until it was flush enough and I was happy with how it was fitting. Insert the usb socket, orientate to your preference and then secure by screwing on the ring from below until tight. Wiring I used the existing cigarette wiring to power it. I taped up the end of the light wiring and then tucked it out of the way. The red/white dot wire is positive (+). Modification is required as the existing plug doesn't fit the male blade connector of the socket. I cut off the plug and put on the female blade connector. I did this by stripping some wire and crimping on the female connector. Caution here, the only connector I had available a suitable was quite long. Although it fits it is snug - I suspect it is touching the floor. Be careful not to use to much force when putting everything back in, the bottom trim may seem like it sits too high, but will seats nicely when the mid is inserted into its place. It pushes it down and holds it. A right angle or smaller length connector is probably ideal, but i had to use what I had laying around and it works for now. The brown wiring is negative/ground (-). No modification is needed as the existing connector is the right size, and right angled too, to fit on the sockets male blade connector. Connect wires to socket (- and + are marked on socket so make sure they are connected appropriately) and check that it is receiving power and charges a device, Mine didn't initially, found that I had a blown cig lighter fuse. Once you're happy reinstall all wiring connectors and trim, reset time and date on the mid, then have a cup of tea. And enjoy passenger and driver usb charging! I've also installed one into another car as well. Best mod to both so far. Well best mod this week ?! Sorry I didn't take any pics therefore the above is just what I remember doing but pretty accurate, so hope this helps someone out. Cheers!
-
1 pointOut with the ciggy lighter and in with the dual usb charger! Was actually quite straight forward, surprisingly. So will take the win - woo-hoo! ?
-
1 point80's and early 90's = orange.
-
1 pointCouple of pics taken with the iPhone potato
-
1 pointAll cleaned up and fitted. Need to open up the drivers seat control box to fit a new bushing so i can put the recline/headrest button back on, and the switch covers for the thigh support on both seats are missing. Hopefully can find those in the e39 530i msport festering away at pickapart Mangere.