Leaderboard
Popular Content
Showing content with the highest reputation since 05/26/25 in Posts
-
12 pointsHi Ray, I'd be keen to help out with trying to drive more activity on the Bimmersport site - and facebook page, I'm finally back in the BMW game (as a passion, not just a daily) after a long hiatus - having kids, selling the pride & joy, building a house, getting screwed over by the builder going into liquidation! Lol - long story there. But I'm back in the hot seat with a 135i, and plans for some minor mods. I also work at Meguiar's NZ (Smits Group) as marketing manager - so would love to support the Bimmersport community with a club discount code, and all the car care knowledge I can offer (been in that game 15 years) I also have graphic design, digital design and marketing experience which could come in handy. I'm also on the Ellerslie Concours committee, and would love to be associated with a 'club' as committee members, are not paid for their hard work, but their clubs can benefit from having an appointed committee member.
-
8 pointsH Shantelle, Andrew and Ollie are pretty much hands off these days. i`ve been giving thought to reviving some of our events, namely the Dyno Day`s we used to have. Would be great to amp up the Bimmersport site and facebook Page. Give us a call sometime to discuss. Thanks Ray Hellbm
-
4 pointsCar is currently stripped out. Engine / transmission, full wiring harness, interior, dash etc. Car came non aircon from factory and has the horrible dealer fit aircon system where they just cut into the heater unit and stuff in a condenser and add an extra blower along with ugly wiring in the engine bay and extra holes cut into the fire wall instead of using the factory stamped cut outs that cars with aircon would use. Overall a useless / ugly system that doesn’t blow cold anymore and can’t be recharged (R12 gas). Managed to find a new unit for a non aircon pre facelift car and promptly pulled it apart and reapplied new foam to all the vents along with giving all the plastic a thorough clean and the wire cables a good greasing. All the foam in the unit (like all units of this age) was disintegrated and don’t create any form of a seal so good to get this done while the car is in bits. Fitted new o rings and resealing the pipes the come out the side of the heater core as well. Wiring for the unit got stripped of the old loom tape (along with the rest of the wiring in the entire car) and new loom tape applied. Doing a huge amount of other work to the car at the moment so more of that to come.
-
3 points
-
2 points
-
2 pointsUsed this stuff for the internal vents: https://a.aliexpress.com/_msIlXjh got a bunch of foam from AliExpress / Temu including the thick low density stuff that seals between dash vents that clear the windscreen mist and heater unit. Had to draw the line at a $50 piece of foam from FCP. Just made stencil out of paper and transferred it to the foam and cut out.
-
2 pointsYeah I get people spend a lot on their project car but unsure how much of that cost you can tack on to the sale price... Might be just getting old and grumpy though 🙂
-
2 pointsWould rather the one with a cage for $25K. Then you have $35K to spend on restoring it if you wanted to.
-
2 pointsGreat format and content, reminds me of garage 4AGE, need more of this.
-
2 points240,500km installed some new headlight lenses. Went with Magneti Marelli from FCP. Pretty happy with them, however they look like they scratch extremely easily so haven’t thrown away the old ones just yet. They are so clear they make the corner lights look old now!
-
2 points
-
2 points
-
1 pointSupercheap will price match Amazon.com.au prices for identical products. Example: Autoglym polar blast 2.5L on amazon = $31.83NZD The same product from Supercheapauto in NZ not on special is $75...... On special it is still $55.90 Supercheap and Repco are just taking the piss now.
-
1 pointFinally managed to get a weekend to get some X5 jobs done. Pulled the Trans mechatronics unit out, fitted the Sonnax zip kit, new filter and fluid and refilled. Is shifting a lot nicer now, but still has that rough 2-1 shift, but not as bad as it was, and the 4-5 flare, but again not as bad. So looks like it’s a solenoid kit next to sort that. While on the hoist, I replaced the rear drive shaft coupler, and fitted the front shaft with a spacer to push the spline into the transfer case further, which has a habit to wear out otherwise. Was also hoping to fit the ECS lift kit, but ran out of time. Did fit some new wheels and test tyres to sus out sizing, these are a 265/65/17 and is tight when on lock, so will stick with that I think. Is only about 25mm taller overall than the factory ones. Is a bit of poke on the front, but should have a set of iS flares arriving this week that should cover them
-
1 pointPretty sure I've finally found a source for the male MAF sensor connector that allows for MOQ of 1 (and it's cheap to boot). This is what I'm talking about: I've ordered a couple to check and confirm, but if it is then this is the missing piece for people to be able to build their own harness extensions (and IAT relocation extensions I guess, not that I think they're good idea) without having to pay Turner mark-up. It also means anyone wanting to do what I did (keep the MAF connector and wire up for MAP sensor) doesn't have to buy a Turner extension just to then hack it up to add on the Bosch MAP sensor connector, etc. I'll wait til these arrive and I've confirmed and then put up a post with all the various part numbers needed to do this.
-
1 pointDrove from Wgtn to Auckland for one of those Dyno days. Great fun ! ( e46 m3 day ) Would be interested is seeing how an s55 with stock and GTS tunes does 😀
-
1 pointA valve cover gasket set (there are two gaskets) isn't going to break the bank regardless of where it comes from. Try BMW? Bear in mind that there are two possible gasket sets - one has a 2-hole fitting centre gasket, the other has a 5-hole fitting centre gasket. They are not interchangeable.
-
1 point
-
1 point
-
1 pointThe MAP sensor adapter printed in CF-reinforced Nylon arrived today. Minimum order value applied so I'm now the proud owner of 12 of these. I'll try to install in the next couple of days. HDT is significantly higher than the CF-PETG I used previously.
-
1 point
-
1 point
-
1 pointAbsolutely not! haha Its got some weird parts i need and I'm confident i could park the rest out and get my 4k back.
-
1 point
-
1 point
-
1 pointUntil someone hits buynow and you get hit with 499 in fees. It could be a genuine mistake as trademe often autopopulates categories based on the title
-
1 point
-
1 pointCan't help but feel this is over priced particularly based on the description. Also that it is listed under parts and not vehicles https://www.trademe.co.nz/5337124210
-
1 point@Twistee see a couple of posts up. Feels like a big car when you are in it due to interior space, doesn’t feel like it in terms of the driving agility.
-
1 point
-
1 pointAssuming you going to cert it then doing adjustable toe\camber brackets could be a good idea while everything is out,. Bit of a hassle but could well pay off if the arms arent perfect and you are lowering it.
-
1 point
-
1 point
-
1 point1987 BMW M325i S1 M-Tech 1 - Rare Aero Silver Project! This isn't just any E30 – it's an original 1987 M325i S1 M-Tech 1 coupe in the incredibly rare Shadow-line 'Aero Silver' (exclusive to the SA 333i). Purchased 7 years ago as a road-legal track car from Wellington, my original vision for club events and weekend drives never fully materialized. The plan was to build a 2.8L stroked M20B25, paint the interior and cage, and add some unique 3-piece wheels. While the full build didn't happen, the roll cage is now beautifully painted to complement the Aero Silver. What makes this M325i special: Original M-Tech 1 coupe – few left in this condition. Rare Shadow-line 'Aero Silver' – truly stands out. Working electric sunroof LSD Diff. M20 BTB Performance Headers – widely considered the best on the market. Yellow Speed Racing Adjustable Suspension. Iconic leather Italvolanti steering wheel. Exceptional condition – no leaks or rust. Logbook. Current state: Rego was on hold and has now lapsed. (In dry storage for past 5 yrs) Will require an MS license to comply with W.O.F requirements. M20b25 & Getrag 260 gearbox have been removed (included with sale) F & R window screens and 2 doors removed to assist with paintwork This is a fantastic opportunity for a serious E30 enthusiast to finish what I started or build their dream machine. It's a solid, rust-free base with some highly desirable factory and aftermarket components. Price: $20,000 or nearest offer. Location: Pukekohe, Auckland. Please note: Car will not be sold on the wheels pictured. Serious buyers, please call/text 0225490061 to arrange a viewing or if you have any further questions. Happy to discuss further! will update the post with more pictures
-
1 pointI'm now accepting offers on Trademe for this one, Bimmersporters should still contact me here first to express interest.
-
1 pointWas a blue 964 under the cover - the other day there was a beautiful red 912 Targa and today this combo - I need to make friends with this person 🤣
-
1 pointIt's home and I have not had a moment to look at the colour closely, but the parting comment from the owner of Eurotech was live with it for a few weeks and if you find anything let me know. I have to go back as the kidney grills and guard vents are a coming from overseas. When I get some time and it's not bucketing down it'll get a wash and put in the garage, led lights will highlight any issues. I'm very happy with the Eurotech service, dealing directly with the owner and having him fight insurance on your behalf to get the best result is one of the many reasons I would recommend them to anyone. Sorry dew covered pics from this morning is all I have right now, The rear bumper is now crack free, at some point in its life someone backed it into a pole just hard enough to spider crack the paint and crack some clips. After a month without it I can honestly say that a hard 3rd gear pull on the way home via "Mexico" is still as scary as the first time I drove it hard Final note, the Turtlewax headlight repair that looked great when I dropped it off has failed - on to the next product.
-
1 point
-
1 pointAwesome. I had an MZ10 as my first car back in 1996 through 2003. Didn't know what I had back then. Factory 2.8GT manual with LSD and lots of rust.
-
1 pointLeast desirable E30 to me. I guess there are some fans out there though. Way more cabs produced than baur convertibles. So they have the rarity thing going for them.
-
1 point
-
1 point
-
1 pointDisassembled the front seats in the E30 as there were a few niggles, sorted all excluding the stuffed backrest shocks, which will be replaced one day. The drivers side backrest bolster had broken and missing plastic piping and a split wide open seam for a few inches. I sewed a new run of piping using the original nylon core around some spotlight vinyl, then sewed that into the two parts of leather using the existing holes so as to not make a ‘tear here’ line(leather needles have a blade which cuts as opposed to separates the fibres). Happy with result.
-
1 pointChanged out the nylon motor gear in an E70 X5 transfer case actuator. What a c**t of a job on the ground, with basic home garage tools. 1. Move heat shields out the way to gain access 2. Drop cross brace as there's still not enough access to the E10 bolts 3. Remove worm gearing from actuator to remove E10 bolts 4. Curse a lot while getting to that last E10 bolt 5. Cuppa tea to cool off, and begin to disassemble actuator casing 6. Soak in WD40 to help split press casing 7. Curse more as pocket knife which would've been perfect to split casing is in E91 with your partner across town 8. Finally get it all apart, replace nylon gear and reassemble 9. Curse some more getting all the fiddly bolts back in their fiddly holes Highly recommend only going ahead with this if you have access to a hoist. Otherwise budget around 4 hours for as many cups of tea as it takes to not throw it across the room.
-
1 point
-
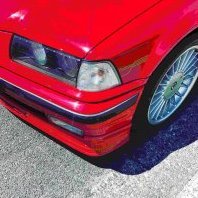
1 pointEven with the non matching panels it looks so good on the Alpina rims
-
1 pointInspired by @CSET and the Facebook series “playing with cars” I decided to use some spare bits to get the convertible back together so I can at least take it for a WoF while I wait for the parts to come back from panel and paint. So I now have a “rat rod” style Vert, fingers crossed for the WoF!
-
1 pointDrivers seat all done. Welded lower base as per previous post, welded one of the tabs that the backrest screws into and recovered the seat in brand new fabric. Still need to put in the new seat shocks but the seat feels fantastic. Hopefully the passengers seat doesn't involve too much welding!
-
0 pointsThis is quite a crap change about to take place. I have actually benefited from the BPC program quite a bit since it has been running. It is when you Buy something and within 14days that item then goes on sale you get the difference credited to your account. As Supercheap has sales nearly as often as Briscoes it resulted in a bit of credit on the account each time I went in. e.g. You buy oil at $100. Sale is 50% off the following weekend. You get $50 added to your account. They are ditching BPC and going to a crappy $5 credit for every $100 spent.
-
0 points


.thumb.jpeg.cf57b0e69deca78c71de2acb8f692648.jpeg)


